HV4XDSerial/USB Digitizer with Pen and/or Mouse
Wacom Co Ltd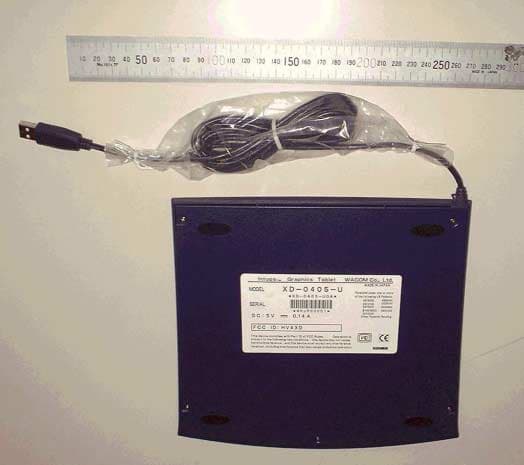
Click to zoom
Application Details
- Equipment Class
- DCD - Part 15 Low Power Transmitter Below 1705 kHz
- Date of Grant
- Jun 14, 2001
- Application Purpose
- Original Equipment
- Date of Application
- Jun 14, 2001
- Equipment Note
- Serial/USB Digitizer with Pen and/or Mouse
- Frequency Range
- 0.66600000 - 0.66600000
- Company
- Wacom Co Ltd
- Country
- Japan
Documents & Files
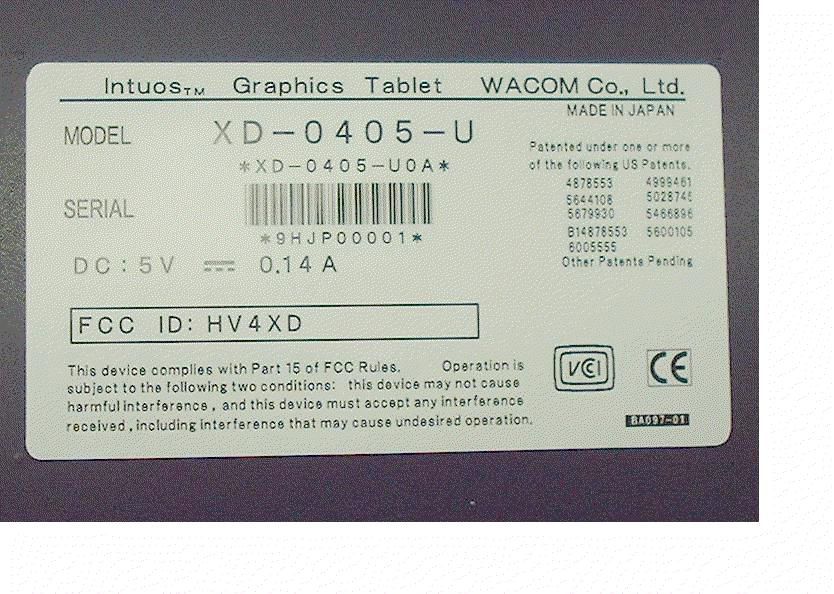
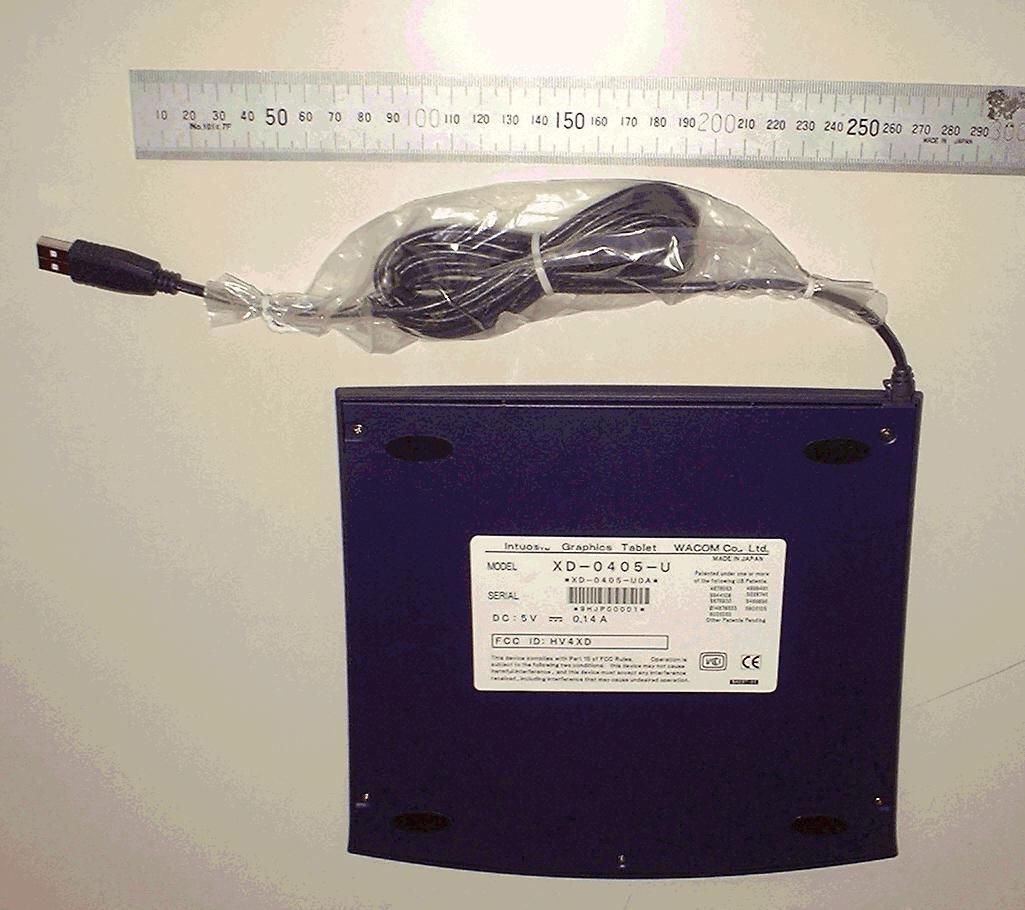
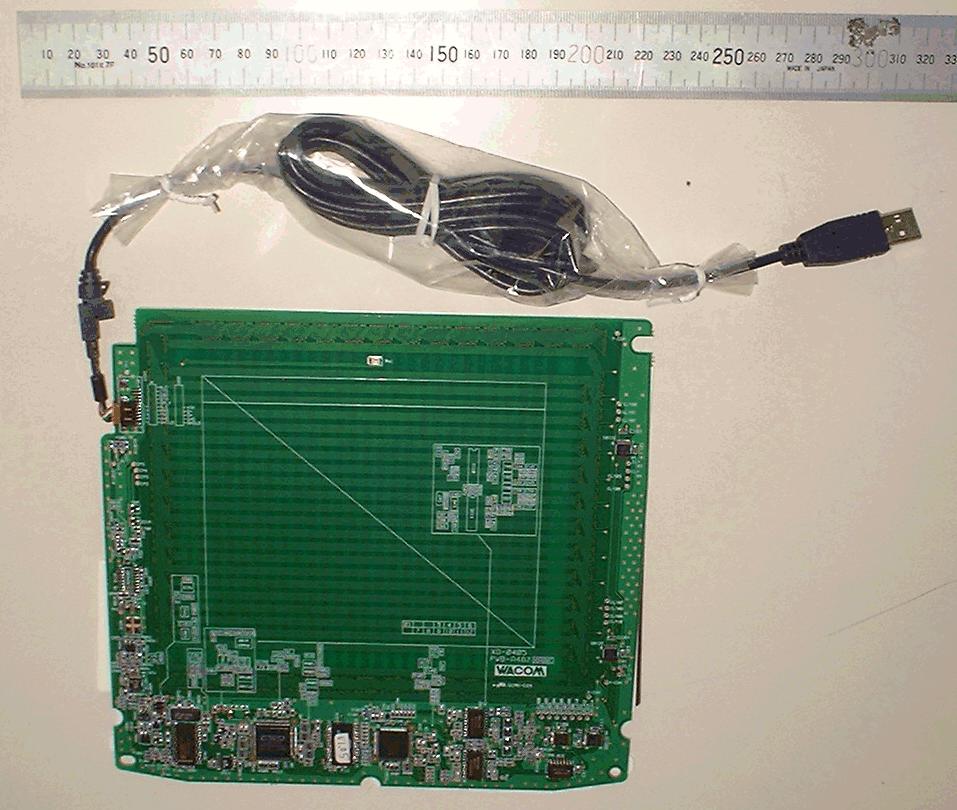
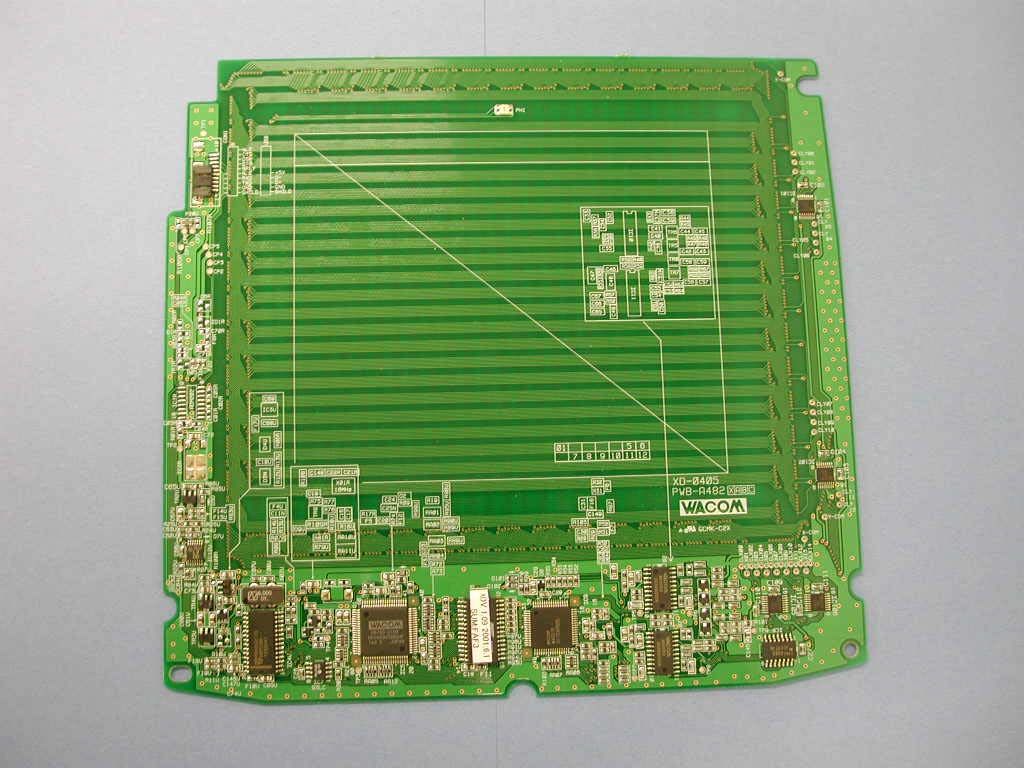
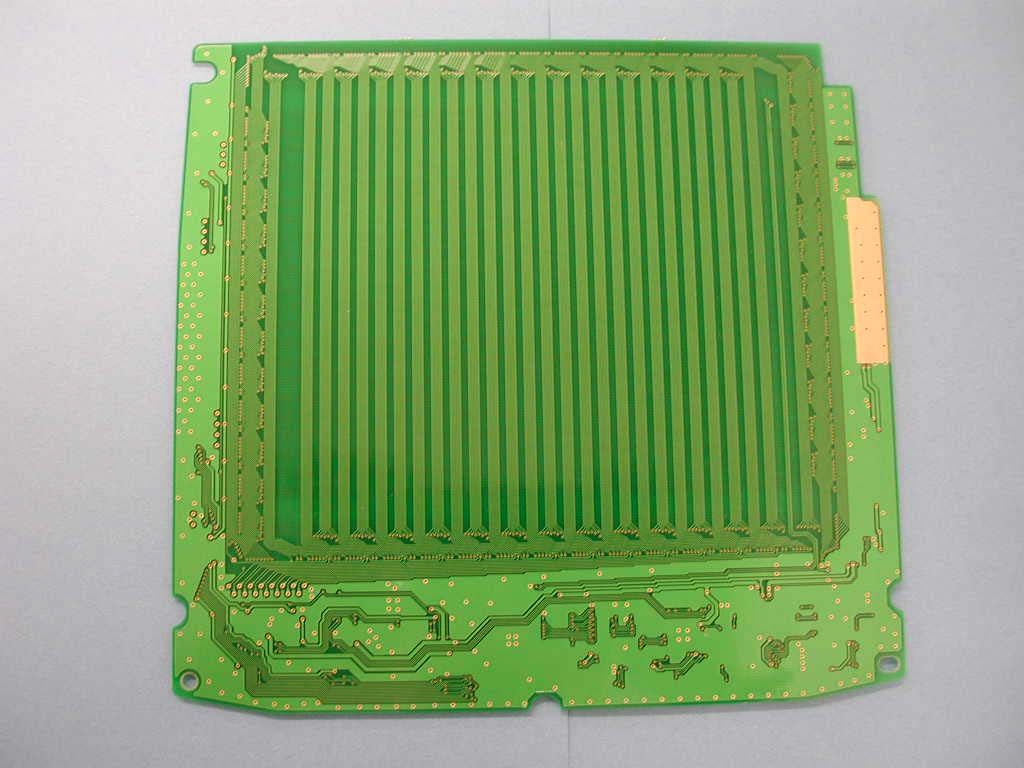
Document Text
Text extracted from the exhibit documents filed with the FCC. Open a document above to read the original.
Users Manual
Navigation Contents Index USER’S MANUAL FOR WINDOWS ® USER’S MANUAL FOR WINDOWS ® Page 3 Contents Index RADIO AND TELEVISION INTERFERENCE The equipment described in this manual generates, uses, and can radiate radio-frequency energy. If it is not installed and use d properly—that is, in strict accordance with Wacom instructions—it may cause interference with radio and television reception. FCC NOTICE This equipment has been tested and found to comply with the limits for a Class B digital device, pursuant to Part 15 of FCC Rules. These limits are designed to provide reasonable protection against harmful interference in a residential installation. This equipment generates, uses and can radiate radio frequency energy and, if not installed and used in accordance with the instructions, may cause harmful interference to radio communications. However, there is no guarantee that interference will no t occur in a particular installation. You can determine whether the tablet is causing interference by powering it off. If the interference stops, it was probably caused by the tablet.If your tablet does cause interference to radio or television reception, you may be able to correct the interference by using o ne or more of the following measures:• Rotate the television or radio antenna until the interference stops. • Move the tablet farther away from the television or radio. • Plug the tablet and computer into an outlet that is on a different circuit from the television or radio. If necessary, consult your Wacom dealer or an experienced radio/television technician for help.Changes or modifications to this product not authorized by Wacom could void the FCC Certification and negate your authority to operate the product. APPENDICES Page 139 Contents Index PRODUCT SPECIFICATIONSGENERAL SPECIFICATIONS FOR ALL INTUOS2 TABLETS Coordinate resolution 100 lpmm (2540 lpi) Accuracy (pen) +/- 0.25 mm (0.010 in) Accuracy (Lens Cursor) +/- 0.15 mm (0.006 in), +/- 0.25 m (0.010 in) on Intuos2 4x5/A6, 6x8/A5, and 9x12/A4-regular tablets Tilt +/- 60 degrees, +/- 50 degrees for Intuos2 4x5/A6 tablets Maximum reading height with pen 6 mm (0.24 in) Maximum report rate 200 points per second Communication interface USB RS-232C Serial Connector USB A (USB tablets) 9-pin, D-sub, female (serial tablets) Power requirements (USB tablets) DC 5V, less than 140mA, from primary USB port or powered USB hub (serial tablets) DC 12V 100mAPower Adaptor(s) for serial tablets AEC-3512B-W (120V, USA), AD-3923FM-W (230V, Continental Europe), AD-4230S-W (240V, Australia), AD-7442-W (240V, UK) Operating temperature 5 to 40 degrees C (41 to 104 degrees F) Storage temperature -10 to +60 degrees C (14 to 140 degrees F) Operating relative humidity 20% to 80% noncondensing Storage relative humidity 20% to 90% noncondensing Certification and compliance FCC class B, VCCI class B, CE APPENDICES Page 140 Contents Index INTUOS2 4x5 / A6 TABLET (MODELS XD-0405-U, XD-0405-R) INTUOS2 6x8 / A5 TABLET (MODELS XD-0608-U, XD-0608-R) INTUOS2 9x12 / A4-REGULAR TABLET (MODELS XD-0912-U, XD-0912-R) Active area (W x D) 127.0 x 106.0 mm (5.0 x 4.24 in) Physical size (W x D x H) 225.0 x 210.0 x 7.5 mm (9.0 x 8.4 x 0.29 in) Cable length 2.5 m (8.2 ft) Weight 520 g (1.14 lb) Power consumption 0.7 watts (USB), 1.2 watts (Serial) Active area (W x D) 203.2 x 162.4 mm (8.13 x 6.45 in) Physical size (W x D x H) 334.0 x 258.0 x 14.0 mm (13.36 x 10.32 x 0.56 in) Cable length 2.5 m (8.2 ft) Weight 900 g (1.98 lb) Power consumption 0.7 watts (USB), 1.2 watts (Serial) Active area (W x D) 304.8 x 240.6 mm (12.19 x 9.62 in) Physical size (W x D x H) 456.0 x 361.0 x 14.0 mm (17.97 x 14.22 x 0.56 in) Cable length 2.5 m (8.2 ft) Weight 1.6 kg (3.52 lb) Power consumption 0.7 watts (USB), 1.2 watts (Serial) APPENDICES Page 141 Contents Index INTUOS2 12x12 / A4-OVERSIZE TABLET (MODELS XD-1212-U, XD-1212-R) INTUOS2 12x18 / A3 TABLET (MODELS XD-1218-U, XD-1218-R) INTUOS2 GRIP PEN (MODEL XP-501E) Active area (W x D) 304.8 x 316.8 mm (12.19 x 12.67 in) Physical size (W x D x H) 444.0 x 435.5 x 37.0 mm (17.76 x 17.42 x 1.48 in) Cable length 2.5 m (8.2 ft) Weight 2.1 kg (4.62 lb) Power consumption 0.7 watts (USB), 1.2 watts (Serial) Active area (W x D) 457.2 x 316.8 mm (18.28 x 12.67 in) Physical size (W x D x H) 616.0 x 445.5 x 37.0 (24.64 x 17.82 x 1.48 in) Cable length 2.5 m (8.2 ft) Weight 3.0 kg (6.6 lb) Power consumption 0.7 watts (USB), 1.2 watts (Serial) Pen tip travel 0.1 mm (0.004 in) or less Pressure levels 1024 levels Eraser tip travel 1.5 mm (0.06 in), approximately Physical size (L x D) 160 x 14.0 mm (6.28 x 0.55 in) Weight 17 g (0.60 oz), approximately Tip refill type Polyacetal (Part No. PSI-A007) APPENDICES Page 142 Contents Index INTUOS2 AIRBRUSH (MODEL XP-400E)INTUOS2 CLASSIC PEN (MODEL XP-300E)INTUOS2 INK PEN (MODEL XP-110) Fingerwheel travel 10 mm (0.39 in) Fingerwheel resolution 1024 levels Pen tip travel 0.1 mm (0.004 in) or less Pressure levels 1024 levels Eraser tip travel 1.5 mm (0.06 in), approximately Physical size (L x D) 162.5 x 32.6 mm (6.38 x 1.28 in) Weight 24 g (0.85 oz), approximately Tip refill type Polyacetal (Part No. PSI-A007) Pen tip travel 0.1 mm (0.004 in) or less Pressure levels 1024 levels Eraser tip travel 1.5 mm (0.06 in), approximately Physical size (L x D) 151 x 12.2 mm (5.9 x 0.48 in) Weight 13 g (0.46 oz), approximately Tip refill type Polyacetal (Part No. PSI-A007) Pen tip travel 0.1 mm (0.004 in) or less Pressure levels 1024 levels Physical size (L x D) 151 x 12.5 mm (5.94 x 0.49 in) Weight 12 g (0.42 oz), approximately Tip refill types Polyacetal (Part No. PSI-A011) Ink refill, black (Part No. PSI-A023) APPENDICES Page 143 Contents Index INTUOS2 STROKE PEN (MODEL XP-120)INTUOS2 2D MOUSE (MODEL XC-100)INTUOS2 4D MOUSE (MODEL XC-400)INTUOS2 LENS CURSOR (MODEL XC-210) Pen tip travel 1.3 mm (0.05 in), approximately Pressure levels 1024 levels Physical size (L x D) 151 x 12.5 mm (5.94 x 0.49 in) Weight 12 g (0.42 oz), approximately Tip refill t…
Text truncated - open the document above for the full version.
Users Manual
Quick Start Guide Intuos™2 Serial Tablets for Windows ® PRN-A2xx 0X10752xx Box Contents Wacom CD Contains the Intuos2 software, Overview, User’s Manual, and a Readme file. Questions?Visit our Web site at http://www.wacom.com/productsupport Intuos2 Pen 2D Mouse 4x5 6x8, 9x12 12x12, 12x18 software suite software suite Pen Stand The Intuos2 tool(s) and tablet included in your box will vary depending upon the tablet model purchased. Images are not shown to scale. Bundled Software CD Getting started with Intuos2 is quick and easy.Just use this guide to install the hardware and software, and to learn the basics of the Intuos2 Graphics Tablet System. Dragging. Select an object, then slide the pen tip across the tablet surface to move the object. Refer to the online User’s Manual for detailed information on using Intuos2. Using the 2D/4D Mouse. Place the 2D/4D Mouse on the tablet. The screen cursor is positioned when you move the Mouse across the tablet surface. Refer to the online User’s Manual for detailed information on button and fingerbwheel defaults for the 2D/4D Mouse. Erasing. In supporting applications, the pen’s eraser works like the eraser on a pencil. In text applications, use the eraser to select text, then lift the eraser from the tablet to delete the text. Customizing Your Intuos 2 Tools — The Basics The pull-down menus access a variety of control panel features. Displays applications that have custom tool settings associated with them. Displays tools that can be customized for the application selected above. Tabs display settings for the selected application and tool. These buttons are for creating application-specific settings. Refer to the online User’s Manual for details. Resets the selected tab to its factory default values. The Wacom control panel makes it easy to customize your Intuos2 tools. To open the control panel: Windows.Click on the Windows STARTbutton and choose PROGRAMS. From the WACOMTABLET group, choose the WACOMTABLEToption. Macintosh.From the Apple menu, choose CONTROLP ANELS and then WACOMT ABLET . When you open the control panel with an Intuos2 tool, the tool is automatically selected in the Tool List and the appropriate tabs are displayed. To customize the selected tool, make your changes to the tab controls. On Windows systems, be sure to click APPLYor OKto save your changes. Note:Application-specific settings are for advanced users. Refer to the online User’s Manual for more information on creating and using application-specific settings. Current selections are highlighted. Wedges emphasize the relationship between tab settings and the selected tool and application. Windows control panel shown. For Windows only. OKsaves changes and closes the control panel. CANCELcloses the control panel without saving changes. Use APPLYto save changes without closing the control panel. HELPdisplays online Help for the control panel. Copies settings from one tool or application to another. Returns a tab to its previously saved or last applied settings. Using the Intuos2 Pen and 2D/4D Mouse Pointing and selecting. Move the Intuos2 Pen above the tablet surface to position the screen cursor, then press the pen tip on the tablet to make a selection. Clicking. Tap the tablet once with the pen tip. Double-clicking. Press the upper side switch (Windows) or lower side switch (Macintosh), or quickly tap the tablet twice in the same place with the pen tip. Running the Intuos2 Overview For a quick overview of your Intuos2 Graphics Tablet System, double-click on the I NTUOS2 O VERVIEWicon located on the Wacom CD. Viewing the Online USER’SMANUAL For more detailed information on using and customizing Intuos2, refer to the online User’s Manual. Windows -To view the manual, select I NTUOS 2 USER’SMANUAL from the WACOM TABLET group. Macintosh -To view the manual, double-click on the I NTUOS2 USER’SMANUALicon located in the WACOMTABLETfolder. To read the User’s Manual before installing Intuos2, run the install program and choose C USTOMinstall. Deselect all components except ENGLISHUSER ’SMANUAL and ACROBAT. Click INSTALL or NEXT, and follow the prompts. Learning About Intuos2 page 1 page 8 page 7 page 6 © 2001 Wacom Company, Limited. All rights reserved. Wacom is a registered trademark, and Intuos 2 is a trademark of Wacom Company, Ltd. Other product and company names are trademarks and/or registered trademarks of the respective owners. •Recherchez le guide de mise en route correspondant à votre langue sur le CD Wacom. •Busque la Guía de arranque rápido en su idioma en el CD de Wacom. •Procure o Guia de Inicialização Rápida em seu idioma no CD Wacom. Update Graphic 4D Mouse (9x12 and 12x18 tablets) Add Graphic Update Graphic PRELIMINARY Windows 95 & NT 4.0 (Manual Install) •Turn on your computer. •If the NEWHARDWARE FOUND dialog box displays, select CANCEL. •Insert the Wacom CD into the CD-ROM drive. •Click on the STARTbutton and select RUN.... In the dialog box, type the letter of your CD-ROM drive and \SETUP. For example, D:\SETUP. If your CD-ROM has a different drive letter, type that letter instead of D:. Then click OK. IMPORTANT:If you replaced your mouse with the tablet, press CTRL+ESCto open the STARTmenu. Use the arrow keys to select RUN..., and then press ENTER. •Select a language from the CHOOSESETUPLANGUAGE dialog box and follow the prompts. •You may register your tablet when prompted. •Adobe Acrobat Reader V4.0 or greater is required to view the online User’s Manual and Help. If Acrobat Reader is already installed on your system, you may cancel this installation. You should now be able to use your Intuos2 Pen on the tablet to move the screen cursor. A WACOMTABLETgroup was created in the START menu under PROGRAMS. It contains shortcuts to the Wacom Tablet Control Panel, User’s Manual, and a Readme file. Follow the instructions for your version of Windows. Windows 98 & 2000 (Plug and Play Install) •Turn on your computer. •The NEWH ARDWAREFOUND dialog box will display, followed by…
Text truncated - open the document above for the full version.
Users Manual
Quick Start Guide Intuos ™ 2 USB for Windows ® 98 and 2000, and Macintosh ® Box Contents Wacom CD Contains the Intuos2 software, Overview, User’s Manual, and a Readme file. Questions?Visit our Web site at http://www.wacom.com/productsupport Intuos2 Pen 4D Mouse (9x12 and 12x18 tablets) 4x5 6x8, 9x12 software suite software suite Pen Stand The Intuos2 tool(s) and tablet included in your box will vary depending upon the tablet model purchased. Images are not shown to scale. Bundled Software CD Getting started with Intuos2 is quick and easy.Just use this guide to install the hardware and software, and to learn the basics of the Intuos2 Graphics Tablet System. Dragging. Select an object, then slide the pen tip across the tablet surface to move the object. Refer to the online User’s Manual for detailed information on using Intuos2. Using the 2D/4D Mouse. Place the Mouse on the tablet. The screen cursor is positioned when you move the Mouse across the tablet surface. Refer to the online User’s Manual for detailed information on button and thumbwheel defaults for the Mouse. Erasing. In supporting applications, the pen’s eraser works like the eraser on a pencil. In text applications, use the eraser to select text, then lift the eraser from the tablet to delete the text. Customizing Your Intuos2 Tools — The Basics The pull-down menus access a variety of control panel features. Displays applications that have custom tool settings associated with them. Displays tools that can be customized for the application selected above. Tabs display settings for the selected application and tool. These buttons are for creating application-specific settings. Refer to the online User’s Manual for details. Resets the selected tab to its factory default values. The Wacom control panel makes it easy to customize your Intuos2 tools. To open the control panel: Windows.Click on the Windows STARTbutton and choose PROGRAMS. From the WACOMTABLET group, choose the WACOMTABLEToption. Macintosh.From the Apple menu, choose CONTROLP ANELS and then WACOMT ABLET . When you open the control panel with an Intuos2 tool, the tool is automatically selected in the Tool List and the appropriate tabs are displayed. To customize the selected tool, make your changes to the tab controls. On Windows systems, be sure to click APPLYor OKto save your changes. Note:Application-specific settings are for advanced users. Refer to the online User’s Manual for more information on creating and using application-specific settings. Current selections are highlighted. Wedges emphasize the relationship between tab settings and the selected tool and application. Windows control panel shown. For Windows only. OKsaves changes and closes the control panel. CANCELcloses the control panel without saving changes. Use APPLYto save changes without closing the control panel. HELP displays online Help for the control panel. Copies settings from one tool or application to another. Returns a tab to its previously saved or last applied settings. Using the Intuos2 Pen and 2D/4D Mouse Pointing and selecting. Move the Intuos2 Pen above the tablet surface to position the screen cursor, then press the pen tip on the tablet to make a selection. Clicking. Tap the tablet once with the pen tip. Double-clicking. Press the upper side switch (Windows) or lower side switch (Macintosh), or quickly tap the tablet twice in the same place with the pen tip. Running the Intuos2 Overview For a quick overview of your Intuos2 Graphics Tablet System, double-click on the I NTUOS2 O VERVIEWicon located on the Wacom CD. Viewing the Online USER’SMANUAL For more detailed information on using and customizing Intuos2, refer to the online User’s Manual. Windows -To view the manual, select I NTUOS 2 USER’SMANUAL from the WACOM TABLET group. Macintosh -To view the manual, double-click on the I NTUOS2 USER’SMANUALicon located in the WACOMTABLETfolder. To read theUser’s Manual before installing Intuos2, run the install program and choose C USTOM install. Deselect all components except ENGLISHUSER ’SMANUAL and ACROBAT. Click INSTALL or NEXT, and follow the prompts. Learning About Intuos page 1 page 8 page 7 page 6 © 2001 Wacom Company, Limited. All rights reserved. Wacom is a registered trademark, and Intuos is a trademark of Wacom Company, Ltd. Other product and company names are trademarks and/or registered trademarks of the respective owners. •Recherchez le guide de mise en route correspondant à votre langue sur le CD Wacom. •Busque la Guía de arranque rápido en su idioma en el CD de Wacom. •Procure o Guia de Inicialização Rápida em seu idioma no CD Wacom. 2D Mouse Update GraphicAdd Graphic PRELIMINARY PRN-A2xx 0X10752xx Macintosh Intuos2 requires a Power Macintosh equipped with a USB port, or an iMac with Mac OS 8.5 or greater. If you have an iMac, refer to the iMac section below before installing your Intuos2 software. Installing the Intuos2 Software You must install the tablet software from the Wacom CD to get full tablet functionality. •Disable any virus protection programs and close all open applications before installing the software. •Insert the Wacom CD into your computer’s CD-ROM drive. Double-click on the INSTALLicon. Choose your language option, click OK, and follow the prompts. •Adobe Acrobat Reader V4.0 or greater is required to view the online User’s Manual and Help. When the Wacom tablet Read Me file displays, select CONTINUE...to install Adobe Acrobat Reader, or QUITto finish without installing Acrobat Reader. After restarting your computer, you will be able to use your Intuos2 Pen on the tablet to move the screen cursor. You may register your tablet when prompted. Windows Intuos2 requires a Windows 98 or 2000 system with USB port. Follow the instructions for your version of Windows, then follow the steps under Windows 98 & 2000: Continue with the Software Installation. Windows 98: •At the ADDNEWHARDWAREWIZARD, click NEXT. •Select the option SEARCH FOR THE BEST DRIVER FOR YOUR DEVICE…
Text truncated - open the document above for the full version.
Block Diagram
To host computer CONNECTOR CONNECTOR XD-****-U DC-DC CONVERTER XD-****-R USB I/F CLOCK 6MHz 5V 5V5V 5V DC power supply to every parts CPU Clock 16.0MHz GATE ARRAY 571.4kHz,666.7kHz ANALOG MASTER SENSER I/F SENSER Radiated frequency 571.4kHz,666.7kHz INTUOS TOOL
Block Diagram
The intentionally radiated frequencies The intentionally radiated frequencies are 571.4kHz and 666.7kHz. All the other frequencies are unintentionally radiated. A. Antenna •he tablet has two groups of multiple loop coils in X (horizontal) and Y (vertical) directions. Radio frequency energy is radiated from these coils. Each coil is approximately 26mm wide and as lo ng as the height, for the X-axis, and width, for the Y-axis, of the effective area of the tablet. Each coil co nsists of 8 turns (loops) of copper conductor. B. Original oscillation frequency and intentionally radiated frequency We make the two (571.4kHz and 666.7kHz) intentionally radiated frequencies from the original oscillation frequency of 16.0MHz •Serial•type••or 6.0MHz(USB type) by G/A (Gate Array W4027F). C. Operatio n The tablet looks for a pointing device, such as a stylus, by feeding electrical current of above-mentio ned frequencies through the coils in both X axis and Y axis. The current fed thro ugh each coil is 17mA(TYP). The tablet is able to detect the position of a pointing device because of the induction caused between the coil of the pointing device and two coils, one from X-axis and the other from Y-axis, of the sensor board. D. Comment on pointing device The pointing device operates with no battery or active oscillator.
Operational Description
Operational Description Product: XD series digitizing tablets. XD-0405-U,XD-0405-R,XD-0608-U,XD-0608-R, XD-0912-U, XD-0912-R XD-1212-U,XD-1212-R, XD-1218-U,XD-1218-R Manufacturer: Name WACOM Co., Ltd. Address 2-510-1, Toyonodai, Otone-machi, Kitasaitama-gun, Saitama, 349-1148 Japan 1.Working area XD-0405-U,R----4 by 5 inches XD-0608-U,R----6 by 8 inches XD-0912-U,R----9 by 12 inches XD-1212-U,R---12 by 12 inches XD-1218-U,R---12 by 18 inches 2. Power supply XD-****-U—Supplied from USB(Universal Serial Bus) port of a controller such as a computer. (DC +5V 140mA) XD-****-R---Supplied from AC adapter.(DC +12V 100mA) 3.The communication protocol XD-****-U--- USB protocol. XD-****-R----RS232C
Test Report
EMC TEST REPORT for WACOM Co., Ltd. 2-510-1, Toyonodai, Otone-machi, Kitasaitama-gun, Saitama 349-1148, Japan Equipment Under Test: Digitizer Model Name : XD-0405-U Category: FCC Part 15 Sub.part B Class B Digital Device FCC Part 15 Sub.part C Class B Digital Device Tokin Report No.: T7L014346 Date of Issue: May 14, 2001 Approved by Mickey Fukuda Assistant Manager, Tsukuba Testing Lab. Tokin EMC Engineering Co., Ltd. -- ATTENTION -- The test results in this report relate only to the following EUTs, and this report shall not be reproduced except in full, without the written approval of the laboratory. This test report must not be used by the client to claim product endorsement by NVLAP or any agency of the U.S. Government. FCC 15B Class B T7L014346 Contents Page 1 DESCRIPTION OF DEVICE ...................................................................... 1 2 TEST FACILITY .............................................................................................. 2 3 SUMMARY OF RESULTS 3.1 Electromagnetic Emission ......................................................................... 2 3.2 Modification to The EUT............................................................................ 2 4 TESTED SYSTEM DETAILS 4.1 Peripherals and Others .............................................................................. 3 4.2 Type of Used Cables ................................................................................. 3 5 TECHNICAL COUNTERMEASURE ................................................................ 3 6 TEST RESULTS 6.1 RFI Voltage Measurement 6.1.1 Measurement Instrumentation Used .................................................... 4 6.1.2 Measurement Procedure....................................................................... 4 6.1.3 Measurement Uncertainty .................................................................... 4 6.1.4 Test Data .............................................................................................. 5 ∼ 6 6.2 RFI Field Strength Measurement 6.2.1 Measurement Instrumentation Used .................................................... 7 6.2.2 Measurement Procedure....................................................................... 8 6.2.3 Measurement Uncertainty .................................................................... 8 6.2.4 Test Data .............................................................................................. 9 ∼ 12 6.3 Minimum Margin ........................................................................................ 13 6.4 Sample Calculation ..................................................................................... 13 7 MEASUREMENT PHOTOS Photo 7.1 Setup with the Maximized RFI Voltage Emission Level................. 14 Photo 7.2 Setup with the Maximized RFI Field Strength Emission Level ...... 15 ∼ 16 Page 1 of 16 FCC 15B,C Class B T7L014346 1 DESCRIPTION OF DEVICE A) Kind of Equipment : Digitizer B) FCC ID : None C) Model Name : XD-0405-U D) Serial No. : 1DJS00001 E) Type of Sample Tested : Pre-production F) High Frequency Used : 6MHz ( Main ) 571.43kHz, 666.6kHz ( Tablet ) G) Rating Power Supply : DC5V, 0.1A H) Tested Power Supply : 1phase AC120V, 60Hz I) Date of Manufacture : April 2001 J) Manufacturer : WACOM Co., Ltd. 2-510-1 Toyonodai, Otone-machi, Kitasaitama-gun, Saitama 349-1148, Japan K) Attachment option: XP-110 (Inking pen) L) Description of Operating : USB Communication M) Date of Sample Received : April 19, 2001 N) Test Engineer : Yutaka Takeuchi Page 2 of 16 FCC 15B,C Class B T7L014346 2 TEST FACILITY The open field test site and conducted measurement facility are used for these testing, where are located following address. This site was fully described in a report dated Mar.20,2001, that was submitted to the FCC. And we had accepted in a letter dated Mar.26,2001 (31040/SIT). This laboratory is accredited by NVLAP for NVLAP Lab. Code : 200221-0. Tokin EMC Engineering Co., Ltd. Tsukuba Testing Laboratory, Open Field Test Site No.7 and Shielded Room No.1 Address ; 28-1, Kitahara-aza, Hanashimashinden-ohaza, Tsukuba-city, Ibaragi 305-0875, Japan 3 SUMMARY OF RESULTS 3.1 Electromagnetic Emission RFI Voltage Measurement .......................... PASS RFI Field Strength Measurement ................ PASS Although the measured emissions indicate that the EUT complies with the required limits, some measurements are close to these limits. When the uncertainty of measurement is considered, there is some possibility that the EUT may not be compliant. Test results are traceable to JQA, TELEC and NML/CISRO. 3.2 Modifications to The EUT : None Page 3 of 16 FCC 15B,C Class B T7L014346 4 TESTED SYSTEM DETAILS 4.1 Peripherals and Others : Description Model Name Serial No. Manufacturer FCC ID Monitor EV500A 15017F019434 Gateway BEJCB575B PC GP7JP3YR/FDKER 01480592 Gateway DoC Mouse M-S34 None COMPAQ DZL211029 Printer AP-550EX OSR0000457 EPSON None Keyboard CMI-6D1Z1C B2080G39F40AB COMPAQ AQ6-MTN4C15 USB Mouse M4848 None Apple DoC Mouse TB-3PS 91100373 SANWA SUPPPLY DoC 4.2 Type of Used Cables : Description Length Type of shield Model name Manufacturer Display AC cable 2.0m Non-shielded None --- PC AC cable 1.8m Non-shielded None --- Printer I/F cable 1.8m Shielded None EPSON 5 TECHINICAL COUNTERMEASURE: None Page 4 of 16 FCC 15B,C Class B T7L014346 6 TEST RESULTS 6.1 RFI Voltage Measurement 6.1.1 Measurement Instrumentation Used ( model/serial no./manufacturer/Tokin control no./last calibration/next calibration ) Field strength meter ...................( FCKL1528/134/Schwarzbeck/RE041/30 Nov.’00/Nov.’01 ) L.I.S.N. ......................................( KNW-407/8-515-20/Kyoritsu/LI010/28 Aug.’00/Aug.’01 ) 2nd L.I.S.N ..................................( PN-T22/9401/Tokin/LI064/17 Feb.’01/Feb.’02 ) Spectrum analyzer .....................( R3131/81781091/Advantest/SP040/22 Mar.’01/Mar.’02 ) Coaxial cable ...............................( ---/---/---/DK125/28 Feb.’01/Feb.’02 ) Data ent…
Text truncated - open the document above for the full version.
Test Report
Frequency Reading Cable Amp Ant Total Results Limit Margin Ver. Hor. Loss Gain Factor Factor Ver. Hor. Ver. Hor. [MHz] [dBuV] [dB] [dB] [dB] [dB] [dBuV/m] [dB] [dB] 0.57 28.0 0.4 0.0 19.8 20.2 48.2 52.5 4.2 0.67 29.0 0.4 0.0 19.9 20.3 49.3 51.1 1.9
Test Setup Photos
Page 14 of 16 FCC 15B,C Class B T7L014346 7 MEASUREMENT PHOTOS Photo 7.1 Setup with the Maximized RFI Voltage Emission Level Page 15 of 16 FCC 15B,C Class B T7L014346 Photo 7.2a Setup with the Maximized RFI Field Strength Emission Level (0.009MHz to 30MHz) Page 16 of 16 FCC 15B,C Class B T7L014346 Photo 7.2b Setup with the Maximized RFI Field Strength Emission Level (30MHz to 1000MHz)
Contact Information
Applicant
Koichi Yokoyama(Senior Director, Quality Assurance)
Test Firm
Tokin EMC Engineering Co., Ltd.Hiro Shida
Technical Specifications
| # | Rule Parts | Frequency Range | Power Output |
|---|---|---|---|
| 2 | 15C | 0.666 MHz - 0.666 MHz | - |
Other Applications from Wacom Co Ltd
HV4CTK6120
Aug 19, 2026Pen Tablet
Equipment Class
DCD - Part 15 Low Power Transmitter Below 1705 kHzHV4STU540A
May 12, 2026LCD SIGNATURE PAD
Equipment Class
DCD - Part 15 Low Power Transmitter Below 1705 kHzHV4DTHA140
Sep 16, 2025Portable Pad
Equipment Class
DTS - Digital Transmission SystemHV4PTK470
Oct 10, 2024Creative Pen Tablet
Equipment Class
DTS - Digital Transmission SystemHV4PTK870
Oct 10, 2024Creative Pen Tablet
Equipment Class
DCD - Part 15 Low Power Transmitter Below 1705 kHz