IPH-D03561Portable Transceiver
Garmin International Inc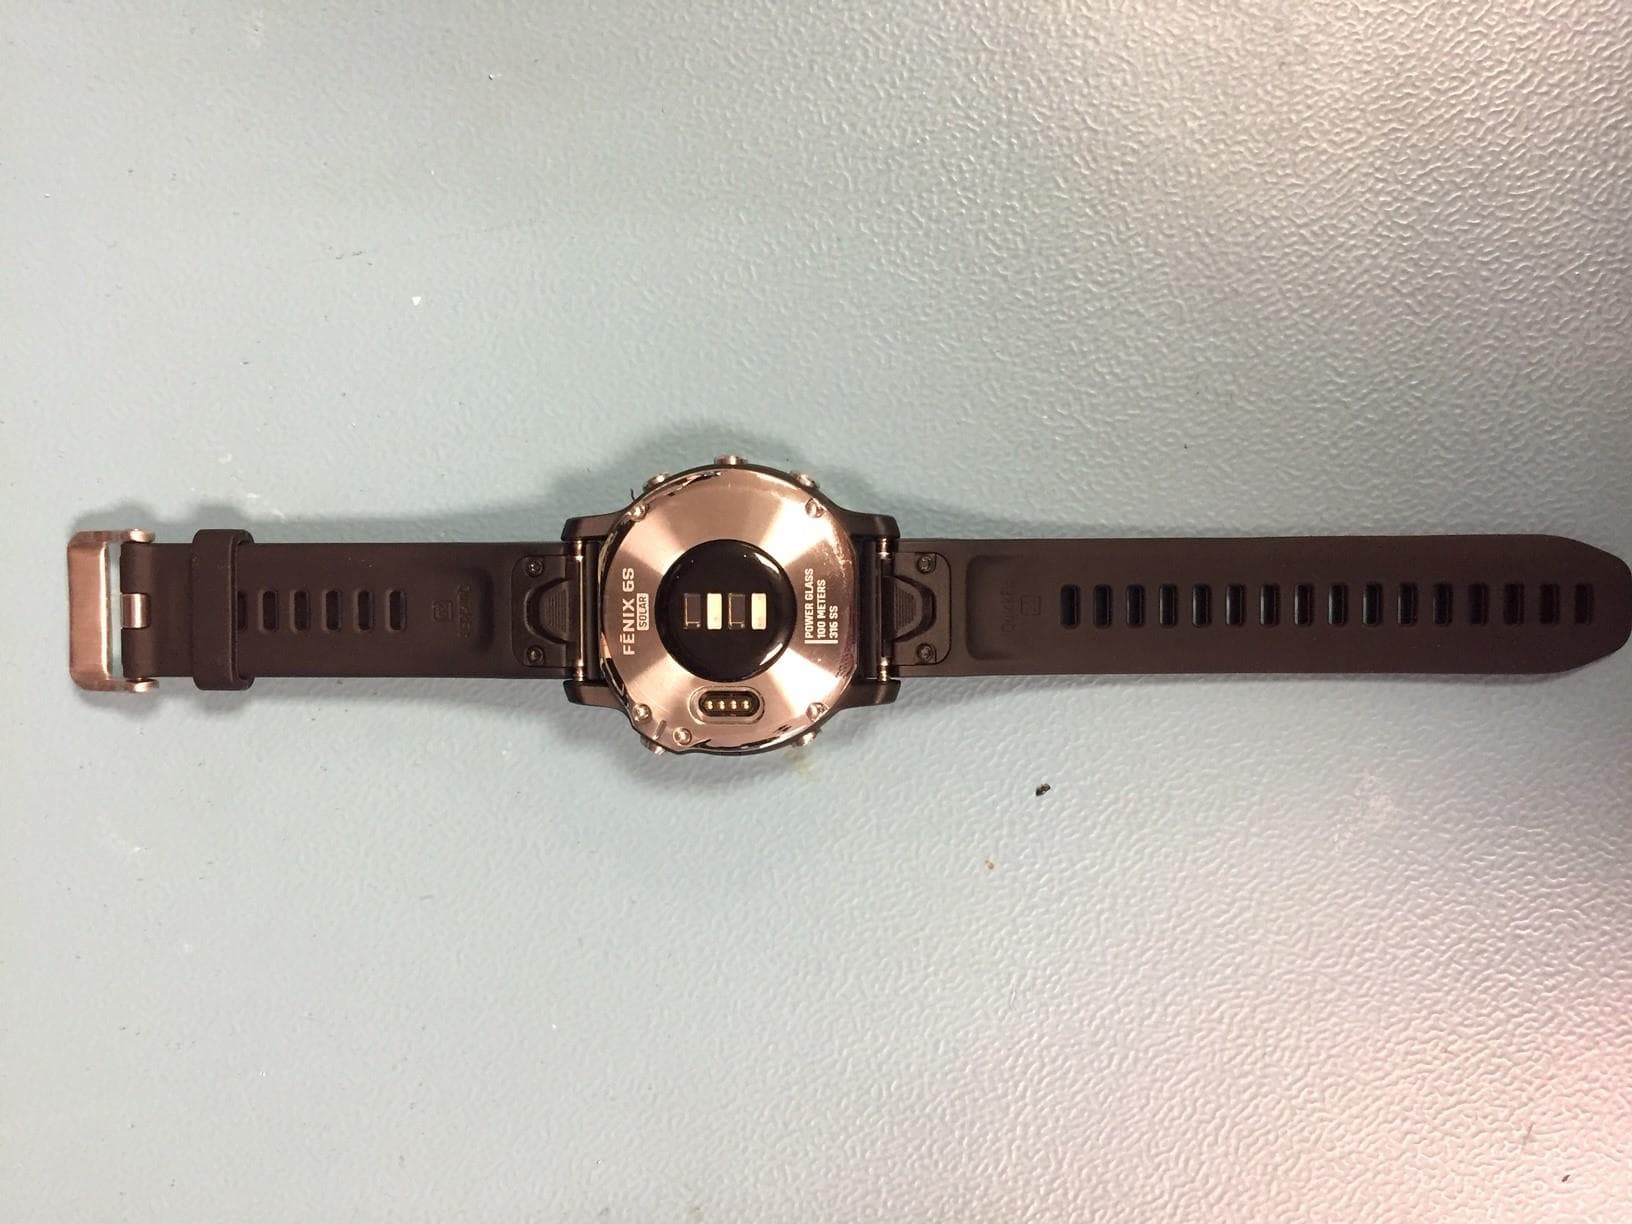
Click to zoom
Application Details
- Equipment Class
- DXX - Part 15 Low Power Communication Device Transmitter
- Date of Grant
- May 10, 2020
- Application Purpose
- Original Equipment
- Date of Application
- May 06, 2020
- Equipment Note
- Portable Transceiver
- Frequency Range
- 13.56000000 - 13.56000000
- Company
- Garmin International Inc
- Country
- United States
Documents & Files
Document Text
Text extracted from the exhibit documents filed with the FCC. Open a document above to read the original.
Users Manual
Important Safety and Product Information2 Informations importantes sur le produit et la sécurité3 guida Informazioni importanti sulla sicurezza e sul prodotto5 Wichtige Sicherheits- und Produktinformationen6 Información importante sobre el producto y tu seguridad8 Informações importantes sobre segurança e sobre o produto9 Belangrijke veiligheids- en productinformatie10 Vigtige produkt- og sikkerhedinformationer11 Viktig sikkerhets- og produktinformasjon12 Tärkeitä turvallisuus- ja tuotetietoja13 Guiden Viktig säkerhets- och produktinformation14 Ważne informacje dotyczące bezpieczeństwa i produktu15 Důležité bezpečnostní informace a informace o produktu16 Pomembne informacije o varnosti in izdelku17 Važne informacije o proizvodu i sigurnosti18 Правила техники безопасности и сведения об изделии19 Informaţii importante privind siguranţa şi produsul20 © 2018 Garmin Ltd. or its subsidiaries August 2019 190-02068-25_0C Important Safety and Product Information WARNING Failure to heed the following warnings could result in an accident or medical event resulting in death or serious injury. Battery Warnings A lithium-ion battery is used in this device. If these guidelines are not followed, batteries may experience a shortened life span or may present a risk of damage to the device, fire, chemical burn, electrolyte leak, and/or injury. •Do not disassemble, modify, remanufacture, puncture or damage the device or batteries. •Do not remove or attempt to remove the non-user-replaceable battery. •Do not expose the device or batteries to fire, explosion, or other hazard. Device Warnings •Do not leave the device exposed to a heat source or in a high-temperature location, such as in the sun in an unattended vehicle. To prevent the possibility of damage, remove the device from the vehicle or store it out of direct sunlight, such as in the glove box. •Do not operate the device outside of the temperature ranges specified in the printed manual in the product packaging. •When storing the device for an extended time period, store within the temperature ranges specified in the printed manual in the product packaging. •Do not use a power cable, data cable and/or power adapter that is not approved or supplied by Garmin ® . Health Warnings •If you have a pacemaker or other internal electronic device, consult your physician before using a heart rate monitor. •The Garmin optical wrist heart rate monitor and pulse oximeter sensor emit green, red, and infrared light and flash occasionally. Consult your physician if you have epilepsy or are sensitive to bright or flashing lights. •Always consult your physician before beginning or modifying any exercise program. •The Garmin device, accessories, heart rate monitor, pulse oximeter sensor, and related data are intended to be used only for recreational purposes and not for medical purposes, and are not intended to diagnose, monitor, treat, cure, or prevent any disease or condition. •The heart rate and blood oxygen saturation readings are for reference only, and no responsibility is accepted for the consequences of any erroneous readings. •While the Garmin optical wrist heart rate monitor technology typically provides an accurate estimate of a user's heart rate, there are inherent limitations with the technology that may cause some of the heart rate readings to be inaccurate under certain circumstances, including the user's physical characteristics, fit of the device, and type and intensity of activity. •While the Garmin pulse oximeter sensor technology typically provides an accurate estimate of a user's blood oxygen saturation, there are inherent limitations with the technology that may cause some of the oxygen saturation readings to be inaccurate under certain circumstances, including the user's physical characteristics, fit of the device, position of the device, and movement. •Garmin activity trackers rely on sensors that track your movement and other metrics. The data and information provided by these devices is intended to be a close estimation of your activity and metrics tracked, but may not be completely accurate, including step, sleep, distance, heart rate, oxygen saturation, and calorie data. Navigation Warnings If your Garmin device uses or accepts map data, follow these guidelines to ensure safe navigating. •Always carefully compare information displayed on the device to all available navigation sources, including information from visual sightings, local waterway rules and restrictions, and maps. For safety, always resolve any discrepancies or questions before continuing navigation, and defer to posted signs and conditions. •Use this device only as a navigational aid. Do not attempt to use the device for any purpose requiring precise measurement of direction, distance, location, or topography. Off-Road Navigation Warnings If your Garmin device is able to suggest off-road routes for various outdoor activities, such as biking, hiking, and all-terrain vehicles, follow these guidelines to ensure safe off-road navigation. •Always use your best judgment and exercise common sense when making off-road navigational decisions. The Garmin device is designed to provide route suggestions only. It is not a replacement for attentiveness and proper preparation for outdoor activities. Do not follow the route suggestions if they suggest an illegal course or would put you in an unsafe situation. •Always carefully compare information displayed on the device to all available navigation sources, including trail signs, trail conditions, weather conditions, and other factors that may affect safety while navigating. For safety, always resolve any discrepancies before continuing navigation, and defer to posted signs and conditions. •Always be mindful of the effects of the environment and the inherent risks of the activity before embarking on off-road activities, especially the impact that weather and weather-related trail conditions can have on the safety of your activity. Ensure that you h…
Text truncated - open the document above for the full version.
Users Manual
© 2019 Garmin Ltd. or its subsidiaries All rights reserved. Under the copyright laws, this manual may not be copied, in whole or in part, without the written consent of Garmin. Garmin reserves the right to change or improve its products and to make changes in the content of this manual without obligation to notify any person or organization of such changes or improvements. Go to www.garmin.com for current updates and supplemental information concerning the use of this product. Garmin ® , the Garmin logo, ANT+ ® , Approach ® , Auto Lap ® , Auto Pause ® , Edge ® , fēnix ® , inReach ® , QuickFit ® , TracBack ® , VIRB ® , Virtual Partner ® , and Xero ® are trademarks of Garmin Ltd. or its subsidiaries, registered in the USA and other countries. Body Battery ™ , Connect IQ ™ , Garmin Connect ™ , Garmin Explore ™ , Garmin Express ™ , Garmin Golf ™ , Garmin Move IQ ™ , Garmin Pay ™ , HRM-Run ™ , HRM-Tri ™ , tempe ™ , TruSwing ™ , TrueUp ™ , Varia ™ , Varia Vision ™ , and Vector ™ are trademarks of Garmin Ltd. or its subsidiaries. These trademarks may not be used without the express permission of Garmin. Android ™ is a trademark of Google Inc. Apple ® , iPhone ® , iTunes ® , and Mac ® are trademarks of Apple Inc., registered in the U.S. and other countries. The BLUETOOTH ® word mark and logos are owned by the Bluetooth SIG, Inc. and any use of such marks by Garmin is under license. The Cooper Institute ® , as well as any related trademarks, are the property of The Cooper Institute. Di2 ™ is a trademark of Shimano, Inc. Shimano ® is a registered trademark of Shimano, Inc. STRAVA and Strava ™ are trademarks of Strava, Inc. Advanced heartbeat analytics by Firstbeat. Training Stress Score ™ (TSS), Intensity Factor ™ (IF), and Normalized Power ™ (NP) are trademarks of Peaksware, LLC. Windows ® is a registered trademark of Microsoft Corporation in the United States and other countries. Other trademarks and trade names are those of their respective owners. This product is ANT+ ® certified. Visit www.thisisant.com/directory for a list of compatible products and apps. Table of Contents Introduction.....................................................................1 Getting Started............................................................................1 Buttons...................................................................................1 Using the Watch.....................................................................1 Viewing the Controls Menu...............................................1 Viewing Widgets................................................................1 Customizing the Watch..........................................................1 Pairing Your Smartphone with Your Watch................................1 Charging the Device...................................................................2 Product Updates.........................................................................2 Setting Up Garmin Express...................................................2 Solar Charging................................................................2 Solar Watch Face.......................................................................2 Viewing the Solar Widget.......................................................2 Tips for Solar Charging...............................................................2 Activities and Apps........................................................2 Starting an Activity......................................................................2 Tips for Recording Activities..................................................3 Changing the Power Mode....................................................3 Stopping an Activity....................................................................3 Adding or Removing a Favorite Activity......................................3 Creating a Custom Activity.........................................................3 Indoor Activities..........................................................................3 Calibrating the Treadmill Distance.........................................3 Recording a Strength Training Activity...................................3 Outdoor Activities........................................................................4 Viewing Your Ski Runs..........................................................4 Using the Metronome.............................................................4 Jumpmaster...........................................................................4 Multisport....................................................................................4 Triathlon Training...................................................................4 Creating a Multisport Activity.................................................4 Swimming...................................................................................4 Swim Terminology.................................................................4 Stroke Types..........................................................................5 Tips for Swimming Activities..................................................5 Resting During Pool Swimming.............................................5 Training with the Drill Log......................................................5 Turning Off Wrist-based Heart Rate While Swimming...........5 Golfing........................................................................................5 Playing Golf............................................................................5 Hole Information.....................................................................5 Big Numbers Mode...........................................................5 Moving the Flag.....................................................................6 Viewing Hazards ....................................................................6 Viewing Measured Shots.......................................................6 Viewing Layup and Dogleg Distances......…
Text truncated - open the document above for the full version.
Users Manual
3 Hold MENU. 4 Select Training > Intervals > Do Workout. 5 Press@to start the activity timer. 6 When your interval workout has a warm up, press LAP to begin the first interval. 7 Follow the on-screen instructions. After you complete all of the intervals, a message appears. Stopping an Interval Workout • At any time, select LAP to stop the current interval or rest period and transition to the next interval or rest period. • After all intervals and rest periods are complete, select LAP to end the interval workout and transition to a timer that can be used for cool down. • At any time, select@to stop the activity timer. You can resume the timer or end the interval workout. PacePro Training Many runners like to wear a pace band during a race to help achieve their race goal. The PacePro feature allows you to create a custom pace band based on distance and pace or distance and time. You can also create a pace band for a known course to maximize your pace effort based on elevation changes. You can create a PacePro plan using the Garmin Connect app. You can preview the splits and elevation plot before you run the course. Downloading a PacePro Plan from Garmin Connect Before you can download a PacePro plan from Garmin Connect, you must have a Garmin Connect account (Garmin Connect, page 8). 1 Select an option: • Open the Garmin Connect app, and select 5 or•••. • Go to connect.garmin.com. 2 Select Training > PacePro Pacing Strategies. 3 Follow the on-screen instructions to create and save a PacePro plan. 4 Select 1J or Send to Device. Starting a PacePro Plan Before you can start a PacePro plan, you must download a p lan from your Garmin Connect account. 1 From the watch face, press @. 2 Select an outdoor running activity. 3 Hold MENU. 4 Select Training > PacePro Plans. 5 Select a plan. TIP: You can press DOWN and select View Splits to preview the splits. 6 Press@to start the plan. 7 Press @to start the activity timer. 22 The device displays your target split pace CD. current split pace ®· completion progress for the split@, distance remaining in the split©. and overall time ahead or behind of your target pace ®· Stopping a PacePro Plan 1 Hold MENU. 2 Select Stop PacePro > Yes. The device stops the PacePro plan. The activity timer continues running. Segments You can send running or cycling segments from your Garmin Connect account to your device. After a segment is saved to your device, you can race a segment, trying to match or exceed your personal record or other participants who have raced the segment. NOTE: When you download a course from your Garmin Connect account, you can download all of the available segments in the course. Strava "' Segments You can download Strava segments to your fenix device. Follow Strava segments to compare your performance with your past rides, friends, and pros who have ridden the same segment. To sign up for a Strava membership, go to the segments widget in your Garmin Connect account. For more information, go to www.strava.com. The information in this manual applies to both Garmin Connect segments and Strava segments. Viewing Segment Details 1 From the watch face, press@. 2 Select an activity. 3 Hold MENU. 4 Select Training > Segments. 5 Select a segment. 6 Select an option: • Select Race Time to view the time and average speed or pace for the segment leader. • Select Map to view the segment on the map. • Select Elevation Plot to view an elevation plot of the segment. Racing a Segment Segments are virtual race courses. You can race a segment, and compare your performance to past activities, others' performance, connections in your Garmin Connect account, or other members of the running or cycling communities. You can upload your activity data to your Garmin Connect account to view your segment position. NOTE: If your Garmin Connect account and Strava account are linked, your activity is automatically sent to your Strava account so you can review the segment position. 1 From the watch face, press@. 2 Select an activity. 3 Go for a run or ride. When you approach a segment, a message appears, and you can race the segment. 4 Start racing the segment. A message appears when the segment is complete. Setting a Segment to Adjust Automatically You can set your device to automatically adjust the target race time of a segment based on your performance during the segment. NOTE: This setting is enabled for all segments by default. 1 From the watch face, press@. Training 6 If necessary, select the alarm, and select an option: • Select Status to turn the alarm on or off. • Select Time to edit the alarm time. • Select Repeat, and select when the alarm should repeat. • Select Sounds, and select a type of notification. • Select Backlight > On to turn on the backlight with the alarm. • Select Label, and select a description for the alarm. Deleting an Alarm 1 From the watch face, hold MENU. 2 Select Clocks. 3 Press UP or DOWN to scroll to the alarms screen. 4 Press@. 5 Select an alarm. 6 Select Delete. Starting the Countdown Timer 1 From the watch face, hold MENU. 2 Select Clocks. 3 Press UP or DOWN to scroll to the timers screen. 4 Select Set Quick Timer. 5 Enter the time. 6 If necessary, press MENU, and select an option: • Select Restart > On to automatically restart the timer after it expires. • Select Sounds, and select a type of notification. 7 Press @to start the timer. Saving a Quick Timer You can set up to ten separate quick timers. 1 From the watch face, hold MENU. 2 Select Clocks. 3 Press UP or DOWN to scroll to the timers screen. 4 Select an option: • To set a quick timer for the first time, select Set Quick Timer, enter the time, press MENU, and select Save Timer. • To save additional quick timers, press@, select Add Timer, and enter the time. Deleting a Timer 1 From the watch face, hold MENU. 2 Select Clocks. 3 Press UP or DOWN to scroll to the timers screen. 4 Press@. 5 Select a timer. 6 Press MENU. 7 Select Delete. Using the Stopwatch 1 From the watch face, hold MENU. …
Text truncated - open the document above for the full version.
Users Manual
Quick Start Manual4 Manuel de démarrage rapide15 Manuale di avvio rapido30 Schnellstartanleitung 43 Guía de inicio rápido56 Manual de início rápido70 © 2020 Garmin Ltd. or its subsidiaries Garmin ® , ANT+ ® , fēnix ® , QuickFit ® , and the Garmin logo are trademarks of Garmin Ltd. or its subsidiaries, registered in the USA and other countries. Connect IQ ™ , Garmin Connect ™ , and Garmin Pay ™ are trademarks of Garmin Ltd. or its subsidiaries. These trademarks may not be used without the express permission of Garmin. The BLUETOOTH ® word mark and logos are owned by the Bluetooth SIG, Inc. and any use of such marks by Garmin is under license. Advanced heartbeat analytics by Firstbeat. Other trademarks and trade names are those of their respective owners. El número de registro COFETEL/ FETEL puede ser revisado en el manual a través de la siguiente página de internet. NOTE: The watch protects itself from overheating and stops charging automatically if the internal temperature exceeds the solar charging temperature threshold (page 13). NOTE: The watch does not solar charge when connected to an external battery source or when the battery is full. Smart Features Pairing Your Smartphone with Your Watch To use the connected features on your watch, you must pair it directly through the Garmin Connect ™ app, instead of from the Bluetooth ® settings on your smartphone. 1 From the app store on your smartphone, install and open the Garmin Connect app. 2 Bring your smartphone within 10 m (33 ft.) of your watch. 3 Press LIGHT to turn on the watch. The first time you turn on the watch, it is in pairing mode. 4 Follow the instructions in the app to complete the pairing and setup process. 8Quick Start Manual EN Setting Up Your Garmin Pay Wallet The Garmin Pay feature allows you to use your watch to pay for purchases in participating stores. You can add one or more participating credit or debit cards to your Garmin Pay wallet. Go to garmin.com /garminpay/banks to find participating financial institutions. 1 From the Garmin Connect app, select or . 2 Select Garmin Pay > Get Started. 3 Follow the on-screen instructions. You can open your Garmin Pay wallet from the controls menu on your device. See the owner's manual for more information on using the Garmin Pay feature. Connect IQ ™ Features You can add Connect IQ features to your watch from Garmin ® and other providers using the Connect IQ app. You can customize your device with watch faces, data fields, widgets, and apps. Downloading Connect IQ Features 1 From the app store on your smartphone, install and open the Connect IQ app. Quick Start Manual9 EN NOTICE To prevent corrosion, thoroughly clean and dry the contacts and the surrounding area before charging or connecting to a computer. Refer to the cleaning instructions in the owner's manual. 1 Plug the small end of the USB cable into the charging port on your device. 2 Plug the large end of the USB cable into a USB charging port. 3 Charge the device completely. Specifications Operating temperature range: From -20 to 45 C (from -4 to 113 F) Charging temperature range: USB charging: from 0 to 45 C (from 32 to 113 F) Quick Start Manual13 EN Solar charging: from 0 to 60 C (from 32 to 140 F) Wireless frequency: 2.4 GHz @ 3 dBm nominal Troubleshooting Restarting Your Device 1 Hold LIGHT until the device turns off. 2 Hold LIGHT to turn on the device. My device is in the wrong language Go to garmin.com /manuals/fenix6Solar /language for more information on changing your device language. Getting the Owner's Manual The owner's manual includes instructions for using device features and accessing regulatory information. Go to garmin.com /manuals/fenix6Solar . Getting More Information You can find more information about this product on the Garmin website. • Go to support.garmin.com for additional manuals, articles, and software updates. 14Quick Start Manual EN • Lorsque vous portez votre montre, évitez de couvrir le cadran avec votre manche. • Quand vous ne portez pas votre montre, orientez son cadran vers une source de lumière vive comme une lampe fluorescente ou le soleil. La montre se chargera plus rapidement si vous l'exposez au soleil, car son verre a été optimisé pour le spectre de la lumière solaire. • Pour optimiser les performances de la batterie, rechargez la montre à la lumière directe du soleil. REMARQUE : la montre est dotée d'un mécanisme de protection contre la surchauffe et arrête de se charger automatiquement lorsque sa température interne dépasse le seuil de température de chargement à l'énergie solaire (page 27). REMARQUE : la recharge à l'énergie solaire ne fonctionne pas lorsque la montre est connectée à une batterie externe ou lorsque la pile est pleine. 20Manuel de démarrage rapide FR Fonctions Intelligentes Couplage de votre smartphone avec votre montre Pour utiliser les fonctions connectées de votre montre, vous devez la coupler directement via l'application Garmin Connect et non pas via les paramètres Bluetooth de votre smartphone. 1 Depuis la boutique d'applications sur votre smartphone, installez et ouvrez l'application Garmin Connect. 2 Rapprochez votre smartphone à moins de 10 m (33 pi) de votre montre. 3 Appuyez sur le bouton LIGHT pour activer la montre. Lorsque vous allumez la montre pour la première fois, celle-ci est réglée sur le mode couplage. 4 Suivez les instructions dans l'application pour terminer la procédure de couplage et de réglage. Configuration de votre portefeuille Garmin Pay La fonction Garmin Pay vous permet d'utiliser votre montre pour payer vos achats dans les Manuel de démarrage rapide21 FR boutiques qui le permettent. Vous pouvez ajouter une ou plusieurs cartes de crédit ou de débit à votre portefeuille Garmin Pay. Rendez-vous sur garmin.com /garminpay/banks pour consulter la liste des établissements bancaires participant au programme. 1 Dans l'application Garmin Connect, sélectionnez ou . 2 Sélectionnez Garmin Pay > Mise en route. 3 Suivez les instructions présent…
Text truncated - open the document above for the full version.
Cover Letter(s)
Authority To Act As Agent Date: April 28, 2020 American Certification Body, Inc. 6731 Whittier Avenue Suite C110 McLean, VA 22101 To Whom It May Concern: Nic Johnson of the Nebraska Center for Excellence in Electronics (NCEE Labs) is authorized to act on our behalf, until otherwise notified, for applications to American Certification Body, Inc. (ACB). We certify that we are not subject to denial of federal benefits, that includes FCC benefits, pursuant to Section 5301 of the Anti-Drug Abuse Act of 1988, 21 U.S.C. 862. Further, no party, as defined in 47 CFR 1.2002 (b), to the application is subject to denial of federal benefits, that includes FCC benefits. We also declare that the information provided to the FCC is true and correct to the best of our knowledge (47 CFR 2.911(d)) and we have been informed of the grantee responsibilities (47 CFR 2.909) with regard to certified equipment. Thank you, Agency Agreement Expiration Date: April 28, 2021 By: William H. Pertner Team Leader Compliance Engineering Garmin International, Inc. Phone: 913-440-5471
Cover Letter(s)
Page 1 of 1 Request for Confidentiality Date: April 23, 2020 Subject: Confidentiality Request for: Garmin International, Inc. FCC ID: IPH-D03561 IC: 1792A-D03561 Pursuant to FCC 47 CFR 0.457(d) and 0.459 and IC RSP-100, Section 9.4, the applicant requests that a part of the subject FCC application be held confidential. Type of Confidentiality Requested Exhibit ☐ Short Term ☒ Permanent ☐ Not Provided Block Diagrams ☒ Short Term ☐ Not Provided External Photos ☒ Short Term ☐ Permanent ☐ Not Provided Internal Photos ☐ Short Term ☒ Permanent ☐ Not Provided Operation Description/Theory of Operation ☐ Short Term ☐ Permanent ☒ Not Provided Parts List & Placement/BOM ☐ Short Term ☐ Permanent ☒ Not Provided Tune-Up Procedure ☐ Short Term ☒ Permanent ☐ Not Provided Schematics ☒ Short Term ☐ Not Provided Test Setup Photos ☒ Short Term ☐ Permanent ☐ Not Provided User’s Manual The above-mentioned company has spent substantial effort in developing this product and it is one of the first of its kind in industry. Having the subject information easily available to "competition" would negate the advantage they have achieved by developing this product. Not protecting the details of the design will result in financial hardship. Permanent Confidentiality: The applicant requests the exhibits listed above as permanently confidential be permanently withheld from public review due to materials that contain trade secrets and proprietary information not customarily released to the public. Short-Term Confidentiality (if applicable): The applicant requests the exhibits selected above as short term confidential be withheld from public view for a period of 180 days from the date of the Grant of Equipment Authorization and prior to marketing. This is to avoid premature release of sensitive information prior to marketing or release of the product to the public. Applicant is also aware that they are responsible to notify ACB in the event information regarding the product or the product is made available to the public before the requested period has expired. ACB will then release the documents listed above for public disclosure pursuant to FCC Public Notice DA 04- 1705. NOTE for Industry Canada Applications: IC currently only distinguishes Permanent Confidentiality exhibits as shown above. Short Term confidentiality is not considered Provided to IC applications Sincerely, By: __________________________ Nic Johnson, Technical Manager, NCEE Labs
Cover Letter(s)
Federal Communications Commission Authorization and Evaluation Division 1435 Oakland Mills Road Columbia, MD 21046 Date: March 23, 2020 Subject: FCC application for FCC ID: IPH-D03561 To Whom It May Concern: Garmin International Inc. will continue to apply processes and procedures to ensure compliance with 47 CFR 2 requirements regarding products produced under Declaration of Conformity procedures for class B computer peripheral portion as applicable to this composite filing. Thank you, William H. Pertner Lead Compliance Engineer Garmin International, Inc.
External Photos
D03561 – External Photos D03561 – External Photos D03561 – External Photos D03561 – External Photos D03561 – External Photos D03561 – External Photos
ID Label/Location Info
E-Label Information The following specific instructions are provided in the Quick Start Manual that ships with the device Label viewing directions are found in the user manual (outlined here for reference) and available on line at www.garmin.com Getting the Owner's Manual The owner's manual includes instructions for using device features and accessing regulatory information Go to www.garmin.com/manuals/D03561 The following are the specific instructions provided in the owner’s manual that is provided at www.garmin.com/manuals: Device Information Viewing Regulatory and Compliance information. 1 Go to System 2 Select About D03561 E-Label The above M/N, FCC ID, and IC numbers are installed in the factory and are unalterable. This information can also be found printed on the product packaging.
Internal Photos
D03561 – Internal Photos D03561 – Internal Photos D03561 – Internal Photos D03561 – Internal Photos
Test Report
The Nebraska Center for Excellence in Electronics (NCEE) authorizes the above named company to reproduce this report provided it is reproduced in its entirety for use by the company’s employees only. Any use that a third party makes of this report, or any reliance on or decisions made based on it, are the responsibility of such third parties. NCEE accepts no responsibility for damages, if any, suffered by any third party as a result of decisions made or actions based on this report. This report applies only to the items tested. Amended FCC/ISED Test Report Prepared for: Garmin International, Inc. Address: 1200 E. 151 st Street Olathe, Kansas, 66062, USA Product: D03561 Test Report No: R20200110-20-E9B Approved by: __________________ Nic S. Johnson, NCE Technical Manager iNARTE Certified EMC Engineer #EMC-003337-NE DATE: 8 May 2020 Total Pages: 43 Report Number: R202…
Text truncated - open the document above for the full version.
Contact Information
Applicant
Ben Karsak(Manager, Compliance Engineering)
Test Firm
Nebraska Center for Excellence in ElectronicsNic Johnson
Technical Specifications
| # | Rule Parts | Frequency Range | Power Output |
|---|---|---|---|
| 2 | 15C | 13.56 MHz - 13.56 MHz | - |
Other Applications from Garmin International Inc
IPH-05126
Sep 09, 2026Portable Digital Transceiver
Equipment Class
NII - Unlicensed National Information Infrastructure TXIPH-A5126
Sep 09, 2026Portable Digital Transceiver
Equipment Class
NII - Unlicensed National Information Infrastructure TXIPH-04812
Sep 01, 2026Mobile Digital Transceiver
Equipment Class
DTS - Digital Transmission SystemIPH-A04825
Sep 01, 2026Marine Stereo
Equipment Class
DSS - Part 15 Spread Spectrum TransmitterIPH-B04825
Sep 01, 2026Marine Stereo
Equipment Class
DSS - Part 15 Spread Spectrum Transmitter