KLN312ALow Power Communications Transmitter
Maximum Incorporated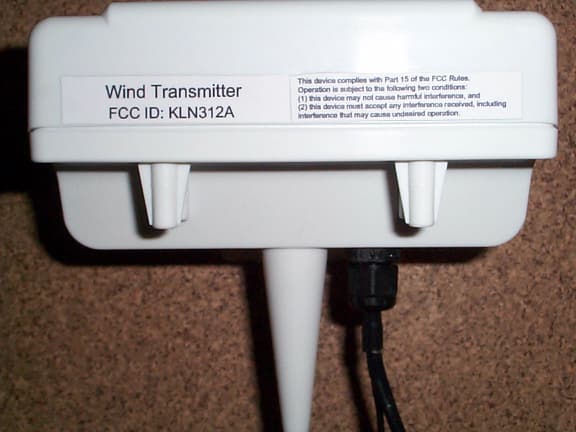
Click to zoom
Application Details
- Equipment Class
- DXX - Part 15 Low Power Communication Device Transmitter
- Date of Grant
- Apr 26, 2006
- Application Purpose
- Original Equipment
- Date of Application
- Apr 26, 2006
- Equipment Note
- Low Power Communications Transmitter
- Frequency Range
- 916.50000000 - 916.50000000
- Company
- Maximum Incorporated
- Country
- United States
Documents & Files
Document Text
Text extracted from the exhibit documents filed with the FCC. Open a document above to read the original.
Users Manual
Installation Instructions I. Introduction Thank you for purchasing a Maximum Wireless Weather instrument. Maximum Wireless Instruments are designed with the customer in mind. Ease of installation and operation enable the “Do It Yourselfer” to install these instruments. If you need assistance, consult a contractor, electrician, or satellite dish installer. II. Components Receiver Wind Tx Temperature Tx Rain Tx III. Test Wiring It is important to pre-wire and test operation from different locations prior to final installation. A. Receivers 1. Merlin and/or Mystic - Connect the AC power wires from the Receiver (Red and Green wires) to the AC power terminals (polarity does not matter) on either Merlin or Mystic instrument (Do Not apply power). - Connect the White wire from the Receiver to terminal #1 (In) of the same instrument. - Connect the Black wire from the Receiver to terminal #2 (GND) of the same instrument. - The Yellow and Brown wires are used only if you are installing a Rainwatch. - If both Merlin and Mystic are being installed, use the jumper wire enclosed with Mystic for connection between these two instruments. o Connect one end of the White wire to terminal #3 (Out) of the instrument wired to the Receiver, and the Black wire to terminal #2 (GND). o Connect the other end of the White wire to terminal #1 (In) of the second Instrument, and the Black wire to terminal #2 (GND). A. Receivers (cont.) 2. Rainwatch - Connect the Yellow wire from the receiver to terminal #4 of the Rainwatch. - Connect the Brown wire from the receiver to terminal #5 of the Rainwatch. B. Transmitters 1. Temperature - The Temperature transmitter operates on two AA Alkaline batteries (supplied). o Do Not install the batteries yet. - Open the thumb-latch on the Temperature transmitter case, and place the circuit board Jumper in the test position (see Diagram A). This will ensure that the Receiver recognizes the Temperature transmitter when batteries are eventually installed. Jumper Normal Position Test Position Diagram A 2. Rain Transmitter - The Rainfall transmitter operates on two AA Alkaline batteries (supplied). o Do Not install the batteries yet. - Remove the top of the Rain Collector by loosening the four Phillips head screws and rotating the top counter-clockwise. - Remove the blue cover to access the circuit board, and place the circuit board Jumper in the test position (see Diagram B). This will ensure that the Receiver recognizes the Rainfall transmitter when batteries are eventually installed. Jumper Normal Position Test Position Diagram B 3. Wind Transmitter - Insert two AA NiCad batteries (supplied) into the enclosed battery charger (be sure to observe Polarity) and charge batteries for 12 hours. o Note: Do not attempt to charge batteries other than NiCad batteries, as they could explode, causing physical damage and/or fire. - Feed the terminal lug end of the Yellow and Brown wires through one of the rubber boots and connect the lugs to the terminals on the bottom of the wind speed sensor using the brass nuts provided. The polarity does not matter. o Note: Do Not adjust the nuts that are already on the sensor. - Feed the terminal lug ends of the remaining 5 wires through the other rubber boot and connect to the terminals on the bottom of the wind direction sensor using the brass nuts provided. o Connect the 5 wires to the wind direction sensor as follows: ß White wire to Terminal 1 ß Orange wire to Terminal 2 ß Black wire to Terminal 3 ß Red wire to Terminal 4 ß Green wire to Terminal 5 o Note: Do Not adjust the nuts that are already on the sensor. - Slide the straight stub mast through the rubber boot and insert it into the bottom of the wind speed sensor. Secure the sensor to the mast with the supplied cotter pin. - Slide the formed (“Z” shaped) stub mast through the other rubber boot and insert it into the bottom of the wind direction sensor with the #3 terminal aligned over the mast arm. Secure the sensor to the mast with the supplied cotter pin. o Note: If the sensor is not installed with the #3 terminal aligned over the mast arm, wind direction readings will be incorrect. SIDE COMPONENT ES00057B 3. Wind Transmitter (cont.) - Remove the bottom portion of the black bracket on the back of the Wind transmitter case, by loosening the four black screws. - Place the Wind transmitter case on the horizontal section of the formed wind direction mast with the antenna situated above the mast arm. - Place the bottom portion of the black bracket behind the mast arm and secure it in place with the four black screws that were removed. - Secure both sensor stub masts to your antenna mast (not supplied) with the two hose clamps provided. - Open the Wind transmitter case by lifting the two thumb latches, and place the circuit board Jumper in the test position (see Diagram C). This will ensure that the Receiver recognizes the Wind transmitter when batteries are eventually inserted. Jumper Normal Position Test Position Diagram C IV. Transceiver Testing & Sensor Installation (please follow directions in the order shown) A. Instrument Display - Move the instrument display and the individual sensors nearby the desired installation location (the display may lie on a table or floor for testing purposes). o This step is necessary to determine whether or not proper signals can be obtained for each component, prior to final installation. - Connect the AC adaptor(s) provided, to the instrument(s). o If you have more than 1 instrument, wire 1 AC adaptor to each instrument. - Plug in all the AC adaptors. SOLDER SIDE A. Instrument Display (cont.) - The following should display on each instrument upon power-up: o Merlin: all LEDs will illuminate, then “0” will display in the window and the North LED will light. o Mystic: all LEDs will illuminate, then a barometer reading will display in the window. o Rainwatch: “00.00” will display in the window. o Cronus: all LEDs will illuminate, then current time will display in the win…
Text truncated - open the document above for the full version.
Cover Letter(s)
Maximum Inc., 30 Samuel Barnet Blvd., New Bedford, MA, 02745, Phone 508-995-2200 March 22, 2006 Federal Communications Commission 7435 Oakland Mills Road Columbia, MD 21046 Curtis-Straus LLC TCB 527 Great Rd Littleton, MA 02702 Re: Confidentiality Request Gentlemen: This letter is to comply with 47 CFR 0.457(d)(2) pertaining to confidential material. Maximum, Inc. requests that the following documents regarding this submission for FCC ID: KLN312A be kept confidential: 1. Schematic 2. Block Diagram 3. Circuit/Technical Description The material above contains technical data, which would customarily be guarded from competitors. Sincerely, Paul Hutchinson Chief Engineer Maximum Inc. 30 Samuel Barnet Blvd. New Bedford, MA, 02745
External Photos
Company: Maximum Inc WO: G0438 FCC ID: KLN312A Company: Maximum Inc WO: G0438 FCC ID: KLN312A Company: Maximum Inc WO: G0438 FCC ID: KLN312A Company: Maximum Inc WO: G0438 FCC ID: KLN312A Company: Maximum Inc WO: G0438 FCC ID: KLN312A Company: Maximum Inc WO: G0438 FCC ID: KLN312A Company: Maximum Inc WO: G0438 FCC ID: KLN312A Company: Maximum Inc WO: G0438 FCC ID: KLN312A Company: Maximum Inc WO: G0438 FCC ID: KLN312A
ID Label/Location Info
WindLabel.pspimage (EXCEPT AS NOTED) DECIMAL FRACTIONAL ANGULAR NO. DATEBY REVISIONS TOLERANCES DRAWN BYSCALE MATERIAL DRAWING NO.DATE 30 Samuel Barnet Blvd. New Bedford, MA 02745 [email protected] (508) 995-2200 Inc. Wind Transmitter Labels 9/24/02 See above This device complies with Part 15 of the FCC Rules. Operation is subject to the following two conditions: (1) this device may not cause harmful interference, and (2) this device must accept any interference received, including interference that may cause undesired operation. 1 3/22/06 P.H. Paul Hutchinson 1:1 2.25 2.25 0.475 0.475 Wind Transmitter FCC ID: KLN312A All dimensions in inches The plastic, adhesive and printing must last for the lifetime of the product. Note - Plastic with a permanent adhesive. Material -
Internal Photos
Company: Maximum Inc WO: G0438 FCC ID: KLN312A
Test Report
Test Report Report No EG0438-2 Client Maximum Inc. Phone 508-995-2200 Fax none FRN 0005833959 Models WWIND FCC ID KLN312A Equipment Type Low Power Communications Device Transmitter Equipment Code DXX Results As detailed within this report Prepared by Josh LeBlanc – Test Engineer Authorized by Michael Buchholz – EMC Manager Issue Date 4/24/06 Conditions of issue This Test Report is issued subject to the conditions stated in ‘terms and conditions’ section of this Curtis-Straus LLC is accredited by the American Association for Laboratory Accreditation for the specific scope of accreditation under Certificate Number 1627-01. This report may contain data which is not covered by the A2LA accreditation. _____________________________________________________________ LLC • 527 Great Road • Littleton, MA • TEL (978) 486-8880 • FAX (978) 486-8828 Curtis-Straus REPORT:EG0438-2 FCC ID: KLN312A _____________________________________________________________ Table of Contents Table of Contents..................................................................................................2 Summary...........................................................................................................3 Test Methodology..............................................................................................3 EUT Configuration.............................................................................................4 Statement of Conformity....................................................................................5 Spurious Radiated Emissions............................................................................6 Fundamental Field Strength..............................................................................8 Test Equipment Used........................................................................................9 Terms and Conditions.....................................................................................10 A2LA Accreditation..........................................................................................12 LLC • 527 Great Road • Littleton, MA • TEL (978) 486-8880 • FAX (978) 486-8828 Page 2 of 14 Curtis-Straus REPORT:EG0438-2 FCC ID: KLN312A _____________________________________________________________ Summary This report is an application for certification of a transmitter operating pursuant to 47 CFR 15.249. The product covered by this report is the WWIND. It is a low power communications transmitter and receiver operating at 916.5MHz. Test Methodology Radiated emissions testing was performed according to the procedures specified in ANSI C63.4 (2003). The EUT was maximized around one axis, as the EUT can only be installed in one position. The EUT has an integrated internal antenna which can not be maximized separately. The EUT is battery powered with no provision to be connected to the AC mains. The standard test voltage was 3V dc provided by two AA alkaline batteries. The ambient environmental conditions were as follows: Date Temperature Humidity 4/21/06 23.9°C 22% Frequency range investigated: 30 MHz- 10 GHz Measurement Distance: Frequency (MHz) Distance (m) Comments Fundamental 916.5MHz 3 m Radiated Spurious & Harmonics 30 – 10000MHz 3 m Radiated All readings are peak unless otherwise noted. For frequencies below 1000MHz, a RBW of120kHz and a VBW of 300kHz were used. For frequencies above 1000MHz, a RBW of 1MHz and a VBW of 3MHz were used. LLC • 527 Great Road • Littleton, MA • TEL (978) 486-8880 • FAX (978) 486-8828 Page 3 of 14 Curtis-Straus REPORT:EG0438-2 FCC ID: KLN312A _____________________________________________________________ EUT Configuration EUT Configuration Work Order: G0438 Company: Maximum Inc. Company Address: 30 Samuel Barnet Blvd. New Bedford, Ma 02745 Contact: Paul Hutchinson Person Present: Paul Hutchinson MNSN EUT: WAIRTest Sample 1 EUT Description: Wireless air temperature transmitter EUT Max Fre quency: 916.5MHz Support Equipment: MNSN none---- EUT Cables: QtyShielded?LengthFerrites none-------- Unpopulated EUT Ports: QtyReason none---- Software / Operating Mode Description: The EUT was transmitting continuously for testing at the fundamental. During spurious emissions testing the EUT was transmitting every four seconds and receiving in between. LLC • 527 Great Road • Littleton, MA • TEL (978) 486-8880 • FAX (978) 486-8828 Page 4 of 14 Curtis-Straus REPORT:EG0438-2 FCC ID: KLN312A _____________________________________________________________ Statement of Conformity The WWIND has been found to conform to the following parts of the 47 CFR as detailed below: 47 CFR Part # Comments 15.15(b) The product contains no user accessible controls that increase transmission power above allowable levels. 15.19 The label is shown in the label exhibit. 15.21 Information to the user is shown in the instruction manual exhibit. 15.27 No special accessories are required for compliance. 15.31(e) A fresh set of batteries was used. 15.203 The device utilizes an integral antenna. 15.204 The antenna is not accessible to the user and therefore cannot be easily removed. 15.205 15.209 The fundamental is not in a restricted band and the spurious emissions in the restricted bands comply with the general emission limits of 15.209. 15.207 The EUT is battery powered only. 15.249(a) Fundamental and Harmonic emissions meet the limits specified in this section. 15.249(b) EUT does not operate in the 24.0-24.25GHz band. 15.249(e) The EUT meets the general radiated emissions limits of section 15.209. 15.249(e) The EUT meets the peak limit of this section. Modifications required for compliance: In order to meet the fundamental emission limit, the resistor R25 was increased to 8.2kOhms. LLC • 527 Great Road • Littleton, MA • TEL (978) 486-8880 • FAX (978) 486-8828 Page 5 of 14 Curtis-Straus REPORT:EG0438-2 FCC ID: KLN312A _____________________________________________________________ Spurious Radiated Emissions Sections 15.249(a), (d) & (e), 15.205, 15.209 Spurious…
Text truncated - open the document above for the full version.
Test Report
RF Circuit Description (ref. ASH Tranceiver Block Diagram) This circuit is the DR3000, 916.50 MHz amplifier-sequenced hybrid (ASH) transceiver module, manufactured by RF Monolithics. This description, and the block diagram, are based on the information provided by RF Monolithics in their “ASH Tranceiver Designer’s Guide”. The diagram and description have been modified to show the manner in which Maximum Inc. is using the DR3000 module. Antenna – The antenna is a quarter-wave whip made from 14AWG copper wire. Receiver chain - the SAW RF filter has a nominal insertion loss of 3.5 dB,a 3 dB band-width of 600 kHz, and an ultimate rejection of 55 dB. The output of the SAW filter drives amplifier RFA1. ON/OFF control to RFA1 (and RFA2) is generated by the Pulse Generator & RF Amp Bias function. The output of RFA1 drives the low-loss SAW delay line, which has a nominal delay of 0.5 μs, an insertion loss of 6 dB, and an ultimate rejection of 50 dB. The second amplifier, RFA2, provides 51 dB of gain below saturation. The output of RFA2 drives a full-wave (rectifier) detector with 19 dB of threshold gain. The onset of saturation in each section of RFA2 is detected and summed to provide a logarithmic response. This is added to the output of the full-wave detector to produce an overall detector response that is square law for low signal levels, and transitions into a log response for high signal levels. The detector output drives a gyrator filter. The filter provides a three-pole, 0.05 degree equiripple low-pass response with excellent group delay flatness and minimal pulse ringing. The 3 dB bandwidth of the filter is set to 4.5 kHz. The filter is followed by a baseband amplifier which boosts the detected signal to the BBOUT pin. The BBOUT signal changes about 10 mV/dB, with a peak-to-peak signal level of up to 685 mV. The detected signal is riding on a 1.1 Vdc level that varies somewhat with supply voltage, temperature, etc. BBOUT is coupled to the CMPIN pin by a series capacitor. Data Slicers - The CMPIN pin drives two data slicers, which convert the analog signal from BBOUT back into a digital stream. Data slicer DS1 is a capacitor-coupled comparator with provisions for an adjustable threshold. The threshold, or squelch, offsets the comparator’s slicing level from 0 to 90 mV, and is set with a resistor between the RREF and THLD1 pins. This threshold allows a trade-off between receiver sensitivity and output noise density in the no-signal condition. DS2 is disabled. AGC Control - AGC operation is disabled. Receiver pulse generator and RF amplifier bias - The receiver amplifier-sequence operation is controlled by the Pulse Generator & RF Amplifier Bias module, which in turn is controlled by the PRATE and PWIDTH input pins, and the Power Down Control Signal from the Modulation & Bias Control function. The interval between the falling edge of one RFA1 ON pulse to the rising edge of the next RFA1 ON pulse is set by a resistor between the PRATE pin and ground. The PWIDTH pin is connected to Vcc through a resistor, the RF amplifiers operate at a nominal 50%-50% duty cycle. Both receiver RF amplifiers are turned off by the Power Down Control Signal, which is invoked in the power-down and transmit modes. Transmitter chain - the transmitter chain consists of a SAW delay line oscillator followed by a modulated buffer amplifier. The SAW filter suppresses transmitter harmonics to the antenna. Note that the same SAW devices used in the amplifier-sequenced receiver are reused in the transmit modes. Transmitter operation uses on-off keyed (OOK) modulation, the transmitter output turns completely off between “1” data pulses. The delay line oscillator amplifier TXA1 and the output buffer amplifier TXA2 are turned off when the voltage to the TXMOD input falls below 220 mV. The transmitter RF output power is proportional to the input current to the TXMOD pin. A resistor in series with the TXMOD pin is used to adjust the peak transmitter output power. The transceiver operating modes, receive, transmit, and power-down (“sleep”), are controlled by the Modulation & Bias Control function, and are selected with the CNTRL1 and CNTRL0 control pins.
Test Setup Photos
Company: Maximum Inc WO: G0438 FCC ID: KLN312A Fundamental and Spurious Emissions Fundamental and Spurious Emissions Company: Maximum Inc WO: G0438 FCC ID: KLN312A Fundamental and Spurious Emissions
Contact Information
Applicant
F Nathaniel Bishop(President)
Test Firm
BUREAU VERITAS CONSUMER PRODUCTS SERVICES, INC.Ozgur Ozturk
[email protected]978-486-8880
Technical Specifications
| # | Rule Parts | Frequency Range | Power Output |
|---|---|---|---|
| 1 | 15C | 916.5 MHz - 916.5 MHz | - |
Other Applications from Maximum Incorporated
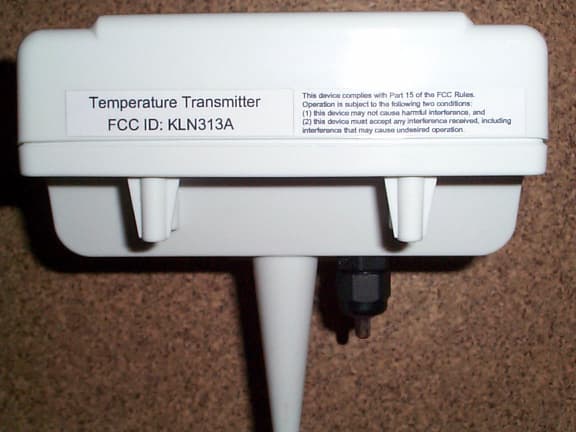
KLN313A
Apr 27, 2006Low Power Communications Transmitter
Equipment Class
DXX - Part 15 Low Power Communication Device Transmitter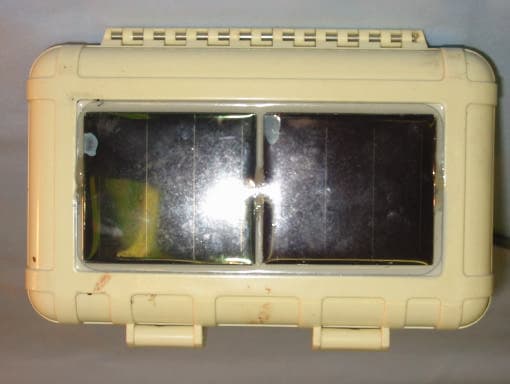
KLN312
Oct 17, 2002Wireless weather sensor
Equipment Class
DXX - Part 15 Low Power Communication Device Transmitter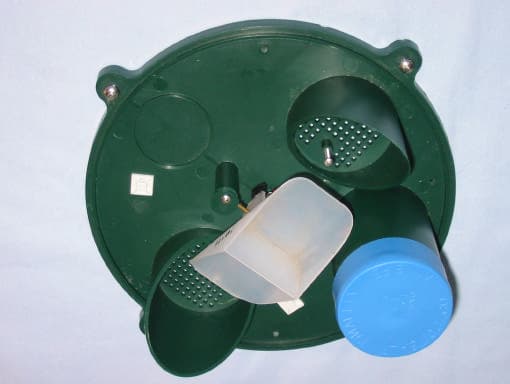
KLN314
Oct 17, 2002Wireless weather sensor
Equipment Class
DXX - Part 15 Low Power Communication Device Transmitter
KLN313
Oct 17, 2002Wireless weather sensor
Equipment Class
DXX - Part 15 Low Power Communication Device Transmitter
KLN311
Oct 17, 2002Wireless weather instrument
Equipment Class
DXX - Part 15 Low Power Communication Device Transmitter