MCLT60H6773MiniPCI 802.11a/b/g
HON HAI Precision Ind. Co., Ltd.
Click to zoom
Application Details
- Equipment Class
- DTS - Digital Transmission System
- Date of Grant
- Nov 12, 2003
- Application Purpose
- Original Equipment
- Date of Application
- Jul 07, 2003
- Equipment Note
- MiniPCI 802.11a/b/g
- Frequency Range
- 2412.00000000 - 2462.00000000
- Country
- Taiwan
Documents & Files
Document Text
Text extracted from the exhibit documents filed with the FCC. Open a document above to read the original.
Users Manual
COMPANY CONFIDENTIAL Ambit Microsystems Corporation 國碁電子股份有限公司 中華民國臺灣省新竹縣新竹科學園區新安路5號5樓之1 電話:886-3-5784975,傳真:886-3-5782924,Internet:http:\\www.ambit.com.tw\ 1 T60H677.03 802.11a/b/g MiniPCI Module (AMBIT WLAN 802.11 a/b/g) User’s Manual COMPANY CONFIDENTIAL Ambit Microsystems Corporation 國碁電子股份有限公司 中華民國臺灣省新竹縣新竹科學園區新安路5號5樓之1 電話:886-3-5784975,傳真:886-3-5782924,Internet:http:\\www.ambit.com.tw\ 2 Chapter 1 About the AMBIT WLAN 802.11a/b/g device........................................ 3 1-1 Introduction .......................................................................................................... 3 1-2 Using a Wireless Local Area Network ................................................................. 3 1-3 Features and Requirements................................................................................... 4 Chapter 2 Network Configuring and Planning ............................................................ 5 2-1 Ad-Hoc Network................................................................................................... 5 2-2 Access Point (Infrastructure) Network ................................................................. 6 Chapter 3 Atheros Client Utility Installation ............................................................... 7 3-1 Atheros Client Utility Installation......................................................................... 7 Chapter 4 Atheros Client Utility (ACU) Configuration ............................................ 11 4-1 Atheros Client Utility icon.................................................................................. 11 4-2 Current Status Tab .............................................................................................. 12 4-3 Profile Management ........................................................................................... 15 4-3-1 Create or Modify a Profile ........................................................................... 16 4-3-2 Security Settings in Profile Management........................................................ 18 4-3-3 Advanced settings in Profile Management...................................................... 22 4-4 Diagnostic Tab .................................................................................................... 23 4-5 Action Menu ....................................................................................................... 25 4-5-1 Enable/Disable Radio ...................................................................................... 25 4-5-2 Enable/Disable Tray Icon ................................................................................ 25 Chapter 5 Wireless Configuration using Windows XP..................................................... 26 5-1 Configuring Your Wireless Networking Settings ............................................... 26 5-2 Advanced Wireless Settings................................................................................ 26 5-3 Disabling the Radio ............................................................................................ 27 5-4 Help and Support Information ............................................................................ 27 Appendix A – Atheros Client Utility Uninstall Process.................................................... 29 Appendix B - Glossary...................................................................................................... 33 Appendix C –Wireless Notices ......................................................................................... 34 COMPANY CONFIDENTIAL Ambit Microsystems Corporation 國碁電子股份有限公司 中華民國臺灣省新竹縣新竹科學園區新安路5號5樓之1 電話:886-3-5784975,傳真:886-3-5782924,Internet:http:\\www.ambit.com.tw\ 3 Chapter 1 About the AMBIT WLAN 802.11a/b/g device 1-1 Introduction The AMBIT WLAN 802.11a/b/g device allows you to access Wireless Local Area Networks (WLANs), share a local printer and files with others in your network, access the Internet, and roam about the office—wirelessly. This wireless Local Area Network solution is designed for both large and small businesses, and it is scalable so that you can add users and new network features as your networking needs grow. The AMBIT WLAN 802.11a/b/g device is a dual band WLAN device that allows for access to both 2.4Ghz and 5Ghz WLAN technologies. The AMBIT WLAN 802.11a/b/g device will operate with at a maximum data rate of 11Mbps with 802.11b (2.4Ghz), 54Mbps with 802.11g (2.4Ghz) wireless networks and a maximum data rate of 54Mbps with 802.11a (5Ghz) wireless networks. The AMBIT WLAN 802.11a/b/g device will automatically detect and seamlessly roam between both 802.11b (2.4Ghz), 802.11g (2.4Ghz) and 802.11a (5Ghz) wireless networks 1-2 Using a Wireless Local Area Network A wireless LAN provides the same functionality of a wired network, but it eliminates the need to install networking cables and other networking equipment. Not only is a wireless LAN easier to deploy, but it also allows for mobility through “roaming.” For example the AMBIT WLAN 802.11a/b/g device can roam from a conference room to an office without being disconnected from the network. COMPANY CONFIDENTIAL Ambit Microsystems Corporation 國碁電子股份有限公司 中華民國臺灣省新竹縣新竹科學園區新安路5號5樓之1 電話:886-3-5784975,傳真:886-3-5782924,Internet:http:\\www.ambit.com.tw\ 4 1-3 Features and Requirements The AMBIT WLAN 802.11a/b/g device includes the following features: Wireless Features • Support for the IEEE 802.11a standard • Support for the IEEE 802.11b standard • Operates within the 2.4-GHz band • Operates within the 5Ghz band • Maximum data rate of up to 54 Mbps (802.11a/g) • Maximum data rate of up to 11 Mbps (802.11b) Interoperability • WiFi certified at 5Ghz to ensure wireless interoperability with other WiFi (802.11a) certified devices. • WiFi certified at 2.4Ghz to ensure wireless interoperability with other WiFi (802.11b) certified devices. Security • Cisco Client Extension compatibility (including LEAP) • Wired Equivalent Privacy (WEP) encryptio…
Text truncated - open the document above for the full version.
Users Manual
TravelMate 660 series User’s guide Changes may be made periodically to the information in this publication without obligation to notify any person of such revision or changes. Such changes will be incorporated in new editions of this manual or supplementary documents and publications. This company makes no representations or warranties, either expressed or implied, with respect to the contents hereof and specifically disclaims the implied warranties of merchantability or fitness for a particular purpose. Record the model number, serial number, purchase date, and place of purchase information in the space provided below. The serial number and model number are recorded on the label affixed to your computer. All correspondence concerning your unit should include the serial number, model number, and purchase information. No part of this publication may be reproduced, stored in a retrieval system, or transmitted, in any form or by any means, electronic, mechanical, photocopy, recording, or otherwise, without the prior written permission of Acer Incorporated. Model number : _________________________________ Serial number: ___________________________________ Purchase date: ___________________________________ Place of purchase: ________________________________ Copyright © 2003 Acer Incorporated. All Rights Reserved. TravelMate 660 series User’s guide Original Issue: May 2003 TravelMate 660 series Notebook computer Acer and the Acer logo are registered trademarks of Acer Incorporated. Other company's product names or trademarks are used herein for identification purposes only and belong to their respective companies. iii English First things first We would like to thank you for making the TravelMate series of notebook computers your choice for your mobile computing needs. We hope you will be happy with your TravelMate as much as we enjoyed making it for you. Yo u r g u i d e s To help you use your TravelMate, we have designed a set of guides: For more information about our products, services, and support information, please visit our Web site (www.acer.com). First off, the Just for Starters... poster helps you get started with setting up your computer. This User’s guide introduces you to the many ways your computer can help you be more productive. This guide provides clear and concise information about the computer, so read it thoroughly. If you ever need to print out a copy, this User’s guide is also available in PDF (Portable Document Format). Follow these steps: 1 Click on Start, Programs, TravelMate. 2 Click on TravelMate User’s guide. Note: Viewing the file requires Adobe Acrobat Reader installed. For instructions on how to use Adobe Acrobat Reader, access the Help menu. iv English Basic care and tips for using your computer Turning your computer on and off To turn on the computer, simply press the power button on the left of the launch keys found above your TravelMate’s standard keyboard. See “Front open view” on page 3 for the location of the power switch. To turn the power off, do any of the following: •Use the Windows shutdown command For Windows 2000: Click on Start, Shut Down..., and select Shut down; then click on OK. - or - For Windows XP: Click on Start, Turn off Computer; then click Tur n Off. •Use the power switch Note: You can also use the power switch to perform power management functions. See Windows help for more information. •Use the customized functions for power management You can also shut down the computer by closing the display cover, or by pressing the sleep hot key (Fn-F4). See the online guide for details. Note: If you cannot power off the computer normally, press and hold the power switch for more than four seconds to shut down the computer. If you turn off the computer and want to turn it on again, wait at least two seconds before powering up. Taking care of your computer Your computer will serve you well if you take care of it. •Do not expose the computer to direct sunlight. Do not place it near sources of heat, such as a radiator. •Do not expose the computer to temperatures below 0ºC (32ºF) or above 50ºC (122ºF). •Do not subject the computer to magnetic fields. v English •Do not expose the computer to rain or moisture. •Do not spill water or any liquid on the computer. •Do not subject the computer to heavy shock and vibration. •Do not expose the computer to dust and dirt. •Never place objects on top of the computer to avoid damaging the computer. •Do not slam the computer display when you close it. •Never place the computer on uneven surfaces. Taking care of your AC adapter Here are some ways to take care of your AC adapter: •Do not connect the adapter to any other device. •Do not step on the power cord or place heavy objects on top of it. Carefully route the power cord and any cables away from personal traffic. •When unplugging the power cord, do not pull on the cord itself but pull on the plug. •The total ampere ratings of the equipment plugged in should not exceed the ampere rating of the cord if you are using an extension cord. Also, the total current rating of all equipment plugged into a single wall outlet should not exceed the fuse rating. Taking care of your battery pack Here are some ways to take care of your battery pack: •Use only batteries of the same kind as replacements. Turn the power off before removing or replacing batteries. •Do not tamper with batteries. Keep them away from children. •Dispose of used batteries according to local regulations. Recycle if at all possible. Cleaning and servicing When cleaning the computer, follow these steps: 1Power off the computer and remove the battery pack. 2Disconnect the AC adapter. vi English 3Use a soft cloth moistened with water. Do not use liquid or aerosol cleaners. 4To clean the display screen, use an LCD cleaning kit. If any of the following occurs: •The computer has been dropped or the body has been damaged. •Liquid has been spilled into the product. •The computer does not operate normally. Please refe…
Text truncated - open the document above for the full version.
Users Manual
1 Getting to know your TravelMate38 English Smart Card Manager The Multiple user support is implemented and managed in Smart Card Manager. Please note that five users can be registered on one PC. If you registered as the Primary User, ONLY you can add/remove other users. If you registered as a regular user, other registered users could add/remove you. All registered users will be able to use the View Smart Card users option. Change Password Click the Change Password button, fill in the three fields in the Change Password dialog box, and then close the dialog box by clicking the OK button to change the Smart Card password. Encrypt/Decrypt PlatinumSecure can also be used to encrypt/decrypt files except for system files or files that are already encrypted with other applications. Double-click on a file to automatically encrypt/decrypt it. However, if the file is associated with an application, it will be opened with that application instead of being encrypted. Note that the encryption is not recursive, i.e., when you encrypt a folder, only the files immediately under that folder are encrypted. Other files under subfolders are not. To find the Encrypt/Decrypt commands: •Right-click on the Start menu, •Right-click on a folder or icon on your Windows desktop, or •In Windows Explorer, right-click on a selected folder, file, or group of files. 39 English Running PlatinumKey PlatinumKey provides one-click logon to all password-required websites. With its unique Smart Card caching technology, you can greatly extend the limited card memory size to unlimited use by storing your private data in an encrypted file either on the Smart Card, or on the 360 Degree Web secure website server. Information in PlatinumKey like the one in My Info and Credit Cards, can be transferred to other applications using the "drag-and-drop" method: simply point the cursor to the field containing the information, press and hold the left mouse button, then drag the cursor to the application and drop the information there. PlatinumKey also makes it convenient to change your password. There is always a PWD button available, which is equivalent to the Change Password button in PlatinumSecure. Follow these steps to use PlatinumKey: 1Open your browser to connect to the Internet. 2Double-click on the PlatinumKey icon on your Windows desktop. 3Enter your Smart Card password and click OK. 4If PlatinumKey is being used for the very first time, it will ask "Would you like to link to 360 Degree Web secure website server to backup the information on your Smart Card?" The default answer is Yes, and it will enable you to store your information (excluding the Credit Cards) on the 360 Degree Web secure website server for backup purposes in case the card is lost/stolen. If you choose No, you will only be able to save My Info, Credit Cards and 5 Websites on your Smart Card. 5Log in to a website where you are already registered. 6PlatinumKey automatically stores your login data and asks for your confirmation to automatically log you in the next time you access the site. Click Yes and continue browsing. 7To close PlatinumKey when you are finished browsing, right-click on the PlatinumKey icon on your Windows taskbar and select Close PlatinumKey. PlatinumKey provides a list of all the logon pages that you have stored. To go directly to any site on the list either double-click it or select it and click the Go button. Also, you can click the View button to view the selected website information including Web Name, User Name, 1 Getting to know your TravelMate40 English Password, and Web URL. Similarly, type the first letter(s) of a site on the list, and the site will be searched and selected. You can Edit and Delete the sites as well as other information, and Save or Cancel the changes you made, by selecting the button corresponding to each command. Using passwords Passwords protect your computer from unauthorized access. Setting these passwords creates several different levels of protection for your computer and data: •Supervisor Password prevents unauthorized entry into the BIOS Utility. Once set, you must key-in this password to gain access to the BIOS Utility. See “BIOS Utility” on page 54. •User Password secures your computer against unauthorized use. Combine the use of this password with password checkpoints on boot-up and resume from hibernation for maximum security. •Password on Boot secures your computer against unauthorized use. Combine the use of this password with password checkpoints on boot-up and resume from hibernation for maximum security. •Hard Disk Password protects your data by preventing unauthorized access to your hard disk. Even if the hard disk is removed from the computer and moved to another computer, it cannot be accessed without the Hard Disk Password. Important! Do not forget your Supervisor and Hard Disk Password! If you forget your password, please get in touch with your dealer or an authorized service center. Entering passwords When a password is set, a password prompt appears in the left-hand corner of the display screen. •When the Supervisor Password is set, a prompt appears when you press F2 to enter the BIOS Utility at boot-up. •Type the Supervisor Password and press Enter to access the BIOS Utility. If you enter the password incorrectly, a warning message appears. Try again and press Enter. •When the User Password is set and the Password on boot 41 English parameter is enabled, a prompt appears at boot-up. •Type the User Password and press Enter to use the computer. If you enter the password incorrectly, a warning message appears. Try again and press Enter. •When the Hard Disk Password is set, a prompt appears at boot-up. •Type the Hard Disk Password and press Enter to use the computer. If you enter the password incorrectly, a warning message appears. Try again and press Enter. Important! You have three chances to enter a password. If you fail to enter the password correctly after three tries, the system halts. Sl…
Text truncated - open the document above for the full version.
Users Manual
TravelMate 660 series User’s guide Changes may be made periodically to the information in this publication without obligation to notify any person of such revision or changes. Such changes will be incorporated in new editions of this manual or supplementary documents and publications. This company makes no representations or warranties, either expressed or implied, with respect to the contents hereof and specifically disclaims the implied warranties of merchantability or fitness for a particular purpose. Record the model number, serial number, purchase date, and place of purchase information in the space provided below. The serial number and model number are recorded on the label affixed to your computer. All correspondence concerning your unit should include the serial number, model number, and purchase information. No part of this publication may be reproduced, stored in a retrieval system, or transmitted, in any form or by any means, electronic, mechanical, photocopy, recording, or otherwise, without the prior written permission of Acer Incorporated. Model number : _________________________________ Serial number: ___________________________________ Purchase date: ___________________________________ Place of purchase: ________________________________ Copyright © 2003 Acer Incorporated. All Rights Reserved. TravelMate 660 series User’s guide Original Issue: May 2003 TravelMate 660 series Notebook computer Acer and the Acer logo are registered trademarks of Acer Incorporated. Other company's product names or trademarks are used herein for identification purposes only and belong to their respective companies. iii English First things first We would like to thank you for making the TravelMate series of notebook computers your choice for your mobile computing needs. We hope you will be happy with your TravelMate as much as we enjoyed making it for you. Yo u r g u i d e s To help you use your TravelMate, we have designed a set of guides: For more information about our products, services, and support information, please visit our Web site (www.acer.com). First off, the Just for Starters... poster helps you get started with setting up your computer. This User’s guide introduces you to the many ways your computer can help you be more productive. This guide provides clear and concise information about the computer, so read it thoroughly. If you ever need to print out a copy, this User’s guide is also available in PDF (Portable Document Format). Follow these steps: 1 Click on Start, Programs, TravelMate. 2 Click on TravelMate User’s guide. Note: Viewing the file requires Adobe Acrobat Reader installed. For instructions on how to use Adobe Acrobat Reader, access the Help menu. iv English Basic care and tips for using your computer Turning your computer on and off To turn on the computer, simply press the power button on the left of the launch keys found above your TravelMate’s standard keyboard. See “Front open view” on page 3 for the location of the power switch. To turn the power off, do any of the following: •Use the Windows shutdown command For Windows 2000: Click on Start, Shut Down..., and select Shut down; then click on OK. - or - For Windows XP: Click on Start, Turn off Computer; then click Tur n Off. •Use the power switch Note: You can also use the power switch to perform power management functions. See Windows help for more information. •Use the customized functions for power management You can also shut down the computer by closing the display cover, or by pressing the sleep hot key (Fn-F4). See the online guide for details. Note: If you cannot power off the computer normally, press and hold the power switch for more than four seconds to shut down the computer. If you turn off the computer and want to turn it on again, wait at least two seconds before powering up. Taking care of your computer Your computer will serve you well if you take care of it. •Do not expose the computer to direct sunlight. Do not place it near sources of heat, such as a radiator. •Do not expose the computer to temperatures below 0ºC (32ºF) or above 50ºC (122ºF). •Do not subject the computer to magnetic fields. v English •Do not expose the computer to rain or moisture. •Do not spill water or any liquid on the computer. •Do not subject the computer to heavy shock and vibration. •Do not expose the computer to dust and dirt. •Never place objects on top of the computer to avoid damaging the computer. •Do not slam the computer display when you close it. •Never place the computer on uneven surfaces. Taking care of your AC adapter Here are some ways to take care of your AC adapter: •Do not connect the adapter to any other device. •Do not step on the power cord or place heavy objects on top of it. Carefully route the power cord and any cables away from personal traffic. •When unplugging the power cord, do not pull on the cord itself but pull on the plug. •The total ampere ratings of the equipment plugged in should not exceed the ampere rating of the cord if you are using an extension cord. Also, the total current rating of all equipment plugged into a single wall outlet should not exceed the fuse rating. Taking care of your battery pack Here are some ways to take care of your battery pack: •Use only batteries of the same kind as replacements. Turn the power off before removing or replacing batteries. •Do not tamper with batteries. Keep them away from children. •Dispose of used batteries according to local regulations. Recycle if at all possible. Cleaning and servicing When cleaning the computer, follow these steps: 1Power off the computer and remove the battery pack. 2Disconnect the AC adapter. vi English 3Use a soft cloth moistened with water. Do not use liquid or aerosol cleaners. 4To clean the display screen, use an LCD cleaning kit. If any of the following occurs: •The computer has been dropped or the body has been damaged. •Liquid has been spilled into the product. •The computer does not operate normally. Please refe…
Text truncated - open the document above for the full version.
Users Manual
1 Getting to know your TravelMate38 English Smart Card Manager The Multiple user support is implemented and managed in Smart Card Manager. Please note that five users can be registered on one PC. If you registered as the Primary User, ONLY you can add/remove other users. If you registered as a regular user, other registered users could add/remove you. All registered users will be able to use the View Smart Card users option. Change Password Click the Change Password button, fill in the three fields in the Change Password dialog box, and then close the dialog box by clicking the OK button to change the Smart Card password. Encrypt/Decrypt PlatinumSecure can also be used to encrypt/decrypt files except for system files or files that are already encrypted with other applications. Double-click on a file to automatically encrypt/decrypt it. However, if the file is associated with an application, it will be opened with that application instead of being encrypted. Note that the encryption is not recursive, i.e., when you encrypt a folder, only the files immediately under that folder are encrypted. Other files under subfolders are not. To find the Encrypt/Decrypt commands: •Right-click on the Start menu, •Right-click on a folder or icon on your Windows desktop, or •In Windows Explorer, right-click on a selected folder, file, or group of files. 39 English Running PlatinumKey PlatinumKey provides one-click logon to all password-required websites. With its unique Smart Card caching technology, you can greatly extend the limited card memory size to unlimited use by storing your private data in an encrypted file either on the Smart Card, or on the 360 Degree Web secure website server. Information in PlatinumKey like the one in My Info and Credit Cards, can be transferred to other applications using the "drag-and-drop" method: simply point the cursor to the field containing the information, press and hold the left mouse button, then drag the cursor to the application and drop the information there. PlatinumKey also makes it convenient to change your password. There is always a PWD button available, which is equivalent to the Change Password button in PlatinumSecure. Follow these steps to use PlatinumKey: 1Open your browser to connect to the Internet. 2Double-click on the PlatinumKey icon on your Windows desktop. 3Enter your Smart Card password and click OK. 4If PlatinumKey is being used for the very first time, it will ask "Would you like to link to 360 Degree Web secure website server to backup the information on your Smart Card?" The default answer is Yes, and it will enable you to store your information (excluding the Credit Cards) on the 360 Degree Web secure website server for backup purposes in case the card is lost/stolen. If you choose No, you will only be able to save My Info, Credit Cards and 5 Websites on your Smart Card. 5Log in to a website where you are already registered. 6PlatinumKey automatically stores your login data and asks for your confirmation to automatically log you in the next time you access the site. Click Yes and continue browsing. 7To close PlatinumKey when you are finished browsing, right-click on the PlatinumKey icon on your Windows taskbar and select Close PlatinumKey. PlatinumKey provides a list of all the logon pages that you have stored. To go directly to any site on the list either double-click it or select it and click the Go button. Also, you can click the View button to view the selected website information including Web Name, User Name, 1 Getting to know your TravelMate40 English Password, and Web URL. Similarly, type the first letter(s) of a site on the list, and the site will be searched and selected. You can Edit and Delete the sites as well as other information, and Save or Cancel the changes you made, by selecting the button corresponding to each command. Using passwords Passwords protect your computer from unauthorized access. Setting these passwords creates several different levels of protection for your computer and data: •Supervisor Password prevents unauthorized entry into the BIOS Utility. Once set, you must key-in this password to gain access to the BIOS Utility. See “BIOS Utility” on page 54. •User Password secures your computer against unauthorized use. Combine the use of this password with password checkpoints on boot-up and resume from hibernation for maximum security. •Password on Boot secures your computer against unauthorized use. Combine the use of this password with password checkpoints on boot-up and resume from hibernation for maximum security. •Hard Disk Password protects your data by preventing unauthorized access to your hard disk. Even if the hard disk is removed from the computer and moved to another computer, it cannot be accessed without the Hard Disk Password. Important! Do not forget your Supervisor and Hard Disk Password! If you forget your password, please get in touch with your dealer or an authorized service center. Entering passwords When a password is set, a password prompt appears in the left-hand corner of the display screen. •When the Supervisor Password is set, a prompt appears when you press F2 to enter the BIOS Utility at boot-up. •Type the Supervisor Password and press Enter to access the BIOS Utility. If you enter the password incorrectly, a warning message appears. Try again and press Enter. •When the User Password is set and the Password on boot 41 English parameter is enabled, a prompt appears at boot-up. •Type the User Password and press Enter to use the computer. If you enter the password incorrectly, a warning message appears. Try again and press Enter. •When the Hard Disk Password is set, a prompt appears at boot-up. •Type the Hard Disk Password and press Enter to use the computer. If you enter the password incorrectly, a warning message appears. Try again and press Enter. Important! You have three chances to enter a password. If you fail to enter the password correctly after three tries, the system halts. Sl…
Text truncated - open the document above for the full version.
Contact Information
Applicant
Mrs. Rio Chen(Compliance Deputy Manager)
Non-Technical Contact
Bay Area Compliance Laboratory Corp.Agnes Fu
[email protected]408-732-9162
Test Firm
Bay Area Compliance LaboratoryJohn Chan
Technical Specifications
| # | Rule Parts | Frequency Range | Power Output |
|---|---|---|---|
| 1 | 15C | 2.41 GHz - 2.46 GHz | 46.80 mW |
Other Applications from HON HAI Precision Ind. Co., Ltd.
MCLT77W968
Jun 03, 2021LTE M.2 Module
Equipment Class
CBE - Citizens Band End User Devices
MCLT77W968C9
Feb 13, 2020LTE M.2 Module
Equipment Class
PCB - PCS Licensed Transmitter
MCLADB1761WF
Jun 03, 2015IP Set-Top Box with Wi-Fi 11ac
Equipment Class
DTS - Digital Transmission System
MCLADB1761W
Jun 02, 2015IP Set-Top Box
Equipment Class
DTS - Digital Transmission System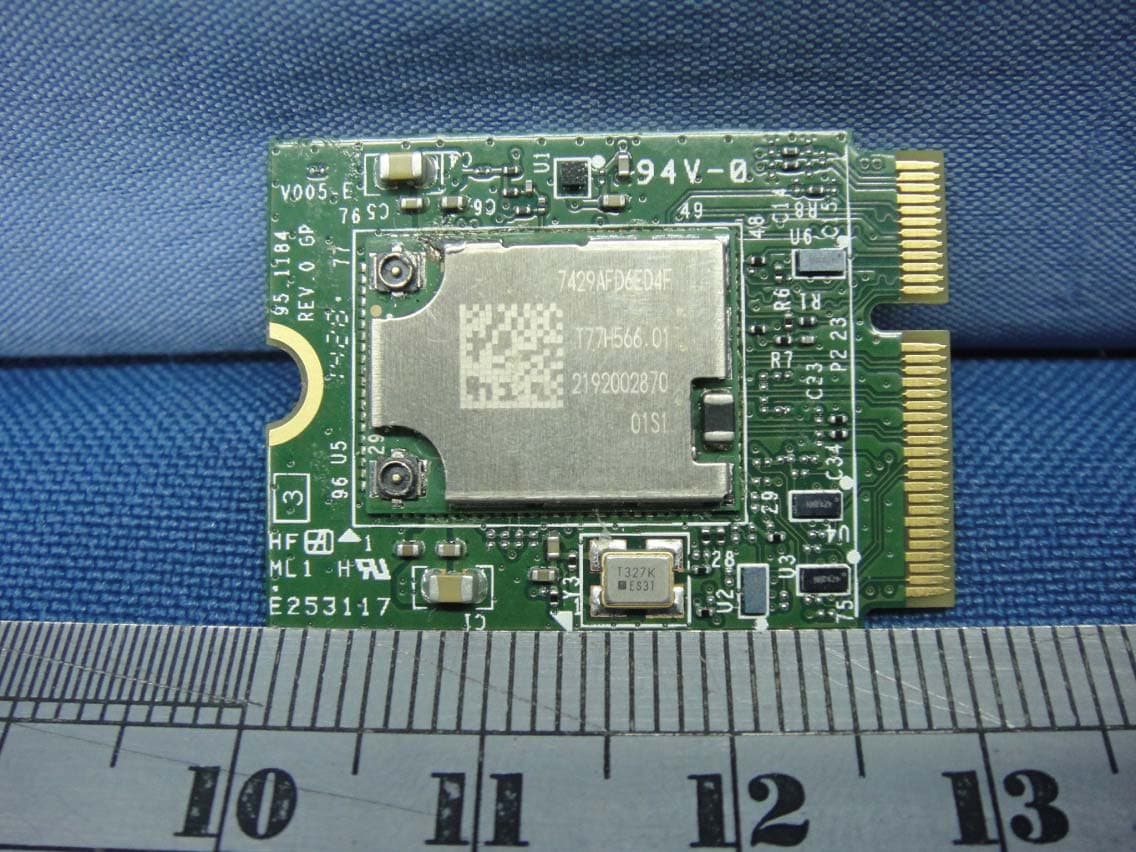
MCLT77H566
Feb 16, 2015WiFi/BT Module
Equipment Class
DTS - Digital Transmission System