PDLAV420A42 Inches TFT LCD TV
ATEC Co., Ltd.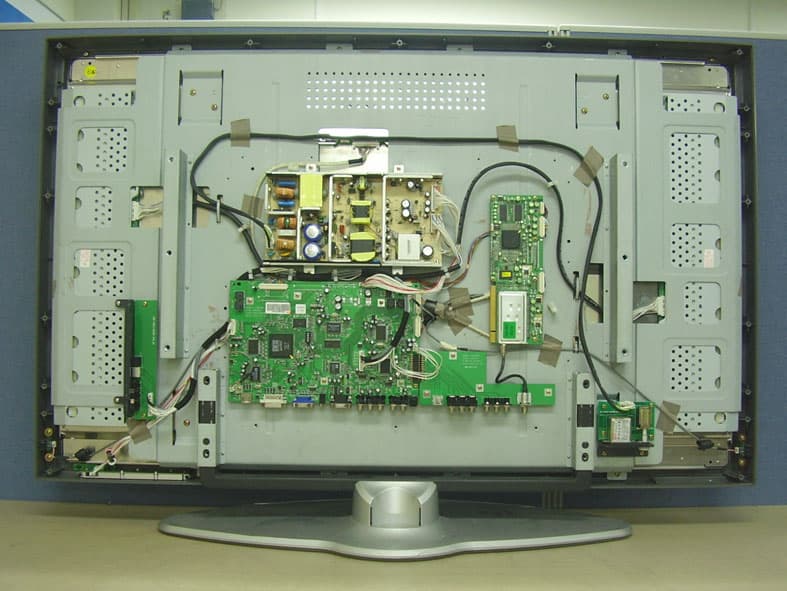
Click to zoom
Application Details
- Equipment Class
- JBP - Part 15 Class B Computing Device Peripheral
- Date of Grant
- Jan 29, 2006
- Application Purpose
- Original Equipment
- Date of Application
- Jan 29, 2006
- Equipment Note
- 42 Inches TFT LCD TV
- Company
- ATEC Co., Ltd.
- Country
- South Korea
Documents & Files
Document Text
Text extracted from the exhibit documents filed with the FCC. Open a document above to read the original.
Users Manual
1 1. Read these instructions. 2. Keep these instructions. 3. Heed all warnings. 4. Follow all instructions. 5. Do not use this TV near water. 6. Clean only with a dry cloth. 7. Do not block any ventilation openings. Install in accordance with the manufacturer’s instructions. 8. Do not install near any heat source such as radiators, stoves, or other apparatus (including amplifiers) that produce heat. 9. Do not defeat the safety purpose of the polarized or grounding-type plug. A polarized plug has two blades one wider than the other. A grounding-type plug has two blades and a third grounding prong. The wide blade and third prong are provided for your safety. If the plug provided does not fit into your outlet, consult an electrician for replacement of the obsolete outlet. 10. Protect the power cord from being walked on or constricted particularly near the plug, by waste bins, and at the point where it exits from the TV. 11. Only use attachments/accessories specified by the manufacturer. 12. Use only with the cart, stand, tripod, bracket, or table specified by the manufacturer, or sold with the TV. When a cart is used, use caution when moving the cart/TV combination to avoid injury from overturning. 13. Unplug this TV during electrical storms or when unused for long periods of time. 14. Refer all servicing to qualified service personnel. Servicing is required when the TV has been damaged in any way, such as when the power-supply cord or plug is damaged, when liquid has been spilled on it, when it does not operate normally, or has been dropped. 15. The TV should not be exposed to dripping or splashing of liquids, and objects filled with liquid, such as vases, should not be placed on the apparatus. 16. Indoor use only. 17. This equipment shall be connected to a main socket outlet with a protective earthing connection. The appliance coupler is used as the disconnect device. Important Safety Instruction 2 Shock Hazard Marking and Associated Graphic Symbols Explanation of Safety Related Symbols WARNING – To reduce the risk of fire or electric shock, do not expose this apparatus to rain or moisture. To prevent fire or shock hazard, do not place objects filled with liquids, such as vases, on the apparatus. CAUTION – These servicing instructions are for use by qualified service personnel only. To reduce the risk of electric shock do not perform any servicing other than that contained in the operating instructions unless you are qualified to do so. This symbol is intended to alert the user to the presence of uninsulated “dangerous voltage” within the product’s casing that may be of sufficient magnitude to constitute a risk of electric shock. RISK OF ELECTRIC SHOCK DO NOT OPEN CAUTION: TO REDUCE THE RISK OF ELECTRIC SHOCK, DO NOT REMOVE COVER (OR BACK). NO USER SERVICEABLE PARTS INSIDE. REFER SERVICING TO QUALIFIED SERVICE PERSONNEL. This symbol is intended to alert the user to the presence of important operating and maintenance(servicing) instructions in the literature accompanying the appliance. RISK OF ELECTRIC SHOCK DO NOT OPEN CAUTION CAUTION Important Safety Instruction 3 General safety precautions Never touch the power plug with wet hands. An electric shock may occur. Don’t plug more than one appliance into the same power outlet. An electric shock or fire may occur. Insert the plug fully so that the power supply unit is connected securely. Unsafe power connection may cause a fire. Grasp the power plug at the base to remove it from the wall, and pull firmly but gently. If you yank the cord, the wire may be break, causing ignition or heat generation. Select a cool, dry area and protect the LCD display from extremes of temperature, humidity, dust and smoke. Electric shock, fire or failure may occur. Place the TV at a proper distance (over 4 inch) away from the wall for sufficient ventilation. A fire may result from an increase in internal temperature. Place the monitor in a well-ventilated room. A fire may result from an increase in internal temperature. Do not touch the antenna when it is snowing or, raining, or during electrical storm. Electric shock may result. There may be a danger of electric shock when installing the outdoor antenna; please consult a specialist firm. Electric shock may result. Important Safety Instruction Position the outdoor antenna line in such a way as to prevent rain water flowing into the parts indoors. A fire or electric shock may be caused if rainwater is allowed to get into the LCD display. Never disassemble and repair this TV yourself ; use trained repair engineers. A fire or electric shock may result. If repair or adjustment is reguired, please contact the appropriate sales agency or customer advisor. Don’t insert metal objects (such as coins, hair pins or ironware) or flammable items (such as paper or matches) into the TV. A fire or electric shock may result. Stop using the TV in case of smoke or abnormal odors. Immediately turn off the power, pull the power cord out of the wall and then contact your service center. Continued use in these circumstances may cause a fire or electric shock. Please prevent children from tampering with or swallowing a remote control battery. Keep batteries out of children’s reach. If a child swallows one, please consult a doctor immediately. Place on a stable and secure surface. If the monitor falls or is dislodged, it may cause an injury. Before moving turn off the TV and disconnect all cables from the TV. Do not subject the TV to shock when moving. 4 Important Safety Instruction If installing or moving the LCD TV after opening the LCD TV box, ensure that two persons hold each side of the unit for moving it to the installation site. This is to avoid potential hazards to the LCD TV as well as to the people moving the unit. Carrying an LCD TV by only one person places intense stress on the back, possibly resulting in back injuries. The unit could also be dropped on the floor, which could break the cradle or cause other injuries. When mo…
Text truncated - open the document above for the full version.
Users Manual
Product Characteristics LCD Display Overview Remote Control Connecting the LCD TV and Peripheral Devices 1-2 Product Characteristics This product is equipped with an LCD panel to provide high-resolution PC mode. It is a 37"/42" LCD display that allows you to watch two high-resolution video sources simultaneously. Automatic Power On/Off You can preset the power on/off time to have it turned on and off automatically as desired. It is automatically turned off if there is no input signal for 15 minutes. (TV Mode) Viewing high resolution video from external devices You can view high-resolution video by connecting it to a DVD player and Set-Top Receiver (480p, 480i, 720p, 1080i-compatible) or a PC connector, AV (Composite) jack, S-Video jack, VGA (RGB) connector, DVI (Digital) connector and Component provided. Viewing two video sources at the same time with the Picture-in-Picture (PIP) feature Using the PIP feature, you can watch two video signals from external devices simultaneously. Viewing two video signals: Interactive Menu Screen The interactive menu screen lets you select a menu item to bring up another menu, providing easy access to the monitor functions. HDTV-Ready Display Enables you to view high-definition digital pictures using a DVD player or HDTV set-top receiver (480p, 480i, 720p, 1080i-compatible). SWAP 1-3 Product Characteristics LCD TV Overview and Installation Monitor Function PC mode resolution supports up to 1600x1200 @ 60Hz. But to get the best picture quality, adjust the PC graphics card to 1360x768 @ 60Hz. NOTE PC Mode Resolution If PC Graphic card is not supportting 1360x768. Please adjust resolution to 1280x768 @ 60Hz or 1024x768 @ 60Hz. Various Picture/Sound Controls Allows you to set the picture and sound settings for a number of different types of program and viewing and listening conditions. Supports SSM (Sound Status Memory) and PSM (Picture Status Memory), facilitating optimum sound settings for different video modes (TV drama, music, movie, and so on). MENU Button Displays the main OSD menu. Exits from a sub-menu. 2 SOURCE Button Displays a menu of all of the available input sources. (TV, AV 1, 2, 3, Component, DVI and RGB) 3 Front View LCD Display Displays the current contents of the display. 1 2 1 7 8 3645 1-4 LCD Display Overview LCD TV Overview and Installation Channel (/) Buttons Press CH () or CH () to change channels. Also used to select the OSD (On Screen Display) menu. 4 Volume (/) Buttons Press the VOL (decrease) or VOL (increase) to change the volume. Also used to increase or reduce the values in an OSD menu. 5 Power Indication Lamp/Remote Control Receiver If the AC adapter is connected, then the red lamp is illuminated. If the LCD Display power is turned on, then the green light is illuminated. Paint the remote control towards the Power Indication Lamp to receive the function of the radio wares emitted from the remate control. 7 External Speakers Output device for LCD TV sound (for information on installing speakers, see Page 1-9). 8 POWER Button Press this button in Standby mode to turn off the LCD TV. (Use this button after pressing the main power button on the rear panel of the LCD TV.) 6 1-5 LCD Display Overview LCD TV Overview and Installation AV3: S-VIDEO (AV) S-Video signal from an S-VHS VCR or Laserdisc player. 2 AV3: Composite - Composite Video IN : Connect with the Video input terminal from a VCR (or DVD Player). - Audio L/R IN : Connect with the Audio-Left/Right from a VCR (or DVD Player). 3 Head Phone Jack Connects with a headphone. 1 Rear View 1 2 3 14 15 456710298 13 NOTE S-video or composite video input signal can be connected for use. (If both of them are connected, the input signal connected to S-video is used.) 1112 1-6 LCD Display Overview
Users Manual
LCD TV Overview and Installation AC Input Connector To input AC power cable from a power outlet. 15 DVI-D Connects the DVI cable to the DVI connector on the computer. 4 ANALOG RGB Connects the VGA signal cable to the VGA connector on the computer. 5 COMPONENT VIDEO INPUT Jack for connecting the DVD player (or VCR player or Digital TV playback player) video input connector (for both DVD and DTV). 8 COMPONENT AUDIO INPUT Jack for connecting the DVD player (or DTV) audio input connector. 9 OPTICAL OUTPUT Connects to a Digital Audio component. 10 Main Power Button Press this button to switch the LCD TV main power on/off. (To use the TV, press this button to turn the main power on, and press the POWER button on the remote control.) 14 ANT (VHF/UHF) Connector Connect with an external cable from the external antenna. 12 PC AUDIO INPUT Connect to the audio-output port of a PC. 6 RS-232C This is used for connecting a serial cable. 7 NOTE Either S-Video input signal or Composite Video input signal can be connected for use. VIDEO INPUT 1/2(AV 1, 2) This jack is used for audio/video input from external devices. 11 VIDEO OUT 1 This jack is used for output from the LCD TV video to an external (other) TV. 13 1-7 LCD Display Overview LCD TV Overview and Installation Cradle Installation Place the cradle on a wide, stable, and flat surface. 1 If the cradle has not been assembled, assemble it as illustrated in the diagram. 2 Lower the LCD panel in the direction of the arrow. 3 NOTE If installing the LCD panel on the cradle, install the LCD panel before attaching the speakers. 1-8 LCD Display Overview LCD TV Overview and Installation Secure the LCD TV with screws. 4 Speaker Installation Attach the latch to the speaker, and secure it with screws. 1 Attach the speaker to the LCD TV, and secure it with screws. 2 1-9 LCD Display Overview LCD TV Overview and Installation Connect the speaker audio cable to the LCD TV. 3 1-10 LCD Display Overview
Users Manual
LCD TV Overview and Installation 1-11 LCD Display Overview Before Using the Remote Control Inserting the batteries in the Remote Control You must insert or replace the batteries in the remote control. Open the cover. Insert batteries with the correct polarity (+, -). Close the cover. NOTE S Always use recommended batteries only; use of other batteries may result in battery leakage or corrosion. Do not insert the batteries with the wrong polarity. Do not put spent batteries in a fire. Do not leave completely-used batteries in the remote control. Leaving them in place for a long time may cause corrosion of the electrodes in the remote control. Replace the batteries with new ones, if the remote control does not work well. 1-12 Remote Control LCD TV Overview and Installation Information on the Use of the Remote Control When using the remote control, point it towards the Power Indication Lamp of the LCD Display. The operating distance should be within 23 feet. The receiving angle should be within 30 degrees. NOTE S Do not subject the remote control to shock. It may get damaged. Be caregul not to let water get into the remote control. It may cause damage. Do not disassemble the remote control. Do not expose the remote control to direct sunlight or other strong light. The remote control may not work normally. Do not keep in cold or humid places. It may cause defects. 1-13 Remote Control LCD TV Overview and Installation Remote Control Button Functions POWER Button Turns the display On or Off. 1 NUMBER Buttons Direct channel select. Direct page selection during Teletext display. 2 1 4 6 7 8 9 10 12 13 11 5 18 22 20 21 19 14 16 15 17 2 3 1-14 Remote Control LCD TV Overview and Installation NOTE PC Mode(CSM) : Warm, Normal, Cool, User <16:9><Zoom 1><14:9> SSM (Sound Status Memory) Button Recalls your preferred sound setting. (Flat, Music, Movie, Speech, User) 5 ‘ ’ Button Set a channel on the digital TV. 3 MENU Button Displays OSD Menu. 6 PSM (Picture Status Memory) Button Recalls your preferred picture setting. (Dynamic, Standard, Game, Mild, User) 4 VOL /(-/+) Buttons Increases or decreases the volume. Also used to select the OSD main menu, to select the sub-menu or to change the values in sub-menus. 7 TV/AV Button It converts to TV input mode and, if you press and hold the button, input mode will be switched. 8 SLEEP Button Sets the sleep timer. The TV is automatically turned off. 9 ARC (Aspect Ratio Control) Button You can watch the LCD Display in various picture formats ; 16:9, 14:9, Zoom 1, Zoom 2, 4:3. Repeatedly press the ARC button to select your chosen picture format. 10 1-15 Remote Control LCD TV Overview and Installation SWAP Button Swaps the main screen for a sub-screen (only in PIP, POP, PBP mode). 15 Q.VIEW Button It goes from the channel you are currently viewing back to the channel you were previously watching. (Quick Search View Function) 16 CAPTION Button Controls the caption decoder. 13 P.POSITION Button Changes the PIP sub-window to 4 different corner locations. PIP Position Change (PIP Mode only). 14 OK Button Select sub-menu or fix user setting. 17 P.INPUT Button Changes the PIP input source. 11 PIP Button Changes the screen size. PIP(Small), PIP(Large), POP, PBP1, PBP2 screen change. PIP (Small) PIP(Large) POP PBP1 PBP2 12 1-16 Remote Control <Zoom 2><4:3> LCD TV Overview and Installation MUTE Button Press to temporarily cut off the sound. 19 CH /Buttons Press CH or CH to change channels. Also used to select in the OSD menu or select the channel providing teletext service. 18 MTS Button Press to choose stereo, mono or Separate Audio Program (SAP broadcast). 20 EPG(Electronic Program Guide) Button View a program guide for the digital TV. 21 SOURCE Button Selects the external input source. (TV, AV1, AV2, AV3, COMPONENT, RGB, DVI) 22 1-17 Remote Control Connecting the Aerial or Cable Television Network To view television channels correctly, a signal must be received by the set from one of following sources: An outdoor aerial An indoor aerial (not recommended) A cable television network VHF Outdoor AntennaUHF Outdoor Antenna VHF/UHF Mixer Electronic Amplifier 75Coaxial Cable (Optional) or 300Feeder Cable (Optional) Antenna Converter (Optional) When connecting an outdoor antenna Antenna connection is the most important factor for obtaining clean and sharp video quality. Whenever possible, use an external antenna in areas with weak signals. 1 In the first three cases, connect the aerial or network input cable to the 75coaxial socket on the rear of the TFT LCD display. 2 Press the TV button on the remote control. Use only when necessary. (Optional) 1-18 Connecting the LCD TV and Peripheral Devices LCD TV Overview and Installation When connecting an indoor antenna (cable TV) Check the antenna connector on the wall and then connect the antenna cable. NOTE S Connecting 300 feeder cable to the antenna converter If the video is not clear because of weak signals, install a signal amplifier to obtain clearer video. (An amplifier is often necessary when using an indoor antenna.) Remove the insulation from the 300 feeder cable. Use the driver to loosen the screw. Connect the 300feeder cable, and secure it by retightening the screw with the screwdriver. 1-19 Connecting the LCD TV and Peripheral Devices LCD TV Overview and Installation Connecting VCR When connecting to the composite connector Different jacks on the rear panel are used for different external devices. VCR Composite Audio/Video cable (Optional) NOTE S-video and composite video signals share the audio signals. Method 1 Method 2 VCR Composite Audio/Video cable (Optional) 1-20 Connecting the LCD TV and Peripheral Devices
Users Manual
LCD TV Overview and Installation When connecting to the S-video connector Different jacks on the rear panel are used for different external devices. VCR Audio cable (Optional) S-Video cable (Optional) VCR Audio cable (Optional) S-Video cable (Optional) Method 1 Method 2 1-21 Connecting the LCD TV and Peripheral Devices LCD TV Overview and Installation Connecting a DVD Player & Set-Top Box (Connecting to Y, Pb, Pr) Connect a set of audio cables between the component AUDIO IN jacks of the LCD Display and the AUDIO OUT jacks of the DVD Player. 1 Connect video cables between the Y, Pb and Pr inputs on the LCD Display and the Y, Pb and Pr outputs on the DVD Player. 2 Turn on the TV power, and press the <SOURCE> button on the remote control to select the DVD mode (component). 3 Turn on the DVD Player power or Set-Top Box power to view high quality video. 4 NOTE S Connecting VCR (when connecting to the antenna input connector) Different jacks on the rear panel are used for different external devices. Connect the external antenna cable to the VCR. Connect the 75coaxial cable to the VCR and TV. Set the channel selection switch on the rear panel of the VCR to channel 3 or 4, and turn on the VCR power. Turn on the TV power and switch the channel to the same channel that was set on the VCR (3 or 4). Insert a video tape into the VCR, and press the <PLAY> button. VCR 75coaxial cable External Antenna 1-22 Connecting the LCD TV and Peripheral Devices LCD TV Overview and Installation DVD orSet top Audio cable (Optional) Component cable (Optional) NOTE S For an explanation of Component video, see your DVD Player's manual. When connecting the DVD player or set top box, connect the component cable to the Component jack. 1-23 Connecting the LCD TV and Peripheral Devices LCD TV Overview and Installation Connecting to a digital (AC3) amplifier "Digital" refers to surround sound technology for movie theatres used for the latest movies and it can be used at home to obtain realistic sound effects. You can enjoy realistic sound effects from a movie or live concert DVD disc by connecting the product to a 6-channel amplifier with a digital converter or digital (AC3) processor. Make sure that the TV speakers are set to OFF when using an external sound device. Digital (AC3) Amplifier with a Converter Optical Voice Cable (sold separately) NOTE S To enjoy digital (AC3) sound with the product, make sure that: - The input signal to the product is digital (AC3). - Connect the product to a 6-channel amplifier with five speakers and one subwoofer that has a digital (AC3) converter or processor. Since the voice output from the product is broadband, set the volume appropriately. Otherwise, the speakers may get damaged by sudden high pitched sounds. Make sure to turn off the amplifier before plugging or unplugging the product’s power cord. Otherwise, the amplifier may get damaged. 1-24 Connecting the LCD TV and Peripheral Devices LCD TV Overview and Installation Connecting an External TV The video output of this LCD TV can be transmitted to other external TVs. Connect the audio/video cables to the video output jack on the LCD TV. 1 Connect the other end of the audio/video cables to the video input jack on the external TV. 2 Turn on the LCD TV power, and then turn on the external TV power. 3 Audio/Video cable (Optional) TV Check the video on the external TV and use the external TV remote control to select the input mode. The same screen showing on the LCD TV will be displayed on the external TV. 4 1-25 Connecting the LCD TV and Peripheral Devices LCD TV Overview and Installation Connecting to a PC When used as a monitor, this LCD TV supports resolutions of 1600x1200 @ 60Hz (UXGA) / 1280x1024 @ 85Hz (SXGA). For best performance, please select 1280x768 @ 60Hz / 1360x768 @ 60Hz (WXGA). Turn off your PC and LCD TV. 1 Turn on the PC power and verify the PC settings. (For best performance, please set the resolution to 1280x768 @ 60Hz / 1360x768 @ 60Hz (WXGA).) 2 Connect a PC VGA or DVI cable between your PC and the ANALOG RGB or DVI-D of the LCD TV. Then fasten the screws on both sides of the cable. 3 Connect a PC Audio Cable between the Sound Output Jack of the sound card on the PC and the AV3 Composite of the LCD TV. 4 Connect a Power cable to the Power connector on the rear of your LCD TV. 5 Power on the computer before turning on the LCD TV. 6 Turn on the TV power and press the <PC> button on the remote control to select the PC input mode. 7 1-26 Connecting the LCD TV and Peripheral Devices LCD TV Overview and Installation DVI PC Headphone (optional) or Speaker (optional) Audio cable (optional) DVI cable RGB Audio cable (optional) Headphone (optional) or PC Speaker (optional) VGA cable 1-27 Connecting the LCD TV and Peripheral Devices
Users Manual
Watching TV Watching Digital TV To configure the menu To Configure TV Channels To Select TV/External Input Adjusting the Picture Adjusting the Sound Configuring the PIP/POP/PBP Functions To Configure the SET UP External Control Device Setup 2-2 Watching TV Check the antenna connection. (For more information on connection, see section ‘1.4 Connecting the LCD TV and Peripheral Devices’.) 1 Press the power button on the rear panel of the LCD TV. 2 Press the <POWER> button on the remote control. 3 Press the <TV/AV> button on the remote control, and press the number button to select a channel (For example, if selecting channel no. 99, press the 9 button twice on the remote control). 4 Press the < > button to adjust the volume. 5 2-3 Watching TV Using the LCD TV NOTE To mute the LCD TV sound Press the <MUTE> button on the remote control once to mute the LCD TV sound. Press the button once again to turn the sound back on. To completely turn off the LCD TV power. Press the <POWER> button on the remote control. The LCD TV will be turned off and remain in standby mode. Press the power button on the rear panel of the LCD TV (or unplug the power cord from the wall outlet).
Users Manual
To view information on the current channel Press the < > button. The information on the current channel will be displayed on the screen. 1 2-4 Watching Digital TV Using the LCD TV To view program guide for the digital TV Press the < > button. Pressing this button while watching the TV displays a program guide for the currently selected channel. 1 NOTE Press the EPG button again to clear the program guide. 2-5 Watching Digital TV To configure the LCD TV functions, press the [MENU] button. Knowing the method for configuring the menu will make using the LCD TV much easier. Menu Settings Press the power button on the rear panel of the LCD TV, and press the <POWER> button on the remote control. 1 Press the <MENU> button on the remote control. Press the < > button on the remote control to navigate to different menus. 2 <PICTURE> <SOUND><PIP/POP/PBP> <SET UP><CHANNEL> 2-6 To configure the menu Using the LCD TV Press the <OK> button or the < > button on the remote control to select the menu to configure. Submenus will be available for each selection. 3 In the submenus, use the < > button on the remote control to navigate to different items. Use the < > button to make adjustments. When selecting ‘PSM’ submenu, use the < > button to make adjustments, and then press the <OK> button on the remote control to make a selection (Select the ‘User’ item under the ‘PSM’ submenu). 4 2-7 To configure the menu
Users Manual
Using the LCD TV Use the < > button and the < > button on the remote control to adjust the settings for different items. (For example, adjustment can be made of items such as Brightness, Contrast, Color, Sharpness, and Tint.) 5 When adjustments are complete, press the <OK> button once to close the adjustment screen. Press the <MENU> button once again to close the ‘Menu’ screen. 6 NOTE To configure the menu without using the remote control Press the <MENU> button located at the bottom of the LCD TV. Press the <CH /> buttons to navigate to submenus. Press the <VOL </ > buttons to adjust each item. If ‘Menu for Local Key’ is on, the <SOURCE> button is used as the <OK> button. When adjustments have been completed, press the <MENU> button to close the ‘Menu’ screen. 2-8 To configure the menu Using the LCD TV Main Menu PICTURE PSM (Select Screen View) ARC 16:9, 14:9, Zoom 1,Screen Aspect Selection Zoom 2, 4:3 OverScan 1~5 Magnifies the size of the Picture on screen. Dynamic Standard Mild Game User Vivid Picture Appearance Standard Picture Appearance Softer Picture Appearance Select when playing video games on LCD TV Brightness : Adjust brightness. (Brightness means the brightness of the screen.) Contrast : Adjust contrast. (Contrast means the difference in brightness between an object and its background.) Color : Adjust color (RGB).(Adjusting the color to make it look more natural.) Sharpness : Adjust sharpness.(Sharpness means the sharpness of the object's profile.) Tint : Adjust color intensity.(Color intensity indicates color depth.) CSM Normal Cool Warm 1 Warm 2 Plain white Bluish white Reddish white Red SOUND Sub Menu 1Sub Menu 2Sub Menu 3 TV Menu Categories and Items The Main Menu contains 5 categories, which in turn contain submenus and option items: Audio Language English, Français, Español, Portugues SPDIF AC-3 PCM SSMMusic When watching music video or concerts. Movie When watching movies. SpeechWhen watching a show that is mostly dialogue. UserBass : Adjust bass. Treble : Adjust treble. 2-9 To configure the menu AVL On/Off AVL Function On/Off. Audio Speaker On/Off Audio Speaker Function On/Off. Surround Balance Off Surround Output Off. Normal Optimal Surround for Output Condition. Spatial Enhanced Surround. -10 ~ 10 Adjust balance between the left & right speakers. Using the LCD TV Main Menu SET UP Language Transparency English, Deutsch, Français, Español, Italiano, Korean (Menu Screen Display Language Selection.) 0~10Adjusts the image transparency. Sub Menu 1Sub Menu 2Sub Menu 3Description The standard time area selection. ISM Method Set ID NormalAdjusts the image transparency. OrbitMoves the screen up, down, left and right in small increments to prevent overheating of the panel during prolonged use. WhiteSets the whole screen to white. 0~99Set ID Selection Factory Reset OffSelects the factory default. Timer Caption Clock Off Timer AM, PM, On/Off Manual AutoPacific Mountain Central Eastern TV Off Time Selection. PIP/POP/PBP On/OffOff PIP POP PBP1~2 PIP/POP/PBP Function Off. Source Swap PIP Size PIP Position Source Swap Source Swap Component, RGB, DVI To Set Small, Large PIP Screen Position Selection. Component, RGB, DVI To Set Component, RGB, DVI To Set On Timer AM, PM, On/OffTV On Time Selection. Volume 0~100 Auto Off On/Off TV Off Auto Function Selection. Caption On/Off Off/On Caption function Off/On. (When the subtitle function is provided.) 2-10 To configure the menu Option Service 1~6 Font Setup By Program By User Font StyleSize Standard, Large, Small Style Font 1~7 Fg ColorWhite, Black, Red, Green, Blue, Yellow, Magenta, Cyan Fg OpacitySolid, Flash, Translucent, Transparent Bg ColorWhite, Black, Red, Green, Blue, Yellow, Magenta, Cyan Using the LCD TV Main Menu CHANNEL Sub Menu 1Sub Menu 2Sub Menu 3Description Bg OpacitySolid, Flash, Translucent, Transparent Edge Type None, Raised, Depressed, Uniform, Left Shadow, Right Shadow Edge ColorWhite, Black, Red, Green, Blue, Yellow, Magenta, Cyan Analog CaptionCC1~4 Closed Captioning function support. TEXT 1~4 Text function support Parental Lock On/Off Parental function On/Off. MPAA MPAA(Motion Picture Association of America) Guideline setup available. Age Block TV Guideline function support. Contect Block Set Password Password setup available. Channel Scan To Start Automatic channel scan. Channel Edit Select the Chnnels by Air, CATV, DTV Air, DTV CATV. Antenna All, Cable STD, Cable HRC, Cable IRC Signal Strength 2-11 To configure the menu To watch TV with the LCD TV, configure the channels. (Always check the TV connection before use.) To save TV channels, configure the channels during the broadcasting hours. Use Automatic Channel Scanning to save all the channels currently airing. Setting Channels Automatically Press the <MENU> button on the remote control, and press the < > button on the remote control to navigate to the ‘CHANNEL’ menu. 1 Press the < > button on the remote control to select the ‘Antenna’ submenu. Press the < > button on the remote control to select the broadcasting method (external input). 2 2-12 To Configure TV Channels Using the LCD TV Press the < > button on the remote control to move to the ‘Channel scan’ submenu. At the ‘Channel scan’ item, press the < > …
Text truncated - open the document above for the full version.
Contact Information
Applicant
Mr. Dong-Suk Cha(Research Engineer)
Test Firm
CTK Co., Ltd.Young-Joon Park
Technical Specifications
| # | Rule Parts | Frequency Range | Power Output |
|---|---|---|---|
| 1 | 15B | - | - |
Other Applications from ATEC Co., Ltd.
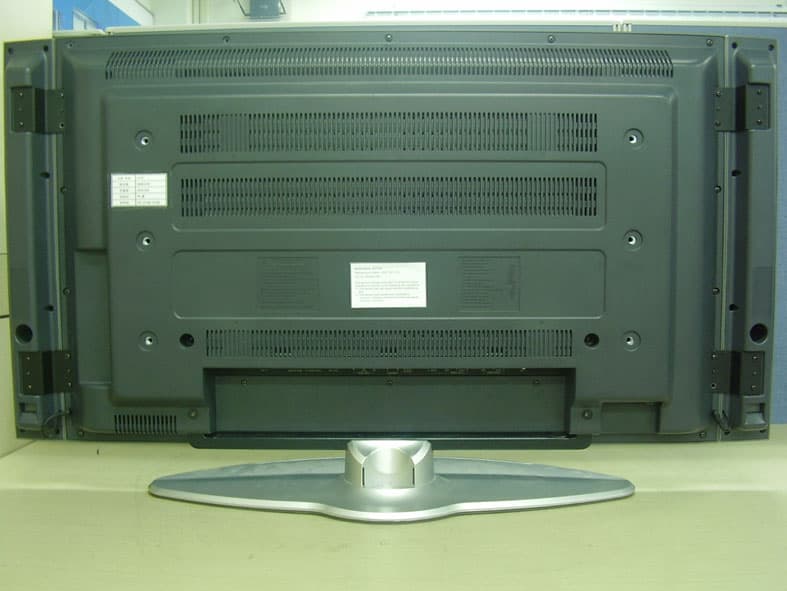
PDLAV370A
Jan 29, 200637 Inches TFT LCD TV
Equipment Class
JBP - Part 15 Class B Computing Device Peripheral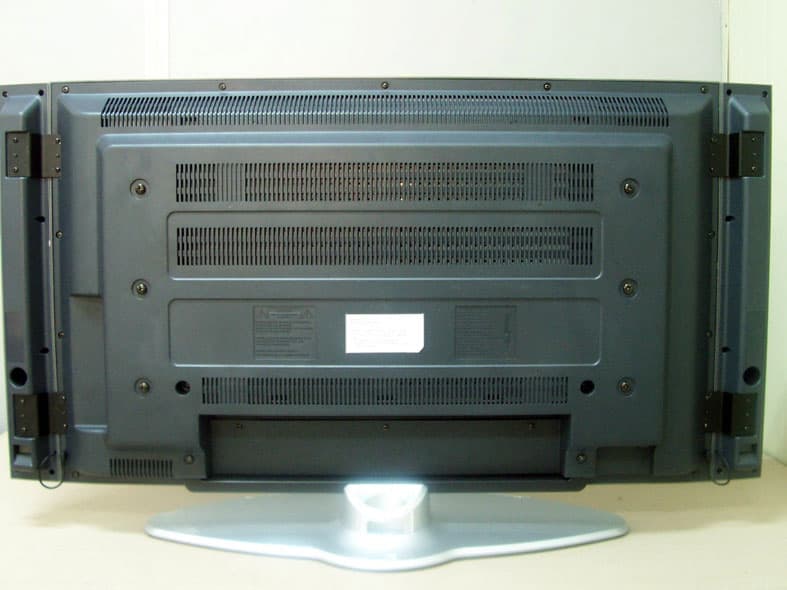
PDLAV370W
May 24, 200537" TFT LCD TV
Equipment Class
JBP - Part 15 Class B Computing Device Peripheral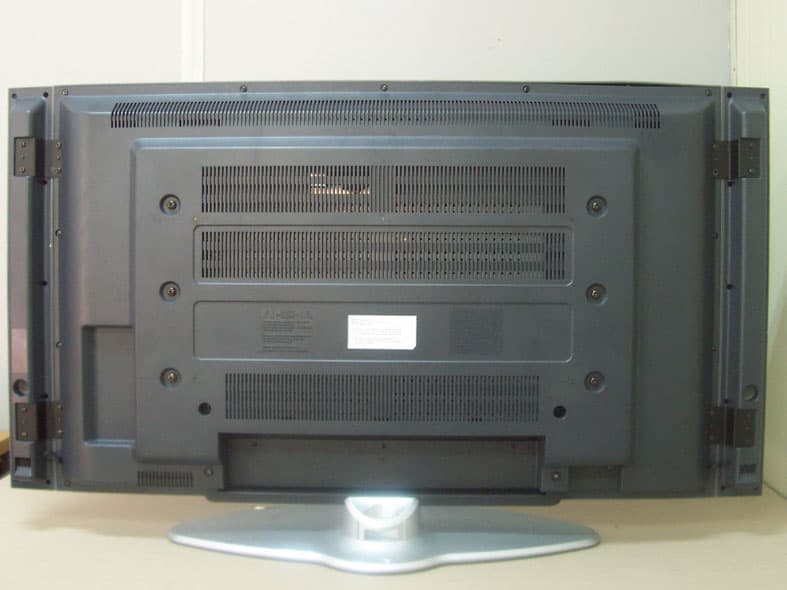
PDLAV420W
May 24, 200542" TFT LCD TV
Equipment Class
JBP - Part 15 Class B Computing Device Peripheral
PDLAV201
Mar 06, 200520.1" LCD TV
Equipment Class
JBP - Part 15 Class B Computing Device Peripheral
PDLAL150N
Dec 14, 200315" LCD Monitor
Equipment Class
JBP - Part 15 Class B Computing Device Peripheral