QDMPMP140PORTABLE MULTIMEDIA PLAYER
DREAMUS COMPANY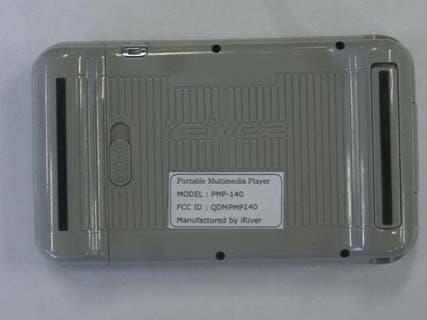
Click to zoom
Application Details
- Equipment Class
- JBP - Part 15 Class B Computing Device Peripheral
- Date of Grant
- Jun 16, 2004
- Application Purpose
- Original Equipment
- Date of Application
- Jun 16, 2004
- Equipment Note
- PORTABLE MULTIMEDIA PLAYER
- Company
- DREAMUS COMPANY
- Country
- South Korea
Documents & Files
Document Text
Text extracted from the exhibit documents filed with the FCC. Open a document above to read the original.
Users Manual
Instruction Manual Portable Multimedia Player Model PMP-100 Series Thank you for purchasing the product. Please read the manual carefully before use. http://www.iRiver.com http://www.iRiver.com 2 Copyrights/Certification/Trademarks/Limited Liability " " iRiver Limited has all the rights of the patent, trademark, literary property and intellectual property related to this manual. You may not reproduce any part of this manual unless authorized by iRiver Limited. You can be punished by using any part of this manual illegally. " " The software, audio and video which have an intellectual property are protected by copyright and international laws. It is user’s responsibilities when he/she reproduce or distribute the contents created by this product. " " The companies, institutions, products, people and events used in examples are not real data. We don t have any intension to be related with any companies, institutions, products, people and events through this manual and should not draw inferences. User’s are responsible for observing the copyrights and intellectual properties. 1999~2004 iRiver Limited. All rights reserved. " " Windows, Windows 98SE, Windows ME, Windows 2000, Windows XP and Windows Media Player are the registered trademarks of Microsoft Corp. " " DivX is the registered trademarks of DivXnNetworks. Inc. " " Neither the Manufacturer, importers nor dealers is responsible for any accidental damage including bodily injury or any damage resulting from misuse or unsuitable operation by you. " " The information on this manual is prepared with the current player specifications. The manufacturer, iRiver Limited, is adding new features to the product and may persistently apply new technologies hereafter. All standards may be changed at any time without notice. 1 Welcome Obtain information about your player, look for updates, and find answers to questions at our web site. iRiver website address is www.iriver.com. The site provides product information and customer support. Use the firmware (system software) upgrade function of our products from the site to continuously improve the product performance. Thank your for your iRiver purchase. The PMP-100 comes complete with a long list of advanced features. It is important that you read the manual to ensure that you get the most out of your new player. Thank your for your iRiver purchase. 11 11 http://www.iRiver.com 22 22 Copyrights 11 11 Certification 22 22 Trademarks 33 33 Limited Liability 44 44 " " 4 Handling notices for safety Product 3 Handling notices for safety Electricity Please read before using for your safety. Do not overload a single power circuit. Overheating or fire can result. Do not kink or crease the power cable or place heavy objects on the power cable. Fire can result from damaged power cables. Do not handle power plug and adapter with wet hands. Electrical Shock may result. Firmly plug the adapter into the wall socket. Fire can result from improper use. Unplug the AC adapter during electrical storms. Electrical Shock may result. Use only the supplied AC adapter. Use of non- authorized power adapters is not recommended. Damage to your player may result from improper use. Unplug adapter when it s not in use. Fire can result from improper use. Immediately power off the player and unplug the AC adapter if water or other liquids are present. Fire can result from improper use. Immediately power off the player and unplug the AC adapter if smoke or odors emit from the player or adapter. Fire can result from improper use. Avoid contact with water and other liquids and dry immediately with a soft cloth should contact occur. Damage to your player may result from improper use. Do not use water or chemicals to clean the player. Clean the surface with a soft cloth. Damage to your player may Do not clean with chemical or detergent. It damages the surface and scraps paint. Do not use excessive force on the buttons or attempt to disassemble the device. Damage to your player may result from improper use. Keep out of direct sunlight and extreme heat and cold. Damage to your player may result from improper use. Do not drop or subject the device to impact. Damage to your player may result from improper use. Do not place objects inside the device other than CD s Damage to your player may result from improper use. Do not place heavy objects on the device. Damage to your player may result from improper use. Keep away from harsh environments including humid, dusty, and smoky areas. Damage to your player may result from improper use. 6 Handling notices for safety Product 5 Handling notices for safety Do not disassemble or modify. Keep the player away from strong magnets. Damage to your player may result from improper use. Do not simultaneously connect the earphone jack, Line-In/Out jack, and USB jack to one device (i.e. a PC). The product's power may be turned off. Product Precautions for Hard Disk Drive 11 11 When turns the player on, in case the system file of the player do not agree with the Firmware version of the player or there is any trouble in the FAT32 file system, Boot Failurewill be displayed because the player do not recognize the HDD. 1 The player can not be formatted using the Disc Management Utility or the Format Commander Utility in Windows 2000 and Windows XP since 32GB is the maximum HDD size enabling to be formatted. Because this is not supported at Windows O.S. and the player is not malfunction. You can still use a HDD which is formatted as FAT 32 system on Windows 98 SE or ME. The player can be formatted using Windows Explorer in Windows 98 SE and Me. The player can be formatted using the HDD Management Utility in Windows 2000 and XP. If the player is disconnected suddenly or turned off during file transfer, it may case data loss and an error screen may display on the player. If this happens, attach the player to your PC and run the Windows Scan Disk utility. 1 bout the Boot Failure 22 22 The following icons are displayed to indi…
Text truncated - open the document above for the full version.
Users Manual
18 2-2. LCD screen display Getting started Music playback File name Artist Folder Name(Title) Hold indicator (Machine/Remote control/Both) Volume level Battery indicator Clock Playback mode/status Progressive Bar Play time(Elapsed l Remain) Level Meter EQ mode Bit Rate Sampling Rate File Format 1 1 2 2 3 3 4 4 5 5 6 6 7 7 8 8 9 9 10 10 11 11 12 12 Elapsed 01:47 i 03 :58 I Love iRiver Singer... Entertainment.MP3 1 1 4 4 8 8 2 2 3 3 5 5 6 6 7 7 9 9 10 10 11 11 12 12 13 13 14 14 15 15 17 2-2. LCD screen display Getting started Function selection mode Music : Playing music files. Video : Playing video files. Photo : Viewing photo files. Radio : FM radio listening. Record: Recording from the Mic(Int/Ext) or connected equipment Setup: Customizing the function setting. Browser : Searching folders/files 1 1 2 2 3 3 4 4 5 5 6 6 7 7 13 13 14 14 15 15 FM radio mode Recording Mode 20 2-2. LCD screen display Getting started 101.7 101.7 MHz STEREO FM Tuner CH 16 02:02 22 Stereo/Mono Battery indicator Hold Clock Volume level Channel Frequency Range Total preset number Region Preset on/off Free space RECORDING.. Bit rate Record status Battery indicator Record File Name Sample rate Recording file format Hold Record elapsed time Source Clock Volume level Video playback Photo view 19 2-2. LCD screen display Getting started Elapsed 00:01:29 : 00:05:23 Battery indicatorHold Elapsed time Progress bar Clock Volume level Total playing time 100% o 0 Name!Name!: .bmp Type!Type!: 0 Size!Size!: 640 x 480 Byte!Byte!: 65 KB Magnification of photo Symmetry Rotation angle File information File name Playback mode/status 22 2-3. Connecting and installation Getting started Charging at the power off mode Charging by using AC adapter 11 11 Use only the AC Power Adapter supplied with the player. The AC operating voltage of this player is 100~240V, 50/60Hz. Connect the AC adapter to the player's DC IN 5.0V connector. 1 Connect the AC adapter plug to a power socket.(AC adapter for this player is 120~240V, 50/60Hz.) If a power source is connected when the player is turned off, a charging indicator light will illuminate while the player is charging. 2 Press the POWER button while charging to start the player in Function selection mode. 4 The light will turn off when charging is complete. 3 " When AC adapter is connected to player without rechargeable battery the player will not operate. 21 2-3. Connecting and installation Getting started about battery indicator If the battery is fully discharged, the red battery icon is blinked in the system LCD. The may not charge if you switch to playback mode during USB charging. If the battery is fully discharged... 11 11 If the battery is all worn out, the player turn off after “Low Battery” is displayed on the LCD. If the battery is all worn out... 22 22 Fully charged - used - Fully discharged " If the player turn off because the battery is all worn out, please turn on the player after connect the AC adapter and charge over the 20 second. " If the battery is detached while the player is operated by AC adapter, the player is turn off for system protection. 24 2-3. Connecting and installation Getting started Charging at power on mode Charging by using AC adapter 11 11 " The charging time : Approx. 2.5~3 hours (At full discharge) " The discharging(play) time : Approx. 4 hours (At video playback) If the battery is fully discharged, the red battery icon is blinked in the system LCD. 1 Connect the AC adapter to the player's DC IN 5.0V connector. 3 Connect the AC adapter plug to a power socket. If a power source is connected when the player is turned off, a charging indicator light will illuminate while the player is charging. 4 The light will turn off when charging is complete. 5 If the battery is all worn out, turn offed the power after “Low Battery” is displayed on the LCD. 2 23 2-3. Connecting and installation Getting started Charging at the power off mode Charging by using USB cable 22 22 Push the USB lock to open the protective cover. 1 Connect the USB cable to the player ‘s USB Port. 2 The light will turn off when charging is complete. 4 Connect the USB cable to the PC’s USB port. A charging indicator light will illuminate while the player is charging. 3 B A Connecting the remote control/earphones 26 2-3. Connecting and installation Getting started 1. Connect the remote control to the socket on the top of the player. 2. Connect the earphones jack to the earphone socket of the remote control. 25 2-3. Connecting and installation Getting started About the Rechargeable battery Battery detach 11 11 Slide the battery onto the player until it locks into place. Press the lock to release the battery and slide it out of the player. Battery attach 22 22 " Charge and store the battery at room temperature. It may not charge properly in hot or cold temperature environments. " Do to attempt to disassemble the battery. Do not expose the battery to open flame. " These activities could cause the battery to explode resulting in serious injury. " Do not contact the connectors of the battery to metal objects, or an electrical shock may occur. 1 1 2 2 Connecting to audio equipment Line-In : Connects external input devices for Line-In recording. 1. Connect the Line-Out or earphone socket of the external device to the Line-In socket of the player with the Line In/Out cable. 2. Use the recording feature to record with the desired setting. 28 2-3. Connecting and installation Getting started Operate the software PMP Manager installation 11 11 Insert the Installation CD into the CD- ROM drive. The installation will start automatically. 1 Click “Next” to continue installation. 2 If the product is connected, disconnect it from the PC and press the "OK" 3 Windows ME, Windows 2000 and Windows XP will recognize the PMP-100 as a USB drive automatically and you can use the player with out installing PMP Manager. For Windows 98 SE users, the PMP Manager must be installed for the computer to recognize the player. All users mu…
Text truncated - open the document above for the full version.
Users Manual
38 3-1. Basic operation Basic operation Sound control Adjusting the volume 11 11 During the music or video file playback, press button to increase or decrease volume During the listening the FM, press A(A-B)button, to mute the sound. To restore the sound, press A (A- B)button. During the music file playback, press B(EQ/MODE) button, to change the sound EQ. Muting the sound 22 22 Changing the sound EQ 33 33 Elapsed 01:47 i 03 :58 I Love iRiver Singer... Entertainment.MP3 Elapsed 01:47 i 03 :58 I Love iRiver Singer... Entertainment.MP3 Elapsed 01:47 i 03 :58 I Love iRiver Singer... Entertainment.MP3 37 3-1. Basic operation Basic operation Turning on/off the player Selecting the function 22 22 1 To turn off the player, press POWER button. Turning off the player 33 33 Press SELECT button to execute selected a function. 2 02:02 22 Music Playlist Browser Jan01000145.m3u (Playlist) When displayed function selection mode, Press or button to select desired a function. " MusicPlaying music files " VideoPlaying video files " PhotoViewing photo files " RadioListening FM station " Record Recording voice/audio " SetupSetting the functions " Browser Searching folders/files Playing music files 40 3-2. Playing music files Basic operation Press the SELECT button to add files to keep playing by using the button. If select the selected file again, the selection is released. You can only select files in the same folder. If select another folder, the previous selected file is released. 4 02:02 22 Browser Playlist 02:02 22 Browser Playlist Press the SELECT button after selecting “Select All” on the pop-up menu to select all files in the folder. 5 02:02 22 Browser Playlist Elapsed 01:47 i 03 :58 I Love iRiver Singer... Entertainment.MP3 Press the II button to play the selected file directly or press the SELECT button after selecting “Play” on the pop-up menu. The selected files add to Playlist and start playback. 6 39 3-2. Playing music files Basic operation Playing music files Basic playback 11 11 Press the POWER button to turn on. Function selection screen is displayed. 1 Press the SELECT button to select “MUSIC” by using the button. The final saved playlist or the playlist played at last is displayed. You can select Browser or Playlist by turns by pressing the B button. The playable files with the selected program is only displayed. 2 Press the SELECT button after selecting a music file to play by using the button. Press button to enter into the folder. Press button to go the upper folder. If select Folder, all files and sub folder in the folder are selected. 3 02:02 22 Music Playlist Browser Jan01000145.m3u <Browser> <Playlist> 02:02 22 Browser Playlist 42 3-2. Playing music files Basic operation Playing music files To pause playback 55 55 During playing, press the II button to pause playing, press II button again to start playing. Elapsed 01:47 i 03 :58 During playing, press and hold the II button to stop playing. The playing finished and the Playlist screen is displayed. 1 In Browser or Playlist screen, press and hold the II button to exit playing music files. Function selection screen is displayed. 2 02:02 22 Music Playlist Browser Jan01000145.m3u Playlist Function selection Exit playing a music file 66 66 long long 41 3-2. Playing music files Basic operation Playing music files Skipping to Next/Previous File 22 22 During playing a music file, press the button to skip to the next or previous file in the playlist. If pressing the button while the last file is playing, the playback is stopped and the Playlist screen is displayed. Press and hold or button to within a music file. Release or button to play normal speed. Press the ?(Help)button. The explantation about each button is displayed. Press the ?/Helpbutton again to exit Help. Playlist/Setup Next Prev Volume Up Volume Down Power ON/OFF Not Used Play/Stop Stop Playlist Setup Not Used Not Used Not Used Repeat Mode <> Fast searching 33 33 Help about a Music 44 44 Elapsed 01:47 i 03 :58 I Love iRiver Singer... Entertainment.MP3 02:02 22 Music Playlist Browser Jan01000145.m3u long 3-2. Playing music files Basic operation Playing with DB Scan Playing with DB Scan 11 11 Press the SELECT button to open the pop-up menu. 1 Press the SELECT button after selecting “DB Scan” by using the button. 2 Press the SELECT button after selecting a music file by using the button. Press button to enter into the folder. Press button to go the upper folder. If select Folder, all files and sub folder in the folder are selected. 3 Files deleted after DB Scan are turned red. In this case, you can update DB file by using Manager Software. In case DB Scan is failed, refer to “4-2 Using DB Scan (page ??)” to create DB file. 3-2. Playing music files Basic operation Playing with DB Scan Press the SELECT button after selecting “All” on the pop-up menu to select all files in the 4 Press the I I button to play the selected file directly or press the SELECT button after selecting “Play” on the pop-up menu. The selected files add to Playlist and start playback. 5 long long Press the SELECT button after selecting “Load List” on the pop-up menu by long click of the SELECT button to exit DB 6 long 44 02:02 22 DB Scan Playlist 02:02 22 DB Scan Playlist 02:02 22 DB Scan Playlist 02:02 22 DB Scan Playlist 43 02:02 22 Browser Playlist 02:02 22 Browser Playlist 02:02 22 Browser Playlist 02:02 22 Browser Playlist 02:02 22 DB Scan Playlist 02:02 22 DB Scan Playlist 02:02 22 DB Scan Playlist Playing a video file 3-3. Playing video files Basic operation Playing a video file Playing a video file directly 11 11 Press the POWER button to turn on. Function selection screen is displayed. 1 Press the SELECT button to select Video Mode by using the button. The final saved playlist or the playlist played at last is displayed. You can select Browser or Playlist by turns by pressing the B button. The playable files with the selected program is only displayed. 2 Press the SELECT button after selecting a motion p…
Text truncated - open the document above for the full version.
Users Manual
Using playlists 3-5. Using playlists Basic operation Using playlists Press the B button to select “Playlist” screen. Confirm the added Playlists. 6 Press the SELECT button after selecting “New List” by using the button. New Playlist is created. 5 Press and hold the SELECT to display the pop-up menu. 4 long 58 02:02 22 Browser Playlist 02:02 22 Browser Playlist 02:02 22 Music Playlist Browser Jan01000145.m3u 57 3-5. Using playlists Basic operation Making a new playlist 11 11 Playlists allows you to play Playlists saved to the player a list of songs to play. You can play the favorite Playlist in the saved order among the files or folders on the player Press the B button to display Browser. 1 Press the SELECT button to keep making playlists by using the button. If select the selected file again, the selection is released. You can only select files in the same folder. If select another folder, the previous selected file is released. 3 Press the SELECT button after selecting file or folder to play by using the button. Press button to enter into the folder. Press button to go the upper folder. If select Folder, all files and sub folder in the folder are selected. 2 02:02 22 Browser Playlist 02:02 22 Browser Playlist 02:02 22 Browser Playlist 3-5. Using playlists Basic operation Using playlists Adding playlists 22 22 Press the B button to select Browser at stop mode. 1 Press the B button after selecting the favorite Playlist by using the button. 2 Press and hold the SELECT to display the pop-up menu. 3 Press the B button after selecting “Load List” by using the button. 4 long Press the B button to select “Playlist” screen. Confirm playlists. 5 3-5. Using playlists Basic operation Using Playlists Press the B button to open Browser. 6 Press the B button after selecting the file to add by using the button. Press button to enter into the folder. Press button to go the upper folder. If select Folder, all files and sub folder in the folder are selected. 7 Press the SELECT button to keep adding files by using the button. If select the selected file again, the selection is released. You can only select files in the same folder. If select another folder, the previous selected file is released. 8 60 02:02 22 Browser Playlist 02:02 22 Browser Playlist 59 02:02 22 Browser Playlist 02:02 22 Browser Playlist 02:02 22 Browser Playlist 02:02 22 Music Playlist Browser Jan01000145.m3u Using Playlists 3-5. Using playlists Basic operation Using playlists Press and hold the SELECT to display the pop-up menu. 9 Press the B button after selecting “Add List” by using the button. 10 Press the B button to select “Playlist screen”. Confirm the added playlists. 11 Press and hold the SELECT to display the pop-up menu. 12 Press the SELECT button after selecting “Save List” by using the button. The modified playlist is saved. 13 long 62 02:02 22 Browser Playlist 02:02 22 Browser Playlist 02:02 22 Browser Playlist 02:02 22 Music Playlist Browser Jan01000145.m3u 02:02 22 Music Playlist Browser Jan01000145.m3u 61 02:02 22 Browser Playlist 02:02 22 Browser Playlist 02:02 22 Music Playlist Browser Jan01000145.m3u 02:02 22 Music Playlist Browser Jan01000145.m3u 02:02 22 Music Playlist Browser Jan01000145.m3u 3-5. Using playlists Basic operation Deleting Playlists 33 33 Press the SELECT button after selecting file to delete using the button. 1 Press and hold the SELECT button to display the pop-up menu. 2 Press the SELECT button after selecting Load Liston the pop-up menu using the button. 3 Press the B button to select Playlist. 4 Select the file to delete using the button on the playlist. 5 long 3-5. Using playlists Basic operation Using playlists Press and hold the SELECT button to display the pop-up menu. 6 Press the SELECT button after selecting “Del List” using the button. 7 Press and hold the SELECT button to display the pop-up 8 Press the SELECT button after selecting “Save List” using the button to save the modified Playlist. The modified Playlist is saved. 9 long long 3-6. Listen to FM station Basic operation Listen to FM radio Listen to FM radio 11 11 Press the SELECT button after selecting “Radio” using button to switch to FM mode. Radio screen is displayed and the former station is receiving. Earphone and remote control play a role as FM antenna. 1 Press the button to select the favorite station. 2 Changing Stereo/Mono 22 22 Press the A button to change Stereo/Mono. Noise will be heard in weak transmission areas. At this time, noise is lessen by changing to Mono. 64 97.3 97.3 MHz FM Tuner 02:02 22 95.9 95.9 MHz STEREO FM Tuner 02:02 22 95.9 95.9 MHz MONO FM Tuner 02:02 22 95.9 95.9 MHz STEREO FM Tuner 02:02 22 63 02:02 22 Music Playlist Browser Jan01000145.m3u 02:02 22 Music Playlist Browser Jan01000145.m3u 02:02 22 Music Playlist Browser Jan01000145.m3u 02:02 22 Music Playlist Browser Jan01000145.m3u 3-6. Listen to FM station Basic operation Listen to FM radio Auto memory function (To save the Channels automatically) 33 33 If Presetis displayed, first press the NAVI / MENU button to exit Preset mode. 1 Press and hold the B (EQ/Mode) button. CH01 to CH20 will be saved automatically with the first 20 stations the player finds. 2 " FM tuner reception will be affected in weak transmission areas. " When player does not have any preset channels, EMPTY will be blinking. long 3-6. Listen to FM station Basic operation Listen to FM radio Memory Function (Save Channels Manually) 44 44 If Presetis displayed, first press the NAVI / MENU button to exit Preset mode. 1 Press the button with short or long click and select the desired channel. 2 Press and hold the B (EQ/Mode) button. MEMORY and Channel number will be displayed on the screen. 3 Press the button to select a Channel number to assign to the frequency. 4 66 95.9 95.9 MHz STEREO FM Tuner 02:02 22 96.1 96.1 MHz STEREO FM Tuner 02:02 22 96.1 96.1 MHz STEREO FM Tuner CH 03 02:02 22 96.1 96.1 MHz STEREO FM Tuner CH 05 02:02 22 MEMORY CH-3 MEMORY CH-5 65 95.9 95.9 MHz STEREO FM T…
Text truncated - open the document above for the full version.
Users Manual
11 11 Playing by using Navigation 78 4-2. Using DB Scan Specific features (DB)DB Navigation File Path DirectoryFile 52 . (DB)DB Navigation Directory File ,TAG 214 . ,,,,,,,,,,,,,,,,,,,,,,,,,,, ,,,,,,,,,,,,,,,,,,,,,,,, ,,,,,,,,,,,,,,,,,,,,,,,,,,,,,, ,,,,,,,,,,,,,,,,,,,,,,,,,, ,,,,.,,,,,,,,,,,,,,,,,,,,,,, ,,,,,,,,,,,,,,,,,,,,,,,,,, ,,,,,,,,,,,,,,,,,,,,,,,,,, ,,,,,,,,,,,,,,,,,,,,,,,,,, , 77 02:02 22 Music Playlist Browser Jan01000145.m3u 02:02 22 Browser Playlist Elapsed 01:47 i 03 :58 4-1. Navigation Specific features Playing file/folder directly 11 11 You can play a music, photo or video file using the file browser or playlist or add, delete, modify a playlist or make a new playlist while playing. 3 Press the NAVI/MENU button while playing. The current playlist will be displayed on the LCD. 1 You can select the “Browser” and “Playlist” by turns by pressing the B button. 2 Navigation mode is useful for deleting or adding and saving playlists to the player and searching music files while playing. Navigation has various function as follows. 4 " : Select all folders/files " Add List : Add a playlist. " Play : Play a selected file/ folder. " New List : Make a new playlist. " Load List : Open a selected playlist. " DB Scan : Search the music information on the player. " Info : Display the information of the selected file. DB ScanDB Scan 4-2. Using DB Scan Specific features DB of all MP3 files on the player are created. You can not use the navigation using ID Tag information in case DB file (iRivNavi.iDB) is deleted or damaged accidentally. This can also be used to re-create the DB file on the PC if it is damaged or deleted accidentally. Updating DB File 22 22 Connect the player to the PC. (Refer to “Connecting to the PC”, page 30) 1 Open Windows Explorer and select the player drive. 2 Right click on the player. Then select “DB File update” to activate DB File update. 3 Click OKafter updating is completed. 4 In case ID Tag information is not in the MP3 file, NO DB displays. In case file or folder name is over 52 characters, Failure displays. After disconnecting the player from the host PC, you can use the Navigation function to search for songs using ID3 Tag information. (Refer to “Safely Removing the player from the PC”, page 35.) 5 4-2. Using DB Scan Specific features You can add the information of the newly saved MP3 file to the DB. Adding DB 33 33 Connect the player to the PC. (Refer to “Connecting to the PC”, page 30) 1 Open Windows Explorer and select the player drive. 2 Right click on the player after select MP3 files. Then select “Add Music(s) to DB” to add MP3 files to the DB. 3 Click OKafter updating is completed. 4 After disconnecting the player from the host PC, you can search the added music by using ID3 Tag. (Refer to “Safely Removing the player from the PC”, page 35.) 5 ID3 Tag information of the selected files are added to DB. In case DB file is not, new DB file (iRivNavi.iDB) is created. 80 DISCONNECTING DISCONNECTING 79 DISCONNECTING DISCONNECTING Setting the Playback Mode 4-3. Playback Mode Specific features Press the B(EQ/MODE) button to set the playback mode. Refer to page ?? for details. 1 You can set Repeat, Shuffle or Intro playback by choosing these selections under Mode while playing music or motion picture. Play a single playlist repeatedly. Play all playlist in the player repeatedly. Repeat : operate on the basis of playlist 11 11 Press the button to play the previous or next playlist at the selected playback mode. 2 Randomly play all playlists on the player and stop. Shuffle : operate on the basis of playlist 22 22 Intro : Only supports to music file 33 33 Play only 10 seconds of each playlist in sequential order. It is useful for searching and playing the favorite music among many music files. Setting the Playback Mode 4-3. Playback Mode Specific features Press A button while playing to select the beginning (A) point. 1 Play a selected interval repeatedly during play. Press A button again to select the end (B) point. The interval (A to B) will be repeated. 2 Press the A button to cancel the interval repeat. 3 44 44 82 Elapsed 01:47 i 03 :58 I Love iRiver Singer . . . Entertainment Elapsed 02:07 i 03 :38 I Love iRiver Singer . . . Entertainment Elapsed 02:17 i 03 :28 I Love iRiver Singer . . . Entertainment 81 Elapsed 01:47 i 03 :58 I Love iRiver Singer... Entertainment.MP3 How to use WINAMP PLAYLIST 1. Menu Setup Configuration 84 4-5. Customizing the function settings Specific features You can configure your own settings. Function Control is subject to change with different firmware versions. USB Device Firmware Upgrade System Hour Minute Day Month Year Setup Clock EQ Balance Sound Repeat Shuffle Intro Visualization Mode " Music Repeat Shuffle Intro " Video Video Out LCD Brightness Video X Position Video Y Position Display Language FM region Disk Load default General Caption H align V align Delay " Video Caption Source Samplerate Bitrate Line In Volume File Record 60Hz(db) 250Hz(db) 1KHz(db) 4KHz(db) 12KHz(db) " User EQ 83 Power " Power Off (Min) Backlight (Min) " Make a PLAYLIST ( * .M3U) using WINAMP. 1 4-4. Using Winamp Playlist Specific features Launch WINAMP and add songs to make a list. Click "LIST OPTS" located on the right bottom and click "SAVE LIST" Winamp execution picture 11 11 Save to the player with the *.M3U and the files added to the playlist. The player can also play the playlists created on the PC. Refer to for details. 3 Name the file name (ex: iriver .m3u) and click "SAVE" to save the list. 1 4-5. Customizing the function settings Specific features 2. Menu Setup Operation 1 <Function Selection> Press the SELECT or button after selecting the “Setup Menu” by using button. 2 <Main Menu> Press button to set the desired feature after selecting the sub menu by using button. 3 <Sub Menu Setting> long Press the SELECT button after selecting “Setup” by long click of the NAVI/MENU or short click of button. 3. Exit Sub Menu Setup 4. Exit Menu Setup 4-5. Cus…
Text truncated - open the document above for the full version.
Contact Information
Applicant
HONGGYU LEE(Manager)
Test Firm
EMC Research InstituteKyu-Hong Jung
Technical Specifications
| # | Rule Parts | Frequency Range | Power Output |
|---|---|---|---|
| 1 | 15B | - | - |
Other Applications from DREAMUS COMPANY
QDMPPF43
Aug 28, 2024SP3000M
Equipment Class
NII - Unlicensed National Information Infrastructure TXQDMPPM45
Oct 17, 2023KANN ULTRA
Equipment Class
NII - Unlicensed National Information Infrastructure TX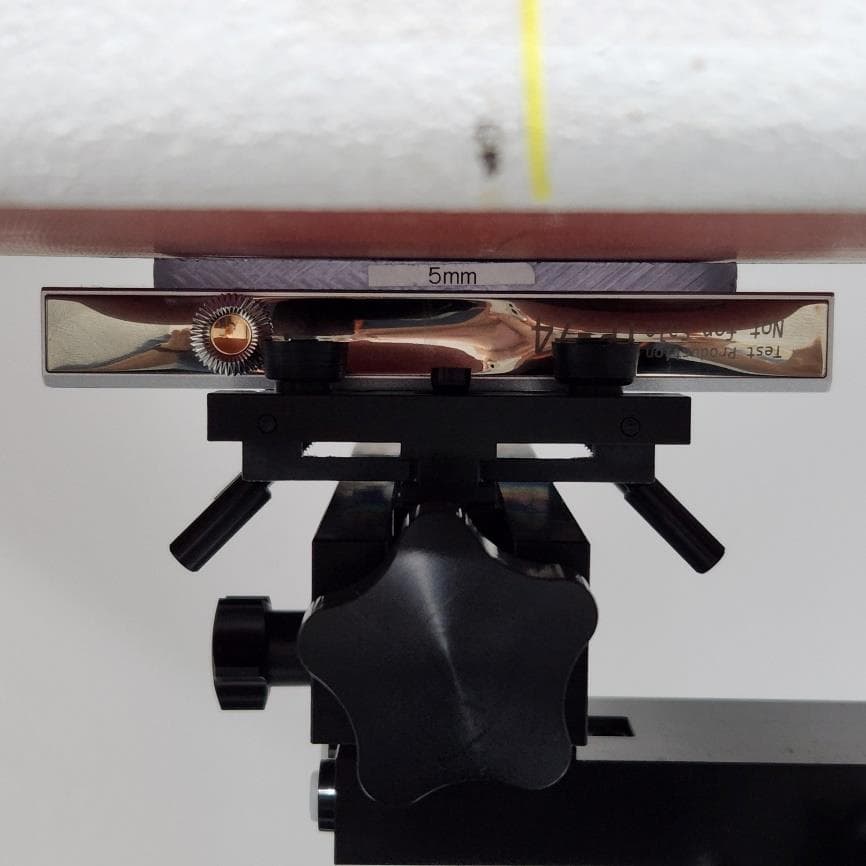
QDMPPR51
May 07, 2023SE300
Equipment Class
NII - Unlicensed National Information Infrastructure TX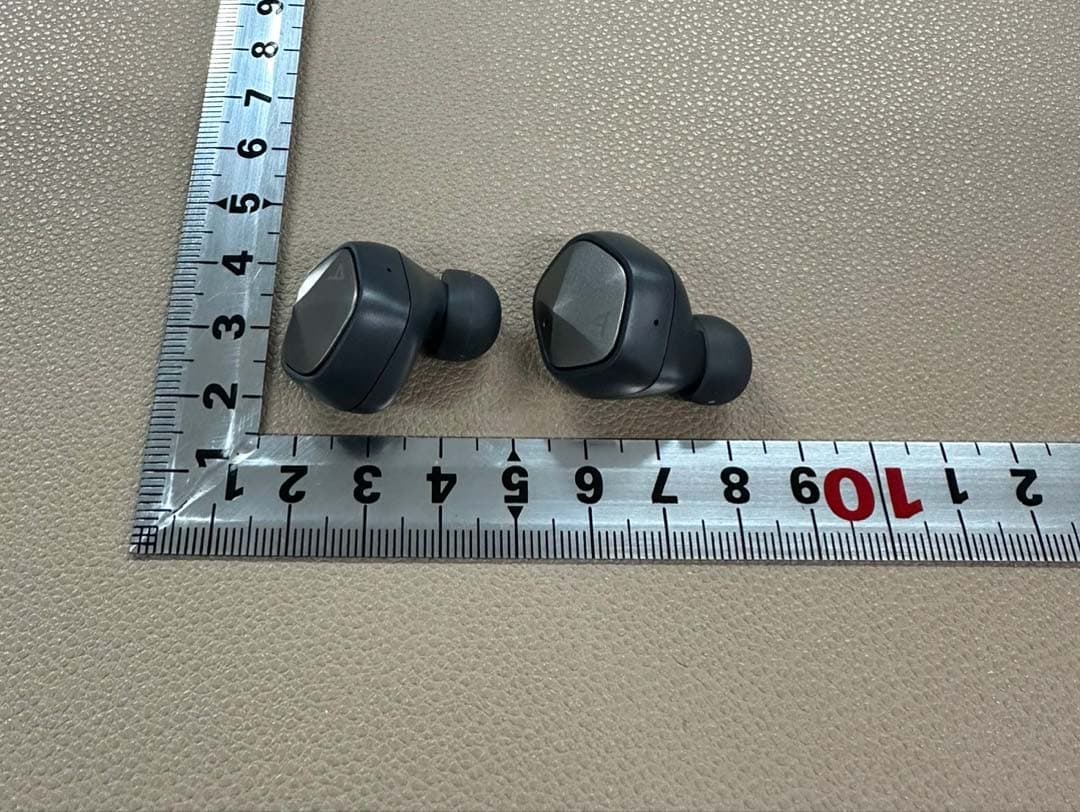
QDMPSP22
May 04, 2023UW100 MK II
Equipment Class
DSS - Part 15 Spread Spectrum Transmitter
QDM-HERO-OLS01
Jan 16, 2023LIM YOUNG WOONG OFFICIAL LIGHT STICK
Equipment Class
DTS - Digital Transmission System