RBV-SAWOmniPod Dash
Insulet Corporation
Click to zoom
Application Details
- Equipment Class
- DTS - Digital Transmission System
- Date of Grant
- Apr 15, 2020
- Application Purpose
- Original Equipment
- Date of Application
- Apr 14, 2020
- Equipment Note
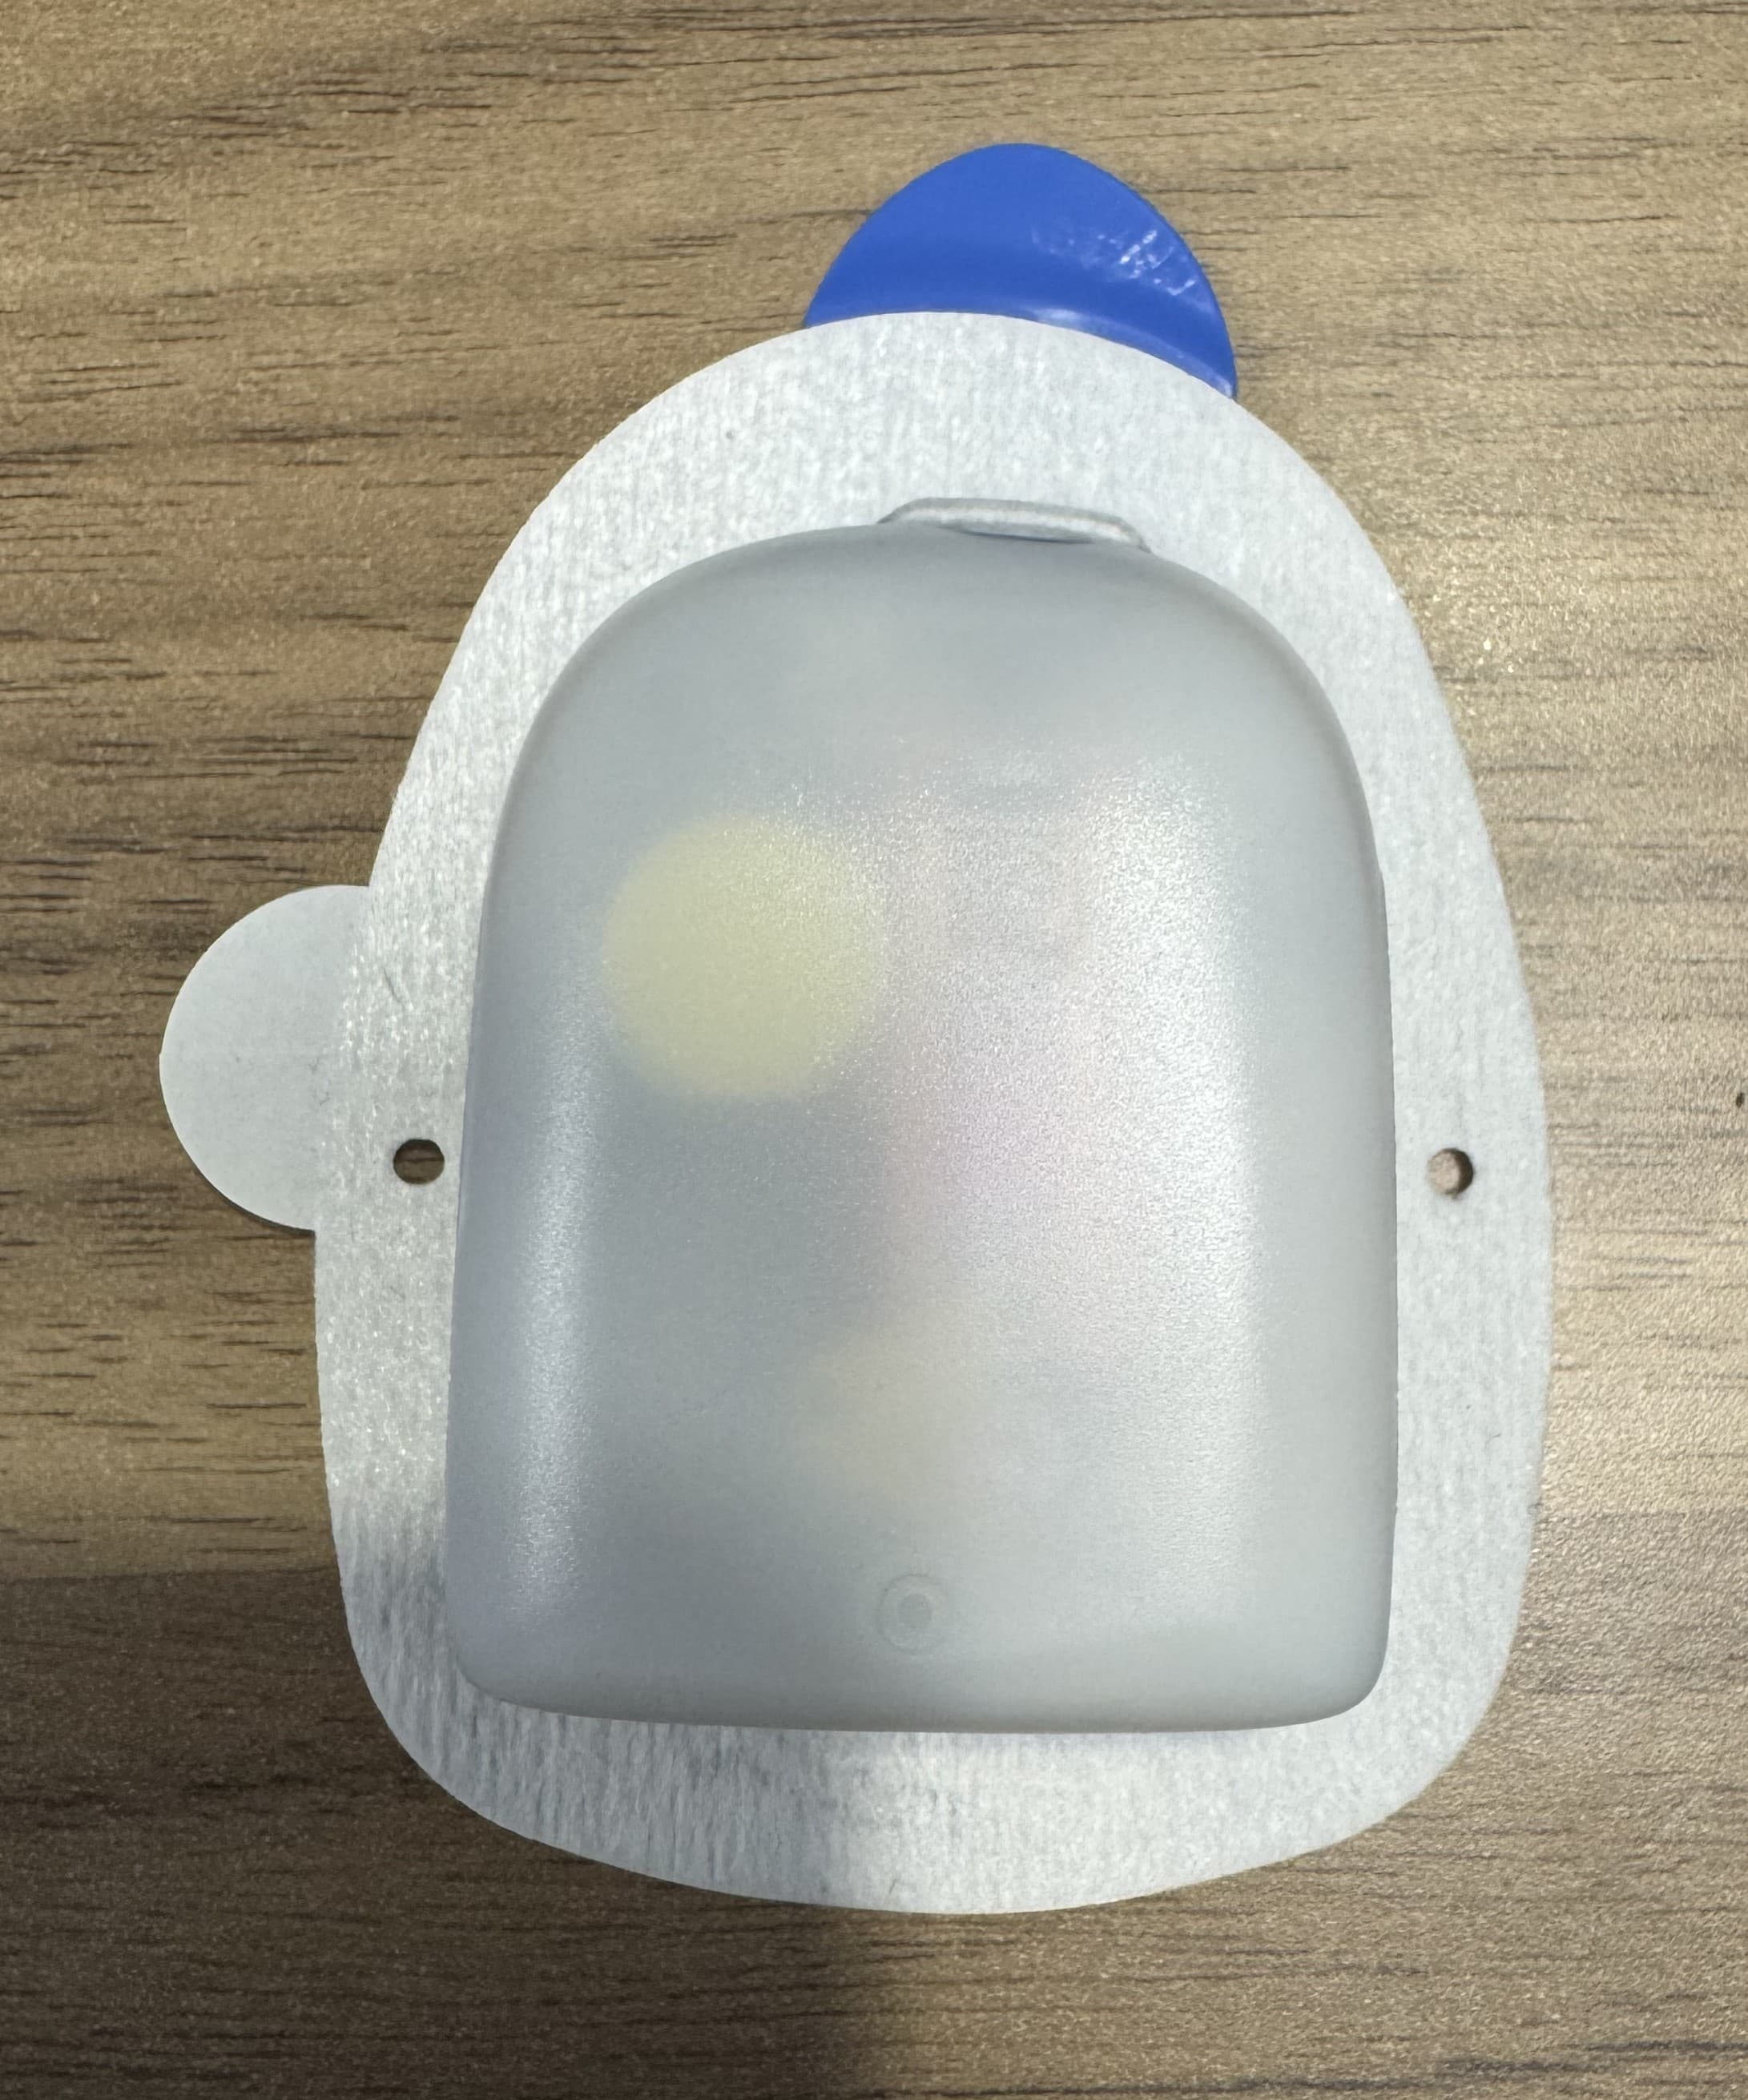
- OmniPod Dash
- Frequency Range
- 2402.00000000 - 2480.00000000
- Company
- Insulet Corporation
- Country
- United States
Documents & Files
Document Text
Text extracted from the exhibit documents filed with the FCC. Open a document above to read the original.
Users Manual
*Up to 72 hours of insulin delivery USER GUIDE www.myomnipod.com Insulet Corporation 100 Nagog Park Acton, MA 01720 1.800.591.3455 | 1.978.600.7850 © 2018 - 2020 Insulet Corporation. Omnipod, the Omnipod logo, Podder, DASH, and the DASH logo, are trademarks or registered trademarks of Insulet Corporation. All rights reserved. Reference #: PDM-USA1-D001-MG-USA1 FCC ID: RBV-041 FCC ID: RBV-SAW OMNIPOD DASH TM USER GUIDE Podder’s handbook TM 2797 18296-ENG-AW Rev. 006 04/20 i Omnipod DASH Insulin Management System User Guide Contacts and Important Information Customer Care 1-800-591-3455 — 24 hours/7 days 1-978-600-7850 when calling from outside the United States of America Customer Care Fax: 877-467-8538 We b s i t e: myomnipod.com Address: Insulet Corporation 100 Nagog Park, Acton MA 01720 Emergency Services: Dial 911 (USA only; not available in all communities) PDM Model PDM-USA1-D001-MG-USA1 Serial Number __________________________________________________ Omnipod DASH™ Insulin Management System Start Date _______________ Healthcare ProviderOmnipod® System Trainer NameName AddressAddress PhonePhone EmailEmail Health InsurancePharmacy NameName AddressAddress PhonePhone Policy NumberEmail ii © 2018-2020 Insulet Corporation. Omnipod, the Omnipod logo, DASH, the DASH logo, and Podder are trademarks or registered trademarks of Insulet Corporation. All rights reserved. The Bluetooth® word mark and logos are registered trademarks owned by the Bluetooth SI G, Inc. and any use of such marks by Insulet Corporation is under license. Contour is a registered trademark of Ascensia Diabetes Care. All other trademarks are the property of their respective owners. The use of third party trademarks does not constitute an endorsement o r imply a relationship or other affiliation. Patent information at www.insulet.com/patents. 18296-ENG-AW Rev. 006 04/20 Contents iii Introduction . . . . . . . . . . . . . . . . . . . . . . . . . . . . . . . . . . . . . . . . . . . . . . . .xi About This User Guide . . . . . . . . . . . . . . . . . . . . . . . . . . . . . . . . . . . . . . . . . . . . . . . . . . . . . . . . .xi Indications and Contraindications . . . . . . . . . . . . . . . . . . . . . . . . . . . . . . . . . . . . . . . . . . . .xii General Warnings . . . . . . . . . . . . . . . . . . . . . . . . . . . . . . . . . . . . . . . . . . . . . . . . . . . . . . . . . . . . .xii Working with Your Healthcare Provider . . . . . . . . . . . . . . . . . . . . . . . . . . . . . . . . . . . . .xiii Safety Features . . . . . . . . . . . . . . . . . . . . . . . . . . . . . . . . . . . . . . . . . . . . . . . . . . . . . . . . . . . . . . .xiv Getting Started 1 Your Omnipod DASH™ Insulin Management System . . . . .1 Welcome . . . . . . . . . . . . . . . . . . . . . . . . . . . . . . . . . . . . . . . . . . . . . . . . . . . . . . . . . . . . . . . . . . . . . . .1 The Pod and PDM . . . . . . . . . . . . . . . . . . . . . . . . . . . . . . . . . . . . . . . . . . . . . . . . . . . . . . . . . . . . . .2 Navigating Screens and Entering Information . . . . . . . . . . . . . . . . . . . . . . . . . . . . . . . .4 Touchscreen Basics . . . . . . . . . . . . . . . . . . . . . . . . . . . . . . . . . . . . . . . . . . . . . . . . . . . . . . . . .4 Entering Numbers and Text . . . . . . . . . . . . . . . . . . . . . . . . . . . . . . . . . . . . . . . . . . . . . . .5 Navigation Icons and Navigation Shorthand . . . . . . . . . . . . . . . . . . . . . . . . . . . . . .7 The Status Bar . . . . . . . . . . . . . . . . . . . . . . . . . . . . . . . . . . . . . . . . . . . . . . . . . . . . . . . . . . . . . . . . . .9 The PDM's Lock and PIN Screens . . . . . . . . . . . . . . . . . . . . . . . . . . . . . . . . . . . . . . . . . . . . .10 The PDM's Home Screen . . . . . . . . . . . . . . . . . . . . . . . . . . . . . . . . . . . . . . . . . . . . . . . . . . . . . .12 Dashboard tab . . . . . . . . . . . . . . . . . . . . . . . . . . . . . . . . . . . . . . . . . . . . . . . . . . . . . . . . . . . . .13 Basal tab / Temp Basal tab . . . . . . . . . . . . . . . . . . . . . . . . . . . . . . . . . . . . . . . . . . . . . . . . .14 Pod Info tab . . . . . . . . . . . . . . . . . . . . . . . . . . . . . . . . . . . . . . . . . . . . . . . . . . . . . . . . . . . . . . . .15 Last BG section . . . . . . . . . . . . . . . . . . . . . . . . . . . . . . . . . . . . . . . . . . . . . . . . . . . . . . . . . . . .16 Last bolus section . . . . . . . . . . . . . . . . . . . . . . . . . . . . . . . . . . . . . . . . . . . . . . . . . . . . . . . . .17 Bolus button . . . . . . . . . . . . . . . . . . . . . . . . . . . . . . . . . . . . . . . . . . . . . . . . . . . . . . . . . . . . . . .17 The Home Page's Menu . . . . . . . . . . . . . . . . . . . . . . . . . . . . . . . . . . . . . . . . . . . . . . . . . . .18 PDM Messages to You . . . . . . . . . . . . . . . . . . . . . . . . . . . . . . . . . . . . . . . . . . . . . . . . . . . . . . . . .20 Alarms . . . . . . . . . . . . . . . . . . . . . . . . . . . . . . . . . . . . . . . . . . . . . . . . . . . . . . . . . . . . . . . . . . . . .20 Notifications . . . . . . . . . . . . . . . . . . . . . . . . . . . . . . . . . . . . . . . . . . . . . . . . . . . . . . . . . . . . . . .20 Confirmation Messages . . . . . . . . . . . . . . . . . . . . . . . . . . . . . . . . . . . . . . . . . . . . . . . . . . .20 2 Initial PDM Setup . . . . . . . . . . . . . . . . . . . . . . . . . . . . . . . . . . . . . . . .21 The Omnipod DASH™ PDM Kit . . . . . . . . . . . . . . . . . . . . . . . . . . . . . . . . . . . . . . . . . . . . . . .21 Preparing for Your Training . . . . . . . . . . . . . . . . . . . . . . . . . . . . . . . . . . . . . . . . . . . . . . . . . . . .21 Contents iv Contents General PDM Settings . . . . . . . . . . . . . . . . . . . . . . . . . . . . . . . . . . . . . . . . . . . . . . . . . . . . . . . . .23 Turning on and personalizing the PDM . . . . . . . . . . . . . . . . . . . . . . . . . . . . …
Text truncated - open the document above for the full version.
Users Manual
Changing Your Pod3 44 3Changing Your Pod Prepare the Pod site Select the Pod infusion site (screen step ): Guidelines for Pod site selection Discuss suitable Pod placement sites with your healthcare provider using the following guidelines: • Ideal sites have a layer of fatty tissue. • Ideal sites offer easy access and viewing. • The site should be at least 1 inch (2.5 cm) away from the previous site to avoid skin irritation. • The site should be at least two inches (5 cm) away from your navel. • Avoid sites where belts, waistbands, or tight clothing may rub against or dislodge the Pod. • Avoid sites where the Pod will be affected by folds of skin. • Avoid placing the Pod over a mole, tattoo, or scar, where insulin absorption may be reduced. • Avoid areas of the skin with an active infection. Pod site map (optional) The Pod site map is an optional feature that helps you track your current and recent Pod site locations. This option only appears if the Pod Sites setting is turned on (see "Pod Sites Setting" on page 108). Front FrontBack Back 45 Changing Your Pod33Changing Your Pod 1. Ta p RECORD POD SITE to bring up the Record Pod Site screen. 2. Tap the FRONT or BACK tab to select an area of your body for your Pod. To help you avoid recent Pod sites, the screen indicates the two most recent dates that each site was selected. 3. Tap a circle to indicate the location on your body where you will place your new Pod. A blue dot appears inside the selected circle. Tap again to deselect the location. 4. Tap the DETAILS tab to add a detail about the placement of this Pod. For example, you could add a detail that says "Facing up" or "Facing down" to describe the Pod's orientation. a. To add a new detail, tap ADD NEW and type in the new detail. Tap ADD when done. The new detail is added to the list. Note: The PDM considers uppercase letters and lowercase letters to be identical. For example, you can only use one of the following details: "Facing up," "FACING UP," or "facing Up," because the PDM considers these to be identical entries. b. Select a detail for the new Pod by tapping the circle next to that detail. You may only add one detail for each Pod. Tap again to deselect the detail. Note: To delete a site detail, tap the next to the detail. 5. Tap DONE when finished to return to the Change Pod screen. Changing Your Pod3 46 3Changing Your Pod Prepare the infusion site To reduce the risk of infection at the infusion site: 1. Wash your hands with soap and water. 2. Wash your selected infusion site with soap and water. Note: Antibacterial soap may irritate skin, especially at the infusion site. Ask your healthcare provider how to treat any skin irritation. 3. Dry the infusion site with a clean towel. 4. Use an alcohol prep swab to disinfect the infusion site. Start at the center of the site and gently rub outward in a circular motion. 5. Let the infusion site air-dry thoroughly. Do not blow on the site to dry it. Remove the Pod's blue cap Remove the Pod's blue needle cap (screen step ): 1. Turn the Pod so the blue needle cap is up and facing you. 2. Place your thumb on the bottom (flat edge) of the blue cap and pull the cap upwards. The cap snaps off. Throw the cap away. When you remove the blue cap, a drop of insulin may be visible at the end of the cannula or in the well. 3. If any of the following apply, tap CANCEL, and then dispose of the Pod and begin again with a new Pod: • The Pod is accidentally dropped, as this may compromise sterility. • The Pod or its adhesive pad is wet, dirty, or damaged. • The cannula extends beyond the adhesive backing when the blue needle cap is removed. Warning: Verify that the cannula does not extend beyond the adhesive backing once the Pod's blue needle cap is removed. 4. Using the pull tabs, remove the white paper backing covering the adhesive pad. Be careful not to remove the adhesive pad itself. Do not allow the adhesive to fold back on itself. 47 Changing Your Pod33Changing Your Pod Apply the Pod Inspect and apply the Pod (screen step ): 1. Examine the Pod. Tap CANCEL and dispose of the Pod if the adhesive pad is folded, torn, or damaged, and begin again with a new Pod. 2. Orient the Pod so it is: • Horizontal or diagonal on your abdomen, hip, lower back, or buttocks. • Up and down or at a slight angle on your upper arm or thigh. 3. Apply the Pod to the selected infusion site, pressing down firmly to secure the Pod to your skin. The adhesive is designed for one- time use. Once a Pod is placed on your body, you cannot move that Pod to another infusion site. Note: The Pod’s adhesive keeps it securely in place for up to three days. However, if necessary, several products are available to enhance adhesion. Ask your healthcare provider about these products. Avoid getting any lotion, creams, sprays, or oils near the infusion site as these products may loosen the adhesive. Begin insulin delivery Begin insulin delivery (screen step ): Warning: If you are applying a Pod in a place that does not have a lot of fatty tissue, squeeze the skin around the Pod throughout the next step. Occlusions may result if you do not use this technique for lean areas. 1. If you applied the Pod to a lean area, squeeze the skin around the Pod. 2. Ta p START. Back Front Up, down, or slight angle Horizontal or diagonal Up, down, or slight angle Changing Your Pod3 48 3Changing Your Pod 3. Confirm that the Pod is securely attached to your body, then tap CONFIRM. 4. If you are squeezing your skin, stop squeezing when the PDM asks if the cannula is properly inserted. Once the cannula is inserted, the Pod automatically fills the cannula with insulin. The Pod then begins delivering the basal rate of insulin according to the active Basal Program. The cannula can be inserted only once with each Pod. Caution: Be sure to check the alarm function at every Pod change (see "Check alarms" on page 105). Check the Infusion Site Following insertion of the cannula, check the Pod and infusion site: 1. Look throu…
Text truncated - open the document above for the full version.
Users Manual
105 Adjusting Settings99Adjusting Settings Diagnostics Check alarms To verify that your PDM and Pod's alarms and vibration functions are working properly, you can test them as follows: 1. Navigate to: Settings icon () > PDM Device > Check Alarms. 2. If you have an active Pod, tap SUSPEND INSULIN and tap YES. 3. Ta p CHECK ALARMS to initiate the alarm check. 4. Listen and feel: The PDM beeps and vibrates three times. Then, if you are wearing a Pod, the Pod beeps several times and sounds the alarm tone for several seconds. 5. If the Pod alarms did not work properly, tap NO. Then either tap CHECK AGAIN to retry testing the alarms, or tap DONE and activate a new Pod. 6. If the PDM alarms did not work properly, tap NO. Then either tap CHECK AGAIN to retry testing the alarms or call Customer Care. 7. If the beeps and vibrations worked properly, tap YES. If you suspended insulin to check the alarms, tap YES to resume insulin delivery. Warning: If the PDM fails to beep, call Customer Care immediately. If an activated Pod fails to beep, change the Pod immediately. Continuing to use the Omnipod DASH™ System in these situations may put your health and safety at risk. Reset PDM Reset PDM is a rarely-used function that erases many of your personal settings. Caution: Resetting the PDM deletes your Basal Programs, temp basal presets, bolus presets, and all Bolus Calculator settings. Before using this feature, check with your healthcare provider and be sure you have a written record of your current information so that you can reprogram your PDM. You will also need to activate a new Pod after resetting your PDM. Caution: Resetting the PDM resets your IOB to zero; however, the Bolus Calculator is not disabled. Note: The Reset PDM option does not delete history records. Adjusting Settings9 106 9Adjusting Settings To reset your PDM: 1. Prepare a list of your personalized settings so you can re-enter them after you reset your PDM. Consult with your healthcare provider to ensure that the settings are appropriate for you. Tip: Record your current settings on the pages at the end of this User Guide. 2. Navigate to: Settings icon () > PDM Device > Reset PDM. 3. If you have an active Pod, tap DEACTIVATE POD, then tap DEACTIVATE POD again. 4. Ta p RESET PDM, and then tap RESET PDM again. This deletes your current user settings. 5. Follow the PDM setup directions in "Initial PDM Setup" on page 21 to re- enter your personalized information or call Customer Care for assistance. Software update (Wireless update) It is important to make sure that your PDM software is kept up to date. When a software update is available, you will receive a notification on the Lock screen, as long as your PDM is connected to Wi-Fi. Caution: Be sure to connect to Wi-Fi periodically to check for software updates. Caution: Do not attempt to install other software or alter the software in any way. Caution: The upper right corner of the Wireless Update screen has an Options icon ( ). The options in this Options menu have not been integrated into the Omnipod DASH™ System. Do not change any of the options found in this Options menu. 107 Adjusting Settings99Adjusting Settings Before you begin Before you begin downloading and installing a software update, make sure the following requirements are met: • No active Pod. If you have an active Pod, deactivate it. • Wi-Fi is ON. If your Wi-Fi is OFF, turn it ON and connect to a Wi-Fi network. (See "Wi-Fi" on page 100.) • PDM battery charge is at least 30%. If below 30%, plug in the PDM until the charge is above 30%. After you confirm meeting these requirements, proceed to the following steps. Downloading and installing a software update To download and install a software update: 1. Navigate to: Settings icon () > PDM Device. The screen shows the current software version. 2. Ta p Software Update. 3. Ta p CHECK FOR UPDATES, then tap OK, I UNDERSTAND. The Wireless Update screen appears. If an update has been detected, the screen will display a Download button. If an update has not been detected, the screen will display a Check for Updates button. 4. To download the available update, tap Download. Note: While you can pause or cancel the download, it is recommended that you allow the download to finish. The update has finished downloading when the circle in the middle of the screen says "100%." Note: If an update has not been detected, tap Check for updates to trigger a check. If the screen tells you that the software is up-to-date, tap the triangular (back) button below the PDM screen to exit. Caution: Do not turn your PDM off or remove its battery during the software installation. 5. Ta p Install Now. Note: If a message appears saying that the battery charge is less than 30%, tap OK and recharge the battery. Note: To install at a later time, (not recommended) tap Install Later. Then select a delay of 1 hour, 4 hours, or 8 hours, and tap OK. If you do not select a delay, the default delay of 4 hours is used. The Lock screen shows a "Wireless Update" reminder until you have installed the update. If you are using your PDM after the delay period has elapsed, a reminder message appears. Adjusting Settings9 108 9Adjusting Settings 6. Read the message about battery power and PDM use during the software installation, and plug in your PDM if the charge is below 30%. Once above 30%, tap OK. Warning: The software update process will take a few minutes. Please refrain from excessive operations during the update and make sure your device is plugged into a power source or has more than a 30% charge before starting the installation process. 7. Wait for several minutes while the software update is installed. As installation proceeds, several screens appear, including an image of a green robot. When installation is complete, the Lock screen appears. The PDM remembers your personal settings and history records. After the software installation is complete, the PDM will restart and display a message. 8. Ta p OK on the messag…
Text truncated - open the document above for the full version.
Users Manual
Understanding PDM and Pod Function12 166 12Understanding PDM and Pod Function Bolus Calculator examples For an explanation of IOB, see page 160. For an explanation of the correction and meal bolus equations, see page 162. Example 1: Eating 45 g carbs, BG of 150 mg/dL is above target, no IOB Duration of Insulin Action = 4 hours. You have not delivered a bolus in the past 4 hours, so there is no IOB (no meal IOB, no correction IOB). Correction Bolus 1 U Your blood glucose is 50 mg/ dL over your target. With your correction factor at 50 and no IOB adjustment, you will need a 1 U correction bolus. BG = 150, Target BG = 100 Correction Factor = 50 (150-100) / 50 = 1 U Meal IOB adjustment Meal IOB = 0 U 1 U - 0 U = 1 U No IOB, so no IOB adjustment. Correction IOB adjustment Correction IOB = 0 U 1 U - 0 U = 1 U No IOB, so no IOB adjustment. Meal Bolus 3 U You are eating 45g carbs. With your IC ratio at 15 and no IOB adjustment, you will need a 3 U meal bolus. Carbs = 45 g, IC Ratio = 15 g/U 45 / 15 = 3 U Correction IOB adjustment Remaining correction IOB = 0 U 3 U - 0 U = 3 U No IOB, so no IOB adjustment. Calculated Bolus 4 U The calculated bolus is the sum of your correction bolus and meal bolus. Your Adjustment 0 U Any adjustment you make to the calculated bolus is shown here. No adjustment was made. Total Bolus 4 U The total bolus is the sum of the calculated bolus and any adjustment made by you. 167 Understanding PDM and Pod Function1212Understanding PDM and Pod Function Example 2: Not eating, BG of 150 mg/dL is above target, 1 U meal IOB, 1 U correction IOB Duration of Insulin Action = 4 hours. Three hours ago, you delivered an 8 U bolus (4 U meal bolus, 4 U correction bolus) because you were eating and had a high blood glucose reading. Now, three hours after the 8 U bolus, there are 2 U of IOB left (1 U meal IOB, 1 U correction IOB). Correction Bolus 0 U BG = 150, Target BG = 100 Correction Factor = 50 (150-100) / 50 = 1 U Your blood glucose is 50 mg/dL over your target. A correction factor of 50 gives a 1 U preliminary correction bolus. Meal IOB adjustment Meal IOB = 1 U 1 U - 1 U = 0 U However, this preliminary correction bolus is reduced to zero by the 1 U meal IOB adjustment. Correction IOB adjustment Correction IOB = 1 U N/A: Correction bolus is <= 0 U Because the preliminary correction bolus has been reduced to zero, the correction IOB is not subtracted. Meal Bolus 0 U You are not eating, so your meal bolus is 0 U. Carbs = 0 g, IC Ratio = 15 g/U 0 / 15 = 0 U Correction IOB adjustment Remaining correction IOB = 1 U 0 U - 1 U = 0 U None of the correction IOB was subtracted from the correction bolus, so the remaining correction IOB is 1 U. However, the meal bolus is already zero. Calculated Bolus 0 U Although your blood glucose is above target, the meal IOB reduces the total bolus to 0 U. Your Adjustment 0 U Total Bolus 0 U Understanding PDM and Pod Function12 168 12Understanding PDM and Pod Function Example 3: Eating 45 g carbs, BG of 100 mg/dL is at target, 1 U meal IOB Duration of Insulin Action = 4 hours. Three hours ago, you delivered a 4 U bolus (4 U meal bolus) because you were eating. There was no correction bolus because your blood glucose was at your Target BG. Now, three hours later and just before your next meal, there is 1 U of IOB from the previous meal, which is a 1 U meal IOB. There is no correction IOB because the earlier bolus had no correction component. Correction Bolus 0 U Blood glucose is at target, so the correction bolus is zero. BG = 100, Target BG = 100 Correction Factor = 50 (100-100) / 50 = 0 U Meal IOB adjustment Meal IOB = 1 U N/A: Correction bolus is <= 0 U The correction bolus is zero, so the meal IOB is not subtracted. Correction IOB adjustment Correction IOB = 0 U N/A: Correction bolus is <= 0 U No IOB adjustment. Meal Bolus 3 U Carbs = 45 g, IC Ratio = 15 g/U 45 / 15 = 3 U You are eating 45 g carbs. With your IC ratio at 15 and no correction IOB adjustment, the meal bolus is 3 U. Correction IOB adjustment Remaining correction IOB = 0 U 3 U - 0 U = 3 U No IOB adjustment is made. There is no correction IOB, and meal IOB is never subtracted from a meal bolus. Calculated Bolus 3 U Even though there was a 1 U meal IOB, it did not reduce the calculated bolus. Your Adjustment 0 U Total Bolus 3 U 169 Understanding PDM and Pod Function1212Understanding PDM and Pod Function Example 4: Eating 60 g carbs, BG of 150 mg/dL is above target, 1 U correction IOB Duration of Insulin Action = 2 hours. One hour ago, you delivered a 2 U bolus to correct a high blood glucose. Because you were not eating at that time and did not enter a carbohydrate value into the Bolus Calculator, this was a 2 U correction bolus. Now, one hour later, you are about to eat. There is a 1 U correction IOB from the earlier bolus, and no meal IOB because you did not eat at the time of your last bolus. Correction Bolus 0 U Your blood glucose is 50 mg/dL over your target. A correction factor of 50 gives a 1 U preliminary correction bolus. BG = 150, Target BG = 100 Correction Factor = 50 (150-100) / 50 = 1 U Meal IOB adjustment Meal IOB = 0 U 1 U - 0 U = 1 U No meal IOB, so no meal IOB adjustment. Correction IOB adjustment Correction IOB = 1 U 1 U - 1 U = 0 U The 1 U correction IOB reduces the correction bolus to zero. Meal Bolus 4 U Carbs = 60 g, IC Ratio = 15 g/U 60 / 15 = 4 U You are eating 60 g carbs. An IC ratio of 15 gives a 4 U preliminary meal bolus. Correction IOB adjustment Remaining correction IOB = 0 U 4 U - 0 U = 4 U The entire correction IOB was used to reduce the correction bolus to zero, so no correction IOB remains. The meal bolus remains at 4 U. Calculated Bolus 4 U The calculated bolus is entirely a meal bolus. Even though your blood glucose is above target, the correction IOB reduced the correction bolus to zero. Your Adjustment 0 U Total Bolus 4 U Understanding PDM and Pod Function12 170 12Understanding PDM and Pod Function Example 5: Reverse correction on, eating 45 g carbs, BG …
Text truncated - open the document above for the full version.
ID Label/Location Info
Insulet Corporation | 100 Nagog Park Acton, MA 01720 USA 1.800.591.3455 | 1.978.600.7850 www.myomnipod.com Assembled in China | FCC ID: RBV-SAW | PT-000340-AW Rev 001 04/20 HealthLink Europe BV, De Tweeling 20-22 5215 MC’s Hertogenbosch, The Netherlands TEL: +31.13.5479300 EMAIL: [email protected] (1x) (1x) (1x) 22 (41 o F) 5 o C (104 o F) 40 o C 85% 20% 1060 hPa 700 hPa POD-BLE-I1-520 2797 (01)10385082000023(10)ED1C01011831(11)181015(17)200415 yyyy-mm-ddyyyy-mm-dd ED1C01011831 File name: Tray Lid, POD Saw Dash Part Number: PT-000340-AW Part Revision: 001 File date: 04/07/2020 Note: Die lines and hidden layers do not print. Color Key: Die line, UDI or Variable Data - Non-printable information CMYK
Internal Photos
100 Nagog Park, Acton, MA 01720 T 978.600.7000 F 978.600.0120 NASDAQ PODD insulet.com Makers of the Omnipod ® Insulin Management System Internal SAW-DASH Pod Pod Top 100 Nagog Park, Acton, MA 01720 T 978.600.7000 F 978.600.0120 NASDAQ PODD insulet.com Makers of the Omnipod ® Insulin Management System Pod Bottom 100 Nagog Park, Acton, MA 01720 T 978.600.7000 F 978.600.0120 NASDAQ PODD insulet.com Makers of the Omnipod ® Insulin Management System Chassis+PCBA Top 100 Nagog Park, Acton, MA 01720 T 978.600.7000 F 978.600.0120 NASDAQ PODD insulet.com Makers of the Omnipod ® Insulin Management System Chassis+PCBA bottom 100 Nagog Park, Acton, MA 01720 T 978.600.7000 F 978.600.0120 NASDAQ PODD insulet.com Makers of the Omnipod ® Insulin Management System Chassis Bottom 100 Nagog Park, Acton, MA 01720 T 978.600.7000 F 978.600.0120 NASDAQ PODD insulet.com Makers of the Omnipod ® Insulin Management System 100 Nagog Park, Acton, MA 01720 T 978.600.7000 F 978.600.0120 NASDAQ PODD insulet.com Makers of the Omnipod ® Insulin Management System 100 Nagog Park, Acton, MA 01720 T 978.600.7000 F 978.600.0120 NASDAQ PODD insulet.com Makers of the Omnipod ® Insulin Management System 100 Nagog Park, Acton, MA 01720 T 978.600.7000 F 978.600.0120 NASDAQ PODD insulet.com Makers of the Omnipod ® Insulin Management System
RF Exposure Info
Laboratory Location: 4840 Winchester Boulevard Suite 5 Frederick, Maryland 21703 Business Office Address: 9055 Comprint Court Suite 310 Gaithersburg, Maryland 20877 (301) 216-1500 [email protected] March 18, 2020 Insulet Corporation SAW-ASIC Omnipod FCC ID: RBV-SAW IESD ID: 8446A-SAW RF Exposure. Unit is categorically excluded from RF Exposure and does not require SAR test. From KDB 447498 DO1 General RF Exposure Guidance v06 In 4.3.1 a) is states: a) For 100 MHz to 6 GHz and test separation distances ≤ 50 mm, the 1-g and 10-g SAR test exclusion thresholds are determined by the following: [(max. power of channel, including tune-up tolerance, mW) / (min. test separation distance, mm)] · [√f(GHz)] ≤ 3.0 for 1-g SAR, and ≤ 7.5 for 10-g extremity SAR, [2 mW/5mm] x [√2.4(GHz)] = 0.4 x 1.55 = 0.6 As this is less than 3 the unit complies with the 1-g SAR. Steven D. Koster
Test Report
FCC & ISED CANADA CERTIFICATION TEST REPORT for the INSULET CORPORATION Omnipod Dash FCC ID: RBV-SAW IC ID: 8446A-SAW REPORT# 16333-01 REV 2 Prepared for: Insulet Corporation 100 Nagog Park Acton, MA 01720 Prepared By: Washington Laboratories, Ltd. 7560 Lindbergh Drive Gaithersburg, Maryland 20879 Certificates and reports shall not be reproduced except in full, without the written permission of Washington Laboratories, Ltd Washington Laboratories, Ltd. Insulet Corporation Omnipod Dash FCC & ISED Canada Certification Test Report December 2019 WLL Report 16333-01 Rev 2 - ii FCC & ISED Canada Certification Test Report for the INSULET CORPORATION Omnipod Dash FCC ID: RBV-SAW ISED ID: 8446A-SAW DECEMBER 18, 2019 WLL REPORT# 16333-01 REV 2 Prepared by: ___________________________ John P. Repella Manager, EMC & Wireless Services Reviewed by: ____________________________ Michael F. Violette, P.E. CEO Insulet Corporation Omnipod Dash FCC & ISED Canada Certification Test Report December 2019 WLL Report 16333-01 Rev 2 - iii ABSTRACT This report has been prepared on behalf of Insulet Corporation to support the attached Application for Equipment Authorization. The test report and application are submitted for a Digital Transmission System (DTS) Transmitter under Part 15.247 of the FCC Rules and Regulations and Spectrum Management and Telecommunications Policy and under RSS-247 of Innovation, Science and Economic Development Canada (ISED). This Certification Test Report documents the test configuration and test results for the Insulet Corporation Omnipod Dash. Testing was performed on an Open Area Test Site (OATS) of Washington Laboratories, Ltd, 4840 Winchester Blvd. Frederick, MD 21703. Site description and site attenuation data have been placed on file with the FCC's Sampling and Measurements Branch at the FCC laboratory in Columbia, MD. The ISED Canada OATS numbers are 3035A for Washington Laboratories, Ltd. Washington Laboratories, Ltd. has been accepted by the FCC and approved by ANAB under Certificate AT-1448 as an independent FCC test laboratory. The Insulet Corporation Omnipod Dash complies with the limits for a Digital Transmission System (DTS) Transmitter device under FCC Part 15.247 and Innovation, Science and Economic Development Canada (ISED) RSS-247. Revision History Description of Change Date Rev 0 Initial Release December 18, 2019 Rev 1 Respond to ACB Comments January 21, 2020 Rev 2 Edited per comments from ACB April 14, 2020 Insulet Corporation Omnipod Dash FCC & ISED Canada Certification Test Report December 2019 WLL Report 16333-01 Rev 2 - iv TABLE OF CONTENTS Abstract ..................................................................................................................................... iii Table of Contents ...................................................................................................................... iv List of Tables ............................................................................................................................. v List of Figures .................................…
Text truncated - open the document above for the full version.
Contact Information
Applicant
Chuck Vadala(Sr Director, Systems Engineering)
Test Firm
Washington Laboratories, Ltd.Steve Koster
Technical Specifications
| # | Rule Parts | Frequency Range | Power Output |
|---|---|---|---|
| 1 | 15C | 2.40 GHz - 2.48 GHz | 1.90 mW |
Other Applications from Insulet Corporation
RBV-029E
Jul 24, 2026Omnipod 5 Pod, Omnipod 6 Pod
Equipment Class
DTS - Digital Transmission System
RBV-029
Feb 09, 2021Omnipod 5
Equipment Class
DTS - Digital Transmission System
RBV-019
Aug 23, 2011OmniPod PDM
Equipment Class
DSR - Part 15 Remote Control/Security Device Transceiver
RBV-017
Aug 23, 2011OmniPod
Equipment Class
DSR - Part 15 Remote Control/Security Device Transceiver
RBV-003
Jul 04, 2005PDM
Equipment Class
DXT - Part 15 Low Power Transceiver, Rx Verified