RGTKBHC-1HANARO CAM
Kubong Information Technology Co., Ltd.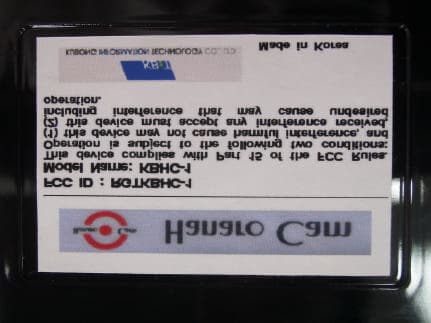
Click to zoom
Application Details
- Equipment Class
- JBP - Part 15 Class B Computing Device Peripheral
- Date of Grant
- Sep 10, 2003
- Application Purpose
- Original Equipment
- Date of Application
- Sep 10, 2003
- Equipment Note
- HANARO CAM
- Country
- South Korea
Documents & Files
Document Text
Text extracted from the exhibit documents filed with the FCC. Open a document above to read the original.
Users Manual
Hanaro Cam (Model : KBHC-1) User Manual rGpG{ GjUSGsU rGpG{ GjUSGsUrGpG{ GjUSGsU rGpG{ GjUSGsUG G aVVUU aVVUUaVVUU aVVUUU UU UG GG G Before Use FCC Compliance Statement This device complies with Part 15 of the FCC Rules. Operation is subject to the following two conditions : (1) this device may not cause harmful interference, and (2) this device must accept any interference received including interference that may cause undesired operation. INFORMATION TO THE USER This equipment has been tested and found to comply with the limits for a Class B digital device, pursuant to part 15 of the FCC Rules. These limits are designed to provide reasonable protection against harmful interference in a residential installation. This equipment generates, uses and can radiate radio frequency energy and, if not installed and used in accordance with the instructions, may cause harmful interference to radio communications. However, there is no guarantee that interference will not occur in a particular installation. If this equipment does cause harmful interference to radio or television reception, which can be determined by turning the equipment off and on, the user is encouraged to try to correct the interference by one or more of the following measures: Reorient or relocate the receiving antenna. Increase the separation between the equipment and receiver. Connect the equipment into an outlet on a circuit different from that to which the receiver is connected. Consult the dealer or an experienced radio/TV technician for help. WARNING Changes or modifications not expressly approved by the manufacturer could void the use’s authority to operate the equipment. Installation and User Guide 2 < Contents > 1. Product Specifications and Features ..................................... 3 2. Software included and system requirements ........................ 4 3. USB Camera specification ................................................... 5 4. KBIT USB Camera Installation ........................................... 6 5. Hanaro Cam Driver Installation ........................................... 7 6. Hanaro Cam Setup .............................................................. 13 7. Hanaro Cam Server Program Instructions .......................... 15 8. System Configuration ......................................................... 30 9. Running Server Program .................................................... 34 10. Monitoring Camera from Remote Site ............................. 35 g Tips .................................................................................... 38 Hanaro Cam 3 1. Product Specifications and Features 1) Product Features • Monitoring abilities from any location • High resolution image with 320,000 pixels and image sensor • Automatic exposure and white balance adjustment • High speed Image transmit • Various application for security or monitoring 2) Product Specifications Optical elements : 320,000 pixels CMOS image sensor Lens : F2.8 Focus : 6.28 mm Exposure : Automatic White balance : Automatic Electricity consumption : 1.3W Output method : USB Dimension : 69.5 x 71.2 x 36.0 mm Frame speed : USB Camera Mode : VGA(640x480) 15 frames/sec CIF(320x240) 30 frames/sec QCIF(160x120) 30 frames/sec Hanaro Cam Mode : CIF(320x240) max. 30 frames/sec Client View Mode : CIF(320x240) max. 30 frames/sec Installation and User Guide 4 2. Software Included and System Requirements Software Included: • Windows 98/2000 Driver • Hanaro Cam POP Security Program • Hanaro Cam Program Package Included: • Hanaro Cam Main Body • Install CD • Manual • Audio Cable • USB Cable System Requirements: • Pentium processor MMX 233 MHz or over • USB port • Minimum 64 MB memory • CD-ROM Drive • VGA graphic adapter with 16 bits, 640x480 resolution • Internet connection (LAN or Modem) Hanaro Cam 5 3. USB Camera Specification 1) Snap shot : Press the button to capture an image and save it to your hard disk. 2) Focus volume : Use this to focus the lens. 3) Indicator : You’ll see a red light when camera is running. 4) Lens 5) Base 1 2 3 4 5 Installation and User Guide 6 4. KBIT HANARO CAM Installation Guide Insert the program CD in the CD-ROM Drive and you’ll see the dialog box below. First, click on “Secumera Lite OOOO OO”, and driver setup will begin. This setup program will automatically detect your system and automatically install the driver to your computer. For further information, check “Chapter 5 HANARO CAM Driver Installation” Next, Click on the “HANARO CAM Setup” to setup a server to watch images using a camera and to copy homepage files to your hard drive in order to watch camera images from other computers not in the area. For further information, please refer to “Chapter 6 HANARO CAM Setup”. Click “Exit” when you’re done. Hanaro Cam 7 5. HANARO CAM Driver Installation 1) Windows 98/SE/ME driver installation Insert the program CD and click “HANARO CAM Driver Setup” (USB port installation will begin when you have finished installing the USB driver.) This dialog box indicates that USB driver setup has began Click “Next” Installation and User Guide 8 Click “Next” Click “Finish” to complete the setup. The Hanaro Cam USB camera Driver installation is complete. As soon as you plug your camera to the USB port, your computer will automatically detect your USB camera. Hanaro Cam 9 You will see this dialog box when you first install the USB camera. Insert Windows 98 CD into the CD-ROM drive, then it will automatically install the driver. However, if driver files can’t be found in your Windows 98 CD, you will see a dialog box below. Browse and select the driver location manually, then it will automatically install the driver. Ex) Click on “Browse...” to search for the folder. Click on “OK” to automatically install the driver. Installation and User Guide 10 2) Windows 2000 …
Text truncated - open the document above for the full version.
Contact Information
Applicant
Moo Hee Park
Test Firm
Korea Standard Quality LaboratoriesSung-goo Kim
Technical Specifications
| # | Rule Parts | Frequency Range | Power Output |
|---|---|---|---|
| 1 | 15B | - | - |
Other Applications from Kubong Information Technology Co., Ltd.
RGTMT-8001K
Jun 01, 2005FM TRANSMITTER
Equipment Class
DXX - Part 15 Low Power Communication Device Transmitter
RGTKBMC
Mar 11, 2004KBit MultiCam
Equipment Class
JBP - Part 15 Class B Computing Device Peripheral