S4XML-21REMOTE STOP
Shenzhen C&D Electronics Co.,Ltd
Click to zoom
Application Details
- Equipment Class
- DSC - Part 15 Security/Remote Control Transmitter
- Date of Grant
- May 29, 2005
- Application Purpose
- Original Equipment
- Date of Application
- May 29, 2005
- Equipment Note
- REMOTE STOP
- Frequency Range
- 315.00000000 - 315.00000000
- Country
- China
Documents & Files
Document Text
Text extracted from the exhibit documents filed with the FCC. Open a document above to read the original.
Users Manual
Remote Stop – Instruction Manual Introduction The Remote Stop is a safety and training device designed for virtually all motorcycles and ATV’s. The Remote Stop operates with a transmitter and receiver that easily coincides with OEM (Original Equipment Manufacturer) engine shut off switches (kill switches). Installation Locate the vehicle’s OEM engine shut off switch (kill switch). Identify the OEM engine shut off switch lead wires. There are normally 2 wires bound together by an insulator. The wires lead from the switch to the engine. Attach the Remote Stop to the handle bar at a point near the OEM lead wires. Do so by using the Velcro strap attached to the Remote Stop. Expose one of the OEM lead wires, cutting a small slit in the insulator if necessary. (Engine should be off during installation). Splice the ‘blue’ wire of the Remote Stop to the exposed wire of the OEM engine shut off switch. Locate a bolt head or something similar to provide a ‘ground’ point. Attach the ‘green’ ground wired of the Remote Stop to this point. Basic installation is complete. Use of the Remote Stop With the receiver installed, normal use of the vehicle is able. Rider may start the vehicle and operate normally. The parent, or other onlooker, holds the transmitter. The transmitter’s antennae should be fully extended. Should the rider begin to encounter any noticeable danger, simply press and hold the button on the transmitter until the engine stops. Engine should stop almost immediately. Parts · (1) Remote Stop bag which includes the receiver and battery components. · (1) Remote Stop transmitter. · (4) ‘AA’ batteries, (not included). Cautions and Warnings Rider should operate the vehicle within a 300-foot radius of the transmitter. Visibility of the onlooker may be impaired if any further. Batteries should be checked, as well as the Remote Stop’s functionality prior to riding or driving the vehicle. To do so, start the vehicle, (following the Remote Stop installation), and press the transmitter button to ensure the engine stops. This should be done prior to each time the vehicle is operated while the Remote Stop is installed. Disassembly Once the rider has the ability to operate the vehicle well and with confidence, the Remote Stop can be removed. This is an undetermined period of time. Each rider’s ability is different. Using wire snips cut the blue wire as close to the OEM lead wire as possible. Be careful not to damage the OEM lead wire. Remove the green ground wire from the ground point. Remove the Remote Stop receiver from the handlebar FCC NOTE: THE MANUFACTURER IS NOT RESPONSIBLE FOR ANY RADIO OR TV INTERFERENCE CAUSED BY UNAUTHORIZED MODIFICATIONS TO THIS EQUIPMENT. SUCH MODIFICATIONS COULD VOID THE USER’S AUTHORITY TO OPERATE THE EQUIPMENT.
Block Diagram
BLOCKDIAGRAM.sch-1 - Mon Apr 18 14:44:41 2005 PDF created with pdfFactory trial version www.pdffactory.com BLOCKDIAGRAM.sch-1 - Mon Apr 18 14:44:48 2005 PDF created with pdfFactory trial version www.pdffactory.com
External Photos
EUT – External Photos View 2.1 EUT - Front View 2.2 EUT - Back View
ID Label/Location Info
FCC ID Label Sample for Model ML-21 FCC ID: S4XML-21 Made in China This device complies with Part 15 of the FCC Rules. Operation is subject to the following two conditions: 1. This device may not cause harmful interference, and 2. This device must accept any interference received, including interference that may cause undesired operation.
ID Label/Location Info
FCC ID Label Location This device complies with Part 15 of the FCC Rules. Operation is subject to the following two conditions:(1) this device may not cause harmful interference, and (2) this device must accept any interference received, including interference that may cause undesired operation The Label must not be a stick-on paper. The Label on these products must be permanently affixed to the product and readily visible at the time of purchase and must last the expected lifetime of the equipment not be readily detachable. Proposed Label Location on EUT EUT Bottom View/proposed FCC Mark Location For Home or Office Use This device complies with Part 15 of the FCC Rules. Operation is subject to the following two conditions: 1. This device may not cause harmful interference, and 2. This device must accept any interference received, including interference that may cause undesired operation.
Internal Photos
PCB - Component View PCB - PCB - Solder View
Operational Description
ML-21 TX FUNCTION 1 Insert the 12V battery into the box door. 2 Press the “red’ button at the top of TX ,the RX will act accordingly after receipt of commands from TX.. ML-21 SPEC POWER SUPPLY DC12V FREQUENCY 315MHZ+ - 75KHZ STANDBY CURRENT 0 MA OPERATING CURRENT 12MA TRANSMITTING POWER LESS –3DBM PDF created with pdfFactory trial version www.pdffactory.com
Schematics
rctxFCC.sch-1 - Mon Apr 18 14:46:02 2005 PDF created with pdfFactory trial version www.pdffactory.com
Test Report
FCC TEST REPORT Page 1 of 25 FCC ID : S4XML-21 Applicant : Shenzhen C&D Electronics Co.,Ltd. Building 2, Xia You Song Mountaintop Industrial District, YouSong Village, LongHua Town, BaoAn District, ShenZhen China Equipment Under Test (EUT) : Product description : REMOTE ACCESS FOR POWERVISORS Model No. : ML-21 Standards : FCC 15 Paragraph 15.205, Paragraph 15.209, Paragraph 15.231, Paragraph 15.31, Paragraph 15.33, Paragraph 15.35. Date of Test : May 26, 2005 Test Engineer : Jimmy Lee Reviewed By : PERPARED BY: Shenzhen Huatongwei International Inspection Co., Ltd Keji S,12th,Road, Hi-tech Industrial Park, Shenzhen, Guangdong, China FCC Registration Number: 662850 Shenzhen C&D Electronics Co.,Ltd FCC ID:S4XML-21 2 Contents Page 1 COVER PAGE..........................................................................................................................................................1 2 CONTENTS..............................................................................................................................................................2 3 TEST SUMMARY....................................................................................................................................................5 4 GENERAL INFORMATION..................................................................................................................................6 4.1 CLIENT INFORMATION............................................................................................................................................6 4.2 GENERAL DESCRIPTION OF E.U.T...........................................................................................................................6 4.3 DETAILS OF E.U.T..................................................................................................................................................6 4.4 DESCRIPTION OF SUPPORT UNITS...........................................................................................................................6 4.5 STANDARDS APPLICABLE FOR TESTING..................................................................................................................6 4.6 TEST FACILITY........................................................................................................................................................7 4.7 TEST LOCATION......................................................................................................................................................7 5 EQUIPMENT USED DURING TEST...................................................................................................................8 6 CONDUCTED EMISSION TEST..........................................................................................................................9 6.1 TEST EQUIPMENT....................................................................................................................................................9 6.2 TEST PROCEDURE...................................................................................................................................................9 6.3 CONDUCTED TEST SETUP.....................................................................................................................................10 6.4 EUT OPERATING CONDITION...............................................................................................................................10 6.5 CONDUCTED EMISSION LIMITS.............................................................................................................................11 6.6 CONDUCTED EMISSION TEST RESULT...................................................................................................................11 7 RADIATION EMISSION TEST...........................................................................................................................12 7.1 TEST EQUIPMENT..................................................................................................................................................12 7.2 MEASUREMENT UNCERTAINTY.............................................................................................................................12 7.3 TEST PROCEDURE.................................................................................................................................................12 7.4 RADIATED TEST SETUP.........................................................................................................................................13 7.5 SPECTRUM ANALYZER SETUP...............................................................................................................................13 7.6 CORRECTED AMPLITUDE & MARGIN CALCULATION............................................................................................14 7.7 SUMMARY OF TEST RESULTS................................................................................................................................14 7.8 EUT OPERATING CONDITION...............................................................................................................................15 7.9 RADIATED EMISSIONS LIMIT.................................................................................................................................15 7.10 RADIATED EMISSIONS TEST RESULT................................................................................................................17 8 PERIODIC OPERATION.....................................................................................................................................19 9 BAND EDGE..........................................................................................................................................................20 9.1 TEST PROCEDURE.................................................................................................................................................20 9…
Text truncated - open the document above for the full version.
Test Setup Photos
Radiation Emission Test Setup Photos Radiation Emission Test View For 30MHz-1000MHz Radiation Emission Test View For 1GHz-5GHz
Contact Information
Applicant
Zuowen Dong(Electronic Engineer)
Test Firm
Shenzhen Huatongwei International Insp. Co., LtdMoffy Yu
Technical Specifications
| # | Rule Parts | Frequency Range | Power Output |
|---|---|---|---|
| 1 | 15.231 | 315 MHz - 315 MHz | - |
Other Applications from Shenzhen C&D Electronics Co.,Ltd

S4X-RF553A
Jun 28, 2023Remote Control
Equipment Class
DTS - Digital Transmission System
S4X-RF439A
Apr 17, 2021Remote Control
Equipment Class
DTS - Digital Transmission System
S4X-RF402A
Feb 17, 2020Remote control
Equipment Class
DTS - Digital Transmission System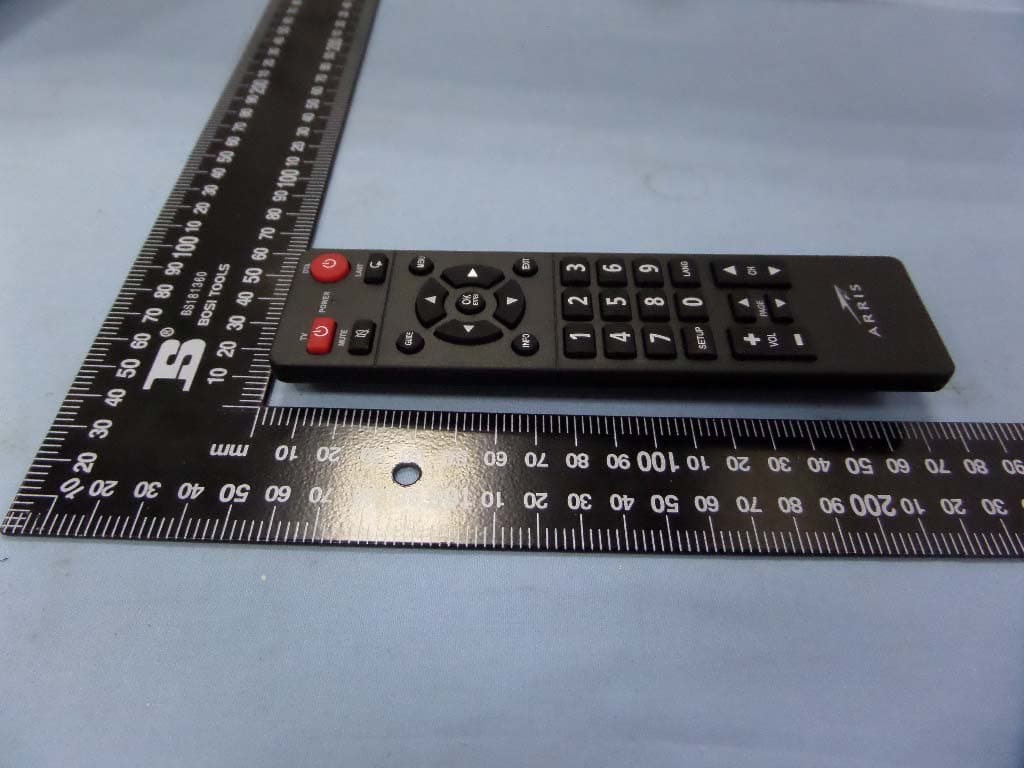
S4XRF143A
Dec 16, 2014Remote control RF143A
Equipment Class
DXX - Part 15 Low Power Communication Device Transmitter
S4XRF-4B
Apr 11, 2005REMOTE ACCESS FOR POWERVISORS
Equipment Class
DSC - Part 15 Security/Remote Control Transmitter