TJY0720Temperature/ Humidity Transmitter
Matador International Inc.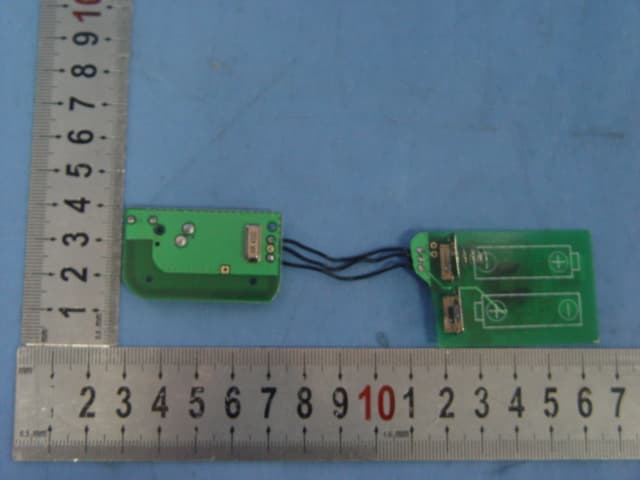
Click to zoom
Application Details
- Equipment Class
- DSC - Part 15 Security/Remote Control Transmitter
- Date of Grant
- Sep 11, 2005
- Application Purpose
- Original Equipment
- Date of Application
- Sep 11, 2005
- Equipment Note
- Temperature/ Humidity Transmitter
- Frequency Range
- 433.92000000 - 433.92000000
- Company
- Matador International Inc.
- Country
- Taiwan
Documents & Files
Document Text
Text extracted from the exhibit documents filed with the FCC. Open a document above to read the original.
Users Manual
1 1 Analog Clock Set Up Instruction INVENTORY OF CONTENTS 1. The indoor temperature station with clock (figurine 1) 2. The remote temperature sensor and mounting bracket (figurine 2) 3. 2 each, 1/2” Phillips screws. 4. Instruction Manual and Warranty Card. ADDITIONAL EQUIPMENT (not included) 1. 1 Philips screwdriver 2. 4 Fresh AAA Alkaline batteries. 3. 2 Fresh AA Alkaline batteries. SET UP GUIDE Hint: Use good quality Alkaline Batteries and avoid rechargeable batteries. First, make sure there is no battery in the Outdoor temperature sensor and Indoor temperature station. 1. Have the indoor temperature station and remote temperature sensor 3 to 5feet apart. 2. Install 4 AA batteries in the indoor temperature Station first (figurine 3), make sure they don’t spring free or start-up problems may occur. At this time, the temperature hand will go back to –60F and the green LED light will turn on. 2 2 3. After green lights turns on, install 2 AA batteries in the remote temperature sensor (figurine 4), during this time, the remote temperature sensor will send signal to Indoor temperature station automatically and the temperature hand will move to the correct temperature degree and the green LED light will turn off. NOTE: THE INDOOR TEMPERATURE STATION MUST BE STARTED BEFORE REMOTE TEMPERATURE SENSOR. In this time, the indoor temperature station and remote temperature sensor will talk to each other, and the temperature hand will display the temperature. If the indoor temperature station does not display correct temperature and the green LED light still turns on after 1min, please retry the set up as stated above. After indoor temperature is displayed for 10 min then you can place your remote temperature sensor outdoors. The remote temperature sensor should be place in a dry, shaded area. The remote temperature sensor has a range of 80 feet. Any walls that the signal will have to pass through will reduce distance. An outdoor wall or window will have 20~30 feet of resistance and an interior wall will have 10~20feet of resistance. Your distance plus resistance should not exceed 80 feet in a straight line. NOTE: FOG AND MIST WILL NOT HARM YOUR REMOTE TEMPERATURE SENSOR BUT DIRECT RAIN MUST BE AVOIDED. MOUTING NOTE: To achieve a true temperature reading, avoid mounting in direct sunlight. We recommend that you mount the remote temperature sensor on a North-facing wall. The sending range is 80 feet, obstacles such as walls, concrete, and large metal objects will reduce the range. Place both units in their desired location before permanently mounting. Remote Temperature Sensor 1. Remove the mounting bracket from the remote temperature sensor. 2. Mount the bracket in the desired location with screws. 3. Re-attach the remote temperature sensor into mounting bracket. 3 3 Indoor Temperature Station 1. Insert an appropriate screw in your desired location. 2. Using the integrated hanging hole on the back of the unit, slip indoor temperature station over the screw and pull down to secure. The meaning of Symbol 1. means Indoor temperature station searching signal- the green LED light will turn on every 10 minutes to receive from outdoor temperature sensor. After receiving the outdoor sensor signal, the green light will turn off automatically. 2. means Indoor temperature station low battery power- if the yellow LED light turns on continually, please change batteries of Indoor temperature station with 4 fresh AA batteries. 3. means Outdoor temperature sensor low battery power- if the red LED light turns on continually, please change batteries of outdoor temperature sensor with 2 fresh AA batteries. 4 4 TROUBLESHOOTING NOTE: For problems not solved, please contact with Matador International Inc via [email protected]. Problem: No outdoor temperature is displayed. Solution: 1. Remove all batteries, reinsert into indoor temperature station first, at this time, the temperature hand will move back to –60F and the green LED light will turn on, then into outdoor temperature sensor. 2. Place indoor temperature station closer to the outdoor temperature sensor. 3. Make sure all the batteries are fresh. 4. place remote temperature sensor and indoor temperature station in position so the straight-line is not passing through more than two or three walls. Problem: Temperature do not mach if units are placed next to each other. Solution: Each temperature sensor is manufactured to be accurate to within 2 degree plus or minus and under normal conditions. It is possible for two temperature sensors to be as much as 4 degrees different. The difference can be exaggerated further because the temperature sensors are designed for different working environments. Error is usually greater at the extreme ends of a range, making it harder to compare different ranges with different curves. Under non-laboratory conditions, it is difficult to obtain an accurate comparison. MAINTENANCE AND CARE INSTRUCTIONS Extreme temperatures, vibration and shock should be avoid to prevent damage to the unit. Do not submerge the unit into water. Do not subject the units to unnecessary heat or cold by placing them in the oven or freezer. Opening the casing invalidates the warranty. Do not try to repair the unit. Contact with Matador International Inc. for repairs. 5 5 Specifications Transmitting Frequency 433.92MHz Measuring Range- Temperature –60F~120F Temperature Accuracy- +/- 4F Outdoor Temperature Checking Interval- one time in 10 minutes Batteries (Alkaline Recommended) Remote Temperature Sensor 2 AA batteries Indoor Temperature Station 4 AA batteries Batteries Life Approximately one year FCC NOTICE 1. This device complies with Part 15 of the FCC Rules. Operation is subject to the following two conditions: (1) This device may not cause harmful interference, and (2) This device must accept any interference received, including interference that may cause undesired operation. 2. Changes or modifications not expressly approved by the party responsible for…
Text truncated - open the document above for the full version.
Block Diagram
12345678 A B C D 87654321 D C B A Title NumberRevisionSize A3 Date:14-Jun-2005Sheet of File:C:\Documents and Settings\wang\\fcc\RADIO- S(Discripe).DDB Drawn By: Microcontroller Power SupplyLow BatteryTest Radio Modul Sensors
ID Label/Location Info
FCC ID: TJY0720 POWER: DC3.0V Made in China This device complies with part 15 of the FCC Rules. Operation is subject to the following two conditions: (1) this device may not cause harmful interference, and (2) this device must accept any interference received, Including interference that may cause undesired operation. FCC MARKING/LABEL FOR PART15 40mm 25mm
Operational Description
Operation Description: TX Operated Description: Typically, The P04483 unit is a simple transmitter. The Transmitter is operated in D.C.3.0 voltage. Periodically. The MCU controller gets the Temperature and humidity signaling from the T&H sensor. Then the signals are converted to D.C. signaling by MCU controller. The D.C. signals also are modulated by RF 433.92MHz frequency and send to LC filter to filter-out the unwanted signals. Finally, The signaling is transmitted from antenna. TX Logical Block RX Logical Block RX Operated Description: The receiver is operated in D.C.6.0 voltage. After the receiver gets the signaling from antenna, The signals will be filtered out the unwanted signals by LC filter. Then they will be de-modulated by localized RF 433.92MHz frequency and then they are fed into the MCU controlled for decoding as temperature and humidity information. Finally, The MCU will diver the clock finger to display the time, temperature and humidity information.
Schematics
1234 A B C D 4321 D C B A Title NumberRevisionSize A4 Date:14-Jun-2005Sheet of File:C: \Documents and Settings\wang \\fcc\RADIO-S-SCH.DDB Drawn By: R2 1M RH HC-1 C8 222 C1 15P C2 15P C3 104 C4 104 C5 104 Y 32768HZ VDD 3V R3 10K C6 104 WTH5021 R1 10K IOA3IOA2IOA1 NCNCNCNCNCNCNCNCNCNCNC NC NC NC S9 S8 S7 S6 S5 S4 S3 S2 S1 C4C3C2C1NCCUP2CUP1VDD3VDD2VDD1GNDXOUT XIN BAK TEST INT RESET IOC4 IOC3 IOC2 IOC1 IOB4 IOB3 IOB2 IOB1 IOA4 123456789 1011121314 15 16 17 18 19 20 21 22 23 24 25 26 2728293031323334353637 383940 41 42 43 44 45 46 47 48 49 50 51 52 RT 103AT-2 Vin 1 GND 2 Vout 3 IC2 HT7127 R4 104 Vdd Sout Sin GND FS9912 123456 A B C D 654321 D C B A Title NumberRevisionSize B Date:4-Aug-2005 Sheet of File:C:\PROGRAM FILES\DESIGN EXPLORER 99 SE\EXAMPLES\~11.DDBDrawn By: R1 472 R3 822 R4 2R2 R7 682 R6 822 R5 221 C1 102 C3 5PF C5 102 C6 102 C8 3P C4 10P C2 12P C7 3.3n C11 15P C10 15P C9 102 C12 102 433MHz R2 680 Q1 NPN L1 Q2 NPN L3 L2 4L C13 IN ANT +3V (10P) (8P)
Test Report
Page 1 of 27 FCC ID: TJY0720 ACCURATE TECHNOLOGY CO. LTD REPORT NO. ATE20051396 FCC CERTIFICATION On Behalf of Matador International Inc. Wireless Analog Outdoor Temperature/Humidity Transmitter Model No.: P04483 FCC ID: TJY0720 Prepared for : Matador International Inc. Address : 5F., No.225, Sec.5, Nan Jing E.Rd., Taipei, 104, Taiwan Prepared by : ACCURATE TECHNOLOGY CO. LTD Address : F1, Bldg. A, Changyuan New Material Port, Keyuan Rd. Science & Industry Park, Nanshan, Shenzhen, Guangdong P.R. China Tel: (0755) 26503290 Fax: (0755) 26503396 Report Number : ATE20051396 Date of Test : August 25, 2005 Date of Report : August 31 , 2005 Page 2 of 27 FCC ID: TJY0720 ACCURATE TECHNOLOGY CO. LTD REPORT NO. ATE20051396 TABLE OF CONTENTS Description Page Test Report Certification 1. GENERAL INFORMATION .......................................................................................................... 4 1.1. Description of Device (EUT)....................................................................................................................4 1.2. Description of Test Facility ......................................................................................................................4 1.3. Measurement Uncertainty.........................................................................................................................4 2. MEASURING DEVICE AND TEST EQUIPMENT ..................................................................... 5 3. THE FIELD STRENGTH OF RADIATION EMISSION ............................................................ 6 3.1. Block Diagram of Test Setup....................................................................................................................6 3.2. The Field Strength of Radiation Emission Measurement Limits..............................................................6 3.3. Configuration of EUT on Measurement ...................................................................................................7 3.4. Operating Condition of EUT ....................................................................................................................7 3.5. Test Procedure ..........................................................................................................................................7 3.6. The Field Strength of Radiation Emission Measurement Results ............................................................8 4. OCCUPIED BANDWIDTH ........................................................................................................... 10 4.1. Block Diagram of Test Setup..................................................................................................................10 4.2. The Bandwidth of Emission Limit According To Section 15.231(c) .....................................................10 4.3. EUT Configuration on Measurement .....................................................................................................11 4.4. Operating Condition of EUT ..................................................................................................................11 4.5. Test Procedure ........................................................................................................................................11 4.6. Measurement Result ...............................................................................................................................12 5. AVERAGE FACTOR MEASUREMENT .................................................................................... 13 5.1. Block Diagram of Test Setup..................................................................................................................13 5.2. Average factor Measurement ..................................................................................................................13 5.3. EUT Configuration on Measurement .....................................................................................................14 5.4. Operating Condition of EUT ..................................................................................................................14 5.5. Test Procedure ........................................................................................................................................14 5.6. Measurement Result ...............................................................................................................................15 APPENDIX I ( TEST CURVES) (11pages) Page 3 of 27 FCC ID: TJY0720 ACCURATE TECHNOLOGY CO. LTD REPORT NO. ATE20051396 Test Report Certification Applicant : Matador International Inc. Manufacturer : E-Kai Industrial Co., Ltd. EUT Description : Wireless Analog Outdoor Temperature / Humidity Transmitter (A) MODEL NO.: P04483 (B) SERIAL NO.: N/A (C) POWER SUPPLY: DC 3.0V(“AA” battery Type2) Measurement Procedure Used: FCC Rules and Regulations Part 15 Subpart C Section 15.231: 2004 & ANSI C63.4: 2003 The device described above is tested by ACCURATE TECHNOLOGY CO. LTD to determine the maximum emission levels emanating from the device. The maximum emission levels are compared to the FCC Part 15 Subpart C Section 15.231 limits. The measurement results are contained in this test report and ACCURATE TECHNOLOGY CO. LTD is assumed full responsibility for the accuracy and completeness of these measurements. Also, this report shows that the Equipment Under Test (EUT) is to be technically compliant with the FCC requirements. This report applies to above tested sample only. This report shall not be reproduced in part without written approval of ACCURATE TECHNOLOGY CO. LTD. Date of Test : August 25 2005 Prepared by : (Engineer) Reviewer : (Quality Manager) Approved & Authorized Signer : (Manager) Page 4 of 27 FCC ID: TJY0720 ACCURATE TECHNOLOGY CO. LTD REPORT NO. ATE20051396 1. GENERAL INFORMATION 1.1. Description of Device (EUT) EUT : Wireless Analog Outdoor Temperature / Humidity Transmitter Model Number : P04483 P…
Text truncated - open the document above for the full version.
Contact Information
Applicant
Max Pai(Assistant Merchandising Manager)
Test Firm
Accurate Technology Co., Ltd.Sean Liu
Technical Specifications
| # | Rule Parts | Frequency Range | Power Output |
|---|---|---|---|
| 1 | 15.231(e) | 433.92 MHz - 433.92 MHz | - |
Other Applications from Matador International Inc.
TJY43392M
Sep 27, 2006Wireless Temperature/ Humidity Transmitter
Equipment Class
DSC - Part 15 Security/Remote Control Transmitter