XPB-NDENDA Series Wireless Lock
Schlage Lock Company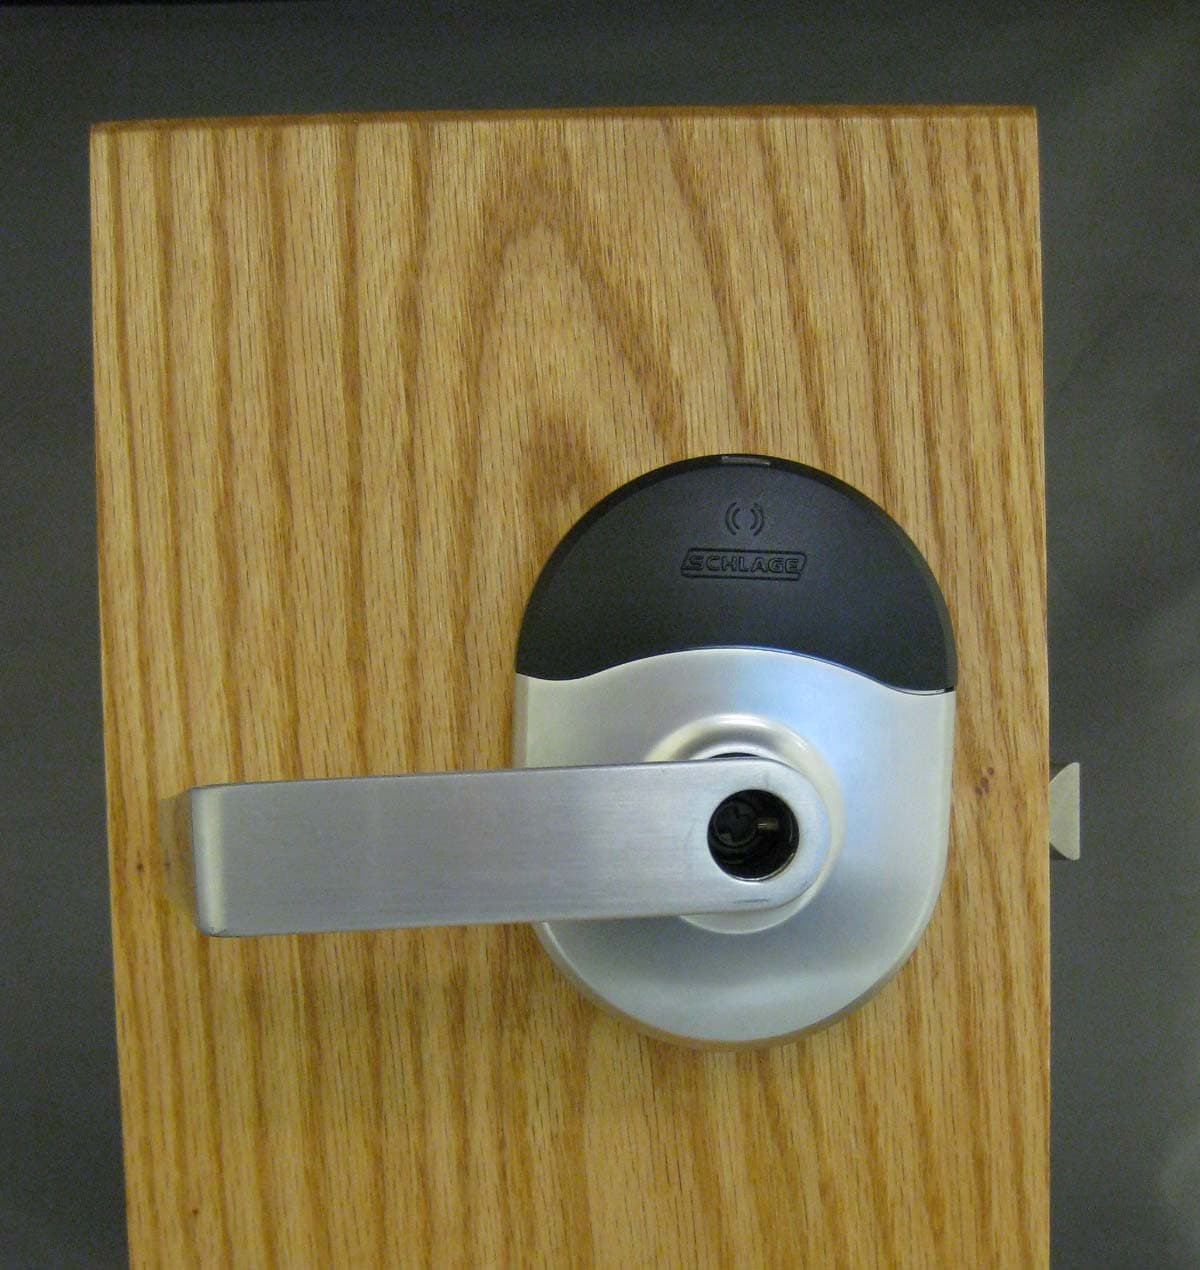
Click to zoom
Application Details
- Equipment Class
- DXX - Part 15 Low Power Communication Device Transmitter
- Date of Grant
- Nov 04, 2014
- Application Purpose
- Original Equipment
- Date of Application
- Oct 28, 2014
- Equipment Note
- NDA Series Wireless Lock
- Frequency Range
- 13.56000000 - 13.56000000
- Company
- Schlage Lock Company
- Country
- United States
Documents & Files
Document Text
Text extracted from the exhibit documents filed with the FCC. Open a document above to read the original.
Users Manual
*P516-958* P516-958 Installation Preparation Tools Needed • Phillips screwdriver • Pin wrench • Pencil Optional • T-15 Tamper Torx screwdriver Door preparation: For door preparation instructions, see included instructions or contact Technical Service at 1-877-671-7011. IMPORTANT NOTES Magnet tray and included strike MUST be installed! The magnet is used to indicate door position. Door position MUST be calibrated using the application. Install and test lock with door open to avoid being locked out. MOBILE APPLICATION Search for “Schlage Engage” in the Apple App Store or Google Play Store to download. Navigate to the website to set up your online account. A Install latch. The bevel must face toward the door stop. Actual Size NDE Wireless Lock Model NDE80Installation Instructions and User Guide Cylinder Options Full Size IC (FSIC) Small Format (SFIC) Standard Cylinder Pin wrench Latch Cylinder Backplate Spring Cage Inside Lever Battery Cover Battery Cover Screw Battery Strap Escutcheon Screws Inside Assembly Outside Lever Outside Assembly Key Ribbon Cable Strike Battery Holder Chassis Mounting Screws ANSI StrikeT-Strike Strike Options B Install strike and magnet tray assembly. Note: If dustbox is included, install first. CAUTION Magnet tray and included strike must be installed! DO NOT DISCARD! ANSI Strike OR T-Strike See instructions below for magnet installation. Actual Size Actual Size 2” (50mm) Drill a hole C\v” (19 mm) diameter, 1Z\x” (38 mm) deep Door Thickness Adjustment For 1B\,” or 2” thick doors, complete the following door thickness adjustment steps. LFor 1C\v” thick doors, NO ADJUSTMENT IS REQUIRED. Continue to step 3. A Remove chassis from outside assembly. Pull lever post and rotate 10 degrees counter-clockwise until adjustment plate tabs align with cutouts on assembly, then remove chassis from escutcheon. B Remove adjustment plate and door thickness insert. C Reorient and replace door thickness insert. Door ThicknessDoor Thickness Insert 1B\,” 2” Door thickness insert channel Chassis Side View D Reinstall adjustment plate. Tighten until door thickness insert enters notch in adjustment plate. E Secure chassis in outside assembly. Continue to next step. Install Outside Assembly 1 Prepare outside assembly. 1a Check that slide hole on chassis is aligned with lever catch pin. If not aligned, remove chassis and reassemble with correct orientation as shown below. LH OR RH To remove chassis, pull lever post and rotate 10 degrees counter- clockwise as shown below until adjustment plate tabs align with cutouts on assembly. 1b To change handing, pull lever post until it stops, then rotate 180 degrees. Align lever catch pin and slide hole to latch side. Release lever post. Assembly will click into place. CAUTION Do not route ribbon cable before rotating chassis! Lever Catch Pin Do not route ribbon cable! 1c Connect chassis cable. Route cables. The cable should be routed on top of the chassis! Connect cable from outside assembly to connector in chassis. Push and tuck cable. Plastic Channel Route cable. LH OR RH Push and tuck cable. Metal Channel Route cable. Tuck connected chassis cable into appropriate channel. 2 Align assembly and install on door. Let the wire hang on the other side, through the hole. WARNING Do not pinch ribbon cable! WARNING Ensure that the lever catch pin is aligned with latch side before continuing! Latch tail fits inside slide. Install Inside Assembly. 3 Install backplate first, then route ribbon cable. CAUTION Do not pinch ribbon cable! Route cable through indicated space. 4 Install spring cage. Align lever catch pin to door edge. Lever Catch Pin Actual Size 5 Install inside escutcheon. 5a Connect the cable from the outside escutcheon to the port on the inside escutcheon. 5b Place inside escutcheon on backplate, and slide down to hook onto backplate. Secure with screws. Actual Size Install Batteries 6 Install batteries into battery holder. 6a Push the tab on the right of the battery securing band, and pull out to release battery holder. 6b Connect cable from battery holder to connector on circuit board. 6c Snap the battery securing strap into place, then slide the strap down until snug. 7 Install battery cover screw. Choose either standard Phillips screw or Torx screw. OR Screw into center of hole. 8 Install battery cover. Install battery cover in place, then push up to secure the cover. Tighten bottom cover screw. CAUTION Removing the battery cover will cause lock Tamper Mode, which halts BLE and Wi-Fi communications! Lever Removal To remove a lever with a cylinder, insert key first, and turn it 90 degrees toward door edge. Press pin wrench into hole in lever, and pull off. To remove a lever without a cylinder, press pin wrench into hole in lever, and pull off. Cylinder and Lever Installation Lever With Standard Cylinder Rotate cam in lever post until the cam stops. Insert cylinder into lever, then insert key. Rotate the key as shown. 90 ̊ LH 90 ̊ RH 90 ̊ LH 90 ̊ RH Install lever. Lever With Interchangeable Core Cylinder Install cylinder tailpiece. Rotate cam in lever post until the cam stops. Insert key into cylinder and insert into lever. Rotate the key clockwise 15 degrees. Install lever. Non-keyed Lever Press lever onto lever post. Continue to User Guide to capture lock with your mobile device. CAUTION Door position MUST be calibrated using the mobile application! NEED HELP? See Troubleshooting on pages 8 - 9. Lock Testing Correct lock installation is indicated by three green LED flashes and beeps at the end of power on boot up. Power On Self Test The Power On Self Test (POST) is a self-diagnostic that the lock runs to verify that the lock is installed correctly. If the red LED lights on power up, use the mobile app to see the exact cause of failure. Capture Lock With Application Make sure the app is downloaded and ready. The lock must be fully assembled, including having the batteries installed. Battery cover must be installed! 1. Download the mobile applica…
Text truncated - open the document above for the full version.
External Photos
EXTERNAL PHOTOS Model # NDE FCC ID # XPB‐NDE IC # 8053B‐NDE Page 1 of 3 EXTERNAL PHOTOS Model # NDE FCC ID # XPB‐NDE IC # 8053B‐NDE Page 2 of 3 EXTERNAL PHOTOS Model # NDE FCC ID # XPB‐NDE IC # 8053B‐NDE Page 3 of 3
ID Label/Location Info
Title Number Revision Created By Creation Date EC Number Revision Description: Schlage Lock Company Copyright © 2014 Material Edited ByApproved ByRelease Date Revision History A BCDEF Notes Software: Illustrator CS6 Activity 3899 Hancock Expwy Security, CO 80911 --EC #EC #EC #EC #EC # See 23539778 A> New Item 051388 9/15/2014 B Robinson D Salvetti Label, SF Inside B Robinson 07-22-14 P516-964 A 1. Tolerance: ±0.03 2. Style: Thermal Transfer 3. To be printed on blank thermal transfer label part number 23539778 4. Graphics shown represent the minimum requirement. Additional information may be added provided legibilty is maintained. = Die Line Variable Content... • S/N Bar Code and Readable S/N to be determined by Manufacturing • >>Date Code<< to be detrmined by Manufacturing • >>Rev #<< to be determined by Manufacturing • >>Model<< to be determined by Manufacturing 1.5” 1.0” 1.0” Label to be set up to print onto 2 labels consecutively using label stock PN 23539778. S/N Bar Code (3of9 .8pt) Readable S/N >>Date Code<< SCHLAGE Firmware Ver.: >> Rev # << >> Model << Schlage Lock Company Model #: NDE This device complies with Part 15 of the FCC Rules. Operation is subject to the following two conditions: 1) this device may not cause harmful interference, and 2) this device must accept any interference received, including interference that may cause undesired operation. FCC ID: XPB-NDE IC: 8053B-NDE Contains FCC ID: QOQBLE112 & T9J-RN171 Contains IC ID: 5123A-BGTBLE112 & 6514A-RN171
Internal Photos
INTERNAL PHOTOS Model # NDE FCC ID # XPB‐NDE IC # 8053B‐NDE Page 1 of 9 INTERNAL PHOTOS Model # NDE FCC ID # XPB‐NDE IC # 8053B‐NDE Page 2 of 9 Picture of potted board as it will be used in lock Picture of unspotted board INTERNAL PHOTOS Model # NDE FCC ID # XPB‐NDE IC # 8053B‐NDE Page 3 of 9 Picture of potted board as it will be used in lock Picture of unpotted board INTERNAL PHOTOS Model # NDE FCC ID # XPB‐NDE IC # 8053B‐NDE Page 4 of 9 Close up of Wi‐Fi g/b and Bluetooth Low Energy pre‐certified modules INTERNAL PHOTOS Model # NDE FCC ID # XPB‐NDE IC # 8053B‐NDE Page 5 of 9 INTERNAL PHOTOS Model # NDE FCC ID # XPB‐NDE IC # 8053B‐NDE Page 6 of 9 Picture of potted board as it will be used in lock INTERNAL PHOTOS Model # NDE FCC ID # XPB‐NDE IC # 8053B‐NDE Page 7 of 9 Picture of potted board from side as it will be used in lock Picture of unpotted board INTERNAL PHOTOS Model # NDE FCC ID # XPB‐NDE IC # 8053B‐NDE Page 8 of 9 Picture of unpotted board INTERNAL PHOTOS Model # NDE FCC ID # XPB‐NDE IC # 8053B‐NDE Page 9 of 9 ANT1 – 125kHz ANT2 – Cap Sense ANT3 – 13.5MHz
RF Exposure Info
LS Research, LLC website: www.lsr.com W66 N220 Commerce Court Phone: 262-375-4400 Cedarburg, WI 53012 Exemption from Routine Evaluation Exhibit Allegion FCC ID: XPB-NDE IC: 8053B-NDE LS Research, LLC website: www.lsr.com W66 N220 Commerce Court Phone: 262-375-4400 Cedarburg, WI 53012 Output Power Evaluation. Evaluation Frequency = 125 kHz, 13.56 MHz, and 2.462 GHz 2.480 GHz Device Operation separation distance: >20cm Radiated Field Strength @ 125 kHz = 60.9 dBμV/m @ 3m Maximum Effective Isotropic Radiated Power (mW) = Radiated field strength (dBμV/m @ 3m -95.2) * log -1 (EIRP(dBm)/10) = 0.000369 mW Radiated Field Strength @ 13.56 MHz = 54.1 dBμV/m @ 3m Maximum Effective Isotropic Radiated Power (mW) = Radiated field strength (dBμV/m @ 3m -95.2) * log -1 (EIRP(dBm)/10) = 0.000077 mW 15.209 Transmitter at 125 kHz: *Note: Since there are no limits expressed for < 300 kHz, the limit at 125 kHz was extrapolated based on Table 1 from Appendix A of OET 65. LS Research, LLC website: www.lsr.com W66 N220 Commerce Court Phone: 262-375-4400 Cedarburg, WI 53012 15.225 Transmitter at 13.56 MHz: FCC ID: QOQBLE112 IC: 5123A-BGTBLE112 2.4 GHz Transmitter Power Density at 20 cm: 0.0006133808 mW/cm 2 FCC ID: T9J-RN171 IC: 6514A-RN171 2.4 GHz Transmitter Power Density at 20 cm: 0.0221681854 mW/cm 2 Sum of MPE ratios for all simultaneous transmitting antennas: 7.34ሺ10ሻ ି଼ ܹ݉ ݉ܿ ଶ 100 ܹ݉ ݉ܿ ଶ 1.53ሺ10ሻ ି଼ ܹ݉ ݉ܿ ଶ 9.79ሺ10ሻ ିଵ ܹ݉ ݉ܿ ଶ 6.13ሺ10ሻ ିସ ܹ݉ ݉ܿ ଶ 1.00 ܹ݉ ݉ܿ ଶ 2.22ሺ10ሻ ିଶ ܹ݉ ݉ܿ ଶ 1.00 ܹ݉ ݉ܿ ଶ = 2.28(10) -2 1.0 LS Research, LLC website: www.lsr.com W66 N220 Commerce Court Phone: 262-375-4400 Cedarburg, WI 53012 The following method is recommended to demonstrate compliance with the requirements of RSS-102: 1) At 20 cm, the measurements will be in the near field for the 125 kHz Tx. Therefore, E and H field measurements will need to be performed. The SC6 limits for uncontrolled environments at 125 kHz are set at 280 V/m and 2.19 A/m for E-field (RMS) and H-field (RMS), respectively. The SC6 limits for uncontrolled environments at 13.56 MHz are set at 28 V/m and 161.5(10 -3 ) A/m for E-Field (RMS) and H-Field (RMS), respectively. See SC6 limits in RSS-102 (http://www.ic.gc.ca/eic/site/smt-gst.nsf/eng/sf01904.html). The measurements would be based on IEEE C95.3 standard. 2) For the 2.4 GHz, the power density value would be determined for 20 cm. SC6 limit for uncontrolled environments at 2.4 GHz is set at 10 W/m2. 3) Once the E and H field values are obtained for the 127 kHz Tx and the power density value is obtained for the 2.4 GHz Tx, the following formulas are to be applied since the two TX are transmitting simultaneously. (E-field value for 125 kHz/SC6 E-field limit) 2 + (E-field value for 13.56 MHz/SC6 E-field limit) 2 + (PD value for 2.4 GHz/SC6 PD limit) + (PD value for 2.4 GHz/SC6 PD limit) = or < 1 (H-field value for 127 kHz/SC6 H-field limit) 2 + (H-field value for 127 kHz/SC6 H-field limit) 2 + (PD value for 2.4 GHz/SC6 PD limit) + (PD value for 2.4 GHz/SC6 PD limit) = or < 1 If both values are less than unity, they are in compliance with RSS-102. Response: The 125 kHz and 13.56 MHz transmitters operating under RSS-GEN Section 7.2.5 limits with maximum field strength of 60.9 dBμV/m at 3 meters and 54.1 dBμV/m at 3 meters, respectively, as measured over a ground plane could be considered worst case conditions and near field conditions. For ease of calculation the duty cycles was assumed to be 100% for both transmitters. Given these considerations this is an extreme over-estimation of the actual RF Exposure. The field strengths at 3 meters were extrapolated to 20 cm using the following equation for frequencies below 30 MHz. This value was then added to the 3 meter field strength to yield the field strength at a 20 cm separation. The field strength was then converted from dBμV/m to V/m. 40∗log ൬ ݉ 3 0.2 ݉ ൰ ൌ47.04 LS Research, LLC website: www.lsr.com W66 N220 Commerce Court Phone: 262-375-4400 Cedarburg, WI 53012 125 kHz Transmitter: E-Field Strength (dBμV/m) at 20 cm: 60.9 ܤ݀μܸ/݉47.04ൌ107.94 ܤ݀μ݉/ܸ Conversion from dBμV/m to V/m: 10 ଵ.ଽସ ଶ ൈ1ሺ10ሻ ି ൌ0.25 ܸ/݉ 13.56 MHz Transmitter: E-Field Strength (dBμV/m) at 20 cm: 54.1 ܤ݀μܸ/݉47.04ൌ101.14 ܤ݀μ݉/ܸ Conversion from dBμV/m to V/m: 10 ଵଵ.ଵସ ଶ ൈ1ሺ10ሻ ି ൌ0.11 ܸ/݉ Condition E-Field (V/m) H-Field (A/m) Conversion of field strength of 125 kHz transmitter 0.25 6.65(10) -4 SC6 Limit 280 2.19 (Value / Limit) 2 7.97(10) -7 9.22(10) -8 Condition E-Field (V/m) H-Field (A/m) Conversion of field strength of 13.56 MHz transmitter 0.11 2.93(10) -4 SC6 Limit 20.65 1.62(10) -1 (Value / Limit) 2 2.84(10) -5 3.27(10) -6 Transmitter Power Density (mW/cm 2 ) Limit (mW/cm 2 ) Bluetooth 6.13(10) -4 1 WLAN 2.22(10) -2 1 LS Research, LLC website: www.lsr.com W66 N220 Commerce Court Phone: 262-375-4400 Cedarburg, WI 53012 Sum of E-Field: 7.97ሺ10ሻ ି 2.84ሺ10ሻ ିହ 6.13ሺ10ሻ ିସ 2.22ሺ10ሻ ିଶ ൌ 2.28ሺ10ሻ ିଶ ൏1 Sum of H-Field: 9.22ሺ10ሻ ି଼ 3.27ሺ10ሻ ି 6.13ሺ10ሻ ିସ 2.22ሺ10ሻ ିଶ ൌ2.28ሺ10ሻ ିଶ ൏1
Test Report
W66 N220 Commerce Court ● Cedarburg, WI 53012 ● USA Phone: 262.375.4400 ● Fax: 262.375.4248 www.lsr.com ENGINEERING TEST REPORT # 314228 LSR Job #: C-2007 Compliance Testing of: NDE Test Date(s): 8/14/2014 8/19/2014 8/15/2014 8/27/2014 8/18/2014 Prepared For: Allegion Attn: Ryan Kincaid 11819 North Pennsylvania Street Carmel, IN 46032 This Test Report is issued under the Authority of: Michael Hintzke, EMC Engineer Signature: Date: 9/12/2014 Test Report Reviewed by: Khairul Aidi Zainal, Senior EMC Engineer Signature: Date: 9/12/2014 Tested by: Michael Hintzke, EMC Engineer Signature: Date: 9/12/2014 This Test Report may not be reproduced, except in full, without written approval of LS Research, LLC. Prepared For: Allegion Model #: NDE Series LS Research, LLC EUT: NDE Serial Number: Engineering Sample Template: 15.209 Report #:314228 13.56 MHz Report Page 2 of 36 Table of Contents EXHIBIT 1. INTRODUCTION ...................................................................................................... 4 1.1 SCOPE ................................................................................................................................ 4 1.2 NORMATIVE REFERENCES .......................................................................................... 5 1.3 LS RESEARCH, LLC TEST FACILITY .......................................................................... 6 1.4 LOCATION OF TESTING ................................................................................................ 6 1.5 TEST EQUIPMENT UTILIZED ....................................................................................... 6 EXHIBIT 2. PERFORMANCE ASSESSMENT ............................................................................ 7 2.1 CLIENT INFORMATION ................................................................................................. 7 2.2 EQUIPMENT UNDER TEST (EUT) INFORMATION ................................................... 7 2.3 ASSOCIATED ANTENNA DESCRIPTION .................................................................... 7 2.4 EUT’S TECHNICAL SPECIFICATIONS ........................................................................ 8 2.5 PRODUCT DESCRIPTION ............................................................................................... 9 EXHIBIT 3. EUT OPERATING CONDITIONS & CONFIGURATION. .................................. 10 3.1 CLIMATE TEST CONDITIONS .................................................................................... 10 3.2 APPLICABILITY & SUMMARY OF EMC EMISSION TEST RESULTS .................. 10 3.3 MODIFICATIONS INCORPORATED IN THE EUT FOR COMPLIANCE PURPOSES 10 3.4 DEVIATIONS & EXCLUSIONS FROM TEST SPECIFICATIONS ............................ 10 EXHIBIT 4. DECLARATION OF CONFORMITY .................................................................... 11 EXHIBIT 5. RADIATED EMISSIONS TEST FOR TRANSMIT AND RECEIVE ................... 12 5.1 TEST SETUP ................................................................................................................... 12 5.2 TEST PROCEDURE ........................................................................................................ 12 5.3 TEST EQUIPMENT UTILIZED ..................................................................................... 13 5.4 TEST RESULTS .............................................................................................................. 13 5.5 CALCULATION OF RADIATED EMISSIONS LIMITS .............................................. 14 5.6 RADIATED EMISSIONS DATA CHART ..................................................................... 15 5.7 TEST SETUP PHOTO(S) – RADIATED EMISSIONS TEST ....................................... 16 EXHIBIT 6. FREQUENCY TOLERANCE ................................................................................. 20 6.1 LIMITS ............................................................................................................................. 20 6.2 METHOD OF MEASUREMENTS ................................................................................. 20 6.3 TEST DATA ...................................................................................................................... 20 Prepared For: Allegion Model #: NDE Series LS Research, LLC EUT: NDE Serial Number: Engineering Sample Template: 15.209 Report #:314228 13.56 MHz Report Page 3 of 36 EXHIBIT 7. OCCUPIED BANDWIDTH .................................................................................... 21 7.1 LIMITS ............................................................................................................................. 21 7.2 METHOD OF MEASUREMENTS ................................................................................. 21 7.3 TEST DATA ...................................................................................................................... 21 7.4 SCREEN CAPTURES - 99% BANDWIDTH ................................................................ 21 EXHIBIT 8. CO-LOCATED EMISSIONS .................................................................................. 22 8.1 TEST SETUP ................................................................................................................... 22 8.2 TEST PROCEDURE ........................................................................................................ 22 8.3 TEST EQUIPMENT UTILIZED ..................................................................................... 23 8.4 CO-LOCATION RADIATED EMISSIONS ........................................................................... 23 8.4.1 TRANSMIT MODE ............................................................................................................. 23 8.4.2 RECEIVE MODE ................................................................................................................ 30 APPENDIX A. INSTRUMENT LIST ..........................................................................…
Text truncated - open the document above for the full version.
Test Setup Photos
TEST SETUP PHOTOS Model # NDE FCC ID # XPB‐NDE IC # 8053B‐NDE Page 1 of 4 TEST SETUP PHOTOS Model # NDE FCC ID # XPB‐NDE IC # 8053B‐NDE Page 2 of 4 TEST SETUP PHOTOS Model # NDE FCC ID # XPB‐NDE IC # 8053B‐NDE Page 3 of 4 TEST SETUP PHOTOS Model # NDE FCC ID # XPB‐NDE IC # 8053B‐NDE Page 4 of 4
Contact Information
Applicant
Frank Nardelli(Lead Hardware Engineer)
Technical Contact
AllegionFrank Nardelli
[email protected]3178103193
11819 N. Pennslyvania Street · Carmel · United States
Test Firm
LS Research, LLCRyan Urness
Technical Specifications
| # | Rule Parts | Frequency Range | Power Output |
|---|---|---|---|
| 1 | 15C | 13.56 MHz - 13.56 MHz | - |
Other Applications from Schlage Lock Company
XPB-47446672
Jan 17, 2024TAG Reader Module
Equipment Class
DCD - Part 15 Low Power Transmitter Below 1705 kHzXPB-47334317
Jan 17, 2024DTS Module
Equipment Class
DTS - Digital Transmission SystemXPB-47334321
Jan 17, 2024DTS Module
Equipment Class
DTS - Digital Transmission SystemXPB-47446668
Jan 17, 2024NFC Reader Module
Equipment Class
DXX - Part 15 Low Power Communication Device Transmitter
XPB-JACKALOPE
Jul 22, 2021Electronic Deadbolt
Equipment Class
DTS - Digital Transmission System