Y4GCU780-2Two Way Radio
SHENZHEN COVALUE COMMUNICATIONS CO., LTD.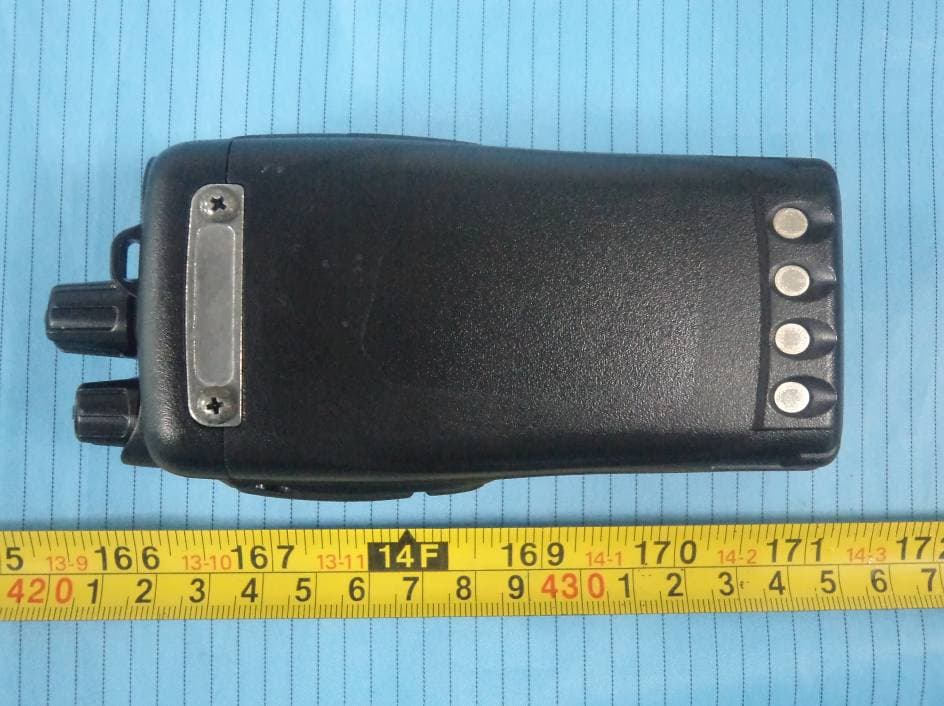
Click to zoom
Application Details
- Equipment Class
- TNF - Licensed Non-Broadcast Transmitter Held to Face
- Date of Grant
- Jun 15, 2012
- Application Purpose
- Original Equipment
- Date of Application
- Jun 15, 2012
- Equipment Note
- Two Way Radio
- Frequency Range
- 406.10000000 - 470.00000000
- Country
- China
Documents & Files
Document Text
Text extracted from the exhibit documents filed with the FCC. Open a document above to read the original.
Users Manual
Instruction Manual CU780-2 FM Portable Radio Thank you for purchasing a COVALUE two-way radio. This simple to use radio adopts the latest advances in technology, providing reliable communication in today’s demanding communication environment. Notice to the User: · Please read this instruction manual before operating this radio. · It’s prohibited to use the radio or charge it at any area with a potentially explosive atmosphere (where the air contains gas, dust and smog, etc.), as well as while taking on fuel, or while parking at a gasoline service station; or any area where radio communication is prohibited (such as a hospital or a airport.) · It’s prohibited to operate the radio without permission in areas where the government laws prohibit radio communication. · Please don't expose the radio to direct sunlight for a long time; don't place the radio near any heating devices, either. · Please don't put the radio in extremely dusty, moist humid areas or unstable surfaces. · Only qualified personal, with proper tools and instruments are allowed to service and repair the radios, do not disassemble the radio by yourself to avoid damages. FCC & IC Warning: Operation is subject to the following two conditions: (1) this device may not cause interference, and (2) this device must accept any interference,including interference that may cause undesired operation of the device. Any Changes or modifications not expressly approved by the party responsible for compliance could void the user’s authority to operate the equipment. FCC Radiation Exposure Statement: This equipment complies with FCC radiation exposure limits set forth for an uncontrolled environment. This transmitter must not be co-located or operating in conjunction with any other antenna or transmitter. Under Industry Canada regulations, this radio transmitter may only operate using an antenna of a type and maximum (or lesser) gain approved for the transmitter by Industry Canada. To reduce potential radio interference to other users, the antenna type and its gain should be so chosen that , the equivalent isotropically radiated power (e.i.r.p.) is not more than that necessary for successful communication. CONTENTS ■ Unpacking and Checking the Equipment ------------------------------------ Supplied Accessories---------------------------------------------------- ■ Preparation ----------------------------------------------------------- Charging the Battery Installing/Removing the Battery Pack Installing the Antenna Installing the Optional Speaker/Microphone Installing/Removing the Belt Clip ■ Radio Overview ■ Basic Operations ■ Programmable Button Function ■ VOX (Voice Operated Transmission) ■ Radio Setting TOT (Time-out Timer) Battery Save Low Power Warning CTCSS/DCS ■ User Template RX Squelch Mode DTMF 5-Tone Signaling 2-Tone Signaling MDC Signaling ■ Troubleshooting ■ Major Specifications ■ Settings ■ Unpacking and Checking the Equipment Unpack the radio carefully. We recommend that you identify the items listed in the following table before discarding the packing material. If any items are missing or have been damaged during shipment, please contact the carrier or the dealer immediately. Supplied Accessories Item Quantity Antenna 1 Battery 1 Hand Strap 1 Charger 1 Power Adapter 1 Belt Clip 1 Instruction Manual 1 1、Open Package Inspection First, take the radio out of the package box carefully. We recommend checking the radio and the supplied accessories in the following table carefully. If any article is missing or damaged, please contact your reseller without delay. Package List Accessories Quantity 1 Radio 1 2 Antenna 1 3 Battery 1 4 Hand Strap 1 5 Charger 1 6 Power Adapter 1 7 Belt Clip 1 8 Instruction Manual 1 2、Getting started 2.1 Charging the Battery Plug the power adapter into the proper AC wall outlet; and insert the DC plug in the charger coup. The Red LED flashes after it enters normal work. (Red LED lights per 4.5 seconds) Insert the battery or the radio to be charged into the charger slot. Please turn off the radio before insert it into the charger. Make sure the battery is in good contact with the charger terminals. When the red indicator is lighted, the charger begins to charge the battery. After charging for about 3 hours, the red LED will turn OFF and the green LED will light indicating the battery has been fully charged. On the first charge, please leave the battery in that state of green indicator for 1~2 hours before you remove it from the charger to achieve the best performance of the battery. Then you can disconnect the power adapter from the AC outlet. If the Red LED flashes quickly (0.2s on 0.2s off), this means the charging process stopped, This could be because the charging temperature is too high or the battery has a problem, the charger enters a protective state and no more charge is delivered to the battery. Please stop charging in such situation and remove the battery from the charger. Notice: * The new battery is not fully charged in the factory, and needs to be fully charged when you use the radio for the first time. * The radio is supplied with a standard battery manufactured by the factory. * When you charge the battery for the first time after purchasing or after a long time storage (over 2 months), you should repeat charging it several times to achieve the normal battery capacity. * Do not recharge the battery after it has been fully charged or it is partially discharged, otherwise it might affect the battery life or performance. Remove the battery from the charger after charging is finished. * If the radio enters low Battery warning state, please recharge the battery. Do not use the radio in low power state, which will affect the battery life and performance. Installing/Removing the Battery Pack Installing/Removing the Battery Pack To install the battery, please place it into the groove on the top of the radio chassis about 5mm away from latch. If the radio has the belt clip installed, you will have to pr…
Text truncated - open the document above for the full version.
External Photos
EXHIBIT B - EUT EXTERNAL PHOTOGRAPHS EUT – Front View EUT – Rear View EUT – Top View EUT – Bottom View EUT – Left Side View EUT – Right Side View EUT – AntennaView
ID Label/Location Info
EXHIBIT A - FCC ID LABELING AND LOCATION FCC ID Label FCC ID Label Location The label shown shall be permanently affixed at a conspicuous location on the device and be readily visible to the user at the time purchase (Labeling requirements per 2.925) Lable here
Internal Photos
EXHIBIT C - EUT INTERNAL PHOTOGRAPHS EUT – Battery off View EUT – Cover off View 1 EUT – Cover off View 2 EUT – Main Board Top View EUT – Main Board Bottom View EUT – Keypad Board Top View EUT –Keypad Board Bottom View EUT – Battery Label View
Operational Description
1 Circuit Description 1 Frequency configuration The reference frequency of frequency synthesizer is provided by 12.8MHz crystal oscillator X1 TCXO. The receiver adopts quadric mixing mode. The first IF is 51.65MHz, and the second IF is 450kHz. The first local oscillation signal of the receiver is produced by frequency synthesizer and the second local oscillation signal selects the 4 rd harmonics of 12.8MHz of crystal oscillator X1 TCXO. The signal of transmitter is produced by frequency synthesizer directly. Figure 1 Frequency configuration 2 Receiver(Rx) The receiver is double conversion superheterodyne,designed to operate in the frequency range of 400 to 470MHz,The frequency configuration in Fig 1.1 Figure 2 Receiver section configuration Front End of Receiver Signals from the antenna are filtered by BPF which consists of C235 C236 C233 C604 C252 C951 C234 2 C255 C260 L211 L209 L208 D201 D202 and D204 via RX/TX switch (D101 D102 and D103). After being filtered out the useless out-of-band signals, the signals are amplified by LNA consisting of Q203 and external components. Signals from LNA are filtered again by BPF which consists of C228 C226 C238 C229 C227 C239 C947 C259 C948 L214 L204 L203 D905 D203 and D206 before entering the 1st mixer (Q202). The PWM wave is output by MCU composed of 58 foot and then commutated to adjustable voltage after filtering to change the capacity of varactor diode D905 D203 D206 D201 D202 and D204 to control the center frequency of BPF. 1 st mixer The first IF (51.65MHz) signal is produced after mixing of the receiving signal from LNA and the 1 st local oscillation signal from frequency synthesizer. The first IF signal is filtered out adjacent channel and other useless signals by crystal filter (XF201). IF Circuit The 1 st IF signal from crystal filter is amplified by the first IF amplifier (Q201) before processing of IC in IF( IC200,NJM2591V). IF IC consists of the 2 nd mixer, 2 nd local oscillation, IF amplifier, limiter, frequency discriminator and noise amplifier. Frequency (12.8MHz) produced by TCXO(X1) is amplified and then selects 4 rd harmonics (51.2MHZ) as the second local oscillator signal source. The second IF signals (450kHz) are generated after signals mixing of the second local oscillation (51.2MHz) and the first IF (51.65MHz) in IC200. Audio signals are demodulated and outputted by IC200 after the second IF signals are amplified and limited in IC200 and then filtered by ceramic filter(450kHz). 3 Figure 3 Schematic Diagram for IF System Receiving Audio Signal Processing: The audio processing circuit of receiver consists of IC300 and IC806. Voice signals from IC300 are sent to IC301(CTCSS signaling filter circuit)and IC806.IC806 includes audio filter and de-emphasis. Figure 4 Schematic Diagram for Audio Processing of Receiver Squelch Circuit Part of the AF signal from the IC200 enters the FM IC again,and the noise component is amplified and rectified by a filter and an amplifier to produce a DC voltage corresponding to the noise level. The DC signal from the FM IC goes to the analog port of the microprocessor(IC403).IC403 determines whether to output sounds from the speaker by checking whether the input voltage is higher or lower than the preset value. To output sounds from the speaker,IC403 sends a high signal to the MUTE and AFCO lines and turns 4 IC302 on through Q302 Q304 and Q305. Audio Power Amplification The audio power amplifying circuit consists of IC302 and the peripheral components. The signals are amplified by audio power amplifier to drive the speaker after collecting the receiving audio signals, voice signals and warning tone signals. The warning tone has no volume limitation. When AFCO is high level, Q304 is on, IC302 begins to work and the speaker sounds. Speaker Impedance: 16ohm CTCSS Signal filtering The audio signals after demodulation in IC200 may contain CTCSS (continuous tone control squelch system) or DCS(digital squelch)signals. The spectrum component of CTCSS/DCS is 67 to 250Hz. The filtering circuit composed of IC301 can filter out signals except CTCSS/DCS spectrum, which makes MCU decode the CTCSS/DCS more accurately. 3 Transmitter (Tx) Transmitter Power Amplifier Figure 5 Schematic Diagram for Power Amplifier and Antenna Switch The modulated RF signals from VCO are amplified by Q101, Q102 and Q105 before the power amplification in Q107. Gate bias of Q105 and Q107 is controlled by APC circuit, so the output power of transmitter can be controlled conveniently by changing the gate bias voltage. APC(Automatic Power Control) 5 Figure 6 Schematic Diagram for APC Circuit R130 R131 and R132 are power amplification current detector, IC100A is power amplification current sampling amplifier and IC00B is power comparison amplifier. The power amplification current and IC100A output will increase with oversized output power of transmitter. When the output voltage of IC100B decreases, the bias voltage of Q105 and Q107 will decrease, finally the output power of transmitter will decrease or vice versa. Thus, the output power of transmitter will keep stable under any different working condition. MCU can set the power by changing the voltage input to IC100B. Audio Signal Processing of Transmitter Figure 7 Schematic Diagram for Audit Circuit of Receiver The audio signal processing circuit of Transmitter consists of IC500 and IC806. Voice signals from MIC are sent to VCO for modulation together with CTCSS/DCS after amplification, limitation and filtering. IC806 includes amplifier,filter,limiter and pre-emphasis. 6 AGC circuit consists of D800, D801 and Q801,Q802. The signal amplitude is reduced to ensure no distortion in case of oversized MIC signal. Q504, the power switch of voice processing circuit, controlled by MCU, will give power supply to IC500 only during transmission. J501 is the socket for external MIC, and the internal MIC will disconnect automatically when using external MIC, but the internal PTT is still effective. 4 PLL Fre…
Text truncated - open the document above for the full version.
Parts List/Tune Up Info
1 ADJUSTMENT 1 Required Test Equipment Table 1 Number Name Parameter requirements 1 Computer Above P2, compatible IBM PC, WINDOWS 98/ME/2000/XPOperating System 2 Programming software CCP780 3 Programming cable 4 Dubbing cable CPL-01 5 DC regulator Output voltage:7.4V, output electric current:≥ 5A 6 RF power meter Test range: 0.5---10W Frequency range: 100MHz—500MHz Resistance: 50Ω SWR≤1.2 7 Frequency meter Frequency range: 0.1—600MHz Frequency accuracy: higher than±1×10 -6 Sensitivity: higher than 100mV 8 Frequency deviator Frequency range: DC—600MHz Test range: 0--±5kHz 9 DMM Input resistance: above 10MΩ/V DC, capable of measuring voltage, electric current and resistance. 10 Audio signal generator Frequency range:2---3000Hz Output level: 1---500mV 11 RF po wer attenuator Decrement: 40db or 50db Receive power : higher than10W 12 Standard signal source Frequency range:10MHz---1000MHz Output level:0.1uV~32mV (-127dBm~-17dBm) 13 Oscillograph Frequency range: DC~20MHz Test range: 10mV~20V 14 Audio Frequency voltmeter Test range: 10mV~10V Recommend how to use: item 6, 7, 8, 10, 11 and 12 which listed in the table can be substituted by integrated tester HP8920/HP8921. 2 Figure 1 External Speaker/microphone Interface Definition 2 Adjustment Items Some detection and adjustment shall be made to the station technical data after changing the components during the maintenance. The debugging introduction of some related circuits goes as follows: Some parameters of the product can be adjusted (“Interphone Performance Tuning”) by use of CCP780 Programming Software of our company. The adjustable parameters are as follows: 1) Frequency stability” 2) Transmitting power 3) Alarm threshold for battery low-voltage 4) Squelch level 5) QT frequency offset 6) DCS frequency offset 7) Receiving sensitivity Steps for adjustment: a、Enter Computer Test Mode by selecting “Test Mode” in main menu of CCP780 Programming Software. b、Select the items to be adjusted in choice menus, and then adjust the parameters by function keys on the computer keyboard. c、Exit Computer Test Mode after adjustment. 3 Adjustment 3.1 VCO Adjustment Close “Power-saving Mode”. Set receiving frequency to low frequency point (see Table 2) and in the receiving state, test voltage of PD by DMM and adjust fine-tuning capacitor TC1/TC2 to get CV voltage of 1.0V±0.2V Set transmitting frequency to high frequency point (refer to Table 2), press PTT and test voltage of PD by DMM, which shall less than 4.0V Table 2 High/ Intermediate/ Low Frequency Point of All Models Low Frequency Point Intermediate Frequency Point High Frequency Point CU780-2 400.100 MHz 435.100 MHz 469.975 MHz 3 3.2 PLL frequency calibration Double-click to enter “Frequency Stability” in “Interphone Performance Tuning” to achieve the rated transmitting frequency by adjusting the number from 0 to 255 (Error<200Hz). 3.3 Transmitting frequency adjustment Double-click to enter “Transmitting High Power” in “Interphone Performance Tuning” to adjust the five frequency points including ”Lowest”, “Low”, “Mid”, “High” and “Highest” respectively and set transmitting power to over 4W by adjusting the number from 0 to 255 and observe the operating current (≤1.6A) at the same time. Double-click to enter “Transmitting Low Power” in “Interphone Performance Tuning” to adjust the five frequency points including ”Lowest”, “Low”, “Mid”, “High” and “Highest” respectively and set transmitting power to over 1W by adjusting the number from 0 to 255. 3.4 Transmitting low-voltage alarm Adjust power voltage to 5.8V and double-click to enter “Transmitting Low Voltage” in “Interphone Performance Tuning” Mode for automatic detection of the software, and then click “Save” for exit after no or little variation in numbers. 3.5 Frequency offset adjustment Input audio signal (12mV, 1000Hz) at MIC jack of interphone. Adjust the potentiometer VR501 and set frequency offset to ±4.2kHz. 3.6 DCS transmitting signal waveform and frequency offset adjustment Double-click to enter “DCS frequency offset” in “Interphone Performance Tuning” Mode, adjust potentiometer VR1 to observe demodulated signal (the waveform shall be smooth and similar to square wave), and then click “Broadband” to adjust all points including ”Lowest”, “Low”, “Mid”, “High” and “Highest” respectively for frequency offset of 0.8kHz. After that, click “Narrowband” to adjust the frequency offset to 0.4kHz. 3.7 CTCSS frequency offset adjustment Double-click to enter “QT(67) frequency offset” in “Interphone Performance Tuning” Mode and click “Broadband” to adjust the five frequency points including ”Lowest”, “Low”, “Mid”, “High” and “Highest” respectively to 0.75kHz and then click “Narrowband” to adjust the frequency offset to 0.35kHz. Select “QT(254) frequency offset” in “Interphone Performance Tuning” Mode, and the debugging method is the same as that of “QT(670) frequency offset”. 3.8 Receiving Sensitivity Double-click to enter “Receiving Sensitivity” in “Interphone Performance Tuning” Mode to adjust the five frequency points including ”Lowest”, “Low”, “Mid”, “High” and “Highest” respectively and the number from 0 to 255 for setting max sensitivity of all points. 3.9 Receiver Squelch setting Double-click to enter “SQL9 open” in “Interphone Performance Tuning” Mode and click “Broadband” to 4 make the frequency of the transmitting signal corresponding to the receiving frequency (level of -116dBm, modulation signal of 1kHz and frequency offset of 3kHz) showed at each frequency point of the software. Enter all points including ”Lowest”, “Low”, “Mid”, “High” and “Highest” respectively for automatic adjustment of software and then press next point after no big change to numbers. After that, adjust “Narrowband”, the debugging method is the same as that of “Broadband” except the input modulation signal is changed to frequency of 1kHz and frequency offset of 1.5kHz. Select “SQL9 open” in “Interphone Performance Tuning” Mode and click “Broadband” to make the frequency of…
Text truncated - open the document above for the full version.
Parts List/Tune Up Info
No. TP-CU780-2 Ver 01 No.Parts No.Description Component Name/Specification Qty.Ref. No. 1 2 3 4RESISTOR 5 1090400050001 0402 CHIP R 0ΩRC0402JR-070R16 C923 R4 R7 R13 R419 R801 R823 R826 R834 R839 R840 R901 R911 R966 R973 R975 6 1090410150001 0402 CHIP R 100Ω RC0402JR-07100R3 R19 R211 R530 7 1090427150001 0402 CHIP R 270Ω RC0402JR-07270R1 R938 8 1090433150001 0402 CHIP R 330Ω RC0402JR-07330R2 R108 R113 9 1090439150001 0402 CHIP R 390Ω RC0402JR-07390R1 R152 10 1090456150001 0402 CHIP R 560Ω RC0402JR-07560R1 R5 11 1090468150001 0402 CHIP R 680Ω RC0402JR-07680R1 R110 12 1090482150001 0402 CHIP R 820Ω RC0402JR-07820R2 R429 R532 13 1090410250001 0402 CHIP R 1kΩRC0402JR-071K17 R2 R9 R10 R222 R328 R407 R409 R413 R420 R427 R433 R434 R810 R932 R951 R952 R967 14 1090415250001 0402 CHIP R 1.5kΩ RC0402JR-071K53 R112 R331 R521 15 1090418250001 0402 CHIP R 1.8kΩ RC0402JR-071K82 R522 R908 16 1090422250001 0402 CHIP R 2.2kΩ RC0402JR-072K25 R1 R226 R418 R536 R537 17 1090427250001 0402 CHIP R 2.7kΩ RC0402JR-072K72 R422 R428 18 1090433250001 0402 CHIP R 3.3kΩ RC0402JR-073K313 R100 R103 R105 R106 R153 R203 R204 R303 R329 R424 R425 R548 R972 19 1090439250001 0402 CHIP R 3.9kΩ RC0402JR-073K93 R201 R205 R523 20 1090447250001 0402 CHIP R 4.7kΩ RC0402JR-074K716 C907 R32 R342 R416 R804 R805 R806 R807 R808 R831 R833 R843 R902 R907 R909 R926 21 1090456250001 0402 CHIP R 5.6kΩ RC0402JR-075K69 R101 R301 R302 R324 R326 R910 R914 R923 R953 22 1090482250001 0402 CHIP R 8.2kΩ RC0402JR-078K23 R339 R410 R426 23 1090410350001 0402 CHIP R 10kΩ RC0402JR-0710K27 R15 R140 R308 R327 R432 R435 R501 R502 R503 R538 R539 R540 R542 R802 R812 R813 R816 R818 R836 R913 R920 R928 R933 R939 R944 R954 R964 24 1090412350001 0402 CHIP R 12kΩ RC0402JR-0712K2 R117 R312 25 1090415350001 0402 CHIP R 15kΩ RC0402JR-0715K6 R525 R526 R527 R814 R817 R955 26 1090418350001 0402 CHIP R 18kΩ RC0402JR-0718K4 R305 R529 R835 R919 27 1090420350001 0402 CHIP R 20kΩ RC0402JR-0720K1 R940 28 1090422350001 0402 CHIP R 22kΩ RC0402JR-0722K11 R321 R500 R504 R506 R841 R903 R904 R905 R906 R927 R958 29 1090427350001 0402 CHIP R 27kΩ RC0402JR-0727K1 R820 CU780-2 PARTS LIST 1/10 No. TP-CU780-2 Ver 01 No.Parts No.Description Component Name/Specification Qty.Ref. No. CU780-2 PARTS LIST 30 1090433350001 0402 CHIP R 33kΩ RC0402JR-0733K4 R513 R825 R929 R963 31 1090439350001 0402 CHIP R 39kΩ RC0402JR-0739K2 R313 R915 32 1090447350001 0402 CHIP R 47kΩ RC0402JR-0747K15 R22 R107 R118 R126 R141 R307 R320 R330 R819 R821 R824 R917 R921 R924 R968 33 1090451350001 0402 CHIP R 51kΩ RC0402JR-0751K1 R822 34 1090456350001 0402 CHIP R 56kΩ RC0402JR-0756K3 R216 R605 R828 35 1090468350001 0402 CHIP R 68kΩ RC0402JR-0768K2 R602 R827 36 1090482350001 0402 CHIP R 82kΩ RC0402JR-0782K3 R11 R918 R961 37 1090491350001 0402 CHIP R 91kΩ RC0402JR-0791K1 R300 38 1090410450001 0402 CHIP R 100kΩ RC0402JR-07100K18 R6 R21 R34 R146 R221 R323 R325 R341 R401 R408 R533 R603 R830 R832 R838 R842 R941 R986 39 1090412450001 0402 CHIP R 120kΩ RC0402JR-07120K2 R30 R340 40 1090415420001 0402 CHIP R 150kΩ RC0402DR-07150K6 R133 R134 R135 R136 R137 R138 41 1090418450001 0402 CHIP R 180kΩ RC0402JR-07180K2 R202 R318 42 1090422450001 0402 CHIP R 220kΩ RC0402JR-07220K5 R306 R322 R411 R415 R421 43 1090427450001 0402 CHIP R 270kΩ RC0402JR-07270K4 R16 R18 R316 R317 44 1090433450001 0402 CHIP R 330kΩ RC0402JR-07330K2 R8 R400 45 1090439450001 0402 CHIP R 390kΩ RC0402JR-07390K1 R315 46 1090447450001 0402 CHIP R 470kΩ RC0402JR-07470K6 R309 R314 R333 R505 R984 R985 47 1090468450001 0402 CHIP R 680kΩ RC0402JR-07680K3 R208 R912 R922 48 1090475450001 0402 CHIP R 750kΩ RC0402JR-07750K2 R206 R528 49 1090410550001 0402 CHIP R 1MΩRC0402JR-071M010 R142 R219 R228 R230 R231 R232 R524 R811 R829 R950 50 51 1090600050001 0603 CHIP R 0ΩRC0603JR-070R4 R120 R147 R311 R837 52 109064R750001 0603 CHIP R 4.7Ω RC0603JR-074R72 R332 R959 53 1090610050001 0603 CHIP R 10ΩRC0603JR-0710R6 R3 R104 R115 R200 R334 R417 54 1090622050001 0603 CHIP R 22ΩRC0603JR-0722R4 R28 R109 R111 R218 55 1090647050001 0603 CHIP R 47ΩRC0603JR-0747R4 R121 R128 R212 R220 56 1090610150001 0603 CHIP R 100Ω RC0603JR-07100R4 R14 R26 R31 R210 57 1090615150001 0603 CHIP R 150Ω RC0603JR-07150R2 R25 R27 58 1090618150001 0603 CHIP R 180Ω RC0603JR-07180R1 R403 59 1090622150001 0603 CHIP R 220Ω RC0603JR-07220R2 R215 R402 60 1090627150001 0603 CHIP R 270Ω RC0603JR-07270R3 R102 R139 R154 61 1090647150001 0603 CHIP R 470Ω RC0603JR-07470R2 R535 R969 62 1090656150001 0603 CHIP R 560Ω RC0603JR-07560R1 R20 63 1090610250001 0603 CHIP R 1kΩRC0603JR-071K1 R33 64 1090618250001 0603 CHIP R 1.8kΩ RC0603JR-071K81 R534 65 1090622250001 0603 CHIP R 2.2kΩ RC0603JR-072K21 R144 66 1090627250001 0603 CHIP R 2.7kΩ RC0603JR-072K71 R209 67 1090647250001 0603 CHIP R 4.7kΩ RC0603JR-074K71 R809 68 1090610350001 0603 CHIP R 10kΩ RC0603JR-0710K2 R35 R214 2/10 No. TP-CU780-2 Ver 01 No.Parts No.Description Component Name/Specification Qty.Ref. No. CU780-2 PARTS LIST 69 1090647350001 0603 CHIP R 47kΩ RC0603JR-0747K2 R125 R338 70 1090610450001 0603 CHIP R 100kΩ RC0603JR-07100K2 R601 R604 71 1090618450001 0603 CHIP R 180kΩ RC0603JR-07180K1 R145 72 1090610550001 0603 CHIP R 1MΩRC0603JR-071M1 R304 73 74 1090700050001 0805 CHIP R 0ΩRC0805JR-070R2 R127 R962 75 76 10910R3950001 1206 CHIP R 0.39Ω RC1206JR-07R393 R130 R131 R132 77 78 1190647350001 ThermistorNCP18WB473J03RB1 TH102 79 80 81CAPACITOR 82 112043P500091 0402 CHIP C 0.5pF GRM1555C1HR50BZ01D2 C40 C49 83 1120431P00091 0402 CHIP C 1pFGRM1555C1H1R0BZ01D2 C226 C238 84 1120432P00091 0402 CHIP C 2pFGRM1555C1H2R0BZ01D4 C29 C233 C239 C951 85 1120433P00091 0402 CHIP C 3pFGRM1555C1H3R0BZ01D3 C54 C229 C409 86 1120434P00091 0402 CHIP C 4pFGRM1555C1H4R0BZ01D7 C38 C39 C41 C42 C44 C45 C227 87 1120436P00091 0402 CHIP C 6pFGRM1555C1H6R0BZ01D3 C53 C105 C222 88 1120437P00091 0402 CHIP C 7pFGRM1555C1H7R0BZ01D1 C108 89 1120438P00091 0402 CHIP C 8pFGRM1555C1H8R0BZ01D2 C219 C234 90 1120439P00091 0402 CHIP C 9pFGRM1555C1H9R0BZ01D1 C235 91 1120431005091 0402 CHIP C 10pFGRM1555C1H100JZ01D9 C9 C14 C36…
Text truncated - open the document above for the full version.
RF Exposure Info
Note: This test report is prepared for the customer shown above and for the device described herein. It may not be duplicated or used in part without prior written consent from Bay Area Compliance Laboratories Corp. This report must not be used by the customer to claim product certification, approval, or endorsement by A2LA* or any agency of the Federal Government. * This report may contain data that are not covered by the A2LA accreditation and are marked with an asterisk “*" (Rev.3) SAR EVALUATION REPORT For Shenzhen Covalue Communications Co., Ltd. 2/F, Blgd.24,Xili Industrial Park, No.119 Xingguang Rd, Xili, Nanshan, Shenzhen, Guangdong, China FCC ID: Y4GCU780-2 Model: CU780-2 Report Type: Original Report Product Type: Two Way Radio Test Engineer: Ricky Wang Report Number: R1205318-SAR Report Date: 2012-06-15 Reviewed By: Quinn Jiang Test Engineer Bay Area Compliance Laboratories Corp. (BACL) 1274 Anvilwood Avenue, Sunnyvale, CA 94089, USA Tel: (408) 732-9162 Fax: (408) 732 9164 Shenzhen Covalue Communication Co.,Ltd. FCC ID: Y4GCU780-2 Report Number: R1205318-SAR SAR Evaluation Report Page 2 of 59 SAR Evaluation Results Rule Part(s): FCC §2.1093 & IEEE 1528 Test Procedure(s): FCC OET Bulletin 65 Supplement C & IEEE 1528 IEC 62209-2 Exposure Category: Occupational/Controlled Exposure Device Type: Two Way Radio Modulation Type: F M TX Frequency Range: 406.1~470 MHz Maximum Conducted Power Tested: 36.41dBm Antenna Type(s) Tested: External Antenna Body-Worn Accessories: Belt Clip and Headset Cable Face-Head Accessories: None Battery Type (s) Tested: Rechargeable Li-Pol Battery, 7.4 V/1700mAh Max. SAR Level(s) Measured: 2.63 W/kg , Body Tissue (50% Duty Cycle) 3.31 W/Kg , Head Tissue (50% Duty Cycle) This wireless device has been shown to be capable of compliance for localized specific absorption rate (SAR) for Occupational/Controlled Exposure limits specified in ANSI/IEEE Standards and has been tested in accordance with the measurement procedures specified in FCC OET 65 Supplement C. The results and statements contained in this report pertain only to the device(s) evaluated. EUT Photo Shenzhen Covalue Communication Co.,Ltd. FCC ID: Y4GCU780-2 Report Number: R1205318-SAR SAR Evaluation Report Page 3 of 59 TABLE OF CONTENTS 1 REFERENCE, STANDARDS AND GUILDELINES ...................................................................................................5 SAR LIMITS.............................................................................................................................................................................6 2 EUT DESCRIPTION........................................................................................................................................................7 3 FACILITIES AND ACCREDITATION.........................................................................................................................8 4 DESCRIPTION OF TEST SYSTEM ..............................................................................................................................9 SYSTEM COMPONENTS...........................................................................................................................................................12 DASY4 MEASUREMENT SERVER...........................................................................................................................................12 DATA ACQUISITION ELECTRONICS.........................................................................................................................................13 PROBES..................................................................................................................................................................................13 5 EQUIPMENT LIST AND CALIBRATION.................................................................................................................20 6 SAR MEASUREMENT SYSTEM VERIFICATION..................................................................................................21 7 EUT TEST STRATEGY AND METHODOLOGY.....................................................................................................22 CHEEK/TOUCH POSITION.......................................................................................................................................................23 EAR/TILT POSITION................................................................................................................................................................23 8 DASY4 SAR EVALUATION PROCEDURE...............................................................................................................26 9 RF OUTPUT POWER VERIFICATION.....................................................................................................................28 10 SAR MEASUREMENT RESULTS ..........................................................................................................................29 11 APPENDIX A – MEASUREMENT UNCERTAINTY ...........................................................................................30 12 APPENDIX B – PROBE CALIBRATION CERTIFICATES ................................................................................31 13 APPENDIX C – DIPOLE CALIBRATION CERTIFICATES .............................…
Text truncated - open the document above for the full version.
Contact Information
Applicant
Chengtao Shu(Engineer)
Test Firm
Bay Area Compliance Laboratory Corp. (Shenzhen)John Chan
Technical Specifications
| # | Rule Parts | Frequency Range | Power Output | Emission | Tolerance |
|---|---|---|---|---|---|
| 2 | 9 | 406.1 MHz - 470 MHz | 4.375 W | 10K4F3E | 2.5 ppm |
Other Applications from SHENZHEN COVALUE COMMUNICATIONS CO., LTD.
Y4GDM8000-2
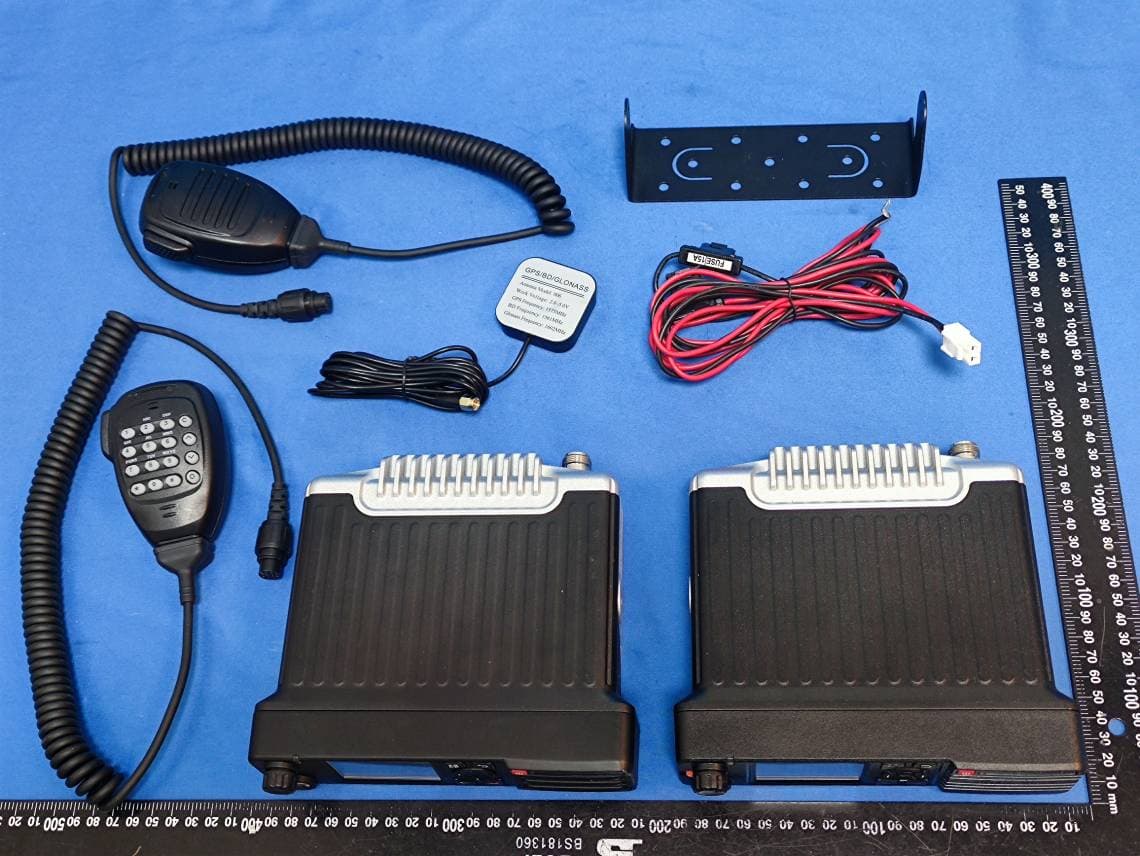
Sep 11, 2024Mobile Radio
Equipment Class
DTS - Digital Transmission System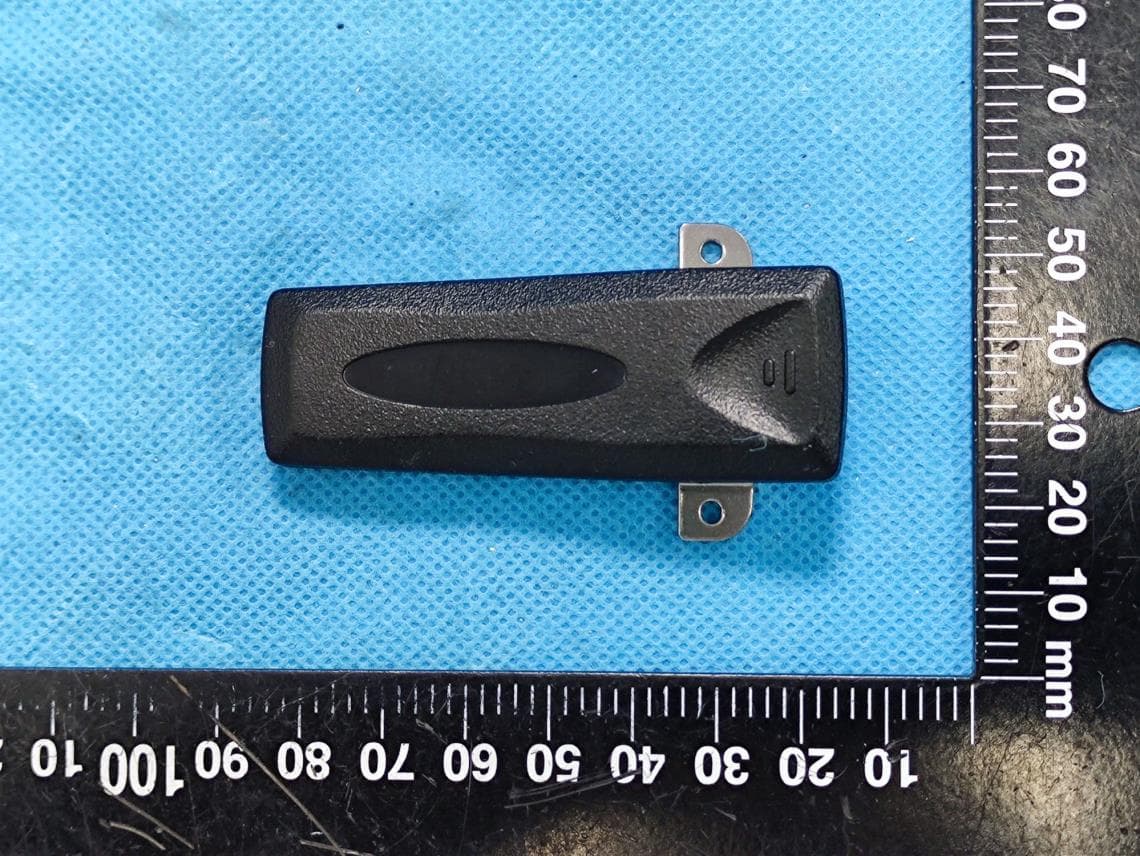
Y4GDR5810S-1
Jul 17, 2022Two Way Radio
Equipment Class
TNF - Licensed Non-Broadcast Transmitter Held to Face
Y4GDR5810-1
Mar 01, 2020Two Way Radio
Equipment Class
TNF - Licensed Non-Broadcast Transmitter Held to Face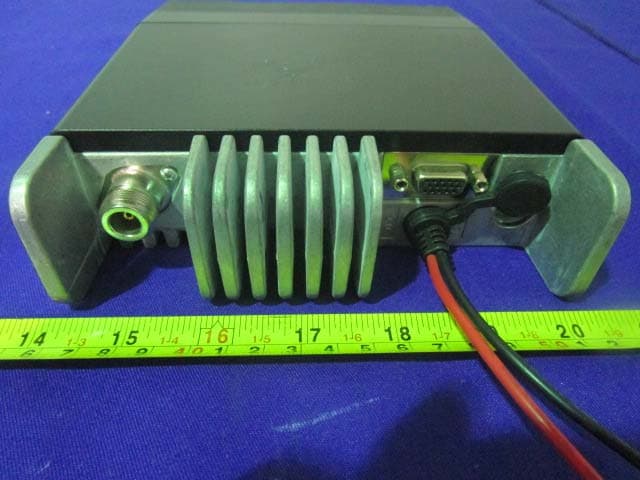
Y4GDM6000-1
Aug 20, 2015Mobile Radio
Equipment Class
TNB - Licensed Non-Broadcast Station Transmitter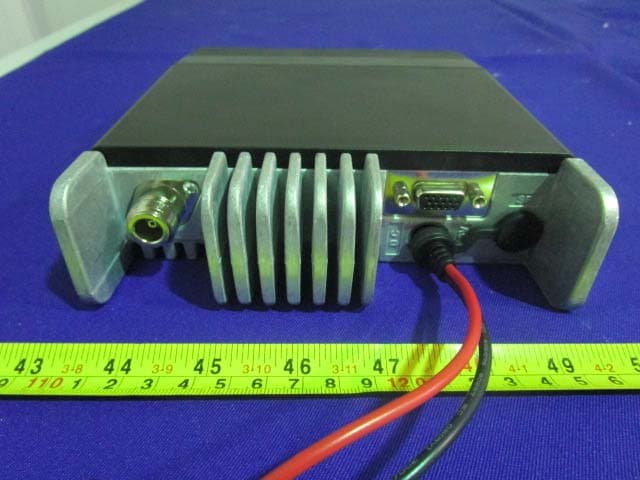
Y4GDM6000-2
May 26, 2015Mobile Radio
Equipment Class
TNB - Licensed Non-Broadcast Station Transmitter