ZIHS100S100 Wireless SOS Health Bracelet
Tech Vision Electronics Ltd.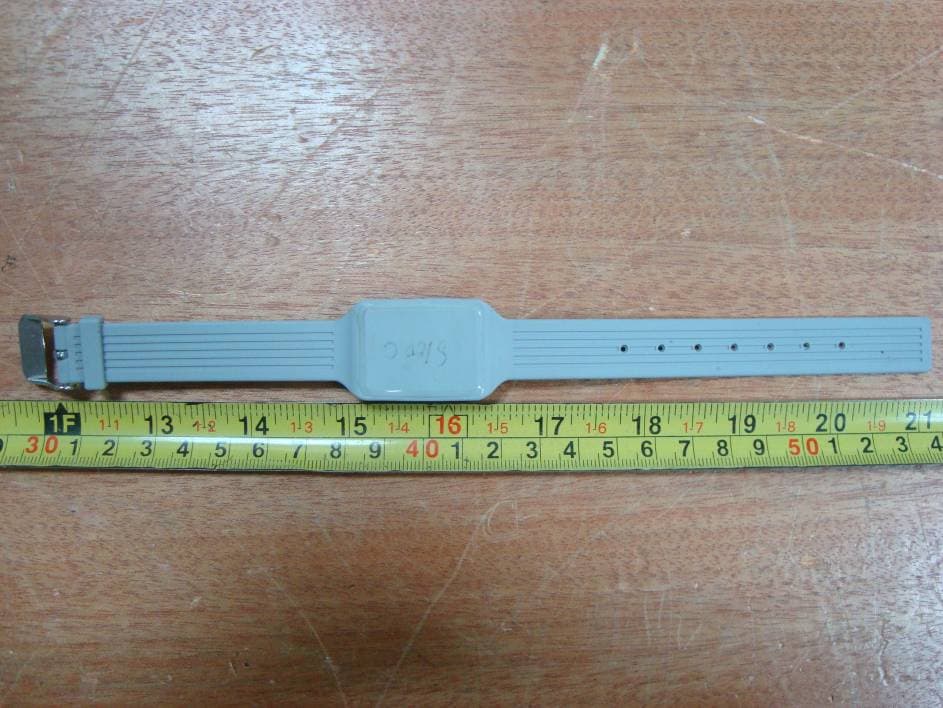
Click to zoom
Application Details
- Equipment Class
- DSC - Part 15 Security/Remote Control Transmitter
- Date of Grant
- Jun 15, 2011
- Application Purpose
- Original Equipment
- Date of Application
- Jun 15, 2011
- Equipment Note
- S100 Wireless SOS Health Bracelet
- Frequency Range
- 433.91000000 - 433.91000000
- Company
- Tech Vision Electronics Ltd.
- Country
- China
Documents & Files
Document Text
Text extracted from the exhibit documents filed with the FCC. Open a document above to read the original.
Users Manual
USER GUIDE B831 Before operating this set, please read these instructions carefully. +S100 1 Warning: The torch uses a high-brightness LED. Do not shine directly into eyes, or view with optical instruments. NOTE – Remember to insert the battery before putting the handset on charge. IMPORTANT – Your handset is not supplied with a SIM card. The clam shell senior phone will work on all GSM mobile networks except “3”, and you will need to insert a SIM card for the handset to work correctly. Network Services – The clam shell senior phone is approved for use on the GSM850 and PCS1900 networks. Check with your mobile phone service provider to see if you can use the Dual-band feature or other Network Services described in this guide. Some networks may not support all language dependent characters and/or services. Where to find it................................................................... 3 Unpacking your clam shell senior phone In the box are: the mobile handset a mains power adaptor a rechargeable battery pack this user guide Keep the packing materials for future use. Keep your sales receipt - it is your guarantee. 2 Symbols on the display ...................................................... 4 Menu Operation .................................................................. 6 Read these notes first.......................................................... 6 Installation and setup.......................................................... 7 Switching On and Off .........................................................10 Making & answering calls...................................................11 Using the Phone Book & Fast keys (M1-M3).......................... 13 Volume control, Redial, Speakerphone, Mute (Secrecy) Call log.............................................................................16 SMS text messaging...........................................................17 Settings.............................................................................20 Phone (Language, Display, Security, Factory reset)... 20 Clock ...................................................... 20 Network ................................................ 20 Call ...................................................... 21 Sound.................................................... 21 Alarm............................................................................... 22 SOS Button.......................................................................23 Tools................................................................................26 Torch................................................................................27 FM radio............................................................................28 Health care........................................................................29 Troubleshooting............................................................... 30 Guarantee and Service information..................................... 31 Battery Information............................................................32 Additional Safety Information............................................. 32 Declaration of Conformity.................................................. 33 Contents 3 Emergencybutton (SOS) Press and hold 3sec to start SOS call procedure Where to find it Perform the function indicated on the LCD above. Talk button Press to answer a phone call. Press to enter redial list Press to dial a number Selection buttons ( - ) Up/Down button (^ / v ) Press to adjust receiving volume in talk and speakerphone modes. Press to step through names, phone numbers, menus and settings. Standby mode shortcuts: Up - to Sound Profiles Down - to Phonebook End / Power button (End call) Press to end or reject a call. Press to return to standby mode Press and hold to switch the phone on or off Earpiece Memory buttons M1,M2,M3 M1 / M2 / M3 3 memory locations for direct dial out. Torch Beam Visual Indicators Torch button Press and hold to switch the Torch on The Red LED is steady on during charging, and flashes when the battery is low. The Blue LED flashes when connected to the mobile network. The Green LED flashes when there is a missed call(s). Plug in headset accessory (not supplied) for headset use. Headset Connector Charging Connector Plug in power adapter to charge battery. Warning! The torch uses a high-brightness LED and you should not point the beam directly into eyes, or view with optical instruments. 4 Note: Press the SOS button on the SOS button on the wireless SOS bracelet ,the left LED will flash, If the left LED not flash, please replace the battery. Press and hold the SOS button on the wireless SOS bracelet, it will start the SOS function, when the left and right LED both flashed it means that the signal was successfully launched. (optional extra not always supplied, it is dependent on the particular commercial model.) Press and hold a few seconds to start SOS call procedure SOS button Left LED Right LED 5 Time Date Symbols on the display 1 - The left selection button in the idle mode is Menu. 2 - The right selection button in the idle mode is SMS. The Soft keys change to different functions in other modes. [Note: Symbols and positions on the display may vary.] Radio link/signal level - On steady when linked and shows the signal strength. Battery charge level - Charge handset as soon as possible if it shows nearly empty. While the batteries are being charged, this blinks. Roaming - On if roaming to other mobile network. Call Divert - On if call divert unconditional is set. Alarm - On if an alarm is set. Ringer off & vibrator off- On if handset's ringer and vibrator are both turned off. Ringer on & vibrator on - On if handset's ringer and vibrator are both turned on. The network name in service 1 2 6 Ringer off & vibrator on - On if handset's ringer is turned off and vibrator is turned on. Headset - On when a headset is plugged in. New SMS - Indicates you have new text messages. Full S…
Text truncated - open the document above for the full version.
Block Diagram
1 1 S100_TRANSCEIVER :0.0 WangHuan Tech-Vision Communications Ltd. X Y A B C D E F G H I J K L M N O O N M L K J I H G F E D C B A 1 2 3 4 5 6 7 8 9 10 11 12 13 14 15 16 17 18 19 20 21 22 22 21 20 19 18 17 16 15 14 13 12 11 10 9 8 7 6 5 4 3 2 1 : : : MODE: Title: 2.4VLow Battrey detect Modulator/PA RF tranceiver CC1101 U3 LNA/Demodulation/ crystal 26MHZ U5 I2S I2S S100_TRANSCEIVER Antenna MCU STC11L04E TX and RX Frequency :433.9MHZ K1 Battrey U1 ME2802 S100 MatthewChu XH
External Photos
EXHIBIT B - EUT EXTERNAL PHOTOGRAPHS Model: S100A EUT– Front View EUT– Rear View EUT– Side View Model: S100B EUT– Front View EUT– Rear View EUT– Side View Model: S100C EUT– Front View EUT– Rear View EUT– Side View
ID Label/Location Info
EXHIBIT A - FCC ID LABELING AND LOCATION FCC ID Label FCC ID Label Location Model: S100A Model: S100B Model: S100C
Internal Photos
EXHIBIT C - EUT INTERNAL PHOTOGRAPHS EUT – Main Board Cover off View EUT – Main Board Top View EUT – Main Board with Shielding off Top View EUT – Main Board Bottom View EUT – Main Board with Shielding off Bottom View PCB antenna
Test Setup Photos
EXHIBIT D - TEST SETUP PHOTOGRAPHS Radiated Emission – Front View (Below 1GHz) Radiated Emission – Rear View (Below 1GHz) Radiated Emission – Front View (Above 1GHz) Radiated Emission – Rear View (Above 1GHz)
Contact Information
Applicant
Yin Zhang Hu(Project Manager)
Test Firm
Bay Area Compliance Laboratory Corp. (Shenzhen)John Chan
Technical Specifications
| # | Rule Parts | Frequency Range | Power Output |
|---|---|---|---|
| 1 | 15.231 | 433.91 MHz - 433.91 MHz | - |
Other Applications from Tech Vision Electronics Ltd.
ZIHB831
Jun 15, 2011GSM Mobile Phone
Equipment Class
DSC - Part 15 Security/Remote Control Transmitter