2AMYQ-202012GD500Robotic Vacuum Cleaner
Shenzhen Hua Xin Information Technology Co., Ltd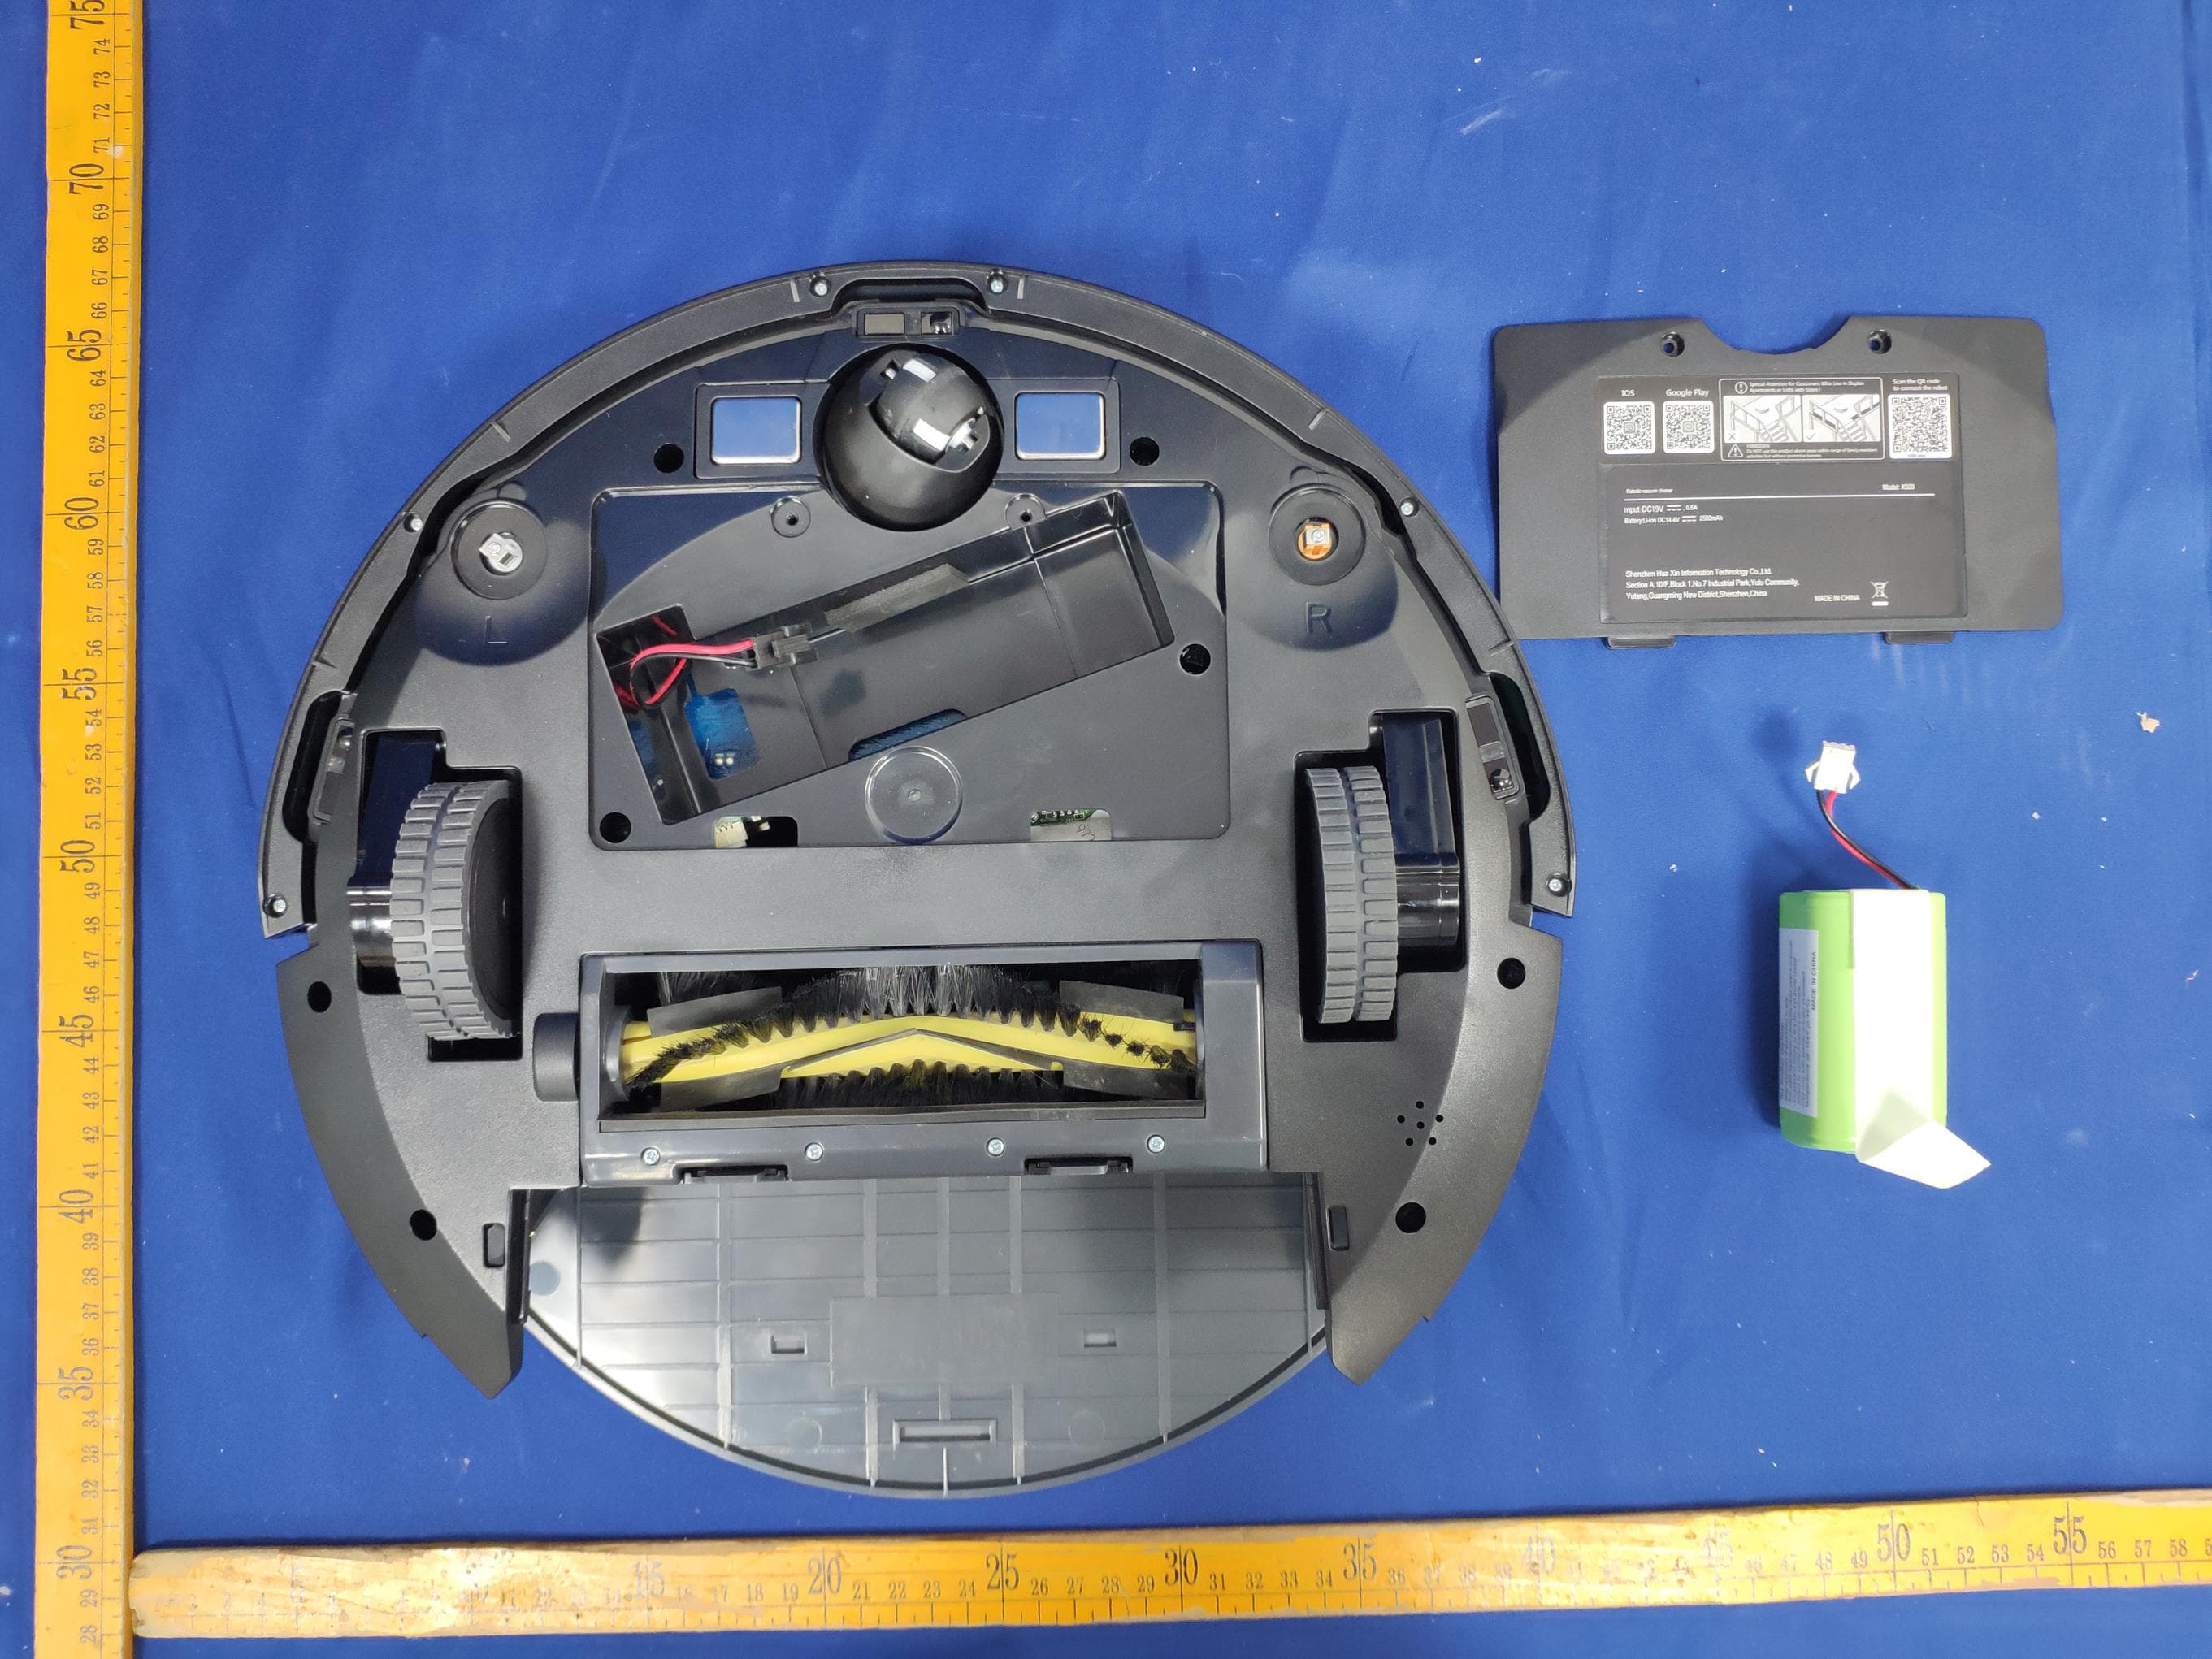
Click to zoom
Application Details
- Equipment Class
- DTS - Digital Transmission System
- Date of Grant
- Jan 25, 2021
- Application Purpose
- Original Equipment
- Date of Application
- Jan 25, 2021
- Equipment Note
- Robotic Vacuum Cleaner
- Frequency Range
- 2412.00000000 - 2462.00000000
- Country
- China
Documents & Files
Document Text
Text extracted from the exhibit documents filed with the FCC. Open a document above to read the original.
Users Manual
Manual ROBOTIC VACUUM CLEANER 1.Wi-Fi Setup Instructions 2.Safety Instructions 3.Product Components 4.Instructions for Use 5.Product Maintenance 6.Common Faults 3.1 Name of Parts 3.2 Products Specifications 3.3 Product Characteristics 4.1 Attention 4.2 Remote Controller Instructions 4.3 Operating Instructions 5.1 Side Brush Cleaning and Replacement 5.2 Cleaning of Dust Box and Filter 5.3 Maintenance of Water Tank Components 5.4 Maintenance of Rolling Brush Components 5.5 Maintenance of Other Components 6.1 Common Faults 6.2 Replaceable Modules Menu Wi-Fi Setup Instructions Wi-Fi Setup Instructions To perfefct the products, we keep the right of updating the APP and the software. The final interface is subject to the actual products, thank you. Scan the QR code on the device or the QR code on the right side,or manual input the QR code/Barcode to confirm the device model,turn on the “Power switch” by following APP instructions and go to the next step. Scan the QR code in Figure 1 to download and install “WeBack” APP, or download and install from other APP stores. Figure 1 Open App, directly log in if you have a “WeBack” account; if not, you can select “New User” to sign up, and click on " " after login. Figure 2 Figure 3 Figure 4 Forget Password Wi-Fi Setup Instructions To perfefct the products, we keep the right of updating the APP and the software. The final interface is subject to the actual products, thank you. Wi-Fi Setup Instructions On the device management page, click the button" " (Figure 8),in the upper right corner of the device to enter the settings page(Figure 9). Figure 5 When you see the APP enter interface Figure 5,you can start using APP to control your ROBOT.Tap the device to enter the main interface of APP (Figure 5), from this interface you can choose different cleaning modes, also to check the cleaning process/status. Tap the “more” Key(Figure 6) to enter the multi-functional panel (Figure 7). Figure 6 Figure 7 Figure 8 Figure 9 Safety Instruction Safety Instruction Safety Instruction 5 Take out two screws on the battery cover with a screw driver. Take out the battery cover. Take out the battery and unplug the electric wires to remove the battery. 06.How to remove the battery: Safety Instruction 6 3.1 Names of Parts Main BodyCharging Base2*AAA Batteries Excluded Remote controllerPower AdapterCleaning Tool Water Tank ComponentSide Brush High-effecient Filter Mop Accessories of some models may be slightly different and they are subject to the actual received products. Product Components Main Body Main Body 1.Bumper2.Wi-Fi Indicator3.Control Button 1.Universal wheel2.Electrode slice 3.Side brush 4.Barrery cover 5.Side wheel6.Rolling brush components 7.Dust box Product Components 3 Main Body 1.DC power jack2.Power switch 3.Dust box release button Dust Box 1.Per-filter2.High-efficient filter 3.Filter sponge 4.Dust box5.Dust box cover Product Components Water Tank Component 1.Tank sealing cap2.Water tank 3.Mop Charging base 1.Charging indicator2.DC power jack 3.Charging terminal Product Components 10 3.2 Product Specifications Structure Electronic Accessory Process Parameters 120min 350mlWater tank capacity the the the 14.4 2500mAh Product Components 11 75 3.0 kgs 3.3 Product Characteristics Multiple smart cleaning modes Humanized design 4 cleaning modes are designed to suit different needs,which can be switched by the remote controller and App,greatly improves the cleaning efficiency and saves 30% of the power. It is simple to operate,pressing the Control Button to start cleaning. Follow the Voice Prompt and let the robot start working for you. Dust box can be washed with water The dust box and the pre-filter can be directly flushed with water without too much labor, which can avoid secondary pollution caused by dust flying!. Product Components 12 4.1 Attention When it is working, please help to remove the unfriendly obstacles.Put the furniture and home appliances such as tables and chairs in the house neatly, the robot will clean up smoothly to give you a clean new home. If the robot works at the stairway, the edge of the step, or the entrance to the narrow area among the furnitures, etc,please place a fence to ensure it is safe and running smoothly. Instructions for Use Please do not stand in narrow places such as thresholds and aisles to avoid missing sweeping . When the robot is working, please ensure that the object with the thickness less than 1.8 cm is not placed in the cleaning area to prevent the machine from climbing and jamming. Please pay attention to remove sundries , such as the power cords, toys, etc,which are scattered on the ground may catch or entangle the Robot. Do not use the mopping function on the carpet! If there is a carpet in the house, please roll up the edge of the carpet in advance. Instructions for Use Remote controller instruction 4.2 Instructions for Use controller. controller Power On/Off Display Screen Return for Auto Charging Direction Clock setting Edge Cleaning Plan Cleaning (Smart Cleaning) Confirm Suction setting Schedule Setting Instructions for Use Return for Auto Charging Pressing this button to shift the mode as recharging,and the logo will be displayed on the screen of the remote controller. Forward /+ At the standby mode,press this button to continue moving forwards,and release it to return to standby mode.At the Schedule setting mode,press this button to increase the number. Back Button /- Press this button and robot will rotate 180 degrees in situ. In the modes of Schedule Setting and Clock Setting, press this button will decrease the number. Left Arrow At the standby mode,press this button to continue turning left,and release it to return to standby mode.At the Schedule setting mode,press this button to switch from minute to hour. Right Arrow At the standby mode,press this button to continue turning right,and release it to return to standby mode.At the Schedule setting mode,press this button to switch from hour to minute. Confir…
Text truncated - open the document above for the full version.
Users Manual
Please keep the power switch turned on before charging the machine. Fix the charging pin into the DC power jack of the robot and plug in the power supply. Charge mode A: Charge mode B: Please keep the power switch turned on before charging the machine. Press Return for Auto charging button on the remote controller or Press Recharge icon on App to auto dock the Robot with the charging base. Charging modes Instructions for Use Automatic charging Pressing the Return for Auto Charging on the remote controller to make the robot return for charging. When Cleaning is completed or the battery is too low,the robot will automatically start finding the charging base to charge itself. Pls keep the charging base energized,otherwise the machine will not be able to find the charging base. 01. The battery should be repaired and replaced by the after-sales service center. 02. For the very first operation,please let the robot run out of power. 03. When the robot is charged,the LED light of Control button will flash 04. lf the robot is out of service for a long time, please turn off the power switch. 05. Please charge the robot as soon as possible after the battery is used up. 06. The product can only use the power adapter and charger provided by the factory. 07. Please charge the robot for 12 hours for the first time of operation. When the charge is done, the Control button light turns off. Charging lnstructions Instructions for Use Switching Modes Startup Pause Sleep 01.Make sure the power switch on the side of the robot is turned on. 02.Press the Control button or the Cleaning mode on the remote controller to start the robot. The pause function is to switch the robot from the operating mode to the selected mode,and the robot can be paused by the following operations: 01.Press the Control button on the robot to pause the robot. 02.Press the power on/off button on the remote controller to pause the robot. Notice:After the machine is paused, the machine can be reoperated. Sleep mode means that the robot is stopped and the indicator light is off.If the Robot is not active within 10 minutes, the robot will enter Sleep mode automatically. Note: If the robot is out of service for a long time, please turn off the power switch. Instructions for Use Use of Water Tank How to add water? Open the tank sealing cap, fill it with enough water and slowly inject water into the water tank. When charging, please remove the water tank to avoid danger. How to fix the microfiber mop? Seal the tank sealing cap,then fix the microfiber mop to the velcro on the bottom of the water tank. When charging, please remove the water tank to avoid danger. Instructions for Use Schedule Setting Cleaning How to install the water tank? Press the release button on the dust box to remove it then install the water tank. When charging, please remove the water tank to avoid danger. You can set the current local time on your robot by pressing the Clock Setting button on the remote controller,then press Confirm button. Instructions for Use Press the"Schedule Setting" button to set the scheduled cleaning time for the robot.(e.g. Setting 6:30am to the robot, the robot will start cleaning at 6:30am every day at the standby mode.) Once the power switch is turned off, all Schedule will be cancelled. Once the schedule setting is succeeded,the robot will start working at the scheduled time everyday. 1.Press the Schedule Setting button to enter the Schedule Setting mode and set the schedule on the remote controller or APP. 2.If you need cancel the schedule,just press the Schedule Setting button for 3 seconds. At the Schedule Setting mode,follow the voice prompts to confirm all your operations. Instructions for Use 24 Cleaning Modes Plan Cleaning (S shape Cleaning)Edge Cleaning The robot will perform the smart plan cleaning in S shape according to the room environment. The robot will clean along the longest edge of the room. Mopping Mode The Robot will perform the S shape cleaning with mop according to the room environment. Please do not move or remote control the robot while it is working,or it will replan the cleaning route and repeat cleaning. There is a normal phenomenon that the robot will perform with a brief pause during working. Please be patient,as it is thinking and making decisions or discovering where to clean. Spot cleaning The robot will perform the concentrated cleaning on a special dirty area. (APP controlled only) Instructions for Use 5.1 Side Brush Cleaning and Replacement 5.2 Cleaning of Dust Box and Filter Check the side brush's condition frequently to see if it has been damaged or entangled with other objects. Clean the side brush with a cleaning tool or cloth. When the side brush is damaged and can not be used,please replace it as soon as possible. L and R correspond to each other. Press the release button to take out the dust box. Product Maintenance Dump all debris form the dust box into the garbage. Remove the pre-filter. Product Maintenance Open the high-efficient filter cover, and remove the high-efficient filter and filter sponge. It is not recommended to wash the high-efficient filter with water. Please pat off the debris carefully. Wash the dust box and pre-filter. Product Maintenance 1. Dry the dust box and filter components. Keep them dry to ensure a longer service. 2.After the pre-filter is used for 15~30 days, it should be washed once. 3. The maximum service life of the high-efficient filter is 3 months. 1. Reinstall the pre-filter and high-efficient filter in the dust box. 2.Before installing the filter, make sure that the high-efficient filter and the pre-filter are dry. 3. Do not expose the high-efficient filter and the pre-filter to sunlight. Product Maintenance Cover the dust box and fix it into the main body. Press the release button to take out the water tank. 5.3 Maintenance of Water Tank Product Maintenance Remove the mop. Wash and dry the mop. Product Maintenance 31 Pour out the rest of water from the water tank. C…
Text truncated - open the document above for the full version.
Attestation Statements
Page1of1 Declarationonmodeldifference We,ShenzhenHuaXinInformationTechnologyCo.,Ltd.theundersigned herebyconfirmthatthesemodelsareidentical,andallmodelshavethesame RFmoduleandAntenna,exceptcolorandmodelNo.fortradingpurpose. ProductnameRoboticVacuumCleaner ModelNo. X500 X500i,X500w,X500r,X500Pro,X520,X530,X550,X580,X-503, X500s,X500u,Robvacuum8X500t,D5,D51,D52,D5s,D5Pro,X500e,S15, N5,S15SERIES,E5,E5S,E5W,E550,E560,E570,X521,X531,X551,X561, M1,M1PRO TradenameN/A INPUTAC100-240V50/60HZ Confirmedby: Client’ssignature: Client’sname/title:Supingzhan/Engineer Date:2021-1-14
Cover Letter(s)
C5266091_X8_Ed.1 1/1 LetterofAuthorization ShenzhenHuaXinInformationTechnologyCo.,Ltd. Company:ShenzhenHuaXinInformationTechnologyCo.,Ltd. Address:SectionA,10/F,Block1,No.7IndustrialPark,Yulu Community,Yutang,GuangmingNew District,Shenzhen,China ProductName: RoboticVacuumCleaner ModelNumber:X500,X500i,X500w,X500r,X500Pro,X520,X530, X550,X580,X-503,X500s,X500u,Robvacuum8X500t, D5,D51,D52,D5s,D5Pro,X500e,S15,N5,S15SERIES, E5,E5S,E5W,E550,E560,E570,X521,X531,X551,X561, M1,M1PRO FCCIdentifier:2AMYQ-202012GD500 WeauthorizeLGAITechnologicalCenterS.A.,RondadelaFontdelCarme,s/n, 08193Bellaterra,Spain,toactonourbehalfonallmattersconcerningthe abovenamedequipment. AnyindividualwithinLGAITechnologicalCenterS.A.isauthorizedtoactonour behalfandtakeactionontheapplication. WedeclarethatauthorizeLGAITechnologicalCenterS.A.,RondadelaFontdel Carme,s/n,08193Bellaterra,Spain,isallowedtoforwardallinformation relatedtotheapprovalprojecttotheFederalCommunicationCommissionand todiscussanyissuesconcerningtheapprovalapplication.Anyandallacts carriedoutbyLGAITechnologicalCenterS.A.onourbehalfshallhavethe sameeffectasactsofourown. Name:SupingzhanDate:2021-1-12 Title:Engineer Signatureofapplicant:
Cover Letter(s)
C5266091_X10_Ed.2 1/1 ShenzhenHuaXinInformationTechnologyCo.,Ltd. OfficeofEngineeringTechnology FederalCommunicationsCommission 7435OaklandMillsRoad Columbia,MD21046 Date:2021-1-12 Subject:RequestforConfidentiality FCCID:2AMYQ-202012GD500 ToWhomItMayConcern, PursuanttotheprovisionsofSections0.457and0.459ofCommission'srules (47CFR0.457,0.459),wearerequestingtheCommissiontowithholdthefollowing attachment(s)asconfidentialdocumentfrompublicdisclosure. ExhibitsLong-Term Confidentiality Short-Term Confidentiality NOTE2 IDLabel/LocationNoNo AttestationStatementNoNo ExternalPhotosNo ☐ BlockDiagram ☒☐ Schematics ☒☐ TestReportNoNo TestSetupPhotosNo ☐ User’sManual ☐ NOTE 1 ☐ InternalPhotos ☐ NOTE 1 ☐ PartsList/TuneUp ☐☐ RFExposureInfoNoNo OperationalDescription ☒☐ CoverLetter(s)NoNo SDRSoftware/SecurityInfo ☐ No NOTE1:Long-TermConfidentialitymaybepermittedunderspecialconditions(SeeII.LONG-TERMCONFIDENTIALITY,Section3of KDB726920,uselastinforce) NOTE2:Short-TermConfidentialitycanberequestedforamaximumof180daysfromthedateofthegrant. Abovementioneddocumentcontainsdetailedsystemandequipmentdescriptionare consideredasproprietaryinformationinoperationoftheequipment.Thepublic disclosureofabovedocumentsmightbeharmfultoourcompanyandwouldgive competitoranunfairadvantageinthemarket. Incaseofshort-termConfidentiality,theapplicantrequeststheexhibitsselected abovearewithheldfrompublicviewforaperiodofdaysfromthedateofthe GrantofEquipmentAuthorizationandpriortomarketing. Itisourunderstandingthatallmeasurementtestreports,FCCIDlabelformatand correspondentduringcertificationreviewprocesscannotbegrantedasconfidential documentsandthoseinformationwillbeavailableforpublicreviewoncethegrantof equipmentauthorizationisissued. C5266091_X10_Ed.2 1/1 Sincerely, Signature: Name:Supingzhan Title:Engineer
Internal Photos
ANT RF Module
RF Exposure Info
ReportNo.:PTC20120301603E-FC02 Page 1 of 7 FCCTESTREPORT FCCID:2AMYQ-202012GD500 Product:RoboticVacuumCleaner ModelName: X500,X500i,X500w,X500r,X500Pro,X520,X530,X550,X580,X-503, X500s,X500u,Robvacuum8X500t,D5,D51,D52,D5s,D5Pro,X500e,S15, N5,S15SERIES,E5,E5S,E5W,E550,E560,E570,X521,X531,X551,X561, M1,M1PRO Brand:N/A ReportNo.:PTC20120301603E-FC02 Preparedfor ShenzhenHuaXinInformationTechnologyCo.,Ltd. SectionA,10/F,Block1,No.7IndustrialPark,YuluCommunity,Yutang,GuangmingNew District,Shenzhen,China Preparedby PreciseTesting&CertificationCo.,Ltd Building1,No.6,TongxinRoad,DongchengStreet,Dongguan,Guangdong,China ReportNo.:PTC20120301603E-FC02 Page 2 of 7 TESTRESULTCERTIFICATION Applicant’sname:ShenzhenHuaXinInformationTechnologyCo.,Ltd. Address: SectionA,10/F,Block1,No.7IndustrialPark,Yulu Community,Yutang,GuangmingNewDistrict,Shenzhen,China Manufacture'sname:ShenzhenHuaXinInformationTechnologyCo.,Ltd. Address: SectionA,10/F,Block1,No.7IndustrialPark,Yulu Community,Yutang,GuangmingNewDistrict,Shenzhen,China Productname: RoboticVacuumCleaner Modelname : X500,X500i,X500w,X500r,X500Pro,X520,X530,X550,X580,X-503, X500s,X500u,Robvacuum8X500t,D5,D51,D52,D5s,D5Pro,X500e, S15,N5,S15SERIES,E5,E5S,E5W,E550,E560,E570,X521,X531 ,X551,X561,M1,M1PRO TestprocedureKDB447498D01GeneralRFExposureGuidancev06 TestDate:Dec08,2020toDec16,2020 DateofIssue:Dec16,2020 TestResult:Pass ThisdevicedescribedabovehasbeentestedbyPTS,andthetestresultsshowthatthe equipmentundertest(EUT)isincompliancewiththeFCCrequirements.Anditisapplicableonlyto thetestedsampleidentifiedinthereport. Thisreportshallnotbereproducedexceptinfull,withoutthewrittenapprovalofPTS,thisdocument maybealteredorrevisedbyPTS,personalonly,andshallbenotedintherevisionofthedocument. TestEngineer: LeoYang/Engineer TechnicalManager: ChrisDu/Manager ReportNo.:PTC20120301603E-FC02 Page 3 of 7 Contents Page 2TESTSUMMARY................................................................................................................................................4 3GENERALINFORMATION...............................................................................................................................5 3.1GENERALDESCRIPTIONOFE.U.T..........................................................................................................5 4RFEXPOSURE...................................................................................................................................................6 4.1REQUIREMENTS........................................................................................................................................6 4.2THEPROCEDURES/LIMIT.........................................................................................................................6 4.3MPECALCULATIONMETHOD..................................................................................................................7 4.4TESTRESULT............................................................................................................................................7 ReportNo.:PTC20120301603E-FC02 Page 4 of 7 2TestSummary TestItemsTestRequirementResult MaximumPermissibleExposure (ExposureofHumanstoRFFields) 1.1307(b)(1)PASS Remark: N/A:NotApplicable ReportNo.:PTC20120301603E-FC02 Page 5 of 7 3GeneralInformation 3.1GeneralDescriptionofE.U.T. ProductName:RoboticVacuumCleaner ModelName: X500,X500i,X500w,X500r,X500Pro,X520,X530,X550,X580,X-503, X500s,X500u,Robvacuum8X500t,D5,D51,D52,D5s,D5Pro,X500e,S15, N5,S15SERIES,E5,E5S,E5W,E550,E560,E570,X521,X531,X551,X561, M1,M1PRO NOTE:(X500isthemaintestmodel,othermodelsandmaintestmodels havedifferentappearancecolors,othersarethesame) BluetoothVersion:WiFi Operatingfrequency:802.11b/g/nHT20:2412-2462MHz TypeofModulation: DSSSwithDBPSK/DQPSK/CCKfor802.11b; OFDMwithBPSK/QPSK/16QAM/64QAMfor802.11g/n; Antennainstallation::PCB AntennaGain::3dBi Powersupply:AC100-240V50/60HZ19V/0.6A(14.4V2500mAh,battery) ReportNo.:PTC20120301603E-FC02 Page 6 of 7 4RFExposure TestRequirement :FCCPart1.1307(b)(1) EvaluationMethod :FCCPart2.1091 4.1Requirements Systemsoperatingundertheprovisionsofthissectionshallbeoperatedinamannerthatensuresthat thepublicisnotexposedtoradiofrequencyenergylevelsinexcesslimitformaximumpermissible exposure.Inaccordancewith47CFRFCCPart2SubpartJ,section2.1091thisdevicehasbeen definedasamobiledevicewherebyadistanceof0.2mnormallycanbemaintainedbetweentheuser andthedevice. 4.2Theprocedures/limit (A)LimitsforOccupational/ControlledExposure FrequencyRangeElectricFieldMagneticFieldPowerDensity(S)AveragingTime 0.3-3.06141.63(100)*6 3.0-301842/f4.89/f(900/f)*6 30-30061.40.1631.06 300-1500F/3006 1500-100,00056 (B)LimitsforGeneralPopulation/UncontrolledExposure FrequencyRangeElectricFieldMagneticFieldPowerDensity(S)AveragingTime 0.3-1.346141.63(100)*30 1.34-30824/f2.19/f(180/f)*30 30-30027.50.0730.230 300-1500F/150030 1500-100,0001.030 Note:f=frequencyinMHz;*Plane-waveequivalentpowerdensity ReportNo.:PTC20120301603E-FC02 Page 7 of 7 4.3MPECalculationMethod E(V/m) = d GP30 PowerDensity:Pd(W/m²) = 377 2 E E = Electricfield(V/m) P=PeakRFoutputpower(W) G = EUTAntennanumericgain(numeric) d=Separationdistancebetweenradiatorandhumanbody(m) Theformulacanbechangedto Pd = 2 377 30 d GP FromthepeakEUTRFoutputpower,theminimummobileseparationdistance,d=0.2m,aswellas thegainoftheusedantenna,theRFpowerdensitycanbeobtained 4.4TestResult Item Antenna Gain (numeric) Max.Peak OutputPower (dBm) PeakOutput Power(mW) PowerDensity (mW/cm2) LimitofPower Density (mW/cm2) Result WIFI2.0018.0663.970.02541Pass ******THEENDREPORT******
Test Report
Page 1 of 66 FCCTESTREPORT FCCID:2AMYQ-202012GD500 Product:RoboticVacuumCleaner ModelName: X500,X500i,X500w,X500r,X500Pro,X520,X530,X550,X580,X-503, X500s,X500u,Robvacuum8X500t,D5,D51,D52,D5s,D5Pro,X500e,S15, N5,S15SERIES,E5,E5S,E5W,E550,E560,E570,X521,X531,X551,X561, M1,M1PRO Brand:N/A ReportNo.:PTC20120301603E-FC01 Preparedfor ShenzhenHuaXinInformationTechnologyCo.,Ltd. SectionA,10/F,Block1,No.7IndustrialPark,YuluCommunity,Yutang,GuangmingNew District,Shenzhen,China Preparedby PreciseTesting&CertificationCo.,Ltd Building1,No.6,TongxinRoad,DongchengStreet,Dongguan,Guangdong,China ReportNo.:PTC20120301603E-FC01 Page 2 of 66 1TESTRESULTCERTIFICATION Applicant’sname:ShenzhenHuaXinInformationTechnologyCo.,Ltd. Address: SectionA,10/F,Block1,No.7IndustrialPark,Yulu Community,Yutang,GuangmingNewDistrict,Shenzhen,China Manufacture'sname:ShenzhenHuaXinInformationTechnologyCo.,Ltd. Address: SectionA,10/F,Block1,No.7IndustrialPark,Yulu Community,Yutang,GuangmingNewDistrict,Shenzhen,China Productname: RoboticVacuumCleaner Modelname : X500,X500i,X500w,X500r,X500Pro,X520,X530,X550,X580,X-503, X500s,X500u,Robvacuum8X500t,D5,D51,D52,D5s,D5Pro,X500e,S15, N5,S15SERIES,E5,E5S,E5W,E550,E560,E570,X521,X531,X551,X561, M1,M1PRO Standards :FCCCFR47Part15Section15.247 Testprocedure:ANSIC63.10:2013 TestDate:Dec08,2020toDec16,2020 DateofIssue:Dec16,2020 TestResult:Pass ThisdevicedescribedabovehasbeentestedbyPTC,andthetestresultsshowthattheequipmentunder test(EUT)isincompliancewiththeFCCrequirements.Anditisapplicableonlytothetestedsample identifiedinthereport. Thisreportshallnotbereproducedexceptinfull,withoutthewrittenapprovalofPTC,thisdocumentmaybe alteredorrevisedbyPTC,personalonly,andshallbenotedintherevisionofthedocument. TestEngineer: LeoYang/Engineer TechnicalManager: ChrisDu/Manager ReportNo.:PTC20120301603E-FC01 Page 3 of 66 Contents Page 1TESTRESULTCERTIFICATION................................................................................................................................2 2TESTSUMMARY...........................................................................................................................................................5 3GENERALINFORMATION..........................................................................................................................................6 3.1GENERALDESCRIPTIONOFE.U.T.....................................................................................................................6 3.2CHANNELLIST......................................................................................................................................................7 3.3TESTSITE...........................................................................................................................................................10 4EQUIPMENTDURINGTEST.....................................................................................................................................11 4.1EQUIPMENTSLIST..............................................................................................................................................11 4.2MEASUREMENTUNCERTAINTY..........................................................................................................................13 4.3DESCRIPTIONOFSUPPORTUNITS....................................................................................................................14 5CONDUCTEDEMISSION...........................................................................................................................................15 5.1E.U.T.OPERATION............................................................................................................................................15 5.2EUTSETUP........................................................................................................................................................15 5.3TESTSET-UP(BLOCKDIAGRAMOFCONFIGURATION)..................................................................................16 5.4MEASUREMENTPROCEDURE............................................................................................................................16 5.5CONDUCTEDEMISSIONLIMIT............................................................................................................................16 5.6MEASUREMENTDESCRIPTION...........................................................................................................................16 5.7CONDUCTEDEMISSIONTESTRESULT..............................................................................................................16 6RADIATEDSPURIOUSEMISSIONS.......................................................................................................................19 6.1EUTOPERATION...............................................................................................................................................19 6.2TESTSETUP.......................................................................................................................................................20 6.3SPECTRUMANALYZERSETUP...........................................................................................................................21 6.4TESTPROCEDURE.............................................................................................................................................22 6.5SUMMARYOFTESTRESULTS...........................................................................................................................23 7CONDUCTEDSPURIOUSEMISSION.....................................................................................................................30 7.1TESTPROCEDURE.............................................................................................................................................30 7.2TESTRESULT.........................................................................................................…
Text truncated - open the document above for the full version.
Test Setup Photos
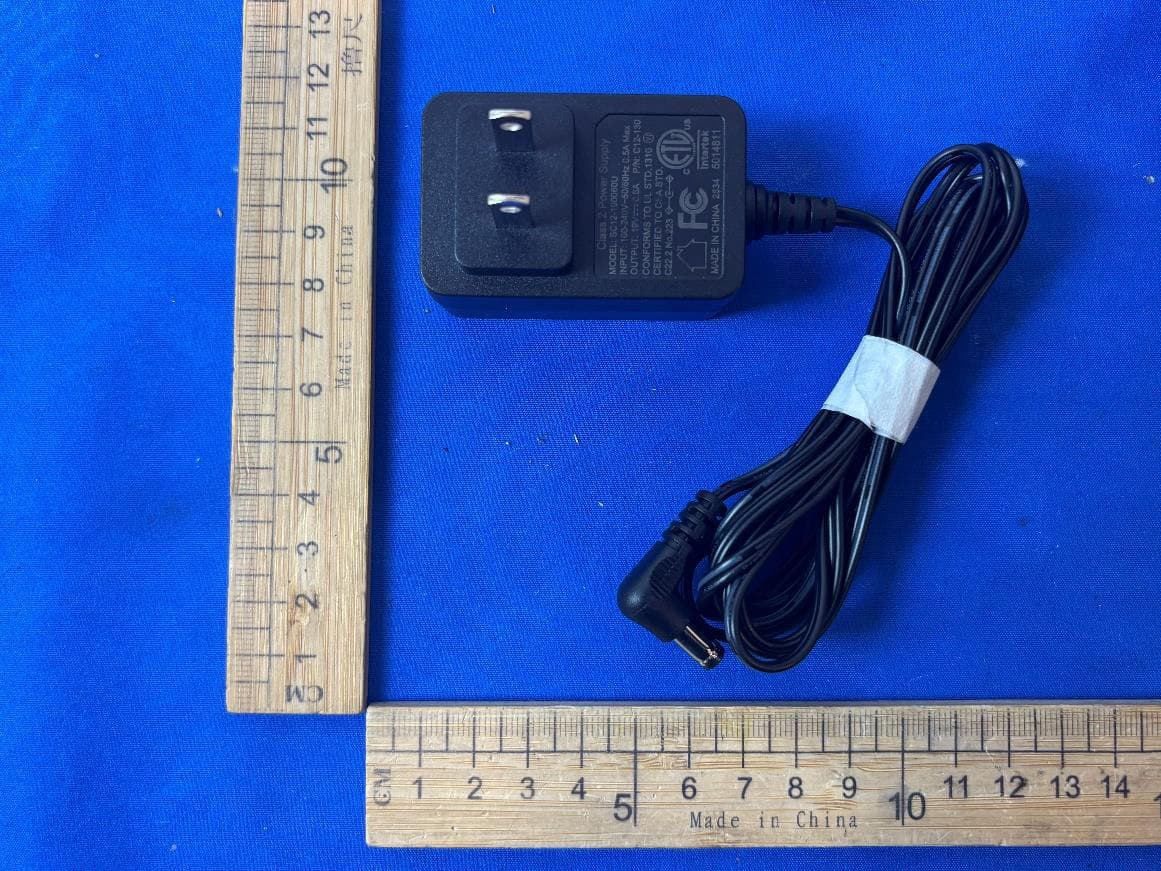
ConductedEmissions RadiatedSpuriousEmissions From30MHz-1000MHz TestfrequencyfromAbove1GHz
Contact Information
Applicant
Suping Zhan
Technical Contact
Shenzhen Hua Xin Information Technology Co.,Ltd.Suping zhan
[email protected]13516823366
Shenzhen · China
Test Firm
Precise Testing & Certification Co., LTD.Chris Du
[email protected]+86-769-38808222
Technical Specifications
| # | Rule Parts | Frequency Range | Power Output |
|---|---|---|---|
| 1 | 15C | 2.41 GHz - 2.46 GHz | 64.00 mW |
Other Applications from Shenzhen Hua Xin Information Technology Co., Ltd
2AMYQ-2026G300
Apr 01, 2026Robotic vacuum cleaner
Equipment Class
DTS - Digital Transmission System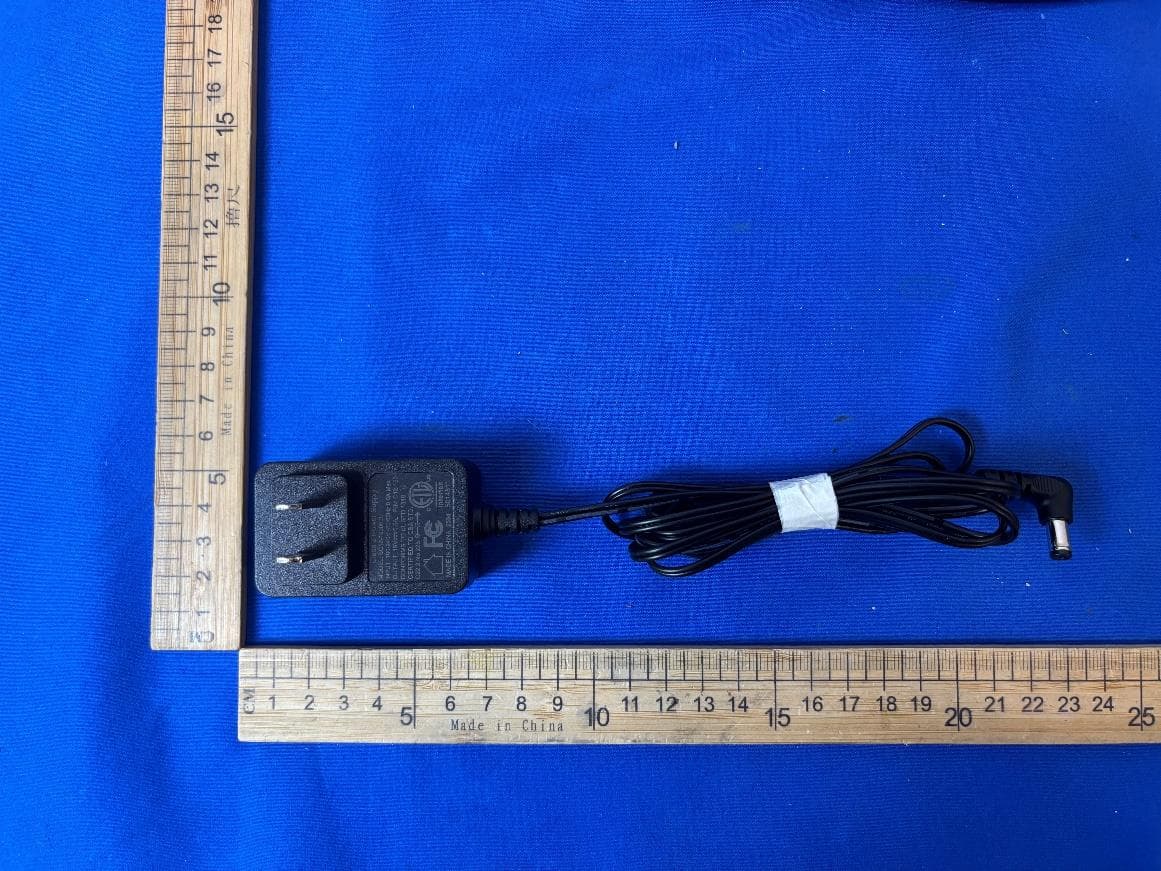
2AMYQ-2025G580
Dec 12, 2025Robotic vacuum cleaner
Equipment Class
DTS - Digital Transmission System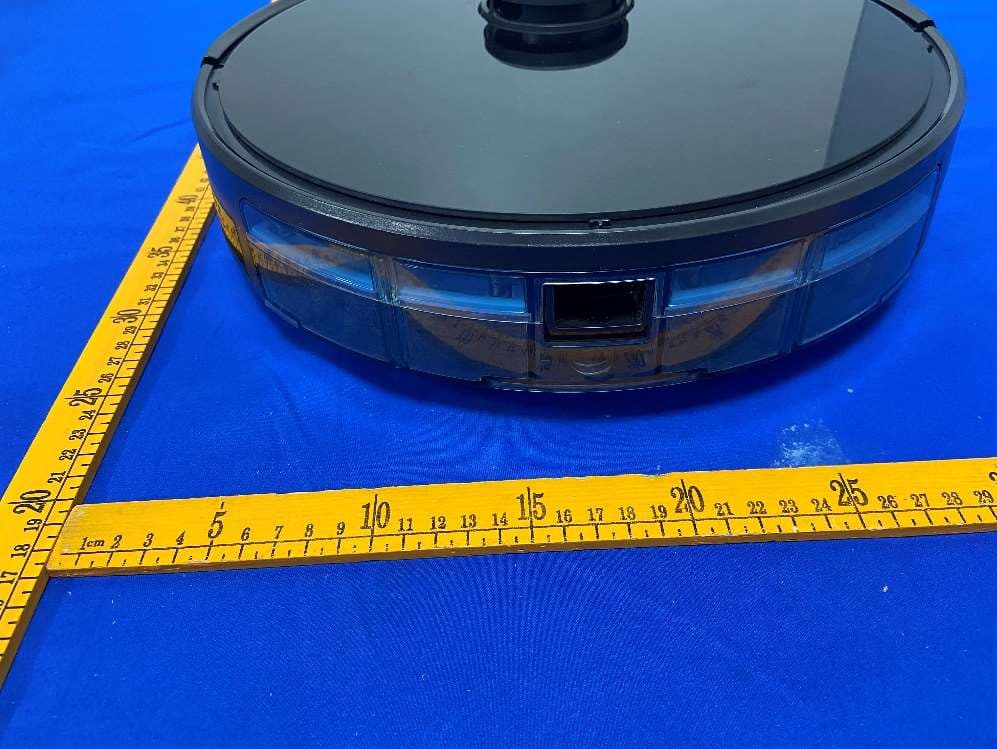
2AMYQ-202012GD580
Jan 28, 2021Robotic Vacuum Cleaner
Equipment Class
DTS - Digital Transmission System
2AMYQ-202012K100
Jan 02, 2021Robotic Vacuum Cleaner
Equipment Class
DTS - Digital Transmission System
2AMYQ-2020X700MG
Sep 16, 2020Robotic Vacuum Cleaner
Equipment Class
DTS - Digital Transmission System