2AXJ4BE805BE19000 Tri-Band Wi-Fi 7 Router
TP-Link Corporation Limited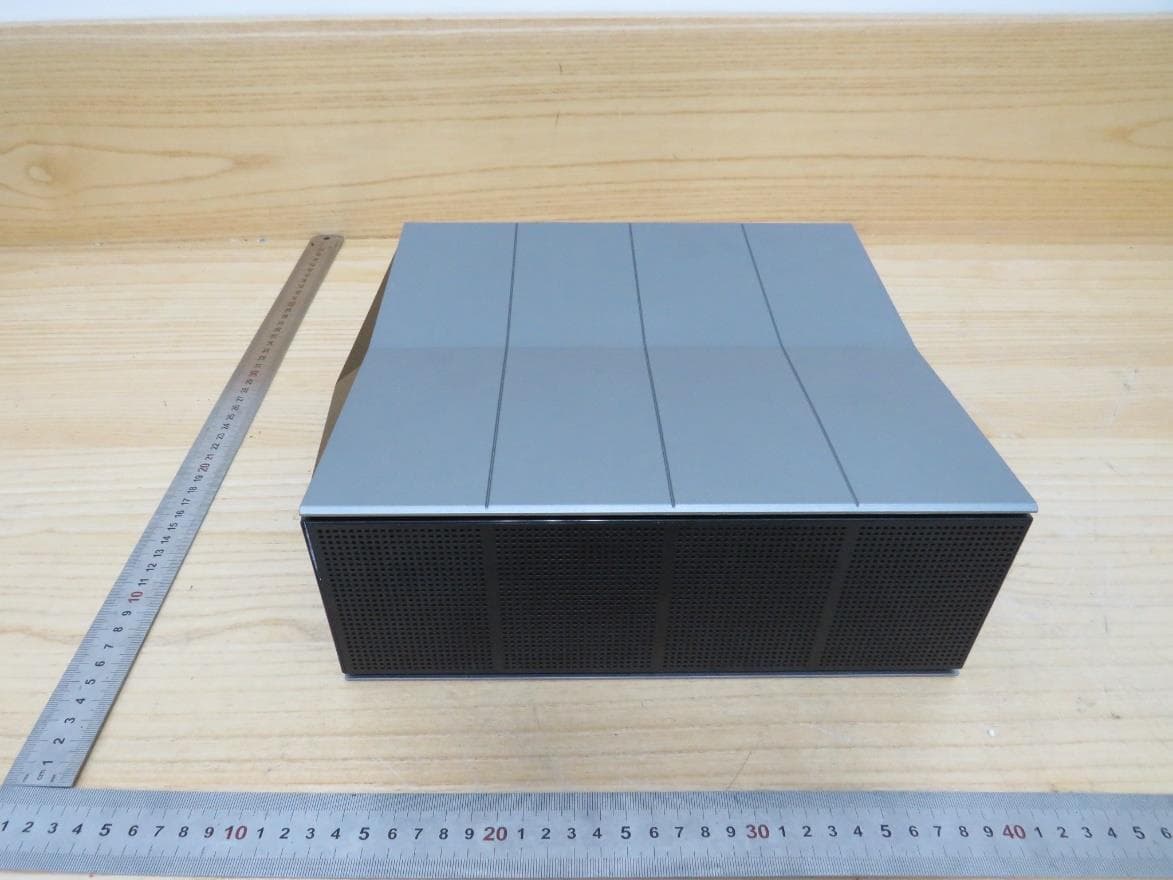
Click to zoom
Application Details
- Equipment Class
- 6ID - 15E 6 GHz Low Power Indoor Access Point
- Date of Grant
- Jul 06, 2023
- Application Purpose
- Original Equipment
- Date of Application
- Jun 20, 2023
- Equipment Note
- BE19000 Tri-Band Wi-Fi 7 Router
- Frequency Range
- 5955.00000000 - 7115.00000000
- Company
- TP-Link Corporation Limited
- Country
- Hong Kong
Documents & Files
Document Text
Text extracted from the exhibit documents filed with the FCC. Open a document above to read the original.
Users Manual
© 2023 TP-Link 1910013365 REV1.0.0 User Guide BE19000 Tri-Band Wi-Fi 7 Router Archer BE805 Contents About This Guide 1 Chapter 1 Get to Kno w About Your Router 3 Chapter 2 Connect the Hardware 7 2. 1. Position Your Router . . . . . . . . . . . . . . . . . . . . . . . . . . . . . . . . . . . . . . . . . . . . . . . . . . . . . . . . . 8 2. 2. Connect Your Router. . . . . . . . . . . . . . . . . . . . . . . . . . . . . . . . . . . . . . . . . . . . . . . . . . . . . . . . . 8 Chapter 3 Log In to Your Router 11 Chapter 4 Set Up Internet Connection 13 4. 1. Use Quick Setup Wizard . . . . . . . . . . . . . . . . . . . . . . . . . . . . . . . . . . . . . . . . . . . . . . . . . . . .14 4. 2. Quick Setup Via TP-Link Tether App. . . . . . . . . . . . . . . . . . . . . . . . . . . . . . . . . . . . . . . . .14 4. 3. Manually Set Up Your Internet Connection . . . . . . . . . . . . . . . . . . . . . . . . . . . . . . . . . .15 4. 4. Set Up the Rout er as an Access Point . . . . . . . . . . . . . . . . . . . . . . . . . . . . . . . . . . . . . . .18 4. 5. Set Up an IPv6 Internet Connection. . . . . . . . . . . . . . . . . . . . . . . . . . . . . . . . . . . . . . . . .19 Chapter 5 TP-Link Cloud Service 23 5. 1. Register a TP-Link ID. . . . . . . . . . . . . . . . . . . . . . . . . . . . . . . . . . . . . . . . . . . . . . . . . . . . . . . .24 5. 2. Change Your TP-Link ID Information. . . . . . . . . . . . . . . . . . . . . . . . . . . . . . . . . . . . . . . . .24 5. 3. Manage the User TP -Link IDs . . . . . . . . . . . . . . . . . . . . . . . . . . . . . . . . . . . . . . . . . . . . . . .25 5. 3. 1. Add TP-Link ID to Manage the Router. . . . . . . . . . . . . . . . . . . . . . . . . . . . . . . . .26 5. 3. 2. Remove TP-Link ID(s) from Managing the Router. . . . . . . . . . . . . . . . . . . . . .26 5. 4. Manage the Router via the TP-Link Tether App . . . . . . . . . . . . . . . . . . . . . . . . . . . . . .27 Chapter 6 Network Map 28 Chapter 8 Wireless Settings 41 8. 1. Specify Wireless Settings . . . . . . . . . . . . . . . . . . . . . . . . . . . . . . . . . . . . . . . . . . . . . . . . . .42 8. 2. Schedule Your Wireless Function . . . . . . . . . . . . . . . . . . . . . . . . . . . . . . . . . . . . . . . . . . .45 8. 3. Use WPS for Wireless Connection . . . . . . . . . . . . . . . . . . . . . . . . . . . . . . . . . . . . . . . . . .46 8. 3. 1. Connect via the Client’s PIN . . . . . . . . . . . . . . . . . . . . . . . . . . . . . . . . . . . . . . . . . .46 8. 3. 2. Connect via the Router’s PIN . . . . . . . . . . . . . . . . . . . . . . . . . . . . . . . . . . . . . . . . .47 8. 3. 3. Push the WPS Button. . . . . . . . . . . . . . . . . . . . . . . . . . . . . . . . . . . . . . . . . . . . . . . . .47 8. 4. Advanced Wireless Settings . . . . . . . . . . . . . . . . . . . . . . . . . . . . . . . . . . . . . . . . . . . . . . . .48 Chapter 9 Guest Network 50 9. 1. Create a Network for Guests . . . . . . . . . . . . . . . . . . . . . . . . . . . . . . . . . . . . . . . . . . . . . . .51 9. 2. Customize Guest Network Options. . . . . . . . . . . . . . . . . . . . . . . . . . . . . . . . . . . . . . . . . .52 Chapter 10 USB Settings 53 10. 1. Access the USB Storage Device . . . . . . . . . . . . . . . . . . . . . . . . . . . . . . . . . . . . . . . . . . . .54 10. 1. 1. Access the USB Device Locally . . . . . . . . . . . . . . . . . . . . . . . . . . . . . . . . . . . . .54 10. 1. 2. A ccess the USB Device Remotely . . . . . . . . . . . . . . . . . . . . . . . . . . . . . . . . . . .55 10. 1. 3. Cust omize the Access Settings . . . . . . . . . . . . . . . . . . . . . . . . . . . . . . . . . . . . .57 10. 2. Media Sharing . . . . . . . . . . . . . . . . . . . . . . . . . . . . . . . . . . . . . . . . . . . . . . . . . . . . . . . . . . . . . .59 10. 3. Time Machine . . . . . . . . . . . . . . . . . . . . . . . . . . . . . . . . . . . . . . . . . . . . . . . . . . . . . . . . . . . . . .60 Chapter 11 HomeShield 62 11. 1. Network Check . . . . . . . . . . . . . . . . . . . . . . . . . . . . . . . . . . . . . . . . . . . . . . . . . . . . . . . . . . . . .63 11. 2. Parental Controls . . . . . . . . . . . . . . . . . . . . . . . . . . . . . . . . . . . . . . . . . . . . . . . . . . . . . . . . . . .63 11. 3. QoS . . . . . . . . . . . . . . . . . . . . . . . . . . . . . . . . . . . . . . . . . . . . . . . . . . . . . . . . . . . . . . . . . . . . . . . .67 11. 4. More Features . . . . . . . . . . . . . . . . . . . . . . . . . . . . . . . . . . . . . . . . . . . . . . . . . . . . . . . . . . . . . . 67 Chapter 12 OneMesh with Seamless Roaming 69 12. 1. Set Up a OneMesh Network. . . . . . . . . . . . . . . . . . . . . . . . . . . . . . . . . . . . . . . . . . . . . . . . .70 12. 2. Manage Devices in the OneMesh Network . . . . . . . . . . . . . . . . . . . . . . . . . . . . . . . . . .72 Chapter 13 Network Security 74 13. 1. Protect the Network from Cyber Attacks . . . . . . . . . . . . . . . . . . . . . . . . . . . . . . . . . . . . 75 13. 2. Access Control . . . . . . . . . . . . . . . . . . . . . . . . . . . . . . . . . . . . . . . . . . . . . . . . . . . . . . . . . . . . .75 13. 3. IP & MAC Binding . . . . . . . . . . . . . . . . . . . . . . . . . . . . . . . . . . . . . . . . . . . . . . . . . . . . . . . . . . .77 13. 4. AL G . . . . . . . . . . . . . . . . . . . . . . . . . . . . . . . . . . . . . . . . . . . . . . . . . . . . . . . . . . . . . . . . . . . . . . . . 79 Chapter 14 NAT Forwarding 80 14. 1. Share Local Resources on the Internet by Port Forwarding . . . . . . . . . . . . . . . . . .81 14. 2. Open Ports Dynamically by Port Triggering. . . . . . . . . . . . . . . . . . . . . . . . . . . . . . . . . .83 14. 3. Make Applications Free from Port Restriction by DMZ . . . . . . . . . . . . . . . . . . . . . . .84 14. 4. Make Xbox Online Games Run Smoothly by UPnP . . . . . . . . . . . . . . . . . . . . . . . . . . .85 Chapter 15 VPN Server&Client 87 15. 1. Use OpenVPN to Access Your Home Ne…
Text truncated - open the document above for the full version.
Users Manual
55 Chapter 10 USB Settings • Share photos and other large files with your friends without logging in to (and paying for) a photo-sharing site or email system. • Get a safe backup for the materials for a presentation. • Remove the files on your camera’s memory card from time to time during the journey. Note: If your ISP assigns a private WAN IP address (such as 192.168.x.x or 10.x.x.x), you cannot use this feature because private addresses are not routed on the internet. Follow the steps below to configure remote access settings. 1 Visit http://tplinkwifi.net, and log in with your TP-Link ID or the password you set for the router. 2 Go to Advanced > USB > USB Storage Device. 3 Tick the Internet FTP checkbox, and then click S AV E. 4 Refer to the following table to access your USB disk remotely. 56 Chapter 10 USB Settings Computer 1 ) Open the Windows Explorer (or go to Computer, only for Windows users) or open a web browser. 2 ) Type the server address in the address bar: Type in ftp://<WAN IP address of the router>:<port number> (such as ftp://59.40.2.243:21). If you have specified the domain name of the router, you can also type in ftp://<domain name>:<port number> (such as ftp://MyDomainName:21) 3 ) Press Enter on the keyboard. 4 ) Access with the username and password you set in To Set Up Authentication for Data Security. Tips: You can also access the USB disk via a third-party app for network files management, which can resume broken file transfers. Tablet Use a third-party app for network files management. Tips: Click Set Up a Dynamic DNS Service Account to learn how to set up a domain name for you router. 10 1 3 Customize the Access Settings By default, all the network clients can access all folders on your USB disk. You can customize your sharing settings by setting a sharing account, sharing specific contents and setting a new sharing address on the router’s web management page. 1 Visit http://tplinkwifi.net, and log in with your TP-Link ID or the password you set for the router. 2 Go to Advanced > USB > USB Storage Device. • To Customize the Address of the USB Storage Device You can customize the server name and use the name to access your USB storage device. 1 In the Access Method session, make sure Samba for Windows is ticked, and enter a Network/Media Server Name as you like, such as MyShare, then click S AV E. 57 Chapter 10 USB Settings 2 Now you can access the USB storage device by visiting \\MyShare (for Windows) or smb://MyShare (for Mac). • To Only Share Specific Content Focus on the File Sharing section. Specify sharing folders that you want to share and click S AV E. • To Set Up Authentication for Data Security You can set up authentication for your USB storage device so that network clients will be required to enter username and password when accessing the USB storage device. 1 In the File Sharing section, enable Secure Sharing. 58 Chapter 10 USB Settings 2 Click to modify the access account. The username and password are both admin for default administrator account, and both visit for default visitor account. Accessing as an administrator can read and modify the shared folders while visitors can only read the shared folders. Note: 1. For Windows users, do not set the sharing username the same as the Windows username. Otherwise, Windows credential mechanism may cause the following problems: • If the sharing password is also the same as the Windows password, authentication will not work since the Windows will automatically use its account information for USB access. • If the sharing password is different from the Windows password, the Windows will be unable to remember your credentials and you will always be required to enter the sharing password for USB access. 2. Due to Windows credential mechanism, you might be unable to access the USB disk after changing Authentication settings. Please log out from the Windows and try to access again. Or you can change the address of the USB disk by referring to To Customize the Address of the USB Storage Device. 10 2 Media Sharing The feature of Media Sharing allows you to view photos, play music and watch movies stored on the USB storage device directly from DLNA-supported devices, such as your computer, tablet and PS2/3/4. 1 Visit http://tplinkwifi.net, and log in with your TP-Link ID or the password you set for the router. 2 Go to Advanced > USB > USB Storage Device. 3 Enable Media Sharing. 4 When your USB storage device is inserted into the router, your DLNA-supported devices (such as your computer and pad) connected to the router can detect and play the media files on the USB storage devices. 5 Refer to the following table for detailed instructions. 59 Chapter 10 USB Settings Windows Computer • Go to Computer > Network, then click the Media Server Name (Model number-share by default) in the Media Devices section. Note: Here we take Windows 7 as an example. Tablet • Use a third-party DLNA-supported player. 10 3 Time Machine Time Machine backs up all files on your Mac computer to a USB storage device connected to your router. 1 Visit http://tplinkwifi.net, and log in with your TP-Link ID or the password you set for the router. 2 Go to Advanced > USB > Time Machine. 60 Chapter 10 USB Settings 3 Tick the checkbox to enable Time Machine. 4 Click Select to select a location for Time Machine backups. 5 Set the Size Limit for Backups. Note: 0 means no limit for the space. 6 Click S AV E. Chapter 11 HomeShield Customize your home network with enhanced security using a kit of features built in TP-Link HomeShield. Whether protecting your sensitive data or limiting the access of kids and guests, TP-Link HomeShield provides you the tools you need to fully manage your network. It contains the following sections: • Network Check • Parental Controls • QoS • More Features *For an easier way to check your home network protection system, you can download the Tether app to enjoy full Homeshield Pro feature. 62 Chapter 11 HomeShield 11 1 Network …
Text truncated - open the document above for the full version.
Users Manual
98 Chapter 15 VPN Server&Client 9. Find the VPN connection you created, then double-click it. 10. Enter the User name and Password you have set for the L2TP/IPSec VPN server on your router, and click Properties. 99 Chapter 15 VPN Server&Client 11. Switch to the Security tab, select Layer 2 Tunneling Protocol with IPsec (L2TP/ IPSec) and click Advanced settings. 12. Select Use preshared key for authentication and enter the IPSec Pre-Shared Key you have set for the L2TP/IPSec VPN server on your router. Then click OK. Done! Click Connect to start VPN connection. 100 Chapter 15 VPN Server&Client 15 4 Use VPN Client to Access a Remote VPN Server VPN Client is used to create VPN connections for devices in your home network to access a remote VPN server. To use the VPN feature, simply configure a VPN connection and choose your desired devices on your router, then these devices can access the remote VPN server. Please follow the steps below: INTERNET Home DevicesRouter (VPN Client)VPN Servers 1. Visit http://tplinkwifi.net, and log in with your TP-Link ID or the password you set for the router. 2. Go to Advanced > VPN Client. Note: Firmware update may be required to support VPN Client. 3. Enable VPN Client, then save the settings. 4. Add VPN servers, and enable the one you need. 1 ) In the Server List section, click Add. 2 ) Specify a description for the VPN, and choose the VPN type. 101 Chapter 15 VPN Server&Client 3 ) Enter the VPN information provided by your VPN provider. • OpenVPN: Enter the VPN username and password if required by your VPN provider, otherwise simply leave them empty. Then import the configuration file provided by your VPN provider. • PPTP: Enter the VPN server address (for example: 218.18.1.73) and the VPN username and password provided by your VPN provider. 102 Chapter 15 VPN Server&Client • L2TP/IPSec VPN: Enter the VPN server address (for example: 218.18.1.73), VPN username and password, and IPSec pre-shared key provided by your VPN provider. 4 ) Save the settings. 5 ) In the server list, enable the one you need. 103 Chapter 15 VPN Server&Client 5. Add and manage the devices that will use the VPN function. 1 ) In the Device List section, click Add. 2 ) Choose and add the devices that will access the VPN server you have configured. 6. Save the settings. 104 Chapter 15 VPN Server&Client Done! Now the devices you specified can access the VPN server you enabled. Chapter 16 Customize Your Network Settings This chapter guides you on how to configure advanced network features. It contains the following sections: • Change the Internet Settings • Change the LAN Settings • Configure to Support IPTV Service • Specify DHCP Server Settings • Set Up a Dynamic DNS Service Account • Create Static Routes 106 Chapter 16 Customize Your Network Settings 16 1 Change the Internet Settings After setting up your internet, you can also easily change the internet settings if needed in the future. 1. Visit http://tplinkwifi.net, and log in with your TP-Link ID or the password you set for the router. 2. Go to Advanced > Network > Internet. • To change the internet port: 1. Select the desired internet port. Make sure the cable is securely connected to this port on your router. 2. Click S AV E. • To change the internet connection settings: 107 Chapter 16 Customize Your Network Settings 1. Select the internet connection type and configure the settings according to the information provided by your ISP. 2. Optional. Reveal the advanced settings and change the settings if needed. It’s recommended to keep the default settings. 3. Click S AV E. • To change the MAC address of the router: You have three options, Use Default MAC Address, Clone Current Device MAC, Use Custom MAC Address. 108 Chapter 16 Customize Your Network Settings • To change the Internet Port Negotiation Speed Setting You can change the internet port speed mode. Auto Negotiation is recommended. 16 2 Change the LAN Settings The router is preset with a default LAN IP 192.168.0.1, which you can use to log in to its web management page. The LAN IP address together with the Subnet Mask also defines the subnet that the connected devices are on. If the IP address conflicts with another device on your local network or your network requires a specific IP subnet, you can change it. 1. Visit http://tplinkwifi.net, and log in with your TP-Link ID or the password you set for the router. 2. Go to Advanced > Network > LAN. 3. Type in a new IP Address appropriate to your needs. And leave the Subnet Mask as the default settings. 4. Click S AV E. Note: If you have set the Port Forwarding, DMZ or DHCP address reservation, and the new LAN IP address is not in the same subnet with the old one, then you should reconfigure these features. 16 3 Configure to Support IPTV Service I want to: Configure IPTV setup to enable Internet/IPTV/Phone service provided by my internet service provider (ISP). How can I do that? 109 Chapter 16 Customize Your Network Settings 1 Visit http://tplinkwifi.net, and log in with your TP-Link ID or the password you set for the router. 2 Go to Advanced > Network > IPTV/VLAN. 3 If your ISP provides the networking service based on IGMP technology, e.g., British Telecom(BT) and Talk Talk in UK: 1 ) Tick the IGMP Proxy and IGMP Snooping checkbox, then select the IGMP Version, either V2 or V3, as required by your ISP. 2 ) Click S AV E. 3 ) After configuring IGMP proxy, IPTV can work behind your router now. You can connect your set-top box to any of the router’s Ethernet port. If IGMP is not the technology your ISP applies to provide IPTV service: 1 ) Tick Enable IPTV/VLAN. 2 ) Select the appropriate Mode according to your ISP. • Select Bridge if your ISP is not listed and no other parameters are required. • Select Custom if your ISP is not listed but provides necessary parameters. 3 ) After you have selected a mode, the necessary parameters, including the LAN port for IPTV connection, are predetermined. If not, select the LAN type to determine…
Text truncated - open the document above for the full version.
Users Manual
130 Chapter 17 Manage the Router 2. Select the correct Start date and time when daylight saving time starts at your local time zone. 3. Select the correct End date and time when daylight saving time ends at your local time zone. 4. Click S AV E. • To set system language: Select the language from the dropdown list, then click S AV E. 17 10 Set the Router to Reboot Regularly The Scheduled Reboot feature cleans the cache to enhance the running performance of the router. 1. Visit http://tplinkwifi.net, and log in with your TP-Link ID or the password you set for the router. 2. Go to Advanced > System > Reboot. 3. Tick the Enable box of Reboot Schedule. 131 Chapter 17 Manage the Router 4. Specify the Reboot Time when the router reboots and Repeat to decide how often it reboots. 5. Click S AV E. 17 11 Control the LED The LED of the router indicates its activities and status. You can enable the Night Mode feature to specify a time period during which the LED is off. 1. Visit http://tplinkwifi.net, and log in with your TP-Link ID or the password you set for the router. 2. Go to Advanced > System > LED Control. 3. Enable Night Mode. 4. Specify the LED off time, and the LED will be off during this period every day. 5. Click S AV E. 132 Chapter 17 Manage the Router 17 12 Volume Control You can disable the speaker or adjust the volume of the device’s speaker, and you can also enable Do Not Disturb mode to schedule when the speaker is off. 1. Visit http://tplinkwifi.net, and log in with your TP-Link ID or the password you set for the router. 2. Go to Advanced > System > Volume Control. 3. You can disable the speaker or hold and drug the bar to adjust the volume of the speaker. 4. (Optional) If you want to schedule when the voice alerts will be silenced. Enable Do Not Disturb Mode 5. Specify the speaker off time, and the speaker will be off during this period every day. 6. Click S AV E. 133 FAQ Q1 What should I do if I forget my wireless password? The default wireless password is printed on the label of the router. If the password has been altered: 1. Connect your computer to the router using an Ethernet cable. 2. Visit http://tplinkwifi.net, and log in with your TP-Link ID or the password you set for the router. 3. Go to Wireless to retrieve or reset your wireless password. Q2 What should I do if I forget my web management password? • If you are using a TP-Link ID to log in, or you have enabled the Password Recovery feature of the router, click Forgot password on the login page and then follow the instructions to reset it. • Alternatively, press and hold the Reset button of the router for about 6 seconds until the Power LED blinks to restore factory default settings, and then visit http://tplinkwifi.net to create a new login password. Note: • Please refer to Password Recovery to learn how to configure Password Recovery. • You’ll need to reconfigure the router to surf the internet once the router is reset, and please mark down your new password for future use. Q3 What should I do if I can’t log in to the router’s web management page? This can happen for a variety of reasons. Please try the methods below to log in again. • Make sure your computer is connected to the router correctly and the corresponding LED indicator(s) light up. • Make sure the IP address of your computer is configured as Obtain an IP address automatically and Obtain DNS server address automatically. • Make sure http://tplinkwifi.net or http://192.168.0.1 is correctly entered. • Check your computer’s settings: 1 ) Go to Start > Control Panel > Network and Internet, and click View network status and tasks. 2 ) Click Internet Options on the bottom left. 3 ) Click Connections and select Never dial a connection. 134 4 ) Click LAN settings and deselect the following three options and click OK. 5 ) Go to Advanced > Restore advanced settings, click OK to save the settings. 135 • Use another web browser or computer to log in again. • Reset the router to factory default settings and try again. If login still fails, please contact the technical support. Note: You’ll need to reconfigure the router to surf the internet once the router is reset. Q4 What should I do if I can’t access the internet even though the configuration is finished? 1 Visit http://tplinkwifi.net, and log in with your TP-Link ID or the password you set for the router. 2 Go to Advanced> Network > Status to check internet status: If IP Address is a valid one, please try the methods below and try again: • Your computer might not recognize any DNS server addresses. Please manually configure the DNS server. 1 ) Go to Advanced > Network > DHCP Server. 2 ) Enter 8.8.8.8 as Primary DNS, click S AV E. Tips: 8.8.8.8 is a safe and public DNS server operated by Google. 136 • Restart the modem and the router. 1 ) Power off your modem and router, and leave them off for 1 minute. 2 ) Power on your modem first, and wait about 2 minutes until it gets a solid cable or Internet light. 3 ) Power on the router. 4 ) Wait another 1 or 2 minutes and check the internet access. • Reset the router to factory default settings and reconfigure the router. • Upgrade the firmware of the router. • Check the TCP/IP settings on the particular device if all other devices can get internet from the router. As the picture below shows, if the IP Address is 0 0 0 0, please try the methods below and try again: • Make sure the physical connection between the router and the modem is proper. • Clone the MAC address of your computer. 137 1 ) Visit http://tplinkwifi.net, and log in with your TP-Link ID or the password you set for the router. 2 ) Go to Internet or Advanced > Network > Internet and focus on the MAC Clone section. 3 ) Choose an option as needed (enter the MAC address if Use Custom MAC Address is selected), and click S AV E. Tips: • Some ISP will register the MAC address of your computer when you access the internet for the first time through their Cable modem, if you add a router into your network to share yo…
Text truncated - open the document above for the full version.
Attestation Statements
012423-17 rev2 TP-Link Corporation Limited Certification Application Attestation Statements Date: March 1, 2023 American Certification Body, Inc. 313 Park Avenue Suite 300 Falls Church, VA 22046 T o Whom It May Concern: Statement for 47 CFR section 2.911(d)(5)(i) ______ TP-Link Corporation Limited______ certifies that as of the date of the application the equipment for which authorization is sought is not “covered” equipment 1 prohibited from receiving an equipment authorization pursuant to section 2.903 of the FCC rules. If the equipment for which the applicant seeks authorization is produced by any of the entities identified on the current Covered List, including affiliates or subsidiaries of the named companies, the applicant must include an explanation on why the equipment is not “covered” equipment. Additional Explanation: <N/A> Statement for 47 CFR section 2.911(d)(5)(ii) ______ TP-Link Corporation Limited______ (“the applicant”) certifies that, as of the date of the filing of this application, the applicant ☐ - is / ■- is not identified on the Covered List as an entity producing “covered” equipment. Thank you, By: _________________________ Sarah Wang (Signature 2 ) (Print name) Title: __ Regulatory Compliance Manager __ Company: __ TP-Link Corporation Limited_ Telephone: ___ 00852-37585053 ______ 1 - The Commission’s Covered List is published by the Public Safety and Homeland Security Bureau and posted on the Commission’s website. This Covered List, which is periodically updated, identifies particular equipment, produced by particular entities, that constitutes “covered” equipment. https://www.fcc.gov/supplychain/coveredlist . 2 - Letters should be placed on appropriate letterhead.
Attestation Statements
Letter of Declaration on Indoor Access Point (6ID) Operation Federal Communications Commission Authorization and Evaluation Division 7435 Oakland Mills Road Columbia, MD 21046 FCC ID: 2AXJ4BE805 To Whom It May Concern We, TP-Link Corporation Limited (Address: Room 901, 9/F., New East Ocean Centre, 9 Science Museum Road, Tsim Sha Tsui, Kowloon, Hongkong), attest that this Indoor Access Point device complies with the following requirements of Part 15E of the FCC’s rules for 6G bands: Protocol attestation statement: FCC ID: 2AXJ4BE805 To Whom It May Concern: Indoor Access Point 6ID: We, TP-Link Corporation Limited attest that this low-power indoor access point complies with the following requirements of Part 15E of the FCC' rules for the 5.925~7.125 GHz band: 1. This device’s transmit power spectral density is in accordance with the rules for low- power indoor access points. 2.Contention-based protocol, as demonstrated in the test report, is permanently embedded in the chip (MT7988+MT7990+MT7976G+MT7977*2+AQR113C*2) and is not host dependent. 3.An 11ax IEEE AP’s Transmit Power Envelope element has information fields for power limits for connecting client/subordinate devices. The TPE information is embedded in this device’s signals and used to tell the connecting clients/subordinate that the max TX powers it is allowed to transmit. There is a regulatory info field in this device’s beacon and probe response frames which details this device type when the client/subordinate associates to this device. Statement acknowledging device restrictions: 1. This device was supplied power from a wired connection, has an integrated antenna, is not battery-powered, and does not have a weatherized enclosure. 2. This device's operation will not be allowed on oil platforms, cars, trains, boats, and aircraft, except that operation of this device is permitted in large aircraft while flying above 10,000 feet. 3. This device is prohibited for control of or communications with unmanned aircraft systems, including drones. Sincerely, Position: Regulatory Compliance Manager Date: 2022-05-25 Name: Sarah Wang
Cover Letter(s)
TP-LinkCorporationLimited 050222-17 AuthoritytoActasAgent Date:April24,2023 AmericanCertificationBody,Inc. 313ParkAvenue Suite300 FallsChurch,VA22046 ToWhomItMayConcern: ULVerificationServices(Guangzhou)Co.,Ltd,SongShanLakeBranch__isauthorizedtoactonour behalf,untilotherwisenotified,forapplicationstoAmericanCertificationBody,Inc.(ACB). Wecertifythatwearenotsubjecttodenialoffederalbenefits,thatincludesFCCbenefits,pursuantto Section5301oftheAnti-DrugAbuseActof1988,21U.S.C.862.Further,noparty,asdefinedin47 CFR1.2002(b),totheapplicationissubjecttodenialoffederalbenefits,thatincludesFCCbenefits. WealsodeclarethattheinformationprovidedtotheFCCistrueandcorrecttothebestofour knowledge(47CFR2.911(d))andwehavebeeninformedofthegranteeresponsibilities(47CFR 2.909)withregardtocertifiedequipment. Thankyou, AgencyAgreementExpirationDate:____4 /24/2024 By:_____________________________________SarahWang_____________ (Signature 1 )(Printname) Title:__________LeadofProductCertificationTeam________________ Onbehalfof:_________TP-LinkCorporationLimited._________________________________ (CompanyName) Telephone:_______________+8675526615494___________________ 1 -MustbesignedbyapplicantcontactgivenforapplicantontheFCCsite,orbytheauthorizedagentifanappropriateauthorizedagent letterhasbeenprovided.Lettersshouldbeplacedonappropriateletterhead.
Cover Letter(s)
TP-LinkCorporationLimited. 050222-17 RequestforConfidentiality Date:May4,2023 Subject:ConfidentialityRequestfor:___2AXJ4BE805_____ PursuanttoFCC47CFR0.457(d)and0.459and/orICRSP-100,Section12.4,theapplicantrequeststhatapartofthe subjectapplication(s)beheldconfidential. TypeofConfidentialityRequestedExhibit ☐ShortTerm☒PermanentBlockDiagrams ☐ShortTerm---------------------------ExternalPhotos ☐ShortTerm☐Permanent* 1 InternalPhotos ☐ShortTerm☒PermanentOperationDescription/TheoryofOperation ☐ShortTerm☐PermanentPartsList&Placement/BOM ☐ShortTerm☐PermanentTune-UpProcedure ☐ShortTerm☒PermanentSchematics ☐ShortTerm---------------------------TestSetupPhotos ☐ShortTerm☐Permanent* 1 User’sManual TP-LinkCorporationLimited.hasspentsubstantialeffortindevelopingthisproductanditisoneofthefirstofits kindinindustry.Havingthesubjectinformati…
Text truncated - open the document above for the full version.
Contact Information
Applicant
Sarah Wang
Technical Contact
UL Verification Services (Guangzhou) Co., Ltd, Sonvicky Gao
[email protected]+8676933817138
Building 10, Innovation Technology Park, No. 1, · Dongguan · China
Non-Technical Contact
UL Verification Services (Guangzhou) Co., Ltd, Sonvicky Gao
[email protected]+8676933817138
Test Firm
UL Verification Services (Guangzhou) Co., Ltd.Stephen Guo
[email protected]+86 0769 33817120
Technical Specifications
| # | Rule Parts | Frequency Range | Power Output |
|---|---|---|---|
| 1 | 15E | 5.96 GHz - 7.12 GHz | 659.20 mW |
Other Applications from TP-Link Corporation Limited
2AXJ4TXE50UH
Jan 28, 2024AXE3000 Wi-Fi 6E High Gain Wireless USB Adapter
Equipment Class
NII - Unlicensed National Information Infrastructure TX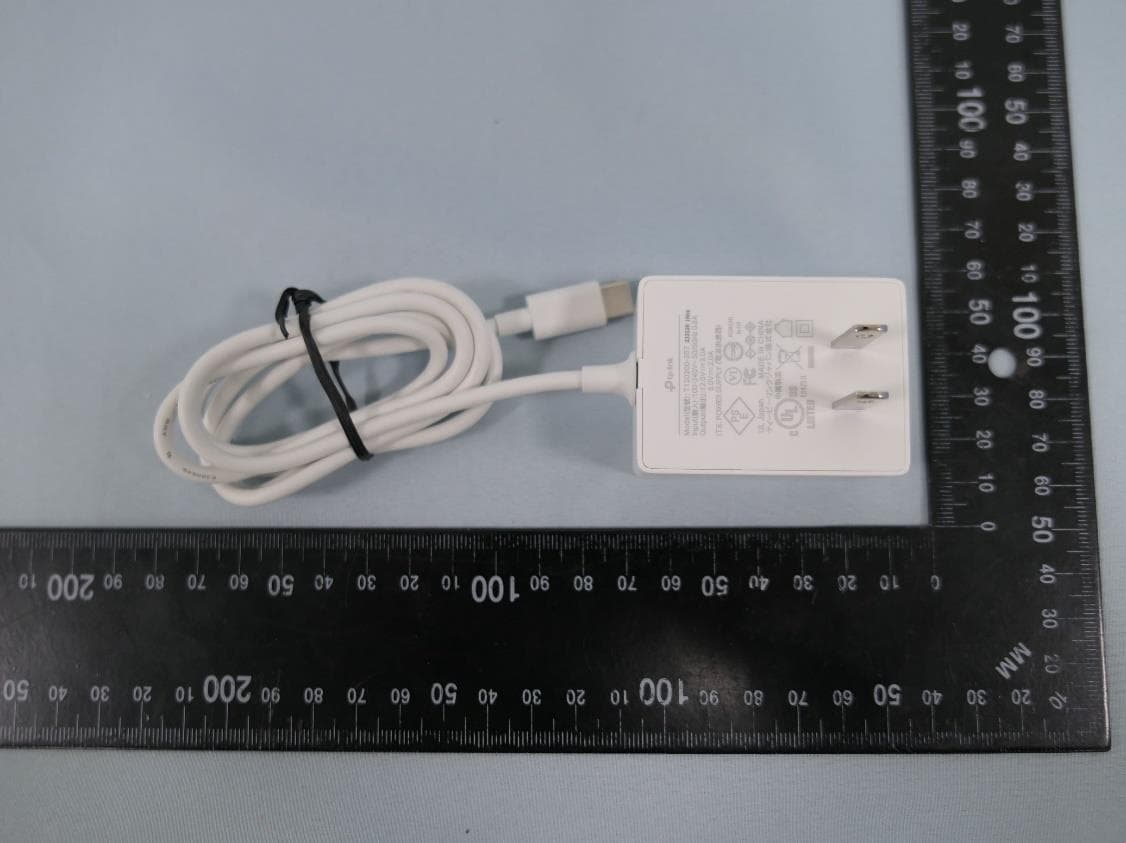
2AXJ4AIRE5
Jan 15, 2024AX3000 Wi-Fi 6 Air Range Extender
Equipment Class
DTS - Digital Transmission System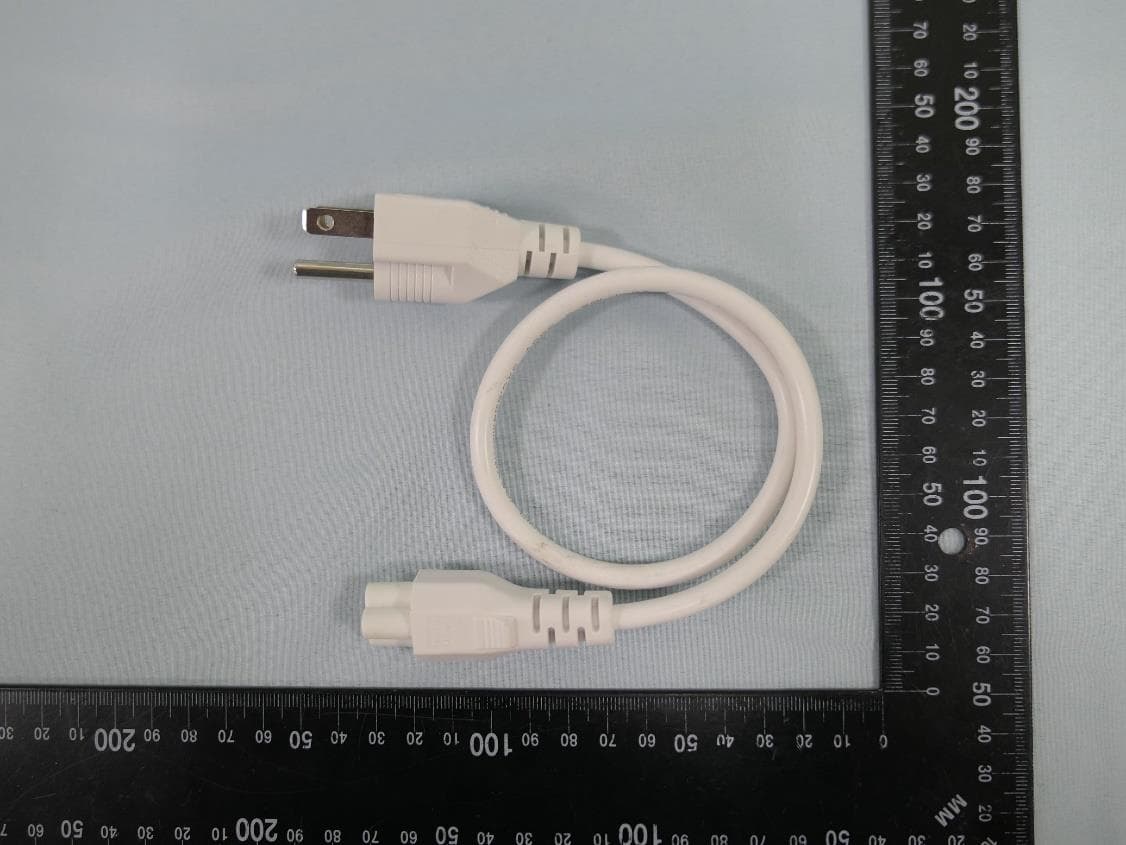
2AXJ4EAP115BRG
Jan 11, 20245GHz 300Mbps Long-range Indoor/Outdoor Access Point
Equipment Class
NII - Unlicensed National Information Infrastructure TX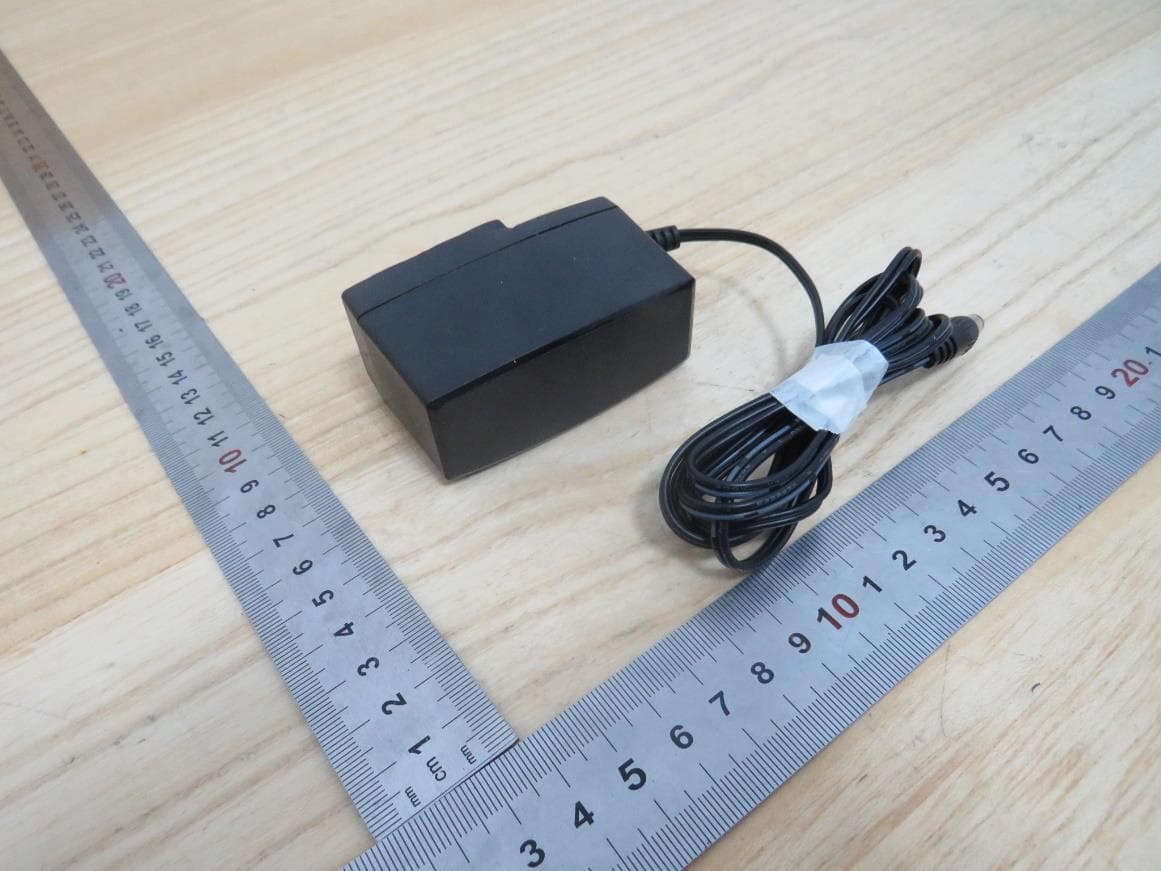
2AXJ4HX510V2
Jan 10, 2024AX3000 Whole Home Mesh Wi-Fi AP
Equipment Class
NII - Unlicensed National Information Infrastructure TX
2AXJ4EAP215BRG
Dec 11, 20235GHz 867Mbps Long-range Indoor/Outdoor Access Point
Equipment Class
NII - Unlicensed National Information Infrastructure TX