2AXJ4EX141AX1500 Dual Band Gigabit Wi-Fi 6 Router
TP-Link Corporation Limited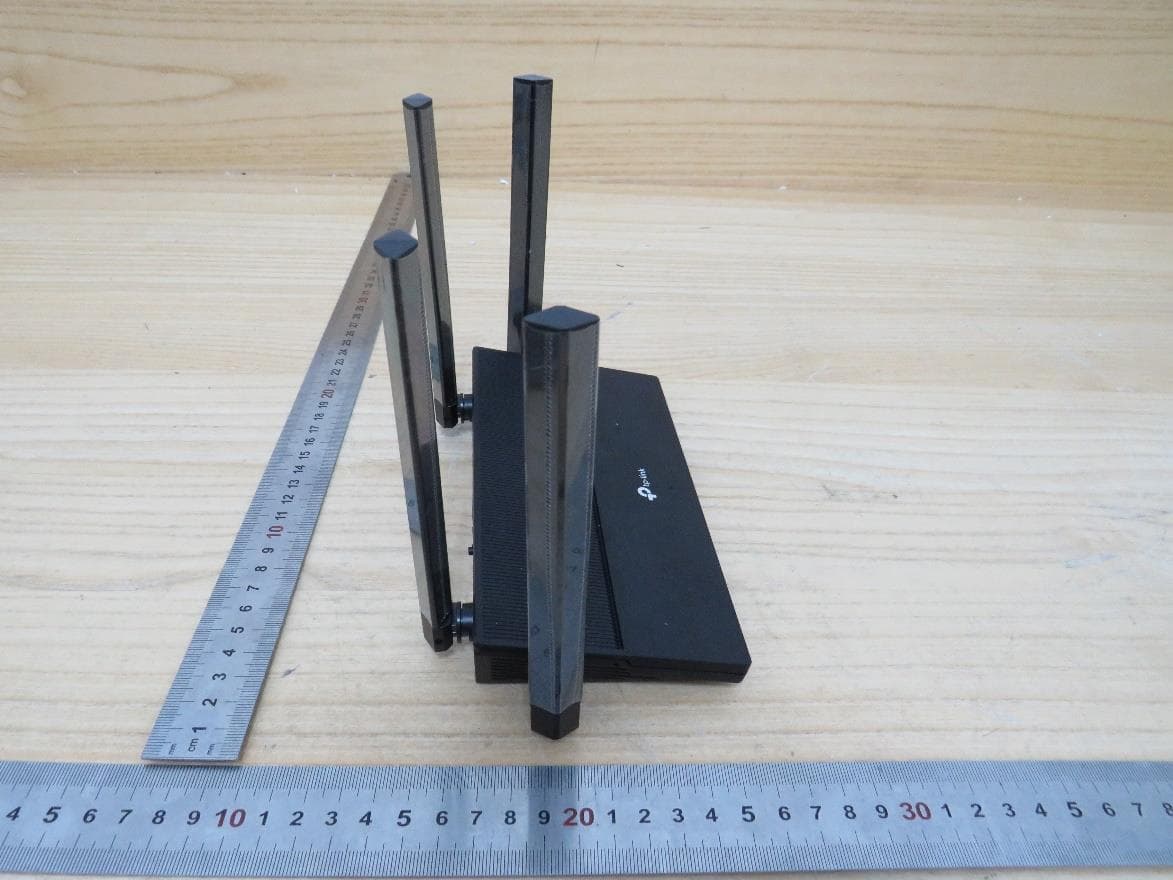
Click to zoom
Application Details
- Equipment Class
- DTS - Digital Transmission System
- Date of Grant
- Jul 12, 2023
- Application Purpose
- Original Equipment
- Date of Application
- Jul 06, 2023
- Equipment Note
- AX1500 Dual Band Gigabit Wi-Fi 6 Router
- Frequency Range
- 2412.00000000 - 2462.00000000
- Company
- TP-Link Corporation Limited
- Country
- Hong Kong
Documents & Files
Document Text
Text extracted from the exhibit documents filed with the FCC. Open a document above to read the original.
Users Manual
© 2022 TP-Link 1910020935 REV1.0.0 User Guide BBA Routers Contents About This Guide 1 Chapter 1 Get t o Know About Your Router 3 1. 1. Product Overview. . . . . . . . . . . . . . . . . . . . . . . . . . . . . . . . . . . . . . . . . . . . . . . . . . . . . . . . . . . . 4 1. 2. Appearance . . . . . . . . . . . . . . . . . . . . . . . . . . . . . . . . . . . . . . . . . . . . . . . . . . . . . . . . . . . . . . . . . 4 1. 2. 1. Top Panel . . . . . . . . . . . . . . . . . . . . . . . . . . . . . . . . . . . . . . . . . . . . . . . . . . . . . . . . . . . . . 4 1. 2. 2. The Back Panel. . . . . . . . . . . . . . . . . . . . . . . . . . . . . . . . . . . . . . . . . . . . . . . . . . . . . . . . 5 Chapter 2 Connect the Hardware 7 2. 1. Position Your Router . . . . . . . . . . . . . . . . . . . . . . . . . . . . . . . . . . . . . . . . . . . . . . . . . . . . . . . . . 8 2. 2. Connect Your Router. . . . . . . . . . . . . . . . . . . . . . . . . . . . . . . . . . . . . . . . . . . . . . . . . . . . . . . . . 8 Chapter 3 Log In to Your Router 11 Chapter 4 Set Up Int ernet Connection 13 4. 1. Use Quick Setup Wizard . . . . . . . . . . . . . . . . . . . . . . . . . . . . . . . . . . . . . . . . . . . . . . . . . . . .14 4. 2. Quick Setup Via TP-Link Aginet App . . . . . . . . . . . . . . . . . . . . . . . . . . . . . . . . . . . . . . . .15 4. 3. Manually Set Up Your Internet Connection . . . . . . . . . . . . . . . . . . . . . . . . . . . . . . . . . .16 4. 4. Set Up the R outer as an Access Point . . . . . . . . . . . . . . . . . . . . . . . . . . . . . . . . . . . . . . .18 4. 5. Set Up an IPv6 Internet Connection. . . . . . . . . . . . . . . . . . . . . . . . . . . . . . . . . . . . . . . . .19 4. 6. IPv6 Tunnel . . . . . . . . . . . . . . . . . . . . . . . . . . . . . . . . . . . . . . . . . . . . . . . . . . . . . . . . . . . . . . . . .23 Chapter 5 Setup Your Network via TP-Link Aginet App 26 5. 1. Set Up Your Router. . . . . . . . . . . . . . . . . . . . . . . . . . . . . . . . . . . . . . . . . . . . . . . . . . . . . . . . . .27 5. 2. Dashboard. . . . . . . . . . . . . . . . . . . . . . . . . . . . . . . . . . . . . . . . . . . . . . . . . . . . . . . . . . . . . . . . . .30 5. 3. Add More Mesh Devices . . . . . . . . . . . . . . . . . . . . . . . . . . . . . . . . . . . . . . . . . . . . . . . . . . . . 32 5. 4. Check Mesh Device Status . . . . . . . . . . . . . . . . . . . . . . . . . . . . . . . . . . . . . . . . . . . . . . . . .33 5. 5. R emove/Reboot Mesh Devices . . . . . . . . . . . . . . . . . . . . . . . . . . . . . . . . . . . . . . . . . . . . .36 5. 6. Manage Connected Devices. . . . . . . . . . . . . . . . . . . . . . . . . . . . . . . . . . . . . . . . . . . . . . . .37 5. 7. Create a New Network . . . . . . . . . . . . . . . . . . . . . . . . . . . . . . . . . . . . . . . . . . . . . . . . . . . . . .38 5. 8. Parental Controls . . . . . . . . . . . . . . . . . . . . . . . . . . . . . . . . . . . . . . . . . . . . . . . . . . . . . . . . . . .39 5. 9. Wi-Fi Settings . . . . . . . . . . . . . . . . . . . . . . . . . . . . . . . . . . . . . . . . . . . . . . . . . . . . . . . . . . . . . .40 5. 10. Guest Net work . . . . . . . . . . . . . . . . . . . . . . . . . . . . . . . . . . . . . . . . . . . . . . . . . . . . . . . . . . . . . . 41 5. 11. Int ernet Connection . . . . . . . . . . . . . . . . . . . . . . . . . . . . . . . . . . . . . . . . . . . . . . . . . . . . . . . .42 5. 12. Block List. . . . . . . . . . . . . . . . . . . . . . . . . . . . . . . . . . . . . . . . . . . . . . . . . . . . . . . . . . . . . . . . . . .44 5. 13. Upgr ade Your Router . . . . . . . . . . . . . . . . . . . . . . . . . . . . . . . . . . . . . . . . . . . . . . . . . . . . . . . . 45 5. 14. Advanced Features . . . . . . . . . . . . . . . . . . . . . . . . . . . . . . . . . . . . . . . . . . . . . . . . . . . . . . . . .46 Chapter 6 Customize Your Network Settings 50 6. 1. Configure LAN Settings. . . . . . . . . . . . . . . . . . . . . . . . . . . . . . . . . . . . . . . . . . . . . . . . . . . . .51 6. 1. 1. Change the LAN IP Address . . . . . . . . . . . . . . . . . . . . . . . . . . . . . . . . . . . . . . . . . .51 6. 1. 2. Us e the Router as a DHCP Server . . . . . . . . . . . . . . . . . . . . . . . . . . . . . . . . . . . . .52 6. 1. 3. R eserve LAN IP Addresses . . . . . . . . . . . . . . . . . . . . . . . . . . . . . . . . . . . . . . . . . . .53 6. 2. Configur e IPv6 LAN Settings . . . . . . . . . . . . . . . . . . . . . . . . . . . . . . . . . . . . . . . . . . . . . . . .53 6. 2. 1. Configur e the RADVD Address Type . . . . . . . . . . . . . . . . . . . . . . . . . . . . . . . . . .54 6. 2. 2. Configur e the DHCPv6 Server Address Type . . . . . . . . . . . . . . . . . . . . . . . . .54 6. 3. Set Up a Dynamic DNS Ser vice Account . . . . . . . . . . . . . . . . . . . . . . . . . . . . . . . . . . . .55 6. 4. Create Static Routes. . . . . . . . . . . . . . . . . . . . . . . . . . . . . . . . . . . . . . . . . . . . . . . . . . . . . . . .56 6. 5. RIP Settings . . . . . . . . . . . . . . . . . . . . . . . . . . . . . . . . . . . . . . . . . . . . . . . . . . . . . . . . . . . . . . . . 59 6. 6. Specify Wireless Settings. . . . . . . . . . . . . . . . . . . . . . . . . . . . . . . . . . . . . . . . . . . . . . . . . . .60 6. 6. 1. Change Basic Wir eless Settings . . . . . . . . . . . . . . . . . . . . . . . . . . . . . . . . . . . . . .60 6. 6. 2. A dvanced Wireless Settings . . . . . . . . . . . . . . . . . . . . . . . . . . . . . . . . . . . . . . . . . .62 6. 6. 3. V iew Wireless Information . . . . . . . . . . . . . . . . . . . . . . . . . . . . . . . . . . . . . . . . . . . .65 6. 7. Schedule Y our Wireless Function . . . . . . . . . . . . . . . . . . . . . . . . . . . . . . . . . . . . . . . . . . .66 6. 8. Use WPS for Wireless Connection . . . . . . . . . . . . . . . . . . . . . . . . . . . . . . . . . . . . . . . . . .67 Chapter 7 Multi-SSID 70 Chapter 8 TP-Link Cloud Service …
Text truncated - open the document above for the full version.
Users Manual
84 Chapter 9 USB Settings 4 When your USB storage device is inserted into the router, your DLNA-supported devices (such as your computer and pad) connected to the router can detect and play the media files on the USB storage devices. 5 Refer to the following table for detailed instructions. Windows Computer • Go to Computer > Network, then click the Media Server Name (Model number-share by default) in the Media Devices section. Note: Here we take Windows 7 as an example. Tablet • Use a third-party DLNA-supported player. 9 3 3G/4G Settings Time Machine backs up all files on your Mac computer to a USB storage device connected to your router. 1 V isit http://tplinkwifi.net or http://192.168.0.1, and log in with your TP-Link ID or the password you set for the router. 2 Go t o Advanced > USB Sharing > 3G/4G Settings. 85 Chapter 9 USB Settings 3 Tick the checkbox to enable 3G/4G as a backup solution for Internet access. 4 Tick the checkbo x to set the Dial Number, APN, Username and Password manually. Note: The following Advanced settings will only display if you enable 3G/4G as the backup solution for Internet access. 5 Click Save. Chapter 10 EasyMesh with Seamless Roaming This chapter introduces the TP-Link EasyMesh feature. It contains the following sections: • Set Up a EasyMesh Network • Manage Devices in the EasyMesh Network 87 Chapter 10 EasyMesh with Seamless Roaming TP-Link EasyMesh Controller and TP-Link EasyMesh Agent work together to form one unified Wi-Fi network. Walk through your home and stay connected with the fastest possible speeds thanks to EasyMesh’s seamless coverage. Unified Wi-Fi Network Controller and agents share the same wireless settings, including network name, password, access control settings and more. Seamless Roaming Devices automatically switch between your controller and agents as you move through your home for the fastest possible speeds. Easy Setup and Management Set up a EasyMesh network with a push of WPS buttons. Manage all network devices on the Aginet app or at your router’s web management page. 10 1 Set Up a EasyMesh Network 1. Visit http://tplinkwifi.net or http://192.168.0.1, and log in with your TP-Link ID or the password you set for the router. 1. Go t o Basic > Mesh or Advanced > Wireless > Mesh, and enable EasyMesh. 88 Chapter 10 EasyMesh with Seamless Roaming 2. Connect a EasyMesh agent to this controller by following the setup instructions in the agent’s manual. The agent will be listed on the controller’s Mesh page. Note: To check full list of TP-Link EasyMesh devices, visit https://www.tp-link.com. 3. If you have set up the agent to join the EasyMesh network, it will be listed on the controller’s EasyMesh page. Otherwise, you need to find it in the Add Mesh Device list and click Add to add it to the EasyMesh network. 89 Chapter 10 EasyMesh with Seamless Roaming Done! Now your controller and agents successfully form a EasyMesh network! 10 2 Manage Devices in the EasyMesh Network In a EasyMesh network, you can manage all mesh devices and connected clients on your router’s web page. • To view mesh devices and connected clients in the network: 1. Visit http://tplinkwifi.net or http://192.168.0.1, and log in with your TP-Link ID or the password you set for the router. 2. Go to Basic > Network Map. 3. Click to view all mesh devices, and click to view all connected clients. 90 Chapter 10 EasyMesh with Seamless Roaming • To manage a EasyMesh device in the network: 1. V isit http://tplinkwifi.net or http://192.168.0.1, and log in with your TP-Link ID or the password you set for the router. 2. Go to Basic > Network Map. 3. Click the Mesh device’s IP Address to redirect to the web management page of this device and view detailed information. 4. Manage the EasyMesh device as needed. You can: • Change device information. • Delet e this device from the EasyMesh network. Chapter 11 Guest Network This function allows you to provide Wi-Fi access for guests without disclosing your main network. When you have guests in your house, apartment, or workplace, you can create a guest network for them. In addition, you can customize guest network options to ensure network security and privacy. It contains the following sections: • Cr eate a Network for Guests • Cust omize Guest Network Options 92 Chapter 11 Guest Network 11 1 Create a Network for Guests 1. Visit http://tplinkwifi.net or http://192.168.0.1, and log in with your TP-Link ID or the password you set for the router. 2. Go to Advanced > Guest Network. Locate the Wireless section. 3. Create a guest network as needed. 1 ) Tick the Enable checkbo x for the 2.4GHz or 5GHz wireless network. 2 ) Customize the SSID. Don‘t select Hide SSID unless you want your guests to manually input the SSID for guest network access. 3 ) Select the Security type and customize your own password. If No security is selected, no password is needed to access your guest network. 4. Click Save. Now your guests can access your guest network using the SSID and password you set! Tips: To view guest network information, go to Network Map and locate the Guest Network section. You can turn on or off the guest network function conveniently. 11 2 Customize Guest Network Options 1. Visit http://tplinkwifi.net or http://192.168.0.1, and log in with your TP-Link ID or the password you set for the router. 93 Chapter 11 Guest Network 2. Go to Advanced > Guest Network. Locate the Settings section. 3. Cust omize guest network options according to your needs. • Allow guests to see each other Tick this checkbox if you want to allow the wireless clients on your guest network to communicate with each other via methods such as network neighbors and Ping. 4. Click Save. Now you can ensure network security and privacy! Chapter 12 NAT Forwarding The router’s NAT (Network Address Translation) feature makes devices on the LAN use the same public IP address to communicate with devices on the internet, which protects the local network by hiding IP addresses of the …
Text truncated - open the document above for the full version.
Users Manual
134 Chapter 16VPN Server&Client 9. Find the VPN connection you created, then double-click it. 10. Enter the User name and Password you have set for the IPSec VPN server on your router, and click Properties. 135 Chapter 16VPN Server&Client 11. Switch to the Security tab, select Layer 2 Tunneling Protocol with IPsec (L2TP/ IPSec) and click Advanced settings. 12. Select Use preshared key for authentication and enter the IPSec Pre-Shared Key you have set for the IPSec VPN server on your router. Then click OK. Done! Click Connect to start VPN connection. 136 Chapter 16VPN Server&Client 16 4 VPN Connections VPN Connections page displays the clients that are currently connected to the OpenVPN servers, PPTP VPN servers and IPSec VPN hosted on the router. 1. V isit http://tplinkwifi.net or http://192.168.0.1, and log in with your TP-Link ID or the password you set for the router. 2. Go to Advanced > VPN > VPN connections. Chapter 17 Manage Your Router This chapter introduces how to change the system settings and administrate your router’s network. This chapter contains the following sections: • Set S ystem Time • Contr ol the LED • T est Internet Connectivity • Updat e the Firmware • Back Up and R estore Configuration Settings • Reboot the Router • A dministration Management • S ystem Log • CWMP Settings • SNMP Settings • Monit or the Internet Traffic Statistics • P ort Mirror 138 Chapter 17 Manage Your Router 17 1 Set System Time System time is the time displayed while the router is running. The system time you configure here will be used for other time-based functions like Parental Controls and Wireless Schedule. You can manually set how to get the system time. Follow the steps below to set your system time. 1 V isit http://tplinkwifi.net or http://192.168.0.1, and log in with the password you set for the router. 2 Go to Advanced > System Tools > Time Settings page. 3 Configure the system time using the following methods: Get from PC: Click this button if you want to use the current time of your PC. Get from the Internet: Click this button if you want to get time from the internet. Make sure your router can access the internet before you select this way to get system time. 4 Click Save. 5 A fter setting the system time, you can set Daylight Saving Time according to your needs. Enable Daylight Saving Time, and set the start and end time and then click Save to make the settings effective. 139 Chapter 17 Manage Your Router 17 2 Control the LED The LED of the router indicates its activities and status. You can enable the Night Mode feature to specify a time period during which the LED is off. 1. Visit http://tplinkwifi.net or http://192.168.0.1, and log in with your TP-Link ID or the password you set for the router. 2. Go t o Advanced > System > LED Control. 3. Enable Night Mode. 4. Specify the LED off time, and the LED will be off during this period every day. 5. Click S AV E. 17 3 Test Internet Connectivity Diagnostics function is used to test the connectivity between the router and the host or other network devices. 1 Visit http://tplinkwifi.net or http://192.168.0.1, and log in with the password you set for the router. 2 Go to Advanced > System Tools > Diagnostics page. ¾T o test the internet connection of the router: Locate the Diagnostic Tools section, and click the Start to test the internet connectivity and you will find the test results in the gray box. 140 Chapter 17 Manage Your Router ¾To run ping and traceroute tools: 1 ) Locate the Diagnostic Tools section. 2 ) Select Ping or Traceroute or Nslookup as the diagnostic tool to test the connectivity. • Ping is used to test the connectivity between the router and the tested host, and measure the round-trip time. • T raceroute is used to display the route (path) your router has passed to reach the tested host, and measure transit delays of packets across an internet Protocol network. • Nslook up is used to queries the Domain Name System (DNS) to obtain the mapping between a domain name and IP address, or other DNS records. 3 ) Enter the Target IP Address/Domain Name of the tested host. You can change the default test options if necessary. 141 Chapter 17 Manage Your Router 4 ) Click Start to begin the diagnostics, and you will find the test results in the gray box. 17 4 Update the Firmware TP-Link is dedicated to improving product features, giving you a better network experience. We will inform you through the web management page if there’s any update firmware available for your router. The latest firmware can also be downloaded from the Support page of our website www.tp-link.com for free. Note: 1. Make sure that you have a stable connection between the router and your computer. It is NOT recommended to upgrade the firmware wirelessly. 2. Back up y our router configuration before upgrading the firmware. 3. DO NO T turn off the router during the firmware upgrade. ¾Follow the steps below to upgrade the firmware online: 1. Click Check f or Upgrades. 2. If a new firmware is displayed, click Upgrade and click Yes when prompted, then the router will automatically download the latest firmware file and upgrade. ¾F ollow the steps below to manually update the firmware: 1. Download the latest firmware file for the router from our website www.tp-link.com. 2. V isit http://tplinkwifi.net or http://192.168.0.1, and log in with the password you set for the router. 3. Go t o Advanced > System Tools > Firmware Upgrade. 4. F ocus on the Device Information section. Make sure the downloaded firmware file matches with the Hardware Version. 5. Focus on the Local Upgrade section. Click Browse to locate the downloaded new firmware file, and click Upgrade. 142 Chapter 17 Manage Your Router 6. Wait a few minutes for the upgrading and rebooting. 17 5 Back Up and Restore Configuration Settings The configuration settings are stored as a configuration file in the router. You can back up the configuration file to your computer for future use and restore the router to a p…
Text truncated - open the document above for the full version.
Attestation Statements
TP-Link Corporation Limited Room 901, 9/F. , New East Ocean Centre, 9 Science Museum Road, Tsim Sha Tsui, Kowloon, Hong Kong 012423-17 rev2 Certification Application Attestation Statements Date: March 7, 2023 American Certification Body, Inc. 313 Park Avenue Suite 300 Falls Church, VA 22046 To Whom It May Concern: Statement for 47 CFR section 2.911(d)(5)(i) _____TP-Link Corporation Limited______ certifies that as of the date of the application the equipment for which authorization is sought is not “covered” equipment 1 prohibited from receiving an equipment authorization pursuant to section 2.903 of the FCC rules. If the equipment for which the applicant seeks authorization is produced by any of the entities identified on the current Covered List, including affiliates or subsidiaries of the named companies, the applicant must include an explanation on why the equipment is not “covered” equipment. Additional Explanation: <N/A> Statement for 47 CFR section 2.911(d)(5)(ii) ____ TP-Link Corporation Limited_______ (“the applicant”) certifies that, as of the date of the filing of this application, the applicant ☐ - is /- is not identified on the Covered List as an entity producing “covered” equipment. Thank you, By: ____Sarah Wang__ (Signature 2 ) (Print name) Title: Compliance manager Company: TP-Link Corporation Limited_____ Telephone: +86 755 21534921 1 - The Commission’s Covered List is published by the Public Safety and Homeland Security Bureau and posted on the Commission’s website. This Covered List, which is periodically updated, identifies particular equipment, produced by particular entities, that constitutes “covered” equipment. https://www.fcc.gov/supplychain/coveredlist . 2 - Letters should be placed on appropriate letterhead.
Attestation Statements
Attestation Letter Federal Communications Commission Authorization and Evaluation Division We Name: TP-Link Corporation Limited Address: Room 901, 9/F., New East Ocean Centre, 9 Science Museum Road, Tsim Sha Tsui, Kowloon, Hongkong Declare that the device does not support channel 12 ~ 13 in 2.4GHz band any non-US channels in all the operational mode(s) for the following product. Product: AX1500 Dual Band Gigabit Wi-Fi 6 Router FCC ID: 2AXJ4EX141 Model: EX141 Brand: tp-link Sincerely, Name: Sarah Wang Position: Regulatory Compliance Manager Date: 06/27/2023
Cover Letter(s)
TP-LinkCorporationLimited 050222-17 AuthoritytoActasAgent Date:April24,2023 AmericanCertificationBody,Inc. 313ParkAvenue Suite300 FallsChurch,VA22046 ToWhomItMayConcern: ULVerificationServices(Guangzhou)Co.,Ltd,SongShanLakeBranch__isauthorizedtoactonour behalf,untilotherwisenotified,forapplicationstoAmericanCertificationBody,Inc.(ACB). Wecertifythatwearenotsubjecttodenialoffederalbenefits,thatincludesFCCbenefits,pursuantto Section5301oftheAnti-DrugAbuseActof1988,21U.S.C.862.Further,noparty,asdefinedin47 CFR1.2002(b),totheapplicationissubjecttodenialoffederalbenefits,thatincludesFCCbenefits. WealsodeclarethattheinformationprovidedtotheFCCistrueandcorrecttothebestofour knowledge(47CFR2.911(d))andwehavebeeninformedofthegranteeresponsibilities(47CFR 2.909)withregardtocertifiedequipment. Thankyou, AgencyAgreementExpirationDate:____4 /24/2024 By:_____________________________________SarahWang_____________ (Signature 1 )(Printname) Title:__________LeadofProductCertificationTeam________________ Onbehalfof:_________TP-LinkCorporationLimited._________________________________ (CompanyName) Telephone:_______________+8675526615494___________________ 1 -MustbesignedbyapplicantcontactgivenforapplicantontheFCCsite,orbytheauthorizedagentifanappropriateauthorizedagent letterhasbeenprovided.Lettersshouldbeplacedonappropriateletterhead.
Cover Letter(s)
Declaration of Frequency Stability We [TP-Link Corporation Limited] ensure that the product (FCC ID: 2AXJ4EX141) meets e-CFR Title 47 section 15.407(g) and KDB 789033 D02v02r01 frequency stability such that the emissions are maintained within the band of operation under all conditions of normal operation as specified in the user's manual. Sincerely, _________________ Name: Sarah Wang Position: Regulatory Compliance Manager Date: 2023-6-27
Cover Letter(s)
Confidentiality Request Letter Federal Communications Commission Authorization and Evaluation Division FCC ID: 2AXJ4EX141 Confidentiality Request Pursuant to Sections 0.457 and 0.459 of the Commission’s Rules, we hereby request confidential treatment of information accompanying this application as outlined below: 1. Block Diagram 2. Schematics 3. Operational Description The above materials contain trade secrets and proprietary information not customarily released to the public. The public disclosure of these matters might be harmful to the applicant and provide unjustified benefits to its competitors. The applicant understands that pursuant to Rule 0.457, disclosure of this application and all accompanying documentation will not be made before the date of the Grant for this application. Sincerely, Name: Sarah Wang Position: Regulatory Compliance Manager Date: 2023-06-27
Cover Letter(s)
Declaration of Conformity We Name: TP-Link Corporation Limited Address: Room 901, 9/F., New East Ocean Centre, 9 Science Museum Road, Tsim Sha Tsui, Kowloon, Hongkong Declare that: Product: AX1500 Dual Band Gigabit Wi-Fi 6 Router FCC ID: 2AXJ4EX141 Model: EX141 Brand: tp-link Product which bears the above FCC ID is also compliant with the FCC requirements for sDOC. And the sDOC procedure shall be carried out prior to marketing the device in the US. Sincerely, Name: Sarah Wang Position: Regulatory Compliance Manager Date: 06/27/2023
External Photos
Appendix I External Photographs Page 2 of 5 View of EUT-1 View of EUT-2 Page 3 of 5 View of EUT-3 View of EUT-4 Page 4 of 5 View of EUT-5 View of EUT-6 Page 5 of 5 View of EUT-7
ID Label/Location Info
2023-05-17 Model: EX141 AX1500 Dual Band Gigabit Wi-Fi 6 Router Model:EX141Ver:1.0 S/N:XXXXXXXXXXXXX MAC:XX-XX-XX-XX-XX-XX Wireless Password/PIN:XXXXXXXX SSID:TP-Link_XXXX SSID:TP-Link_XXXX_5G TP-Link Corporation Limited Suite 901, New East Ocean Centre, Tsim Sha Tsui, Hong Kong Power: 12V 1A Default Access: http://tplinkwifi.net FCC ID:2AXJ4EX141 label: l abel location:
Internal Photos
Appendix II Internal Photographs Page 2 of 4 Internal View of EUT-1 Internal View of EUT-2 Page 3 of 4 Internal View of EUT-3 Internal View of EUT-4 Page 4 of 4 Internal View of EUT-5
RF Exposure Info
The results reported herein have been performed in accordance with the laboratory’s terms of accreditation. This report shall not be reproduced except in full without the written approval of the Laboratory. The results in this report apply to the test sample(s) mentioned above at the time of the testing period only and are not to be used to indicate applicability to other similar products. FCC RF EXPOSURE REPORT For AX1500 Dual Band Gigabit Wi-Fi 6 Router MODEL NUMBER: EX141 REPORT NUMBER: 4790868921-RF-3 ISSUE DATE: June 26, 2023 FCC ID: 2AXJ4EX141 Prepared for TP-Link Corporation Limited Room 901, 9/F. , New East Ocean Centre, 9 Science Museum Road, Tsim Sha Tsui, Kowloon, Hong Kong Prepared by UL Verification Services (Guangzhou) Co., Ltd, Song Shan Lake Branch Building 10, Innovation Technology Park, No. 1, Li Bin Road, Song Shan Lake Hi- Tech Development Zone Dongguan, 523808, People’s Republic of China Tel: +86 769 22038881 Fax: +86 769 33244054 Website: www.ul.com REPORT NO.: 4790868921-RF-3 Page 2 of 8 UL Verification Services (Guangzhou) Co., Ltd, Song Shan Lake Branch FORM No.: 10-SL-F0112 This report shall not be reproduced except in full, without the written approval of UL Verification Services (Guangzhou) Co., Ltd, Song Shan Lake Branch. Revision History Rev. Issue Date Revisions Revised By V0 June 26, 2023 Initial Issue REPORT NO.: 4790868921-RF-3 Page 3 of 8 UL Verification Services (Guangzhou) Co., Ltd, Song Shan Lake Branch FORM No.: 10-SL-F0112 This report shall not be reproduced except in full, without the written approval of UL Verification Services (Guangzhou) Co., Ltd, Song Shan Lake Branch. TABLE OF CONTENTS 1. ATTESTATION OF TEST RESULTS .................................................................................... 4 2. TEST METHODOLOGY ........................................................................................................ 5 3. FACILITIES AND ACCREDITATION .................................................................................... 5 4. DESCRIPTION OF EUT ........................................................................................................ 6 5. REQUIREMENT .................................................................................................................... 7 REPORT NO.: 4790868921-RF-3 Page 4 of 8 UL Verification Services (Guangzhou) Co., Ltd, Song Shan Lake Branch FORM No.: 10-SL-F0112 This report shall not be reproduced except in full, without the written approval of UL Verification Services (Guangzhou) Co., Ltd, Song Shan Lake Branch. 1. ATTESTATION OF TEST RESULTS Applicant Information Company Name: TP-Link Corporation Limited Address: Room 901, 9/F. , New East Ocean Centre, 9 Science Museum Road, Tsim Sha Tsui, Kowloon, Hong Kong Manufacturer Information Company Name: TP-Link Corporation Limited Address: Room 901, 9/F. , New East Ocean Centre, 9 Science Museum Road, Tsim Sha Tsui, Kowloon, Hong Kong EUT Information EUT Name: AX1500 Dual Band Gigabit Wi-Fi 6 Router Model: EX141 Sample Received Date: May 29, 2023 Sample ID: 6125501 Date of Tested: May 29, 2023 to June 25, 2023 APPLICABLE STANDARDS STANDARD TEST RESULTS FCC 47CFR§2.1091 PASS KDB-447498 D01 V06 PASS Prepared By: Checked By: Kebo Zhang Denny Huang Senior Project Engineer Senior Project Engineer Approved By: Stephen Guo Operations Manager REPORT NO.: 4790868921-RF-3 Page 5 of 8 UL Verification Services (Guangzhou) Co., Ltd, Song Shan Lake Branch FORM No.: 10-SL-F0112 This report shall not be reproduced except in full, without the written approval of UL Verification Services (Guangzhou) Co., Ltd, Song Shan Lake Branch. 2. TEST METHODOLOGY The tests documented in this report were performed in accordance with 47 CFR FCC Part 2 Subpart J, section 2.1091 and KDB 447498 D01 General RF Exposure Guidance v06. 3. FACILITIES AND ACCREDITATION Accreditation Certificate A2LA (Certificate No.: 4102.01) UL Verification Services (Guangzhou) Co., Ltd. Song Shan Lake Branch. has been assessed and proved to be in compliance with A2LA. FCC (FCC Designation No.: CN1187) UL Verification Services (Guangzhou) Co., Ltd. Song Shan Lake Branch. Has been recognized to perform compliance testing on equipment subject to the Commission's Delcaration of Conformity (DoC) and Certification rules ISED (Company No.: 21320) UL Verification Services (Guangzhou) Co., Ltd. Song Shan Lake Branch. has been registered and fully described in a report filed with ISED. The Company Number is 21320 and the test lab Conformity Assessment Body Identifier (CABID) is CN0046. VCCI (Registration No.: G-20019, R-20004, C-20012 and T-20011) UL Verification Services (Guangzhou) Co., Ltd. Song Shan Lake Branch. has been assessed and proved to be in compliance with VCCI, the Membership No. is 3793. Facility Name: Chamber D, the VCCI registration No. is G-20019 and R-20004 Shielding Room B , the VCCI registration No. is C-20012 and T-20011 Note 1: All tests measurement facilities use to collect the measurement data are located at Building 10, Innovation Technology Park, Song Shan Lake Hi tech Development Zone, Dongguan, 523808, China Note 2: The test anechoic chamber in UL Verification Services (Guangzhou) Co., Ltd. Song Shan Lake Branch had been calibrated and compared to the open field sites and the test anechoic chamber is shown to be equivalent to or worst case from the open field site. Note 3: For below 30MHz, lab had performed measurements at test anechoic chamber and comparing to measurements obtained on an open field site. And these measurements below 30MHz had been correlated to measurements performed on an OFS. REPORT NO.: 4790868921-RF-3 Page 6 of 8 UL Verification Services (Guangzhou) Co., Ltd, Song Shan Lake Branch FORM No.: …
Text truncated - open the document above for the full version.
Contact Information
Applicant
Sarah Wang
Technical Contact
UL Verification Services (Guangzhou) Co., Ltd, SonSusan Liu
[email protected]: +86 0769-33817102
Building 10, Innovation Technology Park, No. 1, · Dongguan · China
Non-Technical Contact
UL Verification Services (Guangzhou) Co., Ltd, SonSusan Liu
[email protected]: +86 0769-33817102
Test Firm
UL Verification Services (Guangzhou) Co., Ltd.Stephen Guo
[email protected]+86 0769 33817120
Technical Specifications
| # | Rule Parts | Frequency Range | Power Output |
|---|---|---|---|
| 1 | 15C | 2.41 GHz - 2.46 GHz | 240.00 mW |
Other Applications from TP-Link Corporation Limited
2AXJ4TXE50UH
Jan 28, 2024AXE3000 Wi-Fi 6E High Gain Wireless USB Adapter
Equipment Class
NII - Unlicensed National Information Infrastructure TX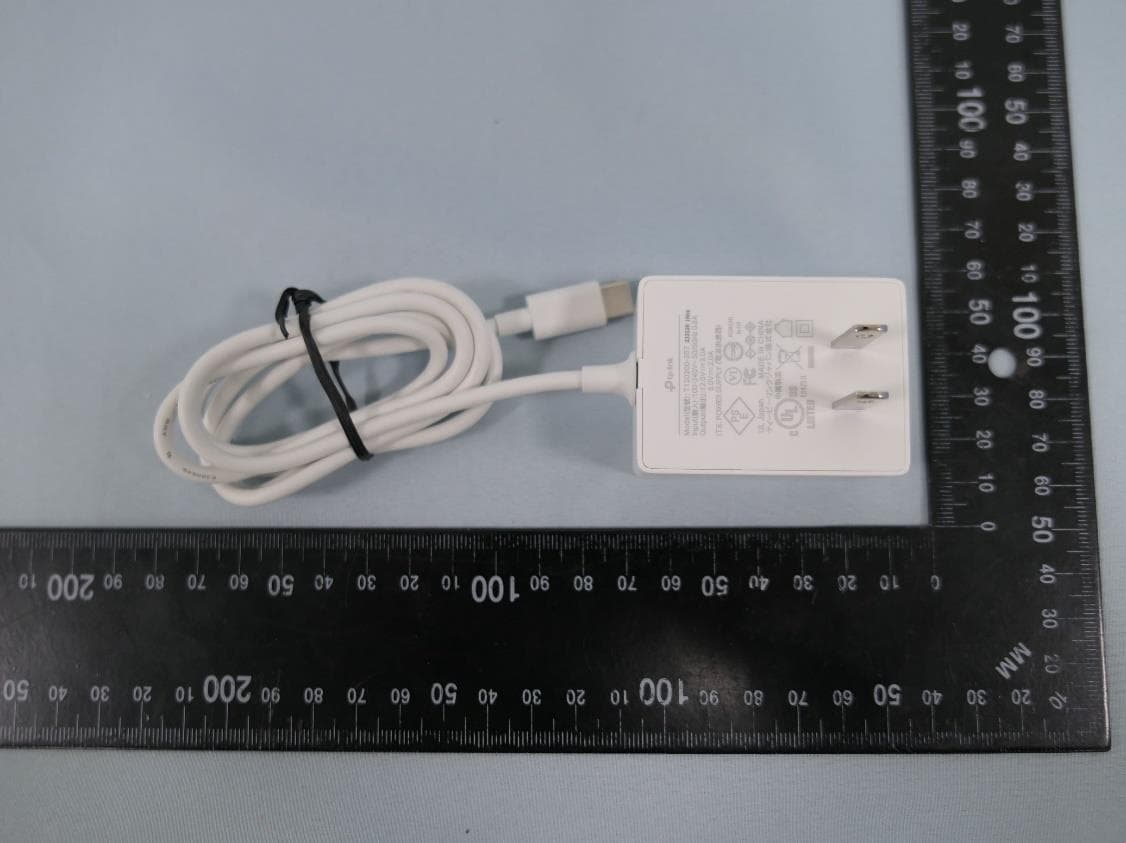
2AXJ4AIRE5
Jan 15, 2024AX3000 Wi-Fi 6 Air Range Extender
Equipment Class
DTS - Digital Transmission System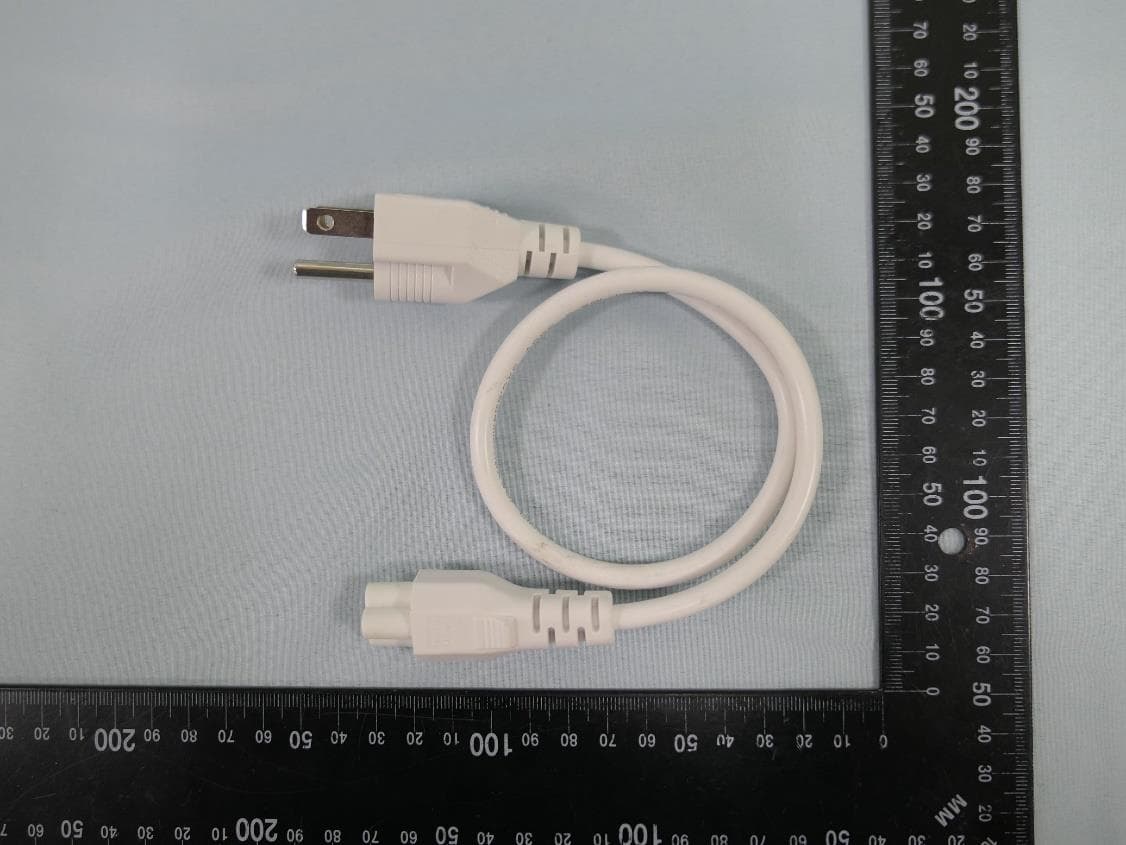
2AXJ4EAP115BRG
Jan 11, 20245GHz 300Mbps Long-range Indoor/Outdoor Access Point
Equipment Class
NII - Unlicensed National Information Infrastructure TX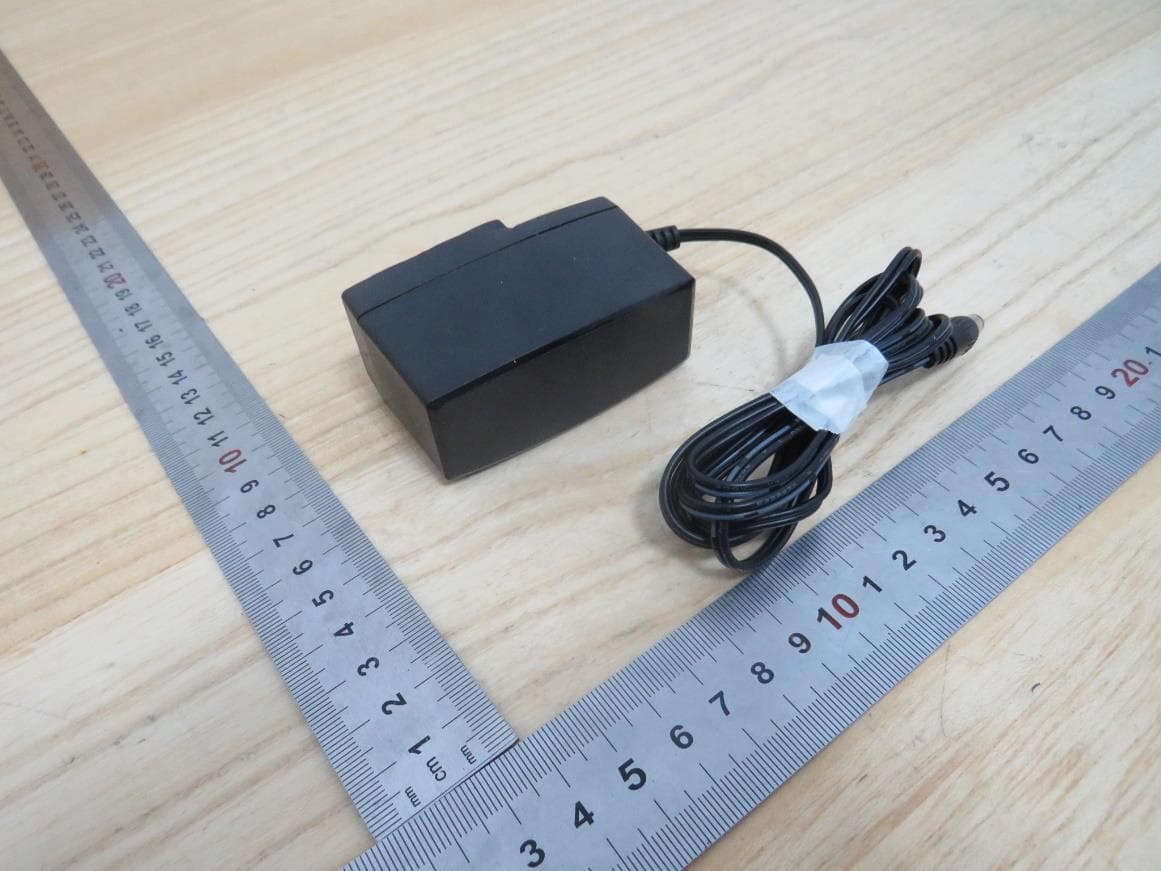
2AXJ4HX510V2
Jan 10, 2024AX3000 Whole Home Mesh Wi-Fi AP
Equipment Class
NII - Unlicensed National Information Infrastructure TX
2AXJ4EAP215BRG
Dec 11, 20235GHz 867Mbps Long-range Indoor/Outdoor Access Point
Equipment Class
NII - Unlicensed National Information Infrastructure TX