BABTN0036BCar Audio
DENSO TEN Limited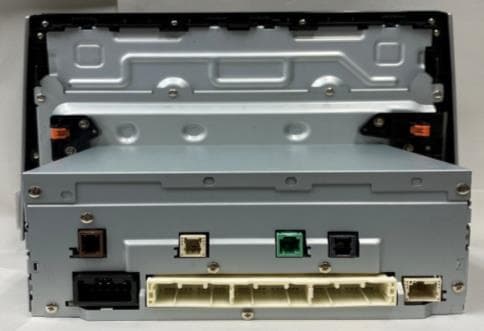
Click to zoom
Application Details
- Equipment Class
- NII - Unlicensed National Information Infrastructure TX
- Date of Grant
- Jul 19, 2023
- Application Purpose
- Original Equipment
- Date of Application
- Jul 19, 2023
- Equipment Note
- Car Audio
- Frequency Range
- 5765.00000000 - 5765.00000000
- Company
- DENSO TEN Limited
- Country
- Japan
Documents & Files
Document Text
Text extracted from the exhibit documents filed with the FCC. Open a document above to read the original.
Users Manual
Type A Index 1-Rating 2-Button Function Spec 3-Radio operation procedure 4-Operating manual (Bluetooth/Handsfree) 5-Operating manual (Wi-Fi/Carplay) 6-FCC Operating manual Requirement 7P Model name Model No Car Audio TN0036B Page 2P 3P 4P 5P 6P TN0036B Operation Manual (1/7) Type A AM TUNING RANGE FM TUNING RANGE DAB TUNING RANGE 1-Rating 12V (10.5~16.0V) - ground 4Ω 2.1mA or less 4.0A or less (Vcc=13.2V, 0.5W output) RATED VOLTAGE LOAD IMPEDANCE BACK UP CURRENT RATED CURRENT 531 - 1602 kHz (9kHz step) 87.5 - 108 MHz (100kHz step) 174.928 - 229.072 MHz (2/7) Type A ■AUDIO controls ③HOME/TALK Short Push: Transition to home screen Long Push: AA/CP voice recognition ⑤ VOL UP Short Push: Increase Volume Up 1 step Long Push: Increase Volume Up continuously ④ VOL DOWN Short Push: Decrease Volume Down 1 step Long Push: Decrease Volume Down continuously 2-Button Function Spec Button No.Button Name ②BACK Transition to previous screen Operation ①POWER Audio ON/OFF 5 4 3 2 1 (3/7) Type A 【操作手順】[Operation procedure] ①起動 (ACC-ON) ACC-ON後、TOYOTA画面が表示された事を確認。 After the ACC-ON, confirm that Toyota screen is displayed. ②数秒後に"CAUTION"画面に遷移します。 The screen is changed to "CAUTION" screen after a few seconds. *初回のACC-ON時はやや時間を要します。 Note: It takes a little longer for the first time of ACC-ON. ③数秒後に”Continue”ボタンを押して、MENU画面に遷移させます。 Press the "Continue" button on the face panel after a few seconds to move MENU screen. Menu Screen Display ④POWERボタンを押す。 画面内のラジオモードウィンドウを押すと、"FM1 "画面に遷移します。 Press the POWER button. When the Radio Mode Window on the screen is pressed,"FM1" screen is displayed. ⑤下記画面に遷移したら、”<”釦 若しくは、”>”釦を押下してください。 これで、SEEKが始まります。 Confirm that the screen is changed as below, Please push down the ”<”button or ”>”button. This will start to SEEK. ※AM/DABモードも同様の手順です。 ※Same as AM/DAB mode. 3-Radio operation procedure Press anywhere in this area Push this button Push this button (4/7) Type A 【操作手順】[Operation procedure] ①起動 (ACC-ON) ⑥画面の”Add Device”釦を押下してください。 ACC-ON後、TOYOTA画が表示された事を確認。 Please press the ”Add Device” button of the screen After the ACC-ON, confirm that Toyota screen is displayed. ②数秒後に"CAUTION"画面に遷移します。 The screen is changed to "CAUTION" screen after a few seconds. ⑦画面の”Search Device”釦を押下してください。 *初回のACC-ON時はやや時間を要します。Please press the ”Search Device” button of the screen Note: It takes a little longer for the first time of ACC-ON. ③数秒後に”Continue”ボタンを押して、MENU画面に遷移させます。⑧下記画面に遷移したらBluetooth端末(iPhone、 iPodなど)をペアリング Press the "Continue" button on the face panel after a few seconds モードに設定してください。 to move MENU screen. Confirm if screen is changed as below, Please set iPhone or iPod in pairing mode. Menu Screen Display ④”Setting”ボタンを押して、SETTINGS画面に遷移させます。 Please press the "Setting" button on the face panel to move to Settings screen ※Displays when you have more than one pairing equipment ※複数のペアリング機器がある場合の表示 ⑨接続したiPhone又はiPodを選択します。 Select the iPhone or iPod to connect. ⑤”Settings”画面に遷移することを確認し、画面上の"Bluetooth"釦を選択。 Confirm if ”Settings” screen is displayed, select the ”Bluetooth” button on the display. ※ 電話機の表示にしたがって操作してください ※ Operate the phone after the message on the screen ⑩完了すれば"Connection Completed"の画面になります。 ”Connection Completed” is displayed if completed. 4-Operating manual (Bluetooth/Handsfree) Push this button Push this button Push this button Push this button Push this button (5/7) Type A 【操作手順】[Operation procedure] ①起動 (ACC-ON) ⑥画面の”Search”釦を押下してください。 ACC-ON後、TOYOTA画が表示された事を確認。 (この時接続させるiPhoneでBluetooth ONにしておく) After the ACC-ON, confirm that Toyota screen is displayed. Please press the ”Search” button of the screen At this time, turn on Bluetooth on the iPhone to be connected. ②数秒後に"CAUTION"画面に遷移します。 The screen is changed to "CAUTION" screen after a few seconds. *初回のACC-ON時はやや時間を要します。 Note: It takes a little longer for the first time of ACC-ON. ⑦接続したiPhoneを選択する Please Select the connected iPhone. ③数秒後に”Continue”ボタンを押して、MENU画面に遷移させます。 Press the "Continue" button on the face panel after a few seconds to move MENU screen. ⑧下記のような表示になれば、製品側は[OK]ボタンを押しiPhone側は [ペアリング]を押す。 If the display looks like the one below, press the [OK] button on the product side and press [Pairing] on the iPhone side. Menu Screen Display ④”Setting”ボタンを押して、SETTINGS画面に遷移させます。 Please press the "Setting" button on the face panel to move to Settings screen ⑨自動でCarPlay画面に遷移すれば接続完了 Connection is completed when the screen automatically transitions to the CarPlay screen. ⑤”Settings”画面に遷移することを確認し、下にスライドし画面上の "Seach Apple CarPlay Device"釦を選択。 Confirm that the screen will change to the "Settings" screen, slide it down and select the "Seach Apple CarPlay Device" button on the screen. 5-Operating manual (Wi-Fi/Carplay) Push this button Push this button Push this button Connecting... (6/7) Type A Co-location: This transmitter must not be co-located or operated in conjunction with any other antenna or transmitter. This device complies with part 15 of the FCC Rules. Operation is subject to the following two conditions: (1) This device may not cause harmful interference, and (2) this device must accept any interference received, including interference that may cause undesired operation. FCC WARNING Changes or modifications not expressly approved by the party responsible for compliance could void the user's authority to operate the equipment. CAUTION: Radio Frequency Radiation Exposure This equipment complies with FCC radiation exposure limits set forth for uncontrolled equipment and meets the FCC radio frequency (RF) Exposure Guidelines. This equipment should be installed and operated keeping the radiator at least 20cm or more away from person's body. 5-FCC Operating manual Requirement (7/7)
Users Manual
Type B Index 1-Rating 2-Button Function Spec 3-Radio operation procedure 4-Operating manual (Bluetooth/Handsfree) 5-Operating manual (Wi-Fi/Carplay) 6-FCC Operating manual Requirement 7P Model name Model No Car Audio TN0036B Page 2P 3P 4P 5P 6P TN0036B Operation Manual (1/7) Type B 1-Rating 12V (10.5~16.0V) - ground 4Ω 2.1mA or less 4.0A or less (Vcc=13.2V, 0.5W output) RATED VOLTAGE LOAD IMPEDANCE BACK UP CURRENT RATED CURRENT 531 - 1602 kHz (9kHz step) 87.5 - 108 MHz (50kHz step) AM TUNING RANGE FM TUNING RANGE (2/7) Type B ■AUDIO controls ④ VOL DOWN Short Push: Decrease Volume Down 1 step Long Push: Decrease Volume Down continuously ⑤ VOL UP Short Push: Increase Volume Up 1 step Long Push: Increase Volume Up continuously ②BACK Transition to previous screen ③HOME/TALK Short Push: Transition to home screen Long Push: AA/CP voice recognition 2-Button Function Spec Button No.Button Name Operation ①POWER Audio ON/OFF 5 4 3 2 1 (3/7) Type B 【操作手順】[Operation procedure] ①起動 (ACC-ON) ACC-ON後、TOYOTA画面が表示された事を確認。 After the ACC-ON, confirm that Toyota screen is displayed. ②数秒後に"CAUTION"画面に遷移します。 The screen is changed to "CAUTION" screen after a few seconds. *初回のACC-ON時はやや時間を要します。 Note: It takes a little longer for the first time of ACC-ON. ③数秒後に”Continue”ボタンを押して、MENU画面に遷移させます。 Press the "Continue" button on the face panel after a few seconds to move MENU screen. Menu Screen Display ④POWERボタンを押す。 画面内のラジオモードウィンドウを押すと、"FM1 "画面に遷移します。 Press the POWER button. When the Radio Mode Window on the screen is pressed,"FM1" screen is displayed. ⑤下記画面に遷移したら、”<”釦 若しくは、”>”釦を押下してください。 これで、SEEKが始まります。 Confirm that the screen is changed as below, Please push down the ”<”button or ”>”button. This will start to SEEK. ※AM/DABモードも同様の手順です。 ※Same as AM/DAB mode. 3-Radio operation procedure Press anywhere in this area Push this button Push this button (4/7) Type B 【操作手順】[Operation procedure] ①起動 (ACC-ON) ⑥画面の”Add Device”釦を押下してください。 ACC-ON後、TOYOTA画が表示された事を確認。 Please press the ”Add Device” button of the screen After the ACC-ON, confirm that Toyota screen is displayed. ②数秒後に"CAUTION"画面に遷移します。 The screen is changed to "CAUTION" screen after a few seconds. ⑦画面の”Search Device”釦を押下してください。 *初回のACC-ON時はやや時間を要します。Please press the ”Search Device” button of the screen Note: It takes a little longer for the first time of ACC-ON. ③数秒後に”Continue”ボタンを押して、MENU画面に遷移させます。⑧下記画面に遷移したらBluetooth端末(iPhone、 iPodなど)をペアリング Press the "Continue" button on the face panel after a few seconds モードに設定してください。 to move MENU screen. Confirm if screen is changed as below, Please set iPhone or iPod in pairing mode. Menu Screen Display ④”Setting”ボタンを押して、SETTINGS画面に遷移させます。 Please press the "Setting" button on the face panel to move to Settings screen ※Displays when you have more than one pairing equipment ※複数のペアリング機器がある場合の表示 ⑨接続したiPhone又はiPodを選択します。 Select the iPhone or iPod to connect. ⑤”Settings”画面に遷移することを確認し、画面上の"Bluetooth"釦を選択。 Confirm if ”Settings” screen is displayed, select the ”Bluetooth” button on the display. ※ 電話機の表示にしたがって操作してください ※ Operate the phone after the message on the screen ⑩完了すれば"Connection Completed"の画面になります。 ”Connection Completed” is displayed if completed. 4-Operating manual (Bluetooth/Handsfree) Push this button Push this button Push this button Push this button Push this button (5/7) Type B 【操作手順】[Operation procedure] ①起動 (ACC-ON) ⑥画面の”Search”釦を押下してください。 ACC-ON後、TOYOTA画が表示された事を確認。 (この時接続させるiPhoneでBluetooth ONにしておく) After the ACC-ON, confirm that Toyota screen is displayed. Please press the ”Search” button of the screen At this time, turn on Bluetooth on the iPhone to be connected. ②数秒後に"CAUTION"画面に遷移します。 The screen is changed to "CAUTION" screen after a few seconds. *初回のACC-ON時はやや時間を要します。 Note: It takes a little longer for the first time of ACC-ON. ⑦接続したiPhoneを選択する Please Select the connected iPhone. ③数秒後に”Continue”ボタンを押して、MENU画面に遷移させます。 Press the "Continue" button on the face panel after a few seconds to move MENU screen. ⑧下記のような表示になれば、製品側は[OK]ボタンを押しiPhone側は [ペアリング]を押す。 If the display looks like the one below, press the [OK] button on the product side and press [Pairing] on the iPhone side. Menu Screen Display ④”Setting”ボタンを押して、SETTINGS画面に遷移させます。 Please press the "Setting" button on the face panel to move to Settings screen ⑨自動でCarPlay画面に遷移すれば接続完了 Connection is completed when the screen automatically transitions to the CarPlay screen. ⑤”Settings”画面に遷移することを確認し、下にスライドし画面上の "Seach Apple CarPlay Device"釦を選択。 Confirm that the screen will change to the "Settings" screen, slide it down and select the "Seach Apple CarPlay Device" button on the screen. 5-Operating manual (Wi-Fi/Carplay) Push this button Push this button Push this button Connecting... (6/7) Type B Co-location: This transmitter must not be co-located or operated in conjunction with any other antenna or transmitter. This device complies with part 15 of the FCC Rules. Operation is subject to the following two conditions: (1) This device may not cause harmful interference, and (2) this device must accept any interference received, including interference that may cause undesired operation. FCC WARNING Changes or modifications not expressly approved by the party responsible for compliance could void the user's authority to operate the equipment. CAUTION: Radio Frequency Radiation Exposure This equipment complies with FCC radiation exposure limits set forth for uncontrolled equipment and meets the FCC radio frequency (RF) Exposure Guidelines. This equipment should be installed and operated keeping the radiator at least 20cm or more away from person's body. 5-FCC Operating manual Requirement (7/7)
Users Manual
Type C Index 1-Rating 2-Button Function Spec 3-Radio operation procedure 4-Operating manual (Bluetooth/Handsfree) 5-Operating manual (Wi-Fi/Carplay) 6-FCC Operating manual Requirement 7P Model name Model No Car Audio TN0036B Page 2P 3P 4P 5P 6P TN0036B Operation Manual (1/7) Type C 1-Rating 12V (10.5~16.0V) - ground 4Ω 2.1mA or less 4.0A or less (Vcc=13.2V, 0.5W output) RATED VOLTAGE LOAD IMPEDANCE BACK UP CURRENT RATED CURRENT 530 - 1625 kHz (5kHz step) 87.5 - 108 MHz (100kHz step) AM TUNING RANGE FM TUNING RANGE (2/7) Type C ■AUDIO controls 2-Button Function Spec Button No.Button Name ④BACK Transition to previous screen Operation ② VOL UP Short Push: Increase Volume Up 1 step Long Push: Increase Volume Up continuously ① VOL DOWN Short Push: Decrease Volume Down 1 step Long Push: Decrease Volume Down continuously ③HOME/TALK Short Push: Transition to home screen Long Push: AA/CP voice recognition ⑤POWER Audio ON/OFF 5 43 2 1 (3/7) Type C 【操作手順】[Operation procedure] ①起動 (ACC-ON) ACC-ON後、TOYOTA画面が表示された事を確認。 After the ACC-ON, confirm that Toyota screen is displayed. ②数秒後に"CAUTION"画面に遷移します。 The screen is changed to "CAUTION" screen after a few seconds. *初回のACC-ON時はやや時間を要します。 Note: It takes a little longer for the first time of ACC-ON. ③数秒後に”Continue”ボタンを押して、MENU画面に遷移させます。 Press the "Continue" button on the face panel after a few seconds to move MENU screen. Menu Screen Display ④POWERボタンを押す。 画面内のラジオモードウィンドウを押すと、"FM1 "画面に遷移します。 Press the POWER button. When the Radio Mode Window on the screen is pressed,"FM1" screen is displayed. ⑤下記画面に遷移したら、”<”釦 若しくは、”>”釦を押下してください。 これで、SEEKが始まります。 Confirm that the screen is changed as below, Please push down the ”<”button or ”>”button. This will start to SEEK. ※AM/DABモードも同様の手順です。 ※Same as AM/DAB mode. 3-Radio operation procedure Press anywhere in this area Push this button Push this button (4/7) Type C 【操作手順】[Operation procedure] ①起動 (ACC-ON) ⑥画面の”Add Device”釦を押下してください。 ACC-ON後、TOYOTA画が表示された事を確認。 Please press the ”Add Device” button of the screen After the ACC-ON, confirm that Toyota screen is displayed. ②数秒後に"CAUTION"画面に遷移します。 The screen is changed to "CAUTION" screen after a few seconds. ⑦画面の”Search Device”釦を押下してください。 *初回のACC-ON時はやや時間を要します。Please press the ”Search Device” button of the screen Note: It takes a little longer for the first time of ACC-ON. ③数秒後に”Continue”ボタンを押して、MENU画面に遷移させます。⑧下記画面に遷移したらBluetooth端末(iPhone、 iPodなど)をペアリング Press the "Continue" button on the face panel after a few seconds モードに設定してください。 to move MENU screen. Confirm if screen is changed as below, Please set iPhone or iPod in pairing mode. Menu Screen Display ④”Setting”ボタンを押して、SETTINGS画面に遷移させます。 Please press the "Setting" button on the face panel to move to Settings screen ※Displays when you have more than one pairing equipment ※複数のペアリング機器がある場合の表示 ⑨接続したiPhone又はiPodを選択します。 Select the iPhone or iPod to connect. ⑤”Settings”画面に遷移することを確認し、画面上の"Bluetooth"釦を選択。 Confirm if ”Settings” screen is displayed, select the ”Bluetooth” button on the display. ※ 電話機の表示にしたがって操作してください ※ Operate the phone after the message on the screen ⑩完了すれば"Connection Completed"の画面になります。 ”Connection Completed” is displayed if completed. 4-Operating manual (Bluetooth/Handsfree) Push this button Push this button Push this button Push this button Push this button (5/7) Type C 【操作手順】[Operation procedure] ①起動 (ACC-ON) ⑥画面の”Search”釦を押下してください。 ACC-ON後、TOYOTA画が表示された事を確認。 (この時接続させるiPhoneでBluetooth ONにしておく) After the ACC-ON, confirm that Toyota screen is displayed. Please press the ”Search” button of the screen At this time, turn on Bluetooth on the iPhone to be connected. ②数秒後に"CAUTION"画面に遷移します。 The screen is changed to "CAUTION" screen after a few seconds. *初回のACC-ON時はやや時間を要します。 Note: It takes a little longer for the first time of ACC-ON. ⑦接続したiPhoneを選択する Please Select the connected iPhone. ③数秒後に”Continue”ボタンを押して、MENU画面に遷移させます。 Press the "Continue" button on the face panel after a few seconds to move MENU screen. ⑧下記のような表示になれば、製品側は[OK]ボタンを押しiPhone側は [ペアリング]を押す。 If the display looks like the one below, press the [OK] button on the product side and press [Pairing] on the iPhone side. Menu Screen Display ④”Setting”ボタンを押して、SETTINGS画面に遷移させます。 Please press the "Setting" button on the face panel to move to Settings screen ⑨自動でCarPlay画面に遷移すれば接続完了 Connection is completed when the screen automatically transitions to the CarPlay screen. ⑤”Settings”画面に遷移することを確認し、下にスライドし画面上の "Seach Apple CarPlay Device"釦を選択。 Confirm that the screen will change to the "Settings" screen, slide it down and select the "Seach Apple CarPlay Device" button on the screen. 5-Operating manual (Wi-Fi/Carplay) Push this button Push this button Push this button Connecting... (6/7) Type C Co-location: This transmitter must not be co-located or operated in conjunction with any other antenna or transmitter. This device complies with part 15 of the FCC Rules. Operation is subject to the following two conditions: (1) This device may not cause harmful interference, and (2) this device must accept any interference received, including interference that may cause undesired operation. FCC WARNING Changes or modifications not expressly approved by the party responsible for compliance could void the user's authority to operate the equipment. CAUTION: Radio Frequency Radiation Exposure This equipment complies with FCC radiation exposure limits set forth for uncontrolled equipment and meets the FCC radio frequency (RF) Exposure Guidelines. This equipment should be installed and operated keeping the radiator at least 20cm or more away from person's body. 5-FCC Operating manual Requirement (7/7)
Users Manual
Type F Index 1-Rating 2-Button Function Spec 3-Radio operation procedure 4-Operating manual (Bluetooth/Handsfree) 5-Operating manual (Wi-Fi/Carplay) 6-FCC Operating manual Requirement 7P Model name Model No Car Audio TN0036B Page 2P 3P 4P 5P 6P TN0036B Operation Manual (1/7) Type F 531 - 1602 kHz (9kHz step) 87.5 - 108 MHz (50kHz step) AM TUNING RANGE FM TUNING RANGE 1-Rating 12V (10.5~16.0V) - ground 4Ω 2.1mA or less 4.0A or less (Vcc=13.2V, 0.5W output) RATED VOLTAGE LOAD IMPEDANCE BACK UP CURRENT RATED CURRENT (2/7) Type F ■AUDIO controls 2-Button Function Spec Button No.Button Name Operation ① VOL DOWN Short Push: Decrease Volume Down 1 step Long Push: Decrease Volume Down continuously ② VOL UP Short Push: Increase Volume Up 1 step Long Push: Increase Volume Up continuously ③HOME/TALK Short Push: Transition to home screen Long Push: AA/CP voice recognition ④BACK Transition to previous screen ⑤POWER Audio ON/OFF 5 4 3 2 1 (3/7) Type F 【操作手順】[Operation procedure] ①起動 (ACC-ON) ACC-ON後、TOYOTA画面が表示された事を確認。 After the ACC-ON, confirm that Toyota screen is displayed. ②数秒後に"CAUTION"画面に遷移します。 The screen is changed to "CAUTION" screen after a few seconds. *初回のACC-ON時はやや時間を要します。 Note: It takes a little longer for the first time of ACC-ON. ③数秒後に”Continue”ボタンを押して、MENU画面に遷移させます。 Press the "Continue" button on the face panel after a few seconds to move MENU screen. Menu Screen Display ④POWERボタンを押す。 画面内のラジオモードウィンドウを押すと、"FM1 "画面に遷移します。 Press the POWER button. When the Radio Mode Window on the screen is pressed,"FM1" screen is displayed. ⑤下記画面に遷移したら、”<”釦 若しくは、”>”釦を押下してください。 これで、SEEKが始まります。 Confirm that the screen is changed as below, Please push down the ”<”button or ”>”button. This will start to SEEK. ※AM/DABモードも同様の手順です。 ※Same as AM/DAB mode. 3-Radio operation procedure Press anywhere in this area Push this button Push this button (4/7) Type F 【操作手順】[Operation procedure] ①起動 (ACC-ON) ⑥画面の”Add Device”釦を押下してください。 ACC-ON後、TOYOTA画が表示された事を確認。 Please press the ”Add Device” button of the screen After the ACC-ON, confirm that Toyota screen is displayed. ②数秒後に"CAUTION"画面に遷移します。 The screen is changed to "CAUTION" screen after a few seconds. ⑦画面の”Search Device”釦を押下してください。 *初回のACC-ON時はやや時間を要します。Please press the ”Search Device” button of the screen Note: It takes a little longer for the first time of ACC-ON. ③数秒後に”Continue”ボタンを押して、MENU画面に遷移させます。⑧下記画面に遷移したらBluetooth端末(iPhone、 iPodなど)をペアリング Press the "Continue" button on the face panel after a few seconds モードに設定してください。 to move MENU screen. Confirm if screen is changed as below, Please set iPhone or iPod in pairing mode. Menu Screen Display ④”Setting”ボタンを押して、SETTINGS画面に遷移させます。 Please press the "Setting" button on the face panel to move to Settings screen ※Displays when you have more than one pairing equipment ※複数のペアリング機器がある場合の表示 ⑨接続したiPhone又はiPodを選択します。 Select the iPhone or iPod to connect. ⑤”Settings”画面に遷移することを確認し、画面上の"Bluetooth"釦を選択。 Confirm if ”Settings” screen is displayed, select the ”Bluetooth” button on the display. ※ 電話機の表示にしたがって操作してください ※ Operate the phone after the message on the screen ⑩完了すれば"Connection Completed"の画面になります。 ”Connection Completed” is displayed if completed. 4-Operating manual (Bluetooth/Handsfree) Push this button Push this button Push this button Push this button Push this button (5/7) Type F 【操作手順】[Operation procedure] ①起動 (ACC-ON) ⑥画面の”Search”釦を押下してください。 ACC-ON後、TOYOTA画が表示された事を確認。 (この時接続させるiPhoneでBluetooth ONにしておく) After the ACC-ON, confirm that Toyota screen is displayed. Please press the ”Search” button of the screen At this time, turn on Bluetooth on the iPhone to be connected. ②数秒後に"CAUTION"画面に遷移します。 The screen is changed to "CAUTION" screen after a few seconds. *初回のACC-ON時はやや時間を要します。 Note: It takes a little longer for the first time of ACC-ON. ⑦接続したiPhoneを選択する Please Select the connected iPhone. ③数秒後に”Continue”ボタンを押して、MENU画面に遷移させます。 Press the "Continue" button on the face panel after a few seconds to move MENU screen. ⑧下記のような表示になれば、製品側は[OK]ボタンを押しiPhone側は [ペアリング]を押す。 If the display looks like the one below, press the [OK] button on the product side and press [Pairing] on the iPhone side. Menu Screen Display ④”Setting”ボタンを押して、SETTINGS画面に遷移させます。 Please press the "Setting" button on the face panel to move to Settings screen ⑨自動でCarPlay画面に遷移すれば接続完了 Connection is completed when the screen automatically transitions to the CarPlay screen. ⑤”Settings”画面に遷移することを確認し、下にスライドし画面上の "Seach Apple CarPlay Device"釦を選択。 Confirm that the screen will change to the "Settings" screen, slide it down and select the "Seach Apple CarPlay Device" button on the screen. 5-Operating manual (Wi-Fi/Carplay) Push this button Push this button Push this button Connecting... (6/7) Type F Co-location: This transmitter must not be co-located or operated in conjunction with any other antenna or transmitter. This device complies with part 15 of the FCC Rules. Operation is subject to the following two conditions: (1) This device may not cause harmful interference, and (2) this device must accept any interference received, including interference that may cause undesired operation. FCC WARNING Changes or modifications not expressly approved by the party responsible for compliance could void the user's authority to operate the equipment. CAUTION: Radio Frequency Radiation Exposure This equipment complies with FCC radiation exposure limits set forth for uncontrolled equipment and meets the FCC radio frequency (RF) Exposure Guidelines. This equipment should be installed and operated keeping the radiator at least 20cm or more away from person's body. 5-FCC Operating manual Requirement (7/7)
Attestation Statements
DENSO TEN Limited 2-28, Gosho-dori 1-chome, Hyogo-ku, Kobe, 652-8510 Japan Tel.: +81.78-682-2159 Date: May 8, 2023 Certification Attestation Statements Attn: Federal Communications Commission Authorization and Evaluation Division 7435 Oakland Mills Road Columbia, MD 21046 USA To Whom It May Concern: 47 CFR section 2.911(d)(5)(i) Attestation Statement DENSO TEN Limited certifies that as of the date of the application the equipment for which authorization is sought is not “covered” equipment 1 prohibited from receiving an equipment authorization pursuant to section 2.903 of the FCC rules. If the equipment for which the applicant seeks authorization is produced by any of the entities identified on the current Covered List, including affiliates or subsidiaries of the named companies, the applicant must include an explanation on why the equipment is not “covered” equipment. 47 CFR section 2.911(d)(5)(ii) Attestation Statement DENSO TEN Limited (“the applicant”) certifies that, as of the date of the filing of this application, the applicant ☐ - is / ☒ - is not identified on the Covered List as an entity producing “covered” equipment. Thank you, Kaoru Abe Department General Manager Quality Assurance Group Quality Control Div Regulatory Management Dept. DENSO TEN Limited Tel # 81-78-682-2159 FCC ID: BABTN0036B 1 - The Commission’s Covered List is published by the Public Safety and Homeland Security Bureau and posted on the Commission’s website. This Covered List, which is periodically updated, identifies particular equipment, produced by particular entities, that constitutes “covered” equipment. https://www.fcc.gov/supplychain/coveredlist . 2 - Letters should be placed on appropriate letterhead.
Attestation Statements
DENSO TEN Limited 2- 28, Gosho-dori 1-chome,Hyogo-ku, Kobe, 652-8510 Japan Tel.: +81.78-682-2159 U.S. Agent Designation for Service of Process ATTENTION: Federal Communications Commission Authorization and Evaluation Division 7435 Oakland Mills Road Columbia, MD 21046 USA REGARDING: FCC Certification – Section 2.911(d)(7) Information Des ignated U.S. Agent Company Name: Approve-IT, Inc. Contact Name: Nathan Grinager Street Address: 8011 34 th Ave South, Suite 342 City/Province/Zip: Bloomington, MN 55425 Telephone No: 651-247-1678 Email: [email protected] FRN #: 0027533835 Th is letter is to confirm that we (“the Designated U.S. Agent) have accepted the responsibility to act as the Designated U.S. Agent for Service of Process as required by section 47 CFR 2.911(d)(7) on behalf of the Applicant noted below. U.S. Agent Signature: Date: Signed by (Printed Name/Title): Nathan Grinager / Co-President *Th is letter must be dated within 5 years of the date the application is submitted to the TCB for device certification The Applicant confirms its explicit consent and acknowledges that they must maintain an agent for no less than one year after terminating all marketing and importation OR the conclusion of any Commission-related proceeding involving the equipment. The applicant further acknowledges their responsibility to inform the FCC whenever the Designated U.S. Agent information above changes. Applicant Company name: DENSO TEN Limited FCC ID: BABTN0036B Contact Name: Kaoru Abe Street Address: 2-28, Gosho-Dori 1-Chome, Hyogo-Ku City/Province/Zip: Kobe, 652-8510, JAPAN Telephone No: 81-78-682-2159 Email: [email protected] FRN#: 0008516007 Applicant Signature: Date: May 8, 2023 Signed by (Printed Name/Title): Kaoru Abe/Department General Manager Quality Assurance Group Quality Control Div, Regulatory Management Dept. June 26, 2023
Cover Letter(s)
DENSO TEN Limited 2-28, Gosho-dori 1-chome, Hyogo-ku, Kobe, 652-8510 Japan Tel.: +81.78-682-2159 Letter of Authorization Date: May 8, 2023 UL Verification Services Inc. 47173 Benicia Street, Fremont, CA 94538 Applicant: DENSO TEN Limited FCC ID: BABTN0036B To whom it may concern: We, the undersigned, hereby authorize Yukari Ito of Consumer, Medical & Information Technologies Division, UL Japan, Inc. to act on our behalf in all manners relating to application for equipment authorization, including signing of all documents relating to these matters. Any and all acts carried out by UL Japan, Inc. on our behalf shall have the same effect as acts of our own. We, the undersigned, hereby certify that we are not subject to a denial of federal benefits, that includes FCC benefits, pursuant to Section 5301 of the Anti-Drug Abuse Act of 1988, 21 U.S.C. 862. This authorization is valid until further written notice from the applicant. The application for the subject equipment has not been submitted to another TCB for certification. Sincerely Yours, Kaoru Abe Department General Manager Quality Assurance Group Quality Control Div Regulatory Management Dept. DENSO TEN Limited
Cover Letter(s)
DENSO TEN Limited 2- 28, Gosho-dori 1-chome, Hyogo-ku, Kobe, 652-8510 Japan Tel.: +81.78-682-2159 Request for Confidentiality Date: May 8, 2023 UL Verification Services Inc. 47173 Benicia Street, Fremont, CA 94538 Applicant : DENSO TEN Limited FCC ID : BABTN0036B To whom it may concern: P lease be advised that the following information is to be held confidential on behalf of us, referring to the FCC rules 0.457 and 0.459: Block Diagram Theory of Operation Schematics The application contains technical information which we deem to be trade secrets and proprietary. If made public, the information might be used to the disadvantage of the applicant in the market place. T hank you for your attention to this matter. Sincerely, Kaoru Abe Department General Manager Quality Assurance Group Quality Control Div Regulatory Management Dept. DENSO TEN Limited
Cover Letter(s)
DENSO TEN Limited 2-28, Gosho-dori 1-chome, Hyogo-ku, Kobe, 652-8510 Japan Tel.: +81.78-682-2159 Request for Short-Term Confidentiality Date: May 8, 2023 UL Verification Services Inc. 47173 Benicia Street, Fremont, CA 94538 FCC ID : BABTN0036B Applicant : DENSO TEN Limited To whom it may concern: Please be advised that the following information is to be held in confidence for 180 days from the date of the Grant of Equipment Authorization based on the FCC rules 0.457 and 0.459: External Photos Internal Photos Test Setup Photos User Manual The application contains technical information, which we deem to be trade secrets and proprietary. If made public, the information might be used to the disadvantage of the applicant in the market place. Thank you for your attention to this matter. Sincerely, ____________________________________ Kaoru Abe Department General Manager Quality Assurance Group Quality Control Div Regulatory Management Dept. DENSO TEN Limited
External Photos
External Photos TN0036BType A/E □Front□Rear □Right□Left □Top□Bottom DENSOTENCONFIDENTIAL
External Photos
External Photos TN0036BType B/C/D/F □Front□Rear □Right□Left □Top□Bottom DENSOTENCONFIDENTIAL
ID Label/Location Info
The label material is Yupo 80 (UV) and the ink is UV ink, wh ich has improved durability against repeated rubbing tests compared to ordinary synthetic paper.
Internal Photos
Internal Photos (Bluetooth/Wi-Fi module) TN0036B External Photo (Top)External Photo (Bottom)Internal Photo (Top) CONFIDENTIAL MATERIAL IN TRUST
Internal Photos
Internal Photos TN0036BType A/E 【PANEL Board】 Component sideSolder side 【MAIN Board】 Component side (CPU)Solder side (CPU) Component side (AUDIO)Solder side (AUDIO) 【Bluetooth/Wi-Fi module mounting position】 Main (CPU) AssyEnlargement 【Bluetooth/Wi-Fi Antenna position】 Main (CPU) AssyEnlargement DENSOTENCONFIDENTIAL Bluetooth/Wi-Fi module Bluetooth and Wi-Fi Antenna Wi-Fi Bluetooth
Internal Photos
Internal Photos TN0036BType B/C/D/F 【PANEL Board】 Component sideSolder side 【MAIN Board】 Component side (CPU)Solder …
Text truncated - open the document above for the full version.
Contact Information
Applicant
Kaoru Abe(Department General Manager)
Technical Contact
UL Japan, Inc.Ryota Yamanaka
[email protected]81-596-24-8999
4383-326 Asama-cho, Ise-shi · Mie-ken · Japan
Test Firm
UL Japan, Inc.(Ise)Takayuki Shimada
Technical Specifications
| # | Rule Parts | Frequency Range | Power Output |
|---|---|---|---|
| 1 | 15E | 5.76 GHz - 5.76 GHz | 3.60 mW |
Other Applications from DENSO TEN Limited
BABTN0052E
May 26, 2026Car Audio
Equipment Class
CXX - Communications Rcvr for use w/ licensed Tx and CBsBABTN0051A
Apr 10, 2026Car Navigation
Equipment Class
CXX - Communications Rcvr for use w/ licensed Tx and CBs
BABTN0046A
Feb 12, 2024Car Audio
Equipment Class
CXX - Communications Rcvr for use w/ licensed Tx and CBs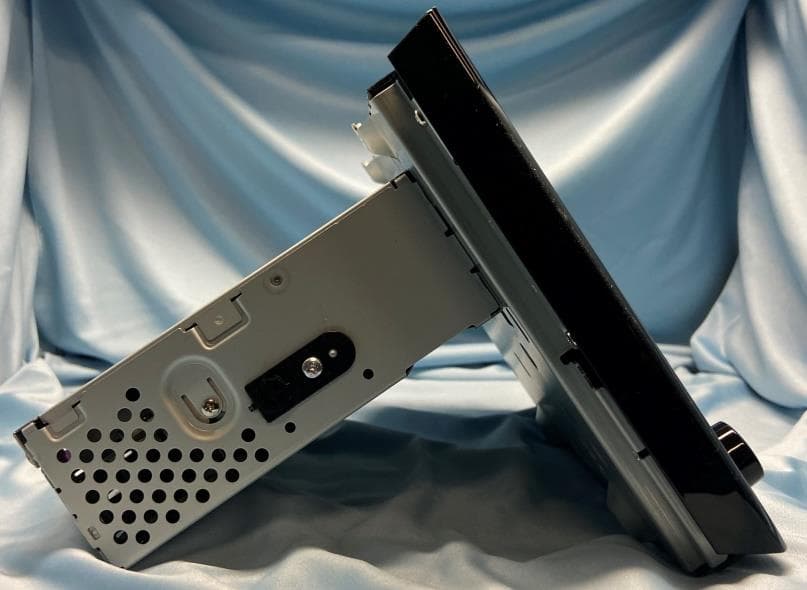
BABTN0040B
Jul 23, 2023Car Audio
Equipment Class
DTS - Digital Transmission System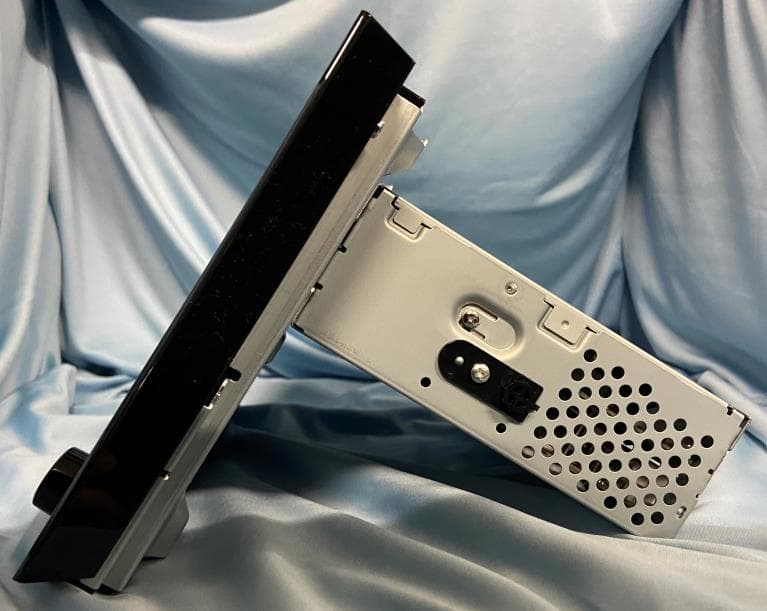
BABTN0040A
Jul 23, 2023Car Audio
Equipment Class
CXX - Communications Rcvr for use w/ licensed Tx and CBs