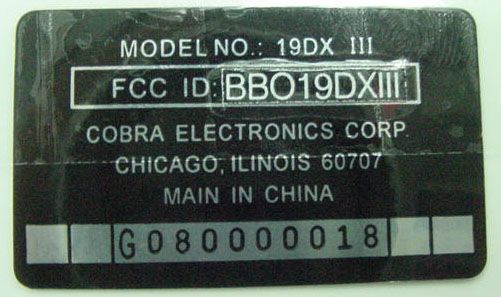
BBO19DXIIINon-Broadcast Transmitter (CB)
Cobra Electronics Corporation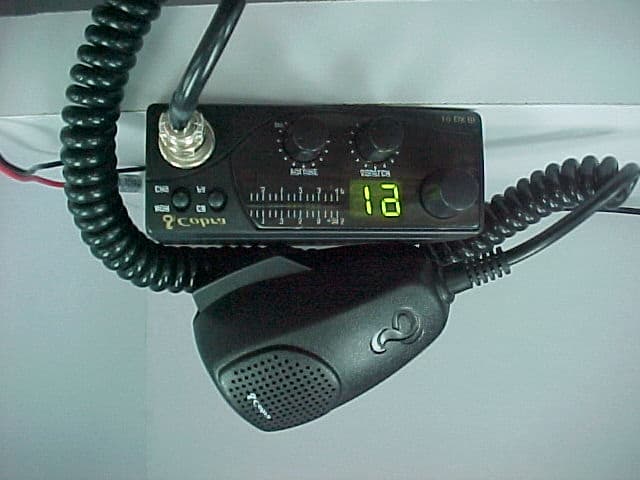
Click to zoom
Application Details
- Equipment Class
- TNB - Licensed Non-Broadcast Station Transmitter
- Date of Grant
- Oct 12, 2000
- Application Purpose
- Original Equipment
- Date of Application
- Oct 12, 2000
- Equipment Note
- Non-Broadcast Transmitter (CB)
- Frequency Range
- 26.96500000 - 27.40500000
- Country
- United States
Documents & Files
Document Text
Text extracted from the exhibit documents filed with the FCC. Open a document above to read the original.
Users Manual
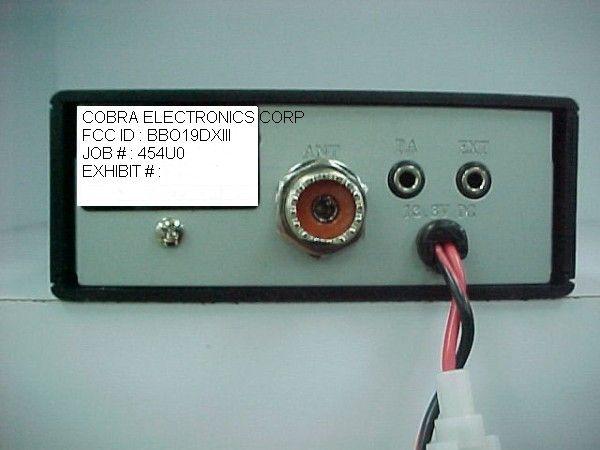
1 Contents Features. . . . . . . . . . . . . . . . . . . . . . . . . . . . . . . . . . . . . . . . 1 The CB Story. . . . . . . . . . . . . . . . . . . . . . . . . . . . . . . . . . A1 Licensing/Warning/Included Accessories. . . . . . . A1 Controls and Indicators. . . . . . . . . . . . . . . . . . . . . . . A2 Our Thanks to You. . . . . . . . . . . . . . . . . . . . . . . . . . . . . A3 Customer Support. . . . . . . . . . . . . . . . . . . . . . . . . . A3 Operating Your CB Mobile Radio Installation/Connection. . . . . . . . . . . . . . . . . . . . . . . . . . 2 Turning On. . . . . . . . . . . . . . . . . . . . . . . . . . . . . . . . . . . . . . 4 CB Antenna. . . . . . . . . . . . . . . . . . . . . . . . . . . . . . . . . . . . . 4 Microphone Connector. . . . . . . . . . . . . . . . . . . . . . . . . . 5 Squelch. . . . . . . . . . . . . . . . . . . . . . . . . . . . . . . . . . . . . . . . . 5 Setting Squelch. . . . . . . . . . . . . . . . . . . . . . . . . . . . . . . . . 6 Channel Selection. . . . . . . . . . . . . . . . . . . . . . . . . . . . . . . 8 Channel 9/NOR. . . . . . . . . . . . . . . . . . . . . . . . . . . . . . . . . . 8 CB/PA. . . . . . . . . . . . . . . . . . . . . . . . . . . . . . . . . . . . . . . . . . . 8 S/RF Power Meter. . . . . . . . . . . . . . . . . . . . . . . . . . . . . . . . 9 TX Indicator LED. . . . . . . . . . . . . . . . . . . . . . . . . . . . . . . . . 9 Antenna Connector. . . . . . . . . . . . . . . . . . . . . . . . . . . . . 10 External Speaker. . . . . . . . . . . . . . . . . . . . . . . . . . . . . . . 10 Power. . . . . . . . . . . . . . . . . . . . . . . . . . . . . . . . . . . . . . . . . 10 Public Address. . . . . . . . . . . . . . . . . . . . . . . . . . . . . . . . . 10 Ignition Noise Interference. . . . . . . . . . . . . . . . . . . . . . 11 Temporary Mobile Operation. . . . . . . . . . . . . . . . . . . . 11 Operation to Receive/Transmit. . . . . . . . . . . . . . . . . . 12 Maintenance. . . . . . . . . . . . . . . . . . . . . . . . . . . . . . . . . . . 13 Frequency Ranges. . . . . . . . . . . . . . . . . . . . . . . . . . . . . . 15 Specifications. . . . . . . . . . . . . . . . . . . . . . . . . . . . . . . . . 16 Accessories. . . . . . . . . . . . . . . . . . . . . . . . . . . . . . . . . . . . 17 Order Form. . . . . . . . . . . . . . . . . . . . . . . . . . . . . . . . . . . . 19 Warranty. . . . . . . . . . . . . . . . . . . . . . . . . . . . . . . . . . . . . . 20 If You Think You Need Service. . . . . . . . . Back Cover Features of This Product •40 CB Radio Channels •Instant Channel 9/NOR • PA System • Compact Size • Dynamic Microphone •9 Foot Mic Cord • Front Panel Microphone Connector How to Use Your Cobra 19D XI I I 19 DX III. LAYOUT(4478) 8/9/00 4:35 PM Page 1 4Co n n e ct the red lead of DC power co rd to an a c ce s s o ry 12 volt fuse. 5Co n n e ct the black lead to the negat i ve side of the auto m o b i l e. This is usually the chassis. Any co nve n i e nt location with good elect ri cal co nt a ct ( re m ove paint) may be used. 6Mo u nt the microphone bra c ket on ri g ht side of the tra n s ce i ver or near it using two scre ws sup- p l i e d. When mounting in an auto m o b i l e,p l a ce the bra c ket under the dash so the micro p h o n e is readily acce s s i b l e. 7Attach the 4-pin microphone cable to recepta- cle on front of unit and install unit in bracket securely. Mo u nting and Co n n e ct i o n s Se l e ct a location for the tra n s ce i ver and micro- phone bra c ket that is co nve n i e nt for ope rat i o n . In auto m o b i l e s, the tra n s ce i ver is usually mounte d to the undern e ath of the dash panel, with the m i c rophone bra c ket beside it. 1Hold the radio with mounting bra c ket in the ex a ct location desire d. Re m ove the mount i n g b ra c ket and use it as a te m p l ate to mark the l ocation for the mounting scre ws. 2Drill nece s s a ry holes and secure mount i n g b ra c ket in locat i o n . 3Co n n e ct the antenna cable plug to the re ce p t a- cle marked “A N T” on the back of the unit. 3 Mounting and Connections Note Before installing the CB radio, visually check the vehicle bat- tery connections to determine which battery terminal,posi- tive or negative (positive is the larger of the two) is grounded to the engine block (or chassis). O p e r a t i o n 2 Mounting and Connections Note The transceiver is held in the universal mounting bracket by two thumb screws, permitting adjustment at the most conve- nient angle. A universal mounting bracket is supplied along with self tap- ping screws and star washers. To mount the transceiver: O p e r a t i o nInstallationInstallation CBTransceiver 19 DX III. LAYOUT(4478) 8/9/00 4:35 PM Page 2 5 Mi c rophone Co n n e ctor Al l ows for co nve n i e nt re m oval of the micro p h o n e plug when sto rage is re q u i re d. The micro p h o n e MUST be co n n e cted to the unit at all times when in u s e, for pro per ope rat i o n . Sq u e l c h This co nt rol is used to cut off or eliminate re ce i ve r b a c kg round noise in the absence of an inco m i n g s i g n a l .Adjust until the re ce i ver noise disappe a r s. This will re q u i re the incoming signal to be slight l y s t ronger than ave rage re ce i ver noise. Fu rther cloc k- wise ro t ation will increase the threshold leve l which a signal must ove rcome in order to be heard. Only strong signals will be heard at a maximum c l oc kwise setting. Microphone Connector O p e r a t i o n 4 Tu rning on Tu rn volume co nt rol cloc kwise to turn power on and set the desired listening vo l u m e. CB Ante n n a Only a pro pe rly matched antenna sys tem will a l l ow maximum power output. In mobile installations (ca r s,t ru c k s, bo at s,e tc. ) , an antenna sys tem that is non-dire ctional should be used. When installed in a bo at, the tra n s ce i ver will not o pe rate at maximum efficiency without a gro u n d p l ate unless the vessel has a steel hull. Be fo re installing the tra n s ce i ver in a b…
Text truncated - open the document above for the full version.
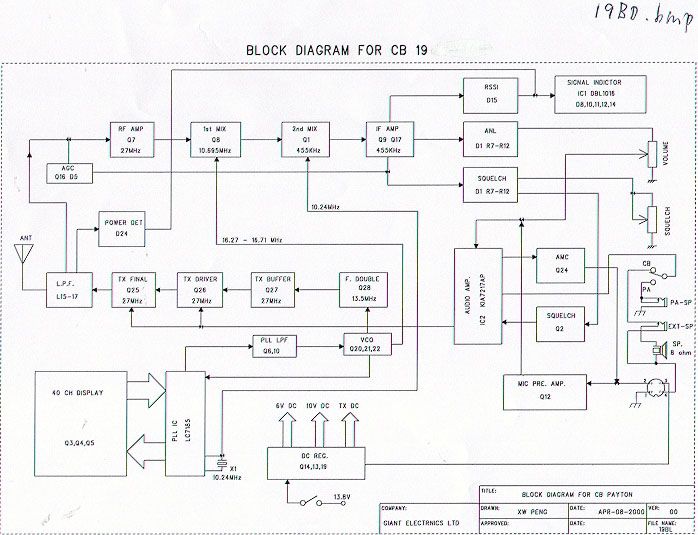
Operational Description
APPENDIX 1 CIRCUITS AND DEVICES TO STABILIZE FREQUENCY All 40 channels of transmitting, and receiving, frequencies are provided by PLL (Phase Locked Loop) circuitry. The purpose of the PLL is to provide a multiple number of frequencies from VCO (Voltage Controlled Oscillator) with quartz crystal accuracy and stability from on crystal oscillator reference frequency. The reference crystal oscillator frequency is 10.24 MHz. CIRCUITS AND DEVICES TO STABILIZE FREQUENCY FCC ID: BBO19DXIII APPENDIX 1 APPENDIX 2 CIRCUITS FOR SUPPRESSION SPURIOUS RADIATION The tuning circuit between frequency synthesizer and final amp Q704 and 4-stage "PI" network C718, C719, L711, C721, L712, C725, L725, L713 and C723 in the Q704 output circuit serve to suppress spurious radiation. This network serves to impedance match Q704 to the antenna and to reduce spurious content to acceptable levels in the frequency synthesizer. CIRCUITS FOR LIMITING MODULATION A portion of the modulating voltage is rectified by D402 which turns on IC401 attenuating the mic input. The resulting feedback loop keeps the modulation below 100 percent for inputs approximately 40 dB greater than that required to produce 50 percent modulation. CIRCUITS FOR LIMITING POWER During factory alignment, tuning is adjusted so that the actual power is from 3.6 to 3.9 watts. There are no other controls for adjusting power. DEVICES AND CIRCUITS TO SUPPRESS SPURIOUS RADIATION AND LIMIT MODULATION FCC ID: BBO19DXIII APPENDIX 2
Parts List/Tune Up Info
ALIGNMENT PROCEDURE OF 19DX3 REVISION: 00 ENG-19DX3-08 Page: 1 OF 6 Print date: 00-10-20 GIANT ELECTRONICS LTD. ALIGNMENT PROCEDURE MODEL: 19DX III REVISION: 00 DATE : AUGUST 15, 2000 PREPARED BY:_____________ CHECKED BY: ____________ APPROVED BY: ____________ TOTAL PAGES: ALIGNMENT PROCEDURE OF 19DX3 REVISION: 00 ENG-19DX3-08 Page: 2 OF 6 Print date: 00-10-20 18WS2 ALIGNMENT INSTRUCTION 1.0 TEST CONDITION: 1.1. STANDARD DC POWER:EXT.DC13.8VDC 1.2. MEASUREMENT CHANNEL:CBCH19 (27.185MHz) 1.3. STANDARD AUDIO LOADING:CB8 Ω 1.4. ANTENNA IMPEDANCE:CB50 Ω 1.5. STANDARD REF. MODULATION:CB30% (AM) 1.6. STANDARD REF. AUDIO OUTPUT:CB0.5W 1.7. FREQUENCY TABLE CB BAND CH NO.FREQ. (MHz) 0126.965 0226.975 0326.985 0427.005 0527.015 0627.025 0727.035 0827.055 0927.065 1027.075 1127.085 1227.105 1327.115 1427.125 1527.135 1627.155 1727.165 1827.175 1927.185 2027.205 2127.215 2227.225 2327.255 2427.235 2527.245 2627.265 2727.275 2827.285 2927.295 3027.305 3127.315 3227.325 3327.335 3427.345 3527.355 3627.365 3727.375 3827.385 3927.395 4027.405 ALIGNMENT PROCEDURE OF 19DX3 REVISION: 00 ENG-19DX3-08 Page: 3 OF 6 Print date: 00-10-20 1.8. TEST EQUIPMENT SETUP AS BELOW: A. TX test equipment setup: Spectrum Power Analyzer Supply Modulation Wattmeter 19DX3 Meter D.U.T. Oscilloscope Frequency Audio Gen. Counter Distortion AC Meter Voltmeter B. RX test equipment setup: SINAD Meter RF Signal Power Generator Supply Distortion 8 ohm 19DX3 Meter loading D.U.T. Oscilloscope Note: D.U.T. = device under test ALIGNMENT PROCEDURE OF 19DX3 REVISION: 00 ENG-19DX3-08 Page: 4 OF 6 Print date: 00-10-20 ALIGNMENT PROCEDURE OF 19DX3 REVISION: 00 ENG-19DX3-08 Page: 5 OF 6 Print date: 00-10-20 2.0 ALIGNMENT 2.1 VCO ALIGNMENT TEST ITEMTEST CONDITION & PROCEDUREPURPOSE CB VCO Voltage1. Connect a digital multi-meter to TP1 2. Set CB RX mode: CH1. Adju st L11 for 1.5 ± 0.1 V. 3. Set CB TX mode Check CH40 ≤ 4.5V. 2.2 CB Receiver Alignment TEST ITEMTEST CONDITION & PROCEDUREPURPOSE 1. Audio output level 1. CB RX mode. 2. Output of signal generator thru 0.01uF to TP3. 3. RF Gen. set 10.7MHz, Fmod= 1KHz, AM= 30%, level: 1mV. 4. Set Volume control to middle position. 5. Set Squelch to minimum. 1. Adju st L8 and L23 for maximum audio output & minimum distortion at the distortion meter.( Distortion less than 5% ) 2. Set volume control to maximum position, audio power output shall be more than 3 Watts. 2. RX sensitivity 1. Set normal band CH19. 2. Output of signal generator to antenna input terminal. 3. RF Gen. set 27.185MHz, fm: 1kHz, AM= 30%, RF level: 1 μ V. 1. Adju st L5, L6 and L10 for more than 10dB S/N ratio. 2. Repeat as needed. Check CH1 and CH40. 3. SQUELCH control ( Tight Squelch ) 1. Set normal band CH19. 2.Output of signal generator to the antenna input terminal. 3. RF Gen. set 27.185 MHz , Fmod= 1KHz, AM= 30%, RF level: 2500 μ V. 4. Rotate the Squelch control to fully clockwise position 1. Slowly turn VR5 to a position that the audio output waveform at the oscilloscope just appears from no output. 2. Must open at 4000uV. 3. Must not open at 800uV. 4. Signal meter display 1. Set normal band CH19. 2. Output of signal generator to antenna input terminal. RF Gen. set 27.185MHz, no modulation, RF level: 100 μ V. 1. Adju st VR1 for “9” displayed on the signal meter of LED panel. 2. Increase RF level by 30dB. The signal meter should be displayed at “+30” position. ALIGNMENT PROCEDURE OF 19DX3 REVISION: 00 ENG-19DX3-08 Page: 6 OF 6 Print date: 00-10-20 2.3 CB Transmitter Alignment TEST ITEMTEST CONDITION & PROCEDUREPURPOSE 1. TP4 Alignment 1. Channel set normal band CH 19. 2. Set TX mode. Connect the TP4 (IC8 pin9) thru a 10pF capacitor to the oscilloscope. 1. Adju st L21, L22 for maximum RF output waveform at the scope. 2. Repeat as needed. 2. TX Carrier output power 1. Channel set normal band CH 19. 2. Set TX mode. 3. Connect an RF wattmeter to the antenna socket. 1. Adju st L21,L22 and L17 for 4.0 watts RF output power. 2. Check TX CH1 and CH40 should meet D.T.S. 3. TX Carrier frequency 1. Channel set CH 19. 2. Set TX mode. Adju st VC1 for 27.185000MHz at the frequency counter. 4. TX Signal meter 1. Connect an RF wattmeter to the antenna socket. 2. No modulation. 3. Set TX output power for 3watts. Adju st VR6 for “4” displayed at the TX signal meter of the LED panel. (red LED) 5. MAXIMUM Modulation (AMC control) 1. Set TX mode. Output of AF generator to MIC jack, @ 1000Hz, 5 mV . 1. Adju st VR2 for 89-91% modulation. 2. Distortion less than 8.0% at 80% modulation. 3. Check CH1,CH40. 7. Occupied band width, ( OBW ) 1. Set TX High power mode 2. Set modulation frequency 2500 Hz. The frequency spectrum of the harmonics should be at least 2 dB better than the limits of the FCC specification.
Parts List/Tune Up Info
ALIGNMENT PROCEDURE OF 19DX3 REVISION: 00 ENG-19DX3-08 Page: 1 OF 6 Print date: 00-10-20 GIANT ELECTRONICS LTD. ALIGNMENT PROCEDURE MODEL: 19DX III REVISION: 00 DATE : AUGUST 15, 2000 PREPARED BY:_____________ CHECKED BY: ____________ APPROVED BY: ____________ TOTAL PAGES: ALIGNMENT PROCEDURE OF 19DX3 REVISION: 00 ENG-19DX3-08 Page: 2 OF 6 Print date: 00-10-20 18WS2 ALIGNMENT INSTRUCTION 1.0 TEST CONDITION: 1.1. STANDARD DC POWER:EXT.DC13.8VDC 1.2. MEASUREMENT CHANNEL:CBCH19 (27.185MHz) 1.3. STANDARD AUDIO LOADING:CB8 Ω 1.4. ANTENNA IMPEDANCE:CB50 Ω 1.5. STANDARD REF. MODULATION:CB30% (AM) 1.6. STANDARD REF. AUDIO OUTPUT:CB0.5W 1.7. FREQUENCY TABLE CB BAND CH NO.FREQ. (MHz) 0126.965 0226.975 0326.985 0427.005 0527.015 0627.025 0727.035 0827.055 0927.065 1027.075 1127.085 1227.105 1327.115 1427.125 1527.135 1627.155 1727.165 1827.175 1927.185 2027.205 2127.215 2227.225 2327.255 2427.235 2527.245 2627.265 2727.275 2827.285 2927.295 3027.305 3127.315 3227.325 3327.335 3427.345 3527.355 3627.365 3727.375 3827.385 3927.395 4027.405 ALIGNMENT PROCEDURE OF 19DX3 REVISION: 00 ENG-19DX3-08 Page: 3 OF 6 Print date: 00-10-20 1.8. TEST EQUIPMENT SETUP AS BELOW: A. TX test equipment setup: Spectrum Power Analyzer Supply Modulation Wattmeter 19DX3 Meter D.U.T. Oscilloscope Frequency Audio Gen. Counter Distortion AC Meter Voltmeter B. RX test equipment setup: SINAD Meter RF Signal Power Generator Supply Distortion 8 ohm 19DX3 Meter loading D.U.T. Oscilloscope Note: D.U.T. = device under test ALIGNMENT PROCEDURE OF 19DX3 REVISION: 00 ENG-19DX3-08 Page: 4 OF 6 Print date: 00-10-20 ALIGNMENT PROCEDURE OF 19DX3 REVISION: 00 ENG-19DX3-08 Page: 5 OF 6 Print date: 00-10-20 2.0 ALIGNMENT 2.1 VCO ALIGNMENT TEST ITEMTEST CONDITION & PROCEDUREPURPOSE CB VCO Voltage1. Connect a digital multi-meter to TP1 2. Set CB RX mode: CH1. Adju st L11 for 1.5 ± 0.1 V. 3. Set CB TX mode Check CH40 ≤ 4.5V. 2.2 CB Receiver Alignment TEST ITEMTEST CONDITION & PROCEDUREPURPOSE 1. Audio output level 1. CB RX mode. 2. Output of signal generator thru 0.01uF to TP3. 3. RF Gen. set 10.7MHz, Fmod= 1KHz, AM= 30%, level: 1mV. 4. Set Volume control to middle position. 5. Set Squelch to minimum. 1. Adju st L8 and L23 for maximum audio output & minimum distortion at the distortion meter.( Distortion less than 5% ) 2. Set volume control to maximum position, audio power output shall be more than 3 Watts. 2. RX sensitivity 1. Set normal band CH19. 2. Output of signal generator to antenna input terminal. 3. RF Gen. set 27.185MHz, fm: 1kHz, AM= 30%, RF level: 1 μ V. 1. Adju st L5, L6 and L10 for more than 10dB S/N ratio. 2. Repeat as needed. Check CH1 and CH40. 3. SQUELCH control ( Tight Squelch ) 1. Set normal band CH19. 2.Output of signal generator to the antenna input terminal. 3. RF Gen. set 27.185 MHz , Fmod= 1KHz, AM= 30%, RF level: 2500 μ V. 4. Rotate the Squelch control to fully clockwise position 1. Slowly turn VR5 to a position that the audio output waveform at the oscilloscope just appears from no output. 2. Must open at 4000uV. 3. Must not open at 800uV. 4. Signal meter display 1. Set normal band CH19. 2. Output of signal generator to antenna input terminal. RF Gen. set 27.185MHz, no modulation, RF level: 100 μ V. 1. Adju st VR1 for “9” displayed on the signal meter of LED panel. 2. Increase RF level by 30dB. The signal meter should be displayed at “+30” position. ALIGNMENT PROCEDURE OF 19DX3 REVISION: 00 ENG-19DX3-08 Page: 6 OF 6 Print date: 00-10-20 2.3 CB Transmitter Alignment TEST ITEMTEST CONDITION & PROCEDUREPURPOSE 1. TP4 Alignment 1. Channel set normal band CH 19. 2. Set TX mode. Connect the TP4 (IC8 pin9) thru a 10pF capacitor to the oscilloscope. 1. Adju st L21, L22 for maximum RF output waveform at the scope. 2. Repeat as needed. 2. TX Carrier output power 1. Channel set normal band CH 19. 2. Set TX mode. 3. Connect an RF wattmeter to the antenna socket. 1. Adju st L21,L22 and L17 for 4.0 watts RF output power. 2. Check TX CH1 and CH40 should meet D.T.S. 3. TX Carrier frequency 1. Channel set CH 19. 2. Set TX mode. Adju st VC1 for 27.185000MHz at the frequency counter. 4. TX Signal meter 1. Connect an RF wattmeter to the antenna socket. 2. No modulation. 3. Set TX output power for 3watts. Adju st VR6 for “4” displayed at the TX signal meter of the LED panel. (red LED) 5. MAXIMUM Modulation (AMC control) 1. Set TX mode. Output of AF generator to MIC jack, @ 1000Hz, 5 mV . 1. Adju st VR2 for 89-91% modulation. 2. Distortion less than 8.0% at 80% modulation. 3. Check CH1,CH40. 7. Occupied band width, ( OBW ) 1. Set TX High power mode 2. Set modulation frequency 2500 Hz. The frequency spectrum of the harmonics should be at least 2 dB better than the limits of the FCC specification.
Parts List/Tune Up Info
ALIGNMENT PROCEDURE OF 19DX3 REVISION: 00 ENG-19DX3-08 Page: 1 OF 6 Print date: 00-10-20 GIANT ELECTRONICS LTD. ALIGNMENT PROCEDURE MODEL: 19DX III REVISION: 00 DATE : AUGUST 15, 2000 PREPARED BY:_____________ CHECKED BY: ____________ APPROVED BY: ____________ TOTAL PAGES: ALIGNMENT PROCEDURE OF 19DX3 REVISION: 00 ENG-19DX3-08 Page: 2 OF 6 Print date: 00-10-20 18WS2 ALIGNMENT INSTRUCTION 1.0 TEST CONDITION: 1.1. STANDARD DC POWER:EXT.DC13.8VDC 1.2. MEASUREMENT CHANNEL:CBCH19 (27.185MHz) 1.3. STANDARD AUDIO LOADING:CB8 Ω 1.4. ANTENNA IMPEDANCE:CB50 Ω 1.5. STANDARD REF. MODULATION:CB30% (AM) 1.6. STANDARD REF. AUDIO OUTPUT:CB0.5W 1.7. FREQUENCY TABLE CB BAND CH NO.FREQ. (MHz) 0126.965 0226.975 0326.985 0427.005 0527.015 0627.025 0727.035 0827.055 0927.065 1027.075 1127.085 1227.105 1327.115 1427.125 1527.135 1627.155 1727.165 1827.175 1927.185 2027.205 2127.215 2227.225 2327.255 2427.235 2527.245 2627.265 2727.275 2827.285 2927.295 3027.305 3127.315 3227.325 3327.335 3427.345 3527.355 3627.365 3727.375 3827.385 3927.395 4027.405 ALIGNMENT PROCEDURE OF 19DX3 REVISION: 00 ENG-19DX3-08 Page: 3 OF 6 Print date: 00-10-20 1.8. TEST EQUIPMENT SETUP AS BELOW: A. TX test equipment setup: Spectrum Power Analyzer Supply Modulation Wattmeter 19DX3 Meter D.U.T. Oscilloscope Frequency Audio Gen. Counter Distortion AC Meter Voltmeter B. RX test equipment setup: SINAD Meter RF Signal Power Generator Supply Distortion 8 ohm 19DX3 Meter loading D.U.T. Oscilloscope Note: D.U.T. = device under test ALIGNMENT PROCEDURE OF 19DX3 REVISION: 00 ENG-19DX3-08 Page: 4 OF 6 Print date: 00-10-20 ALIGNMENT PROCEDURE OF 19DX3 REVISION: 00 ENG-19DX3-08 Page: 5 OF 6 Print date: 00-10-20 2.0 ALIGNMENT 2.1 VCO ALIGNMENT TEST ITEMTEST CONDITION & PROCEDUREPURPOSE CB VCO Voltage1. Connect a digital multi-meter to TP1 2. Set CB RX mode: CH1. Adju st L11 for 1.5 ± 0.1 V. 3. Set CB TX mode Check CH40 ≤ 4.5V. 2.2 CB Receiver Alignment TEST ITEMTEST CONDITION & PROCEDUREPURPOSE 1. Audio output level 1. CB RX mode. 2. Output of signal generator thru 0.01uF to TP3. 3. RF Gen. set 10.7MHz, Fmod= 1KHz, AM= 30%, level: 1mV. 4. Set Volume control to middle position. 5. Set Squelch to minimum. 1. Adju st L8 and L23 for maximum audio output & minimum distortion at the distortion meter.( Distortion less than 5% ) 2. Set volume control to maximum position, audio power output shall be more than 3 Watts. 2. RX sensitivity 1. Set normal band CH19. 2. Output of signal generator to antenna input terminal. 3. RF Gen. set 27.185MHz, fm: 1kHz, AM= 30%, RF level: 1 μ V. 1. Adju st L5, L6 and L10 for more than 10dB S/N ratio. 2. Repeat as needed. Check CH1 and CH40. 3. SQUELCH control ( Tight Squelch ) 1. Set normal band CH19. 2.Output of signal generator to the antenna input terminal. 3. RF Gen. set 27.185 MHz , Fmod= 1KHz, AM= 30%, RF level: 2500 μ V. 4. Rotate the Squelch control to fully clockwise position 1. Slowly turn VR5 to a position that the audio output waveform at the oscilloscope just appears from no output. 2. Must open at 4000uV. 3. Must not open at 800uV. 4. Signal meter display 1. Set normal band CH19. 2. Output of signal generator to antenna input terminal. RF Gen. set 27.185MHz, no modulation, RF level: 100 μ V. 1. Adju st VR1 for “9” displayed on the signal meter of LED panel. 2. Increase RF level by 30dB. The signal meter should be displayed at “+30” position. ALIGNMENT PROCEDURE OF 19DX3 REVISION: 00 ENG-19DX3-08 Page: 6 OF 6 Print date: 00-10-20 2.3 CB Transmitter Alignment TEST ITEMTEST CONDITION & PROCEDUREPURPOSE 1. TP4 Alignment 1. Channel set normal band CH 19. 2. Set TX mode. Connect the TP4 (IC8 pin9) thru a 10pF capacitor to the oscilloscope. 1. Adju st L21, L22 for maximum RF output waveform at the scope. 2. Repeat as needed. 2. TX Carrier output power 1. Channel set normal band CH 19. 2. Set TX mode. 3. Connect an RF wattmeter to the antenna socket. 1. Adju st L21,L22 and L17 for 4.0 watts RF output power. 2. Check TX CH1 and CH40 should meet D.T.S. 3. TX Carrier frequency 1. Channel set CH 19. 2. Set TX mode. Adju st VC1 for 27.185000MHz at the frequency counter. 4. TX Signal meter 1. Connect an RF wattmeter to the antenna socket. 2. No modulation. 3. Set TX output power for 3watts. Adju st VR6 for “4” displayed at the TX signal meter of the LED panel. (red LED) 5. MAXIMUM Modulation (AMC control) 1. Set TX mode. Output of AF generator to MIC jack, @ 1000Hz, 5 mV . 1. Adju st VR2 for 89-91% modulation. 2. Distortion less than 8.0% at 80% modulation. 3. Check CH1,CH40. 7. Occupied band width, ( OBW ) 1. Set TX High power mode 2. Set modulation frequency 2500 Hz. The frequency spectrum of the harmonics should be at least 2 dB better than the limits of the FCC specification.
Test Report
ENGINEERING STATEMENT For Type Certification of Cobra Electronics Corporation Model No: 19DX-III FCC ID: BBO19DXIII I am an Electronics Engineer, a principal in the firm of Hyak Laboratories, Inc., Springfield, Virginia. My education and experience are a matter of record with the Federal Communications Commission. Hyak Laboratories, Inc. has been authorized by Cobra Electronics Corporation, to make type certification measurements on the 19DX-III transceiver. These tests were made by me or under my supervision in our Springfield laboratory. Test data and documentation required by the FCC for type certification are included in this report. It is submitted that the above-mentioned transceiver meets all applicable FCC require- ments. ______________________________ Rowland S. Johnson Dated: September 5, 2000 A. INTRODUCTION The following data are submitted in connection with this request for type certification of the 19DX-III transceiver in accordance with Part 2, Subpart J of the FCC Rules. The 19DX-III is a double sideband amplitude modulated trans- mitter/receiver combination intended for mobile (vehicle) applications in the citizens radio service. The transmitter has 40-channel capability in the 26.965 - 27.405 MHz band utilizing phase locked loop (PLL) technology. B. GENERAL INFORMATION REQUIRED FOR TYPE CERTIFICATION (Paragraph 2.983 of the Rules) 1. Name of applicant: Cobra Electronics Corporation 2. Identification of equipment: FCC ID: BBO19DXIII a. The equipment identification label is submitted as a separate exhibit. b. Photographs of the equipment are submitted as a separate exhibit. 3. Quantity production is planned. 4. Technical description: a. 6k00A3E emission b. Frequency range: 26.965 - 27.405 MHz c. Operating power of transmitter is fixed at the factory at less than 4 watts. d. Maximum power rating under 95.635(c) of the Rules is 4 watts. e. The dc voltage and dc currents at final amplifier: Collector voltage: 13.4 V Collector current: 0.56 mA @ 13.8 Vdc input. f. Function of each active semiconductor device: Submitted as a separate exhibit. g. Complete ciruit diagram is submitted as a separate exhibit. h. A draft instruction book is submitted as a separate exhibit. i. The transmitter tune-up procedure is submitted as a separate exhibit. 2 B. GENERAL INFORMATION...(Continued) j. A description of circuits for stabilizing frequency is included in Appendix 1. k. A description of circuits and devices employed for suppression of spurious radiation and for limiting modulation is included in Appendix 2. l. Not applicable. 5. Data for 2.985 through 2.997 follow this section. 6. RF_Power_Output (Paragraph 2.985(a),(b)(1) of the Rules) RF power output in the AM mode was measured with a Bird 4421 RF power meter and a Narda 765-20 50 ohm dummy load. (The transmitter was tuned by the factory according to the procedure of Exhibit 4.) Power was measured with a supply voltage of 13.8 volts, and indicated: Channel Power, W 1 3.7 21 3.6 40 3.6 C. MODULATION CHARACTERISTICS 1. AF_Frequency_Response A curve showing frequency response of the transmitter is shown in Figure 1. Reference level was taken as a 1 kHz tone with 50% modulation, as measured on a Data Tech 209 modulation meter, using Audio Precision System One digital voltmeter and tracking generator. 2. Modulation_Limiting Curves of AM modulation limiting for both positive and negative peaks are shown in Figures 2a and 2b, respec- tively. Characteristics at 300, 940, and 2500 Hz are shown using a Data Tech 209 modulation meter. Signal level was established with a Audio Precision System One digital voltmeter. The curves show compliance with Paragraph 95.633(d) of the Rules. 3 C. MODULATION REQUIREMENTS...(Continued) 3. Modulation_Limiter_Attack_Time Modulation limiter attack time was measured by applying to the microphone input terminals a pulsed tone at 2500 Hz, 16 dB above the level required for 50% modulation at the frequency of maximum response, 940 Hz. The spectrum analyzer was tuned to upper and lower fourth- order sidebands in the time domain. Horizontal sweep of the analyzer was triggered in synchronism with the tone turn-on. Sweep speed was 100 milliseconds per division. Plots are included as Figures 3a and 3b. Any transients observed in excess of 33 dB attenuation as referenced to the carrier were less than 20 ms in duration. 4 FIGURE 1 TRANSMITTER FREQUENCY RESPONSE TRANSMITTER FREQUENCY RESPONSE FCC ID: BBO19DXIII FIGURE 1 5 FIGURE 2a AM MODULATION LIMITING - POSITIVE PEAKS MODULATION LIMITING CHARACTERISTICS Percent modulation as a function of input level at microphone jack in dBm for 300 Hz, 940 Hz, and 2500 Hz tones. MODULATION LIMITING POSITIVE PEAKS FCC ID: BBO19DXIII FIGURE 2a 6 FIGURE 2b AM MODULATION LIMITING – NEGATIVE PEAKS MODULATION LIMITING CHARACTERISTICS Percent modulation as a function of input level at microphone jack in dBm for 300 Hz, 940 Hz, and 2500 Hz tones. MODULATION LIMITING NEGATIVE PEAKS FCC ID: BBO19DXIII FIGURE 2b 7 FIGURE 3a MODULATION LIMITER ATTACK TIME Measurement_Conditions: 16 dB over 50% modulation level at 940 Hz with 2500 Hz tone, upper fourth order sideband; horizontal scale 100 ms/div. UPPER FOURTH-ORDER SIDEBAND LIMITER ATTACK TIME FCC ID: BBO19DXIII FIGURE 3a 8 FIGURE 3b MODULATION LIMITER ATTACK TIME Measurement_Conditions: 16 dB over 50% modulation level at 940 Hz with 2500 Hz tone, lower fourth order sideband; horizontal scale 100 ms/div. LOWER FOURTH-ORDER SIDEBAND LIMITER ATTACK TIME FCC ID: BBO19DXIII FIGURE 3b 9 C. MODULATION CHARACTERISTICS (Continued) 4. Occupied_Bandwidth_-_AM (Paragraph 2.989(c) of the Rules) Figure 4 is a plot of the sideband envelope of the transmitter taken from a Tektronix 494P spectrum analyzer. Modulation corresponded to conditions of 2.989(a) and consisted of 2500 Hz tone at an input level 16 dB greater than that necessary to produce 50% modulation at 940 Hz, the frequency of maximum response. Measured modulation under these conditions was 86% positive…
Text truncated - open the document above for the full version.
Contact Information
Applicant
Chris de Waal(Senior Project Engineer)
Test Firm
Hyak Laboratories, Inc.Rowland Johnson
703-451-1188
Technical Specifications
| # | Rule Parts | Frequency Range | Power Output | Emission | Tolerance |
|---|---|---|---|---|---|
| 1 | 95D | 26.965 MHz - 27.405 MHz | 4 W | 6K00A3E | 0.0050000000 % |
Other Applications from Cobra Electronics Corporation
BBOCHEM01
Jul 21, 2026Radar detector
Equipment Class
CRD - Part 15 Radar DetectorBBOPERF600
Jul 13, 2026PERFORMA 600 RADIO DIGITAL BULK, US/COBRA PERFORMA 600 DIGITAL SINGLE PACK, US/COBRA PERFORMA 600 DIGITAL SIX PACK, US/COBRA PERFORMA 600 DIGITAL RADIO, US
Equipment Class
TNF - Licensed Non-Broadcast Transmitter Held to Face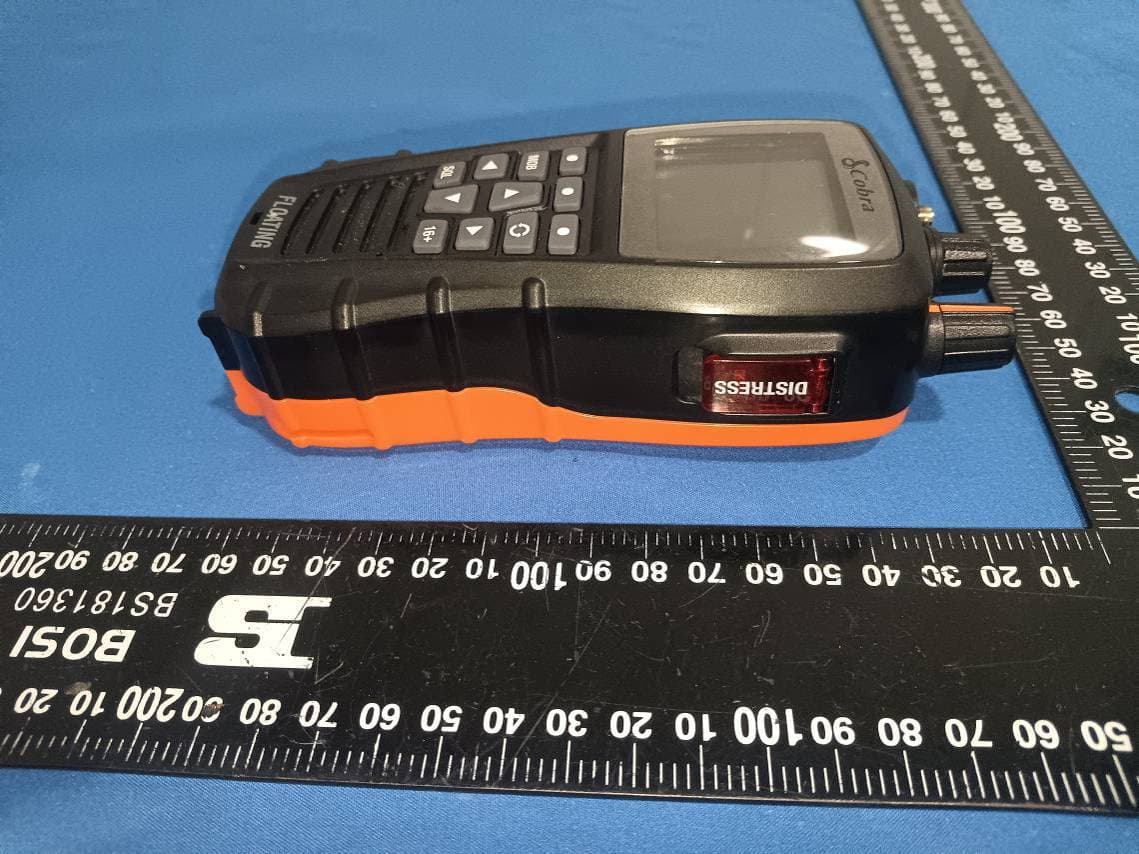
BBOBB650
May 01, 2026VHF Marine Radio Transceiver
Equipment Class
TNF - Licensed Non-Broadcast Transmitter Held to FaceBBOLESS01
Apr 14, 2026Radar detector with Bluetooth
Equipment Class
DTS - Digital Transmission System
BBOCBPT01
Feb 14, 2023Wireless PTT
Equipment Class
DTS - Digital Transmission System