BEJDT-NKPERSONAL COMPUTER
LG Electronics USA, Inc.
Click to zoom
Application Details
- Equipment Class
- JBC - Part 15 Class B Computing Device/Personal Computer
- Date of Grant
- Dec 19, 2005
- Application Purpose
- Original Equipment
- Date of Application
- Dec 19, 2005
- Equipment Note
- PERSONAL COMPUTER
- Company
- LG Electronics USA, Inc.
- Country
- United States
Documents & Files
Document Text
Text extracted from the exhibit documents filed with the FCC. Open a document above to read the original.
Users Manual
NK series NK series Copyright 2005 LG Electronics, Inc., DigitalMate Co., Ltd. P/N:3828BPH016A Rev.00 P/N: 3828BPH016A(Rev.00) Microsoft, MS, MS-DOS, and Windows are trademarks of Microsoft Corporation. IBM, IBM Personal Computer, PS/2 and PC AT are trademarks of International Business Machine Corporation. is a trademark of LG. Copyright 2005 LG Electronics, Inc., DigitalMate Co., Ltd. Thank you for using the LG product. LG has manufactured and tested this product to provide you with a reliable computing environment. Please read this manual carefully before using the computer. This User's guide is for CK model. Instructions may be different depending on models. Check your model before reading User's guide. Keep User's guide at a place where other users always can reach Information in this manual may include technical inaccuracies or typographical errors. Images in this manual are for illustrative purposes only and may be different from the actual product. LG reserves the rights to make improvements and/or changes to the product without notice. Reproducing any or all of the information contained in this publication without written permission is prohibited. This computer complies with the radio frequency and safety standards of any country or region in which it has been approved for wireless use. 1.Warning: Not following the instruction could result in death or serious injury. This sign calls attention to features and operations that may be dangerous to the user. Follow the instruction closely to reduce the risk of bodily harm or damage to the equipment 2.Caution: Not following the instruction could result in minor or moderate injury and/or damage to the product. 1Contents Contents Important Safety Instructions.................................................................................................. 2 1-1 Contents of the Product .......................................................................................................................... 9 1-2 Composition ........................................................................................................................................... 10 1-3 Installation .............................................................................................................................................. 14 1-4 Connecting Peripheral Devices (To Be Separately Purchased) ............................................................ 16 1. Installing the system 2. Using the system 3-1 Entering System Setup .......................................................................................................................... 48 3-2 Booting with a USB drive ....................................................................................................................... 50 3-3 Setting a Password ................................................................................................................................ 52 3-4 Deleting or Changing a Password ......................................................................................................... 53 3-5 Initializing System Setup ....................................................................................................................... 55 3-6 Deciding the Temporary Booting Orders................................................................................................ 56 3-7 Setting the Power Saver Mode .............................................................................................................. 57 3-8 Using Hyper-Threading Feature............................................................................................................. 58 3. System Setup 4. System Recovery................................................................................................................. 60 5. Reinstallation of Drivers Product Specifications. . . . . . . . . . . . . . . . . . . . . . . . . . . . . . . . . . . . . . . . . . . . . . . . . . . . . . . . . . . . . . . . . . . . . . . . . . . . . . . . . . . . . . . . . . . . . . . . . . . . . . . 9 1 6-1 Opening the Computer Case ................................................................................................................. 68 6-2 Main Board ............................................................................................................................................ 69 6-3 Internal Connectors................................................................................................................................ 70 6-4 Replacing the CPU................................................................................................................................. 72 6-5 Expanding the Computer Memory ........................................................................................................ 74 6-6 Adding a Hard Disk ................................................................................................................................ 78 6-7 Installing an Expansion Card ................................................................................................................. 86 5-1 Reinstalling Printer driver ....................................................................................................................... 62 5-2 Reinstalling Sound driver ....................................................................................................................... 66 5-3 Reinstalling Video driver ........................................................................................................................ 67 2-1 Turning on the Computer ....................................................................................................................... 18 2-2 Using Windows XP................................................................................................................................. 21 2-3 Turning off the Computer ......................................................…
Text truncated - open the document above for the full version.
Users Manual
22Using the system Windows XP Desktop Click the Start button to view Start menus. By clicking [All Programs] you can display a list of pro- grams currently installed on the computer. Include necessary applications to start Windows. Indicates currently running programs. You can set the screen resolution, color, audio, and date/time by clicking icons. You can delete files and folders which will be saved auto- matically in the Recycle Bin. Running Empty Recycle Bin will delete files and folders permanently from your com- puter. [Start button Start Menu Taskbar Taskbar Icons and Clock Recycle Bin 23Using the system Overview of Start Menu Click the [Start]button to view menus that are most com- monly used on the computer Fixed Topics Recently Used Programs All Programs Control Panel: Enables to customize computer setting. My Computer: Displays information on drives and networks, and enables you to retrieve or run files and folders To Change Start Menu Style Right-click the [Start]button, and click[Properties]. Then, click an option under the Start menu tab. To select the default start menu, click [Start Menu]on the [Taskbar and Start Menu Properties]tab. To select the style in an older version of Windows, click the Classic Start Menu. Click [OK]to apply the new settings. 24Using the system Fixed items Control Panel Category View, a New View grouping similar topics, has been added to Control Panel.Classic View displays all topics individually. You can select either Category View or Classic View according to your taste. To Display Recent Documents on Start Menu Right-click the [Start]button, and click the [Properties]. Click Start menu on the Start Menu tab, and click [Customize].Select [List my most recently opened documents]on the Advanced tab, and click[OK]. Click [Apply] [OK]in [Taskbar and Start Menu Properties]window to save the new settings. Then, click the Start button to display the Recently Opened Documents folder where recent documents and files are saved will be displayed on the Start menu. To Display Programs at the top of Start Menu Select and right-click a program to display at the top of Start menu. Click [Pin to Start Menu]. The selected program will be displayed on the upper part of bound- ary as a fixed topic. To empty My Recent Documents folder, click the Clear List on the Advanced tab. Although the list is cleared, the documents will not be deleted in the computer. Note Category View Classic View 25Using the system To Use Windows Classic Configuration To Select an Other Theme Click [Control Panel] [Switch to Classic View] [Display]. Click[Windows XP]under Theme tab. Changing Desktop Appearance and Theme Click[Control Panel] [Switch to Classic View] [Display]. Click [Windows Classic] under Themes tab. To view display properties, click [Start][Control Panel][Switch to Classic View] and double-click Display. After selecting Windows Classic, you can customize Windows elements such as window borders, icons, and menus. Select Appearance tab, and click Advanced. Note With Theme menu, you can customize the desktop including the background, the screen saver, icons, windows, the mouse pointer, and sound. If there are multiple users, each user can customize his/her own desktop using Theme menu. 26Using the system Select a screen saver from the list. Click the scroll button of Wait field and set the time to wait till the screen saver is activated. Select Password Protected check box, then you will be requested to enter the password when restarting Windows while the screen saver is running. This feature is convenient for prevent- ing others from accessing data and damaging them. To Change Background Click [Control Panel] [Switch to Classic View] [Display], and select the Background tab. (Or locate the mouse point on the Windows background, and right-click it. Then, a popup menu will appear. Select [Properties] from the popup menu.) Click the scroll (triangle down) button, and check the image list. Select an image to use it as the background, and click [Apply]. Then, the background will be changed. However, if there is no image that you would like to use as the background, click [Browse]and select an image file. To Set Screen Saver Run [Control Panel] [Switch to Classic View] [Display]. And select [Screen Saver]tab. 27Using the system Desktop Cleanup With Desktop Cleanup Wizard, you can delete hot icon paths that are not used on the desktop. Desktop Cleanup Wizard will be automatically executed every 60 days, or you can run this program when necessary. To delete unused icons on the desktop, do the following Open[Control Panel][Switch to Classic View] [Display]. Click [Customize Desktop]under Background tab. Click [Clean Desktop Now]under Desktop Cleanup tab. Follow instructions of [Desktop Cleanup Wizard]. Taskbar If there are multiple documents and programs are running on the computer, the taskbar will group tasks and display each group. For example, if there are three Word Pad documents are running on the computer with other seven windows, three Word Pad tasks will be grouped under one Word Pad button. To view a Word Pad document, click the Word Pad group button and select the corresponding document. For simple display of the taskbar, icons that are not used for a long time and located next to the clock icon will be hidden. Click the arrow button to display hidden icons. Or click on the icon to display it again. To Customize Background Run [Control Panel][Switch to Classic View][Display] Click the theme to change under [Themes]tab. Change the theme. After changing the theme, click [Apply] under Theme tab of Display Properties dialogue box and select [Save As]. Input the name of the theme, and click [OK]. To view display properties, click [Start] [Control Panel] [Switch to Classic View], and double-click on display. If you change the theme without inputting the theme name, the new theme will be named previous name (modified). However, if you select another theme, the changed theme will …
Text truncated - open the document above for the full version.
Users Manual
46Using the system Click [Start][All programs][Norton Antivirus][Norton AntiVirus2005]. Click [Scan for virus]and select an item to scan. Norton AntiVirus is scanning virus. Click[Finish]. Virus scanning is complete. Running Norton Antivirus If any virus is detected, click [Fix]to repair. Note 47MEMO System setup 48 System setup means storing hardware configuration information of the computer in CMOS RAM. Through the System Setup, the computer gets various information -date of the day, time, memory capacity, H/D capacity and its type. System Setup is to set passwords, to change booting orders, and to add new periph- eral devices. 3-1. Entering System Setup Booting with a USB drive (Page 50). Setting a password (Page 52). Deleting or changing a password (Page 53). Initializing system setup (Page 55). Deciding the temporary booting orders (Page 56). Select the current item. Closes the current task or goes back to the previous screen. Moves up, down, right, and left. Increases or decreases the item values. Goes to the beginning of the screen. Goes to the end of the screen. Saves changes and exits System Setup. Keys Used in System Setup 3. System setup Wrong system setup may cause errors during system operation. Therefore, be careful when changing the System Setup, and it is recommended not to change the setup unless it is necessary. For performance improvement, CMOS setup menu configuration and the initial setup status may be changed and may become different from images included in the user manual. System setup 49 Turn on the computer and the monitor. While the LG logo screen is on, press [Delete]key. The initial setup screen will appear. Cursor Pad These keys are used to move the cursors on the monitor screen up, down, right, and left. When the Num Lock button is off on the numeric keypad, the numeric keypad functions the same as the cursor keypad. Note <Cursor Keypad> <Numeric Keypad> CMOS Setup Utility-Copyright(C)1984-2004 Award Software Standard CMOS FeaturesPC Health Status Advanced BIOS Features Frequency/Voltage Control Advanced Chipset FeaturesLoad Optimized Defaults Integrated Peripherals Set Password Power Management SetupSave & Exit Setup PnP/PCI ConfigurationsExit Without Saving Esc : Quit : Select ltem F8: Q-FlashF10 : Save & Exit Setup Virus Protection, Boot Sequence... 50System setup A booting with a USB device (USB-FDD, USB-ZIP, USB-CD-ROM, or USB-HDD) proceeds as follows When the following screen appears, select First Boot Device by pressing keys. Then, select the device and press [Enter]key To save changes in System Setup, press the [F10]key The computer reboots by the selected device. When the following message appears on the screen, press the [Enter]key to restart the computer. SAVE to CMOS and EXIT(Y/N)? Y Execute the initial screen of System Setup, and select Advance Bios Features by pressing , and keys. Then, press [Enter]key Booting with a USB Drive CMOS Setup Utility-Copyright(C)1984-2004 Award Software Advanced BIOS Features :Move Enter:Select +/-/PU/PD:Value F10:Save ESC:Exit F1:General Help F5:Previous Values F7:Optimized Defaults Hard Disk Boot Priority[Press Enter] BIOS Flash Protection[Auto] First Boot Device[CDROM] Second Boot Device[USB-FDD] Third Boot Device[Hard Disk] Boot Up Floppy Seek[Disabled] Boot Up Num-Loce[On] Passward Check[System] Interrupt Mode[APIC] Boot to OS2 or DR-DOS[Disabled] HDD S,M,A,R,T, Capability[Enabled] CPU Hyper-Threading[Enabled] Limit CPUID Max.to3[Enabled] Full Screen LOGO Show[Enabled] Summary Screen Show[Disabled] Item Help Memu Level Select Your Boot Device Priority Bootable devices will be dis- played only when bootable devices are equipped. First Boot Device USB-FDD Booting with a USB-FDD, USB-ZIP, or USB-CD ROM Note 51System setup When the following screen appears, select Hard Disk Boot priority by pressing keys. Then, select the USB-HDD Execute the initial screen of System Setup, and select Advance Bios Features by pressing , and keys. Then, press [Enter]key CMOS Setup Utility-Copyright(C)1984-2004 Award Software Advanced BIOS Features :Move Enter:Select +/-/PU/PD:Value F10:Save ESC:Exit F1:General Help F5:Previous Values F7:Optimized Defaults Hard Disk Boot Priority[Press Enter] BIOS Flash Protection[Auto] First Boot Device[CDROM] Second Boot Device[USB-FDD] Third Boot Device[Hard Disk] Boot Up Floppy Seek[Disabled] Boot Up Num-Loce[On] Passward Check[System] Interrupt Mode[APIC] Boot to OS2 or DR-DOS[Disabled] HDD S,M,A,R,T, Capability[Enabled] CPU Hyper-Threading[Enabled] Limit CPUID Max.to3[Enabled] Full Screen LOGO Show[Enabled] Summary Screen Show[Disabled] Item Help Memu Level Select Your Boot Device Priority Hard Disk Boot Priority [Press Enter] CMOS Setup Utility-Copyright(C)1984-2004 Award Software Advanced BIOS Features :Move Enter:Select +/-/PU/PD:Value F10:Save ESC:Exit F1:General Help F5:Previous Values F7:Optimized Defaults Hard Disk Boot Priority[Press Enter] BIOS Flash Protection[Auto] First Boot Device[CDROM] Second Boot Device[USB-FDD] Third Boot Device[Hard Disk] Boot Up Floppy Seek[Disabled] Boot Up Num-Loce[On] Passward Check[System] Interrupt Mode[APIC] Boot to OS2 or DR-DOS[Disabled] HDD S,M,A,R,T, Capability[Enabled] CPU Hyper-Threading[Enabled] Limit CPUID Max.to3[Enabled] Full Screen LOGO Show[Enabled] Summary Screen Show[Disabled] Item Help Memu Level Select Your Boot Device Priority CMOS Setup Utility-Copyright(C)1984-2004 Award Software Hard Disk Boot Priority 000 1. HDD 2. Cho M. :S_ATA1-XXXXXX 3. Bootable Add-in Cable Item Help Memu Level To save changes in System Setup, press the [F10]key The computer reboots by the selected device. When the following message appears on the screen, press the [Enter]key to restart the computer SAVE to CMOS and EXIT(Y/N)? Y When the following screen appears by pressing [ESC]key, select Third Boot Device by pressing keys. Then, select the Hard Diskby pressing [Page up] and[Page down]keys Third Boot Device Hard Disk 1. USB-HDD0:XX A bootable device should be …
Text truncated - open the document above for the full version.
Users Manual
System Expansion 69 6-2. Main Board The model name of the computer depends on the main board type. When extend- ing the computer, check the model name on the label attached on the rear panel of the computer and the following. Before extending the computer, check the main board first. Expansion slot (PCI-E x1) Expansion slot (PCI) Expansion slot (PCI-E x16) CPU socket (with Pentium4 LGA 775) Memory socket (DIMM) Floppy disk connector Hard disk/CD-ROM connector Serial ATA-type hard disk connector The main board in your computer may look different from the picture. Note System Expansion70 6-3. Internal Connectors Connectors are configured in a certain way at the factory, and connectors show the connection status between the main board of the computer and peripherals. (Connector configuration depends on product models.) Before separating the connector, check the connection state of the connectors and leave a record on the state. Link the floppy disk driver connector and the hard disk/CD-ROM connector in the correct direction. The Pin Number and the color of the connector cable must match. Otherwise, an error may occur in the computer. Risk of explosin if battery is replaced by an incorrect type. Dispose of used batteries according to the instructions. There is a risk of explosion if the backup(standby) RTC battery is replaced by an incorrect type. Dispose of used backup(stadby) RTC battery according to your local ordinances or regulation. System Expansion 71 Power on/off and power/hard disk operation status indication lamp connector (F_PANEL) Connects the floppy disk driver. Floppy disk driver connector (FDD: 34 pins) Power connector (ATX: 24 pins) Connects the power supply unit. Power connector (ATX_12V: 4 pins) Connects the front USB . USB connector (F_USB1, F_USB1: 10 pins) Connects camcorders supporting IEEE1394. 1394 connector (F1_1394: 10 pins) Connects a front ear- phone and microphone. Audio connector (AZALIA_FP: 10 pins) S_ATA connector is linked to the hard disk driver. Connects the power on/off switch and the power/hard disk operation status indication lamp. CDROM, hard disk driver. Connects the power supply unit. Hard disk connector (S_ATA1, S_ATA2, S_ATA3, S_ATA4: 7 pins) Optic drive connector (IDE : 40 pins) Connects the SPDIF port with optic output feature. SPDIF connector (SPDIF_LG: 3 pins) Provides power to the CPU fan. CPU fan (CPU_FAN: 4 pins) Connects the VFD. VFD connector Installed at the bottom (rear panel) of the system, and connects the VFD. System fan (SYSTEM_FAN: 3 pins) F_PANEL ATX S_ATA IDE FDD ATX USB F1_1394 AZALIA_FP SPIF CPU_FAN SYSTEM_FAN VFD System Expansion72 6-4 Replacing the CPU To upgrade the CPU for better performance of the computer, you need to replace the CPU first. Check the location and the type of the CPU in the main board, and do the following. (Shape of the CPU FAN and CPU replacement methods may differ by model.) Align the groove to the right position, pins can easily be broken. Unfasten four screws fixing the CPU fan as shown in the figure. Turn the CPU socket handle as shown in the figure of Step , and open the cover as shown in the figure of Step . Remove the CPU fan as shown in the figure. System Expansion 73 Always wear gloves to avoid injuries. Lift the CPU up carefully to remove it from the main board. Insert the new CPU with caution in the CPU socket in the correct direction and close the cover and then put down the handle of the CPU socket Insert the CPU FAN as shown in the figure, and fix it with four screws. 74System Expansion 6-5. Expanding the Computer Memory You may expand the memory capacity, if needs be. About Memory This system uses a 240-pin memory module called Double Data Rate-2 (DDR-2), not the old 184-pin memory module called Double Data Rate (DDR). The main board can support maximum 2GB in memory. Before Expanding the Memory When disassembling the computer, wear gloves to protect internal parts of the computer and slot cards from damage. As the memory is sensitive to static electricity, be careful with the static electrici- ty when removing or installing a memory. Check the specifications of the current memory and the new memory before expanding the memory. Unlike SIMM, DIMM is of 64 bits. Therefore, single DIMM can function, and you can add DIMM by one. Windows 95, 98SE, and ME support maximum 512MB. Installing a memory with higher capacity than 512MB may cause malfunctioning of the system. Note Note When expanding the memory, add a memory with the same specification (DDR-2 SDRAM for 1.8V). (The shape of the memory may differ depending on the product model.) The DDR-2 memory provides greatly improved transmission rate than existing memo- ries, and is differently shaped. 75System Expansion Refer to the following when expanding memory. This computer supports PC3200/4300, DDR-2 specification. When expanding the memory, use only unbuffered DDR SDRAM DMM When inserting two same memories in same-colored DIMM slots, the computer will oper- ate in Dual Channel mode. FSB Frequency 400/533 MHz Usable Memory PC3200/4300-DDR-2 SDRAM 400/533MHz Preparing a Memory Before purchasing memory, study the specifications and features of the current memory. Specification : PC3200/4300 (240-pin DDR-2 SDRAM) Rate: 400MHz (200MHz 2), 533MHz (266MHz 2) Type: 256MB, 512MB Composing the Memory Total memory capacity DIMM 1 DIMM 2DIMM 3DIMM 4 DUAL/SINGLE SINGLE DUAL DUAL SINGLE DUAL DUAL DUAL DUAL 512MB 256MB256MB 256MB256MB 256MB 1024MB 256MB256MB256MB256MB 512MB 512MB 512MB512MB 2048MB 512MB512MB512MB512MB 512 (One out of four slots) 256 (One out of four slots) The computer operates faster in Dual Channel mode. Use the same memory to operate the computer in Dual Channel mode. It is recommended to use Dual Channel mode. Note 76System Expansion Main board configuration, memory socket and memory type may differ by model. Loosen the screws on the rear panel of the computer, and remove the cover. Release the latches from both flanks of the memory. The …
Text truncated - open the document above for the full version.
Block Diagram
133/200M 133/200M 100M 48M 33M 750M 12.288M 33M 66M
External Photos
Test Report No.: NK2FE819 FCC Certification LG Electronics Inc. FCC ID:BEJDT-NK Page 21 of 42 APPENDIX C – EUT PHOTOGRAPHS z Front View of EUT Test Report No.: NK2FE819 FCC Certification LG Electronics Inc. FCC ID:BEJDT-NK Page 22 of 42 z Rear View of EUT
ID Label/Location Info
Test Report No.: NK2FE819 FCC Certification LG Electronics Inc. FCC ID:BEJDT-NK Page 18 of 42 APPENDIX A – SAMPLE LABEL The sample label shown shall be permanently affixed at a conspicuous location on the device and be readily visible to the user at the time of purchase. z FCC ID Location of EUT Labelling Requirements
Internal Photos
Test Report No.: NK2FE819 FCC Certification LG Electronics Inc. FCC ID:BEJDT-NK Page 23 of 42 z Inside View of EUT Test Report No.: NK2FE819 FCC Certification LG Electronics Inc. FCC ID:BEJDT-NK Page 24 of 42 z Front View of Main Board Test Report No.: NK2FE819 FCC Certification LG Electronics Inc. FCC ID:BEJDT-NK Page 25 of 42 z Rear View of Main Board Test Report No.: NK2FE819 FCC Certification LG Electronics Inc. FCC ID:BEJDT-NK Page 26 of 42 z Front View of Video Card Test Report No.: NK2FE819 FCC Certification LG Electronics Inc. FCC ID:BEJDT-NK Page 27 of 42 z Rear View of Video Card Test Report No.: NK2FE819 FCC Certification LG Electronics Inc. FCC ID:BEJDT-NK Page 28 of 42 z Front View of CPU Test Report No.: NK2FE819 FCC Certification LG Electronics Inc. FCC ID:BEJDT-NK Page 29 of 42 z Rear View of CPU Test Report No.: NK2FE819 FCC Certification LG Electronics Inc. FCC ID:BEJDT-NK Page 30 of 42 z Front View of Memory Test Report No.: NK2FE819 FCC Certification LG Electronics Inc. FCC ID:BEJDT-NK Page 31 of 42 z Rear View of Memory Test Report No.: NK2FE819 FCC Certification LG Electronics Inc. FCC ID:BEJDT-NK Page 32 of 42 z Front View of DVD-ROM Test Report No.: NK2FE819 FCC Certification LG Electronics Inc. FCC ID:BEJDT-NK Page 33 of 42 z Rear View of DVD-ROM Test Report No.: NK2FE819 FCC Certification LG Electronics Inc. FCC ID:BEJDT-NK Page 34 of 42 z Front View of HDD Test Report No.: NK2FE819 FCC Certification LG Electronics Inc. FCC ID:BEJDT-NK Page 35 of 42 z Rear View of HDD Test Report No.: NK2FE819 FCC Certification LG Electronics Inc. FCC ID:BEJDT-NK Page 36 of 42 z Front View of FDD Test Report No.: NK2FE819 FCC Certification LG Electronics Inc. FCC ID:BEJDT-NK Page 37 of 42 z Rear View of FDD Test Report No.: NK2FE819 FCC Certification LG Electronics Inc. FCC ID:BEJDT-NK Page 38 of 42 z Front View of Power Supply Test Report No.: NK2FE819 FCC Certification LG Electronics Inc. FCC ID:BEJDT-NK Page 39 of 42 z Rear View of Power Supply
Schematics
5 5 4 4 3 3 2 2 1 1 DD CC BB AA Revision 1.0 SHEETTITLE COMPONENT SIDE GND SIDE (1 oz. Copper) (1 oz. Copper) (1 oz. Copper) (1 oz. Copper) VCC SIDE SOLDER SIDE 01 02 03 04 05 06 07 08 09 10 11 12 13 14 15 16 17 18 19 20 21 22 SHEETTITLE 23 24 25 26 27 28 29 30 31 BOM & PCB MODIFY HISTORY COVER SHEET P4_LGA775_A P4_LGA775_B P4_LGA775_C PCI SLOT 1, 2 ITE8712 IDE&FDD KB_MS&GAME PORT COM & LPT 32 33 34 BLOCK DIAGRAM 35 36 1394 FRONT PANEL 37 38 39 & IR USBFRONTCONNECTOR Model Name: GA-8I915G-LGE 40 41 42 43 44 GPIO & RESET TABLE ALL POWER ATX POWER CONN. F_AUDIO AUDIO JACK CODEC P4_LGA775_D VCORE POWER GMCH-GRANTSDALE_HOST GMCH-GARNTSDALE_DDR GMCH-GRANTSDALE_PCI E, DMI GMCH-GRANTSDALE_INT VGA GMCH-GRANTSDALE_GND GMCH-GRANTSDALE_PWR DDRII CHANNEL A DDRII CHANNEL B DDR TERMINATION PCI EXPRESS*16 SLOT ICH6 PCI, USB, DMI, LAN ICH6 IDE, GPIO, SATA, CTRL ICH6 VCC, GND FWH CK410M CLOCK. PCI EXPRESS*1 SLOT 1 HWMO&PROCHOT CPU_FAN & SYS_FAN LAN GA-8I915G-LGE 1.0 Cover Sheet GIGABYTE Custom 141, 07, 2004 Title SizeDocument NumberRev Date:Sheetof 5 5 4 4 3 3 2 2 1 1 DD CC BB AA BLOCK DIAGRAM PAGE 4, 5, 6 INTEL Pentium4 LGA775 PAGE 7 ,8 ,9,10 GMCH GRANTSDALE PAGE 32,33,34 PWM/OTHER POWER VID0~4 PAGE 12 DDRII SDRAM DIMM X 2 MAA0~14 MDD0~63 -DQSD0~7 DM0~7 PAGE 14 GAD0~31 AGPUSB+ / - SBA0~7 GCBE0~3- ST0~2 ADSTB0,ADSTB0- ADSTB1,ADSTB1- SBSTB,SBSTB- HL0~10 PAGE 19 CLOCK GENERATOR CONTROL BUS HUB LINK AGP BUS PAGE 25, 26 COMB PAGE 29 COMAIR FRONT AUDIO LPT TELE MICLIN_ OUT AC97 LINK CD_IN PCI BUS AMRUSB+ / - AUX_IN LPC BUS PAGE 22 ICH6 USB PORTS 0~7 PS2 PAGE 20, 21 LINE_IN PAGE 15,16,17 PAGE 27 AUDIO PORTS : LPC I/O ITE8712G I/O PORTS : PAGE 30, 31 FDD PAGE 28 FRONT PANEL /CPU FAN PCI SLOT 1,2,3 PCI EXPRESS MAA_CPC1~5 MAB_CPC1~5 PAGE 11 DDRII SDRAM DIMM X 2 CHANNEL A CHANNEL B IDE Primary PAGE 24 SERIAL ATA PAGE 16 PAGE 18, 23 FWH/HWMO PAGE 35 KINNERTH-R/NORTHWAY AC97/Azalia ALC880 GA-8I915G-LGE 1.0 BLOCK DIAGRAM Intel Confidential 5 5 4 4 3 3 2 2 1 1 DD CC BB AA Version: 1.0 Component value change history Model Name: GA-8I915G-LGE 243.84mm*243.84mm/C/60/+-15%/blue Circuit or PCB layout change for next version DateChange ItemReason GA-8I915G-LGE 1.0 BOM & PCB MODIFY HISTORY GIGABYTE Custom 341, 07, 2004 Title SizeDocument NumberRev Date:Sheetof 5 5 4 4 3 3 2 2 1 1 DD CC BB AA Closed to Pin-H1 * GA-8I915G-LGE 1.0 P4_LGA775-A GIGABYTE Custom 441, 07, 2004 Title SizeDocument NumberRev Date:Sheetof -HTRDY HA5 -HREQ3 HA7 -HLOCK -HINIT -CPURST -DEFER HA4 HA8 HA12 HA13 HA15 -HITM -BR0 -BNR HA3 HA[3..16] HA6 -RS0 -DBSY HA9 HA11 -HADS HA10 HA14 -HREQ2 HA16 -HADSTB1 -DRDY -HREQ0 -HREQ4 -IERR TESTHI10 TESTHI8 TESTHI9 -HREQ1 -HADSTB0 HA22 HA17 HA19 HA30 HA26 HA23 HA18 HA25 HA21 HA27 HA29 HA28 HA20 HA31 HA[17..31] HA24 -BPRI -RS1 -RS2 -HIT -EDRDY -HPCREQ -IERR -BR0 GTLREF GTLREF -CPURST TESTHI10 TESTHI8 TESTHI9 -IERR HA[3..16](8) -HADSTB1(8) -HTRDY(8) -CPURST(8) -HINIT(19) -DRDY(8) -DEFER(8) -DBSY(8) -BNR(8) -HADS(8) -HREQ4(8) -HREQ3(8) -HREQ2(8) -HREQ0(8) -RS0(8) -HLOCK(8) -BR0(8) -HREQ1(8) -HADSTB0(8) HA[17..31](8) -BPRI(8) -RS2(8) -RS1(8) -HIT(8) -HITM(8) -EDRDY(8) -HPCREQ(8) VCORE VCORE VCORE VCORE VCORE VTT_GMCH VTT_OL VTT_OL VTT_OR VTT_OL VCORE VTT_OL CR1 CPU RETAINTION/X BC3 10U/12/X/6.3V/X BC2 10U/12/X/6.3V/X R662/6/X + SBC3 100U/2V/SPCAP/X C4 22P/4/N/50V BC1 10U/12/X/6.3V/X BC4 10U/12/X/6.3V/X R762/6 + SBC2 100U/2V/SPCAP/X C2 33P/4/N/50V BC30 10U/12…
Text truncated - open the document above for the full version.
Contact Information
Applicant
David Kim(Team leader, LGEUS NA Policy & Regulatory Affairs)
Test Firm
Nemko Korea Co., LtdHyun Kim
Technical Specifications
| # | Rule Parts | Frequency Range | Power Output |
|---|---|---|---|
| 1 | 15B | - | - |
Other Applications from LG Electronics USA, Inc.
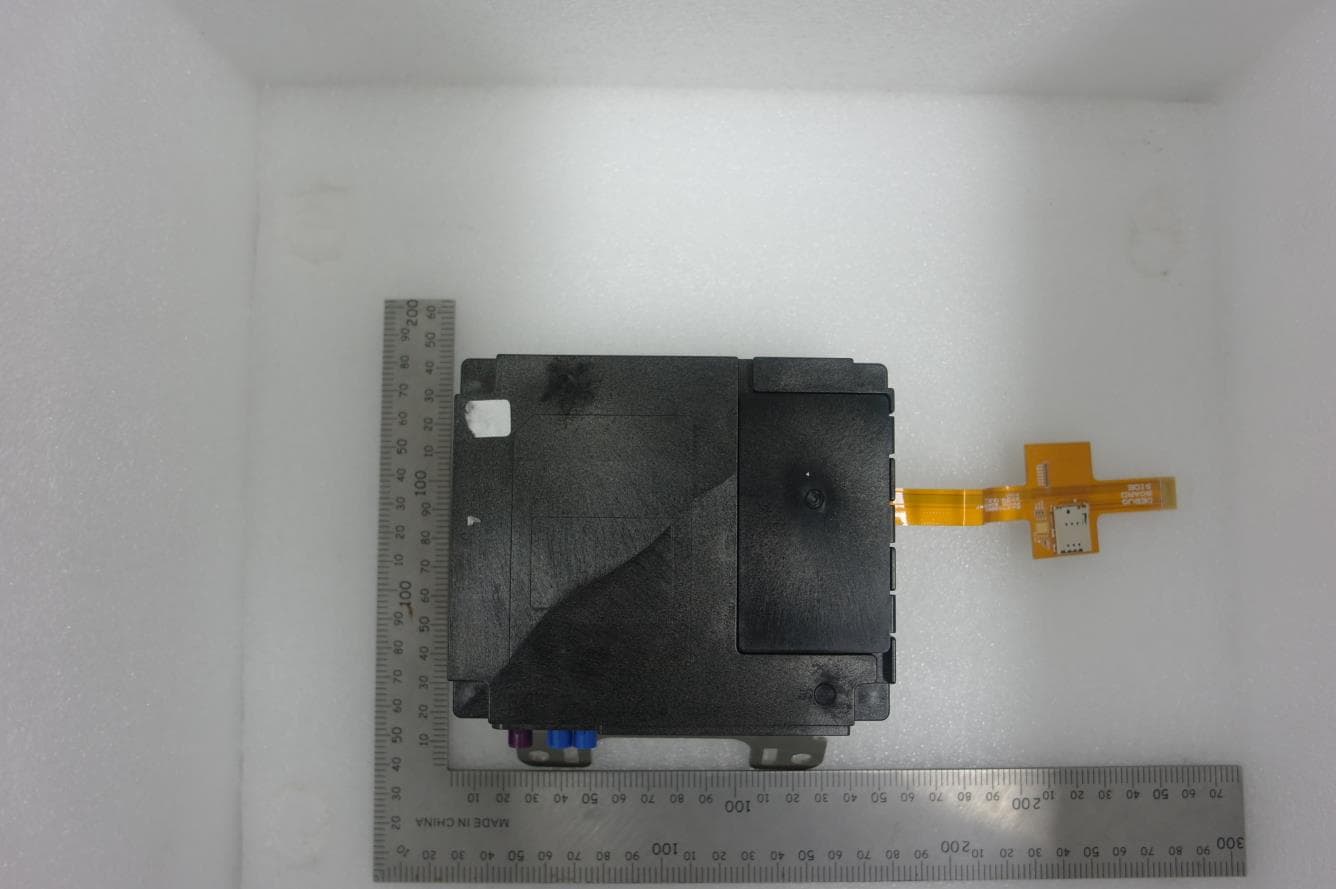
BEJTFHOBINI1F1
Jan 08, 2025Telematics
Equipment Class
DTS - Digital Transmission SystemBEJNT-16Z90TS
Oct 02, 2024Notebook Computer
Equipment Class
DSS - Part 15 Spread Spectrum TransmitterBEJSP-PEW8
Sep 26, 2024Stylus Pen
Equipment Class
DCD - Part 15 Low Power Transmitter Below 1705 kHzBEJ-RSMV2
Sep 24, 2024RF Module
Equipment Class
FDS - Part 15 Field Disturbance SensorBEJTFBMEIBN3EU
Sep 24, 2024Telematics
Equipment Class
NII - Unlicensed National Information Infrastructure TX