CFS8DLLMD500AWireless door/window contact
Ademco Inc.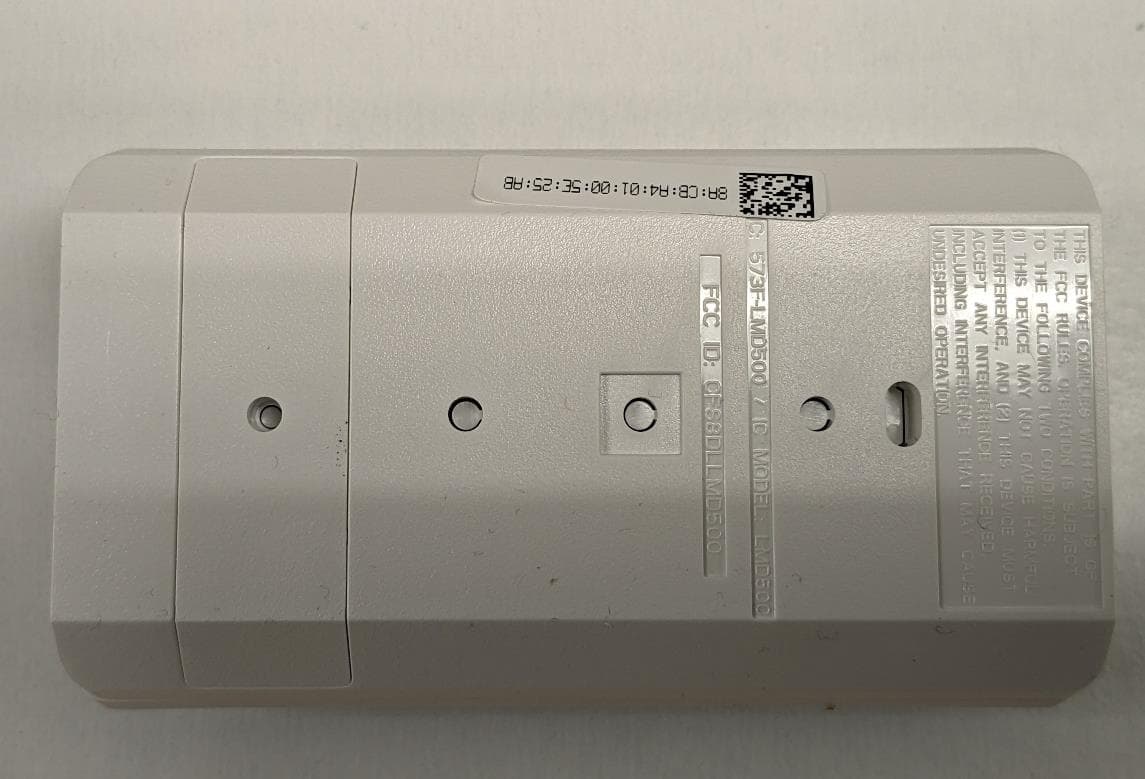
Click to zoom
Application Details
- Equipment Class
- DTS - Digital Transmission System
- Date of Grant
- Jul 20, 2023
- Application Purpose
- Original Equipment
- Date of Application
- Jul 20, 2023
- Equipment Note
- Wireless door/window contact
- Frequency Range
- 2405.00000000 - 2475.00000000
- Company
- Ademco Inc.
- Country
- United States
Documents & Files
Document Text
Text extracted from the exhibit documents filed with the FCC. Open a document above to read the original.
Users Manual
SIXPIRA Wireless Passive Infrared Motion Sensor / Détecteur de mouvement passif à infrarouge sans fil / Sensor inalámbrico de movimiento infrarrojo pasivo Quick Installation Guide This wireless passive infrared motion sensor is intended for use with controls that support SiX™ series devices. Guide d'installation rapide Ce détecteur de mouvement passif à infrarouge sans fil est conçu pour être utilisé avec les panneaux de commande qui supportent les dispositifs de la série SIX MC . Guía Rápida de Instalación Este sensor inalámbrico de movimiento infrarrojo pasivo ha sido diseñado para usar con los controles compatibles con los dispositivos de la serie SiX™. Enroll To enroll the device, use the programming app. When prompted activate the device by pulling the battery tab (use the tamper switch if the battery tab is removed). NOTE: Once enrolled, the device cannot be used with another system until it is removed from the current co ntroller. See the controller’s instructions. Enrôlement Utilisez l'application de programmation pour enregistrer un dispositif. Lorsque l’identifiant vous est demandé, activez le dispositif en tirant sur la languette de la pile (utilisez l’interrupteur antisabotage si la languette de la pile est retirée). NOTE : Une fois enrôlé, le dispositif ne peut pas être utilisé avec un autre système avant d'avoir été supprimé du panneau actuel. Reportez-vo us aux instructions du panneau. Enrolar Para inscribir el dispositivo, use la aplicación de programación. Cuando se le solicite la identificación, active el dispositivo tirando de la lengüeta de la batería (use el interruptor de seguridad si se ha quitado la lengüeta de la batería). NOTA: Una vez enrolado, el dispositivo no se puede usar con otro sistema hasta que sea removido del controlador actual. Ver las instrucciones del controlador. Mounting Locations / Emplacements de montage/ Ubicaciones de montaje NOTE: After enrolling and before mounting permanently, conduct A Walk test (see controller’s instructions) to verify adequate signal strength. Adjust the device location and orientation as necessary. NOTE : Après avoir enrôlé l'unité et avant de la mettre en place de façon permanente, effectuer un test de marche (voir les instructions du panneau de commande) pour vérifier que la puissance du signal est adéquate. Au besoin, modifiez l'emplacement ou l'orientation du dispositif. NOTA: Una vez inscrito y antes del ensamblaje permanente, realice una prueba de caminata (vea las instrucciones del controlador) para verificar la potencia de la señal adecuada. Ajuste la ubicación y la orientación del dispositivo según sea necesario. Mounting Options / Options de montage / Opciones de montaje ADT Security Services 1501 Yamato Rd Boca Raton, FL 33431 SiXPIRA 800-15963-1F 6/18 Rev F Walk Test / Test par déplacement / Prueba de caminata NOTE: Before using Test Mode, the device must first be enrolled in the Controller. NOTE : Avant d'utiliser le mode de test, le dispositif doit d'abord être enrôlé dans le panneau. NOTA: Antes de usar el Modo de prueba, el dispositivo debe ser enrolado en el controlador. Detection Patterns / Champs de Détection / Patrones de Detección Approval Listings / Approbations Homologations / Listas de aprobaciones Listagens de aprovação: FCC / IC ETL Listed to UL639 cETL Listed to ULC S306-03 Other Standards: SIA-PIR-01 RoHS Product must be tested at least once each year Le fonctionnement du produit doit être vérifié au moins une fois par année El producto debe ser probado al menos una vez al año REFER TO THE INSTALLATION INSTRUCTIONS FOR THE CONTROL WITH WHICH THIS DEVICE IS USED, FOR DETAILS REGARDING LIMITATIONS OF THE ENTIRE ALARM SYSTEM. POUR LES LIMITES DU SYSTÈME D’ALARME AU COMPLET, REPORTEZ- VOUS AU GUIDE D’INSTALLATION DU PANNEAU DE COMMANDE. CONSULTE LAS INSTRUCCIONES DE INSTALACIÓN PARA EL CONTROL CON EL CUAL SE UTILIZA ESTE DISPOSITIVO, PARA OBTENER DETALLES CON RESPECTO A LAS LIMITACIONES DE TODO EL SISTEMA DE ALARMA. Specifications / Spécifications / Especificaciones / Especificações: Range / Portée / Rango / Alcance: 40’ x 56’ / 12 m x 17 m Wall Mounting Height / Hauteur de montage au mur / Altura de montaje en la pared / Altura de instalação na parede: 7’ – 9’ (2.1 m – 2.7 m); Optimal 7’6” (2.3 m) Battery / Pile / Batería / Bateria: 1 x 3V, Lithium; Panasonic CR123A, Duracell DL 123A, Duracell DL 123, Resideo 466 RF Frequency / Fréquence RF / Frecuencia de RF / Frequência RF: 2.4GHz Tamper / Interrupteurs antisabotage / Tamper / Tamper: Cover and Wall Operating Temperature / Température de fonctionnement / Temperatura de funcionamiento / Temperatura de operação: 32° – 122° F / 0° – 50° C (Agency Compliance 32° – 120° F / 0° – 49° C) Relative Humidity / Humidité relative / Humedad relativa / Umidade relativa: 95% max. (Agency Compliance - 93% max.), non-condensing Dimensions / Dimensions / Dimensiones / Dimensões: 4.13” H x 2.38” W x 1.61” D / 105 mm H x 60.4 mm W x 41 mm D NOTE: To conserve battery life, the sensor is active only when the system is armed. NOTE : Pour augmenter la durée de vie de la pile, le capteur est seulement actif quand le système est armé. NOTA: Para prolongar la vida de la batería, el sensor se activa solo cuando el sistema es armado. Replace Battery / Remplacement des piles / Cambiar batería/ Substituir a bateria BATTERY CAUTION: Risk of fire, explosion and burns. Do not recharge, disassemble, heat above 212° F (100° C) or incinerate. Dispose of used batteries properly. Keep away from children. Attention de batterie: Risque d'incendie, d'explosion et de brûlures. Ne rechargez pas, démonter, chauffer au-dessus de 212° F (100°C), ou incinérer. Débarrassez-vous des batteries utilisées de façon appropriée. Gardez à partir des enfants. Precauciones con respecto a las baterías: Riesgo de FUEGO, explosión y quemaduras. No recargar, desarmar, calentar por encima de 100°C (212°F), o incinerar. Descarte Apropiadamente las baterias usadas. Manténgalas fuera del alcance de los niños…
Text truncated - open the document above for the full version.
Users Manual
SIXPIRA Wireless Passive Infrared Motion Sensor Installation Instructions This wireless passive infrared motion sensor is intended for use with controls that support SiX™ series devices. Mounting Location • The optimal range is obtained at a mounting height of 7’ 6” (2.3 m). • Allow a clear line-of-sight to all areas to protect. • Do not directly face windows. • Avoid close proximity to moving machinery, fluorescent lights, and heating/cooling sources. • For use in applications with pets up to 80 pounds (36 kilograms). In Applications with Animals: • Mount with the center of the device at 7.5 feet (2.3m) • Mount where pet cannot come within 6 feet (1.8m) of the sensor by climbing on furniture, stairs, boxes or other objects. • Test each installation to determine exact level of animal immunity; levels vary based on environmental differences and the amount of heat radiated by an animal. Mounting Options After enrolling, verify adequate signal strength by conducting a walk test (see the controller’s instructions) with the device in its intended mounting location. Adjust the device location and orientation as necessary. The SIXPIRA can be mounted on the wall or in corners: • [A] = Wall mounting holes. • [B] = Corner mounting holes. • The rear tamper plate MUST be mounted to a stud, solid wood, or with a robust wall anchor. 2 Enroll the SIXPIRA To enroll the device, use the programming application. When prompted, activate the device by pulling the tab on the battery (use the tamper switch if the battery tab has been removed). NOTES: • If the sensor is not successfully enrolled during the enrollment period, the LED turns off and the device enters a sleep mode. Activate a tamper or remove and reinsert the battery to restart the enrollment process. • Pet Immunity is selectable: Off or Up to 80 bs (36 kg). • Once enrolled in a system, the sensor cannot be used with another controller until it is removed from the current controller. See the Controller’s instructions for details. 24-Hour Enrollment Deletion and Default If the device is enrolled in a panel different than the intended panel, and you are unable to delete it from the unintended panel, reset default the device to factory default setting: 1. Open the cover and remove the battery. 2. Hold down the tamper switch while reinserting the battery. This procedure is available for 24 hours after enrollment with a panel and the device remains powered (battery installed). Walk Test the SIXPIRA After power up and enrollment, the sensor automatically enters Walk Test mode. Walk through the detection area and observe the LED. After 10 minutes, the sensor automatically exits Test mode, disables the LED and enters normal operation mode. To restart a 10 minute Test period, activate the Test mode with the controller (see the Controller’s instructions), or use the flashlight feature (see the following section). NOTE: the system must be disarmed to enter Test Mode. 3 Flashlight Feature The flashlight feature is only available for the first 24 hours after the first power up, or until the system is first armed. This feature is no longer available after the first system arming. Each time the flashlight features is used, and the system is disarmed, the walk test timer restarts for 10 minutes. 1. Use a flashlight with a bright light beam, and stand within 4’ (1.2 m) of the sensor. 2. Swing the light beam past the sensor Lens 3-5 times, holding the beam on the window for 0.5 second each pass. Detection Patterns Battery Replacement • Press the latch at the top of the device and slide the front cover down to remove it. • Remove the battery and wait 10 seconds, then insert a new battery. Recommended batteries: Panasonic CR123A Resideo 466 Huiderui CR123A Duracell DL123A • Place the front and back covers together and slide the front cover upward as shown. BATTERY CAUTION: Risk of fire, explosion and burns. Do not recharge, disassemble, heat above 212°F (100°C) or incinerate. Dispose of used batteries properly. Keep away from children. NOTE: Constant exposure to high or low temperature or high humidity may reduce battery life. Zones A 18 Lower B 46 Intermediate C 36 Long NOTE: the flashlight feature only initiates or restarts the Test Mode and does not change any other sensor settings. Specifications Range: 40’ x 56’ / 12 m x 17 m Wall Mounting Height: 7’ – 9’ (2.1 m – 2.7 m); Optimal 7’6” (2.3 m) Battery: 1 x 3V, Lithium; Panasonic CR123A, Duracell DL 123A, Huiderui CR123A, Resideo 466 RF Frequency: 2.4GHz Tamper: Cover and Wall Operating Temperature: 32° – 122°F / 0° – 50°C (Agency Compliance 32° – 120°F / 0° – 49°C) Relative Humidity: 95% max. (Agency Compliance - 93% max.), non-condensing Dimensions: 4.13” H x 2.38” W x 1.61” D / 105 mm H x 60.4 mm W x 41 mm D Weight: 3.97 oz / 112.67g (net weight) Approval Listings FCC / IC cETLus Listed Conforms to UL 639 Certified to ULC-S306-03 Other Standards: SIA-PIR-01 RoHS The product must be tested at least once each year. FEDERAL COMMUNICATIONS COMMISSION (FCC) & INDUSTRY CANADA (IC) STATEMENTS The user shall not make any changes or modifications to the equipment unless authorized by the Installation Instructions or User's Manual. Unauthorized changes or modifications could void the user's authority to operate the equipment. CLASS B DIGITAL DEVICE STATEMENT This equipment has been tested to FCC requirements and has been found acceptable for use. The FCC requires the following statement for your information: This equipment generates and uses radio frequency energy and if not installed and used properly, that is, in strict accordance with the manufacturer's instructions, may cause interference to radio and television reception. It has been type tested and found to comply with the limits for a Class B computing device in accordance with the specifications in Part 15 of FCC Rules, which are designed to provide reasonable protection against such interference in a residential installation. However, there is no guarantee that i…
Text truncated - open the document above for the full version.
Users Manual
PROSiXPIR Wireless Passive Infrared Motion Sensor Quick Installation Guide Guide d'installation rapide Guía Rápida de Instalación Guia rápido de instalação This wireless passive infrared motion sensor is intended for use with Honeywell Home controls that support PROSiX™ series devices. Ce détecteur de mouvement passif à infrarouge sans fil est conçu pour être utilisé avec les panneaux de commande Honeywell Home qui supportent les dispositifs de la série PROSIX MC . Este sensor inalámbrico de movimiento infrarrojo pasivo ha sido diseñado para usar con los controles Honeywell Home compatibles con los dispositivos de la serie PROSiX™. Este sensor de movimento infravermelho passivo sem fio deve ser usado com controles Honeywell Home compatíveis com dispositivos da série PROSiX™. Enroll Enrôlement Enrolar Registrar You must enroll the device in the control. Refer to the control's programming instruction for detailed procedures. Vous devez inscrire le dispositif dans les commandes. Consultez les instructions de programmation des commandes pour obtenir les procédures détaillées. Debe registrar el dispositivo en el control. Consulte la instrucción de programación del control para ver los procedimientos detallados. Você deve registrar o dispositivo no controle. Consulte a instrução de programação do controle para ver o procedimento detalhado. NOTES: • Once enrolled, the device cannot be used with another system until it is removed from the current controller. See the controller’s instructions. • After enrolling and before mounting permanently, conduct a sensor test (see controller’s instructions) to verify adequate signal strength. Adjust the device location and orientation as necessary. NOTES : • Une fois enrôlé, le dispositif ne peut pas être utilisé avec un autre système avant d'avoir été supprimé du panneau actuel. Reportez-vous aux instructions du panneau. • Après avoir enrôlé l'unité et avant de la mettre en place de façon permanente, effectuez un test de capteur (voir les instructions du panneau de commande) pour vérifier que la puissance du signal est adéquate. Au besoin, modifiez l'emplacement ou l'orientation du dispositif. NOTAS: • Una vez enrolado, el dispositivo no se puede usar con otro sistema hasta que sea removido del controlador actual. Ver las instrucciones del controlador. • Una vez enrolado y previo a su montaje permanente, una prueba de sensor (vea las instrucciones del controlador) para verificar la intensidad adecuada de la señal. Ajuste la ubicación y orientación del dispositivo según sea necesario. NOTAS: • Uma vez registrado, o dispositivo não pode ser usado com outro sistema até que seja removido do controlador atual. Consulte as instruções do controlador. • Após o registro e antes de montar de forma permanente, realize um teste de sensor (consulte as instruções do controlador) para verificar a intensidade de sinal adequada. Ajuste, se necessário, o posicionamento e a orientação do dispositivo. Mounting Options Options de Montage Opciones de Montaje Opções de Montagem Ê800-25242CFŠ PROSiXPIR 800-25242C 2/19 Rev C The Honeywell Home Trademark is used under license from Honeywell International Inc. This product is manufactured by Resideo Technologies, Inc. and its affiliates. 2 Corporate Center Drive, Suite 100 P.O. Box 9040, Melville, NY 11747 2020 Resideo Technologies, Inc. www.resideo.com Test / Test par déplacement / Prueba de caminata / Teste de caminhada NOTE: Before using Test Mode, the device must first be enrolled in the Controller. NOTE : Avant d'utiliser le mode de test, le dispositif doit d'abord être enrôlé dans le panneau. NOTA: Antes de usar el Modo de prueba, el dispositivo debe ser enrolado en el controlador. NOTA: antes de usar o modo de teste, o dispositivo deve estar registrado no controlador. Detection Patterns / Champs de Détection / Patrones de Detección / Padrões de Detecção Specifications / Spécifications / Especificaciones / Especificações: Range / Portée / Rango / Alcance: 40’ x 56’ / 12 m x 17 m Wall Mounting Height / Hauteur de montage au mur / Altura de montaje en la pared / Altura de instalação na parede: 7’ – 9’ (2.1 m – 2.7 m); Optimal 7’6” (2.3 m) Battery / Pile / Batería / Bateria: 1 x 3V, Lithium; Resideo 466, Panasonic CR123A, Duracell DL 123A, Duracell DL 123 RF Frequency / Fréquence RF / Frecuencia de RF / Frequência RF: 2.4GHz Tamper / Interrupteurs antisabotage / Tamper / Tamper: Cover and Wall Operating Temperature / Température de fonctionnement / Temperatura de funcionamiento / Temperatura de operação: 32° – 122° F / 0° – 50° C (Agency Compliance 32° – 120° F / 0° – 49° C) Relative Humidity / Humidité relative / Humedad relativa / Umidade relativa: 95% max. (Agency Compliance - 93% max.), non-condensing Dimensions / Dimensions / Dimensiones / Dimensões: 4.13” H x 2.38” W x 1.61” D / 105 mm H x 60.4 mm W x 41 mm D NOTE: To conserve battery life, the sensor is active only when the system is armed. NOTE : Pour augmenter la durée de vie de la pile, le capteur est seulement actif quand le système est armé. NOTA: Para prolongar la vida de la batería, el sensor se activa solo cuando el sistema es armado. NOTA: para poupar a vida útil da bateria, o sensor fica ativo apenas quando o sistema está armado. REFER TO THE INSTALLATION INSTRUCTIONS FOR THE CONTROL WITH WHICH THIS DEVICE IS USED, FOR DETAILS REGARDING LIMITATIONS OF THE ENTIRE ALARM SYSTEM. POUR LES LIMITES DU SYSTÈME D’ALARME AU COMPLET, REPORTEZ-VOUS AU GUIDE D’INSTALLATION DU PANNEAU DE COMMANDE. CONSULTE LAS INSTRUCCIONES DE INSTALACIÓN PARA EL CONTROL CON EL CUAL SE UTILIZA ESTE DISPOSITIVO, PARA OBTENER DETALLES CON RESPECTO A LAS LIMITACIONES DE TODO EL SISTEMA DE ALARMA. PARA SABER MAIS SOBRE AS LIMITAÇÕES DE TODO O SISTEMA DE ALARME, CONSULTE AS INSTRUÇÕES DE INSTALAÇÃO DO CONTROLE COM O QUAL ESTE DISPOSITIVO É USADO. Approval Listings / Approbations Homologations / Listas de aprobaciones / Listagens de aprovação: FCC / IC ETL Listed to UL639 cETL Listed to ULC S306-…
Text truncated - open the document above for the full version.
Users Manual
PROSiXPIR Wireless Passive Infrared Motion Sensor Installation Instructions This wireless passive infrared motion sensor is intended for use with Honeywell Home controls that support PROSiX™ series devices. Mounting Location • The optimal range is obtained at a mounting height of 7’ 6” (2.3 m). • Allow a clear line-of-sight to all areas to protect. • Do not directly face windows. • Avoid close proximity to moving machinery, fluorescent lights, and heating/cooling sources. • For use in applications with pets up to 80 pounds (36 kilograms). In Applications with Animals: • Mount with the center of the device at 7.5 feet (2.3m) • Mount where pet cannot come within 6 feet (1.8m) of the sensor by climbing on furniture, stairs, boxes or other objects. • Test each installation to determine exact level of animal immunity; levels vary based on environmental differences and the amount of heat radiated by an animal. Mounting Options After enrolling, verify adequate signal strength by conducting a sensor test (see the controller’s instructions) with the device in its intended mounting location. Adjust the device location and orientation as necessary. The PROSIXPIR can be mounted on the wall or in corners: • [A] = Wall mounting holes. • [B] = Corner mounting holes. • The rear tamper plate MUST be mounted to a stud, solid wood, or with a robust wall anchor. 2 Enroll the PROSIXPIR Press down on the top latch and separate the front and back covers. 1. Put the control in Programming Mode: 2. Remove the battery tab to activate and begin the enrollment process. 3. The green LED beneath the battery flashes (up to about 20 seconds*) during enrollment. The device sends its unique MAC ID (Serial Number) and Services information to the controller. *NOTE: Enrollment time varies depending on the signal strength between the device and the controller. 4. Enrollment is confirmed when the LED is ON for 3 seconds. NOTE: If the sensor is not successfully enrolled during the enrollment period, the LED turns off and the device enters a sleep mode. Activate a tamper or remove and reinsert the battery to restart the enrollment process. NOTE: Pet Immunity is selectable: Off or Up to 80 lbs (36 kg). NOTE: Once enrolled in a system, the sensor cannot be used with another controller until it is removed from the current controller. See the Controller’s instructions for details. 24-Hour Enrollment Deletion and Default If the device is enrolled in a panel different than the intended panel, and you are unable to delete it from the unintended panel, reset default the device to factory default setting: 1. Open the cover and remove the battery. 2. Hold down the tamper switch while reinserting the battery. This procedure is available for 24 hours after enrollment with a panel and the device remains powered (battery installed). Walk Test the PROSIXPIR After power up and enrollment, the sensor automatically enters Walk Test mode. Walk through the detection area and observe the LED. After 10 minutes, the sensor automatically exits Test mode, disables the LED and enters normal operation mode. To restart a 10 minute Test period, activate the Test mode with the controller (see the Controller’s instructions), or use the flashlight feature (see the following section). NOTE: the system must be disarmed to enter Test Mode. 3 Flashlight Feature The flashlight feature is only available for the first 24 hours after the first power up, or until the system is first armed. This feature is no longer available after the first system arming. Each time the flashlight features is used, and the system is disarmed, the walk test timer restarts for 10 minutes. 1. Use a flashlight with a bright light beam, and stand within 4’ (1.2 m) of the sensor. 2. Swing the light beam past the sensor Lens 3-5 times, holding the beam on the window for 0.5 second each pass. Detection Patterns Battery Replacement • Press the latch at the top of the device and slide the front cover down to remove it. • Remove the battery and wait 10 seconds, then insert a new battery. Recommended batteries: Panasonic CR123A Huiderui CR123A Duracell DL123A • Place the front and back covers together and slide the front cover upward as shown. BATTERY CAUTION: Risk of fire, explosion and burns. Do not recharge, disassemble, heat above 212°F (100°C) or incinerate. Dispose of used batteries properly. Keep away from children. NOTE: Constant exposure to high or low temperature or high humidity may reduce battery life. Specifications Range: 40’ x 56’ / 12 m x 17 m Wall Mounting Height: 7’ – 9’ (2.1 m – 2.7 m); Optimal 7’6” (2.3 m) Battery: 1 x 3V, Lithium; Panasonic CR123A, Duracell DL 123A, Huiderui CR123A RF Frequency: 2.4GHz Tamper: Cover and Wall – reported separately to panel. Operating Temperature: 32° – 122°F / 0° – 50°C (Agency Compliance 32° – 120°F / 0° – 49°C) Relative Humidity: 95% max. (Agency Compliance - 93% max.), non-condensing Dimensions: 4.13” H x 2.38” W x 1.61” D / 105 mm H x 60.4 mm W x 41 mm D Weight: 3.97 oz / 112.67g (net weight) Approval Listings FCC / IC cETLus Listed Conforms to UL 639 Certified to ULC-S306-03 Other Standards: SIA-PIR-01 RoHS The product must be tested at least once each year. Zones A 18 Lower B 46 Intermediate C 36 Long NOTE: the flashlight feature only initiates or restarts the Test Mode and does not change any other sensor settings. FEDERAL COMMUNICATIONS COMMISSION (FCC) & INDUSTRY CANADA (IC) STATEMENTS The user shall not make any changes or modifications to the equipment unless authorized by the Installation Instructions or User's Manual. Unauthorized changes or modifications could void the user's authority to operate the equipment. CLASS B DIGITAL DEVICE STATEMENT This equipment has been tested to FCC requirements and has been found acceptable for use. The FCC requires the following statement for your information: This equipment generates and uses radio frequency energy and if not installed and used properly, that is, in strict accordance with the man…
Text truncated - open the document above for the full version.
Attestation Statements
CFS8DLLMD500A CFR 47 §2.911 (d)(5) Attestation Date: 03-29-2023 FCC ID: CFS8DLLMD500A To: Federal Communications Commission 7435 Oakland Mills Road Columbia, MD 21046 USA 1. Ademco Inc. (“the applicant”) certifies that the equipment for which authorization is sought is not “covered” equipment prohibited from receiving an equipment authorization pursuant to section 2.903 of the FCC rules. 2. Ademco Inc. (“the applicant”) certifies that, as of the date of the filing of the application, the applicant is not identified on the Covered List as an entity producing “covered” equipment and is not an affiliate or subsidiary of an entity identified on the Covered List. Sincerely yours, Name: Christian Fouth Job Title: Global Leader Wireless Testing Company Name: Ademco Inc.
Attestation Statements
CFS8DLLMD500A CFR 47 §2.911 (d)(7) Agent Designation Attestation Date: 03-29-2023 FCC ID: CFS8DLLMD500A FCC FRN: 0004071130 To: Federal Communications Commission 7435 Oakland Mills Road Columbia, MD 21046 USA Ademco Inc. (“the applicant”) as required by section 2.911(d)(7), will also serve as the agent for service of process for the above referenced FCC ID. The applicant acknowledges that they will maintain an agent for no less than one year after the grantee has terminated all marketing and importation or the conclusion of any Commission-related proceeding involving the equipment. The applicant further acknowledges their responsibility to inform the FCC whenever the agent information changes. Christian Fouth Ademco Inc. 2 Corporate Center Dr, Melville, NY 11747 [email protected] Sincerely yours, Christian Fouth Ademco Inc. 2 Corporate Center Dr, Melville, NY 11747 [email protected]
Cover Letter(s)
Federal Communications Commission 7435 Oakland Mills Road Columbia MD 21046 Subject: FCC ID: Request for Confidentiality CFS8DLLMD500A To Whom It May Concern: Pursuant to the provisions of Sections 0.457 and 0.459 of the Commission’s rules (47 CFR §§ 0.457, 0.459), we are requesting the Commission to withhold the following attachments as confidential document from public disclosure indefinitely. •Schematic Diagram •RF Block Diagram •Operational Description •BOM Above mentioned document contains detailed system and equipment description are considered as proprietary information in operation of the equipment. The public disclosure of above documents might be harmful to our company and would give competitor an unfair advantage in the market. It is our understanding that all measurement test reports, FCC ID label format and correspondent during certification review process cannot be granted as confidential documents and those information will be available for public review once the grant of equipment authorization is issued. Best Regards Christian Fouth Global Leader Wireless Testing Ademco Inc. 0 3/29/2023
External Photos
External Photos CFS8DLLMD500A / 573F-LMD500A 1 SIXPIRA/PROSIXPIR EXTERNAL PHOTOS Figure 1 TOP VIEW Figure 2 BOTTOM VIEW External Photos CFS8DLLMD500A / 573F-LMD500A 2 Figure 3 Side VIEW right Figure 4 Side VIEW left External Photos CFS8DLLMD500A / 573F-LMD500A 3 Figure 5 Front VIEW Figure 6 Back VIEW
ID Label/Location Info
CFS8DLLMD500A/573F-LMD500A SIXPIRA/PROSIXPIR Label Location Figure 1 Device back cover The FCC/ISED IDs and the FCC compliance statement are molded into the device's back cover. FCC/ISED IDs FCC ID: CFS8DLLMD500A IC: 573F-LMD500A LMD500A
Internal Photos
Internal Photos CFS8DLLMD500A / 573F-LMD500A 1 SIXPIRA/PROSIXPIR INTERNAL PHOTOS Figure 1 VIEW when removing back cover Figure 2 PCB TOP VIEW Internal Photos CFS8DLLMD500A / 573F-LMD500A 2 Figure 3 PCB with Antennas Figure 4 PCB BACK ANT1 ANT2 Internal Photos CFS8DLLMD500A / 573F-LMD500A 3 Figure 5 Case Interior PCB holder Figure 6 Case Interior Top cover Internal Photos CFS8DLLMD500A / 573F-LMD500A 4 Figure 7 Case interior bottom cover
RF Exposure Info
FCC Part 1 Subpart I FCC Part 2 Subpart J RF EXPOSURE REPORT FOR 2.4 GHz Infrared Motion Sensor MODEL NUMBER: SIXPIRA FCC ID: CFS8DLLMD500A REPORT NUMBER: R14662781-E3 ISSUE DATE: 2023-06-14 Prepared for: Ademco Inc. 2 Corporate Center Dr. Melville, NY 11747, U.S.A. Prepared by: UL LLC 12 LABORATORY DR. RESEARCH TRIANGLE PARK, NC 27709 USA TEL: (919) 549-1400 REPORT NO: R14662781-E3 DATE: 2023-06-14 FCC ID: CFS8DLLMD500A Page 2 of 10 UL LLC FORM NO: 03-EM-F00858 12 Laboratory Dr., RTP, NC 27709 TEL: (919) 549-1400 This report shall not be reproduced except in full, without the written approval of UL LLC. REVISION HISTORY Rev. Issue Date Revisions Revised By V1 2023-02-24 Initial Issue Charles Moody V2 2023-04-27 Removed Measurement Uncertainty Charles Moody V3 2023-05-05 Updated average output power to match operational description and max average power measured in RF report. Charles Moody V4 2023-06-14 Updated antenna gain Charles Moody REPORT NO: R14662781-E3 DATE: 2023-06-14 FCC ID: CFS8DLLMD500A Page 3 of 10 UL LLC FORM NO: 03-EM-F00858 12 Laboratory Dr., RTP, NC 27709 TEL: (919) 549-1400 This report shall not be reproduced except in full, without the written approval of UL LLC. TABLE OF CONTENTS REVISION HISTORY ..................................................................................................................2 1. ATTESTATION OF TEST RESULTS ..................................................................................4 2. TEST METHODOLOGY ......................................................................................................5 3. REFERENCES ....................................................................................................................5 4. FACILITIES AND ACCREDITATION ..................................................................................5 5. DECISION RULES AND MEASUREMENT UNCERTAINTY ...............................................6 5.1. METROLOGICAL TRACEABILITY ...............................................................................6 5.2. DECISION RULES ........................................................................................................6 6. MAXIMUM PERMISSIBLE EXPOSURE (LIMITS A…
Text truncated - open the document above for the full version.
Contact Information
Applicant
Christian Fouth(Sr. Wireless Certification Engineer)
Technical Contact
UL LLCLariah Sanders
[email protected]919-549-0945
2800 Perimeter Park Dr · Morrisville · United States
Test Firm
UL LLCSteven Thompson
[email protected]919 549 1430
Technical Specifications
| # | Rule Parts | Frequency Range | Power Output |
|---|---|---|---|
| 1 | 15C | 2.40 GHz - 2.48 GHz | 82.04 mW |
Other Applications from Ademco Inc.
CFS8DL5800MINIV
Jan 28, 2026Wireless Alarm Transmitter
Equipment Class
DXX - Part 15 Low Power Communication Device Transmitter
CFS8DLWTS800
Jan 12, 2026Wireless Alarm Transmitter
Equipment Class
DTS - Digital Transmission SystemCFS8DLCAMWEWI1
Jul 25, 2024VX5 HD Indoor Camera
Equipment Class
DTS - Digital Transmission System
CFS8DLCAMWEWO1
Sep 17, 2023VX3 HD Outdoor Camera
Equipment Class
NII - Unlicensed National Information Infrastructure TX
CFS8DLCAMWWDB1
Apr 09, 2023VX1 HD Video Doorbell
Equipment Class
NII - Unlicensed National Information Infrastructure TX