CKENKE2632Solid State S-Band Marine Radar
Japan Radio Co., Ltd.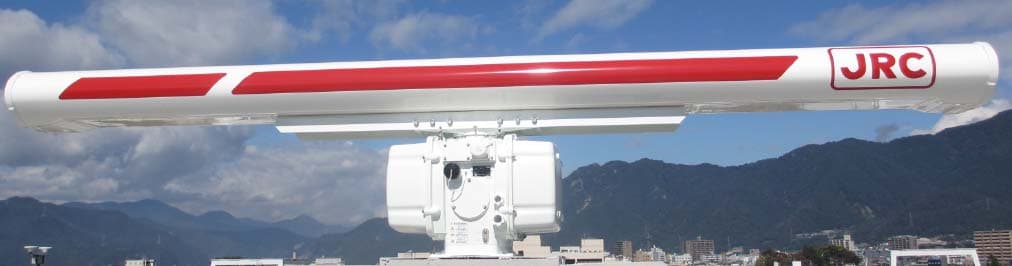
Click to zoom
Application Details
- Equipment Class
- MRD - Marine Radar
- Date of Grant
- Oct 21, 2015
- Application Purpose
- Original Equipment
- Date of Application
- Oct 21, 2015
- Equipment Note
- Solid State S-Band Marine Radar
- Frequency Range
- 3065.00000000 - 3065.00000000
- Company
- Japan Radio Co., Ltd.
- Country
- United States
Documents & Files
Document Text
Text extracted from the exhibit documents filed with the FCC. Open a document above to read the original.
Users Manual
01ETM ISO 9001, ISO 14001 Certified Printed in Japan Marine Service Department [email protected] Telephone :Facsimile :e-mail : Alphatron Marine Systems Pte Ltd Telephone :Facsimile :e-mail : +65 6863 0335+65 6863 3305 [email protected] Singapore Branch SEATTLE Branch Telephone :Facsimile :e-mail : [email protected] CODE No.7ZPNA4466A CODE No.7ZPNA4466A JUL. 2015 Edition 3 JRCJUL. 2015 Edition 3 JRC Not use the asbestos For further information,contact: URL http://www.jrc.co.jp Alphatron Marine B.V. Telephone :Facsimile :e-mail : +31 (0)10- 453 4000+31 (0)10- 452 [email protected] Rotterdam (Head office) URL http://www.alphatronmarine.com MARINE RADAR EQUIPMENTMARINE RADAR EQUIPMENT /ECDIS/CONNING/ECDIS/CONNING INSTALLATION MANUALINSTALLATION MANUAL JMR-9230-S/S3JMR-9230-S/S3JMR-9225-7X3/9X3/6X/9X/6XHJMR-9225-7X3/9X3/6X/9X/6XHJMR-9210-6X/6XHJMR-9210-6X/6XHJMR-9272-SJMR-9272-SJMR-9282-S/SHJMR-9282-S/SHJMR-7230-S/S3JMR-7230-S/S3JMR-7225-7X3/9X3/6X/9X/6XHJMR-7225-7X3/9X3/6X/9X/6XHJMR-7210-6X/6XHJMR-7210-6X/6XHJMR-7272-SJMR-7272-SJMR-7282-S/SHJMR-7282-S/SHJAN-9201JAN-9201JAN-7201JAN-7201JAN-9202JAN-9202JAN-7202JAN-7202 i Cautions for High Voltage High voltages, ranging from several hundreds to tens of thousands of volts, are used in electronic apparatus, such as radio and radar instruments. These voltages are totally harmless in most operations. However, touching a component inside the unit is very dangerous. (Any person other than authorized service engineers should not maintain, inspect, or adjust the unit.) High voltages on the order of tens of thousand volts are most likely to cause instant deaths from electrical shocks. At times, even voltages on the order of several hundred volts could lead to electrocution. To defend against electrical shock hazards, don't put your hand into the inside of apparatus. When you put in a hand unavoidably in case of urgent, it is strongly suggested to turn off the power switch and allow the capacitors, etc. to discharge with a wire having its one end positively grounded to remove residual charges. Before you put your hand into the inside of apparatus, make sure that internal parts are no longer charged. Extra protection is ensured by wearing dry cotton gloves at this time. Another important precaution to observe is to keep one hand in your pocket at a time, instead of using both hands at the same time. It is also important to select a secure footing to work on, as the secondary effects of electrical shock hazards can be more serious. In the event of electrical shocks, disinfect the burnt site completely and obtain medical care immediately. Precautions for Rescue of Victim of Electric Shock When a victim of electric shock is found, turn off the power source and ground the circuit immediately. If this is impossible, move the victim away from the unit as quick as possible without touching him or her with bare hands. He or she can safely be moved if an insulating material such as dry wood plate or cloth is used. Breathing may stop if current flows through the respiration center of brain due to electric shock. If the electric shock is not large, breathing can be restored by artificial respiration. A victim of electric shock looks pale and his or her pulse may become very weak or stop, resulting in unconsciousness and rigidity at worst. It is necessary to perform first aid immediately. 7ZPNA4466A ii Method of First-Aid Treatment Precautions for First-Aid Treatments Whenever a person is struck by an electrical shock, give the patient artificial respiration immediately on the spot, unless it is absolutely necessary to move the patient for safety's sake. Once started, artificial respiration should be continued rhythmically. (1) Refrain from touching the patient carelessly as a result of the accident; the first-aider could suffer from electrical shocks by himself or herself. (2) Turn off the power calmly and certainly, and move the patient apart from the cable gently. (3) Call or send for a physician or ambulance immediately, or ask someone to call doctor. (4) Lay the patient on the back, loosening the necktie, clothes, belts and so on. (5) (a) Feel the patient's pulse. (b) Check the heartbeat by bringing your ear close to the patient's heart. (c) Check for respiration by bringing your face or the back of your hand to the patient's face. (d) Check the size of patient's pupils. (6) Opening the patient's mouth, remove artificial teeth, cigarettes, chewing gum, etc. if any. With the patient's mouth open, stretch the tongue and insert a towel or the like into the mouth to prevent the tongue from being withdrawn into the throat. (If the patient clenches the teeth so tight that the mouth won't open, use a screwdriver or the like to force the mouth open and then insert a towel or the like into the mouth.) (7) Wipe off the mouth to prevent foaming mucus and saliva from accumulating. iii Treatment to Give When the Patient Has a Pulse Beating but Has Ceased to Breathe Performing mouth-to-mouth artificial respiration - Fig. 1 (1) Bend the patient's face backward until it is directed to look back. (A pillow may be placed under the neck.) (2) Pull up the lower jaw to open up the airway. (To spread the airway) (3) Pinching the patient's nose, breathe deeply and blow your breath into the patient's mouth strongly, with care to close it completely. Then, move your mouth away and take a deep breath, and blow into his or her mouth. Repeat blowing at 10 to 15 times a minute (always with the patient's nostrils closed). (4) Continue artificial respiration until natural respiration is restored. (5) If the patient's mouth won't open easily, insert a pipe, such as one made of rubber or vinyl, into either nostril. Then, take a deep breath and blow into the nostril through the pipe, with the other nostril and the mouth completely closed. (6) The patient may stand up abruptly upon recovering c…
Text truncated - open the document above for the full version.
Users Manual
2.Installation of Scanner Unit > 2.4 PRECAUTIONS 2-38 Fig 2-14 The permissible bending radius of coaxial cable 2.Installation of Scanner Unit > 2.4 PRECAUTIONS 2-39 2.4.3 Scanner installation position 1) Physical selection criteria • Install the scanner at the center of the mast on the keel line. • If the scanner cannot be installed at the above position for some reason, the amount of deviation must be minimized. And, reinforce the mount base and the platform and take precautions to protect the scanner from vibration and impact at the installation position. To avoid the radiating section coming in contact with other installed objects while it is rotating, ensure that there is at least 200 millimeters from the swing circle (turning radius) to other installed objects (Fig 2-15 Installation of scanner). The swing circle of the JMR-7200/9100 radar's scanner is as shown in Table 2-5 Swing circle. See “SN.1/Circ.271 6.2(b)”. Fig 2-15 Installation of scanner Table 2-5 Swing circle Scanner unit (length) Swing circle NKE-2103-6/6HS (6ft) NKE-1125-6 (6ft) NKE-2254-6HS (6ft) 1910mm NKE-1129-7 (7ft) 2270mm NKE-2632/H (8ft) 2770mm NKE-1125-9 (9ft) NKE-1129-9 (9ft) 2825mm NKE-1130/1139 (12ft) NKE-1632 (12ft) 4000mm 2.Installation of Scanner Unit > 2.4 PRECAUTIONS 2-40 • Avoid having a rope or signal flag from winding around the radiating section thereby preventing it from rotating. • Avoid the effects of dust and heat caused by smoke from a chimney. • When determining the appropriate scanner height and installation location, take into consideration the reduction of vibration, the strength of the hull and the scanner mount base, and maintenance properties. • Provide for maintenance space: platform, safety link, hand rail, steps, etc. The lower edge of a radar antenna should be a minimum of 500 mm above any safety rail. See “SN.1/Circ.271 6.1(b)”. • When installing the scanner, select a location where there are the fewest structural objects in the surrounding area so that the capability to drive the motor will not be depressed by the non-equability wind which is likely to rotate the scanner. 2) Electrical selection criteria • The installation height of the scanner relates to the maximum detection distance. The higher, the better. However, if it is too high, radio wave energy greatly attenuates above the scanner's vertical beam width (the point -3dB from the peak of the main lobe). As a result, it is difficult to detect a close-in target. Sea clutter also increases. Determine the installation height by taking into consideration the weight, maximum length of the cable, and maintenance after installation. See “SN.1/Circ.271 6.3(b), 7.1”. • If the installation height of the scanner is low, it is difficult to detect a long distance target. The ship's mast, derrick, and chimney interfere with radiating beam causing the range that cannot be viewed on the radar display to increase. Generally, the lowest scanner installation position is supposed to be on the A-B line shown in Fig 2-16 Lowest scanner installation height. In the case of the JMR-7210/7225/9210/9225 type radar, 2θ equals 20 . In the case of the JMR-7230/7272/7282/9230/9272/9282 type radar, 2θ equals 25 . Specifically, the scanner position is normally elevated so that the chimney and the shrine-gate type mast do not interfere with radiating beam. The A-B line, or L line of sight from the radar antenna to the bow of the ship should hit the surface of the sea in not more than 500 m or twice the ship length, depending which value is smaller, for all load and trim conditions. See “SN.1/Circ.271 6.3(a)”. A B θ JMR-7210 / 7225 / 9210 / 9225:θ=10° JMA-7230 / 7272 / 7282 / 9230 / 9272 / 9282 :θ=12.5° Fig 2-16 Lowest scanner installation height 2.Installation of Scanner Unit > 2.4 PRECAUTIONS 2-41 • If it is considered that sufficient installation height cannot be provided when the scanner is in- stalled directly on the roof of the wheelhouse, use a mounting rack or radar mast ( Fig 2-17 Mounting rack and mast for the scanner ). Normally, when the scanner installation height is less than 2 meters from the roof of the wheelhouse, provide a mounting rack assembled at an angle frame to install the scanner. When the scanner installation height is 2 meters or higher from the roof of the wheelhouse, provide a cylindrical radar mast to install the scanner. Con- sider the convenience of the service staff who take care of installation, maintenance, adjustment, and repair of the scanner by providing adequate footholds to the mounting rack and the radar mast. Fig 2-17 Mounting rack and mast for the scanner • When installing the scanner, select a location where there are the fewest structural objects in the surrounding area so that false echoes which interfere with target detection will not be generated by signal reflection from other scanners, deck structures, and cargo. Only as a guide, note that structural objects should not exist within the range of the vertical beam width (Fig 2-18 Scanner and the surrounding structural objects). See “SN.1/Circ.271 6.2(a)”. Vertical beam width of X-band: Approx. 20 ( 10.0 when the height of the radiating section is 0 ) Vertical beam width of S-band: Approx. 25 ( 12.5 when the height of the radiating section is 0 ) Fig 2-18 Scanner and the surrounding structural objects 2.Installation of Scanner Unit > 2.4 PRECAUTIONS 2-42 • When installing two or more scanners, scanners in close proximity should have a minimum vertical elevation separation angle of 20 and a minimum vertical separation of 1m where possible, so that those scanners do not enter each other's vertical beam width range. See “SN.1/Circ.271 6.1(c)”. • To avoid interference with other equipment and to prevent radio noise from generating, do not place the VHF antenna, GPS antenna, and INMARSAT's dome within the range of the vertical beam width. See “SN.1/Circ.271 6.1(a)”. • Keep a record of installation height data. The data is necessary for the initial setting of the display…
Text truncated - open the document above for the full version.
Users Manual
3 Installation of Display Unit > 3.4 Installation of Standard Equipment 3-30 2) Install the Monitor Unit to the Display Unit Mount Kit with screws. Screws are attached to the Monitor Unit. Screw: M5x14SUS + Spring washer + Washer (included in CWA-245/CWA-246/CWB-1594/CWB-1595) Number of screw point: 26inch Monitor Unit(NWZ-208/NWZ-208-TP) - 10 points 19inch Monitor Unit(NWZ-207/NWZ-207-TP) - 6 points Do not install in a position to close the vents of the monitor. In case of the 26inch Monitor Unit 3) Remove the rear panel for wiring. Remove 4) Insert the screw covers into the top and bottom spaces on the monitor. Monitor unit(26inch) NWZ-208/NWZ-208-TP Monitor unit(19inch) NWZ-207/NWZ-207-TP Installation of Monitor Unit ends above. 3 Installation of Display Unit > 3.4 Installation of Standard Equipment 3-31 3.4.2 Installation of Operation Unit (NCE-5625/CWB-1593/NCE-5605) 3.4.2.1 Installation of Keyboard Operation Unit (NCE-5625) 1) Remove the 4 screw covers from the KOPU-Keyboard Operation Unit by pushing the inside of the cover. Do not remove the cover using a flat blade screwdriver. Because there is a possibility that the cover is damaged. 2) Insert the W64: H-7ZCNA4187cable (included in the CMD-1106 in the NCE-5625) to the J642 connecter. 3 Installation of Display Unit > 3.4 Installation of Standard Equipment 3-32 3) Install the KOPU to the Display Unit Mount Kit. Screw: M5x14SUS + Spring washer + Washer (included in CWA-245/CWA-246/CWB-1596) 4) Insert the 4 screw covers into the original positions. 3 Installation of Display Unit > 3.4 Installation of Standard Equipment 3-33 3.4.2.2 Installation of Large Tray (CWB-1593) 1) Remove the 4 screw covers from the Large Tray by pushing the inside of the cover. Do not remove the cover using a flat blade screwdriver. Because there is a possibility that the cover is damaged. 2) Install the Large Tray to the frame (CWA-245/CWA-246/CWB-1596). Screw: M5x14SUS + Spring washer + Washer (included in CWA-245/CWA-246/CWB-1596) 3) Insert the 4 screw covers into the original positions. 3 Installation of Display Unit > 3.4 Installation of Standard Equipment 3-34 3.4.2.3 Installation of Trackball Operation Unit (NCE-5605) 1) Connect the W61: H-7ZCNA4151(included in CML-901) with the TOPU-Trackball Operation Unit. After connecting, guide the cable in the groove. 2) Remove the 2 screw covers from the TOPU. Remove the screw covers by pushing the inside of the cover. 3 Installation of Display Unit > 3.4 Installation of Standard Equipment 3-35 3) Install the TOPU bracket (MTV305174 included in TOPU) to the frame (CWA-245/CWA-246/CWB-1596). Screw: NC3x8BS (included in CWA-245/CWA-246/CWB-1596) 4) In case of installation of Keyboard Operation Unit. Connect the W64: H-7ZCNA4187 cable (connected with Chapter 3.4.2.1 Installation of Keyboard Operation Unit) to J614 connector on TOPU. 5) Insert the TOPU as shown in the figure below. And Install the TOPU to the Frame. The W61: H-7ZCNA4151 cable through the hole in the bottom of the frame. 3 Installation of Display Unit > 3.4 Installation of Standard Equipment 3-36 3.4.3 Installation of Central Control Unit (NDC-1590) 1) Remove the 4 screws of the front cover. 2) Remove the 2 screws that hold the upper shelf, and remove the shelf. And then draw out forward and take out the upper shelf. 3 Installation of Display Unit > 3.4 Installation of Standard Equipment 3-37 3) Install the CCU to the shelf. Refer to the figure below. 4) Insert the shelf installed CCU. And screw the shelf to the frame. Make sure the shelf is not floating. 3 Installation of Display Unit > 3.4 Installation of Standard Equipment 3-38 3.4.4 Installation of Power Supply Unit (NBD-913) 1) Remove the 2 screws that hold the lower shelf, and remove the shelf. And then draw out forward and take out the lower shelf. 2) Install the PSU-Power Supply Unit to the shelf. Refer to the figure below. 3) Insert the shelf installed PSU. And screw the shelf to the Frame. Make sure the shelf is not floating. 3 Installation of Display Unit > 3.4 Installation of Standard Equipment 3-39 3.4.5 Installation of Relay Terminal (CQD-2312) Attach the CQD-2312 Relay Terminal for distribute the AC/DC power. When the NQA-2443 Sensor LAN SW or UPS, has been arranged, install the SENSOR LAN SW and UPS before installing the Relay Terminal. For install the Relay Terminal, refer to the following procedure. -3.5.3 Installation of Sensor LAN Unit -3.5.4 Installation of UPS 1) Remove the 2 screws fixed to Display Unit Mount Kit(CWA-245/246). Refer to figure below for screw position. 2) Fix the bracket for relay terminal mount(MTB409517) to Display Unit Mount Kit(CWA-245/246) use the screws removed in the previous section 3 Installation of Display Unit > 3.4 Installation of Standard Equipment 3-40 3) Attach the Relay terminal(H-7JTNA4061) to the DIN rail. Refer to figure below. 4) Make sure that Relay terminal is fixed as shown in the figure below. The installation of Relay terminal ends above 3 Installation of Display Unit > 3.4 Installation of Standard Equipment 3-41 3.4.6 Connection of cables between unit 3.4.6.1 Wiring diagram Option Option wiring Standard wiring NWZ-208 MNU DVI RGB_in USB RGB_out DCAC NDC-1590 CCU J4101 DVI-MNU J4118 USB_TP J4202 SER-OPU J4201 USB-OPU J4203 RIF J4204 PSU-CONT J4301 PWR-PSU J4205 RGB-OUT NBD-913 PSU J53 CONT J52 OUT J51 DC_SC OUT J50 AC_SC OUT NCE-5605 TOPU NCE-5625 KOPU NQE-1143 JB J831 RIF J8100 DC24V J601OPU J614 KOPU J642 KOPU J8111 LAN J839 DC TB838 AC MTR TB840 DC MTR J4117 LAN1 J4122 LAN2 J4115 RADAR NQA-2443 Sensor LAN SW P90 DC24V W71 7ZCNA4147 W73 7ZCNA4149 J8112 LAN W64 7ZCNA4187 W61 7ZCNA4151 W75 BSUABFC210IV W83 KB-STP-01LB W53 7ZCNA4156A W51 7ZCNA4154 W841 7ZCNA4164 W853 7ZCNA4160 W85 KB-STP-01LB J837 48V W851 7ZCNA4158 ME-MAX-NEF/ QUINT20A QUINT-BAT/24DC/ 3.4AH QUINT-DC-UPS/ 24DC/20 QUINT-PS/1AC/ 24DC/20 TB1 AC DC JMR-9200 series wiring Fig 3-22: JMR-9200Series/JAN-9201/JAN-9202 Wiring Diagram Option Option wiring Standard wiring NWZ-207 MN…
Text truncated - open the document above for the full version.
Users Manual
3 Installation of Display Unit > 3.5 Installation of Option Equipment 3-75 W853:H-7ZCNA4160(included in CML-836-DC) ・Connect the W853 cable connector labeled “P51” to the J51 connector on the PSU. ・Connect the W853 cable connector labeled “P839” to the J839 connector on the RIF. ・Co-tighten the terminal labeled “FG” in the W853 cable and FG connection screw. Wire the cable to pass through the nylon clip No.6. 3 Installation of Display Unit > 3.5 Installation of Option Equipment 3-76 3.5.2.2 Connection for desktop type If the RIF is incorporated JB, connect the RIF and CCU. Either cable is arranged by the scanner unit. ・CML-836-ACF ・CML-836-DCF ●When CML-836-ACF has been arranged W842:H-7ZCNA4165(included in CML-836-ACF) Connect the J831 connector on the RIF to the J4203 on CCU by W842: H-7ZCNA4165. W852:7ZCNA4159(included in CML-836-ACF) ・Connect the W852 cable connector labeled “P50” to the J50 connector on the PSU. ・Connect the cable labeled “P837” in the W852 cable to the J837 connector on the RIF. ・Connect the terminal labeled “U” in the W851 to the TB838 U terminal on the RIF. ・Connect the terminal labeled “V” in the W851 to the TB838 V terminal on the RIF. ・Co-tighten the terminal labeled “FG” in the W852 cable and FG connection screw (See. 3.5.2.1 Connection for standalone type) on the RIF. 3 Installation of Display Unit > 3.5 Installation of Option Equipment 3-77 ●When CML-836-DCF has been arranged W842:H-7ZCNA4165(included in CML-836-DCF) Connect the J831 connector on the RIF to the J4203 on CCU by W842: H-7ZCNA4165. W854:H-7ZCNA4161(included in CML-836-DCF) ・Connect the W854 cable connector labeled “P51” to the J51 connector on the PSU. ・Connect the W854 cable connector labeled “P839” to the J839 connector on the RIF. ・Co-tighten the terminal labeled “FG” in the W854 cable and FG connection screw(See. 3.5.2.1 Connection for standalone type). W854 DC OUT(P51) W854 DC(P839) 3 Installation of Display Unit > 3.5 Installation of Option Equipment 3-78 3.5.3 Installation of Sensor LAN Unit If the NQA-2443 Sensor LAN Unit is arranged, install the rear panel of the frame. ■In case of CWA-246(26inch monitor stand alone type) 1) Open the rear cover. And install the Sensor LAN Unit to the rear panel. Screw: M3x12(included in NQA-2443) 2) Connect the J4117 connector on the CCU and Port12 connector on the Sensor LAN Unit with W83: KB-STP-01LB(included in CML-901). Wire the cable to pass through the nylon clip No.4, 5 and 6. 3 Installation of Display Unit > 3.5 Installation of Option Equipment 3-79 3) Connect the J8111 connector on the SLC and Port12 connector on the Sensor LAN Unit with W85: KB-STP01LB(CML-841). Wire the cable to pass through the cable tie base No.8. Fasten the cable using the T50R cable tie to the cable tie base No.8. Be careful so that the cables are not stretched. Fold in the cable length is left over. Before installing power cable, always make sure to turn off the circuit breaker of main power line. Otherwise, it may cause an electric shock or malfunction. 4) Refer to the 3.4.5 Installation of Relay Terminal (CQD-2312). And connect the 24VDC power supply cable. 3 Installation of Display Unit > 3.5 Installation of Option Equipment 3-80 ■In case of CWA-245(19inch monitor stand alone type) 1) Open the rear cover. And screw the Sensor LAN Unit to the rear panel. Screw: M3x12(included in NQA-2443) 2) Attach the cable tie base to the 3 position shown in the figure below. 3) Connect the J4117 connector on the CCU and Port1 connector on the Sensor LAN Unit with W83: KB-STP-01LB(included in CML-901). Wire the cable to pass through the 3 position shown in the figure above.. Fasten the cable using the T30R cable tie to the each cable tie base. 3 Installation of Display Unit > 3.5 Installation of Option Equipment 3-81 4) Connect the J8111 connector on the SLC and Port12 connector on the Sensor LAN Unit with W85: KB-STP01LB(CML-841). Wire the cable to pass through the cable tie base No.8. Fasten the cable using the T50R cable tie to the cable tie base No.8. Be careful so that the cables are not stretched. Fold in the cable length is left over. Before installing a power cable, always make sure to turn off the circuit breaker of main power line. Otherwise, it may cause an electric shock or malfunction. 5) Refer to the 3.4.5 Installation of Relay Terminal (CQD-2312). And connect the 24VDC power supply cable. 3 Installation of Display Unit > 3.5 Installation of Option Equipment 3-82 3.5.3.1 Assembling an Ethernet Connector (RJ-45 Type) Assemble an Ethernet connector according to the following procedure. ●Assemble Outside Sheath of an Ethernet cable Cut off outside sheath except for inner LAN Cable at the cable let-in hole. Only shielding wire needs to leave length to a chassis. ●How to Assemble an Ethernet Connector Let the Ethernet cable pass through the cable boot. Measure the length of the cable sheath that is to be peeled. NOTE: The rough standard is the length of your thumb (about 5 to 6 cm). Make a cut in the sheath by a wire stripper. 3 Installation of Display Unit > 3.5 Installation of Option Equipment 3-83 Check by bending the cable that the foil inside is not damaged. If the foil inside is damaged, cut the cable there and go back to the procedure 2 again. [Failure example] The foil is torn and the core wires inside can be seen. Cut the sheath by a cutter vertically from the cut line made by the stripper in the procedure 3. NOTE: Do not damage the foil inside. Twist the cable to split off the sheath. Peel the sheath along the cut lines made by the stripper and the cutter. Check that the foil is not damaged after the sheath is peeled. The foil is OK if it is not torn by the pull of the arrow direction shown in the left figure. Failure example 3 Installation of Display Unit > 3.5 Installation of Option Equipment 3-84 Fold back the foil and roll it up around the cable. NOTE: The blue surface of the foil must be touched to the sheath. As the same way, fold back the drain wire to att…
Text truncated - open the document above for the full version.
Users Manual
3 Installation of Display Unit > 3.5 Installation of Option Equipment 3-94 9) While maintaining the OFF state of the circuit breaker for the power supply of the display unit, turn ON the circuit breaker of the main power line and check that the LEDs of the UPS controller turn ON/OFF as follows. LED Color ON/OFF Status Alarm Red OFF Bat.-Mode Bat.-Charge Yellow Flashing or OFF Power In OK Green ON 10) Install the rear panel installed UPS to the frame. And wire the cable to pass through the cable tie base No.16. 11) Install the 2 frames for installing the JB. The installation of UPS ends above. 3 Installation of Display Unit > 3.5 Installation of Option Equipment 3-95 3.5.5 Installation of Hood 3.5.5.1 Installation of CWB-1620 3 Installation of Display Unit > 3.5 Installation of Option Equipment 3-96 3 Installation of Display Unit > 3.5 Installation of Option Equipment 3-97 3.5.6 Installation of CWB-1618 3 Installation of Display Unit > 3.5 Installation of Option Equipment 3-98 3 Installation of Display Unit > 3.6 Connections with Scanner and Transceiver 3-99 3.6 Connections with Scanner and Transceiver Before conducting replacement work, turn OFF the circuit breaker for the power supply of the display unit. Before replacement work, be sure that all the LEDs on the front of the PSU NBD-913 are unlit. Charged electricity may still remain in the internal capacitor. Do not lose the bolt and screws as they will be needed again. Ensure the cable extra length for maintenace. And store the cable to the back of the junction box. 3 Installation of Display Unit > 3.6 Connections with Scanner and Transceiver 3-100 3.6.1 NKE-1125, NKE-1129, NKE-1130, NKE-1139, NKE-1632, NKE-2632 SCANNERS Connect the device to J832 and TB838 of RADAR INTERFACE CIRCUIT CQD-2273 located in display unit (processing unit). For the procedure for processing the equipment cable terminal, see 2.1.4 Cable end processing method. CML-836AC or CML-836ACF CML-836AC or CML-836ACF YEL GRN J835 SCANNER J832 TB840 (DC24V MTR) CQD-2273 RADAR Interface Circuit (RIF) NQE-1143 Junction Box (JB) GYRO I/F FG 1 2 3 4 5 6 7 8 + - TB838(AC100/220V) U V 1 2 3 4 5 6 7 8 1 2 3 4 5 6 7 8 1 2 3 4 5 6 7 8 ISW_IN ISW_OUT EX_OUT J837 J839 J834 J833 J836 J831 CCU I/F DC_SC_IN (DC24V PSU) AC_SC_IN(DC48V) PWROUT PWROUTE PWRIN PWRINE ISWI_VD+ ISWI_VD- ISWI_TRG+ ISWI_TRG- ISWI_BP+ ISWI_BP- ISWI_BZ+ ISWI_BZ- ISWI_MTR+ ISWI_MTR- ISWI_MTRG ISWO_VD+ ISWO_VD- ISWO_TRG+ ISWO_TRG- ISWO_BP+ ISWO_BP- ISWO_BZ+ ISWO_BZ- ISWO_MTR+ ISWO_MTR- ISWO_MTRG VD+_OUT VD-_OUT TRG+_OUT TRG-_OUT BP+_OUT BP-_OUT BZ+_OUT BZ-_OUT GND N.C. VD+ VD- TRG+ TRG- BP+ BP- BZ+ BZ- MTR+ MTR- N.C. DC+ DC- MTRG BLK1 WHT- ORN BLK2 BLK3 BLK4 WHT- WHT RED BLU H-2695110056 SCANNER ・NKE-1125 ・NKE-1129 ・NKE-1130 ・NKE-1139 ・NKE-1632 ・NKE-2632 NBD-913 PSU NDC-1590 CCU Confirm the Model of Scanner Unit and input power supply of Display Unit. Radar Model Scanner Unit Model of 100-115VAC Scanner Unit Model of 220-240VAC JMR-9230-S3 NKE-1139-1 NKE-1139-2 JMR-9230-S NKE-1130-1 NKE-1130-2 JMR-9225-7X3 NKE-1129-71 NKE-1129-72 JMR-9225-9X3 NKE-1129-91 NKE-1129-92 JMR-9225-6X NKE-1125-61 NKE-1125-62 JMR-9225-9X NKE-1125-91 NKE-1125-92 3 Installation of Display Unit > 3.6 Connections with Scanner and Transceiver 3-101 3.6.2 NKE-2103, NKE-2254 SCANNERS Connect the device to J832 and TB840 of RADAR INTERFACE CIRCUIT CQD-2273 located in display unit (processing unit). For the procedure for processing the equipment cable terminal, see 2.1.1 CFQ-6912-**. 3 Installation of Display Unit > 3.6 Connections with Scanner and Transceiver 3-102 3.6.3 Settings for RADAR I/F Circuit Fig 3-26 CQD-2273 Radar Interface Circuit TB1 Table 3-2 Radar Interface Circuit TB1 Settings Radar Interface Circuit TB1 Settings Description 1-2 SHORT CIRCUIT ISW_AUTO (Factory default) You can switch the scanner unit to be used on your Display unit via the Interswitch unit. 2-3 SHORT CIRCUIT ISW_ONLY (Not allowed) Scanner signals always come down to your Display unit via the Interswitch unit. You can switch them on your Display unit in service mode. OPEN ISW_OFF (Not allowed) Scanner signals come down to your Display unit directly. Since they do not come through the Interswitch unit, you cannot switch them. If it is not suggested from JRC office, do not set “2-3 SHORT CIRCUIT” or “OPEN” the TB1 of Radar Interface Circuit. It may cause a lower radar system performance. 3 Installation of Display Unit > 3.6 Connections with Scanner and Transceiver 3-103 3.6.3.1 Connection procedure between Radar Interface Circuit and Scanner Unit 1. Connect as follows Radar Interface Circuit and Scanner Unit. (J832: Signal TB838: AC Power TB840: DC Power) AC Motor Scanner Unit: NKE-1139、NKE-1130、NKE-1632、NKE-2632、NKE-2632-H、 NKE-1129-7、NKE-1129-9、NKE-1125-6、NKE-1125-9 J832 とTB838 DC Motor Scanner Unit: NKE-2254-6HS、NKE-2103-6、NKE-2103-6HS J832と TB840 • For the procedures for processing the equipment cable end, see 2.1.4 Cable end processing method. • Fix the shield part of the equipment cable with pressing by metal fittings which is surrounded by a dotted line frame in the figure below..Connect the shield to the thumbscrew surrounded by the circle.(Recommended crimp terminals V5.5) So that the braided shield is not shorted to the power supply terminal block, please insulate the cable and fix with cable tie. Please put the Extra length of the cable to the bottom of the display unit so that the not shorted to the UPS or SENSOR LAN switch unit. • When connecting the interswitch unit, see 5.1 Installation of Interswitch Unit. • When connecting the ECDIS, see 3.8 Connection with ECDIS. 3 Installation of Display Unit > 3.7 Connection with Sensors 3-104 3.7 Connection with Sensors Ensure the cable extra length for maintenace. And store the cable to the back of the junction box. When the CMH-2370 has been installed to the Junction Box, start up the CMH-2370 by turning on the switch S1. Refer to figure below for location of the S1. If do not start up the CMH-2370, sensors wha…
Text truncated - open the document above for the full version.
Contact Information
Applicant
Yuji Kinoshita(General Manager)
Technical Specifications
| # | Rule Parts | Frequency Range | Power Output | Emission | Tolerance |
|---|---|---|---|---|---|
| 2 | 8 | 3.06 GHz - 3.06 GHz | 80.72 W | 8M16Q0N | 353 ppm |
Other Applications from Japan Radio Co., Ltd.
CKENTG1014
May 09, 20235G Radio Unit
Equipment Class
CBD - Citizens Band Category A and B Devices
CKENJJ-200
Jan 22, 2015Handy Search
Equipment Class
UWB - Ultra Wideband Transmitter
CKEJRN-130K
Oct 21, 20143G/GSM IT Controller
Equipment Class
PCB - PCS Licensed Transmitter
CKENKE1066
Feb 04, 2014MARINE RADAR
Equipment Class
MRD - Marine Radar
CKEJSS-2250
Jan 16, 2014Marine MF/HF GMDSS Radio Transceiver, digital selective calling (DSC) / narrow-band direct printing (NBDP) Modem
Equipment Class
GHF - Part 80 HF Transmitter (GMDSS)