CNTHSTNN-I01CNotebook PC with Built-in Wireless
HP Inc.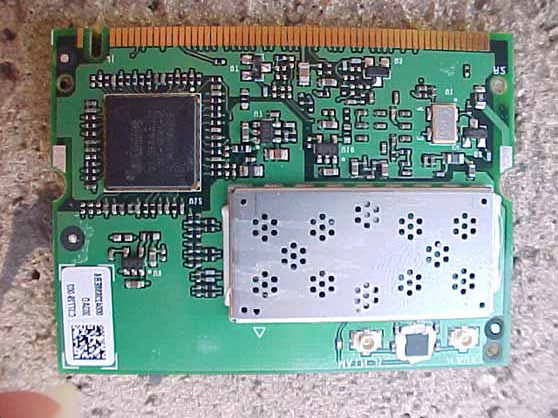
Click to zoom
Application Details
- Equipment Class
- DTS - Digital Transmission System
- Date of Grant
- Nov 13, 2003
- Application Purpose
- Original Equipment
- Date of Application
- Nov 13, 2003
- Equipment Note
- Notebook PC with Built-in Wireless
- Frequency Range
- 2412.00000000 - 2462.00000000
- Company
- HP Inc.
- Country
- United States
Documents & Files
Document Text
Text extracted from the exhibit documents filed with the FCC. Open a document above to read the original.
Users Manual
Hardware Guide HP Compaq Notebook Series Document Part Number: 345582-001 December 2003 This guide explains how to identify and use notebook hardware features, including connectors for external devices. It also includes power and environmental specifications, which can be helpful when traveling with the notebook. 345582-001.book Page i Friday, September 12, 2003 2:40 PM © 2003 Hewlett-Packard Development Company, L.P. Microsoft and Windows are trademarks of Microsoft Corporation in the U.S. and/or other countries. Intel and SpeedStep are trademarks of Intel Corporation in the U.S. and/or other countries. SD Logo is a trademark. The information contained herein is subject to change without notice. The only warranties for HP products and services are set forth in the express warranty statements accompanying such products and services. Nothing herein should be construed as constituting an additional warranty. HP shall not be liable for technical for editorial errors or omissions contained herein. Hardware Guide HP Compaq Notebook Series First Edition December 2003 Reference Number: nx5000 Document Part Number: 345582-001 345582-001.book Page ii Friday, September 12, 2003 2:40 PM Hardware Guideiii Contents 1 Notebook Features TouchPad Components . . . . . . . . . . . . . . . . . . . . . . . . . . 1–1 Top Components . . . . . . . . . . . . . . . . . . . . . . . . . . . . . . . 1–2 Lights . . . . . . . . . . . . . . . . . . . . . . . . . . . . . . . . . . . . . . . . 1–5 Left-Side Components . . . . . . . . . . . . . . . . . . . . . . . . . . . 1–7 Right-Side Components . . . . . . . . . . . . . . . . . . . . . . . . . . 1–8 Front Components . . . . . . . . . . . . . . . . . . . . . . . . . . . . . . 1–9 Rear Components . . . . . . . . . . . . . . . . . . . . . . . . . . . . . . 1–11 Bottom Components. . . . . . . . . . . . . . . . . . . . . . . . . . . . 1–13 Labels . . . . . . . . . . . . . . . . . . . . . . . . . . . . . . . . . . . . . . . 1–15 2 Pointing Devices and Keyboard Using a Pointing Device. . . . . . . . . . . . . . . . . . . . . . . . . . 2–1 Using the TouchPad. . . . . . . . . . . . . . . . . . . . . . . . . . 2–2 Using an External Mouse . . . . . . . . . . . . . . . . . . . . . 2–2 Setting Pointing Device Preferences . . . . . . . . . . . . . 2–2 Using Hotkeys and Shortcut Keys . . . . . . . . . . . . . . . . . . 2–3 Identifying fn and Function Keys . . . . . . . . . . . . . . . 2–3 Hotkey and Shortcut Key Quick Reference . . . . . . . 2–4 Using Hotkeys and Shortcut Keys with External Keyboards . . . . . . . . . . . . . . . . . . . . . . . . . . . . . . . . . 2–6 Using Quick Launch Buttons . . . . . . . . . . . . . . . . . . . . . . 2–7 Using Keypads . . . . . . . . . . . . . . . . . . . . . . . . . . . . . . . . . 2–8 Using the Embedded Numeric Keypad . . . . . . . . . . . 2–8 Using an External Keypad . . . . . . . . . . . . . . . . . . . . 2–10 345582-001.book Page iii Friday, September 12, 2003 2:40 PM Contents Hardware Guideiv 3 Battery Packs Running the Notebook on Battery Power . . . . . . . . . . . . 3–1 Identifying Battery Packs . . . . . . . . . . . . . . . . . . . . . . . . . 3–2 Inserting or Removing a Primary Battery Pack . . . . . . . . 3–3 Inserting or Removing a MultiBay Battery Pack . . . . . . . 3–4 Charging a Battery Pack. . . . . . . . . . . . . . . . . . . . . . . . . . 3–6 Charging a New Battery Pack . . . . . . . . . . . . . . . . . . 3–7 Charging an In-Use Battery Pack . . . . . . . . . . . . . . . 3–7 Charging a Primary and MultiBay Battery Pack . . . . 3–7 Monitoring the Charge in a Battery Pack. . . . . . . . . . . . . 3–8 Obtaining Accurate Charge Information . . . . . . . . . . 3–8 Displaying Charge Information on the Screen . . . . . 3–8 Displaying Charge Information on a MultiBay Battery Pack. . . . . . . . . . . . . . . . . . . . . . . . . . . . . . . 3–10 Managing Low-Battery Conditions . . . . . . . . . . . . . . . . 3–11 Identifying Low-Battery Conditions . . . . . . . . . . . . 3–11 Resolving Low-Battery Conditions . . . . . . . . . . . . . 3–12 Calibrating a Battery Pack . . . . . . . . . . . . . . . . . . . . . . . 3–13 When to Calibrate . . . . . . . . . . . . . . . . . . . . . . . . . . 3–13 How to Calibrate . . . . . . . . . . . . . . . . . . . . . . . . . . . 3–13 Battery Conservation Procedures and Settings . . . . . . . 3–17 Conserving Power as You Work . . . . . . . . . . . . . . . 3–17 Selecting Power Conservation Settings . . . . . . . . . . 3–18 Storing a Battery Pack . . . . . . . . . . . . . . . . . . . . . . . . . . 3–19 Disposing of a Used Battery Pack . . . . . . . . . . . . . . . . . 3–20 Finding More Power Information . . . . . . . . . . . . . . . . . 3–20 4 Drives Caring for Drives . . . . . . . . . . . . . . . . . . . . . . . . . . . . . . . 4–1 Adding a Drive to the System . . . . . . . . . . . . . . . . . . . . . 4–2 Hard Drive . . . . . . . . . . . . . . . . . . . . . . . . . . . . . . . . . . . . 4–3 Identifying the Hard Drive Activity Light. . . . . . . . . 4–3 Removing and Installing a Primary Hard Drive . . . . 4–4 345582-001.book Page iv Friday, September 12, 2003 2:40 PM Contents Hardware Guidev MultiBay Drive . . . . . . . . . . . . . . . . . . . . . . . . . . . . . . . . 4–7 Identifying the MultiBay Activity Light . . . . . . . . . . 4–7 Inserting a Drive into the MultiBay. . . . . . . . . . . . . . 4–8 Removing a Drive from the MultiBay. . . . . . . . . . . . 4–9 MultiBay Drive Media . . . . . . . . . . . . . . . . . . . . . . . . . . 4–10 Inserting an Optical Disc . . . . . . . . . . . . . . . . . . . . . 4–10 Removing an Optical Disc (With Power) . . . . . . . . 4–11 Removing an Optical Disc (No Power) . . . . . . . . . . 4–12 Displaying Optical Disc Contents . . . . . . . . . . . . . . 4–13 Locating Optical Disc Software . . . . . . . . . . . . . . . 4–13 Resuming From Standby or Hibernation. . . . . . . . . 4–14 Inserting a Diskette . . . . . . . . . . . . . . . . . . . . . . . . . 4–14 Removing a Diskette…
Text truncated - open the document above for the full version.
Users Manual
Drives Hardware Guide4–3 Hard Drive This section discusses the primary hard drive of the notebook. Identifying the Hard Drive Activity Light The hard drive activity light turns on when the primary hard drive is being accessed. 345582-001.book Page 3 Friday, September 12, 2003 2:40 PM Drives Hardware Guide4–4 Removing and Installing a Primary Hard Drive The hard drive that is in the hard drive bay is the primary hard drive. The following sections describe how to remove and install the primary hard drive. Before You Begin 1. Save your work, exit all applications, and shut down the notebook. If you are not sure whether the notebook is off or in Hibernation, briefly press the power button. If your work returns to the screen, save your work, exit all applications, and then shut down the notebook. 2. Disconnect all external devices connected to the notebook. 3. Disconnect the power cord. 4. Remove any battery packs. Removing the Primary Hard Drive To remove the primary hard drive: 1. Follow the procedures in the “Before You Begin” section. 2. Turn the notebook upside down. 3. Remove the hard drive security screw 1. 4. Remove the hard drive door retaining screw 2. 345582-001.book Page 4 Friday, September 12, 2003 2:40 PM Drives Hardware Guide4–5 5. To remove the hard drive, lift the hard drive door 1, and pull the hard drive 2 out of the bay. 6. If you are not installing a hard drive at this time, put the hard drive retaining screw and hard drive security screw in a safe place. Installing the Primary Hard Drive To install a hard drive: 1. Follow the procedure in the “Before You Begin” section. 2. Lift the hard drive door 1. 3. Slide the hard drive 2 into the bay until the drive is seated. 345582-001.book Page 5 Friday, September 12, 2003 2:40 PM Drives Hardware Guide4–6 4. Reinsert the hard drive security screw 1 and hard drive retaining screw 2. 345582-001.book Page 6 Friday, September 12, 2003 2:40 PM Drives Hardware Guide4–7 MultiBay Drive This section explains how to use optional drives in the notebook MultiBay. Identifying the MultiBay Activity Light The MultiBay activity light turns on when any MultiBay device is active, with the exception of the MultiBay battery pack. 345582-001.book Page 7 Friday, September 12, 2003 2:40 PM Drives Hardware Guide4–8 Inserting a Drive into the MultiBay ✎ Before inserting a hard drive into the MultiBay, insert the drive into a MultiBay hard drive adapter (purchased separately). 1. Turn the notebook upside down. 2. With the connector on the drive or drive assembly facing the MultiBay, slide the drive or drive assembly into the MultiBay until it is seated. 345582-001.book Page 8 Friday, September 12, 2003 2:40 PM Drives Hardware Guide4–9 Removing a Drive from the MultiBay Ä CAUTION: To prevent system lockup and loss of information, stop the drive before removing it. To stop the drive: ■Windows XP—Select the Safely Remove Hardware icon on the taskbar, then select the drive you want to remove. When it is safe to remove the drive, a message is displayed. (To display taskbar icons, select Show Hidden Icons in the system tray.) ■Windows 2000—Select the Unplug or Eject Hardware icon on the taskbar, then select the drive you want to remove. When it is safe to remove the drive, a message is displayed. Ä CAUTION: To protect the MultiBay when no device is inside, insert the weight saver in the bay. This device prevents damage to the MultiBay and does not increase notebook weight. 1. If the drive has a media tray, extend it, remove any media, then close the tray. 2. Stop the drive as instructed in the preceding caution. 3. Turn the notebook upside down. 4. Slide the MultiBay release latch 1 toward the rear of the notebook. 5. Pull the drive or drive assembly 2 out of the MultiBay. 345582-001.book Page 9 Friday, September 12, 2003 2:40 PM Drives Hardware Guide4–10 MultiBay Drive Media This section provides information on using optional optical disc drives (such as CD-ROM and DVD drives) and optional diskette drives in the MultiBay. Inserting an Optical Disc 1. Turn on the notebook. 2. Press the release button 1 on the drive bezel to release the media tray. 3. Pull out the tray 2 until it is fully extended. Position a CD or one-sided DVD over the tray with the label side up. 4. Gently press the disc 3 onto the tray spindle until the disc snaps into place. Handle the disc by the edges, not the flat surfaces. If the media tray is not fully extended, tilt the disc to position it over the tray spindle, then press it into position. 5. Close the media tray. ✎ After you insert a DVD, a short pause is normal as Autorun opens the DVD and the WinDVD player if the WinDVD has been installed. To install WinDVD player, see the “Optical Drive Software” chapter in the Software Guide on the Documentation CD. If Autorun is not enabled, see “Displaying Optical Disc Contents” later in this chapter. 345582-001.book Page 10 Friday, September 12, 2003 2:40 PM Drives Hardware Guide4–11 Removing an Optical Disc (With Power) If power is available: 1. Turn on the notebook. 2. Press the release button 1 on the drive bezel to release the media tray, then pull the tray 2 out until it is fully extended. 3. Remove the disc 3 from the tray by gently pressing down on the spindle while lifting the outer edges of the disc. Handle the disc by the edges, not the flat surfaces. If the media tray is not fully extended, tilt the disc as you remove it. 4. Close the media tray and place the disc in a protective case. 345582-001.book Page 11 Friday, September 12, 2003 2:40 PM Drives Hardware Guide4–12 Removing an Optical Disc (No Power) If power is unavailable: 1. Insert the end of a paper clip 1 into the manual eject recess in the front bezel of the drive. 2. Press in gently on the paper clip until the media tray is released, then pull out the tray 2 until it is fully extended. 3. Remove the disc 3 from the tray by gently pressing down on the spindle while lifting the outer edges of the disc. Handle the disc by t…
Text truncated - open the document above for the full version.
Users Manual
b Hardware Guide Compaq Notebook Series Document Part Number: 348383-001 December 2003 This guide explains how to identify and use notebook hardware features, including connectors for external devices. It also includes power and environmental specifications, which can be helpful when traveling with the notebook. 348383-001.book Page i Friday, September 12, 2003 10:50 AM © 2003 Hewlett-Packard Development Company, L.P. Microsoft and Windows are trademarks of Microsoft Corporation in the U.S. and/or other countries. Intel and SpeedStep are trademarks of Intel Corporation in the U.S. and/or other countries. SD Logo is a trademark. The information contained herein is subject to change without notice. The only warranties for HP products and services are set forth in the express warranty statements accompanying such products and services. Nothing herein should be construed as constituting an additional warranty. HP shall not be liable for technical for editorial errors or omissions contained herein. Hardware Guide Compaq Notebook Series First Edition December 2003 Reference Number: V1000 Document Part Number: 348383-001 348383-001.book Page ii Friday, September 12, 2003 10:50 AM Hardware Guideiii Contents 1 Notebook Features TouchPad Components . . . . . . . . . . . . . . . . . . . . . . . . . . 1–1 Top Components . . . . . . . . . . . . . . . . . . . . . . . . . . . . . . . 1–2 Lights . . . . . . . . . . . . . . . . . . . . . . . . . . . . . . . . . . . . . . . . 1–5 Left-Side Components . . . . . . . . . . . . . . . . . . . . . . . . . . . 1–7 Right-Side Components . . . . . . . . . . . . . . . . . . . . . . . . . . 1–8 Front Components . . . . . . . . . . . . . . . . . . . . . . . . . . . . . . 1–9 Rear Components . . . . . . . . . . . . . . . . . . . . . . . . . . . . . . 1–11 Bottom Components. . . . . . . . . . . . . . . . . . . . . . . . . . . . 1–13 Labels . . . . . . . . . . . . . . . . . . . . . . . . . . . . . . . . . . . . . . . 1–15 2 Pointing Devices and Keyboard Using a Pointing Device. . . . . . . . . . . . . . . . . . . . . . . . . . 2–1 Using the TouchPad. . . . . . . . . . . . . . . . . . . . . . . . . . 2–2 Using an External Mouse . . . . . . . . . . . . . . . . . . . . . 2–2 Setting Pointing Device Preferences . . . . . . . . . . . . . 2–2 Using Hotkeys and Shortcut Keys . . . . . . . . . . . . . . . . . . 2–3 Identifying fn and Function Keys . . . . . . . . . . . . . . . 2–3 Hotkey and Shortcut Key Quick Reference . . . . . . . 2–4 Using Hotkeys and Shortcut Keys with External Keyboards . . . . . . . . . . . . . . . . . . . . . . . . . . . . . . . . . 2–6 Using Quick Launch Buttons . . . . . . . . . . . . . . . . . . . . . . 2–7 Using Keypads . . . . . . . . . . . . . . . . . . . . . . . . . . . . . . . . . 2–8 Using the Embedded Numeric Keypad . . . . . . . . . . . 2–8 Using an External Keypad . . . . . . . . . . . . . . . . . . . . 2–10 348383-001.book Page iii Friday, September 12, 2003 10:50 AM Contents Hardware Guideiv 3 Battery Packs Running the Notebook on Battery Power . . . . . . . . . . . . 3–1 Identifying Battery Packs . . . . . . . . . . . . . . . . . . . . . . . . . 3–2 Inserting or Removing a Primary Battery Pack . . . . . . . . 3–3 Inserting or Removing a MultiBay Battery Pack . . . . . . . 3–4 Charging a Battery Pack. . . . . . . . . . . . . . . . . . . . . . . . . . 3–6 Charging a New Battery Pack . . . . . . . . . . . . . . . . . . 3–7 Charging an In-Use Battery Pack . . . . . . . . . . . . . . . 3–7 Charging a Primary and MultiBay Battery Pack . . . . 3–7 Monitoring the Charge in a Battery Pack. . . . . . . . . . . . . 3–8 Obtaining Accurate Charge Information . . . . . . . . . . 3–8 Displaying Charge Information on the Screen . . . . . 3–8 Displaying Charge Information on a MultiBay Battery Pack. . . . . . . . . . . . . . . . . . . . . . . . . . . . . . . 3–10 Managing Low-Battery Conditions . . . . . . . . . . . . . . . . 3–11 Identifying Low-Battery Conditions . . . . . . . . . . . . 3–11 Resolving Low-Battery Conditions . . . . . . . . . . . . . 3–12 Calibrating a Battery Pack . . . . . . . . . . . . . . . . . . . . . . . 3–13 When to Calibrate . . . . . . . . . . . . . . . . . . . . . . . . . . 3–13 How to Calibrate . . . . . . . . . . . . . . . . . . . . . . . . . . . 3–13 Battery Conservation Procedures and Settings . . . . . . . 3–17 Conserving Power as You Work . . . . . . . . . . . . . . . 3–17 Selecting Power Conservation Settings . . . . . . . . . . 3–18 Storing a Battery Pack . . . . . . . . . . . . . . . . . . . . . . . . . . 3–19 Disposing of a Used Battery Pack . . . . . . . . . . . . . . . . . 3–20 Finding More Power Information . . . . . . . . . . . . . . . . . 3–20 4 Drives Caring for Drives . . . . . . . . . . . . . . . . . . . . . . . . . . . . . . . 4–1 Adding a Drive to the System . . . . . . . . . . . . . . . . . . . . . 4–2 Hard Drive . . . . . . . . . . . . . . . . . . . . . . . . . . . . . . . . . . . . 4–3 Identifying the Hard Drive Activity Light. . . . . . . . . 4–3 Removing and Installing a Primary Hard Drive . . . . 4–4 348383-001.book Page iv Friday, September 12, 2003 10:50 AM Contents Hardware Guidev MultiBay Drive . . . . . . . . . . . . . . . . . . . . . . . . . . . . . . . . 4–7 Identifying the MultiBay Activity Light . . . . . . . . . . 4–7 Inserting a Drive into the MultiBay. . . . . . . . . . . . . . 4–8 Removing a Drive from the MultiBay. . . . . . . . . . . . 4–9 MultiBay Drive Media . . . . . . . . . . . . . . . . . . . . . . . . . . 4–10 Inserting an Optical Disc . . . . . . . . . . . . . . . . . . . . . 4–10 Removing an Optical Disc (With Power) . . . . . . . . 4–11 Removing an Optical Disc (No Power) . . . . . . . . . . 4–12 Displaying Optical Disc Contents . . . . . . . . . . . . . . 4–13 Locating Optical Disc Software . . . . . . . . . . . . . . . 4–13 Resuming From Standby or Hibernation. . . . . . . . . 4–14 Inserting a Diskette . . . . . . . . . . . . . . . . . . . . . . . . . 4–14 Removing a Diskette …
Text truncated - open the document above for the full version.
Users Manual
Drives Hardware Guide4–3 Hard Drive This section discusses the primary hard drive of the notebook. Identifying the Hard Drive Activity Light The hard drive activity light turns on when the primary hard drive is being accessed. Your model might vary slightly from this illustration. 348383-001.book Page 3 Friday, September 12, 2003 10:50 AM Drives Hardware Guide4–4 Removing and Installing a Primary Hard Drive The hard drive that is in the hard drive bay is the primary hard drive. The following sections describe how to remove and install the primary hard drive. Before You Begin 1. Save your work, exit all applications, and shut down the notebook. If you are not sure whether the notebook is off or in Hibernation, briefly press the power button. If your work returns to the screen, save your work, exit all applications, and then shut down the notebook. 2. Disconnect all external devices connected to the notebook. 3. Disconnect the power cord. 4. Remove any battery packs. Removing the Primary Hard Drive To remove the primary hard drive: 1. Follow the procedures in the “Before You Begin” section. 2. Turn the notebook upside down. 3. Remove the hard drive security screw 1. 4. Remove the hard drive door retaining screw 2. Your model might vary slightly from this illustration. 348383-001.book Page 4 Friday, September 12, 2003 10:50 AM Drives Hardware Guide4–5 5. To remove the hard drive, lift the hard drive door 1, and pull the hard drive 2 out of the bay. 6. If you are not installing a hard drive at this time, put the hard drive retaining screw and hard drive security screw in a safe place. Your model might vary slightly from this illustration. Installing the Primary Hard Drive To install a hard drive: 1. Follow the procedure in the “Before You Begin” section. 2. Lift the hard drive door 1. 3. Slide the hard drive 2 into the bay until the drive is seated. Your model might vary slightly from this illustration. 348383-001.book Page 5 Friday, September 12, 2003 10:50 AM Drives Hardware Guide4–6 4. Reinsert the hard drive security screw 1 and hard drive retaining screw 2. Your model might vary slightly from this illustration. 348383-001.book Page 6 Friday, September 12, 2003 10:50 AM Drives Hardware Guide4–7 MultiBay Drive This section explains how to use optional drives in the notebook MultiBay. Identifying the MultiBay Activity Light The MultiBay activity light turns on when any MultiBay device is active, with the exception of the MultiBay battery pack. Your model might vary slightly from this illustration. 348383-001.book Page 7 Friday, September 12, 2003 10:50 AM Drives Hardware Guide4–8 Inserting a Drive into the MultiBay ✎ Before inserting a hard drive into the MultiBay, insert the drive into a MultiBay hard drive adapter (purchased separately). 1. Turn the notebook upside down. 2. With the connector on the drive or drive assembly facing the MultiBay, slide the drive or drive assembly into the MultiBay until it is seated. Your model might vary slightly from this illustration. 348383-001.book Page 8 Friday, September 12, 2003 10:50 AM Drives Hardware Guide4–9 Removing a Drive from the MultiBay Ä CAUTION: To prevent system lockup and loss of information, stop the drive before removing it. To stop the drive: ■Windows XP—Select the Safely Remove Hardware icon on the taskbar, then select the drive you want to remove. When it is safe to remove the drive, a message is displayed. (To display taskbar icons, select Show Hidden Icons in the system tray.) ■Windows 2000—Select the Unplug or Eject Hardware icon on the taskbar, then select the drive you want to remove. When it is safe to remove the drive, a message is displayed. Ä CAUTION: To protect the MultiBay when no device is inside, insert the weight saver in the bay. This device prevents damage to the MultiBay and does not increase notebook weight. 1. If the drive has a media tray, extend it, remove any media, then close the tray. 2. Stop the drive as instructed in the preceding caution. 3. Turn the notebook upside down. 4. Slide the MultiBay release latch 1 toward the rear of the notebook. 5. Pull the drive or drive assembly 2 out of the MultiBay. Your model might vary slightly from this illustration. 348383-001.book Page 9 Friday, September 12, 2003 10:50 AM Drives Hardware Guide4–10 MultiBay Drive Media This section provides information on using optional optical disc drives (such as CD-ROM and DVD drives) and optional diskette drives in the MultiBay. Inserting an Optical Disc 1. Turn on the notebook. 2. Press the release button 1 on the drive bezel to release the media tray. 3. Pull out the tray 2 until it is fully extended. Position a CD or one-sided DVD over the tray with the label side up. 4. Gently press the disc 3 onto the tray spindle until the disc snaps into place. Handle the disc by the edges, not the flat surfaces. If the media tray is not fully extended, tilt the disc to position it over the tray spindle, then press it into position. 5. Close the media tray. Your model might vary slightly from this illustration. ✎ After you insert a DVD, a short pause is normal as Autorun opens the DVD and the WinDVD player if the WinDVD has been installed. To install WinDVD player, see the “Optical Drive Software” chapter in the Software Guide on the Documentation CD. If Autorun is not enabled, see “Displaying Optical Disc Contents” later in this chapter. 348383-001.book Page 10 Friday, September 12, 2003 10:50 AM Drives Hardware Guide4–11 Removing an Optical Disc (With Power) If power is available: 1. Turn on the notebook. 2. Press the release button 1 on the drive bezel to release the media tray, then pull the tray 2 out until it is fully extended. 3. Remove the disc 3 from the tray by gently pressing down on the spindle while lifting the outer edges of the disc. Handle the disc by the edges, not the flat surfaces. If the media tray is not fully extended, tilt the disc as you remove it. 4. Close the media tray and place the disc in a protective case. Yo…
Text truncated - open the document above for the full version.
Users Manual
Regulatory and Safety Notices Document Part Number: 316782-003 December 2003 This guide includes all country-specific regulatory notices and compliance information for your computer except the notices concerning wireless communication. Additional wireless regulatory notices may be included with your computer. 316782-003.book Page i Thursday, October 2, 2003 11:08 AM © 2003 Hewlett-Packard Development Company, L.P. The information contained herein is subject to change without notice. The only warranties for HP products and services are set forth in the express warranty statements accompanying such products and services. Nothing herein should be construed as constituting an additional warranty. HP shall not be liable for technical or editorial errors or omissions contained herein. Regulatory and Safety Notices Third Edition December 2003 First Edition February 2003 Document Part Number: 316782-003 316782-003.book Page iii Thursday, October 2, 2003 11:08 AM Regulatory and Safety Noticesiii Contents 1 Regulatory Notices Federal Communications Commission Notice. . . . . . . . . 1–1 Modifications. . . . . . . . . . . . . . . . . . . . . . . . . . . . . . . 1–2 Cables . . . . . . . . . . . . . . . . . . . . . . . . . . . . . . . . . . . . 1–2 Declaration of Conformity for Products Marked with the FCC Logo (United States Only) . . . . . . . . . . . . . 1–2 Canadian Notice . . . . . . . . . . . . . . . . . . . . . . . . . . . . . . . . 1–3 Avis Canadien . . . . . . . . . . . . . . . . . . . . . . . . . . . . . . . . . 1–3 European Union Notice . . . . . . . . . . . . . . . . . . . . . . . . . . 1–3 Japanese Notice . . . . . . . . . . . . . . . . . . . . . . . . . . . . . . . . 1–4 Korean Notice . . . . . . . . . . . . . . . . . . . . . . . . . . . . . . . . . 1–4 Airline Travel Notice . . . . . . . . . . . . . . . . . . . . . . . . . . . . 1–4 Energy Star Compliance . . . . . . . . . . . . . . . . . . . . . . . . . 1–4 Battery Notices. . . . . . . . . . . . . . . . . . . . . . . . . . . . . . . . . 1–5 Power Cords Notice . . . . . . . . . . . . . . . . . . . . . . . . . . . . . 1–6 German Ergonomics Notice . . . . . . . . . . . . . . . . . . . . . . . 1–7 Macrovision Corporation Notice . . . . . . . . . . . . . . . . . . . 1–7 Laser Safety Notices . . . . . . . . . . . . . . . . . . . . . . . . . . . . 1–8 CDRH Regulations. . . . . . . . . . . . . . . . . . . . . . . . . . . . . . 1–8 Laser Information. . . . . . . . . . . . . . . . . . . . . . . . . . . . . . . 1–9 Modem Notices . . . . . . . . . . . . . . . . . . . . . . . . . . . . . . . 1–10 Important Safety Instructions . . . . . . . . . . . . . . . . . 1–10 Telecommunications Device Approvals . . . . . . . . . 1–11 U.S. Modem Statements . . . . . . . . . . . . . . . . . . . . . 1–11 Canadian Modem Statements . . . . . . . . . . . . . . . . . 1–13 New Zealand Modem Statements . . . . . . . . . . . . . . 1–14 316782-003.book Page iii Thursday, October 2, 2003 11:08 AM ivRegulatory and Safety Notices Contents 2 Electrostatic Discharge Preventing Electrostatic Discharge . . . . . . . . . . . . . . . . . 2–1 Handling Drives. . . . . . . . . . . . . . . . . . . . . . . . . . . . . 2–1 Handling Internal Components . . . . . . . . . . . . . . . . . 2–1 Grounding Methods . . . . . . . . . . . . . . . . . . . . . . . . . . . . . 2–2 316782-003.book Page iv Thursday, October 2, 2003 11:08 AM Regulatory and Safety Notices1–1 1 Regulatory Notices This chapter provides all country-specific regulatory notices and compliance information for your computer except the notices concerning wireless communication. Additional wireless regulatory notices may be included with your computer. Federal Communications Commission Notice This equipment has been tested and found to comply with the limits for a Class B digital device, pursuant to Part 15 of the FCC Rules. These limits are designed to provide reasonable protection against harmful interference in a residential installation. This equipment generates, uses, and can radiate radio frequency energy and, if not installed and used in accordance with the instructions, may cause harmful interference to radio communications. However, there is no guarantee that interference will not occur in a particular installation. If this equipment does cause harmful interference to radio or television reception, which can be determined by turning the equipment off and on, the user is encouraged to try to correct the interference by one or more of the following measures: ■Reorient or relocate the receiving antenna. ■Increase the separation between the equipment and receiver. ■Connect the equipment into an outlet on a circuit different from that to which the receiver is connected. ■Consult the dealer or an experienced radio or television technician for help. 316782-003.book Page 1 Thursday, October 2, 2003 11:08 AM 1–2Regulatory and Safety Notices Regulatory Notices Modifications The FCC requires the user to be notified that any changes or modifications made to this device that are not expressly approved by HP may void the user’s authority to operate the equipment. Cables Connections to this device must be made with shielded cables with metallic RFI/EMI connector hoods to maintain compliance with FCC Rules and Regulations. Declaration of Conformity for Products Marked with the FCC Logo (United States Only) This device complies with Part 15 of the FCC Rules. Operation is subject to the following 2 conditions: 1. This device may not cause harmful interference. 2. This device must accept any interference received, including interference that may cause undesired operation. If you have questions about your product that are not related to this declaration, refer to the printed Worldwide Telephone Numbers booklet included with your product for customer support information. Or write to: Hewlett-Packard Company P. O. Box 692000, Mail Stop 530113 Houston, TX 77269-2000 For questions regarding this FCC declaration, write to: Hewlett-Packard Comp…
Text truncated - open the document above for the full version.
Contact Information
Applicant
Richard P Tarsio(US Canada Technical Regulations)
Technical Contact
Compatible Electronics, Inc.Kyle Fujimoto
[email protected]714-579-0500
114 Olinda Drive · Brea, California · United States
Test Firm
Compatible ElectronicsScott McCutchan
714-579-0500Fax: 714-579-1850
Technical Specifications
| # | Rule Parts | Frequency Range | Power Output |
|---|---|---|---|
| 1 | 15C | 2.41 GHz - 2.46 GHz | 46.00 mW |
Other Applications from HP Inc.
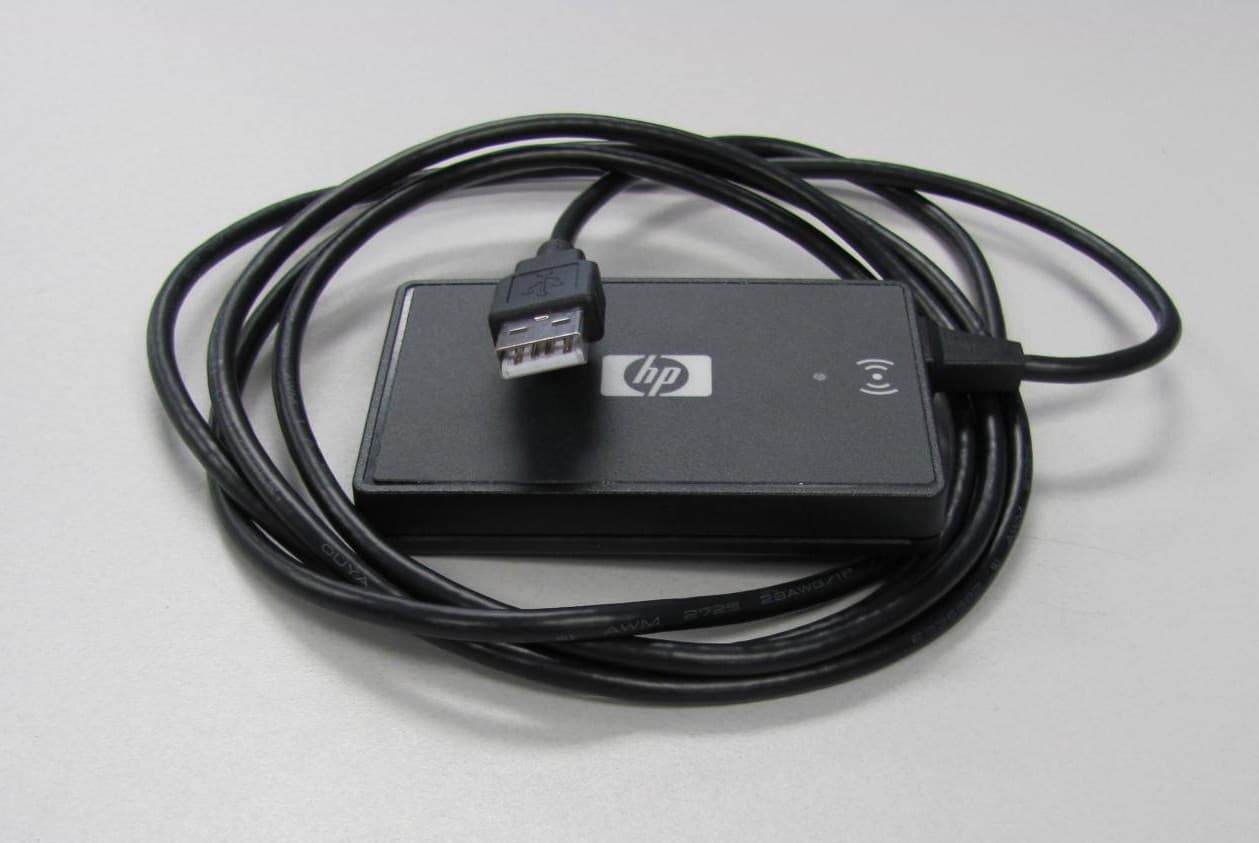
CNTBOISB110600
Jul 17, 2011Multi-Protocol RFID Reader
Equipment Class
DXX - Part 15 Low Power Communication Device Transmitter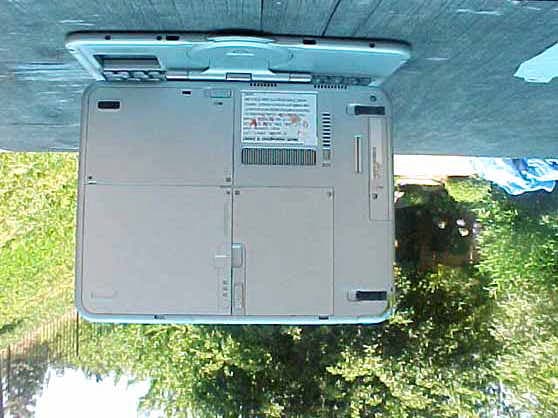
CNTWM3B2915ABG
Dec 19, 2004Intel Mini PCI Type 802.11ABG WLAN Adapter
Equipment Class
NII - Unlicensed National Information Infrastructure TX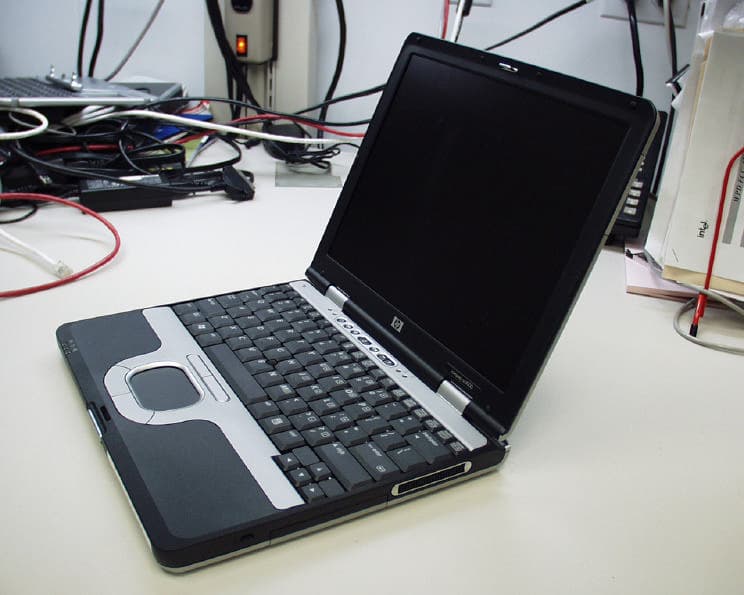
CNTPP2170SIL
Apr 08, 2004Laptop with WLAN and Bluetooth
Equipment Class
DTS - Digital Transmission System
CNTWM3B2200BGA
Feb 29, 2004Laptop w/ Intel 802.11 BG Wireless LAN Adapter
Equipment Class
DTS - Digital Transmission System
CNTPP3006
Oct 14, 2003Tablet PC with WLAN
Equipment Class
DTS - Digital Transmission System