CNTPP2090Notebook PC with Built-in Wireless LAN
HP Inc.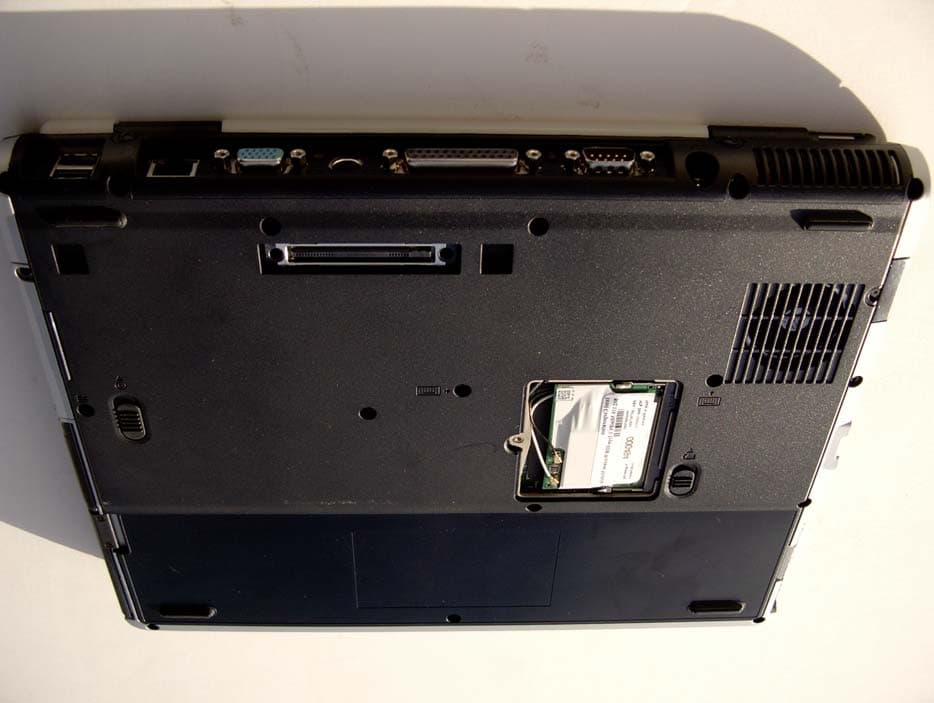
Click to zoom
Application Details
- Equipment Class
- DSS - Part 15 Spread Spectrum Transmitter
- Date of Grant
- Aug 26, 2003
- Application Purpose
- Original Equipment
- Date of Application
- Aug 26, 2003
- Equipment Note
- Notebook PC with Built-in Wireless LAN
- Frequency Range
- 2412.00000000 - 2462.00000000
- Company
- HP Inc.
- Country
- United States
Documents & Files
Document Text
Text extracted from the exhibit documents filed with the FCC. Open a document above to read the original.
Users Manual
Calexico Compliance Document Page 1 12/20/02 Mobile Communications Division Compliance Notices Source Document for OEMs Calexico Created: 09/25/02 Last Updated: 12/20/02TL Authors: Paul Straley, Tony Lukyn Calexico Compliance Document Page 2 12/20/02 Revision History Date Changes 09/25/02 Created document 10/03/02 Corrected errors in document, added 3 additional Mini PCI models, genericized product references to refer to “LAN Mini PCI Adapters” 10/08/02 Added Annex II under 1999/5/EC for 2.4 GHz products (PS) 12/18/02 Added “Information for the OEM” page 1 and additional text for OEM integrators page 4 (TL) 12/20/02 Added End Product Label: FCC ID “XXXXXXXX’ info. Calexico Compliance Document Page 3 12/20/02 Intel(R) PRO/Wireless LAN 7100 and 2100 Mini PCI Adapters Safety and Regulatory Notices Information for the OEM Integrators: Please refer to the full Grant of equipment document for other restrictions. Note: The following regulatory and safety notices must be published in compliance with local regulations. This information applies to the following products: Intel(R) PRO/Wireless LAN 7100 3B Mini PCI Adapter (model WM3B7100; dual 802.11a and 802.11b) Intel(R) PRO/Wireless LAN 7100 3A Mini PCI Adapter (model WM3A7100; dual 802.11a and 802.11b) Intel(R) PRO/Wireless LAN 2100 3B Mini PCI Adapter (model WM3B2100; 802.11b only) Intel(R) PRO/Wireless LAN 2100 3A Mini PCI Adapter (model WM3A2100; 802.11b only) Local Restriction of 802.11a and 802.11b Radio Usage The following statement on local restrictions must be published as part of the compliance documentation for all 802.11a and 802.11b products. Caution: Due to the fact that the frequencies used by 802.11a and 802.11b wireless LAN devices may not yet be harmonized in all countries, 802.11a and 802.11b products are designed for use only in specific countries, and are not allowed to be operated in countries other than those of designated use. As a user of these products, you are responsible for ensuring that the products are used only in the countries for which they were intended and for verifying that they are configured with the correct selection of frequency and channel for the country of use. Any deviation from permissible settings and restrictions in the country of use could be an infringement of national law and may be punished as such. USA and Canada Safety Requirements and Notices The FCC with its action in ET Docket 96-8 has adopted a safety standard for human exposure to radio frequency (RF) electromagnetic energy emitted by FCC certified equipment. The Intel PRO/Wireless LAN Mini PCI Adapter products meet the Human Exposure limits found in OET Bulletin 65, 2001, and ANSI/IEEE C95.1, 1992. Proper operation of this radio according to the instructions found in this manual will result in exposure substantially below the FCC’s recommended limits. The following safety precautions should be observed: • Do not touch or move antenna while the unit is transmitting or receiving. • Do not hold any component containing the radio such that the antenna is very close or touching any exposed parts of the body, especially the face or eyes, while transmitting. • Do not operate the radio or attempt to transmit data unless the antenna is connected; if not, the radio may be damaged. • Use in specific environments: o The use of wireless devices in hazardous locations is limited by the constraints posed by the safety directors of such environments. o The use of wireless devices on airplanes is governed by the Federal Aviation Administration (FAA). o The use of wireless devices in hospitals is restricted to the limits set forth by each hospital. • Antenna use: o In order to comply with FCC RF exposure limits, low gain integrated antennas should be located at a minimum distance of 20 cm (8 inches) or more from the body of all persons. o High-gain, wall-mount, or mast-mount antennas are designed to be professionally installed and should be located at a minimum distance of 30 cm (12 inches) or more from the body of all persons. Please contact your professional installer, VAR, or antenna manufacturer for proper installation requirements. Explosive Device Proximity Warning Warning: Do not operate a portable transmitter (such as a wireless network device) near unshielded blasting caps or in an explosive environment unless the device has been modified to be qualified for such use. Antenna Warning Warning: To comply with the FCC and ANSI C95.1 RF exposure limits, it is recommended for Intel(R) PRO/Wireless LAN Mini PCI Adapters installed in a desktop or portable computer, that the antenna for this device be installed so as to provide a separation distance of al least 20 cm (8 inches) from all persons and that the antenna must not be co-located or operating in conjunction with any other antenna or radio transmitter. It is recommended that the user limit exposure time if the antenna is positioned closer than 20 cm (8 inches). Use On Aircraft Caution Caution: Regulations of the FCC and FAA prohibit airborne operation of radio-frequency wireless devices because their signals could interfere with critical aircraft instruments. Other Wireless Devices Safety Notices for Other Devices in the Wireless Network: Refer to the documentation supplied with wireless Ethernet adapters or other devices in the wireless network. This device is intended for OEM integrators only. This device cannot be co-located with any other transmitter. Calexico Compliance Document Page 4 12/20/02 This device is intended only for OEM integrators under the following conditions: 1) The antenna must be installed such that 20 cm is maintained between the antenna and users. For laptop installations, the antenna must be installed to ensure that the proper spacing is maintained in the event the users places the device in their lap during use (i.e. positioning of antennas must be placed in the upper portion of the LCD panel only to ensure 20 cm will be maintained if the user places the device in their …
Text truncated - open the document above for the full version.
Users Manual
Regulatory and Safety Notices Document Part Number: 316782-002 August 2003 This guide includes all country-specific regulatory notices and compliance information for your notebook except the notices concerning wireless communication. Wireless communication notices are provided in other notebook documentation, for example in the Reference Guide, Hardware Guide or Startup Guide. © 2003 Hewlett-Packard Development Company, L.P. The information contained herein is subject to change without notice. The only warranties for HP products and services are set forth in the express warranty statements accompanying such products and services. Nothing herein should be construed as constituting an additional warranty. HP shall not be liable for technical or editorial errors or omissions contained herein. Regulatory and Safety Notices Second Edition August 2003 First Edition February 2003 Document Part Number: 316782-002 Regulatory and Safety Noticesiii Contents 1 Regulatory Notices Federal Communications Commission Notice. . . . . . . . . 1–1 Modifications. . . . . . . . . . . . . . . . . . . . . . . . . . . . . . . 1–2 Cables . . . . . . . . . . . . . . . . . . . . . . . . . . . . . . . . . . . . 1–2 Declaration of Conformity for Products Marked with the FCC Logo (United States Only) . . . . . . . . . 1–2 Canadian Notice . . . . . . . . . . . . . . . . . . . . . . . . . . . . . . . . 1–3 Avis Canadien . . . . . . . . . . . . . . . . . . . . . . . . . . . . . . . . . 1–3 European Union Notice . . . . . . . . . . . . . . . . . . . . . . . . . . 1–3 Japanese Notice . . . . . . . . . . . . . . . . . . . . . . . . . . . . . . . . 1–4 Korean Notice . . . . . . . . . . . . . . . . . . . . . . . . . . . . . . . . . 1–4 Airline Travel Notice . . . . . . . . . . . . . . . . . . . . . . . . . . . . 1–4 Energy Star Compliance . . . . . . . . . . . . . . . . . . . . . . . . . 1–4 Battery Notices. . . . . . . . . . . . . . . . . . . . . . . . . . . . . . . . . 1–5 Power Cords Notice . . . . . . . . . . . . . . . . . . . . . . . . . . . . . 1–6 German Ergonomics Notice . . . . . . . . . . . . . . . . . . . . . . . 1–6 Macrovision Corporation Notice . . . . . . . . . . . . . . . . . . . 1–7 Laser Safety Notices . . . . . . . . . . . . . . . . . . . . . . . . . . . . 1–8 CDRH Regulations . . . . . . . . . . . . . . . . . . . . . . . . . . 1–8 Laser Information. . . . . . . . . . . . . . . . . . . . . . . . . . . . . . . 1–9 Modem Notices . . . . . . . . . . . . . . . . . . . . . . . . . . . . . . . . 1–9 Important Safety Instructions . . . . . . . . . . . . . . . . . . 1–9 Telecommunications Device Approvals . . . . . . . . . 1–10 U.S. Modem Statements . . . . . . . . . . . . . . . . . . . . . 1–10 Canadian Modem Statements . . . . . . . . . . . . . . . . . 1–12 New Zealand Modem Statements . . . . . . . . . . . . . . 1–13 ivRegulatory and Safety Notices 2 Electrostatic Discharge Preventing Electrostatic Discharge . . . . . . . . . . . . . . . . . 2–1 Handling Drives. . . . . . . . . . . . . . . . . . . . . . . . . . . . . 2–1 Handling Internal Components . . . . . . . . . . . . . . . . . 2–1 Grounding Methods . . . . . . . . . . . . . . . . . . . . . . . . . . . . . 2–2 Regulatory and Safety Notices1–1 1 Regulatory Notices This chapter provides all country-specific regulatory notices and compliance information for your notebook except the notices concerning wireless communication. Wireless communication notices are provided in other notebook documentation, for example in the Reference Guide, Hardware Guide or Startup Guide. Federal Communications Commission Notice This equipment has been tested and found to comply with the limits for a Class B digital device, pursuant to Part 15 of the FCC Rules. These limits are designed to provide reasonable protection against harmful interference in a residential installation. This equipment generates, uses, and can radiate radio frequency energy and, if not installed and used in accordance with the instructions, may cause harmful interference to radio communications. However, there is no guarantee that interference will not occur in a particular installation. If this equipment does cause harmful interference to radio or television reception, which can be determined by turning the equipment off and on, the user is encouraged to try to correct the interference by one or more of the following measures: ■Reorient or relocate the receiving antenna. ■Increase the separation between the equipment and receiver. ■Connect the equipment into an outlet on a circuit different from that to which the receiver is connected. ■Consult the dealer or an experienced radio or television technician for help. 1–2Regulatory and Safety Notices Regulatory Notices Modifications The FCC requires the user to be notified that any changes or modifications made to this device that are not expressly approved by HP may void the user’s authority to operate the equipment. Cables Connections to this device must be made with shielded cables with metallic RFI/EMI connector hoods to maintain compliance with FCC Rules and Regulations. Declaration of Conformity for Products Marked with the FCC Logo (United States Only) This device complies with Part 15 of the FCC Rules. Operation is subject to the following two conditions: 1. This device may not cause harmful interference. 2. This device must accept any interference received, including interference that may cause undesired operation. If you have questions about your product that are not related to this declaration, refer to the printed Worldwide Telephone Numbers booklet included with your product for customer support information. Or write to: Hewlett-Packard Company P. O. Box 692000, Mail Stop 530113 Houston, TX 77269-2000 For questions regarding this FCC declaration, write to: Hewlett-Packard Company P. O. Box 692000, Mail Stop 510101 Houston, TX 77269-2000 Or call HP at 281-514-3333. To identify your product, refer to the part, series, or model number found on the prod…
Text truncated - open the document above for the full version.
Users Manual
Intel(R) PRO/Wireless LAN Mini PCI Adapter User's Guide This document provides information for the following wireless devices: l Intel(R) PRO/Wireless LAN 7100 3B Mini PCI Adapter, operating at 5 GHz l Intel(R) PRO/Wireless LAN 2100 3B Mini PCI Adapter, operating at 2.4 GHz These wireless adapters operate with high-capacity networks using multiple access points within large or small environments. Using the Intel(R) PROSet Windows utility you can configure, manage wireless local area network (WLAN) management tasks, adapter switching functions, and connections. Wireless LAN General Information About Wireless LAN Technology Administrator's Guide Adapter Setup and Configuration Software Installation Using PROSet Connecting to a Network Security Overview Setting Up Security Troubleshooting Specifications Glossary Support and Warranty Customer Support Software License Safety and Regulatory Notices Limited Warranty Adapter Registration Legal Notices Copyright © 2002 Intel Corporation. All rights reserved. Intel Corporation, 5200 N.E. Elam Young Parkway, Hillsboro, OR 97124-6497 Intel Corporation assumes no responsibility for errors or omissions in this document. Nor does Intel make any commitment to update the information contained herein. Intel, Itanium, and Pentium are trademarks or registered trademarks of Intel Corporation or its subsidiaries in the United States and other countries. *Other names and brands may be claimed as the property of others. Back to Contents Page About Wireless LAN Technology l Choosing a WLAN l Configuring a WLAN l Identifying a WLAN l Surveying the Site of Your WLAN l Factors Affecting Range l Stronger Security A wireless network connects computers without using network cables. Computers use radio communications to send data between each other. You can communicate directly with other wireless computers, or connect to an existing network through a wireless access point. When you set up your wireless adapter, you select the operating mode for the kind of wireless network you want. You can use your Intel(R) PRO/Wireless adapter to connect to other similar wireless devices that comply with the 802.11 standard for wireless networking. Choosing a Wireless LAN Mode Wireless LANs can operate with or without access points, depending on the number of users in the network. Infrastructure mode uses access points to allow wireless computers to send and receive information. Wireless computers transmit to the access point, the access point receives the information and rebroadcasts it to other computers. The access point can also connect to a wired network or to the Internet. Multiple access points can work together to provide coverage over a wide area. Peer-to-Peer mode, also called Ad Hoc mode, works without access points and allows wireless computers to send information directly to other wireless computers. You can use Peer-to-Peer mode to network computers in a home or small office or to set up a temporary wireless network for a meeting. Configuring a Wireless LAN There are three basic components that must be configured for a wireless LAN to operate properly: l Network Name—Each wireless network uses a unique Network Name to identify the network. This name is called the Service Set Identifier (SSID). When you set up your wireless adapter, you specify the SSID. If you want to connect to an existing network, you must use the name for that network. If you are setting up your own network you can make up your own name and use it on each computer. The name can be up to 32 characters long and contain letters and numbers. l Profiles—When you set up your computer to access a wireless network, Intel(R) PROSet creates a profile for the wireless settings that you specify. If you want to connect to another network, you can scan for existing networks and make a temporary connection, or create a new profile for that network. After you create profiles, your computer will automatically connect when you change locations. l Security—The 802.11 wireless networks use encryption to help protect your data. Wired equivalent privacy (WEP) uses a 64-bit or 128-bit shared encryption key to scramble data. Before a computer transmits data, it scrambles the data using the secret encryption key. The receiving computer uses this same key to unscramble the data. If you are connecting to an existing network, use the encryption key provided by the administrator of the wireless network. If you are setting up your own network you can make up your own key and use it on each computer. Identifying a Wireless Network Depending on the size and components of a wireless LAN, there are many ways to identify a wireless LAN: l The Network Name or Service Set Identifier (SSID)—Identifies a wireless network. All wireless devices on the network must use the same SSID. l Extended Service Set Identifier (ESSID)—A special case of SSID used to identify a wireless network that includes access points. l Independent Basic Service Set Identifier (IBSSID)—A special case of SSID used to identify a network of wireless computers configured to communicate directly with one another without using an access point. l Basic Service Set Identifier (BSSID)—A unique identifier for each wireless device. The BSSID is the Ethernet MAC address of the device. l Broadcast SSID—An access point can respond to computers sending probe packets with the broadcast SSID. If this feature is enabled on the access point, any wireless user can associate with the access point by using a blank (null) SSID. Surveying the Site of Your Wireless LAN Conducting a site survey for your wireless LAN is the most crucial step in the process of setting up a wireless network. It greatly reduces the amount of troubleshooting you will have to do once you have the wireless LAN set up and ready for connection testing. To conduct a site survey, you will need the following tools: l An access point (or laptop computer) that is set up to be the transmitter. It should be mounted near a…
Text truncated - open the document above for the full version.
Users Manual
Hardware Guide HP Compaq Notebook Series Document Part Number: 333644-001 August 2003 This guide explains how to identify and use notebook hardware features, including connectors for external devices. It also includes power and environmental specifications, which may be helpful when traveling with the notebook. 333644-001.book Page i Thursday, July 10, 2003 2:56 PM © 2003 Hewlett-Packard Development Company, L.P. Microsoft and Windows are trademarks of Microsoft Corporation in the U.S. and/or other countries. Intel and SpeedStep are trademarks of Intel Corporation in the U.S. and/or other countries. SD Logo is a trademark. The information contained herein is subject to change without notice. The only warranties for HP products and services are set forth in the express warranty statements accompanying such products and services. Nothing herein should be construed as constituting an additional warranty. HP shall not be liable for technical for editorial errors or omissions contained herein. Hardware Guide HP Compaq Notebook Series First Edition August 2003 Reference Number: nc6000 Document Part Number: 333644-001 333644-001.book Page iii Thursday, July 10, 2003 2:56 PM Hardware Guideiii Contents 1 Notebook Features Pointing Device Components. . . . . . . . . . . . . . . . . . . . . . 1–1 TouchPad Model . . . . . . . . . . . . . . . . . . . . . . . . . . . . 1–1 Dual Pointing Device Model . . . . . . . . . . . . . . . . . . . 1–2 Top Components . . . . . . . . . . . . . . . . . . . . . . . . . . . . . . . 1–3 Lights . . . . . . . . . . . . . . . . . . . . . . . . . . . . . . . . . . . . . . . . 1–6 Left Side Components . . . . . . . . . . . . . . . . . . . . . . . . . . . 1–8 Right Side Components . . . . . . . . . . . . . . . . . . . . . . . . . . 1–9 Front View Components . . . . . . . . . . . . . . . . . . . . . . . . 1–11 Rear View Components . . . . . . . . . . . . . . . . . . . . . . . . . 1–13 Bottom Components. . . . . . . . . . . . . . . . . . . . . . . . . . . . 1–15 Labels . . . . . . . . . . . . . . . . . . . . . . . . . . . . . . . . . . . . . . . 1–17 2 Pointing Devices and Keyboard Using a Pointing Device. . . . . . . . . . . . . . . . . . . . . . . . . . 2–1 Using the Pointing Stick . . . . . . . . . . . . . . . . . . . . . . 2–3 Using the TouchPad. . . . . . . . . . . . . . . . . . . . . . . . . . 2–3 Using an External Mouse . . . . . . . . . . . . . . . . . . . . . 2–4 Setting Pointing Device Preferences . . . . . . . . . . . . . 2–4 Using Hotkeys and Shortcut Keys . . . . . . . . . . . . . . . . . . 2–5 Identifying fn and Function Keys . . . . . . . . . . . . . . . 2–5 Hotkey and Shortcut Key Quick Reference . . . . . . . 2–6 Initiating Standby (fn+f3) . . . . . . . . . . . . . . . . . . . . . 2–6 Switching Displays (fn+f4) . . . . . . . . . . . . . . . . . . . . 2–7 Viewing Battery Charge Information (fn+f8) . . . . . . 2–7 333644-001.book Page iii Thursday, July 10, 2003 2:56 PM ivHardware Guide Contents Decreasing Screen Brightness (fn+f9). . . . . . . . . . . . 2–8 Increasing Screen Brightness (fn+f10) . . . . . . . . . . . 2–8 Displaying System Information (fn+esc) . . . . . . . . . 2–8 Using Hotkeys and Shortcut Keys with External Keyboards . . . . . . . . . . . . . . . . . . . . . . . . . . . . . . . . . 2–8 Using Quick Launch Buttons . . . . . . . . . . . . . . . . . . . . . . 2–9 Using Keypads . . . . . . . . . . . . . . . . . . . . . . . . . . . . . . . . 2–10 Using the Embedded Numeric Keypad . . . . . . . . . . 2–10 Using an External Keypad . . . . . . . . . . . . . . . . . . . . 2–12 3 Battery Packs Running the Notebook on Battery Power . . . . . . . . . . . . 3–1 Identifying Battery Packs . . . . . . . . . . . . . . . . . . . . . . . . . 3–2 Inserting or Removing a Primary Battery Pack . . . . . . . . 3–3 Inserting or Removing a MultiBay Battery Pack . . . . . . . 3–4 Charging a Battery Pack. . . . . . . . . . . . . . . . . . . . . . . . . . 3–6 Charging a New Battery Pack . . . . . . . . . . . . . . . . . . 3–7 Charging an In-Use Battery Pack . . . . . . . . . . . . . . . 3–7 Charging a Primary and MultiBay Battery Pack . . . . 3–7 Monitoring the Charge in a Battery Pack. . . . . . . . . . . . . 3–8 Obtaining Accurate Charge Information . . . . . . . . . . 3–8 Displaying Charge Information on the Screen . . . . . 3–8 Displaying Charge Information on a MultiBay Battery Pack. . . . . . . . . . . . . . . . . . . . . . . . . . . . . . . 3–10 Managing Low-Battery Conditions . . . . . . . . . . . . . . . . 3–11 Identifying Low-Battery Conditions . . . . . . . . . . . . 3–11 Resolving Low-Battery Conditions . . . . . . . . . . . . . 3–12 Calibrating a Battery Pack . . . . . . . . . . . . . . . . . . . . . . . 3–13 When to Calibrate . . . . . . . . . . . . . . . . . . . . . . . . . . 3–13 Battery Conservation Procedures and Settings . . . . . . . 3–17 Conserving Power As You Work . . . . . . . . . . . . . . 3–17 Selecting Power Conservation Settings . . . . . . . . . . 3–18 Storing a Battery Pack . . . . . . . . . . . . . . . . . . . . . . . . . . 3–19 Disposing of a Used Battery Pack . . . . . . . . . . . . . . . . . 3–20 Finding More Power Information . . . . . . . . . . . . . . . . . 3–20 333644-001.book Page iv Thursday, July 10, 2003 2:56 PM Contents Hardware Guidev 4 Drives Caring for Drives . . . . . . . . . . . . . . . . . . . . . . . . . . . . . . . 4–1 Adding a Drive to the System . . . . . . . . . . . . . . . . . . . . . 4–3 Hard Drive . . . . . . . . . . . . . . . . . . . . . . . . . . . . . . . . . . . . 4–4 Identifying the Hard Drive Activity Light. . . . . . . . . 4–4 Replacing the Primary Hard Drive . . . . . . . . . . . . . . 4–5 MultiBay Drive . . . . . . . . . . . . . . . . . . . . . . . . . . . . . . . . 4–8 Identifying the MultiBay Activity Light . . . . . . . . . . 4–8 Using a MultiBay Hard Drive Adapter . . . . . . . . . . . 4–8 Inserting a Hard Drive into the MultiBay . . . . . . . . 4–11 Removing a Drive from the MultiBay. . . . . . . . . .…
Text truncated - open the document above for the full version.
Users Manual
Hardware Guide4–1 4 Drives Caring for Drives Drives are fragile notebook components that must be handled with care. The following cautions apply to all drives. Additional cautions are included with the procedures to which they apply. 333644-001.book Page 1 Thursday, July 10, 2003 2:56 PM 4–2Hardware Guide Drives Ä CAUTION: To prevent loss or damage to the notebook or a drive: ■Handle a drive carefully. Do not drop it. ■Excessive force can damage drive connectors. When you insert a drive, use only enough force to seat the drive. ■Do not spray a drive with cleaning fluid or other liquid or expose it to temperature extremes. ■Do not remove the primary hard drive (the hard drive in the hard drive bay) except for repair or replacement. ■Electrostatic discharge can damage electronic components. To prevent electrostatic damage to the notebook or a drive: ❏Discharge yourself from static electricity before handling a drive by touching a grounded metal object; and ❏Avoid touching the connectors on a drive. ❏For more information about preventing electrostatic damage, refer to the Regulatory and Safety Notices guide on the Documentation Library CD. ■Avoid exposing a drive or a diskette to devices with magnetic fields. Security devices with magnetic fields include airport walk-through devices and security wands. The airport security devices that check carry-on luggage, usually while it is placed on a conveyor belt, use x-rays instead of magnetism and will not damage a drive or a diskette. ■If you mail a drive, ship it in packaging that protects it from shock, vibration, temperature, and high humidity. Label the package “FRAGILE.” ✎ Airport security devices that check carry-on luggage placed on a conveyor belt use x-rays instead of magnetism and will not damage a hard drive. 333644-001.book Page 2 Thursday, July 10, 2003 2:56 PM Drives Hardware Guide4–3 Adding a Drive to the System Removable drives enable you to store and access data. ■A standard drive can be added to the system by inserting the drive into the notebook MultiBay or optional Advanced Port Replicator. ■A diskette drive can also be added. ■A USB drive can be added by connecting the drive to a USB connector on the notebook or optional Port Replicator. For information about connecting a USB drive, refer to the “External Devices” chapter in this book. The notebook has 2 drive bays: ■The hard drive bay supports only a hard drive. The hard drive in the hard drive bay is the primary hard drive. ■The MultiBay supports any MultiBay device, including the following: ❏Hard drive (inserted into a MultiBay hard drive adapter) ❏CD or CD-RW drive ❏DVD or DVD/CD-RW or DVD+RW ❏Diskette drive ❏MultiBay battery 333644-001.book Page 3 Thursday, July 10, 2003 2:56 PM 4–4Hardware Guide Drives Hard Drive This section discusses the primary hard drive of the notebook. Identifying the Hard Drive Activity Light The hard drive activity light turns on when the primary hard drive is being accessed. 333644-001.book Page 4 Thursday, July 10, 2003 2:56 PM Drives Hardware Guide4–5 Replacing the Primary Hard Drive The hard drive that is in the hard drive bay is the primary hard drive. Remove it only after the notebook is properly shut down. Ä CAUTION: To prevent system lockup and loss of information: ■Shut down the notebook before removing the hard drive from the hard drive bay. Do not remove the hard drive while the notebook is on, in Standby, or in Hibernation. ■If you are not sure whether the notebook is in Hibernation, turn the notebook on by pressing the power button. Then shut down the notebook through the operating system. To remove the primary hard drive: 1. Save your work. 2. Shut down the notebook and close the display. 3. Turn the notebook bottom side up. 4. Remove the hard drive security screw 1. 5. Remove the hard drive retaining screw 2. 333644-001.book Page 5 Thursday, July 10, 2003 2:56 PM 4–6Hardware Guide Drives 6. To remove the hard drive, lift the hard drive door 1, and pull the hard drive 2 out of the bay. To install a hard drive: 1. Lift the hard drive door 1. 2. Slide the hard drive 2 into the bay until the drive is seated. 333644-001.book Page 6 Thursday, July 10, 2003 2:56 PM Drives Hardware Guide4–7 3. Do one of the following: ❏If you have inserted a hard drive, reinsert the hard drive security screw 1 and hard drive retaining screw 2. ❏If you removed but did not replace a hard drive, put the hard drive retaining screw and hard drive security screw in a safe place. 333644-001.book Page 7 Thursday, July 10, 2003 2:56 PM 4–8Hardware Guide Drives MultiBay Drive This section explains how to use drives the MultiBay on the notebook. Identifying the MultiBay Activity Light The MultiBay activity light turns on when any MultiBay device is active, with the exception of the MultiBay battery pack. Using a MultiBay Hard Drive Adapter A hard drive must be inserted into an optional MultiBay hard drive adapter before it can be used in the MultiBay. The hard drive assembly (the hard drive inserted into the MultiBay adapter) is then inserted into and removed from the MultiBay in the same way as any other MultiBay device. 333644-001.book Page 8 Thursday, July 10, 2003 2:56 PM Drives Hardware Guide4–9 Inserting a Hard Drive into the Adapter 1. Slide the 2 adapter selection switches to the outer edge. 2. Lower the hard drive into the adapter, then slide the drive connectors on the drive toward the drive connectors in the adapter until the connectors engage and the hard drive is seated. 333644-001.book Page 9 Thursday, July 10, 2003 2:56 PM 4–10Hardware Guide Drives Removing a Hard Drive from the Adapter 1. Slide the adapter release latch to the outside as indicated below. 2. Gently disengage the drive connectors by sliding the drive away from the connectors, then remove the drive. 333644-001.book Page 10 Thursday, July 10, 2003 2:56 PM Drives Hardware Guide4–11 Inserting a Hard Drive into the MultiBay ✎ Before inserting a hard drive into the MultiBay, insert the drive…
Text truncated - open the document above for the full version.
Contact Information
Applicant
Richard P Tarsio(US Canada Technical Regulations)
Technical Contact
Aegis Labs, Inc.Rick Candelas
[email protected]949 459 7886
22431-B160 Antonio Parkway · Rancho Santa Margarita, California · United States
Test Firm
Bureau Veritas CPS (H.K.) Ltd. Taoyuan BranchRichard Chen
Technical Specifications
| # | Rule Parts | Frequency Range | Power Output |
|---|---|---|---|
| 1 | 15C | 2.41 GHz - 2.46 GHz | 49.00 mW |
Other Applications from HP Inc.
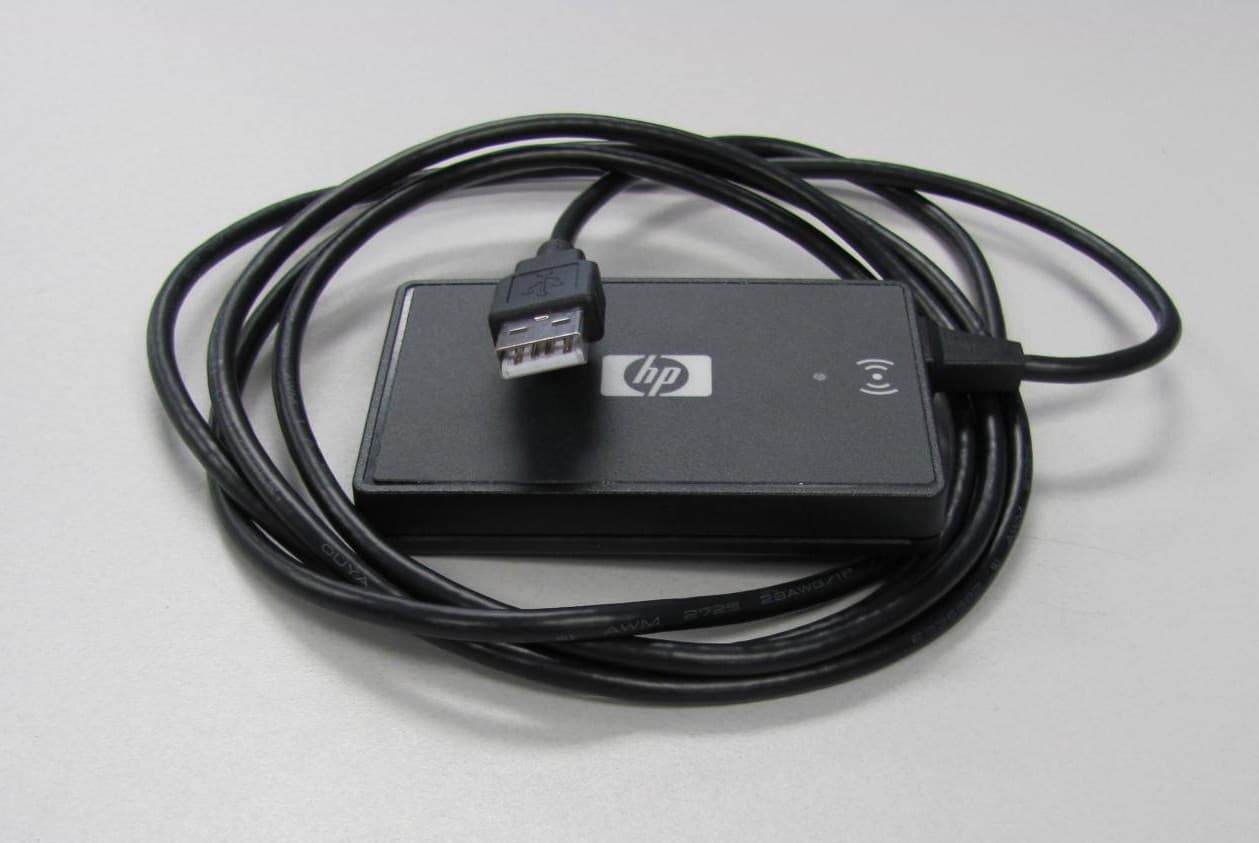
CNTBOISB110600
Jul 17, 2011Multi-Protocol RFID Reader
Equipment Class
DXX - Part 15 Low Power Communication Device Transmitter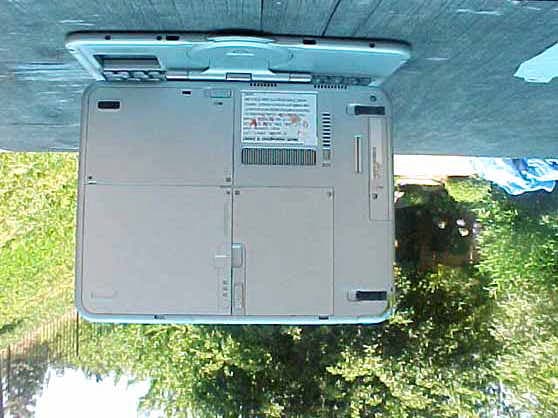
CNTWM3B2915ABG
Dec 19, 2004Intel Mini PCI Type 802.11ABG WLAN Adapter
Equipment Class
NII - Unlicensed National Information Infrastructure TX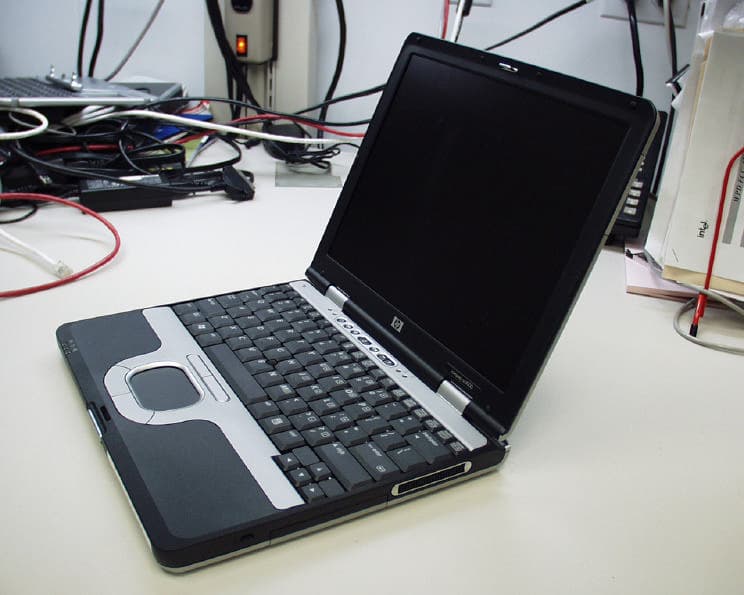
CNTPP2170SIL
Apr 08, 2004Laptop with WLAN and Bluetooth
Equipment Class
DTS - Digital Transmission System
CNTWM3B2200BGA
Feb 29, 2004Laptop w/ Intel 802.11 BG Wireless LAN Adapter
Equipment Class
DTS - Digital Transmission System
CNTHSTNN-I01C
Nov 13, 2003Notebook PC with Built-in Wireless
Equipment Class
DTS - Digital Transmission System