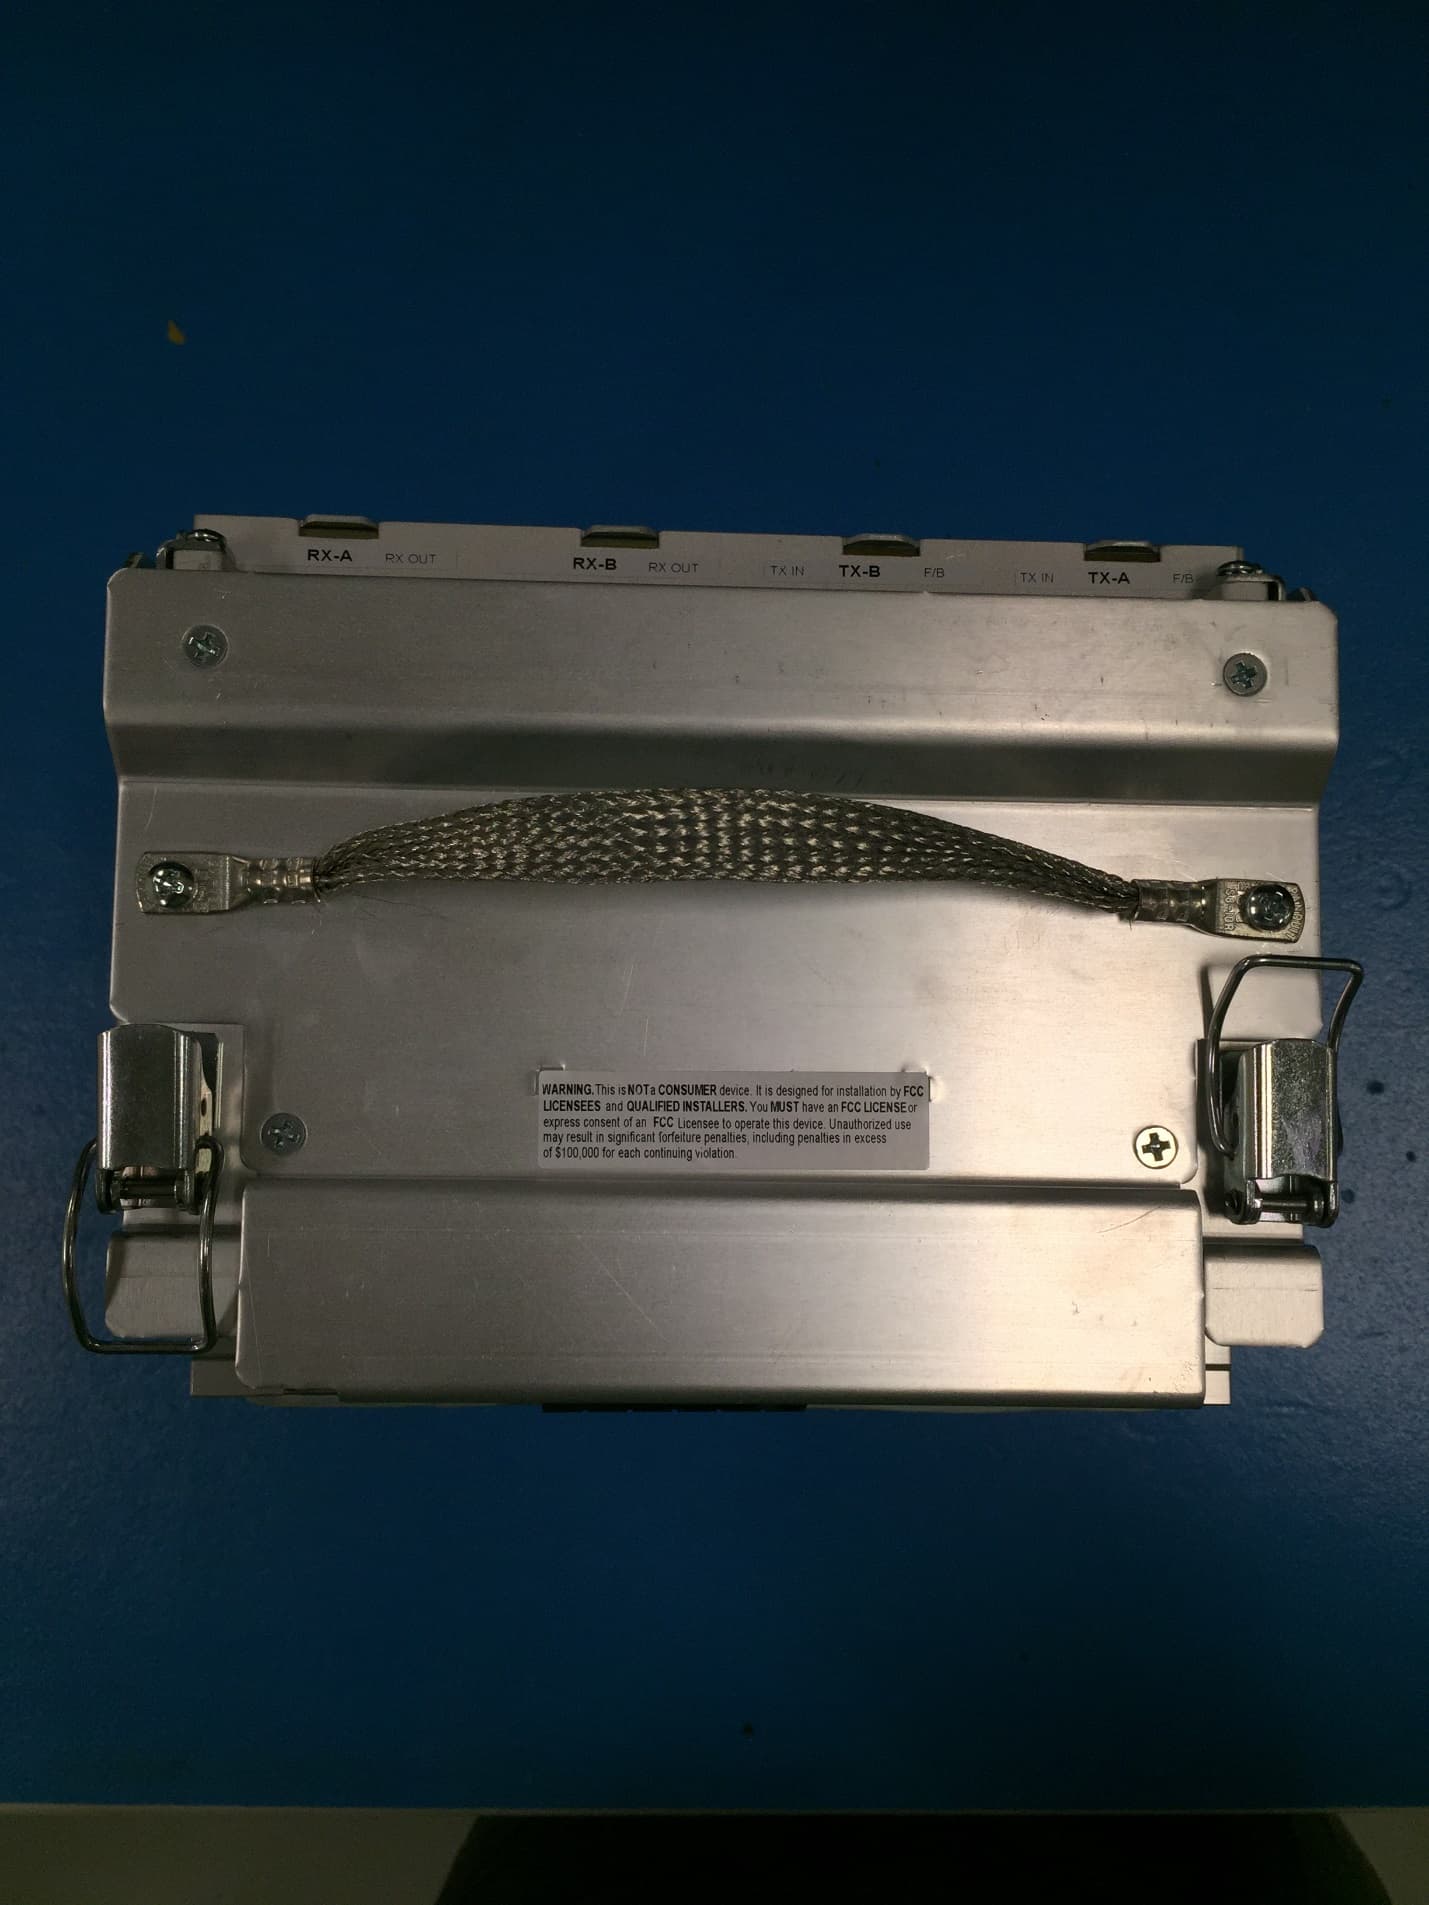
F8I-DLC1902BDigivance� LRCS 1900 MHz, 20-Watt LPA
ADC Telecommunications Inc
Click to zoom
Application Details
- Equipment Class
- AMP - Amplifier
- Date of Grant
- Mar 13, 2007
- Application Purpose
- Original Equipment
- Date of Application
- Mar 13, 2007
- Equipment Note
- Digivance� LRCS 1900 MHz, 20-Watt LPA
- Frequency Range
- 1930.00000000 - 1990.00000000
- Company
- ADC Telecommunications Inc
- Country
- United States
Documents & Files
Document Text
Text extracted from the exhibit documents filed with the FCC. Open a document above to read the original.
Users Manual
ADCP-75-158 Issue 1 July 2003 1263478 Rev A Digivance ® 1900 MHz 20 Watt System with Version 2.00.01 EMS Software Installation and Operation Manual 18641-C ADCP-75-158 Issue 1 July 2003 1263478 Rev A Digivance ® 1900 MHz 20 Watt System with Version 2.00.01 EMS Software Installation and Operation Manual ADCP-75-158 • Issue 1 • July 2003 • Preface Page ii COPYRIGHT © 2003, ADC Telecommunications, Inc. All Rights Reserved Printed in the U.S.A. REVISION HISTORY TRADEMARK INFORMATION ADC, Digivance, and PowerWorx are registered trademarks of ADC Telecommunications, Inc. Procomm Plus is a registered trademark of Quarterdeck Corporation. DISCLAIMER OF LIABILITY Contents herein are current as of the date of publication. ADC reserves the right to change the contents without prior notice. In no event shall ADC be liable for any damages resulting from loss of data, loss of use, or loss of profits and ADC further disclaims any and all liability for indirect, incidental, special, consequential or other similar damages. This disclaimer of liability applies to all products, publications and services during and after the warranty period. This publication may be verified at any time by contacting ADC’s Technical Assistance Center at 1-800-366-3891, extension 73475 (in U.S.A. or Canada) or 952-917-3475 (outside U.S.A. and Canada), or by e-mail to [email protected] ISSUEDATEREASON FOR CHANGE 107/2003Original issue. ADC Telecommunications, Inc. P.O. Box 1101, Minneapolis, Minnesota 55440-1101 In U.S.A. and Canada: 1-800-366-3891 Outside U.S.A. and Canada: (952) 938-8080 Fax: (952) 917-1717 ADCP-75-158 • Issue 1 • July 2003 • Preface Page iii © 2003, ADC Telecommunications, Inc. TABLE OF CONTENTS ContentPage ABOUT THIS MANUAL . . . . . . . . . . . . . . . . . . . . . . . . . . . . . . . . . . . . . . . . . . . . . . . . . . . . . . . . . . . . . . . . . . . . . . . . vii RELATED PUBLICATIONS . . . . . . . . . . . . . . . . . . . . . . . . . . . . . . . . . . . . . . . . . . . . . . . . . . . . . . . . . . . . . . . . . . . . . . vii ADMONISHMENTS . . . . . . . . . . . . . . . . . . . . . . . . . . . . . . . . . . . . . . . . . . . . . . . . . . . . . . . . . . . . . . . . . . . . . . . . . . viii GENERAL SAFETY PRECAUTIONS . . . . . . . . . . . . . . . . . . . . . . . . . . . . . . . . . . . . . . . . . . . . . . . . . . . . . . . . . . . . . . . . viii STANDARDS CERTIFICATION . . . . . . . . . . . . . . . . . . . . . . . . . . . . . . . . . . . . . . . . . . . . . . . . . . . . . . . . . . . . . . . . . . . . ix LIST OF ACRONYMS AND ABBREVIATIONS . . . . . . . . . . . . . . . . . . . . . . . . . . . . . . . . . . . . . . . . . . . . . . . . . . . . . . . . . . . ix SECTION 1: OVERVIEW 1INTRODUCTION. . . . . . . . . . . . . . . . . . . . . . . . . . . . . . . . . . . . . . . . . . . . . . . . . . . . . . . . . . . . . . . . . . . . . . . . 1-1 2 1900 MHZ 20 WATT SYSTEM OVERVIEW . . . . . . . . . . . . . . . . . . . . . . . . . . . . . . . . . . . . . . . . . . . . . . . . . . . . . . 1-1 2.1Basic System Components . . . . . . . . . . . . . . . . . . . . . . . . . . . . . . . . . . . . . . . . . . . . . . . . . . . . . . . . . . 1-1 2.2Base Transceiver Station to Host Unit Interface . . . . . . . . . . . . . . . . . . . . . . . . . . . . . . . . . . . . . . . . . . . . 1-3 2.3 Handset Interface . . . . . . . . . . . . . . . . . . . . . . . . . . . . . . . . . . . . . . . . . . . . . . . . . . . . . . . . . . . . . . . . 1-4 2.4Local Service Interface. . . . . . . . . . . . . . . . . . . . . . . . . . . . . . . . . . . . . . . . . . . . . . . . . . . . . . . . . . . . .1-4 2.5Remote NOC Interface . . . . . . . . . . . . . . . . . . . . . . . . . . . . . . . . . . . . . . . . . . . . . . . . . . . . . . . . . . . . . 1-5 3SYSTEM FUNCTIONS AND FEATURES . . . . . . . . . . . . . . . . . . . . . . . . . . . . . . . . . . . . . . . . . . . . . . . . . . . . . . . . 1-6 3.1Fiber Optic Transport . . . . . . . . . . . . . . . . . . . . . . . . . . . . . . . . . . . . . . . . . . . . . . . . . . . . . . . . . . . . . . 1-6 3.2Control and Monitoring Software . . . . . . . . . . . . . . . . . . . . . . . . . . . . . . . . . . . . . . . . . . . . . . . . . . . . . . 1-9 3.3Fault Detection and Alarm Reporting . . . . . . . . . . . . . . . . . . . . . . . . . . . . . . . . . . . . . . . . . . . . . . . . . . . 1-9 3.4Powering . . . . . . . . . . . . . . . . . . . . . . . . . . . . . . . . . . . . . . . . . . . . . . . . . . . . . . . . . . . . . . . . . . . . . . 1-9 3.5Equipment Mounting and Configuration . . . . . . . . . . . . . . . . . . . . . . . . . . . . . . . . . . . . . . . . . . . . . . . . . 1-9 SECTION 2: DESCRIPTION 1INTRODUCTION. . . . . . . . . . . . . . . . . . . . . . . . . . . . . . . . . . . . . . . . . . . . . . . . . . . . . . . . . . . . . . . . . . . . . . . . 2-3 2HOST UNIT . . . . . . . . . . . . . . . . . . . . . . . . . . . . . . . . . . . . . . . . . . . . . . . . . . . . . . . . . . . . . . . . . . . . . . . . . . .2-3 2.1Primary Components . . . . . . . . . . . . . . . . . . . . . . . . . . . . . . . . . . . . . . . . . . . . . . . . . . . . . . . . . . . . . . 2-3 2.2Mounting . . . . . . . . . . . . . . . . . . . . . . . . . . . . . . . . . . . . . . . . . . . . . . . . . . . . . . . . . . . . . . . . . . . . . . 2-3 2.3Fault Detection and Alarm Reporting . . . . . . . . . . . . . . . . . . . . . . . . . . . . . . . . . . . . . . . . . . . . . . . . . . . 2-4 2.4RF Signal Connections . . . . . . . . . . . . . . . . . . . . . . . . . . . . . . . . . . . . . . . . . . . . . . . . . . . . . . . . . . . . .2-4 2.5RF Signal Level Adjustments. . . . . . . . . . . . . . . . . . . . . . . . . . . . . . . . . . . . . . . . . . . . . . . . . . . . . . . . . 2-4 2.6Propagation Delay . . . . . . . . . . . . . . . . . . . . . . . . . . . . . . . . . . . . . . . . . . . . . . . . . . . . . . . . . . . . . . . . 2-5 2.7Optical Connection . . . . . . . . . . . . . . . . . . . . . . . . . . . . . . . . …
Text truncated - open the document above for the full version.
Users Manual
ADCP-75-158 • Issue 1 • July 2003 • Section 2: Description Page 2-10 © 2003, ADC Telecommunications, Inc. 3.6Antenna Cable Connection An N-type female connector is provided on the exterior bottom side of the RU cabinet for connecting the antenna coaxial cable. The exterior N-type connector is on the surge side of a lightning protector that is mounted within the enclosure. On the inside of the enclosure, the protected side of the lightning protector is also equipped with an N-type female connector. A coaxial jumper cable (included with the enclosure) is used for connecting the protected side of the lightning protector to the ANTENNA port on the STM. 3.7AC Power Wiring and Grounding The RU outdoor cabinet is equipped with a stub cable for the AC power connections. The AC power cable provides three wire leads (Load, Neutral, and Ground) that must be connected to a 120 or 240 VAC power source. The AC power cable exits the cabinet though a 3/4-inch NPT threaded hole located on the bottom of the cabinet. The threaded hole accepts a standard 3/4- inch AC conduit fitting. A 3/4-inch to 1/2-inch reducer is also included if 1/2-inch conduit is preferred over 3/4-inch conduit. From the exit point in the bottom of the cabinet, the AC power cable must be routed through conduit to an external AC junction box (not provided) where it can be connected to the AC power wiring. The junction box should be located within two feet of the cabinet and should be equipped with a 120 VAC GFCI outlet for powering test equipment and/or power tools. If AC power spikes are likely to occur, the junction box should also include a surge protector to protect the equipment from damage. Three wire nuts are included with the cabinet for completing the AC power wiring connections. The junction box wiring should be connected to the AC power source through a 20 Amp breaker box (not provided). All AC power wiring should be run within conduit. A grounding lug is provided on the underside of the enclosure for connecting a separate grounding wire directly to the cabinet. 3.8Ventilation Vent openings are provided in the bottom of the RU cabinet to permit air exchange for cooling. Air enters the cabinet through an opening in the front/bottom side of the cabinet A Filter removes dirt particles so that only clean air enters the enclosure. Both the STM and LPA have cooling fans. The STM has a rear mounted fan that pulls air through the module and exhausts it toward the rear of the enclosure. The LPA has a fan on the front that draws air into the module and exhausts it toward the rear of the enclosure. The heated air exits through an opening in the rear/bottom side of the enclosure. 3.9User Interface The RU cabinet user interface consists of the various connectors, fittings, mounting slots, and switches that are provided on both the interior and exterior of the enclosure. The user interface points are indicated in Figure 2-4 and described in Ta b l e 2 - 2. ADCP-75-158 • Issue 1 • July 2003 • Section 2: Description Page 2-11 © 2003, ADC Telecommunications, Inc. Figure 2-4. Remote Unit Outdoor Cabinet User Interface (1) AIR INLET FILTER 18563-B (2) AC POWER CABLE (3) DOOR SWITCH (5) STM MOUNTING SLOT (4) LPA MOUNTING SLOT (6) WDM/CWDM MOUNTING SLOT (8) FIBER SLACK SPOOLS (12) GROUNDING LUG (11) 3/4-INCH NPT THREADED HOLE (10) FIBER CABLE CONNECTOR (7) CWDM POWER CORD BOTTOM VIEW OF CABINET (9) LIGHTNING PROTECTOR ADCP-75-158 • Issue 1 • July 2003 • Section 2: Description Page 2-12 © 2003, ADC Telecommunications, Inc. 4 REMOTE UNIT INDOOR MOUNTING SHELF The RU indoor mounting shelf, shown in Figure 2-5, is a rack-mountable framework that provides the following basic functions: • Supports the various electronic modules (STM and LPA) and accessories (WDM or CWDM) for mounting within a standard 19-inch, WECO or EIA, equipment rack. • Provides the electrical interface connections for the STM and LPA modules. • Provides an AC power cord for powering the STM module • Provides DC power connections for the CWDM module. 4.1Primary Components The RU indoor mounting shelf is a rack-mountable frame assembly that provides mounting slots for the STM, LPA, WDM (accessory), and CWDM (accessory) modules plus connectors and a wiring harness for interfacing the STM and LPA modules. The indoor mounting shelf is designed for mounting in a standard 19-inch, EIA or WECO, equipment rack. The frame assembly is constructed of aluminum and is painted putty white for corrosion protection. Table 2-2. Remote Unit Cabinet User Interface REF NO DEVICEFUNCTIONAL DESCRIPTION 1Air inlet filterReusable filter that prevents the entry of dirt particles when out- side air is pulled into the cabinet for cooling. 2AC power cordProvides AC power to the STM. 3Door switchIndicates to the fault detection and alarm reporting system if the cabinet door is open (major alarm) or closed. 4LPA mounting slotProvides a mounting point for the LPA module. 5STM mounting slotProvides a mounting point for the STM module. 6WDM/CWDM mounting slot Provides a mounting point for either the WDM or CWDM mod- ule. 7CWDM power cordProvides DC power to the CWDM module. 8Fiber slack spoolsProvide a storage place for excess fiber pigtail and patch cord slack. 9Lightning protectorProvides lightning surge protection for the antenna connection. 10Fiber cable connectorProvides both an entry point and strain relief for the fiber optic cable. 113/4-inch NPT threaded hole Provides a connection point for a 3/4-inch AC conduit fitting. 12Grounding lugProvides a connection point for an external grounding cable. ADCP-75-158 • Issue 1 • July 2003 • Section 2: Description Page 2-13 © 2003, ADC Telecommunications, Inc. Figure 2-5. Remote Unit Indoor Mounting Shelf 4.2STM and LPA Module Installation Two mounting slots are provided within the indoor mounting shelf for installing the STM and LPA modules. The mounting slots include tracks that guide each module into the installed position. Separate mounting slots are provided …
Text truncated - open the document above for the full version.
Users Manual
ADCP-75-158 • Issue 1 • July 2003 • Section 2: Description Page 2-28 © 2003, ADC Telecommunications, Inc. Optical transmit power output Host Unit Remote Unit 0 dBm +2 dBm Optical budget25 dB For optical BER of 10 –6 Optical receive input–15 dBm maximum Optical connectorsIndustry standard SCHost, remote, and WDM Optical - Host and Remote WDM Passband1310 nm ± 20 nm 1550 nm ± 20 nm Forward path insertion loss Host WDM Remote WDM 0.7 dB 0.3 dB Does not include connector loss Reverse path insertion loss Host WDM Remote WDM 0.3 dB 0.7 dB Does not include connector loss Isolation> 30 dB minimum Return loss (Reflectance)< –50 dBAll input ports RF Forward Path - 1900 MHz System bandwidth 20 MHz AD band, 25 MHz DBE, BEF, and EFC bands Frequency range AD DBE BEF EFC 1930 to 1950 MHz 1945 to 1970 MHz 1950 to 1975 MHz 1965 to 1990 MHz Out-of-band emissions Primary Secondary (see Note 1) –13 dBm per 1 MHz bandwidth from 10 kHz to 20 GHz –98 dBm per 100 kHz from 824 to 849 MHz and from 1850 to 1910 MHz Gain of forward path (Host input to Remote antenna port) 80.5 dB at band center, room temperature, and 0 dB attenua- tion setting Includes power amplifier. Gain flatness Band flatness Channel flatness ± 1.5 dB across freq. range ±1 dB variation across any 1.25 MHz channel Gain variation± 3 dB over temp and unit-to- unit Out-of-band rejection–40 dB at > ±17.5 MHz from 881.5 MHz Propagation delay6 μsExcludes fiber delay Table 2-6. 1900 MHz 20 Watt System Nominal Specifications, continued PARAMETERSPECIFICATIONREMARKS ADCP-75-158 • Issue 1 • July 2003 • Section 2: Description Page 2-29 © 2003, ADC Telecommunications, Inc. Configurable propagation delay Range Step size Up to 63 μs 0.1μs Plus standard propagation delay Spurious In-band self generated Free dynamic range –13 dBm at remote output 60 dB at 30 kHz bandwidth Transmit peak-to-average10 dB Two-tone Intermodulation–55 dBc at remote outputTwo CW tones at 5 Watts each CDMA Intermodulation 885 kHz to 1.25 MHz 1.25 to 1.98 MHz 1.98 to 2.25 MHz –45 dBc per 30 kHz –8 dBm per 30 kHz –55 dBc per 30 kHz Absolute level Nominal composite RF input signal level –40 dBm at 0 dB attenuation –9 dBm at max. attenuation An input signal level of –40 dBm provides maximum output power Configurable input level Range Step size 31 dB 1 ± 0.5 dB ±10% of attenuation monotonic Composite RF Output power40.5 dBm (11 Watts) at remote antenna port with –40 dBm input 20 Watts at power amplifier out- put Configurable RF Output Range Step size 31 dB at remote unit 1 ±0.5 dB ±10% of attenuation monotonic Transmit path insertion loss2.5 dB RF Reverse Path - 1900 MHz System bandwidth A band B band 20 MHz AD band, 25 MHz DBE, BEF, and EFC bands Frequency range AD DBE BEF EFC 1850 to 1870 MHz 1865 to 1890 MHz 1870 to 1895 MHz 1885 to 1910 MHz In band spurs (caused by an indi- vidual out-of-band signal) –75 dBc (1 MHz to 20 GHz and > 10 MHz out-of-band) –120 dBc (1930 to 1990 MHz) –120 dBc (869 to 894 MHz)Required for dual band Propagation delay6 μsExcludes fiber delay Configurable propagation delay Range Step size Up to 63 μs 0.1μs Plus standard propagation delay Table 2-6. 1900 MHz 20 Watt System Nominal Specifications, continued PARAMETERSPECIFICATIONREMARKS ADCP-75-158 • Issue 1 • July 2003 • Section 2: Description Page 2-30 © 2003, ADC Telecommunications, Inc. Gain flatness Band flatness Channel flatness ±1.5 dB across frequency range ±1 dB variation across any 1.25 MHz channel Gain of reverse path Overall gain Gain variation 30 dB at band center at room temperature 3 dB over temperature ALC not invoked ALC not invoked Out-of-band rejection–40 dB at > ±17.5 MHz from 836.6 MHz ALC not invoked Spurious (in-band self gener- ated) –110 dBm referred to inputALC not invoked Intermodulation–62 dBc two tones at –50 dBm System noise figure8 dB at mid-bandALC not invoked Configurable RF output Range Step size 31 dB 1 ±0.5 dB ±10% of attenuation monotonic Blocking dynamic range70 dB Level limiting ALC threshold–40 dBm dB instantaneous Level limiting ALC range30 dB RF Forward and Reverse Path Modulation Accuracy Service/Mod Type/Parameter TDMA/n/4-DQSK/rms EVM GSM/GMSK/rms phase error EDGE/8PSK/rms EVM EIA-97D/CDMA/rho factor 7% 4º 7% .97% Physical/Environmental/ Electrical - Host Unit Dimensions (H×W×D) 3.5 × 17.2 × 15.3 inches (89 × 437 × 389 mm) Dimension for width does not include the mounting brackets which can be installed for either 19- or 23-inch racks. Mounting19- or 23-inch rackEIA or WECO Weight18 lbs. (8.2 kg) Weather resistanceIndoor installation only Operating temperature0º to 50º C (32º to 122º F) Storage temperature–40º to 70º C (–40º to 158ºF) Humidity10% to 90%No condensation External alarm connectorScrew-type terminalsNO and NC relay contacts Table 2-6. 1900 MHz 20 Watt System Nominal Specifications, continued PARAMETERSPECIFICATIONREMARKS ADCP-75-158 • Issue 1 • July 2003 • Section 2: Description Page 2-31 © 2003, ADC Telecommunications, Inc. DC power connectorScrew-type terminal strip RF coaxial cable connectorsN-type (female) Service connectorDB-9 (female)RS-232 DTE interface CAN connectorsRJ-45 jack Power input± 24 or ± 48 VDC± 21 to ± 60 VDC Power consumption55 watts Current rating1 Amp at –48 VDC Reliability at 25ºCMTBF 80,000 hoursExcluding fans Physical/Environmental/ Electrical - Remote Unit Outdoor Cabinet Cabinet dimensions (H×W×D)25.6 × 10.13 × 20.75 inches (674 × 257 × 527 mm) MountingWall, pole, or pedestalPedestal mounting requires ped- estal mount kit. (accessory) Weight80 lbs (36.3 kg)Includes modules Weather resistanceNEMA-3R, removable dust filter Operating temperature–30º to 50º C (–22º to 122º F) Storage temperature–40º to 70º C (–40º to 158ºF) Humidity10% to 90%No condensation External alarm connectorScrew-type terminalsExternal alarm inputs AC power connection3/4- or 1/2-inch conduitPer local code or practice. Antenna cable connectorN-type female Fiber optic cable size 0.375 to 0.875 inch (10 to 22 mm) diameter cable 9/125, single-mode Lightning protectio…
Text truncated - open the document above for the full version.
Users Manual
ADCP-75-158 • Issue 1 • July 2003 • Section 4: Operation Page 4-4 © 2003, ADC Telecommunications, Inc. Figure 4-1. Digivance Element Management System Main Window 9. Open the View drop down menu and connect to the Host and Remote pair by selecting “NotNamed/NotNamed”. The HOST Alarms display and the REMOTE Alarms display will open within the main window as shown in Figure 4-2. 10. Verify that the Host and Remote Unit are loaded with the current system software and download the current software to both the Host and the Remote unit if necessary. Refer to Section 2.2 for details. Figure 4-2. Selecting Display Tabs Click to view drop down menu Clicking on the tabs in this list will open the cor- responding display. Host/Remote pair site name ADCP-75-158 • Issue 1 • July 2003 • Section 4: Operation Page 4-5 © 2003, ADC Telecommunications, Inc. 11. Click on the HOST Config tab and on the REMOTE Config tab (see Figure 4-2). The HOST Config display and the REMOTE Config display will open within the main window. 12. Enter the Site Name and Site Number for both the HOST and the REMOTE unit. Refer to Section 2.4 for details. 13. If the site has multiple host units, reconnect the CAN cables to the HU’s NET IN and NET OUT ports. 14. Verify that no Major (except Major Extern Alarm) or Minor alarms are being reported in either the HOST or REMOTE Alarm displays and that all alarm fields (except Major Extern Alarm) are green. 15. Click on the HOST RF tab (see Figure 4-2). The HOST RF display will open within the main window. 16. Enter the Host Fwd Att (Forward Attenuation) values. This sets the forward input RF signal level at the HU. Refer to Section 2.5 for details. By default, this value is set to 0 dB. If the DRIVE LED on the HU front panel was red, it should turn green when this step is completed. 17. Determine if the RF output power at the STM ANTENNA is at the correct level per channel up to a composite maximum of +40.5 dBm. Refer to Section 2.6 for details. 18. Place the MUTE/NORM/RESET switch (on LPA front panel) in the NORM position. 19. Verify that the STATUS indicator (on LPA front panel) turns from steady green to blinking green. 20. Click on the REMOTE LPA tab (see Figure 4-2). The REMOTE PA display will open within the main window. 21. Enter the Remote Fwd Att value. This adjusts the RF output signal level at the STM ANTENNA port. Refer to Section 2.7 for details. By default this value is set to 0 dB. 22. Click on the HOST RF tab (see Figure 4-2). The HOST RF display will open within the main window. 23. Enter the Host Rev Att (Reverse Attenuation). This sets the reverse output RF signal levels at the HU. Refer to Section 2.8 for details. 24. If a delay adjustment is required per the system design plan, enter the Host Fwd Delay and Host Rev Delay values. By default, the delay values are set to 0. Refer to Section 2.9 for details. 25. If a separate laptop computer loaded with the EMS software was used to initially configure the system, disconnect the laptop computer from the SERVICE connector on the HU front panel. 26. Reconnect the external alarm system or notify the alarm system provider that the turn-up process has been completed. Note: For continuous monitoring of alarms, each HU and RU pair must remain permanently connected to a PC-type desktop computer loaded with the EMS software. When two or more systems are connected together through the CAN interface, only one EMS computer is required to manage the networked HU and RU systems. The EMS computer may be connected to the SERVICE port on any one of the HUs in the network. ADCP-75-158 • Issue 1 • July 2003 • Section 4: Operation Page 4-6 © 2003, ADC Telecommunications, Inc. 2.2Verify/Download HU and RU System Software The HU’s and RU’s may require a system software download if they are not loaded with the current system software. Use the following procedure to check the version number of the system software and if necessary to download the current system software: 1. Click on the HOST Prg Load tab and on the REMOTE Prg Load tab. The HOST Prg Load display and the Remote Prg Load display will open within the EMS main window as shown in Figure 4-3. Figure 4-3. HOST and REMOTE Prg Load Displays 2. Click on the HOST Select button (see Figure 4-3). The Select Control Program File window will open as shown in Figure 4-4. Browse until the folder where the Control Program files are located is selected and the software files are displayed in the window. 3. Check the software version numbers shown in the Software Info section of the Prg Load display against the version numbers of the software files displayed in the Select Control Program File window. If files in the Select Control Program File window are a later version than those shown in the Prg Load display, proceed with the software download. If the version numbers shown in the Software Info section are the same as the version numbers of the files in the Select Control Program File window, the software download is not required. Click to open Select Control Program window for HOST Click to start down- load to HOST. Click to start down- load to REMOTE. Click to open Select Control Program win- dow for REMOTE. Verify software version before starting download. Verify software version before starting download.
Users Manual
ADCP-75-158 • Issue 1 • July 2003 • Section 4: Operation Page 4-7 © 2003, ADC Telecommunications, Inc. Figure 4-4. Select Control Program File Window 4. Select the first file to download and click on the OK button. 5. Click on the HOST Load button (see Figure 4-3) to start the download. 6. Repeat steps 4 and 5 for each file that requires downloading. 7. Repeat steps 2 through 5 for the REMOTE. 2.3Determine Forward Path Input Signal Level The level of the composite RF input signal at the FORWARD RF IN port at the HU will vary depending on the type of BTS, the cable loss, the number of channels present, and the required forward path composite power. If maximum composite RF output is required, the signal level of the composite forward path RF signal at the HU forward path input must be adjusted to fall within a range of –9 to –40 dBm. If the signal level is not within this range, it must be adjusted to fall within this range through the use of an external attenuator capable of handling the BTS forward path output power. If using the Conditioning Panel or Duplexing Panel, refer to the Digivance 800 and 1900 MHz Interface Panels User Manual (ADCP-75-147) for the procedures for measuring and adjusting the input RF signal level at the HU. If connecting a single HU to a single BTS, use the following procedure to measure and adjust the input RF signal level at the HU: 1. Connect a spectrum analyzer or power meter to the forward path output port of the BTS. The required signal levels and test points are shown in Figure 4-5. 2. If using a spectrum analyzer, proceed to step 3. If using a power meter, measure the composite signal power from the BTS and then proceed to step 5. 3. Measure the RF level of a single carrier, such as the control channel, in dBm. Make sure the resolution bandwidth of the spectrum analyzer is 30 kHz. Maximum power in any channel should not exceed 5W (+37 dB). Note: Check the input rating of the test equipment and the output rating of the BTS. To avoid burning out the spectrum analyzer or power meter, it may be necessary to insert a 30 dB 100W (or similar) attenuator between the BTS and test equipment. ADCP-75-158 • Issue 1 • July 2003 • Section 4: Operation Page 4-8 © 2003, ADC Telecommunications, Inc. 4. Calculate the total composite signal power from the BTS using the following formula: P tot = P c + 10Log N – (see Note) Where, P tot is the total composite power in dBm P c is the power per carrier in dBm as measured in step 3, and N is the total number of channels. 5. Determine the total cable loss that is imposed by the forward path coaxial cable that links the BTS to the HU and also any insertion loss imposed by splitters or combiners. 6. Subtract the total cable loss and any insertion losses from the total composite power calculated in step 4. 7. Subtract –25 (midpoint of the required range) from the value determined in step 6. The difference (which should be positive) equals the value of the external attenuator that is required to reduce the forward path signal level to fall within the required range. The following formula outlines the required calculations for steps 6 and 7: P tot – (Cable and insertion loss) – (–25) = Value of external attenuator required 8. Select an attenuator that is as close to the value calculated in step 7 as possible. Select a value that will adjust the signal level of the composite input signal to fall within the specified range. 9. Install the external attenuator in the coaxial cable that is connected to the FORWARD RF IN port at the HU. 10. Subtract the value of the external attenuator used in step 9 from the total composite signal power (P tot ) and record the result. This value will be required when setting the attenuation of the HU’s internal forward attenuator. Note: If calculating the composite power for a CDMA system, reduce the initial result by 16.23 dB. Note: If the input signal level is already within the required range of –9 to –40 dBm, then no external attenuator is required. Caution: The Host Unit can be damaged if it is overdriven by the BTS. Always install an external protective attenuator at the Host Unit FORWARD RF IN port if the forward path composite input signal level is greater than –9 dBm. ADCP-75-158 • Issue 1 • July 2003 • Section 4: Operation Page 4-9 © 2003, ADC Telecommunications, Inc. Figure 4-5. Signal Levels, Test Points, and Adjustments INPUT SIGNAL LEVEL (-25 dBm TYPICAL COMPOSITE FOR FULL POWER) HOST UNIT PRIMARY ANTENNA LPA REMOTE UNIT BASE TRANSCEIVER STATION 17000-C EXTERNAL ATTENUATOR TRANS- MITTERS RECEIVERS 0 to 31 dB ATTENUATOR (HOST REV ATT) 0 to 31 dB ATTENUATOR (HOST FWD ATT) RF, OPTICS, AND CONTROL 0 to 31 dB ATTENUATOR (REMOTE FWD ATT) OPTICAL LINK RF, OPTICS, AND CONTROL DUPLEXER ADJUSTMENTS TO INPUT SIGNAL LEVEL AS SET BY HOST FORWARD PATH ATTENUATOR ADJUSTMENTS TO OUTPUT SIGNAL LEVEL AS SET BY HOST REVERSE PATH ATTENUATOR MAXIMUM OUTPUT SIGNAL LEVEL AT STM ANTENNA PORT ADJUSTMENTS TO OUTPUT SIGNAL LEVEL AS SET BY THE REMOTE FORWARD ATTENUATOR ADCP-75-158 • Issue 1 • July 2003 • Section 4: Operation Page 4-10 © 2003, ADC Telecommunications, Inc. 2.4Enter Site Name and Site Number All HU’s and RU’s are programmed with the same site name and site number. It is therefore necessary to assign a unique site name and site number to the HU and RU before they can be connected to the same CAN. Use the following procedure to assign a unique site name and number to each HU and RU system: 1. Click on the HOST Config tab and on the REMOTE Config tab. The HOST Config display and the REMOTE Config display will open within the EMS main window as shown in Figure 4-6. Figure 4-6. HOST and REMOTE Config Displays 2. Right-click on the HOST Site Name field (see Figure 4-6). The Site Name pop-up screen will open as shown in Figure 4-7. Enter a unique name for the HOST. The name may be up to 32 characters long and must not contain any spaces. The name may include numbers, punctuation, and upper or lower case letters a…
Text truncated - open the document above for the full version.
Users Manual
ADCP-75-158 • Issue 1 • July 2003 • Section 4: Operation Page 4-18 © 2003, ADC Telecommunications, Inc. 2. Right-click on the Host Fwd Delay section of the display (see Figure 4-14). The Host Fwd Delay pop-up screen will open as shown in Figure 4-15. 3. Obtain the value of the forward delay as specified in the system design plan. The delay is adjustable in 0.1 μsec steps. 4. Enter the forward path delay value and click OK to close the pop-up screen and to make the changes take effect. 5. Repeat the process for reverse delay and diversity reverse delay by right-clicking on the appropriate delay section (see Figure 4-14) and then entering the required delay value in the pop-up screen. 6. Click O…
Text truncated - open the document above for the full version.
Contact Information
Applicant
Joshua Wittman(Compliance Engineer)
Technical Specifications
| # | Rule Parts | Frequency Range | Power Output | Emission | Tolerance |
|---|---|---|---|---|---|
| 6 | 24E | 1.93 GHz - 1.99 GHz | 16.9 W | F9W | Amp |
Other Applications from ADC Telecommunications Inc
F8I-PSM25TDL
Sep 28, 2015FWP-T4MT000MOD-L
Equipment Class
B2I - Part 20 Industrial Booster (CMRS)
F8I-PSM230WM
Jul 29, 2015FWP-W4MT000MOD
Equipment Class
B2I - Part 20 Industrial Booster (CMRS)
F8I-PSM0800M
Aug 26, 2014FWP-44MT000MOD
Equipment Class
B2I - Part 20 Industrial Booster (CMRS)
F8I-PSM1921D
Aug 24, 2014FWP-84MTA4MMOD
Equipment Class
B2I - Part 20 Industrial Booster (CMRS)
F8I-PSM0850M
Jul 27, 2014FlexWave Prism HDM 850 MHz MIMO
Equipment Class
B2I - Part 20 Industrial Booster (CMRS)