HFSOA8BCM94309MPTablet Computer
Quanta Computer Inc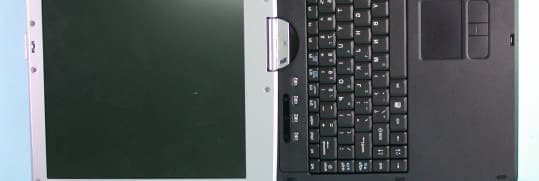
Click to zoom
Application Details
- Equipment Class
- NII - Unlicensed National Information Infrastructure TX
- Date of Grant
- Feb 03, 2004
- Application Purpose
- Original Equipment
- Date of Application
- Oct 21, 2003
- Equipment Note
- Tablet Computer
- Frequency Range
- 5250.00000000 - 5350.00000000
- Company
- Quanta Computer Inc
- Country
- Taiwan
Documents & Files
Document Text
Text extracted from the exhibit documents filed with the FCC. Open a document above to read the original.
Users Manual
[email protected] www.adt.com.tw ADVANCE DATA TECHNOLOGY CORPORATION FEDERAL COMMUNICATIONS COMMISSION DECLARATION OF CONFORMITY (DoC) FOR THE FOLLOWING EQUIPMENT: PRODUCT NAME: Tablet MODEL NO.: M275 , OA8 TRADE NAME: Gateway, Quanta IS HEREWITH CONFIRMED AND FOUND TO COMPLY WITH THE REQUIREMENTS OF CFR 47 PART 15 REGULATION. THE RESULTS OF ELECTROMAGNETIC EMISSION EVALUATION ARE SHOWN IN THE REPORT NO.: D920924R05 THIS DEVICE COMPLIES WITH PART 15 OF THE FCC RULES. OPERATION IS SUBJECT TO THE FOLLOWING TWO CONDITIONS: (1) THIS DEVICE MAY NOT CAUSE HARMFUL INTERFERENCE AND, (2) THIS DEVICE MUST ACCEPT ANY INTERFERENCE RECEIVED, INCLUDING INTERFERENCE THAT MAY CAUSE UNDESIRED OPERATION. THE FOLLOWING LOCAL MANUFACTURER/IMPORTER IS RESPONSIBLE FOR THIS DECLARATION: ManufacturerUSA Local Representative Company name: QUANTA COMPUTER INC. To Be Determined. Address: 7F, 116 Hou Kang St., Shih Lin, Taipei, Taiwan, R.O.C. Contact Person: Joyce Kuo Title: Regulatory Coordinator Te l / F a x : +886 3 327 2345 +886 3 328 5048
Users Manual
1 1 Checking Out Your Gateway M275 This chapter introduces you to the basic features of your convertible tablet PC. Read this chapter to learn: ■How to identify the features of your Gateway convertible tablet PC ■How to locate your convertible tablet PC’s model and serial number ■How to locate the Microsoft Certificate of Authenticity ■How to locate the specifications for your convertible tablet PC ■What accessories are available for your convertible tablet PC Tips & TricksYou can download an electronic copy of this guide from support.gateway.com/support/manlib/ . 2 Chapter 1: Checking Out Your Gateway M275 www.gateway.com Front ComponentIconDescription Modular bayUse this bay for a DVD drive, combination DVD/CD-RW drive, or a secondary battery. For more information, see “Changing modules” on page 110. To determine the type of drive in the modular bay, examine the drive tray’s plastic cover and compare the logo to those listed in “Identifying drive types” on page 112. Important: Your convertible tablet PC may have come with an optical drive module (such as a DVD or DVD/CD-RW drive), a secondary battery module, or any combination of these modules. To order a different module, visit the Accessory Store at accessories.gateway.com . LCD panel release latchOpen the LCD panel by pressing the release latch. LCD panel release latch Modular bay 3 Left Side www.gateway.com Left Side ComponentIconDescription Kensington™ lock slotSecure your convertible tablet PC to an object by connecting a Kensington cable lock to this slot. PC Card slotInsert one Type II PC Card into this slot. For more information, see “Adding and removing a PC Card” on page 258. Memory card readerInsert a memory card from a digital camera, MP3 player, PDA, or cellular telephone into the memory card reader. For more information, see “Using the memory card reader” on page 154. IEEE 1394 portPlug an IEEE 1394 (also known as Firewire ® or i.Link ® ) device (such as a digital camcorder, Iomega™ Zip™ drive, or MP3 player) into this 4-pin IEEE 1394 port. For more information, see “Connecting a digital video camera” on page 158. Microphone jackPlug a microphone into this jack. The built-in microphone is turned off when a microphone is plugged into this jack. For the location of your built-in microphone, see “Keyboard area” on page 8. Kensington lock slot PC Card slot Memory card reader IEEE 1394 port Microphone jack Headphone jack Power switch Speaker 4 Chapter 1: Checking Out Your Gateway M275 www.gateway.com Headphone jackPlug amplified speakers or headphones into this jack. The built-in speakers are turned off when speakers or headphones are plugged into this jack. Power switchSlide to turn the power on or off. You can also configure the power switch for Standby/Resume mode. For more information on configuring the power switch mode, see “Changing power settings” on page 178. SpeakerProvides audio output when headphones or amplified speakers are not plugged into your convertible tablet PC or port replicator. ComponentIconDescription 5 Right Side www.gateway.com Right Side ComponentIconDescription PenWrite, tap, and input directly on your convertible tablet PC’s display using the cordless pen. SpeakerProvides audio output when headphones or amplified speakers are not plugged into your convertible tablet PC or port replicator. Modem jackPlug a modem cable into this jack. For more information, see “Connecting the modem” on page 47. Kensington™ lock slotSecure your convertible tablet PC to an object by connecting a Kensington cable lock to this slot. PenSpeakerModem jackKensington lock slot 6 Chapter 1: Checking Out Your Gateway M275 www.gateway.com Back ComponentIconDescription Ventilation fanHelps cool internal components. Do not block or insert objects into these slots. USB portsPlug USB (Universal Serial Bus) devices (such as a diskette drive, flash drive, Iomega™ Zip™ drive, printer, scanner, camera, keyboard, or mouse) into these ports. Monitor portPlug an analog VGA monitor into this port. Docking portConnect the port replicator to this port. Warning! Power is passed through this port. This docking connection is certified to UL 1950 for use only with port replicators designed for your Gateway convertible tablet PC. Ethernet jackPlug a 10/100 Ethernet network cable into this jack. For more information, see “Connecting to a wired Ethernet network” on page 48 and “Networking Your Gateway M275” on page 207. Power connectorPlug the AC adapter cable into this connector. Status indicatorsInform you of the power status or when a drive is in use. For more information, see “LCD panel status indicators” on page 25. Ventilation fan USB port Monitor port Docking port Ethernet jack USB port Power connector Status indicators 7 Bottom www.gateway.com Bottom ComponentIconDescription System labelIncludes the product model number. For more information, see “Identifying your model” on page 10. Reset holeInsert a straightened paper clip into this hole to manually restart your convertible tablet PC. Memory bay cover Open this cover to install a memory module. For more information, see “Adding or replacing memory” on page 261. Pen latchSlide to release the pen. Battery latchSlide to release the battery. Battery bayInsert the battery into this bay. For more information, see “Changing batteries” on page 171. Hard drive bayThe hard drive is located in this bay. For more information, see “Replacing the hard drive kit” on page 273. System label Reset hole Memory bay cover Battery bay Hard drive bay Battery latch Pen latch 8 Chapter 1: Checking Out Your Gateway M275 www.gateway.com Keyboard area For information on using your keyboard, see “Using the keyboard” on page 28. ComponentIconDescription MicrophoneRecord audio through this microphone. The built-in microphone is turned off while an external microphone is connected. For the location of your microphone jack, see “Left Side” on page 3 and “Back” on page 280. LCD panel status indicators Inform you of the p…
Text truncated - open the document above for the full version.
Users Manual
250 Chapter 14: Restoring Software www.gateway.com 5If this is the first time you have inserted the red Drivers and Applications CD, accept the End User License Agreement (EULA) by clicking/tapping Yes, I accept it, then clicking/tapping Continue. The Gateway Driver and Application Recovery program starts and the Drivers and Application Recovery tab appears. 6Select a single device driver to reinstall. - OR - Click/Tap Automatic Installation, then select multiple device drivers to reinstall. (Grayed out drivers are not available for Automatic Installation. To select these drivers, click/tap Manual Installation.) 7Click/Tap Install. 8Follow any additional on-screen instructions. Depending on the device driver you are reinstalling, you may only need to restart your convertible tablet PC to complete the installation. However, if a setup wizard opens when you restart your convertible tablet PC, follow the on-screen instructions. Help and Support For more information about reinstalling device drivers, click/tap Start, then click/tap Help and Support. Type the keyword drivers in the Search box , then click/tap the arrow. 251 Updating device drivers www.gateway.com Updating device drivers The Restoration CDs contain a device driver update utility that works over the Internet. If you do not have an Internet service provider, the update utility works by direct-dialing the device driver update service. To update device drivers: 1Insert the red Drivers and Applications CD into the DVD or DVD/CD-RW drive. If the program starts automatically, go to Step 5. - OR - If the program does not start automatically, go to Step 2. 2Click/Tap Start, then click/tap Run. The Run dialog box opens. 3In the Open text box, type d:\runmenu.exe (where d is the drive letter of the DVD or DVD/CD-RW drive). 4Click/Tap OK. ImportantIf your convertible tablet PC came equipped with a wireless device, only use the drivers approved for the country the device will be used in. See the red Drivers and ApplicationsCD or the Gateway Technical Support Web site (support.gateway.com). If your convertible tablet PC came equipped with an internal embedded wireless device, see “Safety, Regulatory, and Legal Information” on page 315 for general wireless regulatory and safety guidelines.To find out if your convertible tablet PC has an internal wireless device, check the label (see “Identifying your model” on page 10). ImportantIf the drive you want to use is not in the modular bay, you need to swap modules. For more information about swapping modules, see “Changing modules” on page 110. 252 Chapter 14: Restoring Software www.gateway.com 5If this is the first time you have inserted the red Drivers and Applications CD, accept the End User License Agreement (EULA) by clicking/tapping Yes, I accept it, then clicking/tapping Continue. The Gateway Driver and Application Recovery program starts and the Drivers and Application Recovery tab appears. 6Click/Tap the Web Updates tab. 7Click/Tap Check Now. The Connect window opens. 8Install available updated device drivers by following the on-screen instructions. Depending on the device driver you are updating, you may only need to restart your convertible tablet PC to complete the installation. However, if a setup wizard opens when you restart your convertible tablet PC, follow the on-screen instructions. Reinstalling programs If you have problems running a program or if you have reinstalled your operating system, you can reinstall programs from the red Drivers and Applications CD and other program CDs. If you are reinstalling programs from other program CDs, follow the installation instructions on each CD. If you want to reinstall a program, uninstall the old version first. To reinstall programs from the Drivers and Applications CD: 1If you just reinstalled Windows, go to Step 4. Otherwise, go to the next step. 2Click/Tap Start, Control Panel, then click/tap Add or Remove Programs. 3In the Currently Installed Programs list, click/tap the program you want to uninstall, then click/tap Change/Remove and follow the on-screen instructions. Help and Support For more information about updating device drivers, click/tap Start, then click/tap Help and Support. Type the keyword updating drivers in the Search box , then click/tap the arrow. 253 Reinstalling programs www.gateway.com 4Insert the red Drivers and Applications CD into the DVD or DVD/CD-RW drive. If the program starts automatically, go to Step 8. - OR - If the program does not start automatically, go to Step 5. 5Click/Tap Start, then click/tap Run. The Run dialog box opens. 6In the Open text box, type d:\runmenu.exe (where d is the drive letter of your DVD or DVD/CD-RW drive). 7Click/Tap OK. 8If this is the first time you have inserted the red Drivers and Applications CD, accept the End User License Agreement (EULA) by clicking/tapping Yes, I accept it, then clicking/tapping Continue. The Gateway Driver and Application Recovery program starts and the Drivers and Application Recovery tab appears. 9Select a single program to reinstall. - OR - Click/Tap Automatic Installation, then select multiple programs to reinstall. (Grayed out programs are not available for Automatic Installation. To select these programs, click/tap Manual Installation.) 10Click/Tap Install. 11Follow any additional on-screen instructions. Depending on the programs you are reinstalling, you may only need to restart your convertible tablet PC to complete the installation. However, if a setup wizard opens when you restart your convertible tablet PC, follow the on-screen instructions. ImportantIf the drive you want to use is not in the modular bay, you need to swap modules. For more information about swapping modules, see “Changing modules” on page 110. 254 Chapter 14: Restoring Software www.gateway.com To reinstall other programs from a CD: 1If you just reinstalled Windows, go to Step 4. Otherwise, go to the next step. 2Click/Tap Start, Control Panel, then click/tap Add or Remove Prog…
Text truncated - open the document above for the full version.
Users Manual
Wireless LAN User manual Wireless LAN 11 Mbps 1 Quanta Computer Inc. WMIB-100AG Mini-PCI Adapter User's Manual Aug. 20, 2003 (Draft 1.0) Wireless LAN User manual Wireless LAN 11 Mbps 2 Copyright statement No part of this publication may be reproduced, stored in a retrieval system, or transmitted in any form or by any means, whether electronic, mechanical, photocopying, recording, or otherwise without the prior writing of the publisher. Printed in Taiwan, Aug. 2003 Wireless LAN User manual Wireless LAN 11 Mbps 3 .Contents 1. Introduction .................................................................................4 2. Wireless LANBasics .....................................................................5 3. Installation for Windows platform......................................................6 3.1. Installation Overview...................................................................7 3.2. Install Procedure for Windows XP.................................................8 3.3. Install Procedure for Windows 98/ME/2000..............................10 4. Configuration Utility.....................................................................17 4.1 Link Stauts ..............................................................................24 4.2 C ONNECTIONS ...........................................................................25 4.3 PROFILE SETTING .......................................................................26 4.4 A BOUT ....................................................................................28 4.5 Win XP Zero Configuration ........................................................29 5. Hardware installation .................................................................31 6. Troubleshooting.........................................................................33 7. Technical specifications of Wireless LAN........................................35 Wireless LAN User manual Wireless LAN 11 Mbps 4 1. Introduction Thank you for purchasing your Wireless LAN, Wireless LAN mini-PCI Adapter. This manual will assist you with the installation procedure. The package you have received should contain the following items: • User manual • CD containing Wireless LAN Management utility and drivers Note: if anything is missing, please contact your vendor The CD contains drivers and Configuration Utility program that is used for managing the Wireless LAN Card and establishing the wireless connection with your Local Area Network. Wireless LAN User manual Wireless LAN 11 Mbps 5 2. Wireless LAN Basics Wireless LAN (Local Area Networks) systems offer a great number of advantages over a traditional, wired system. Wireless LANs (WLANs) are more flexible, easier to setup and manage and often more cost effective than their wired equivalence. Using radio frequency (RF) technology, WLANs transmit and receive data over the air, minimizing the need for wired connections. Thus, WLANs combine data connectivity with user mobility, and, through simplified configuration, enable movable LANs. With wireless LANs, users can access shared information without looking for a place to plug in and network managers can set up or augment networks without installing or moving wires. Wireless LANs offer the following productivity, convenience and cost advantages over traditional wired networks: • Mobility - Wireless LAN systems can provide LAN users with access to real-time information anywhere in their organization. This mobility supports productivity and service opportunities not possible with wired networks. • Installation Speed and Simplicity - Installing a wireless LAN system can be fast and easy and can eliminate the need to pull cable through walls and ceilings. • Installation Flexibility - Wireless technology allows the network to go where wires cannot go. • Reduced Cost-of-Ownership - While the initial investment required for wireless LAN hardware might be higher than the cost of wired LAN hardware, overall installation expenses and life-cycle costs will be significantly lower. Long-term cost benefits are greatest in dynamic environments requiring frequent moves, adds, and changes. • Scalability - Wireless LAN systems can be configured in a variety of topologies to meet the needs of specific applications and installations. Configurations are easily changed and range from peer- to-peer to full infrastructure networks, also allow roaming over a broad area. Wireless LAN User manual Wireless LAN 11 Mbps 6 3. Installation for Windows platform The following section will assist you to in installing wireless LAN Adapter successfully. You will first install software (Utility) and then set the network properties to accommodate resource sharing and select the type of wireless network that you wish to install. Wireless LAN User manual Wireless LAN 11 Mbps 7 3.1. Installation Overview Here are some steps you will perform in establishing your wireless network connection: ! Install the Access Point at first. AP is needed in case of Infrastructure network mode. ! Install the software using the Install CD. ! Install the network protocol(s) required to communicate on your network. Most likely you will need the TCP/IP protocol. Wireless LAN User manual Wireless LAN 11 Mbps 8 3.2. Install Procedure for Windows XP 1. Insert the given Installation CD in the CD-ROM and then click on the Setup. Follow the instruction to finish the installation. Select “Install the software automatically (Recommended) ”, and then click Next to continue. Once your system detected the driver, Microsoft will show a warning message as below. Click “ Continue Anyway ” for next step. Wireless LAN User manual Wireless LAN 11 Mbps 9 After copy the file to your system, then the setup is finish. Wireless LAN User manual Wireless LAN 11 Mbps 10 3.3. Install Procedure for Windows 98/ME/2000 Please follow the following steps one by one in order to install the software successfully. 1. Power on your computer and allow Windows 98/ME/2000 to load ful…
Text truncated - open the document above for the full version.
Users Manual
i Contents 1 Checking Out Your Gateway M275. . . . . . . . . . . . . . . . . . . . . . . . . . . . . . . 1 Front . . . . . . . . . . . . . . . . . . . . . . . . . . . . . . . . . . . . . . . . . . . . . . . . . . . . . . . . . . . . . 2 Left Side . . . . . . . . . . . . . . . . . . . . . . . . . . . . . . . . . . . . . . . . . . . . . . . . . . . . . . . . . . 3 Right Side . . . . . . . . . . . . . . . . . . . . . . . . . . . . . . . . . . . . . . . . . . . . . . . . . . . . . . . . . 5 Back . . . . . . . . . . . . . . . . . . . . . . . . . . . . . . . . . . . . . . . . . . . . . . . . . . . . . . . . . . . . . . 6 Bottom . . . . . . . . . . . . . . . . . . . . . . . . . . . . . . . . . . . . . . . . . . . . . . . . . . . . . . . . . . . . 7 Keyboard area . . . . . . . . . . . . . . . . . . . . . . . . . . . . . . . . . . . . . . . . . . . . . . . . . . . . . . 8 Identifying your model . . . . . . . . . . . . . . . . . . . . . . . . . . . . . . . . . . . . . . . . . . . . . . . 10 Gateway model number . . . . . . . . . . . . . . . . . . . . . . . . . . . . . . . . . . . . . . . . . . 10 Gateway serial number . . . . . . . . . . . . . . . . . . . . . . . . . . . . . . . . . . . . . . . . . . . 11 Internal wireless label . . . . . . . . . . . . . . . . . . . . . . . . . . . . . . . . . . . . . . . . . . . . 11 Microsoft Certificate of Authenticity . . . . . . . . . . . . . . . . . . . . . . . . . . . . . . . . . 11 Finding your specifications . . . . . . . . . . . . . . . . . . . . . . . . . . . . . . . . . . . . . . . . . . . 12 Accessories . . . . . . . . . . . . . . . . . . . . . . . . . . . . . . . . . . . . . . . . . . . . . . . . . . . . . . . 13 2Getting Started. . . . . . . . . . . . . . . . . . . . . . . . . . . . . . . . . . . . . . . . . . . . . . . . . . 15 Safety instructions . . . . . . . . . . . . . . . . . . . . . . . . . . . . . . . . . . . . . . . . . . . . . . . . . . 16 General tips . . . . . . . . . . . . . . . . . . . . . . . . . . . . . . . . . . . . . . . . . . . . . . . . . . . . 16 Using the battery . . . . . . . . . . . . . . . . . . . . . . . . . . . . . . . . . . . . . . . . . . . . . . . . 17 Using the AC adapter . . . . . . . . . . . . . . . . . . . . . . . . . . . . . . . . . . . . . . . . . . . . 17 Basic safety precautions . . . . . . . . . . . . . . . . . . . . . . . . . . . . . . . . . . . . . . . . . . 18 Connecting the AC adapter . . . . . . . . . . . . . . . . . . . . . . . . . . . . . . . . . . . . . . . . . . . 19 Protecting from power source problems . . . . . . . . . . . . . . . . . . . . . . . . . . . . . . 21 Starting your convertible tablet PC . . . . . . . . . . . . . . . . . . . . . . . . . . . . . . . . . . . . . 22 Waking up your convertible tablet PC . . . . . . . . . . . . . . . . . . . . . . . . . . . . . . . 23 Turning off your convertible tablet PC . . . . . . . . . . . . . . . . . . . . . . . . . . . . . . . . . . 23 Restarting (rebooting) your convertible tablet PC . . . . . . . . . . . . . . . . . . . . . . . . . . 24 Status indicators . . . . . . . . . . . . . . . . . . . . . . . . . . . . . . . . . . . . . . . . . . . . . . . . . . . 25 LCD panel status indicators . . . . . . . . . . . . . . . . . . . . . . . . . . . . . . . . . . . . . . . 25 Keyboard status indicators . . . . . . . . . . . . . . . . . . . . . . . . . . . . . . . . . . . . . . . . 27 Using the keyboard . . . . . . . . . . . . . . . . . . . . . . . . . . . . . . . . . . . . . . . . . . . . . . . . . 28 Key types . . . . . . . . . . . . . . . . . . . . . . . . . . . . . . . . . . . . . . . . . . . . . . . . . . . . . 29 System key combinations . . . . . . . . . . . . . . . . . . . . . . . . . . . . . . . . . . . . . . . . . 30 Buttons . . . . . . . . . . . . . . . . . . . . . . . . . . . . . . . . . . . . . . . . . . . . . . . . . . . . . . . . . . . 32 LCD panel buttons . . . . . . . . . . . . . . . . . . . . . . . . . . . . . . . . . . . . . . . . . . . . . . 32 Multi-function buttons . . . . . . . . . . . . . . . . . . . . . . . . . . . . . . . . . . . . . . . . . . . . 33 Using the EZ Pad touchpad . . . . . . . . . . . . . . . . . . . . . . . . . . . . . . . . . . . . . . . . . . 35 Using the touchpad . . . . . . . . . . . . . . . . . . . . . . . . . . . . . . . . . . . . . . . . . . . . . . 36 Using the display . . . . . . . . . . . . . . . . . . . . . . . . . . . . . . . . . . . . . . . . . . . . . . . . . . . 38 ii Converting the display from notebook to tablet mode . . . . . . . . . . . . . . . . . . .39 Using the pen . . . . . . . . . . . . . . . . . . . . . . . . . . . . . . . . . . . . . . . . . . . . . . . . . . . . . .41 Storing and removing the pen . . . . . . . . . . . . . . . . . . . . . . . . . . . . . . . . . . . . . .41 Calibration . . . . . . . . . . . . . . . . . . . . . . . . . . . . . . . . . . . . . . . . . . . . . . . . . . . . .42 Gestures . . . . . . . . . . . . . . . . . . . . . . . . . . . . . . . . . . . . . . . . . . . . . . . . . . . . . . .43 Pen button . . . . . . . . . . . . . . . . . . . . . . . . . . . . . . . . . . . . . . . . . . . . . . . . . . . . .44 Tips . . . . . . . . . . . . . . . . . . . . . . . . . . . . . . . . . . . . . . . . . . . . . . . . . . . . . . . . . . .44 Tablet Input Panel (TIP) . . . . . . . . . . . . . . . . . . . . . . . . . . . . . . . . . . . . . . . . . . .44 Using speech recognition . . . . . . . . . . . . . . . . . . . . . . . . . . . . . . . . . . . . . . . . . . . . .46 Connecting the modem . . . . . . . . . . . . . . . . . . . . . . . . . . . . . . . . . . . . . . . . . . . . . .47 Connecting to a wired Ethernet network . . . . . . . . . . . . . . . . . . . . . . . . . . . . . . . . .48 Broadband Internet connections . . . . . . . . . . . . . . . . . . . . . . . . . . . . . . . . . . . .49 Installing a printer, scanner, or other peripheral device . . . . . . . . . . . . . . . . . . . . .49 3Getting Help. . . . . . . . . . . . . . . . . . . . . . . . . . . . . . . . . . . . . . . . . . . . . . .…
Text truncated - open the document above for the full version.
Users Manual
120 Chapter 7: Using Multimedia www.gateway.com 7Click/Tap Start. 8When a message appears that tells you the CD drive needs to be configured, click/tap OK. After the drive is configured, MUSICMATCH records the tracks to your hard drive as MP3 files. A progress bar appears next to each track as it is recorded. Editing track information After you add a CD track as an MP3 file to your music library, you can edit the track’s information. To edit track information: 1Open MUSICMATCH. 2If a CD is playing, click/tap the stop button. 3In the MUSIC CENTER area, click/tap the track you want to edit. 4Click/Tap Options, Music Library, then click/tap Edit Track Tag(s). The Edit Track Tag(s) dialog box opens. 121 Using MUSICMATCH www.gateway.com 5Enter information such as track title, lead artist, album, and genre. 6Click/Tap OK. The new track information appears in the MUSICMATCH playlist, music library, and recorder window. Building a music library Use MUSICMATCH to build a music library. You can organize your music tracks by categories, find a track quickly by using the sort features, and add information to a music file. You can add music tracks to your music library by: ■Creating MP3 files – When you create MP3 files from the tracks on your music CD, MUSICMATCH automatically adds these files to your music library. ■Dragging and Dropping – Drag and drop files from Windows Explorer or your desktop to the music library. ■Downloading files from the Internet – When you are connected to the Internet, MP3 files that you download are automatically added to your music library. CautionDuring the download process, MP3 files may become corrupt. If you are having trouble listening to, or working with, a downloaded file, try downloading the file again. 122 Chapter 7: Using Multimedia www.gateway.com Changing the music library display settings To change the music library display settings: 1In MUSICMATCH, click/tap Options, then click/tap Settings. The Settings window opens. 2Click/Tap the Music Library tab. 3Click/Tap an arrow button to open a column list, then click/tap the category that you want to display in the column. 4When you have finished selecting categories, click/tapOK. 123 Using MUSICMATCH www.gateway.com Listening to Internet radio To listen to an Internet radio station: 1Connect to the Internet, then open MUSICMATCH. 2In the MUSIC CENTER area, under PLAY, click/tap Online Music. 3To select one of the MUSICMATCH Internet radio stations, click/tap Featured Radio Stations or Radio Stations, the radio station, then click/tap the arrow in the play this station box. MusicMatch connects to the station and plays the audio. If you do not see Featured Radio Stations or Radio Stations , drag the scroll bar on the left. - OR - To play another Internet radio station, click/tap Broadcast Radio, the appropriate category in the Broadcast Stations list, the radio station, then click/tap the arrow in the play this station box. MusicMatch connects to the station and plays the audio. If you do not see Broadcast Radio, drag the scroll bar on the left. Using advanced features You can also use MusicMatch to create your own music CDs and to download MP3 files to your portable MP3 player. For more information, see the MusicMatch online help. Tips & TricksSee Do More With Gateway for more information about using your convertible tablet PC to play digital music and download music from the Internet. Click Start, then click Do More With Gateway. If you are in the Business Solutions view, click Consumer Solutions. Click Digital Music. 124 Chapter 7: Using Multimedia www.gateway.com Playing a DVD A Digital Versatile Disc (DVD) is similar to a standard CD but has greater data capacity. Because of this increased capacity, full-length movies, several albums of music, or several gigabytes of data can fit on a single disc. You can play DVDs with the InterVideo DVD Player program or Windows Media Player. For more information about playing DVDs, click/tap Help in the DVD player program. To play a DVD: 1Make sure that the speakers are turned on or headphones are plugged in and that the volume is turned up. 2Turn off your screen saver and standby timers. 3To play a DVD using InterVideo DVD, click/tap Start, All Programs, DVD, then click/tap DVD Player. The InterVideo DVD Player video screen and control panel open. -OR- To play a DVD using Windows Media Player, click/tap Start, All Programs, then click/tap Windows Media Player. The Windows Media Player opens. 4Insert a DVD into the DVD drive, then click/tap(play). The DVD plays. Use the volume controls in the DVD player to adjust the volume. For more information on using the DVD player, see its online help. ImportantIf the InterVideo DVD player is not on your Start menu, and if Windows Media Player cannot play a DVD, you will need to install the InterVideo DVD program. To install the InterVideo DVD program, insert the InterVideo DVD Software disc into your DVD drive and f…
Text truncated - open the document above for the full version.
Contact Information
Applicant
Joyce Kuo
Technical Contact
Advance Data Technology CorporationEllis Wu
[email protected]+886-3-327-0910
13-1, Lane 19, WenShan 3rd., St. · Taoyuan · Taiwan
Non-Technical Contact
American TCBTimothy Johnson
[email protected]703-847-4700
Test Firm
Bureau Veritas CPS (H.K.) Ltd. Taoyuan BranchTommy Wu
Technical Specifications
| # | Rule Parts | Frequency Range | Power Output |
|---|---|---|---|
| 2 | 15E | 5.25 GHz - 5.35 GHz | 38.00 mW |
Other Applications from Quanta Computer Inc
HFS-C306
Sep 03, 2026Mini
Equipment Class
DTS - Digital Transmission SystemHFS-QV28NRW
Jul 15, 2026Telematics Module
Equipment Class
PCB - PCS Licensed TransmitterHFSCIP
Jun 15, 2026QOCA ecg1202
Equipment Class
DTS - Digital Transmission System
HFS-QV28NUS
Apr 16, 2026Telematics Module
Equipment Class
PCB - PCS Licensed TransmitterHFS-C407
Jul 21, 2024Clover Flex Pocket
Equipment Class
NII - Unlicensed National Information Infrastructure TX