HFSOA8WM3B2100NoteBook
Quanta Computer Inc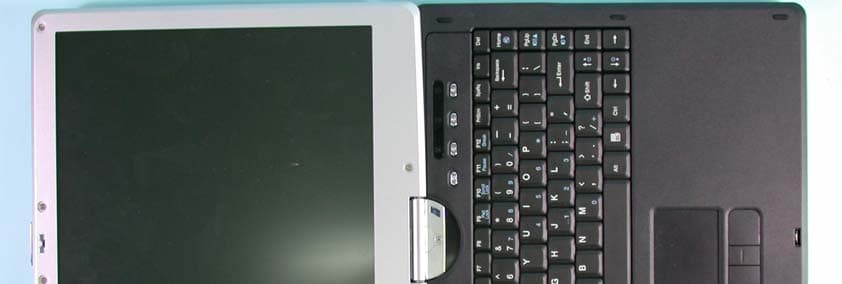
Click to zoom
Application Details
- Equipment Class
- DTS - Digital Transmission System
- Date of Grant
- Oct 08, 2003
- Application Purpose
- Original Equipment
- Date of Application
- Oct 08, 2003
- Equipment Note
- NoteBook
- Frequency Range
- 2412.00000000 - 2462.00000000
- Company
- Quanta Computer Inc
- Country
- Taiwan
Documents & Files
Document Text
Text extracted from the exhibit documents filed with the FCC. Open a document above to read the original.
Users Manual
Intel(R) PRO/Wireless LAN Mini PCI Adapter User's Guide [Preliminary Draft] The Intel(R) PRO/Wireless LAN Mini PCI Adapter is a wireless device that operates at 5 and 2.4 GHz. This adapter operates with high-capacity networks using multiple access points within large or small environments. Using the Intel(R) PROSet Windows utility you can configure, manage wireless local area network (WLAN) management tasks, adapter switching functions, and connections. Wireless LAN General Information About Wireless LAN Technology Adapter Setup and Configuration Software Installation Using PROSet Connecting to a Network Security Overview Setting Up Security Troubleshooting Specifications Glossary Support and Warranty Customer Support Software License Safety and Regulatory Notices Limited Warranty Legal Notices Copyright © 2002 Intel Corporation. All rights reserved. Intel Corporation, 5200 N.E. Elam Young Parkway, Hillsboro, OR 97124-6497 Intel Corporation assumes no responsibility for errors or omissions in this document. Nor does Intel make any commitment to update the information contained herein. Intel, Itanium, and Pentium are trademarks or registered trademarks of Intel Corporation or its subsidiaries in the United States and other countries. *Other names and brands may be claimed as the property of others. Back to Contents About Wireless LAN Technology • Choosing a WLAN • Configuring a WLAN • Identifying a WLAN • Surveying the Site of Your WLAN • Factors Affecting Range • Stronger Security A wireless network connects computers without using network cables. Computers use radio communications to send data between each other. You can communicate directly with other wireless computers, or connect to an existing network through a wireless access point. When you set up your wireless adapter, you select the operating mode for the kind of wireless network you want. You can use your Intel(R) PRO/Wireless adapter to connect to other similar wireless devices that comply with the 802.11 standard for wireless networking. Choosing a Wireless LAN Mode Wireless LANs can operate with or without access points, depending on the number of users in the network. Infrastructure mode uses access points to allow wireless computers to send and receive information. Wireless computers transmit to the access point, the access point receives the information and rebroadcasts it to other computers. The access point can also connect to a wired network or to the Internet. Multiple access points can work together to provide coverage over a wide area. Peer-to-Peer mode, also called Ad Hoc mode, works without access points and allows wireless computers to send information directly to other wireless computers. You can use Peer-to-Peer mode to network computers in a home or small office or to set up a temporary wireless network for a meeting. Configuring a Wireless LAN There are three basic components that must be configured for a wireless LAN to operate properly: • Network Name—Each wireless network uses a unique Network Name to identify the network. This name is called the Service Set Identifier (SSID). When you set up your wireless adapter, you specify the SSID. If you want to connect to an existing network, you must use the name for that network. If you are setting up your own network you can make up your own name and use it on each computer. The name can be up to 32 characters long and contain letters and numbers. • Profiles—When you set up your computer to access a wireless network, Intel(R) PROSet creates a profile for the wireless settings that you specify. If you want to connect to another network, you can scan for existing networks and make a temporary connection, or create a new profile for that network. After you create profiles, your computer will automatically connect when you change locations. • Security—The 802.11 wireless networks use encryption to help protect your data. Wired equivalent privacy (WEP) uses a 64-bit or 128-bit shared encryption key to scramble data. Before a computer transmits data, it scrambles the data using the secret encryption key. The receiving computer uses this same key to unscramble the data. If you are connecting to an existing network, use the encryption key provided by the administrator of the wireless network. If you are setting up your own network you can make up your own key and use it on each computer. Identifying a Wireless Network Depending on the size and components of a wireless LAN, there are many ways to identify a wireless LAN: • The Network Name or Service Set Identifier (SSID)—Identifies a wireless network. All wireless devices on the network must use the same SSID. • Extended Service Set Identifier (ESSID)—A special case of SSID used to identify a wireless network that includes access points. • Independent Basic Service Set Identifier (IBSSID)—A special case of SSID used to identify a network of wireless computers configured to communicate directly with one another without using an access point. • Basic Service Set Identifier (BSSID)—A unique identifier for each wireless device. The BSSID is the Ethernet MAC address of the device. • Broadcast SSID—An access point can respond to computers sending probe packets with the broadcast SSID. If this feature is enabled on the access point, any wireless user can associate with the access point by using a blank (null) SSID. Surveying the Site of Your Wireless LAN Conducting a site survey for your wireless LAN is the most crucial step in the process of setting up a wireless network. It greatly reduces the amount of troubleshooting you will have to do once you have the wireless LAN set up and ready for connection testing. To conduct a site survey, you will need the following tools: • An access point (or laptop computer) that is set up to be the transmitter. It should be mounted near and at the same height as the designated location of your wireless LAN. • A laptop that will act as the mobile receiver. It must contain your site survey soft…
Text truncated - open the document above for the full version.
Users Manual
i Contents 1 Checking Out Your Gateway M275. . . . . . . . . . . . . . . . . . . . . . . . . . . . . . . 1 Front . . . . . . . . . . . . . . . . . . . . . . . . . . . . . . . . . . . . . . . . . . . . . . . . . . . . . . . . . . . . . 2 Left Side . . . . . . . . . . . . . . . . . . . . . . . . . . . . . . . . . . . . . . . . . . . . . . . . . . . . . . . . . . 3 Right Side . . . . . . . . . . . . . . . . . . . . . . . . . . . . . . . . . . . . . . . . . . . . . . . . . . . . . . . . . 5 Back . . . . . . . . . . . . . . . . . . . . . . . . . . . . . . . . . . . . . . . . . . . . . . . . . . . . . . . . . . . . . . 6 Bottom . . . . . . . . . . . . . . . . . . . . . . . . . . . . . . . . . . . . . . . . . . . . . . . . . . . . . . . . . . . . 7 Keyboard area . . . . . . . . . . . . . . . . . . . . . . . . . . . . . . . . . . . . . . . . . . . . . . . . . . . . . . 8 Identifying your model . . . . . . . . . . . . . . . . . . . . . . . . . . . . . . . . . . . . . . . . . . . . . . . 10 Gateway model number . . . . . . . . . . . . . . . . . . . . . . . . . . . . . . . . . . . . . . . . . . 10 Gateway serial number . . . . . . . . . . . . . . . . . . . . . . . . . . . . . . . . . . . . . . . . . . . 11 Internal wireless label . . . . . . . . . . . . . . . . . . . . . . . . . . . . . . . . . . . . . . . . . . . . 11 Microsoft Certificate of Authenticity . . . . . . . . . . . . . . . . . . . . . . . . . . . . . . . . . 11 Finding your specifications . . . . . . . . . . . . . . . . . . . . . . . . . . . . . . . . . . . . . . . . . . . 12 Accessories . . . . . . . . . . . . . . . . . . . . . . . . . . . . . . . . . . . . . . . . . . . . . . . . . . . . . . . 13 2Getting Started. . . . . . . . . . . . . . . . . . . . . . . . . . . . . . . . . . . . . . . . . . . . . . . . . . 15 Safety instructions . . . . . . . . . . . . . . . . . . . . . . . . . . . . . . . . . . . . . . . . . . . . . . . . . . 16 General tips . . . . . . . . . . . . . . . . . . . . . . . . . . . . . . . . . . . . . . . . . . . . . . . . . . . . 16 Using the battery . . . . . . . . . . . . . . . . . . . . . . . . . . . . . . . . . . . . . . . . . . . . . . . . 17 Using the AC adapter . . . . . . . . . . . . . . . . . . . . . . . . . . . . . . . . . . . . . . . . . . . . 17 Basic safety precautions . . . . . . . . . . . . . . . . . . . . . . . . . . . . . . . . . . . . . . . . . . 18 Connecting the AC adapter . . . . . . . . . . . . . . . . . . . . . . . . . . . . . . . . . . . . . . . . . . . 19 Protecting from power source problems . . . . . . . . . . . . . . . . . . . . . . . . . . . . . . 21 Starting your convertible tablet PC . . . . . . . . . . . . . . . . . . . . . . . . . . . . . . . . . . . . . 22 Waking up your convertible tablet PC . . . . . . . . . . . . . . . . . . . . . . . . . . . . . . . 23 Turning off your convertible tablet PC . . . . . . . . . . . . . . . . . . . . . . . . . . . . . . . . . . 23 Restarting (rebooting) your convertible tablet PC . . . . . . . . . . . . . . . . . . . . . . . . . . 24 Status indicators . . . . . . . . . . . . . . . . . . . . . . . . . . . . . . . . . . . . . . . . . . . . . . . . . . . 25 LCD panel status indicators . . . . . . . . . . . . . . . . . . . . . . . . . . . . . . . . . . . . . . . 25 Keyboard status indicators . . . . . . . . . . . . . . . . . . . . . . . . . . . . . . . . . . . . . . . . 27 Using the keyboard . . . . . . . . . . . . . . . . . . . . . . . . . . . . . . . . . . . . . . . . . . . . . . . . . 28 Key types . . . . . . . . . . . . . . . . . . . . . . . . . . . . . . . . . . . . . . . . . . . . . . . . . . . . . 29 System key combinations . . . . . . . . . . . . . . . . . . . . . . . . . . . . . . . . . . . . . . . . . 30 Buttons . . . . . . . . . . . . . . . . . . . . . . . . . . . . . . . . . . . . . . . . . . . . . . . . . . . . . . . . . . . 32 LCD panel buttons . . . . . . . . . . . . . . . . . . . . . . . . . . . . . . . . . . . . . . . . . . . . . . 32 Multi-function buttons . . . . . . . . . . . . . . . . . . . . . . . . . . . . . . . . . . . . . . . . . . . . 33 Using the EZ Pad touchpad . . . . . . . . . . . . . . . . . . . . . . . . . . . . . . . . . . . . . . . . . . 35 Using the touchpad . . . . . . . . . . . . . . . . . . . . . . . . . . . . . . . . . . . . . . . . . . . . . . 36 Using the display . . . . . . . . . . . . . . . . . . . . . . . . . . . . . . . . . . . . . . . . . . . . . . . . . . . 38 ii Converting the display from notebook to tablet mode . . . . . . . . . . . . . . . . . . .39 Using the pen . . . . . . . . . . . . . . . . . . . . . . . . . . . . . . . . . . . . . . . . . . . . . . . . . . . . . .41 Storing and removing the pen . . . . . . . . . . . . . . . . . . . . . . . . . . . . . . . . . . . . . .41 Calibration . . . . . . . . . . . . . . . . . . . . . . . . . . . . . . . . . . . . . . . . . . . . . . . . . . . . .42 Gestures . . . . . . . . . . . . . . . . . . . . . . . . . . . . . . . . . . . . . . . . . . . . . . . . . . . . . . .43 Pen button . . . . . . . . . . . . . . . . . . . . . . . . . . . . . . . . . . . . . . . . . . . . . . . . . . . . .44 Tips . . . . . . . . . . . . . . . . . . . . . . . . . . . . . . . . . . . . . . . . . . . . . . . . . . . . . . . . . . .44 Tablet Input Panel (TIP) . . . . . . . . . . . . . . . . . . . . . . . . . . . . . . . . . . . . . . . . . . .44 Using speech recognition . . . . . . . . . . . . . . . . . . . . . . . . . . . . . . . . . . . . . . . . . . . . .46 Connecting the modem . . . . . . . . . . . . . . . . . . . . . . . . . . . . . . . . . . . . . . . . . . . . . .47 Connecting to a wired Ethernet network . . . . . . . . . . . . . . . . . . . . . . . . . . . . . . . . .48 Broadband Internet connections . . . . . . . . . . . . . . . . . . . . . . . . . . . . . . . . . . . .49 Installing a printer, scanner, or other peripheral device . . . . . . . . . . . . . . . . . . . . .49 3Getting Help. . . . . . . . . . . . . . . . . . . . . . . . . . . . . . . . . . . . . . . . . . . . . . .…
Text truncated - open the document above for the full version.
Users Manual
71 Searching for files www.gateway.com 3Continue double-clicking/double-tapping folders and their subfolders until you find the file or folder you want. Searching for files If you are looking for a particular file or folder or a set of files or folders that have characteristics in common, but you do not remember where they are stored on your hard drive, you can use the Search utility to search by: ■Name or part of a name ■Creation date ■Modification date ■File type ■Text contained in the file ■Time period in which it was created or modified You can also combine search criteria to refine searches. Files and folders found using this utility can be opened, copied, cut, renamed, or deleted directly from the list in the results window. Help and Support For more information about browsing for files and folders, click/tap Start, then click/tap Help and Support. Type the keyword files and folders in the Search box , then click/tap the arrow. 72 Chapter 4: Windows Basics www.gateway.com Using the Windows Search utility To find files and folders using the Search utility: 1Click/Tap Start, then click/tap Search. The Search Results window opens. Click/Tap All files and folders. 2If you want to search by file or folder name, type in all or part of the file or folder name in the name box in the left pane of the window. ■If you type all of the name, Search will list all files and folders of that name. ■If you type part of the name, Search will list all of the file and folder names containing the letters you typed. 73 Searching for files www.gateway.com 3Click/Tap Search. When the search is completed, Windows lists the files and folders whose names contain the text that you searched for. 4Open a file, folder, or program by double-clicking/double-tapping the name in the list. Using advanced search options Search can find files meeting more criteria than file name. You can narrow your search by selecting the search options that you want. You can search by the: ■Date the file was created or modified. ■Size of the file. ■Type of file, such as a program or a text document. Help and Support For more information about searching for files and folders, click/tap Start, then click/tap Help and Support. Type the keyword searching in the Search box , then click/tap the arrow. 74 Chapter 4: Windows Basics www.gateway.com Working with documents Computer documents include word processing files, spreadsheet files, or other similar files. The basic methods of creating, saving, opening, and printing a document apply to most of these types of files. The following examples show how to create, save, open, and print a document using Microsoft ® WordPad. Similar procedures apply to other programs such as WordPerfect, Microsoft Word, and Microsoft Excel. For more information about using a program, click/tap Help on its menu bar. Creating a new document To create a new document: 1Click/Tap Start, All Programs, Accessories, then click/tap WordPad. Microsoft WordPad starts and a blank document opens. 2Begin composing your document. Use the menus and toolbar buttons at the top of the window to format the document. 75 Working with documents www.gateway.com Saving a document After you create a document, you need to save it if you want to use it later. To save a document: 1Click/Tap File, then click/tap Save. The Save As dialog box opens. 2Click/Tap the arrow button to open the Save in list, then click/tap the folder where you want to save the file. If you do not see the folder you want, browse through the folders listed below the Save in list. 3Type a new file name in the File name box. 4Click/Tap Save. Help and Support For more information about saving documents, click/tap Start, then click/tap Help and Support. Type the keyword saving in the Search box , then click/tap the arrow. Save in list File name 76 Chapter 4: Windows Basics www.gateway.com Opening a document To view, revise, or print an existing document, first you need to open it. Open the document in the program that it was created in. To open a document: 1Start the program. 2Click/Tap File, then click/tap Open. 3Click/Tap the arrow button to open the Look in list, then click/tap the folder you want to open. If you do not see the folder you want, browse through the folders listed below the Look in list. 4Double-click/Double-tap the document file name. The document opens. Help and Support For more information about opening documents, click/tap Start, then click/tap Help and Support. Type the keyword opening files in the Search box , then click/tap the arrow. Look in list 77 Working with documents www.gateway.com Printing a document To print a document, you must have a printer connected to your convertible tablet PC or have access to a network printer. For more information about installing or using your printer, see the printer documentation. To print a document: 1Make sure that the printer is turned on and loaded with paper. 2Start the program and open the document. 3Click/Tap File, then click/tap Print. The Print dialog box opens. 4Set the print options, then click/tap OK. The document prints. Help and Support For more information about printing documents, click/tap Start, then click/tap Help and Support. Type the keyword printing in the Search box , then click/tap the arrow. 78 Chapter 4: Windows Basics www.gateway.com Keyboard shortcuts The following table shows a few shortcuts that you can use in Windows and almost all programs that run in Windows. For more information about shortcuts, see your Windows or program documentation. To...Do this... Copy a file, folder, text, or graphicClick the item, then press CTRL+C. Cut a file, folder, text, or graphicClick the item, then press CTRL+X. Paste a file, folder, text, or graphicClick inside the folder or window where you want to paste the object, then press CTRL+V. Select multiple items in a list or windowClick the first item, press and hold down the CTRL key, then click each of the remaining items. Select multiple adjacent i…
Text truncated - open the document above for the full version.
Users Manual
141 Creating CDs using Nero Express www.gateway.com 9Click/Tap Next. The Final Burn Settings screen opens. 10Click/Tap the arrow to open the Current recorder list, then click/tap your recordable drive. 11Click/Tap Burn. The Burning Process screen opens and Nero Express burns the files to the CD. 12When a message tells you that the recording is complete, click/tap OK. 13Click/Tap Next to return the main Nero Express screen. 14Click/Tap Exit. 142 Chapter 7: Using Multimedia www.gateway.com Copying a CD To copy a music CD or data CD: 1Click/Tap Start, All Programs, Burn a CD or Data DVD, Nero Programs, then click/tap Nero Express. Nero Express opens. 2Click/Tap Copy entire disc. The Select source and destination screen opens. 3Insert the music CD or data CD you want to copy into your recordable drive. 4Click/Tap the arrow to open the Source drive list, then click/tap the drive that contains your source disc. ImportantIf the drive you want to use is not in the modular bay, you need to swap modules. For more information about swapping modules, see “Changing modules” on page 110. 143 Creating CDs using Nero Express www.gateway.com 5Click/Tap the arrow to open the Destination drive list, then click/tap your recordable drive. 6Click/Tap Burn. The Nero’s Title and CD Database dialog box opens. 144 Chapter 7: Using Multimedia www.gateway.com 7Wait until the dialog box closes. - OR - Click/Tap Cancel. The Burning Process screen opens. Nero Express copies the tracks or files to your hard drive. 8A message prompts you to insert a CD. Remove the source CD, insert a blank, writable CD, then wait for the message box to close. Nero Express copies the files from your hard drive to the writable CD. 9When a message tells you that the recording is complete, click/tap OK. 10Click/Tap Next to return to the main Nero Express screen. 11Click/Tap Exit. 145 Creating CDs using Nero Express www.gateway.com Copying music tracks To copy music CD tracks to your hard drive: 1Click/Tap Start, All Programs, Burn a CD or Data DVD, Nero Programs, then click/tap Nero Express. Nero Express opens. 2Insert the music CD that has the tracks you want to copy into your CD drive. 3If an Audio CD dialog box opens, click/tap Take no action, then click/tap OK. 4Click/Tap More. The Nero Toolbar opens. ImportantIf the drive you want to use is not in the modular bay, you need to swap modules. For more information about swapping modules, see “Changing modules” on page 110. 146 Chapter 7: Using Multimedia www.gateway.com 5Click/Tap the Save Tracks icon. The Nero’s Title and CD Database dialog box opens. 6Wait until the dialog box closes. - OR - Click/Tap Cancel. 147 Creating CDs using Nero Express www.gateway.com 7If a message box opens, click/tap OK. The Save Tracks dialog box opens. 8Click/Tap the arrow button to open the Output file format list, then click/tap the format you want for the saved tracks. 9To record all the tracks, click/tap GO. The recording process begins. - OR - To record selected tracks, hold down the C TRL key, click/tap the tracks you want, then click/tap GO. The recording process begins. 10After the recording is complete, click/tap Close. 148 Chapter 7: Using Multimedia www.gateway.com Creating a music CD To create a music CD: 1Click/Tap Start, All Programs, Burn a CD or Data DVD, Nero Programs, then click/tap Nero Express. Nero Express opens. 2Insert a blank, writable CD into your recordable drive. 3If a dialog box opens, click/tap Take no action, then click/tap OK. 4Move your pointer over Music, then click/tap one of the following options: ■Audio CD to create a music CD that will play on all CD players. Nero Express converts MP3 and WMA files to Audio CD format. ■Audio and Data CD to create a CD that contains tracks and data files. You can play the music files in a CD player and you can view all files on your convertible tablet PC. ■MP3 Disc to create a CD using MP3 files. You can play the CD on your convertible tablet PC or a player that supports MP3 files. ■WMA disc to create a CD using WMA files. You can play the CD on your convertible tablet PC or a player that supports WMA files. ImportantIf the drive you want to use is not in the modular bay, you need to swap modules. For more information about swapping modules, see “Changing modules” on page 110. 149 Creating CDs using Nero Express www.gateway.com The screen you use to add files opens. 150 Chapter 7: Using Multimedia www.gateway.com 5Click/Tap Add. The Select Files and Folders dialog box opens. 6Browse to the folder that contains the files you want to add. You can click/tap the arrow to open the Location list, then click/tap a drive or folder, or you can click/tap folders in the Name list. Press and hold the CTRL key to select multiple files. 7Click/Tap Add. You can continue to select files and click/tap Add. 8After you select all your files, click/tap Finished. 151 Creating CDs using Nero Express www.gateway.com 9Click/Tap Next. The Final Burn Settings screen opens. 10Click/Tap the arrow to open the Current recorder list, then click/tap your recordable drive. 11Click/Tap Burn. The Burning Process screen opens and Nero Express burns the files to the CD. 12When a message tells you that the recording is complete, click/tap OK. 13Click/Tap Next to return the main Nero Express screen. 14Click/Tap Exit. 152 Chapter 7: Using Multimedia www.gateway.com Advanced features In addition to Nero Express, you can use: ■Nero BackItUp to create a backup of files on your hard drive, then use BackItUp to restore the files you backed up in case of a hard drive failure, virus, or other problem. ■Nero CD-DVD Speed to test your DVD and DVD/CD-RW drives for transfer rates, load and eject times, seek and access times, and more. ■Nero Cover Designer to create labels for your CDs and DVDs, covers for your CD and DVD cases, booklets to include with your CDs and DVDs, and more. ■Nero DriveSpeed to control DVD or DVD/CD-RW drive read speed and spin down time. ■Nero InfoTool to find out a…
Text truncated - open the document above for the full version.
Users Manual
211 Using a wired Ethernet network www.gateway.com Using a wired Ethernet network A wired Ethernet network consists of two or more computers connected together through an Ethernet cable. This connection type is commonly used in offices around the world and can be used to build computer networks in the home. Ethernet, Fast Ethernet, or Gigabit Ethernet Ethernet is available at three different speeds. Standard Ethernet runs at 10 Mbps, Fast Ethernet runs at 100 Mbps, and Gigabit Ethernet runs at 1000 Mbps. Most home networks are built using Standard or Fast Ethernet components. Business networks are typically built using Fast or Gigabit Ethernet components. To create a wired Ethernet network, you or your electrician must: ■Install special Ethernet cables in your home or office ■Install an Ethernet card in each of your desktop computers (if your computers do not already have built-in Ethernet jacks) ■Install an Ethernet PC Card in each of your notebooks or convertible tablet PCs (if your notebooks or convertible tablet PCs do not already have built-in Ethernet jacks) ■Install an Ethernet router, switch, or hub ImportantCheck local code requirements before installing Ethernet cable or other wiring in your home or office. Your municipality may require you to obtain a permit and hire a licensed installer. Tips & TricksIf you are connecting just two computers (known as a peer-to-peer wired Ethernet network), you can eliminate the router, switch, or hub and use a special crossover cable. 212 Chapter 11: Networking Your Gateway M275 www.gateway.com Example wired Ethernet network The following is an example of a wired Ethernet network. The network is made up of a router, a cable or DSL modem, your computers, and cables connecting each of these components. The router is the central control point for the network. Attached to the router are all of your computers or Ethernet-ready devices. Also connected to the router is a cable or DSL modem that provides access to the Internet. Tips & TricksTo add the ability to access a wireless Ethernet network to your wired Ethernet network, connect an access point to the router, switch, or hub. For more information about accessing a wireless Ethernet, see “Using a wireless Ethernet network” on page 214. Cable/DSL modem Router, switch, or hub 213 Using a wired Ethernet network www.gateway.com Equipment you need for a wired Ethernet network For a wired Ethernet network you need: ■An Ethernet jack on each desktop computer, notebook, tablet PC, and convertible tablet PC. - OR - An Ethernet card (also called network interface cards or NICs) installed in each desktop computer. - OR - An Ethernet PC Card installed in each notebook or convertible tablet PC. ■An Ethernet router. Select a router that gives you the following features: ■A jack for connecting to a cable or DSL modem. ■The ability to assign IP addresses to your networked computers dynamically. This prevents intruders from seeing the computers over the Internet. ■A built-in firewall to protect the computers on your network from intruders trying to access your data over the Internet. ■Built-in switching (with enough ports for all computers and devices on the network) so you will not have to purchase a hub or switch. ■If you did not purchase a router that includes built-in switching or if the router does not have enough ports to attach all of your computers, an Ethernet hub or switch with enough ports for all computers and devices in the network. ■Ethernet cable going from each computer to the router, hub, or switch. ImportantFor best results, all Ethernet components should be either standard Ethernet (10 Mbps), Fast Ethernet (100 Mbps or 10/100), or Gigabit Ethernet (1000 Mbps or 10/100/1000). A mixture of components rated at different speeds will result in your network running at the speed of the slowest rated component. 214 Chapter 11: Networking Your Gateway M275 www.gateway.com Using a wireless Ethernet network A wireless Ethernet network is ideal for creating a home or office network or adding mobility to an existing wired Ethernet network. A wireless Ethernet network allows you the freedom to move about your home or office with your notebook, tablet PC, or convertible tablet PC. For example, you can take your notebook, tablet PC, or convertible tablet PC from your home office to your patio without having an Ethernet jack available. WarningRadio frequency wireless communication can interfere with equipment on commercial aircraft. Current aviation regulations require wireless devices to be turned off while traveling in an airplane. IEEE 802.11a, IEEE 802.11b, and IEEE 802.11g communication devices are examples of devices that provide wireless communication. For instructions to turn wireless Ethernet on and off, see “Turning your wireless Ethernet emitter on or off” on page 220. ImportantIf your convertible tablet PC came equipped with an internal radio frequency wireless device, see “Safety, Regulatory, and Legal Information” on page 315 for general wireless regulatory and safety guidelines. To find out if your convertible tablet PC has an internal wireless device, check the label (see “Identifying your model” on page 10) or the device manager. 215 Using a wireless Ethernet network www.gateway.com Wireless Ethernet speed and frequency Wireless Ethernet is available at two different speeds and at two different frequencies. The following table compares the various wireless Ethernet network types. The two most common types of wireless Ethernet networks are access point and peer-to-peer. Network TypeSpeedFrequencyAdvantagesDisadvantages IEEE 802.11a54 Mbps5 GHzLess possible interference than IEEE 802.11b and IEEE 802.11g ■ Shorter range (25 to 75 feet) than IEEE 802.11b and IEEE 802.11g ■ Not compatible with IEEE 802.11b or IEEE 802.11g networks IEEE 802.11b11 Mbps2.4 GHz ■ Large number of access points already exist in airports, college campuses, and businesses ■ Compatible with IEEE 802.11g networks ■ Longer r…
Text truncated - open the document above for the full version.
Contact Information
Applicant
Joyce Kuo
Technical Contact
Advance Data Technology Corp.Ellis Wu
[email protected]+886-3-327-0910
13-1 Lane 19 WenShan 3rd Street · Taoyuan · Taiwan
Test Firm
Bureau Veritas CPS (H.K.) Ltd., Taoyuan BranchRichard Chen
Technical Specifications
| # | Rule Parts | Frequency Range | Power Output |
|---|---|---|---|
| 1 | 15C | 2.41 GHz - 2.46 GHz | 41.00 mW |
Other Applications from Quanta Computer Inc
HFS-QV28NRW
Jul 15, 2026Telematics Module
Equipment Class
PCB - PCS Licensed TransmitterHFSCIP
Jun 15, 2026QOCA ecg1202
Equipment Class
DTS - Digital Transmission System
HFS-QV28NUS
Apr 16, 2026Telematics Module
Equipment Class
PCB - PCS Licensed TransmitterHFS-C407
Jul 21, 2024Clover Flex Pocket
Equipment Class
NII - Unlicensed National Information Infrastructure TXHFS-C406
Jul 01, 2024Clover Flex
Equipment Class
DTS - Digital Transmission System