MSQ-RTBE7M00BE3600 Dual Band WiFi Router, BE5000 Dual Band WiFi Router
ASUSTeK Computer Inc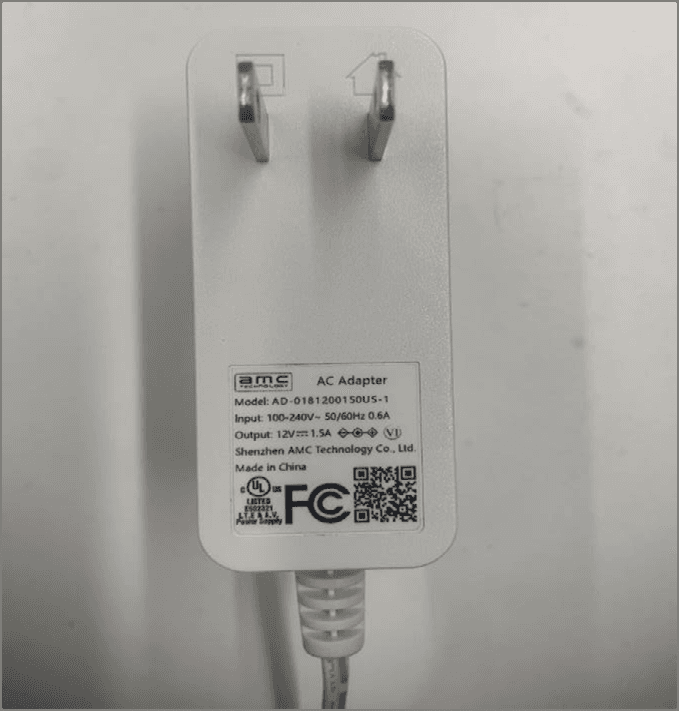
Click to zoom
Application Details
- Equipment Class
- DTS - Digital Transmission System
- Date of Grant
- Sep 03, 2024
- Application Purpose
- Original Equipment
- Date of Application
- Sep 02, 2024
- Equipment Note
- BE3600 Dual Band WiFi Router, BE5000 Dual Band WiFi Router
- Frequency Range
- 2412.00000000 - 2462.00000000
- Company
- ASUSTeK Computer Inc
- Country
- Taiwan
Documents & Files
Document Text
Text extracted from the exhibit documents filed with the FCC. Open a document above to read the original.
Users Manual
ASUS ZenWiFi BD4 BE3600 Dual Band WiFi Router Model: BD4 Quick Start Guide 1 Plug the adapter into the DC port, and press the power button. 2 The power LED will light up when the hardware is ready. Hardware Explanations ZenWiFi BD4 Overview 2.5GbE port (WAN/LAN auto-detecting) • Connect your optical modem to a 2.5GbE port with a network cable. • Connect your PC to a 2.5GbE port with a network cable. Before Setup AiMesh Setup Steps DC Power adapterDC Output: +12V with max 1.5A current Operating Temperature0~40 o CStorage0~70 o C Operating Humidity50~90%Storage20~90% Specifications: One Router Setup Steps Unplug Prepare your Modem 01 1 Unplug the power of cable / DSL modem. If it has a battery backup, remove the battery. 2 Connect your modem to the router with the network cable provided. 3 Power on the modem. Plug modem to the power outlet and power on. WE SUGGEST... Modem back Modem back 4 Check the modem LED lights to ensure the connection is active. If you are using DSL for internet, you will need your username / password from your Internet service provider (ISP) to properly configure your router. Modem front Connect your Device 02 1 Power on the router. Plug in and press the power switch at the back of your router. 2 Check that the LED turns solid blue to indicate that the hardware connection is ready for setup. 3 [Web] Connect your PC to the router using an additional network cable. [App] Or you can use a phone or pad to complete the setup via ASUS Router App. Login and Connect 03 [Web] 1 Refer to ONE ROUTER SETUP STEPS to connect your AiMesh router to your PC and modem, and then log in into the web GUI. AiMesh router 03 AiMesh router ModemAiMesh node Logout/Reboot AiMesh Router 2 Go to Network Map page, click AiMesh icon and then Search for your extending AiMesh node. 3 Click Search, it will automatically search for your AiMesh node nearby. When the AiMesh node shows on this page, click it to add it into the AiMesh system. ** If you cannot find any AiMesh node, please go to TROUBLE SHOOTING. 4 A message is displayed when synchronization is completed. 5 Congratulations! You will find the pages below show up when an AiMesh node has been successfully added to the AiMesh network. Successfully added RT-ABCDE to your AiMesh system, it will take awhile to show up as connected in the AiMesh router list. OK [App] Log in to your existing router via ASUS Router App and choose “Add AiMesh Node” to complete the setup. 2.5GbE port x 2 Setting up an AiMesh WiFi system 02 1 Prepare two or more ASUS routers supporting AiMesh. 2 Assign one as AiMesh router, and another one as AiMesh node. ** If you have multiple AiMesh routers, we recommend using the router with the highest specifications as your AiMesh router and the others as AiMesh nodes. 3 Go to AiMesh SETUP STEPS. Setting up a standalone router 01 1 Go to ONE ROUTER SETUP STEPS. One Router Setup Download free ASUS Router APP to set up and manage your router(s) 03 AiMesh Setup Steps AiMesh routerAiMesh node Prepare 01 Place your AiMesh router and node in the same room and at least 1 meter apart during the setup process. AiMesh node 02 Keep your AiMesh node powered on and standby for AiMesh system settings. Power (DCIN) port 1 [Web] Open a web browser. You will be redirected to the ASUS Setup Wizard. If not, navigate to http://www.asusrouter.com. [App] Launch ASUS Router App and follow the instructions to complete the setup. E23694 Power button At least 1 meter AiMesh node AiMesh router Relocation FAQ Locate the AiMesh router and node at the best place. NOTES: To minimize interference, keep the routers away from devices like cordless phones, Bluetooth devices and microwave ovens. We recommend that you place the routers in an open or spacious location. ZenWiFi BD4 LED indications Q1: Does the AiMesh router support Access Point mode? A: Yes. You can choose to set the AiMesh router as router mode or access point mode. Please go to web GUI (http://www.asusrouter.com), and go to the page Administration > Operation Mode. Could I setup wired connection between AiMesh routers (Ethernet backhaul)? Q2: A: Yes. AiMesh system supports both wireless and wired connection between AiMesh router and node to maximize throughput and stability. AiMesh analyzes the wireless signal strength for each frequency band available, and then determines automatically whether a wireless or wired connection is best to serve as the inter-router connection backbone. 1 Follow the setup steps to establish a connection between the AiMesh router and node via WiFi first. 2 Place the node in the ideal locations for best coverage. Run an Ethernet cable from either 2.5GbE port of the AiMesh router to either 2.5GbE port of AiMesh node. 3 AiMesh system will auto-select the best path for data transmission, whether wired or wireless. Modem THE BEST PERFORMANCE FREQUENTLY ASKED QUESTIONS Troubleshooting If your AiMesh router cannot find any AiMesh node nearby or synchronization fails, please check the following and try again. a Move your AiMesh node closer to the AiMesh router ideally. Ensure that it is within 3 meters. b Your AiMesh node is powered on. Solid blue: Your ZenWiFi BD4 is ready for setup. Solid white: Your ZenWiFi BD4 is online and works well. Solid red: Your ZenWiFi BD4 router has no Internet connection. Q3: Where can I find more information about Mesh WiFi system? A: Technical support site: https://www.asus.com/support Service and Support https://www.asus.com/support Video Tutorials https://qr.asus.com/wl_videotutorials ASUS Recycling/Takeback Services ASUS recycling and takeback programs come from our commitment to the highest standards for protecting our environment. We believe in providing solutions for you to be able to responsibly recycle our products, batteries, other components, as well as the packaging materials. Please go to https://esg.asus.com/en/Takeback.htm for the detailed recycling information in different regions. REACH Complying with the REACH (Registration, Evalu…
Text truncated - open the document above for the full version.
Users Manual
ASUS ZenWiFi BD5 BE5000 Dual Band WiFi Router Model: BD5 Quick Start Guide 1 Plug the adapter into the DC port, and press the power button. 2 The power LED will light up when the hardware is ready. Hardware Explanations ZenWiFi BD5 Overview 2.5GbE port (WAN/LAN auto-detecting) • Connect your optical modem to a 2.5GbE port with a network cable. • Connect your PC to a 2.5GbE port with a network cable. Before Setup AiMesh Setup Steps DC Power adapterDC Output: +12V with max 1.5A current Operating Temperature0~40 o CStorage0~70 o C Operating Humidity50~90%Storage20~90% Specifications: One Router Setup Steps Unplug Prepare your Modem 01 1 Unplug the power of cable / DSL modem. If it has a battery backup, remove the battery. 2 Connect your modem to the router with the network cable provided. 3 Power on the modem. Plug modem to the power outlet and power on. WE SUGGEST... Modem back Modem back 4 Check the modem LED lights to ensure the connection is active. If you are using DSL for internet, you will need your username / password from your Internet service provider (ISP) to properly configure your router. Modem front Connect your Device 02 1 Power on the router. Plug in and press the power switch at the back of your router. 2 Check that the LED turns solid blue to indicate that the hardware connection is ready for setup. 3 [Web] Connect your PC to the router using an additional network cable. [App] Or you can use a phone or pad to complete the setup via ASUS Router App. Login and Connect 03 [Web] 1 Refer to ONE ROUTER SETUP STEPS to connect your AiMesh router to your PC and modem, and then log in into the web GUI. AiMesh router 03 AiMesh router ModemAiMesh node Logout/Reboot AiMesh Router 2 Go to Network Map page, click AiMesh icon and then Search for your extending AiMesh node. 3 Click Search, it will automatically search for your AiMesh node nearby. When the AiMesh node shows on this page, click it to add it into the AiMesh system. ** If you cannot find any AiMesh node, please go to TROUBLE SHOOTING. 4 A message is displayed when synchronization is completed. 5 Congratulations! You will find the pages below show up when an AiMesh node has been successfully added to the AiMesh network. Successfully added RT-ABCDE to your AiMesh system, it will take awhile to show up as connected in the AiMesh router list. OK [App] Log in to your existing router via ASUS Router App and choose “Add AiMesh Node” to complete the setup. 2.5GbE port x 2 Setting up an AiMesh WiFi system 02 1 Prepare two or more ASUS routers supporting AiMesh. 2 Assign one as AiMesh router, and another one as AiMesh node. ** If you have multiple AiMesh routers, we recommend using the router with the highest specifications as your AiMesh router and the others as AiMesh nodes. 3 Go to AiMesh SETUP STEPS. Setting up a standalone router 01 1 Go to ONE ROUTER SETUP STEPS. One Router Setup Download free ASUS Router APP to set up and manage your router(s) 03 AiMesh Setup Steps AiMesh routerAiMesh node Prepare 01 Place your AiMesh router and node in the same room and at least 1 meter apart during the setup process. AiMesh node 02 Keep your AiMesh node powered on and standby for AiMesh system settings. Power (DCIN) port 1 [Web] Open a web browser. You will be redirected to the ASUS Setup Wizard. If not, navigate to http://www.asusrouter.com. [App] Launch ASUS Router App and follow the instructions to complete the setup. E23887 Power button At least 1 meter AiMesh node AiMesh router Relocation FAQ Locate the AiMesh router and node at the best place. NOTES: To minimize interference, keep the routers away from devices like cordless phones, Bluetooth devices and microwave ovens. We recommend that you place the routers in an open or spacious location. ZenWiFi BD5 LED indications Q1: Does the AiMesh router support Access Point mode? A: Yes. You can choose to set the AiMesh router as router mode or access point mode. Please go to web GUI (http://www.asusrouter.com), and go to the page Administration > Operation Mode. Could I setup wired connection between AiMesh routers (Ethernet backhaul)? Q2: A: Yes. AiMesh system supports both wireless and wired connection between AiMesh router and node to maximize throughput and stability. AiMesh analyzes the wireless signal strength for each frequency band available, and then determines automatically whether a wireless or wired connection is best to serve as the inter-router connection backbone. 1 Follow the setup steps to establish a connection between the AiMesh router and node via WiFi first. 2 Place the node in the ideal locations for best coverage. Run an Ethernet cable from either 2.5GbE port of the AiMesh router to either 2.5GbE port of AiMesh node. 3 AiMesh system will auto-select the best path for data transmission, whether wired or wireless. Modem THE BEST PERFORMANCE FREQUENTLY ASKED QUESTIONS Troubleshooting If your AiMesh router cannot find any AiMesh node nearby or synchronization fails, please check the following and try again. a Move your AiMesh node closer to the AiMesh router ideally. Ensure that it is within 3 meters. b Your AiMesh node is powered on. Solid blue: Your ZenWiFi BD5 is ready for setup. Solid white: Your ZenWiFi BD5 is online and works well. Solid red: Your ZenWiFi BD5 router has no Internet connection. Q3: Where can I find more information about Mesh WiFi system? A: Technical support site: https://www.asus.com/support Service and Support https://www.asus.com/support Video Tutorials https://qr.asus.com/wl_videotutorials ASUS Recycling/Takeback Services ASUS recycling and takeback programs come from our commitment to the highest standards for protecting our environment. We believe in providing solutions for you to be able to responsibly recycle our products, batteries, other components, as well as the packaging materials. Please go to https://esg.asus.com/en/Takeback.htm for the detailed recycling information in different regions. REACH Complying with the REACH (Registration, Evalu…
Text truncated - open the document above for the full version.
Users Manual
1 Plug the adapter into the DC port, and press the power switch. 2 The power LED will light up when your hardware is ready. Hardware Explanations Before Setup ASUS Router App AiMesh Setup Steps Troubleshooting 1 Find two ZenWiFi BD5, and power both on. 2 Use a network cable to connect your optical modem to a 2.5GbE port of ZenWiFi BD5 with the “Main Unit” sticker. This ZenWiFi BD5 will be the AiMesh router, and the other ZenWiFi BD5 will be the AiMesh node. 3 The LED turns solid blue to indicate that ZenWiFi BD5 is ready for setup. Preparing to set up an AiMesh WiFi system AiMesh router AiMesh Setup Steps AiMesh node Download free ASUS Router APP to set up and manage your router(s). Prepare 01 Place your AiMesh router and node in the same room and at least 1 meter apart during the setup process. AiMesh node 02 Keep your AiMesh node powered on and standby for AiMesh system settings. Launch ASUS Router APP, and then follow the on-screen instructions to finish the AiMesh setup. Launching ASUS Router APP 03 If your AiMesh router cannot find any AiMesh node nearby or synchronization fails, please check the following and try again. a Move your AiMesh node closer to the AiMesh router ideally. Ensure that it is within 3 meters. b Your AiMesh node is powered on. NOTE: When you’re using a wireless backhaul to connect your router and AiMesh node, both 2.5GbE ports on your AiMesh node can be used as LAN ports. Quick Start Guide ZenWiFi BD5 Overview E23888 At least 1 meter AiMesh nodeAiMesh router 2.5GbE port (WAN/LAN auto-detecting) • Connect your optical modem to a 2.5GbE port with a network cable. • Connect your PC to a 2.5GbE port with a network cable. DC Power adapterDC Output: +12V with max 1.5A current Operating Temperature0~40 o CStorage0~70 o C Operating Humidity50~90%Storage20~90% Specifications: 2.5GbE port x 2 Power (DCIN) port Power button ASUS ZenWiFi BD5 BE5000 Dual Band WiFi Router Model: BD5 Relocation FAQ Locate the AiMesh router and node at the best place. NOTES: To minimize interference, keep the routers away from devices like cordless phones, Bluetooth devices and microwave ovens. We recommend that you place the routers in an open or spacious location. ZenWiFi BD5 LED indications Q1: Does the AiMesh router support Access Point mode? A: Yes. You can choose to set the AiMesh router as router mode or access point mode. Please go to web GUI (http://www.asusrouter.com), and go to the page Administration > Operation Mode. Could I setup wired connection between AiMesh routers (Ethernet backhaul)? A: Yes. AiMesh system supports both wireless and wired connection between AiMesh router and node to maximize throughput and stability. AiMesh analyzes the wireless signal strength for each frequency band available, and then determines automatically whether a wireless or wired connection is best to serve as the inter- router connection backbone. Q2: 1 Follow the setup steps to establish a connection between the AiMesh router and node via WiFi first. 2 Place the node in the ideal locations for best coverage. Run an Ethernet cable from either 2.5GbE port of the AiMesh router to either 2.5GbE port of AiMesh node. 3 AiMesh system will auto-select the best path for data transmission, whether wired or wireless. Solid blue: Your ZenWiFi BD5 is ready for setup. Solid yellow: The signal between your ZenWiFi BD5 router and the node is weak. Solid red: Your ZenWiFi BD5 router has no Internet connection. / Your node is disconnected from the router. Solid white: Your ZenWiFi BD5 is online and works well. Q3: Where can I find more information about Mesh WiFi system? A: Technical support site: https://www.asus.com/support Service and Support https://www.asus.com/support Video Tutorials https://qr.asus.com/wl_videotutorials ASUS Recycling/Takeback Services ASUS recycling and takeback programs come from our commitment to the highest standards for protecting our environment. We believe in providing solutions for you to be able to responsibly recycle our products, batteries, other components, as well as the packaging materials. Please go to https://esg.asus.com/en/Takeback.htm for the detailed recycling information in different regions. REACH Complying with the REACH (Registration, Evaluation, Authorisation, and Restriction of Chemicals) regulatory framework, we published the chemical substances in our products at ASUS REACH website at https://esg.asus.com/Compliance.htm Federal Communications Commission Statement This device complies with Part 15 of the FCC Rules. Operation is subject to the following two conditions: • This device may not cause harmful interference. • This device must accept any interference received, including interference that may cause undesired operation. FCC regulations restrict the operation of this device to indoor use only. This equipment has been tested and found to comply with the limits for a class B digital device, pursuant to part 15 of the FCC Rules. These limits are designed to provide reasonable protection against harmful interference in a residential installation. This equipment generates, uses and can radiate radio frequency energy and, if not installed and used in accordance with the instructions, may cause harmful interference to radio communications. However, there is no guarantee that interference will not occur in a particular installation. If this equipment does cause harmful interference to radio or television reception, which can be determined by turning the equipment off and on, the user is encouraged to try to correct the interference by one or more of the following measures: • Reorient or relocate the receiving antenna. • Increase the separation between the equipment and receiver. • Connect the equipment into an outlet on a circuit different from that to which the receiver is connected. • Consult the dealer or an experienced radio/TV technician for help. WARNING! Any changes or modifications not expressly approved by the party responsible for compliance could void the…
Text truncated - open the document above for the full version.
Users Manual
1 Plug the adapter into the DC port, and press the power switch. 2 The power LED will light up when your hardware is ready. Hardware Explanations Before Setup ASUS Router App AiMesh Setup Steps Troubleshooting 1 Find three ZenWiFi BD5, and power them on. 2 Use a network cable to connect your optical modem to a 2.5GbE port of ZenWiFi BD5 with the “Main Unit” sticker. This ZenWiFi BD5 will be the AiMesh router, and the other two ZenWiFi BD5 will be the AiMesh nodes. 3 The LED turns solid blue to indicate that ZenWiFi BD5 is ready for setup. Preparing to set up an AiMesh WiFi system AiMesh router AiMesh Setup Steps AiMesh node Download free ASUS Router APP to set up and manage your router(s). Prepare 01 Place your AiMesh router and node in the same room and at least 1 meter apart during the setup process. AiMesh node 02 Keep your AiMesh node powered on and standby for AiMesh system settings. Launch ASUS Router APP, and then follow the on-screen instructions to finish the AiMesh setup. Launching ASUS Router APP 03 If your AiMesh router cannot find any AiMesh node nearby or synchronization fails, please check the following and try again. a Move your AiMesh node closer to the AiMesh router ideally. Ensure that it is within 3 meters. b Your AiMesh node is powered on. NOTE: When you’re using a wireless backhaul to connect your router and AiMesh node, both 2.5GbE ports on your AiMesh node can be used as LAN ports. Quick Start Guide ZenWiFi BD5 Overview E23889 At least 1 meter AiMesh node AiMesh router 2.5GbE port (WAN/LAN auto-detecting) • Connect your optical modem to a 2.5GbE port with a network cable. • Connect your PC to a 2.5GbE port with a network cable. DC Power adapterDC Output: +12V with max 1.5A current Operating Temperature0~40 o CStorage0~70 o C Operating Humidity50~90%Storage20~90% Specifications: 2.5GbE port x 2 Power (DCIN) port Power button ASUS ZenWiFi BD5 BE5000 Dual Band WiFi Router Model: BD5 AiMesh node At least 1 meter AiMesh node Relocation FAQ Locate the AiMesh router and node at the best place. NOTES: To minimize interference, keep the routers away from devices like cordless phones, Bluetooth devices and microwave ovens. We recommend that you place the routers in an open or spacious location. ZenWiFi BD5 LED indications Q1: Does the AiMesh router support Access Point mode? A: Yes. You can choose to set the AiMesh router as router mode or access point mode. Please go to web GUI (http://www.asusrouter.com), and go to the page Administration > Operation Mode. Could I setup wired connection between AiMesh routers (Ethernet backhaul)? A: Yes. AiMesh system supports both wireless and wired connection between AiMesh router and node to maximize throughput and stability. AiMesh analyzes the wireless signal strength for each frequency band available, and then determines automatically whether a wireless or wired connection is best to serve as the inter- router connection backbone. Q2: 1 Follow the setup steps to establish a connection between the AiMesh router and node via WiFi first. 2 Place the node in the ideal locations for best coverage. Run an Ethernet cable from either 2.5GbE port of the AiMesh router to either 2.5GbE port of AiMesh node. 3 AiMesh system will auto-select the best path for data transmission, whether wired or wireless. Solid blue: Your ZenWiFi BD5 is ready for setup. Solid yellow: The signal between your ZenWiFi BD5 router and the node is weak. Solid red: Your ZenWiFi BD5 router has no Internet connection. / Your node is disconnected from the router. Solid white: Your ZenWiFi BD5 is online and works well. Q3: Where can I find more information about Mesh WiFi system? A: Technical support site: https://www.asus.com/support Service and Support https://www.asus.com/support Video Tutorials https://qr.asus.com/wl_videotutorials ASUS Recycling/Takeback Services ASUS recycling and takeback programs come from our commitment to the highest standards for protecting our environment. We believe in providing solutions for you to be able to responsibly recycle our products, batteries, other components, as well as the packaging materials. Please go to https://esg.asus.com/en/Takeback.htm for the detailed recycling information in different regions. REACH Complying with the REACH (Registration, Evaluation, Authorisation, and Restriction of Chemicals) regulatory framework, we published the chemical substances in our products at ASUS REACH website at https://esg.asus.com/Compliance.htm Federal Communications Commission Statement This device complies with Part 15 of the FCC Rules. Operation is subject to the following two conditions: • This device may not cause harmful interference. • This device must accept any interference received, including interference that may cause undesired operation. FCC regulations restrict the operation of this device to indoor use only. This equipment has been tested and found to comply with the limits for a class B digital device, pursuant to part 15 of the FCC Rules. These limits are designed to provide reasonable protection against harmful interference in a residential installation. This equipment generates, uses and can radiate radio frequency energy and, if not installed and used in accordance with the instructions, may cause harmful interference to radio communications. However, there is no guarantee that interference will not occur in a particular installation. If this equipment does cause harmful interference to radio or television reception, which can be determined by turning the equipment off and on, the user is encouraged to try to correct the interference by one or more of the following measures: • Reorient or relocate the receiving antenna. • Increase the separation between the equipment and receiver. • Connect the equipment into an outlet on a circuit different from that to which the receiver is connected. • Consult the dealer or an experienced radio/TV technician for help. WARNING! Any changes or modifications not expressly approved by th…
Text truncated - open the document above for the full version.
Users Manual
1 Plug the adapter into the DC port, and press the power switch. 2 The power LED will light up when your hardware is ready. Hardware Explanations Before Setup ASUS Router App AiMesh Setup Steps Troubleshooting 1 Find three ZenWiFi BE5000, and power them on. 2 Use a network cable to connect your optical modem to a 2.5GbE port of ZenWiFi BE5000 with the “Main Unit” sticker. This ZenWiFi BE5000 will be the AiMesh router, and the other two ZenWiFi BE5000 will be the AiMesh nodes. 3 The LED turns solid blue to indicate that ZenWiFi BE5000 is ready for setup. Preparing to set up an AiMesh WiFi system AiMesh router AiMesh Setup Steps AiMesh node Download free ASUS Router APP to set up and manage your router(s). Prepare 01 Place your AiMesh router and node in the same room and at least 1 meter apart during the setup process. AiMesh node 02 Keep your AiMesh node powered on and standby for AiMesh system settings. Launch ASUS Router APP, and then follow the on-screen instructions to finish the AiMesh setup. Launching ASUS Router APP 03 If your AiMesh router cannot find any AiMesh node nearby or synchronization fails, please check the following and try again. a Move your AiMesh node closer to the AiMesh router ideally. Ensure that it is within 3 meters. b Your AiMesh node is powered on. NOTE: When you’re using a wireless backhaul to connect your router and AiMesh node, both 2.5GbE ports on your AiMesh node can be used as LAN ports. Quick Start Guide ZenWiFi BE5000 Overview E23988 At least 1 meter AiMesh node AiMesh router 2.5GbE port (WAN/LAN auto-detecting) • Connect your optical modem to a 2.5GbE port with a network cable. • Connect your PC to a 2.5GbE port with a network cable. DC Power adapterDC Output: +12V with max 1.5A current Operating Temperature0~40 o CStorage0~70 o C Operating Humidity50~90%Storage20~90% Specifications: 2.5GbE port x 2 Power (DCIN) port Power button ASUS ZenWiFi BE5000 BE5000 Dual Band WiFi Router Model: BE5000 AiMesh node At least 1 meter AiMesh node Relocation FAQ Locate the AiMesh router and node at the best place. NOTES: To minimize interference, keep the routers away from devices like cordless phones, Bluetooth devices and microwave ovens. We recommend that you place the routers in an open or spacious location. ZenWiFi BE5000 LED indications Q1: Does the AiMesh router support Access Point mode? A: Yes. You can choose to set the AiMesh router as router mode or access point mode. Please go to web GUI (http://www.asusrouter.com), and go to the page Administration > Operation Mode. Could I setup wired connection between AiMesh routers (Ethernet backhaul)? A: Yes. AiMesh system supports both wireless and wired connection between AiMesh router and node to maximize throughput and stability. AiMesh analyzes the wireless signal strength for each frequency band available, and then determines automatically whether a wireless or wired connection is best to serve as the inter- router connection backbone. Q2: 1 Follow the setup steps to establish a connection between the AiMesh router and node via WiFi first. 2 Place the node in the ideal locations for best coverage. Run an Ethernet cable from either 2.5GbE port of the AiMesh router to either 2.5GbE port of AiMesh node. 3 AiMesh system will auto-select the best path for data transmission, whether wired or wireless. Solid blue: Your ZenWiFi BE5000 is ready for setup. Solid yellow: The signal between your ZenWiFi BE5000 router and the node is weak. Solid red: Your ZenWiFi BE5000 router has no Internet connection. / Your node is disconnected from the router. Solid white: Your ZenWiFi BE5000 is online and works well. Q3: Where can I find more information about Mesh WiFi system? A: Technical support site: https://www.asus.com/support Service and Support https://www.asus.com/support Video Tutorials https://qr.asus.com/wl_videotutorials ASUS Recycling/Takeback Services ASUS recycling and takeback programs come from our commitment to the highest standards for protecting our environment. We believe in providing solutions for you to be able to responsibly recycle our products, batteries, other components, as well as the packaging materials. Please go to https://esg.asus.com/en/Takeback.htm for the detailed recycling information in different regions. REACH Complying with the REACH (Registration, Evaluation, Authorisation, and Restriction of Chemicals) regulatory framework, we published the chemical substances in our products at ASUS REACH website at https://esg.asus.com/Compliance.htm Federal Communications Commission Statement This device complies with Part 15 of the FCC Rules. Operation is subject to the following two conditions: • This device may not cause harmful interference. • This device must accept any interference received, including interference that may cause undesired operation. FCC regulations restrict the operation of this device to indoor use only. This equipment has been tested and found to comply with the limits for a class B digital device, pursuant to part 15 of the FCC Rules. These limits are designed to provide reasonable protection against harmful interference in a residential installation. This equipment generates, uses and can radiate radio frequency energy and, if not installed and used in accordance with the instructions, may cause harmful interference to radio communications. However, there is no guarantee that interference will not occur in a particular installation. If this equipment does cause harmful interference to radio or television reception, which can be determined by turning the equipment off and on, the user is encouraged to try to correct the interference by one or more of the following measures: • Reorient or relocate the receiving antenna. • Increase the separation between the equipment and receiver. • Connect the equipment into an outlet on a circuit different from that to which the receiver is connected. • Consult the dealer or an experienced radio/TV technician for help. WARNING! Any changes or mod…
Text truncated - open the document above for the full version.
Contact Information
Applicant
Jackson Yen(Associate Vice President)
Test Firm
Bureau Veritas CPS (H.K.) Ltd., Taoyuan BranchRichard Chen
Technical Specifications
| # | Rule Parts | Frequency Range | Power Output |
|---|---|---|---|
| 1 | 15C | 2.41 GHz - 2.46 GHz | 823.00 mW |
Other Applications from ASUSTeK Computer Inc
MSQ-GC701
Aug 21, 2026Wireless Gaming Controller
Equipment Class
DSS - Part 15 Spread Spectrum TransmitterMSQMPDONGLE3
Aug 18, 2026WIRELESS DONGLE
Equipment Class
DTS - Digital Transmission System
MSQ-GC701D
Aug 13, 2026USB Wireless Dongle
Equipment Class
DSS - Part 15 Spread Spectrum TransmitterMSQ-CM3206DM4A
May 27, 2026Chromebook/Notebook PC
Equipment Class
DCD - Part 15 Low Power Transmitter Below 1705 kHz
MSQ-GST868003
Apr 03, 2026MODULE-WIRELESS CHRG
Equipment Class
DCD - Part 15 Low Power Transmitter Below 1705 kHz