NIT-SCWI275UUSB GPRS+WLAN Dongle
Solomon Technology Corp
Click to zoom
Application Details
- Equipment Class
- PCB - PCS Licensed Transmitter
- Date of Grant
- May 05, 2004
- Application Purpose
- Original Equipment
- Date of Application
- May 05, 2004
- Equipment Note
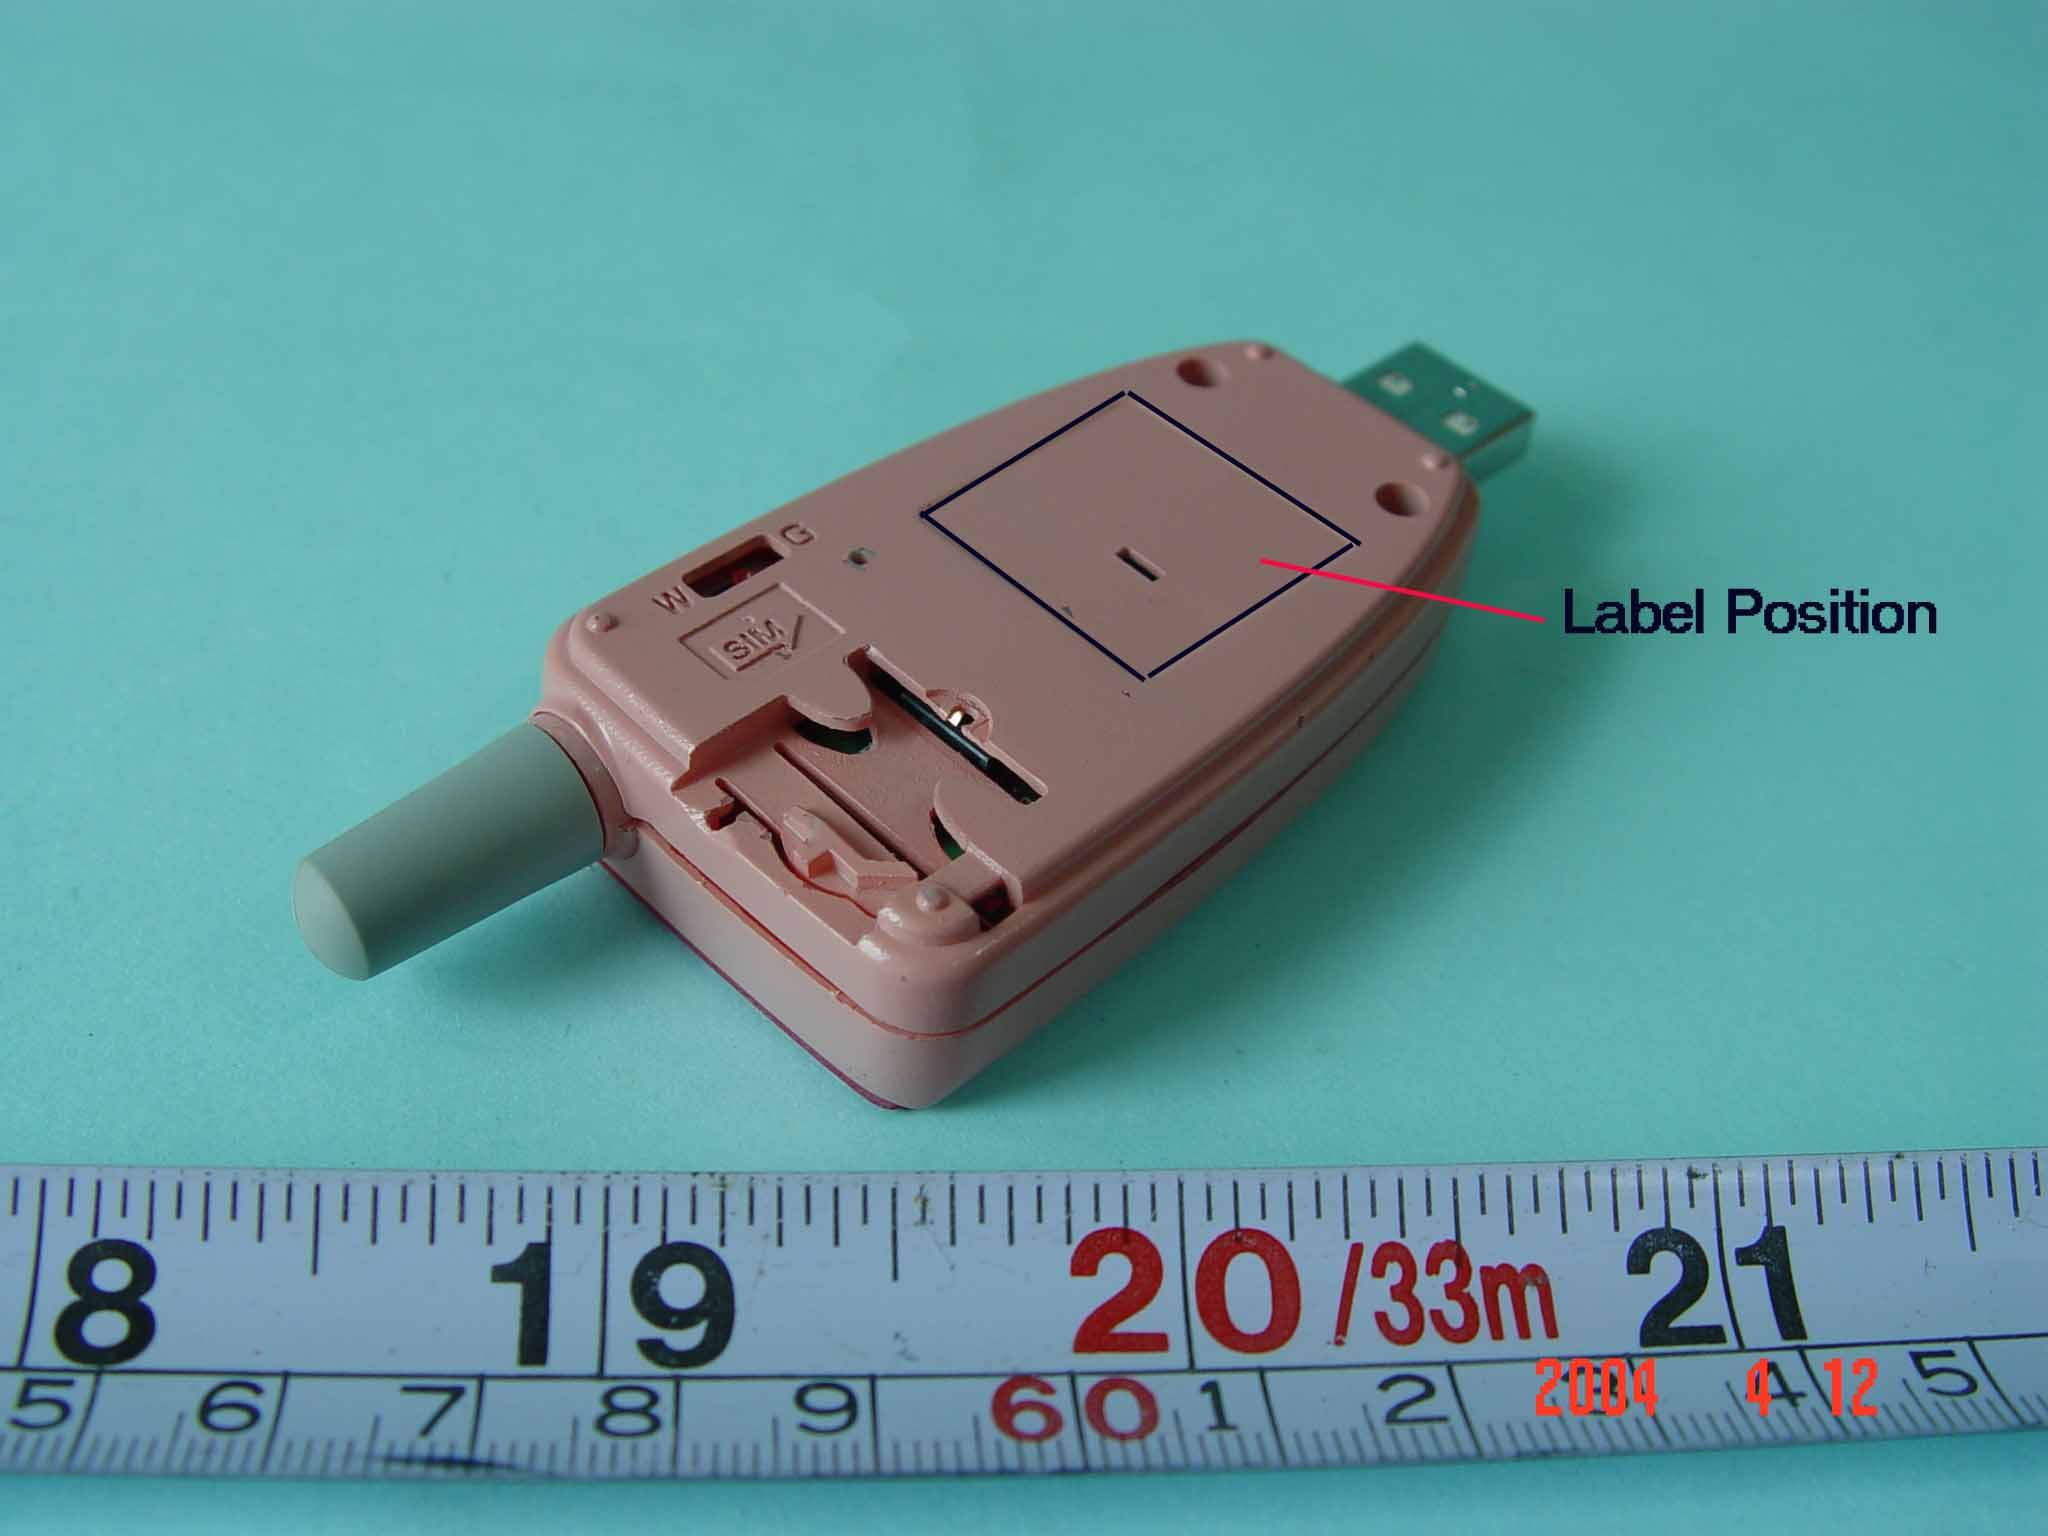
- USB GPRS+WLAN Dongle
- Frequency Range
- 1850.20000000 - 1909.80000000
- Company
- Solomon Technology Corp
- Country
- Taiwan
Documents & Files
Document Text
Text extracted from the exhibit documents filed with the FCC. Open a document above to read the original.
Users Manual
Users ManualUsers Manual USB GPRS+WLAN Dongle CautionCaution This device complies with Part 15 of the FCC Rules. Operation is subject to the following two conditions:(1) this device may not cause harmful interference, and (2) this device must accept any interference received, including interference that may cause undesired operation. This equipment has been tested and found to comply with the limits for a Class B digital device, pursuant to Part 15 of the FCC Rules. These limits are designed to provide reasonable protection against harmful interference in a residential installation. This equipment generates, uses and can radiated radio frequency energy and, if not installed and used in accordance with the instructions, may cause harmful interference to radio communications. However, there is no guarantee that interference will not occur in a particular installation If this equipment does cause harmful interference to radio or television reception, which can be determined by turning the equipment off and on, the user is encouraged to try to correct the interference by one or more of the following measures: -Reorient or relocate the receiving antenna. -Increase the separation between the equipment and receiver. -Connect the equipment into an outlet on a circuit different from that to which the receiver is connected. -Consult the dealer or an experienced radio/TV technician for help. Changes or modifications not expressly approved by the party responsible for compliance could void the user's authority to operate the equipment. The antenna(s) used for this transmitter must not be co-located or operating in conjunction with any other antenna or transmitter. This EUT is incompliance with SAR for general population /uncontrolled exposure limits in ANSI/IEEE C95.1-1999 and had been tested in accordance with the measurement methods and procedures specified in OET Bulletin 65 Supplement C. Users ManualUsers Manual Copyright This USB GPRS/WLAN dongle Installation Guide is copyright by Solomon Tech. Corp. with all rights reserved. No part of this document maybe reproduced in any form without the prior written approval of Solomon Tech. Corp. Disclaimer The information in this document is accurate at time of release. However, as Solomon Tech. Corp. is committed to continued research and development activities, these specifications may change from time to time. Contact your local representative should you require clarification on information contained in this document or to request of copy of the latest version of this document. Users ManualUsers Manual Be aware of aviation safety Please do not use this device on the civilian airplanes, the aviation instruments on board maybe interfered by the RF power leads to failure. Be aware of your surroundings Please do not use this device when your are close to gas stations, fuel silos, chemical factories, or explosive materials. Be aware of traffic safety Please do not use this device when you are driving a vehicle. Be aware of the RF power. Keep your body at least 2 inches (5 cm) away from the antenna when in use. Be aware of the medical device. The transmitted RF power might interfere some of the medical devices such as a heart pacer, please do not use this device in hospitals. Users Manual User The device is a delicate instrument, please handle with care, it is prohibited to fall on the ground or bent to avoid damage to the device. There are no parts to be maintained by the user, if the device seemed to be not functioning, please have it serviced by the qualified technician at the qualified service center. To avoid damage to the device, please do not take this device apart by yourself; the warranty is void once the seal is broken. Do not let children play with this device. When the device is not in use, please unplugged from the notebook PC and keep it at a cold dry place. Do not take the antenna off the device to avoid poor reception. Do not touch the antenna when in use to avoid poor reception. The device is not waterproof, please do not use it in rain or damp surroundings. Warnings Users ManualUsers Manual Cautions when in use The device might suffer interference and cause poor reception when it close to a massive metal structure such as a metal furniture or inside of a steel structure of a building. To avoid RF interference, try not to use the device when it is close to a microwave oven or a TV. Please do not use the device when it has passed through dramatic temperature variations, the moisture inside the device may cause short circuits once powered on. Please wait until the moisture dries out before power on. The device is powered by the USB port from the computer, to avoid poor communication quality please do not power on the device when the computer is in low battery. It is always a nice tip to cut your large file into small packets for transmission. SAR related issues The device is not a cellular phone, however please use it accordingly to the instructions. MemoMemo IndexIndex 1. Introduction Thanks for using ...................................................................... Package contents ..................................................................... Exterior introduction ............................................................... Status indictor lights ................................................................ To switch in between GPRS and WLAN ................................... 2. Installation & setting procedures System requirements ............................................................... Software & hardware requirements ......................................... Network system requirements ................................................. SIM card installation ............................................................... Insert the SIM card .................................................................. Remove the SIM card .............................................................. Install the GPRS/WLAN Don…
Text truncated - open the document above for the full version.
Users Manual
Users ManualUsers Manual Package contents. Please check the items in the package, if there is any short or damage in the package, please contact your local representative immediately. USB GPRS/WLAN Dongle ItemsQuantity USB Extender Cord Installation CD Easy Installation Guide 1 1 1 1 03 Easy Installation Guide USB Extender Cord Installation CD USB GPRS/WLAN Dongle Users Manual Exterior introduction 04 WLAN Status light SIM card connector slot GPRS Status light Users ManualUsers Manual GPRS Status light GPRS Status light indicates the connection status when it is powered on. ItemsRepresenting Connected to the network 05 Light Blue SIM lock(entered PIN code) Purple SIM block(entered PUK code) Error (Invalid SIM card or failed to connect to the network) Red Search Network and registering Full-colour Red and Blue flashes interactively Connected to the WLAN WLAN Status light on 1 2 3 4 5 6 GPRS Status light WLAN Status light Note: The normal lights-on sequence: Blue light on Red light on White light on Full-colour on Blue light on Users ManualUsers Manual 07 To switch in between GPRS and WLAN There is a switch on the bottom side of the USB GPRS/WLAN dongle. GPRS is enabled when switched to G and WLAN is enabled when switched to W. You may observe the status by the indicate light on the front panel, upper 7 color LED is for GPRS and the lower single color LED is for WLAN. Note: USB GPRS/WLAN dongle's factory setting is set to (G). WLAN is enabled when switched to (W) GPRS is enabled when switched to (G) 06 GPRS modem Installation & setting procedures GPRS modem Installation & setting procedures 07 Users ManualUsers Manual System requirements Please make sure your computer's hardware and software meet the following requirements, please refer to your computer's users manual or contact your local representative for more information. Network system requirements Please make sure your local GSM network provides GPRS service and please apply the GPRS service from the network. Software & hardware requirements A valid SIM card (GPRS service is granted) An USB port or a PCMCIA to USB converter card is available. IBM compatible Pentium II 400 MHz (or above) notebook or PC with a minimum of 64 MB RAM 08 SIM card installationSIM card installation Insert the SIM card Insert the SIM card into the SIM card compartment with the chamfered corner to click into the housing. Chamfered corner Note: 1. Please make sure the chamfered corner on the SIM card matche with the latch on the housing. 2. If the SIM card is inserted into the housing with incorrectly direction, the SIM card won't be able to click into the chamfered latch. 09 Users ManualUsers Manual Remove the SIM card Gently pressing the chamfered latch on the housing, the SIM card will be ejected from the housing automatically. 10 Gently pressing the chamfered latch SIM card will be ejected Install the GPRS/WLAN Dongle on the PCInstall the GPRS/WLAN Dongle on the PC 1. Put the installation disc into your CDROM on your computer. 2. The Installation Wizard shows up on the screen automatically. install software: install the driver for the GPRS/WLAN Dongle. browse CD contents: browse the contents of the installation disc. contact us: you may check the button to visit our web site about SOLOMON Technology Corp.. exit : close the window and thanks for using. 11 Please follow the following procedures to install the driver software. The Installation Wizard will automatically determine the type of operating system on your computer and choose the proper driver for the GPRS/WLAN Dongle. When the software installation is completed, plug the GPRS/WLAN Dongle into the USB port on your computer; the operatingsystem will automatically identify the GPRS/WLAN Dongle. Then you may configure the software settings, please refer to page 37. Note: Do not plug the GPRS/WLAN Dongle into the computer prior to the software installation. Users ManualUsers Manual Install the software Install the GPRS/WLAN Dongle driver software 12 1. Click on "install software". 2. Install the software window. Click on left button. install driver install Adobe Acrobat Reader exit. 1 2 3
Users Manual
Users ManualUsers Manual After the completion of the above procedures, the GPRS Manager will automatically generate an icon (Default Connection) for connection, you may create multiple connections if you have more than one SIM card for GPRS connection. 9. 33 Users ManualUsers Manual Should you wish to remove any of the connections just simply use the toolbar or select the connection menu to remove the undesired connection(s). Click on properties you may choose the modify the settings of the connection. Toolbar Connection menu 34 10. 11. Toolbar Connection menu Users ManualUsers Manual 12. You may use "Import" in the toolbar to import a pre-restored connection file. 13. Click on "Import", you may choose a pre-restored file (.dat file). 9. 9. 9. 35 Users ManualUsers Manual 14. You may click on the desired network from the dialog box then click on "ok". 15. The GPRS Manager will automatically generate the connections for each network. 36 Users ManualUsers Manual 16. You may use "Export" in the toolbar to export an existing connection to a file. 17. Click on "Export", you may enter a name for the destination file (.dat file). 37 Users ManualUsers Manual 18. You may click on the desired network from the dialog box then click on "ok" to export. 19. After the completion of the export, a popup window will indicate how many network records been exported. 38 Users ManualUsers Manual To use the GPRS modem 1. Double click on the "GPRS Utility" on your desktop to initiate the GPRS connection. 2. Double click on the connection in the "GPRS Utility" window to start dialing. 39 Users ManualUsers Manual 3. You may see the GPRS Utility start performing dialing to the network. 4. Once the connection is established, the modem connection icon will appear in the system tray. 40 Users ManualUsers Manual 5. Click on the GPRS Utility icon in the system tray you may see a short menu bar. 6. Select "Disconnect" in the short menu bar then click on Yes you may disconnect from the network. 41 Users ManualUsers Manual 42 Should you have multiple connections in the GPRS Manager window, the last dialed connection will be the default connection. Right click on the connection in the GPRS Manager window you may modify the property of the connection. 7. 8. Short menu bar
Users Manual
Users ManualUsers Manual Remove the GPRS modem software 1. Go to add/remove programs in Control. 2. Select "USB GPRS/WLAN dongle" then click on 43 Change/Remove. Users ManualUsers Manual You will see the USB GPRS-WLAN dongle installation dialogue box, select "Remove", then click "Next". A popup window shows "Do you wish to remove the program and its components"? Click on Yes, and then the software starts to remove the program. 44 3. 3. 4. Users ManualUsers Manual When the program is removed, a dialogue box will show up to indicate it has completed, then click on Finish to close the dialog box. 5. 45 SMS ManagementSMS Management Send and Receive SMS 1. Click "Message" icon and the SMS functions will be initiated. 46 2. The SMS user interface. Folders including: SIM card folders and Local folders; SIM card folders indicate the contents stored on the SIM card and the Local folders indicate the contents stored on the local PC. folders toolbar SMS ManagementSMS Management 47 New SMS 1. Click on "New" in the toolbox or right mouse click on the empty folder content select "New", the Message Editor window will pop out.
Users Manual
SMS ManagementSMS Management 48 2. Click "Recipient" on the Message Editor window to select the recipient from the phonebook or type in the recipient's phone number, you may choose multiple recipients for the SMS service. When finished the SMS editing message, if you wished to send time then choose "Save", the message will be stored in the click on "Send" to send out the out the the message some other "Drafts" folder. SMS ManagementSMS Management 49 3. Send SMS progress window: Shows the progress of the SMS being sent to the network, a backup will be stored in the "Sent backup" folder under the Local folders. Sent backup window SMS ManagementSMS Management Receive SMS 1. Click on "Receive" in the toolbox or right mouse click on 50 the empty folder content select "Receive", then it will start to receiving the SMS from the GPRS modem to the PC. 2. There are two modes for to receiving the SMS from the GPRS modem to the PC. 1 2 Preview Mode: The messages are resided on the SIM card. Post Mode: The messages will be moved from the SIM card to the "Inbox" folder under the Local folders. SMS ManagementSMS Management Duplicate or move the received SMS 51 1. If you right click on any of the received SMS, you may choose to copy or move to the Local PC. 2. The selected SMS will get copied or moved to the "Inbox" folder under the Local folders. SMS ManagementSMS Management Delete SMS 52 1. Select the SMS you wished to delete then click on "Delete" in the toolbox to delete it or right mouse click to select "Delete" from the right mouse menu. 2. The deleted SMS will be moved to the "Trash can" folder under the Local folders.
Users Manual
SMS ManagementSMS Management Delete SMS permanently 53 1. Select the SMS you wished to delete permanently in the "T rash can" folder then click on "Delete" in the toolbox to delete it permanently or right mouse click to select "Delete" from the right mouse menu. 2. Click on (Y) in the pop up window to delete permanently. SMS ManagementSMS Management Reply an SMS 54 1. Select the SMS you wished to reply then click on "Reply" in the toolbox or right mouse click to select "Reply" from the right mouse menu. 2. When finished the SMS editing click on "Send" to send out the mesage. SMS ManagementSMS Management Forward an SMS 55 1. Select the SMS you wished to forward then click on "Forward" in the toolbox or right mouse click to select "Forward" from the right mouse menu. 2. Select the "Recipient" and finish the SMS editing then click "Send" to send out the message. Phonebook MangementPhonebook Mangement Chick "Phonebook" icon and the phonebook contained the names and phone numbers both stored in the GPRS modem and SIM card will be displayed. The Phonebook user interface contains: Toolbox, Phonebook, SIM card space used, GPRS modem space used and Connection indicator. 56 phonebook toolbar SIM card space used connection indicator phonebook GPRS modem space used Phonebook managementPhonebook management Add a new contact: You may type in the name and phone number and choose to store in the GPRS modem or SIM card. Select the contact you wished to modify and then click on Edit, you may modify the name and phone number. 57 The Toolbar includes: New, Modify, Delete, Export,Import, Upload and download. Add a New Contact Edit the phonebook Phonebook ManagementPhonebook Management Select the contact you wished to delete and then click on Delete the phonebook Delete, you may delete the name and phone number. Export the phonebook You may choose to export the phonebook to the PC, enter the filename and a .pbo file will be generated on the PC. Import the phonebook You may choose to import the phonebook from the PC, click on the filename with the .pbo extension; the phonebook file will be imported from the PC. 58 Phonebook ManagementPhonebook Management Upload You may upload the new or modified contact to the GPRS modem or SIM card. Download You may download the phonebook from the GPRS modem or SIM card into the PC. 59 Phonebook ManagementPhonebook Management Speed editing All the above features can also be executed by the right mouse button menu. speed ediing 60 Users ManualUsers Manual Setting 61 1. Click "Setting" icon and the setting contained the General, Mseeage and Pin code. General: contain English, Tradional Chinese or Simplified Chinese. Users ManualUsers Manual 62 Pin code: You have to enable the PIN code request first in order to enable the security service You will have to key in the original default PIN code or the modified PIN code. Please note that the SIM card will get locked if you entered the incorrect PIN code three times. Message: contained the Review mode and Post mode.
Users Manual
Users ManualUsers Manual 63 3. Enter the PUK code: When the SIM card is locked and you will need a PUK code string to unlock it. Please contact your network operator to acquire the PUK code. When the PUK is entered you need to give the SIM card a new PIN code release. Change SIM PIN: The SIM PIN may be modified from its default, you need to enter the old SIM PIN twice then enter the new SIM PIN to complete the process, if the old SIM PIN is entered incorrectly for three times, the SIM card will get locked (you then may require the PUK code to unlock it). Please enable the PIN code request first in order to modify the PIN code. 2. Users ManualUsers Manual 64 4. Network Service: You may manually select the best network when you are in roaming. Select the network you wished to log on and click onregister you will get switched onto the new network if your SIM card is valid for GPRS roaming. Please note that the network search time and register time varies between different networks. Users ManualUsers Manual About 65 1. About: you may check the revision of the software release. Users ManualUsers Manual 66 To use WLAN to access the Internet or other computers 1. Set the switch on the back side of the GPRS/WLAN dongle to "". Set the switch to "W" To use WLAN to access the Internet The usage modes include Ad-Hoc mode and Infrastructure mode. Each usage mode will have its unique settings, please confirm your network environment mode first. Ad-Hoc mode: no need to get connected through Access Point (AP), a pier to pier connection type of connection between computers. Infrastructure mode: to make use Access Point (AP) to form a wireless network connection with the fixed LAN network. The LED will start blinking Users ManualUsers Manual 67
Users Manual
Users ManualUsers Manual 68 Users ManualUsers Manual 69 Users ManualUsers Manual 70 Users ManualUsers Manual 71 Users ManualUsers Manual 72
Users Manual
Users ManualUsers Manual 73 Users ManualUsers Manual 74 Users ManualUsers Manual 75 Frequently asked Q & AFrequently asked Q & A 76 Users ManualUsers Manual GPRS modem installation failure: Please make sure you have properly installed the USB GPRS software, if not, please re-install the software. Did you plug the GPRS modem into the computer USB port prior to the USB GPRS software installation? If yes, please remove the device from Windows Hardware Manager. <Windows 98 SE> Remove the Device with the question mark manually in the Hardware Manager. 1. 2. 77 Users ManualUsers Manual <Windows ME/XP/2000> Remove the Device with the question mark manually from Other Devices in the Windows Hardware Manager Once you have removed all the devices from the Windows Hardware Manager, please remove the GPRS modem from your computer first, and then re-install the program. Note: The Solomon GPRS Modem is using Motorola GPRS chipset, it is quite all right to see "Motorola Phone (I250-000)" during the installation. If you are using a PCMCIA (or other form) to USB conversion card and the computer failed to detect the GPRS modem, please check the hardware first. Please make sure the GPRS modem is plugged into the USB port completely. 3. 4. 78 Users ManualUsers Manual Could not establish GPRS connection: Please make sure your network has granted your GPRS service Have you entered all the parameters during the software installation? Please check light is lit on your GPRS modem, if not, you are probably in a RF dead zone or in an area your GPRS roaming service is not permitted. If light is lit on your GPRS modem, your SIM card is probably inserted incorrectly or damaged. GPRS connection is slow and unstable: Please disconnect from the network and re-connect, the network might re-assign you to a better sector in the network. If the connection is still slow it indicates the base-stations near you is having heavy traffic, try to re-connect later or move to a different location (move to a nearby window might help). Could not open the GPRS manager: Please make sure your GPRS modem is plugged into the USB port on your computer. 1. 2. 3. 1. 2. 79 1 2 Users ManualUsers Manual Interference during connection Try to stay away from microwave stove, stereo, or TV, which might interfere the RF connection. If you are in a spot where there is a fading dip, you might have poor communication; make use of the USB extender cord in the package to adjust a better antenna angle will definitely help! Q & A The speaker on my computer is making strange noise or my computer is functioning improperly? Answer: The USB GPRS modem is using the GSM cellular phone network, the maximum transmitting power could reach 2 watts, if your notebook or PC is not properly designed for EMI protection, the speaker and the computer might function improperly, it is not the USB GPRS modem's fault. I did not move my PC, but get disconnected fr om the network? Answer: 1) could be the base-stations near you is having heavy traffic. 2) the network is dynamically re-allocating all the mobile handsets in its sectors, if your GPRS modem is being allocated to a sector which has lower signal you might get disconnected, just re-connect. 1. 2. 1. 2. 80 Users ManualUsers Manual Is the RF power of the GPRS modem hazardous to human body? Answer: The GPRS modem is plugged into your computer, not like the mobile phone is attached to one's head, the influence of the GPRS modem on human body is much lighter than mobile phones. Can I use the GPRS modem to dial a speech phone call? Answer: Negative, it is data only, however, the Internet application of speech can be achieved. May I use the GPRS modem abroad? Answer: Yes, but please make sure your GPRS roaming is activated on your SIM card and the overseas country is of fering the adequate frequencies for your GPRS modem. Am I logging on to the real Internet or just WAP? Answer: Yes, the real Internet, not WAP. I have SIM pin on my SIM card; do I need to remove the SIM pin first? Answer: Yes, please remove the SIM pin first. Why my GPRS modem gets hot when in use? Answer: The GPRS modem transmit 2 watts in 900 MHz band and 1 watt in 1800 MHz band when in full power, it is normal to be a little hot when it communicates with the Internet. 6. 5. 4. 3. 7. 8. 81
Cover Letter(s)
Dear Tim, We have uploaded the modified report and exhibits. Pls check. Ths responses for your comments are as follows: item 1: the DUT only support class 8 and it is updated. item 2: It only has GPRS function, no EDGE and it is updated. item 3, 9, 11, 14: 731 form has been updated. item 4,6,7, 8: the related exhibits have been modified. item 5: is the exhibit needed for all product? It seems that we did not provide this kind of exhibit before. item 10: the report has been added for testing channel. item 12: as item 1 item 13: The crest factor is 8.3. item 15, 17: the SAR report is modified. item 16: the side nearest the antenna was not investigated. The reason is that we are sure we have investaged the worst case because the shortest distance between antenna edge and the flat phantom is the DUT top face , not side face. The distance between antenna edge and the phantom flat surface (Fig. 9.1) is 0.7 cm, which is shorter than the normal testing distance (1.5cm). Therefore, we can make sure the SAR value 1.04 W/kg on this report is worse than the typical using case. item 18: for the distance between porbe tip to dipole center is 2.7 mm, which is shown on page 12 of 37 . For the distance between probe tip to phantom inner surface, pls refer to App. A or B. The DASY 4 Configuration/ Sensor - Surface : 4 mm. Thanks a lot for support. B.R. Daniel >From: Timothy R. Johnson [mailto:[email protected]] >Sent: Tuesday, April 27, 2004 10:02 AM >To: Daniel Lee (æ_ Žæ ̃¥å’Œ) ...snip... >Taiwan Cell: +886 0920399260 > >Message has been scanned by Sporton AntiVirus System with no virus detected. Subject: RE: FW: Review of Solomon Technology Corp.: NITSCW1275U including SAR From: Daniel Lee \(æ_ Žæ ̃¥å’Œ\) <[email protected]> To: "Timothy R. Johnson" <[email protected]>
Cover Letter(s)
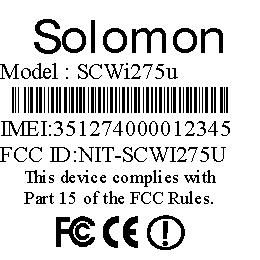
American Telecommunications Certification Body Inc. 6731 Whittier Ave, McLean, VA 22101 April 27, 2004 RE: SOLOMON Technology Corp. FCC ID: NITSCWI275U I have a few comments on the above referenced Application. General Requirements 1) Note that the operational description states that the device supports Class 8 GPRS, but is Class 10 GPRS capable. Please clarify. Is the device capable of both? This become important during the SAR review 2) The device operational description also mentions GPRS/Edge Modulation capable, but it is uncertain if the device actually uses both? Please explain and clarify which bands of operation use which modulations. 3) Note that normal GSM is typically listed as 300KGXW while edge is listed as 300KG7W for the emissions designator. Please update the 731 form for all the proper emissions designators that this device will use for the Part 22/24. 4) Plots Referenced in the 15.247 report Appendix B do not appear to be provided. Please provide. 5) Please provide a description of all circuitry and devices provided for determining and stabilizing frequency, for suppression of spurious radiation, for limiting modulation, and for limiting power. 6) The users manual does not appear to include the necessary statements for 15.21. Please show where this may be found or provide a modified manual. 7) Page 76 of the manual should define whether the device meets with Class A or B emissions. Please adjust. 8) The users manual does not appear to contain any RF exposure information. 9) The values on the 731 form for Part 22 and 24 do not appear to match the test report. Part 22 should be listed as the maximum ERP value and Part 24 the maximum EIRP value measured. 10) The data on page 33 & 34 of the Part 22/24 report is not clear what channel was being tested. Please explain. 11) The frequency stability shown on the 731 form does not match the worse case value measured. Please correct. 12) SAR Report shows a crest factor of 8, while the device is capable of Class 10 (see question 1 above). Please explain and/or update the SAR report as necessary. 13) Please explain the crest factor of 8.3 vs. 8.0 or 4.0 given in the SAR report. 14) The 731 form shows FCC ID: NITSCWI275U, while all other information in the application shows FCC ID: NIT- SCWI275U. Please clarify which is correct and correct the appropriate exhibits. 15) The maximum power rating given on page 5 of the SAR report for GSM 850 appears incorrect. Please review and correct if necessary. 16) It appears for SAR that the top/bottom/side opposite antenna were tested. Was the side nearest the antenna investigated? Please comment and/or justify not providing data for this configuration. Was it pretested? 17) It appears that the data for i_Buddie, NM BTM Touch should be a SAR value of 1.0, but is not listed in the table as this. Please review/correct as necessary. 18) The SAR report should report the report probe tip distance to phantom inner surface during scans. Please update the report to include this. --- Continued on Next Page --- z Page 2 April 27, 2004 19) The users manual should include information regarding be tested and meeting with RF exposure regulations. Note that the statement regarding 2” does not meet with tested conditions. Please update or show where this information may be found. Timothy R. Johnson Examining Engineer mailto: [email protected] The items indicated above must be submitted before processing can continue on the above referenced application. Failure to provide the requested information may result in application termination. Correspondence should be considered part of the permanent submission and may be viewed from the Internet after a Grant of Equipment Authorization is issued. Please do not respond to this correspondence using the em…
Text truncated - open the document above for the full version.
Contact Information
Applicant
Jimmy Tsai(VP)
Technical Contact
Sporton International Inc.Daniel Lee
[email protected]886-3-327-3456
No.52, Hwa-Ya 1st Rd. · Tao Yuan Hsien · Taiwan
Non-Technical Contact
Sporton International Inc.Daniel Lee
[email protected]886-3-327-3456
Test Firm
Sporton International Inc.Kathy Lin
Technical Specifications
| # | Rule Parts | Frequency Range | Power Output | Emission | Tolerance |
|---|---|---|---|---|---|
| 2 | 24E | 1.85 GHz - 1.91 GHz | 634.00 mW | 300KGXW | 0.2 ppm |
Other Applications from Solomon Technology Corp
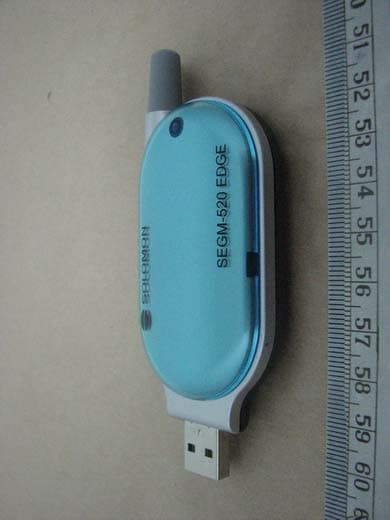
NIT-SEGM520
Feb 05, 2007EDGE Modem
Equipment Class
PCB - PCS Licensed Transmitter
NIT-SCWI375U
Sep 21, 2004USB GPRS and WLAN Dongle
Equipment Class
PCB - PCS Licensed Transmitter
NIT-SCWI211B
Apr 08, 2004WLAN Dongle
Equipment Class
DTS - Digital Transmission SystemNIT205105
Sep 10, 1997ETS - Part 15 Cordless Telephone System
Equipment Class
ETS - Part 15 Cordless Telephone System