OWDTR-0005-AUHF-FM Land Mobile Transceiver
HARRIS CORPORATION
Click to zoom
Application Details
- Equipment Class
- TNB - Licensed Non-Broadcast Station Transmitter
- Date of Grant
- Feb 14, 2001
- Application Purpose
- Original Equipment
- Date of Application
- Aug 11, 2000
- Equipment Note
- UHF-FM Land Mobile Transceiver
- Frequency Range
- 450.00000000 - 488.00000000
- Company
- HARRIS CORPORATION
- Country
- United States
Documents & Files
Document Text
Text extracted from the exhibit documents filed with the FCC. Open a document above to read the original.
Users Manual
MM101030V4 Operator’s Manual Panther 300M Mobile Radio This manual is published by Com-Net Ericsson Critical Radio Systems, Inc., without any warranty. Improvements and changes to this manual necessitated by typographical errors, inaccuracies of current information, or improvements to programs and/or equipment, may be made by Com-Net Ericsson Critical Radio Systems, Inc., at any time and without notice. Such changes will be incorporated into new editions of this manual. No part of this manual may be reproduced or transmitted in any form or by any means, electronic or mechanical, including photocopying and recording, for any purpose, without the express written permission of Com-Net Ericsson Critical Radio Systems, Inc. Copyright © 1998-2000, Com-Net Ericsson Critical Radio Systems, Inc. All rights reserved. 1 Table Of Contents SAFETY INFORMATION................................................................3 RADIO OPERATOR WARNING..................................................3 MPE NOTES...............................................................................7 TRANSMITTER HAZARDS.........................................................7 SAFE DRIVING RECOMMENDATIONS......................................8 OPERATING RULES AND REGULATIONS...................................9 OPERATING TIPS....................................................................11 INTRODUCTION..........................................................................12 CONTROLS, DISPLAYS AND INDICATORS...............................13 CONTROLS..............................................................................13 OPTION BUTTON FUNCTIONS................................................14 Disabled..............................................................................14 Monitor/Clear.......................................................................14 Local/Distant Squelch..........................................................15 Type 99 On/Off....................................................................15 Home Channel....................................................................16 Horn Alert On/Off.................................................................16 Public Address On/Off.........................................................17 Internal/External Speaker....................................................17 HOOKSWITCH FUNCTIONS....................................................17 DISPLAY...................................................................................19 PANTHER 300M Display.....................................................19 Display Status And Error Codes..........................................19 Self Test Error Messages....................................................21 RADIO INDICATORS................................................................22 Option Status Leds..............................................................22 Busy / Tx Indicator...............................................................22 ALERT TONES.........................................................................24 Power Up............................................................................24 Carrier Control Timer...........................................................24 Denied Tone.......................................................................24 Failed Tone.........................................................................24 Option Button Keypress That Disables.................................24 Option Button Keypress That Enables.................................25 Transmitter Disabled...........................................................25 Type 99 Individual Call........................................................25 Type 99 Group Call.............................................................25 Type 99 Super Group/Quick Call.........................................25 Synthesizer Unlock..............................................................25 BASIC OPERATION.....................................................................26 TURNING THE RADIO ON........................................................26 SELECTING OR CHANGING CHANNELS................................26 TRANSMITTING A BASIC CALL...............................................26 PUBLIC ADDRESS MESSAGE.................................................27 CHANNEL GUARD...................................................................28 Channel Guard Monitor Function.........................................28 SENDING DTMF WITH THE DTMF MICROPHONE..................28 Com-Net Ericsson Critical Radio Systems, Inc. 2 P.O. Box 2000 Lynchburg, Virginia 24501 MM101030V3 1-800-528-7711 (Outside USA, 804-592-7711) Printed in U.S.A. Table Of Contents (Continued) SELECTIVE SIGNALING..............................................................29 TYPE 99 OPERATION..............................................................30 Receiving An Individual, Group, or Supergroup Call.............30 Resetting Type 99 After A Call.............................................31 PROGRAMMABLE PTT FUNCTIONS.......................................31 Channel Busy Lockout.........................................................31 Channel Guard Channel Busy Lockout................................31 Type 99 Disable After PTT...................................................32 Ignition A+ Disable...............................................................32 PROGRAMMABLE HORN ALERT FUNCTIONS........................33 External Alarms...................................................................33 Resetting the Car Horn Alert................................................33 Car Horn Alert Ignition A+ Option.........................................33 3 SAFETY INFORMATION RADIO OPERATOR WARNING Do not transmit with this radio and antenna when persons are within the MPE Radius* of the antenna [see “Determining MPE Radius” in this section], unless such persons (such as th…
Text truncated - open the document above for the full version.
Users Manual
MM-101031V1-A1 Installation Manual P ANTHER TM 300M Mobile Radio 2 Copyright © 2000, Com-Net Ericsson Critical Radio Systems, Inc. All rights reserved. This manual is published by Com-Net Ericsson Critical Radio Systems, Inc., without any warranty. Improvements and changes to this manual necessitated by typographical errors, inaccuracies of current information, or improvements to programs and/or equipment, may be made by Com-Net Ericsson Critical Radio Systems, Inc., at any time and without notice. Such changes will be incorporated into new editions of this manual. No part of this manual may be reproduced or transmitted in any form or by any means, electronic or mechanical, including photocopying and recording, for any purpose, without the express written permission of Com-Net Ericsson Critical Radio Systems, Inc. The software contained in this device is copyrighted by Com-Net Ericsson Critical Radio Systems, Inc. Unpublished rights are reserved under the copyright laws of the United States. NOTICE! Repairs made to this equipment should be made only by an authorized service technician or facility designated by the supplier. Any repairs, alterations, or substitution of recommended parts made by the user to this equipment not approved by the manufacturer could void the userís authority to operate the equipment in addition to the manufacturerís warranty. NOTICE! 3 SAFETY INFORMATION.........................................................................4 MAXIMUM PERMISSIBLE EXPOSURE (MPE) LIMITS ...................5 Determining MPE Radius ......................................................................5 SAFETY TRAINING INFORMATION ...................................................6 INTRODUCTION .......................................................................................8 UNPACK AND CHECK THE EQUIPMENT ..........................................8 Options And Accessories .......................................................................9 INSTALLATION ......................................................................................10 STEP 1 - PLAN THE INSTALLATION .............................................10 STEP 2 - LOCATE THE TOOLS REQUIRED ...................................10 STEP 3 ñ EQUIPMENT PREPARATION ..........................................13 Mounting .......................................................................................13 STEP 4 ñ PROGRAM THE RADIO....................................................17 STEP 5 ñ INSTALL CABLES.............................................................18 Power Cable ..................................................................................18 Connect To Ignition Sense ............................................................19 Radio Mounting Procedures..........................................................21 STEP 7 ñ INSTALL OPTIONS AND ACCESSORIES ......................22 Radio Option Cable.......................................................................22 External Speaker ...........................................................................25 Alarm (Horn) Relay Kit ................................................................28 Microphone Hanger/Hook Switch Mounting ................................30 Antenna .........................................................................................30 Noise Suppression Kit ...................................................................31 FIGURES Figure 1 ñ Typical Front Mount Connection Diagram ............................... 12 Figure 2 ñ Removing Top Cover ................................................................ 14 Figure 3 ñ Factory Default Internal Speaker Jumper Setting (Enabled) ..... 15 Figure 4 ñ Factory Default Settings for Jumper JP600............................... 16 Figure 5 ñ Removing Plastic Cover............................................................ 17 Figure 6 ñ Power Cable RPM 113 7674/10................................................ 19 Figure 7 ñ Radio Mounting Hardware........................................................ 21 Figure 8 - Mounting the External Speaker ................................................. 25 Figure 9 ñ External Speaker Option ........................................................... 26 Figure 10 ñ Internal/External Speaker Relay.............................................. 27 Figure 11 - External Car Alert .................................................................... 29 Figure 12 - External Alarm Relay .............................................................. 29 Figure 13 ñ Ignition Sense Option.............................................................. 30 TABLES Table 1 - P ANTHER 300M Mobile Radio Options and Accessories.............. 9 Table 2 ñ Radio Option Connector P3 Interface Description ..................... 23 TABLE OF CONTENTS 4 SAFETY INFORMATION The operator of any mobile radio should be aware of certain hazards common to the operation of vehicular radio transmissions. A list of several possible hazards is given: 1. Explosive Atmospheres - Just as it is dangerous to fuel a vehicle with the motor running, similar hazards exist when operating a mobile radio, be sure to turn the radio off while fueling the vehicle. Do not carry containers of fuel in the trunk of the vehicle if the radio is mounted in the trunk. 2. Interference to Vehicular Electronics Systems - Electronic fuel injection systems, electronic anti-skid braking systems, electronic cruise control systems, etc., are typical electronic systems that may malfunction due to the lack of protection from radio frequency energy present when transmitting. If the vehicle contains such equipment, consult the dealer and enlist their aid in determining the expected performance of electronic circuits when the radio is transmitting. 3. Dynamite Blasting Caps - Dynamite blasting caps may be caused to explode by operating a radio within 500 feet of the blasting caps. Always obey the "Tu…
Text truncated - open the document above for the full version.
Users Manual
MM101030V1 R1A Operator’s Manual P ANTHER 300M Mobile Radio 2 TABLE OF CONTENTS Page MAXIMUM PERMISSIBLE EXPOSURE (MPE) LIMITS............................................................... 3 R ADIO O PERATOR W ARNING ............................................................................................................... 3 SAFETY TRAINING INFORMATION............................................................................................... 4 T RANSMITTER H AZARDS ..................................................................................................................... 6 S AFE D RIVING R ECOMMENDATIONS .................................................................................................... 7 OPERATING RULES AND REGULATIONS .................................................................................... 8 O PERATING T IPS .................................................................................................................................. 9 INTRODUCTION ................................................................................................................................ 10 RADIO INDICATORS ........................................................................................................................ 11 C ONTROLS ......................................................................................................................................... 11 O PTION B UTTON F UNCTIONS ............................................................................................................. 12 H OOKSWITCH F UNCTIONS ................................................................................................................. 14 DISPLAY STATUS AND ERROR CODES....................................................................................... 15 BASIC OPERATION........................................................................................................................... 17 S ELECTING A C HANNEL .................................................................................................................... 17 T RANSMITTING A B ASIC C ALL .......................................................................................................... 17 P UBLIC A DDRESS M ESSAGE ............................................................................................................... 17 C HANNEL G UARD .............................................................................................................................. 18 S ENDING DTMF W ITH T HE DTMF M ICROPHONE ............................................................................. 19 SELECTIVE SIGNALING ................................................................................................................. 20 TYPE 99 O PERATION ........................................................................................................................ 20 PROGRAMMABLE PTT FUNCTIONS ........................................................................................... 22 C HANNEL B USY L OCKOUT ................................................................................................................. 22 C HANNEL G UARD C HANNEL B USY L OCKOUT ................................................................................... 22 TYPE 99 D ISABLE A FTER PTT.......................................................................................................... 22 I GNITION S ENSE T X D ISABLE ............................................................................................................. 22 PROGRAMMABLE HORN ALERT FUNCTION ........................................................................... 23 E XTERNAL A LARMS ........................................................................................................................... 23 R ESETTING THE C AR H ORN A LERT .................................................................................................... 23 C AR H ORN A LERT I GNITION S ENSE O PTION ...................................................................................... 23 CLONING............................................................................................................................................. 23 This manual is published by Com-Net Ericsson Critical Radio Systems, Inc., without any warranty. Improvements and changes to this manual necessitated by typographical errors, inaccuracies of current information, or improvements to programs and/or equipment, may be made by Com-Net Ericsson Critical Radio Systems, Inc., at any time and without notice. Such changes will be incorporated into new editions of this manual. No part of this manual may be reproduced or transmitted in any form or by any means, electronic or mechanical, including photocopying and recording, for any purpose, without the express written permission of Com- Net Ericsson Critical Radio Systems, Inc. Copyright © 2001, Com-Net Ericsson Critical Radio Systems, Inc. All rights reserved. 3 MAXIMUM PERMISSIBLE EXPOSURE (MPE) LIMITS RADIO OPERATOR WARNING Do not transmit with this radio and antenna when persons are within the MPE Radius of the antenna, unless such persons (such as the driver or radio operator) are shielded from the antenna field by a grounded metallic barrier (such as the user’s vehicle rooftop). The MPE Radius is the minimum distance from the antenna axis that persons should maintain in order to avoid RF exposure higher than the allowable MPE level set by the FCC. FAILURE TO OBSERVE THESE LIMITS MAY ALLOW THOSE WITHIN THE MPE RADIUS TO EXPERIENCE RF RADIATION ABSORPTION WHICH EXCEEDS THE FCC MAXIMUM PERMISSIBLE EXPOSURE (MPE) LIMIT. IT IS THE RESPONSIBILITY OF THE RADIO OPERATOR TO ENSURE THAT THE MAXIMUM PERMISSIBLE EXPOSURE LIMITS ARE OBSERVED AT ALL TIMES DURING RADIO TRANSMISSION. THE RADIO OPERATOR IS TO ENSURE THAT NO BYSTANDERS COME WITHIN THE RADIUS OF THE MAXIMUM PERMISSIBLE …
Text truncated - open the document above for the full version.
Users Manual
MM101031V1 R1A Installation Manual P ANTHER TM 300M Mobile Radio 2 Copyright © 2000, Com-Net Ericsson Critical Radio Systems, Inc. All rights reserved. This manual is published by Com-Net Ericsson Critical Radio Systems, Inc., without any warranty. Improvements and changes to this manual necessitated by typographical errors, inaccuracies of current information, or improvements to programs and/or equipment, may be made by Com-Net Ericsson Critical Radio Systems, Inc., at any time and without notice. Such changes will be incorporated into new editions of this manual. No part of this manual may be reproduced or transmitted in any form or by any means, electronic or mechanical, including photocopying and recording, for any purpose, without the express written permission of Com-Net Ericsson Critical Radio Systems, Inc. The software contained in this device is copyrighted by Com-Net Ericsson Critical Radio Systems, Inc. Unpublished rights are reserved under the copyright laws of the United States. NOTICE! Repairs made to this equipment should be made only by an authorized service technician or facility designated by the supplier. Any repairs, alterations, or substitution of recommended parts made by the user to this equipment not approved by the manufacturer could void the user’s authority to operate the equipment in addition to the manufacturer’s warranty. NOTICE! 3 SAFETY INFORMATION ..................................................................................... 4 MAXIMUM PERMISSIBLE EXPOSURE (MPE) LIMITS ................................ 5 DETERMINING MPE RADIUS ....................................................................... 5 SAFETY TRAINING INFORMATION ................................................................ 6 INTRODUCTION .................................................................................................... 8 UNPACK AND CHECK THE EQUIPMENT ....................................................... 8 OPTIONS AND ACCESSORIES ...................................................................... 9 INSTALLATION ................................................................................................... 10 STEP 1 - PLAN THE INSTALLATION ......................................................... 10 STEP 2 - LOCATE THE TOOLS REQUIRED ............................................... 10 STEP 3 – EQUIPMENT PREPARATION ...................................................... 11 Mounting .................................................................................................. 11 STEP 4 – PROGRAM THE RADIO................................................................ 16 STEP 5 – INSTALL CABLES ......................................................................... 17 Power Cable ............................................................................................. 17 Connect To Ignition Sense ....................................................................... 18 Radio Mounting Procedures ..................................................................... 20 STEP 7 – INSTALL OPTIONS AND ACCESSORIES .................................. 22 Radio Option Cable .................................................................................. 22 External Speaker – 19A149590P11.......................................................... 25 Alarm (Horn) Relay Kit - 19A705499P1 ................................................. 28 Microphone Hanger/Hook Switch Mounting – 344A4678P1................... 30 Antenna .................................................................................................... 30 Noise Suppression Kit - Option KMPD1A (19A148539G1).................... 32 FIGURES Figure 1 – Typical Connection Diagram ..................................................................12 Figure 2 – Removing Top Cover..............................................................................13 Figure 3 – Factory Default Internal Speaker Jumper Setting (Enabled) ...................14 Figure 4 – Factory Default Settings For Jumper JP600 ............................................15 Figure 5 – Removing Plastic Cover..........................................................................16 Figure 6 – Power Cable RPM 113 7674/10..............................................................18 Figure 7 – Mounting Bracket and Mounting Bracket Hardware Kit ........................20 Figure 8 –Mounting Bracket Installation..................................................................21 Figure 9 – Mounting Radio to Bracket .....................................................................22 Figure 10 - Mounting the External Speaker .............................................................25 Figure 11 – External Speaker Option .......................................................................26 Figure 12 – Internal/External Speaker Relay............................................................27 Figure 13 - External Car Alert..................................................................................29 Figure 14 - External Alarm Relay ............................................................................29 Figure 15 – Ignition Sense Option............................................................................30 TABLES Table 1 - P ANTHER 300M Mobile Radio Options and Accessories ............................9 Table 2 – Radio Option Connector P3 Interface Description ...................................23 TABLE OF CONTENTS 4 SAFETY INFORMATION The operator of any mobile radio should be aware of certain hazards common to the operation of vehicular radio transmissions. A list of several possible hazards is given: 1. Explosive Atmospheres - Just as it is dangerous to fuel a vehicle with the motor running, similar hazards exist when operating a mobile radio, be sure to turn the radio off while fueling the vehicle. Do not carry containers of fuel in the trunk of the vehicle if the radio is mounted in the trunk. 2. Interfer…
Text truncated - open the document above for the full version.
Users Manual
15 To use the Ignition Sense line in any application, the option cable must be wired accordingly, see the section Connect To Ignition Sense on page 18. There are three parameters that define how the Ignition Sense feature will operate - a jumper on the radio (as described above), and two programmable parameters in the personality. The programmable parameters enable/disable Transmission and/or Horn Alert with respect to the vehicle ignition switch. For more information on the personality parameters, see the On-Line Help in Conventional ProGrammer (TQ-3389 R9A or later) or ProGrammer (TQ-3385 R9A or later). Figure 4 – Factory Default Settings For Jumper JP600 16 Connect Option Cable This section applies to installations that require an option cable. The option cable (RPM 113 7674/1) is required if you are installing: ! External Speaker ! Internal/External Speaker Option ! Car Horn Alert ! Ignition Sense ! External Modulation ! External Demodulation To connect the option cable to the radio: 1. Remove the two Phillips screws holding the plastic cover in place, from the back of the radio, see Figure 5. Figure 5 – Removing Plastic Cover 2. Insert the option cable through the hole left by removing the plastic cover. This will allow the connector to fit through the hole in the back of the radio. 3. Plug the option cable connector into J3 on the radio circuit board. 4. Finally attach cable with the two Phillips screws. STEP 4 – PROGRAM THE RADIO All radios must be programmed with a radio personality. There are many parameters in the P ANTHER 300M mobile radio that need to be setup and defined for the radio to operate appropriately for each application. Conventional ProGrammer (TQ-3389 R9A or later) or ProGrammer (TQ-3385 R9A or later) is the software used to create 17 the personality for the P ANTHER 300M radio. The radio personality is a computer file that defines all the operating parameters for the radio. For more information on programming the P ANTHER 300M radio, see the On-Line Help provided with Conventional ProGrammer (TQ-3389 R9A or later) or ProGrammer (TQ-3385 R9A or later). Typically, the radio is programmed before it is installed in a vehicle. STEP 5 – INSTALL CABLES The P ANTHER 300M Mobile Radio is installed as a front mount radio. The location of the mount, the application and the options to be installed should be considered when planning the cable runs. The cable diagram in Figure 1 should be referenced throughout the installation process. Power Cable The power cable RPM 113 7674/10 consists of a two-wire cable, see Figure 6. The red fused lead supplies power to the radio directly from the vehicle battery. Ignition Sense lead, through the separate option cable, is used by the radio electronics to determine when the ignition switch is turned on. The black lead is the radio ground connection. To install the power cable: 1. Remove the fuse from the power cable. 2. When the power cable is wired directly to the vehicle’s battery it is necessary to route the red power lead through the vehicle’s firewall. If an existing hole is not conveniently located in the firewall, drill a 1/2-inch hole in the firewall for the cable run and insert a rubber grommet. This grommet is required to prevent lead chaffing. Additional grommets may be required if the leads must pass through shields or guards in the engine compartment. 18 Figure 6 – Power Cable RPM 113 7674/10 Route the lead away from high heat sources in the engine compartment that may cause lead damage and introduce a fire hazard. In addition, the lead should not be routed near electrical noise sources such as electronic ignition modules or cruise control modules. 3. Secure the cable at several locations within the engine compartment to prevent possible damage to the cable. 4. Connect the BLACK lead to the vehicle chassis. Connect the lead as close to the radio as possible. DO NOT connect the BLACK lead to the “NEG” or “-“ battery post. Connect the RED lead to the positive (“POS” or “+”) battery post. See Figure 6. # The power source must have a minimum current supply capability of 13 amps. Connect To Ignition Sense The ignition sense line is used to enable or disable transmit or the Car Horn Alert option through the vehicle ignition switch. For a 19 detailed description on how to configure the Ignition Sense line, see the section Configure Ignition Sense Jumper on page 14. Regardless of how the ignition sense line is configured, the option cable must be wired as described below for the feature to work. Connect Pin 13 of the option cable to an ignition “ON” sense point (preferably an “Accessory” point in the vehicle fuse panel) that is switched on when the vehicle ignition switch is in the ACCESSORY and RUN positions. This lead should be connected so the vehicle fuse protection is used. See Figure 6. # The DB-25 male connector that connects to the option cable is user-supplied. The “Accessory” point should drop to ZERO volts when cranking the engine and return to +12 volts after the engine is started. If a point is chosen that drops to a voltage between zero and +12 volts, the radio may execute a power-up cycle several times during start up. It is recommended that the terminal be measured with a voltmeter to be sure it shuts off (goes to zero volts) during the cranking of the engine. Certain problems may be encountered when accessory equipment is connected to the ignition or accessory lines of the vehicle, where these lines may have large filter capacitors and a leakage path present. If the radio does not turn off within a reasonable amount of time after the ignition is turned off, first try a different accessory or ignition A+ pick up point in the vehicle. Many vehicles have more than one circuit that is switched by the ignition switch, and one may be available that does not have large filter capacitors or a leakage path present. If a different pickup point cannot be found, then add a 470-ohm, 1-watt resistor from the ignition A+ pick point…
Text truncated - open the document above for the full version.
Contact Information
Applicant
Thomas Camper, Jr.(Regulatory Manager)
Technical Contact
Rhein Tech Laboratories, Inc.Desmond Fraser
[email protected]703 689 0368
360 Herndon Parkway · Herndon, Virginia · United States
Non-Technical Contact
Rhein Tech Laboratories, Inc.Desmond Fraser
[email protected]703 689 0368
Test Firm
Rhein Tech Laboratories, Inc.Rick McMurray
Technical Specifications
| # | Rule Parts | Frequency Range | Power Output | Emission | Tolerance |
|---|---|---|---|---|---|
| 2 | 22,74,90.210,95A | 450 MHz - 488 MHz | 43.8 W | 11K0F3E | 2.5 ppm |
Other Applications from HARRIS CORPORATION
OWDTR-0170-E
Apr 18, 2024XL-85M, 700/800MHZ Land Mobile Radio
Equipment Class
DTS - Digital Transmission System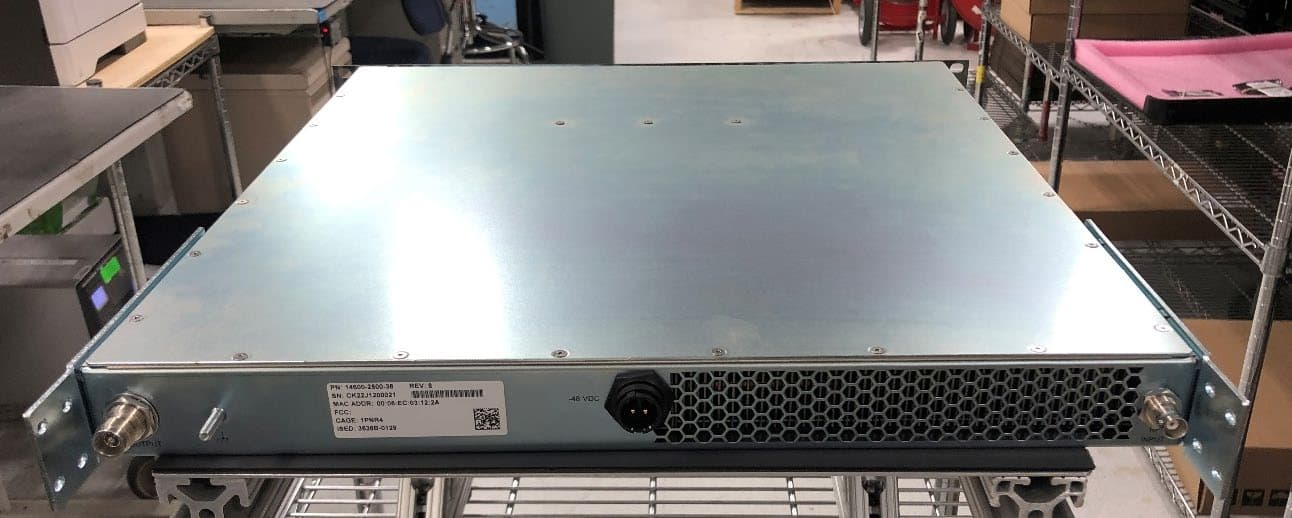
OWDTR-0172-E
Oct 02, 2023Two47, Base Station Transceiver (700 MHz Band)
Equipment Class
TNB - Licensed Non-Broadcast Station Transmitter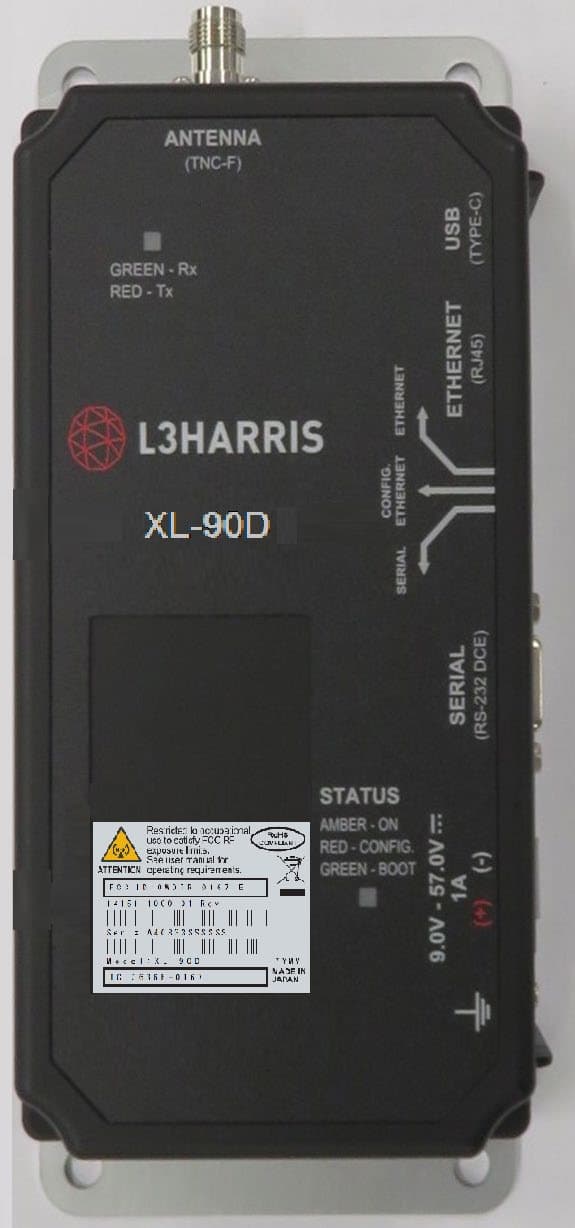
OWDTR-0167-E
Dec 13, 2022XL-90D 7/8/900 MHz Mobile Based Terminal Device
Equipment Class
PCB - PCS Licensed Transmitter
OWDTR-0164-E
Apr 18, 2021XL-400P, Multi-Band Portable Land Mobile Radio
Equipment Class
TNF - Licensed Non-Broadcast Transmitter Held to Face
OWDTR-0162-E
Mar 10, 2021XL-95P, 7/800MHz Portable Land Mobile Radio
Equipment Class
NII - Unlicensed National Information Infrastructure TX