P6JQREX-Q150LCD PC
Hyojincontec Co., Ltd.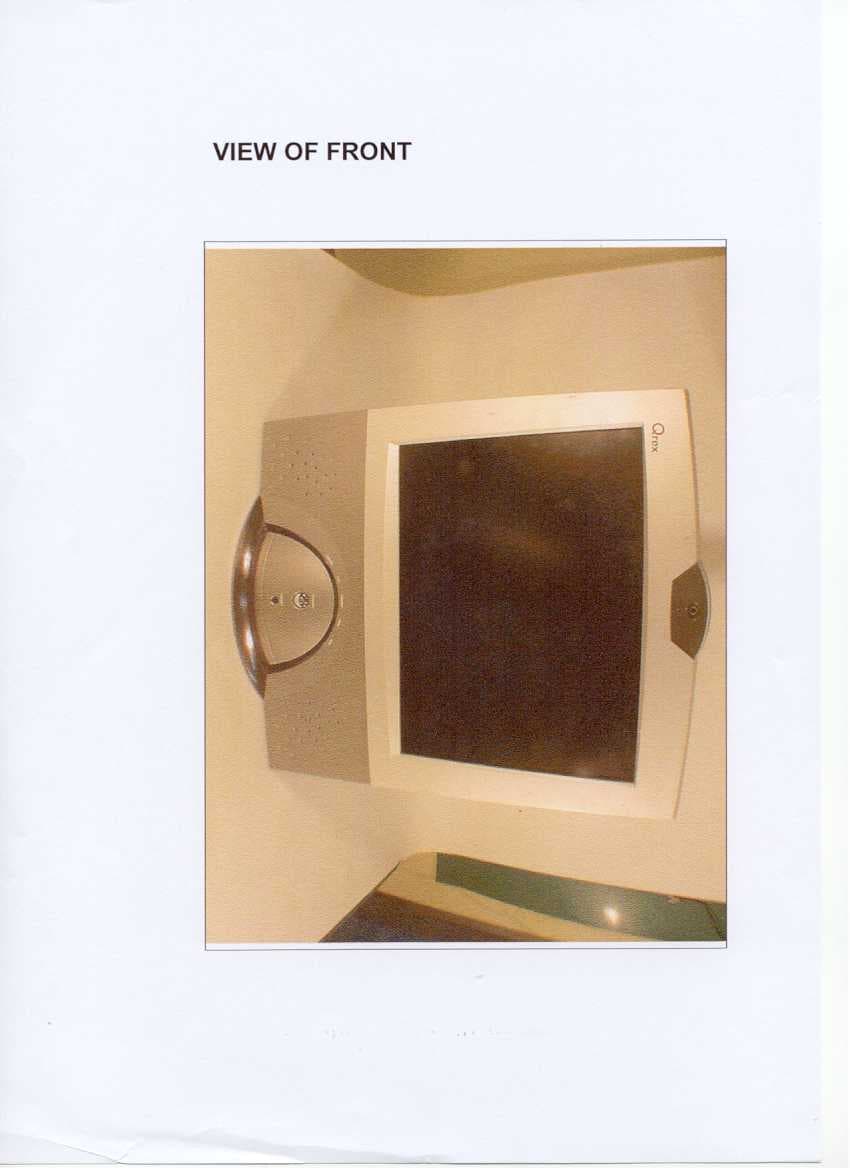
Click to zoom
Application Details
- Equipment Class
- JBC - Part 15 Class B Computing Device/Personal Computer
- Date of Grant
- Apr 21, 2002
- Application Purpose
- Original Equipment
- Date of Application
- Apr 21, 2002
- Equipment Note
- LCD PC
- Company
- Hyojincontec Co., Ltd.
- Country
- South Korea
Documents & Files
Document Text
Text extracted from the exhibit documents filed with the FCC. Open a document above to read the original.
Users Manual
User’s Manual Qrex PC(Q150) user’s Manual Grade – A equipment This equipment is certified by EMI to be Used in office. Qrex PC User’s Manual - 2 - Table of Contents Chapter 1. Important Safety Instructions ------------------------------------------------------------------------------- 3 Chapter 2. Hardware Overview ------------------------------------------------------------------------------- 4 Chapter 3. Specification ------------------------------------------------------------------------------ 11 Chapter 4. Starting Windows ------------------------------------------------------------------------------ 12 Turn on the system ------------------------------------------------------------------------------ 12 Turn off the system ------------------------------------------------------------------------------ 12 Starting windows ------------------------------------------------------------------------------ 13 Understanding desktop ------------------------------------------------------------------------------ 13 Using the keyboard / mouse ------------------------------------------------------------------------------ 14 Using the multimedia shortcut ------------------------------------------------------------------------------ 15 Using mouse ------------------------------------------------------------------------------ 16 Using the driver ------------------------------------------------------------------------------ 17 Using CD-ROM ------------------------------------------------------------------------------ 17 Using FDD ------------------------------------------------------------------------------ 17 Chapter 5. Maintenance System ------------------------------------------------------------------------------ 18 Screen Cleaning ------------------------------------------------------------------------------ 18 Hard disk defragmenter ------------------------------------------------------------------------------ 19 Mouse cleaning ------------------------------------------------------------------------------ 20 Chapter 6. Installing driver ------------------------------------------------------------------------------ 21 Driver CD ------------------------------------------------------------------------------ 21 Installing Graphic driver ------------------------------------------------------------------------------ 22 Installing LAN driver ------------------------------------------------------------------------------ 24 Installing Audio driver (Win98 / WinME) ------------------------------------------------------------------------------ 27 Installing Audio driver (Win2000) ------------------------------------------------------------------------------ 35 Installing Camera driver ------------------------------------------------------------------------------ 38 Using Camera ------------------------------------------------------------------------------ 44 Installing Touch Screen driver ------------------------------------------------------------------------------ 51 Installing VGA(NVIDIA) driver ------------------------------------------------------------------------------ 61 Setting Twin View ------------------------------------------------------------------------------ 63 Qrex PC User’s Manual - 3 - Chapter 7. System Upgrade ------------------------------------------------------------------------------ 67 Take a system apart ------------------------------------------------------------------------------ 67 Changing HDD ------------------------------------------------------------------------------ 68 Changing CPU ------------------------------------------------------------------------------ 70 Changing RAM ------------------------------------------------------------------------------ 71 Changing VGA card ------------------------------------------------------------------------------ 72 Chapter 8. BIOS setting ------------------------------------------------------------------------------ 74 Chapter 9. Qrex Mainboard ------------------------------------------------------------------------------ 78 Introduction ------------------------------------------------------------------------------ 78 Product Description ------------------------------------------------------------------------------ 78 Check List ------------------------------------------------------------------------------ 78 Specifications ------------------------------------------------------------------------------ 79 Board Dimension ------------------------------------------------------------------------------ 80 Installation ------------------------------------------------------------------------------ 81 Installing CPU ------------------------------------------------------------------------------ 81 Installing Memory (DIMM) ------------------------------------------------------------------------------ 82 Connectors on LPC-815 ------------------------------------------------------------------------------ 87 Chapter 10. BIOS Setup ------------------------------------------------------------------------------ 96 BIOS Introduction ------------------------------------------------------------------------------ 96 BIOS Setup ------------------------------------------------------------------------------ 96 Standard CMOS Setup ------------------------------------------------------------------------------ 98 Advanced BIOS Features ------------------------------------------------------------------------------100 Advanced Chipset Feature ------------------------------------------------------------------------------103 Power Management Setup ------------------------------------------------------------------------------108 PNP / PCI Configurations ------------------------------------------------------------------------------111 PC Health Status ------------------------------------------------------------------------------ 112 Frequency / Voltage Control ----------------------------------------------------------------------------- 113 Load Fail-Safe Default ---…
Text truncated - open the document above for the full version.
Users Manual
Qrex PC User’s Manual - 38 - Installing camera driver 1. ‘START’>’SETTINGS’>’CONTROL PANEL’>’SYSTEM’>’DEVICE MANAGER’> click ‘REFRESH’ 2. After confirmation the add device, select driver of CD-ROM (Caution : Take a driver for each corresponding OS) Qrex PC User’s Manual - 39 - 3. Click ‘NEXT’ on add new hardware wizard screen 4. Click ‘NEXT’ on add new hardware wizard screen Qrex PC User’s Manual - 40 - 5. Screen of install 6. Click ‘CLOSE’ Qrex PC User’s Manual - 41 - 7. Image device is installed on ‘DEVICE MANAGER’ 8. Camera OS install selection Qrex PC User’s Manual - 42 - 9. Installing OS driver 10. screen of install Qrex PC User’s Manual - 43 - 11. When installing is done, click ‘FINISH’ 12. Double click ‘Qrex’ icon on desk top. The Qrex camera window will appear. Qrex PC User’s Manual - 44 - Using Camera 1. Function button You can display image that inputting camera or can take photograph still image and moving image. Also, you can send stillness image and moving image by e-mail with one-click. This convenient program supports moving Image compression function Qrex PC User’s Manual - 45 - 2. Function button explanation Camera control Control color / brightness of camera Video format Change Image size / format of camera Help Help for how to use program and special feature of camera Minimize Minimize size of program Exit Close program Track bar Time setting the moving image that will record. (Max-60sec) Play Running the saved moving image Record Recording moving image Snap shot Changing moving image to still image Stop Stop running moving image E-mail Sending moving image and still image Edit Editing with image editor Load Loading saved moving image and still image from disk Save Saving moving image and still image to disk Gallery open Viewing the recorded still image / moving image Qrex PC User’s Manual - 46 - 3. Explanation for main function Appending image to e-mail Stillness image supports JPEG, moving image is compressed by MPEG-4 (AVI) MPEG-4 is not compression codec of window, so it may not be installed in computer. If it is not played, download window media player from Microsoft web site and install. Reference : In case of window98 English version, e-mail attach function may not play Qrex PC User’s Manual - 47 - 4. Moving image saving / playing function Reference : Moving image is saved by AVI format- 1. Record moving image saved temporally to gallery) (Recorded moving image 2. Appoint recording time (Max 60sec) 3. Push save button 4. When you play, push load Button and select file 5. Write file name and save where you want Qrex PC User’s Manual - 48 - 5. Snap shot function (Save / Load function) Reference : Stillness image can be saved by BMP / JPG 2. Push save button 3. When you play, push load Button and select file 4. Write file name and save where you want 1. Take a photograph what you still image Qrex PC User’s Manual - 49 - 6. Video format setting Changing for pixel size / format of viewer Frame rate Control frame / sec which is recognized by camera, 640 x 480 (Max15fps) 320 x 230 (Max30fps) With more frame per sec interruption will be low and high quality image will appear. However high function system is required. But it needs high system Flip horizontal Flip over image (switching left to right) Color S/.C Control screen quality of viewer display RGB24 is best screen, but speed becomes slow. Output size Control pixel size of viewer. Display size is not changed. If you take a photograph with snap shot button, size is pertinent size Qrex PC User’s Manual - 50 - 7. Camera format setting Adjust brightness, contrast, color tone, chroma and resolution Automatic adjustment Adjust brightness and exposure automatically by mark ‘AUTO’ Color selection Converts the display to color or black and white Flicker Removes the flickering of the display Defaults Load default settings Qrex PC User’s Manual - 51 - Installing touch driver 1. Installing touch driver (1) Program installing (2) Screen of setup Qrex PC User’s Manual - 52 - (3) Screen of running install Beginning screen appears when you run setup. Then click ‘NEXT’ (4) Click ‘YES’ in software license agreement Qrex PC User’s Manual - 53 - (5) Click ‘NEXT’ on information (6) Choose destination location screen appears (click ‘NEXT’) Qrex PC User’s Manual - 54 - (7) Select program folder. Click ‘NEXT’ (8) Screen of start copying files. Click ‘YES’ Qrex PC User’s Manual - 55 - (9) Click ‘FINISH’ when screen of setup complete appears (10) Screen of PenMount Control Panel appears after program installation. Qrex PC User’s Manual - 56 - (11) Screen of detecting touch driver (12) Screen of detected touch driver Qrex PC User’s Manual - 57 - (13) After detecting touch driver, click ‘YES’ to reboot system. (14) After rebooting, setup touch calibration ‘START’ > ‘PROGRAM’ > ‘ENMOUNT’ > ‘PENMOUNT CONTROL’ Qrex PC User’s Manual - 58 - (15) Select calibration (16) Screen will turn to white, point mark appears five times on screen, push center of mark with Penmount. After five times selection, click ‘OK’ when screen of success appears Qrex PC User’s Manual - 59 - (17) Screen of setting 1) By push right button, window appears like mouse and then choose icon what user’s need . 2) By choosing beep sound, beep sound will comes when touch screen works. (If you choose long sound, select long beep icon.) 3) Cursor icons are to select the with arrow or not on desk top 4) Double click icons are for adjusting click speed and touching area. 5) Test for touch setting by drawing on screen with pen Qrex PC User’s Manual - 60 - (18) Screen of test drawing (19) Click ‘OK’ after setting Qrex PC User’s Manual - 61 - Installing VGA (NVIDIA) Driver 1. Click Nvidia button in window of driver CD 2. Click ‘NEXT’ Qrex PC User’s Manual - 62 - 3. Screen of file copying 4. Click ‘Finish’ to restart system. Qrex PC User’s Manual - 63 - Setting Twin View 1. Go to Display properties (click mouse right button on desktop) has a monitor is connected to Qrex 2. Click #2 in win…
Text truncated - open the document above for the full version.
Users Manual
Qrex PC User’s Manual - 76 - Advanced BIOS Features You can setup more detail parts than standard setup. This has items that related system performance. So you have to consult to expert or A/S center. Advanced Chipset Features This is setting menu for chipset that is related system performance. Beginner does not change before consultation for expert. Integrated Peripherals The menu has an item that controls each Input / Output devices. Power Management Setup This section provides information of functioning the Green PC power management features. PnP / PCI Configurations By choosing the PnP / PCI configurations, each plug and play devices and PCI devices can be controlled. PC Health Status By choosing the PC Health status, you can see voltage of CPU, RPM of cooling Fan, temperature. Frequency / Voltage Control There are three parts that control for clock of memory. PCI, CPU clock and related EMI. No booting or burning CPU may occur by wrong setting. Load Fail-Safe Defaults If you want to restore the original system setting, choose this item. Qrex PC User’s Manual - 77 - Load Optimized Defaults The menu makes optimized system setting, choose this item. Set Supervisor Password The menu prevent to indiscreet BIOS setup. Use carefully. Set User Password The menu requires password before system boot and operate OS. Setting menu for user’s password. Save & Exit Setup Selecting this option let you exit with recording setup. Exit Without Saving Selecting this option let you exit without recording setup. It is recommend that BIOS setting needs expert’s help. Caution : Don’t lost password after setting password. Lost password Causes complicated recover procedure. Qrex PC User’s Manual - 78 - Introduction Product description LPC-815 is a high-performance flexible motherboard that comes with Socket 370 that supports up to 1.2GHz Pentium III processors. It has built-in VGA with TMDS panel support and an Intel 82562ET Ethernet controller. LPC-815 also supports a micro AGP socket for high performance micro AGP VGA cards. LPC-815 is based on the Intel 815E(B) chipset that contains the Graphics and Memory Controller Hub (GMCH), the I/O Controller Hub (ICH2) and the Firmware Hub (FWH). It supports 66/100/133MHz system bus, up to 1.2GHz CPU speed, integrated 2D/3D graphics accelerator, and 100/133MHz SDRAM modules. System memory is provided by two 168-pin DIMM sockets that accommodate SDRAM with a maximum capacity of 512MB. The Award BIOS facilitates easy system configuration and peripheral setup. The board also features include 4 USB port support and IrDA interface. Checklist Your LPC-815 package should include the items listed below. ??The LPC-815 Motherboard ??This User’s Manual ??LPC-SP Silicon image graphics daughter with TMDS panel support or LPC-N200 nVidia micro AGP VGA card Chapter9. Qrex Mainboard (LPC-815) Qrex PC User’s Manual - 79 - Specifications Processor Supported Socket 370 support Intel Celeron / Pentium III, 533MHz~1.2GHz, 66/100/133MHz Bus Speed Chipset Intel 815E(B) Chipset BIOS Award BIOS Supports ACPI, DMI, PnP System Memory 2x DIMM sockets support up to 512MB capacity PC100/PC133 supported LPC I/O Chipset ITE IT8712 (keyboard controller is built-in) I/O Features 1x FDD (up to 2.88MB, 3 Mode, LS120) 1x Parallel Port (EPP, ECP Port) 2x Serial Ports (2x RS232) 1x IrDA TX/RX pin headers 4x USB ports interface Bus Master IDE 2x IDE interfaces for up to 4 devices; supports PIO Mode 3/4 or UDMA/33/66/100 HDD, and ATAPI CD-ROM VGA 815E(B) integrated graphics Shared memory Optional LPC-SP VGA daughter card with TMDS (SiI851) with panel connector or LPC-N200 NVIDIA micro AGP VGA card LAN Intel 82562ET Ethernet controller 10Base-T / 100Base-TX protocol RJ-45 connector cable via pin header Hardware Monitoring Built-in IT8712 Monitors CPU/system temperature and voltages Power Supply Connector ATX type Keyboard and Mouse Connector Pin headers Form Factor Custom size motherboard Dimensions 200mm x 230mm (9.06” x 7.87”) Qrex PC User’s Manual - 80 - Board Dimensions Qrex PC User’s Manual - 81 - Installations This section provides information on how to use the jumpers and connectors on the LPC-815 in order to set up a workable system. The topics covered are: Installing the CPU The LPC-815 Motherboard supports a Socket 370 processor socket for Intel Pentium III and Celeron processors. The Socket 370 processor socket comes with a lever to secure the processor. Raise this lever to about a 90? angle to allow the insertion of the processor. Place the processor into the socket by making sure the notch on the corner of the CPU corresponds with the notch on the inside of the socket. Once the processor has slide into the socket, return the lever to the lock position. Refer to the figures below. After you have installed the processor into the socket, check if the jumpers for the CPU type and speed are correct. Note : Ensure that the CPU heat sink and the CPU top surface are In total contact to avoid CPU overheating problem that would cause your system to hang or be unstable Qrex PC User’s Manual - 82 - Installing the Memory (DIMM) The LPC-815 Motherboard supports two 168-pin DIMM sockets for a maximum total memory of 512MB in SDRAM type. The memory module capacities supported are 32MB, 64MB, 128MB and 256MB. Installing and Removing DIMMs To install the DIMM, locate the memory slot on the Motherboard and perform the following steps: 1. Hold the DIMM so that the two keys of the DIMM align with those on the memory slot. 2. Gently push the DIMM in an upright position until the clips of the slot close to hold the DIMM in place when the DIMM touches the bottom of the slot. 3. To remove the DIMM, press the clips with both hands DIMM Lock Lock Lock Lock Qrex PC User’s Manual - 83 - Setting the jumper Jumpers are used on LPC815 to select various setting and features according to you needs and applications. Contact your supplier if you have doubts about the best configuration for your needs. The following lists the conne…
Text truncated - open the document above for the full version.
Block Diagram
5 5 4 4 3 3 2 2 1 1 DD CC BB AA BLOCK DIAGRAM DF PORT SII 164 SII 851 TMDS PORT Clock 66.667MHz 28MHz 28MHz 66.667MHz 66.667MHz
Contact Information
Applicant
Hyun Jong Park(Manager)
Technical Contact
SGS KES Co., Ltd.Seung-Hun An
[email protected]82-31-263-0409
705, Dongchun-Ri, Sooji-Eub · Kyunggi-Do · South Korea
Non-Technical Contact
SGS KES Co., Ltd.Myung-Jin Lee
[email protected]82-31-263-0409
Test Firm
SGS Korea Co., Ltd.Julia Choi
Technical Specifications
| # | Rule Parts | Frequency Range | Power Output |
|---|---|---|---|
| 1 | 15B | - | - |
Other Applications from Hyojincontec Co., Ltd.

P6JQREX-X150
Apr 02, 2003LCD PC
Equipment Class
JBC - Part 15 Class B Computing Device/Personal Computer
P6JQREX-X170
Jan 15, 2003LCD PC
Equipment Class
JBC - Part 15 Class B Computing Device/Personal Computer