PIZGH97642.4GHz DSST Multi-Handset w/ CID+DAM
CIDMATE International Technology Inc.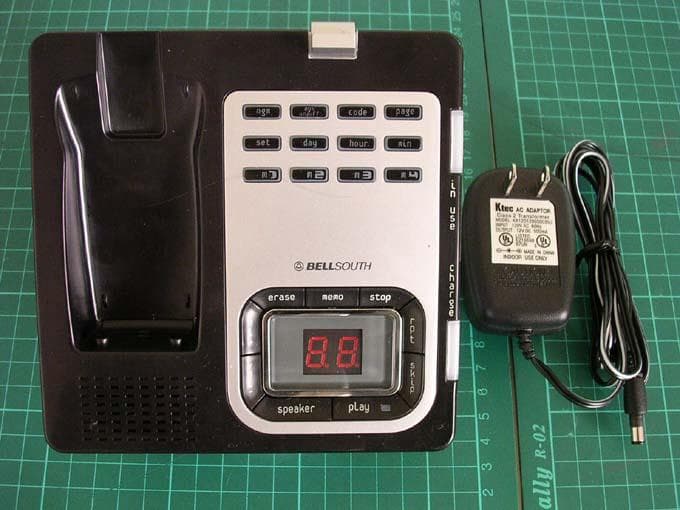
Click to zoom
Application Details
- Equipment Class
- DTS - Digital Transmission System
- Date of Grant
- Mar 24, 2004
- Application Purpose
- Original Equipment
- Date of Application
- Mar 24, 2004
- Equipment Note
- 2.4GHz DSST Multi-Handset w/ CID+DAM
- Frequency Range
- 2407.50000000 - 2472.00000000
- Country
- Taiwan
Documents & Files
Document Text
Text extracted from the exhibit documents filed with the FCC. Open a document above to read the original.
Users Manual
2.4 GHz DIGITAL SPREAD SPECTRUM ALL DIGITAL ANSWERING SYSTEM WITH CALLER ID / CALL WAITING & SPEAKERPHONE IN BASE UNIT 54 CHANNEL AUTOSCAN WITH 4 SEPARATE MAILBOXES MULTIPLE HANDSETS FEATURE Model GH9764 OWNER’S MANUAL INSTALLATION AND OPERATING INSTRUCTIONS PLEASE READ THIS MANUAL CAREFULLY BEFORE USE. KEEP FOR YOUR REFERENCE. For installation information, please see “Getting Started” instructions on page 6 or your separate Quick Start Guide. Visit Us on the Web: www.uselectronics.info © 2004 Bellsouth Corporation 11 IMPORTANT:The BASE UNITIN USE LED indicator will light up RED when the HANDSETis properly positioned in the BASE UNITCHARGE CRADLE and charging. Securely positioning the HANDSETin the BASE UNITwill also prevent the HANDSETfrom falling. Wall Mounting 12 Preparing for Use Before you can use your cordless telephone, you must charge the HANDSETfor 12 hours. Failure to do so will require more frequent recharging of the BATTERYPACK, See page 44 for more information on the BATTERYPACK. 1.Place the HANDSETon the BASE UNITfor 12 hours. 2.After 12 hours, remove the HANDSETfrom the BASE UNIT. The “RING: HI” should be displayed on the LCD Screen. If you see “WAIT REG.” on the LCD Screen, please do handset registration as described in page 29. NOTE: Depending on the frequency of use, once the HANDSETis fully charged, it remains functional for approximately 4 hours of continuous use and approximately 5 days when the HANDSETis off the BASE UNITin STANDBYmode. NO LINE Indicator This telephone checks for an active TELEPHONE LINE connection. If “NO LINE” appears on the LCD Screen, when the HANDSETis in STANDBYmode, no calls can be made or received from this telephone. Check that the TELEPHONE LINE CORD plugs are connected to the wall TELEPHONE JACK and the BASE UNIT TELEPHONE LINE CONNECTION JACK. If “NO LINE” continues to be displayed, check that the other phones in the house are working. If none of the phones work, contact your local phone company. Receiving Calls From the HANDSET 1.When the phone rings, lift the HANDSETand press the button. The HANDSETLCD Screen will display “CALLS” and “TALKING”, and the BASE UNITIN USE LED indicator will light up GREEN. 2.Start your conversation. 3.To end your conversation, either press the button or place the HANDSETon the BASE UNIT. If you place the H A N D S E Ton the BASE UNIT CHARGE CRADLE, you activate the automatic STANDBYfeature. talk talk Cordless Telephone Operation TALKING. . . . CALLS 13 NOTE: 1.The Call Timer will start to count once you press the button. 2.The LCD Screen emits light for 5 seconds every time you press any buttons on the HANDSET. 3.When “CALLS” appears on the LCD Screen, it means that the HANDSETis OFF-HOOK (connected to the telephone line). Receiving Calls Using the BASE UNIT SPEAKERPHONE 1.When the phone rings, press the button and begin speaking. 2.The LED Message Display will show“”. 3.The S P E A K E R P H O N Espeaker volume can be adjusted by pressingthe and .The LED Message Display will indicate the speaker volume as: “0” - Speaker off “1~8” - Volume from low to high 4.To hang up, press the button again. SPEAKER vol -vol + SPEAKER talk CALLS 00 MIN 1 SEC 14 Minutes Seconds Channel Cordless Telephone Operation IMPORTANT In order to utilize the Caller ID feature, you must subscribe to Caller ID service from your local telephone company. 14 Placing Calls 1.Press the button, the Call Timer starts to count. The HANDSETLCD Screen will display “CALLS”, and “TALKING”, and the BASE UNITIN USE LED indicator will light up GREEN. 2.Listen for a dial tone. 3.Dial the phone number. 4.When you have finished with your call, press the button again or place the HANDSETon the BASE UNIT. OR 1.Dial the phone number. 2.Press and hold down the DIAL7or the DIAL10 or the DIAL1+ button. The BASE UNITIN USE LED indicator will light up RED. 3.When you have finished with your call, press the button again or place the HANDSETon the BASE UNIT. Headset Feature Your telephone can utilize a headset (not included) to be connected to your HANDSETfor you to enjoy hands-free communication. Pull out the HEADSETJACK COVER then insert the small plug at the end of the headset into the HEADSETJACK at the right side of the HANDSET. Follow the procedures discussed in “Receiving Calls” and “Placing Calls” to receive and place a call. NOTE:When you plug the headset plug into the HEADSET JACK it automatically mutes the MICROPHONE and SPEAKER of the HANDSET. Unplug the headset to return the HANDSETto normal use. Headsets are available at most retail outlets that sell telephone equipment. The HEADSETJACK is compatible with 2.5mm headset plugs only. talk # 1+ * 7 talk talk Cordless Telephone Operation TALKING. . . . CALLS 15 Redial Feature 1.If you get a busy tone, press the button or place the HANDSETon the BASE UNITto hang up. 2.Later, press the button again. 3.Listen for a dial tone. 4.Press the button. This will automatically redial the last telephone number you called in TALK mode. 5.When you have finished with your call, press the button again (the BASE UNITIN USE LED indicator will turn off) or place the HANDSETon the BASE UNIT. NOTE: If you are too far away from the BASE UNIT, the HANDSETemits “beep” sounds to warn you that the background noise level is too high for proper communication between the HANDSET and the BASE UNIT. When you hear this sound, you should move closer to the BASE UNITto reduce the noise level. Otherwise, the call will automatically cut off. talk redial save/pause talk talk Caller ID System Operation 16 Caller ID System This telephone automatically displays an incoming caller’s name and telephone number together with the date and time of the call. It records up to 80 calls and stores the data in Memory. IMPORTANT:You must subscribe to the Caller ID service from your local telephone company to utilize this feature. Viewing Caller Information During Incoming Calls 1.When there is an incoming call, the name and the telephone number of the ca…
Text truncated - open the document above for the full version.
Users Manual
30 L. RESET When you feel there is interference while you use this telephone, you can reset your cordless telephone to factory pre-set value but gain a new security code for your telephone. The name and telephone number in the Caller List and Directory memory will not lose while doing this reset operation. 1.Press the button. 2.Press the TELEPHONE KEYPAD button. 3.The “RESET” will appear on the LCD Screen. 4.Press the button. 5.The “CONFIRM” will appear on the LCD Screen. 6.Press and hold down the button to confirm the reset. The “WAITREG.” will appear on the LCD Screen to ask you to register your HANDSET. 7.After registering your HANDSET, follow the Function Operation in page 25~28 to set the other function of the HANDSET. IMPORTANT:When you are a multiple HANDSETuser, please ask the user of the other HANDSETto register his HANDSETagain to set up a new link to BASE UNIT; otherwise, his HANDSETwill not work properly. redial save/pause edit flash # 1+ menu voice mail Caller ID System Operation 31 Telephone Keypad Characters The TELEPHONE KEYPAD ~buttons are used to enter characters when entering names. Press the appropriate TELEPHONE KEYPAD button to get the following characters. EXAMPLE: If you want to enter the characters “ACE” on the HANDSETLCD Screen. 1.Press the button. 2.Press the button. 3.Press the TELEPHONE KEYPAD button, “A” will be displayed. Press the SHIFT RIGHTbutton to move the cursor to the right to enter the next character (See NOTES below.). 4.Press the TELEPHONE KEYPAD button three times to display “C”. 5.Press the TELEPHONE KEYPAD button two times to display “E”. NOTES: 1.To enter the next character, press the appropriate button. If, however, the next character is on the same button as the previous character, you will first need to press the SHIFTRIGHT button. Pressing the SHIFTRIGHTbutton a second time will produce a space. 2.If you want to change any character, you can go back to the incorrect character by pressing the SHIFTLEFTbutton. To delete the character inside the cursor “”,press the button. 3.You can store a maximum of 15 characters on the letter icon. 4.You can store a maximum of 16 digits on the number icon. delete scan def3 abc2 abc2 edit flash wxyz9 Multiple Handsets Feature KEYPAD BUTTONS 1 2 3 4 5 6 7 8 9 * 0 # CHARACTERS SPACE & ’( ) * . 1 AB C 2 D E F 3 G H I 4 J K L5 M N O 6 PQ R S 7 TU V 8 W X YZ 9 * 0 # Multiple Handsets Feature After two or more HANDSETSare registered with a BASEunit, and different extension number is assigned to each HANDSET, you get the advanced multiple handset features. The following paragraphs tell you how to use these advanced features. How to Receive Calls When there is an incoming call, all HANDSETSwill ring, and the name and telephone number of the caller will appear on the LCD Screen provided that you have subscribed to the Caller ID service. Any HANDSETcan press the button to answer the call. How to Place Calls Press the button on any HANDSETto get a dial tone, and then follow the Placing Calls in page 12 for the number dialing. NOTE:If the line is used by other HANDSET, “LINE IN USE” will be displayed. Privacy Feature While a HANDSETis talking over the line, the other HANDSETScan not connected to their conversation by pressing the button on his own HANDSET. Meanwhile the other HANDSETScan not make a call at this moment, but the other HANDSETScan make intercom call to each other. Handset to Handset Intercom Call You can make an intercom call to any HANDSETwhich is registered to the same BASEunit. 1.Press the button. The “EXTNO.” and “- -” appear on LCD Screen for you to enter the desired 2- digit extension number. 2.The called HANDSETrings. If the called HANDSETis in use, you will hear the busy tone, and “HS - - IN USE” will be displayed. 3.The user of the called HANDSETcan press his button to answer the intercom call. 4.Before the called HANDSETanswers you call, you can press the button again to cancel your intercom operation. 5.When you finish with the intercom call, press the button. talk intercom talk intercom talk talk talk Multiple Handsets Feature HS12 IN USE the called handset (ext no.=12) is in use 32 Transfer a Call to Other Extension Handset While you are talking over the line, you can transfer the talking (far-end) party to the other HANDSETuser. Transfer the call to a HANDSET without notify: 1.Press the button. The line is put on hold, and your HANDSETdisplays “EXTNO.” and “- -” appear on LCD Screen for you to enter the 2-digit extension number you want to transfer the call. 2.The called HANDSETwill ring. Press the button on your HANDSET.The call is transfered, and you own HANDSETgoes to Stand-By. 3.The user of called HANDSETcan press the button on his HANDSETto answer the transfered call. 4.If the called H A N D S E Tuser did not answer the transferred call within 30 seconds, Your HANDSETwill ring alarming you to receive the returned call. You can press the button to get back with the talking party. Transfer the call to a HANDSET with notify: 1.Press the button. The line is put on hold, and your HANDSETdisplays “EXTNO.” and “- -” appear on LCD Screen for you to enter the 2-digit extension number you want to transfer the call. 2.The called HANDSETwill ring. 3.Converse with the user of the called HANDSETWhen he press the button on his HANDSETto answer. 4.Press the button on your HANDSETto complete the call transfer. talk talk intercom talk talk talk intercom 33 Multiple Handsets Feature 34 Resetting the Answering System After connecting your phone, press and hold down the button for at least 3 seconds. Release the button and the unit will “beep”. Your unit will now reset itself. Then your unit will announce, “Please enter new time and record your announcement.”You can now set the day/time and record your new announcement. See the details in following paragraphs. NOTE:In the use of this Answering System, if the machine freezes or acts abnormally, unplug and plug the AC adapter.Then follow the same procedure to…
Text truncated - open the document above for the full version.
Users Manual
50 Federal Communications Commission Requirements (continued) NOTE: This equipment has been tested and found to comply with the limits for a Class B digital device, pursuant to Part 15 of the FCC Rules. These limits are designed to provide reasonable protection against harmful interference in a residential installation. This equipment generates, uses, and can radiate radio frequency energy and, if not installed and used in accordance with the instructions, may cause harmful interference to radio communications. However, there is no guarantee that interference will not occur in a particular installation. If the equipment does cause harmful interference to radio or television reception, which can be determined by turning the equipment off and on, the user is encouraged to try to correct the interference by one or more of the following measures: -Reorient or relocate the receiving ANTENNA. -Increase the distance between the equipment and the receiver. -Connect the equipment into an outlet on a circuit different from that to which the receiver is connected. -Consult the dealer or an experienced radio/TV technician for help. This device complies with Part 15 of the FCC Rules. Operation is subjected to the following two conditions: (1)this device may not cause harmful interference, and (2)this device must accept any interference received including interference that may cause undesired operation. The equipment complies with FCC RF radiation exposure limits set forth for an uncontrolled environment, under 47 CFR2.1093 paragraph (d)(2). The 2.4GHz DSSTMulti Handset with CID + DAM has been tested to the FCC exposure requirements (Specific Absorption Rate). FCC Requirements 51 Warranty Information BellSouth Products One-Year Limited Warranty This limited warranty sets forth all BellSouth Productsresponsibilities regarding your telephone. There are no other expressed or implied warranties from BellSouth Products. Warranty Service Provided If you purchased the telephone new from a retail vendor,BellSouth Productswarrants the telephone against defects in material and workmanship for a period of one (1) year from the original date of purchase. This warranty is in lieu of all other express warranties. This warranty begins when you purchase the telephone and continues for one (1) year unless you sell or rent the telephone, in which case the warranty stops. BellSouth Productsdisclaims any implied warranty, including the warranty of merchantability and the warranty of fitness for a particular purpose, as of the date of 90 days from your original purchase of the telephone. BellSouth Productsassumes no responsibility for any special, incidental, or consequential damages. This warranty gives you specific legal rights and you may have other rights which vary from state to state. Some states do not allow the exclusion or limitations of special, incidental or consequential damages, or limitations on how long a warranty lasts, so the above exclusion and limitation may not apply to you. Warranty Service Not Provided This warranty does not cover damage resulting from accident, misuse, abuse, improper installation or operation, lack of reasonable care, unauthorized modification, or the affixing of any attachment not provided by BellSouth Productswith the telephone, and/or loss of parts. This warranty is voided in the event any unauthorized person opens, alters or repairs the telephone. All BellSouthequipment being returned for repair must be suitably packaged. Telephone companies use different types of equipment and offer various types of services to customers. BellSouth Productsdoes not warrant that this telephone is compatible with the type of equipment of any particular telephone company or the services provided by it. Warranty 52 What To Do for Warranty Service During the first thirty (30) days, a defective product is eligible for over-the-counter exchange at the retailer from whom it was purchased. After thirty (30) days, the defective product should be returned to the authorized service center. Please allow 2-3 weeks for the return of your telephone product. The shipping address of the authorized service center is: U.S. Electronics Consumer Center C/O Southern Bonded Warehouse 7137 Southlake Parkway Morrow, GA30260 NOTE:Atelephone product received which was not made for BellSouth Productsor which is not defective as determined by our test procedures will not be repaired and will be returned to you C.O.D., freight collect. To Obtain Warranty Service • Provide proof of the date of purchase within the package. • Prepay all shipping costs to the authorized service center. • Include a return shipping address within the package. Please retain your sales receipt, the carton, the packing materials, and the printed material. The original carton is the best shipping container for the telephone should you have to return it. For your reference: Serial Number Date of Purchase Name of Dealer Customer Service Telephone Number: 1-800-210-8950 OUTSIDE THE U.S.A. CALL1-212-242-6978 Visit Us on the Web: www.uselectronics.info Warranty 53 Wall Mounting Template This page serves as a template for attachment of screws to the wall when mounting this telephone on the wall. 1.Cut out this page. 2.Use this template to determine the distance between screws when mounting this phone on the wall. The two cross hairs identify where to attach the screws. 54 IMPORTANT In order to get maximum life from the HANDSET BATTERYPACK, be sure to charge the HANDSET for 12 hours before initial use. IMPORTANT Placing your BASE UNIT near appliances such as televisions, refrigerators, radios, or microwave ovens may cause interference. IMPORTANT When you hear interference, press the button to change the operating channel. delete scan IMPORTANT If you live in an area which gets frequent thunderstorms, we strongly recommend plugging your AC ADAPTER into a surge protector. IMPORTANT The AC ADAPTER must always be plugged into an electrical outlet. IMPORTANT In …
Text truncated - open the document above for the full version.
Users Manual
23.MAILBOX 2 Button: Press to activate functions for MAILBOX 2. 24.MINUTE Button: Press to set the minute during time setting, or press to set the third digit of the access code during code setting. 25.MEMO Button: Press and hold down to record memo messages. 26.VOL +Button: Press to increase the speaker volume. 27.LED MESSAGE DISPLAY: indicates the number of memos/messages received, status of the system. Ea - Erase OP - OGM is playing 01 ~63- No. of memos/messages AO - Announce Only FU - Memory is full PA- Pause 28.SPEAKER Button: Press to answer the incoming call using the BASE UNIT. 29.MAILBOX 3 Button: Press to activate functions for MAILBOX 3. 30.IN USE LED Indicator: Lights up to indicate that the HANDSETis in TALK mode. 31.STOPButton: Press to stop playing a message. Press and hold down for more than 3 seconds to initiate/re-initiate your answering machine, then release the button and a “beep” will sound.(See detail operations in pages 34 and 47.) 32.CHARGE LED Indicator: Lights up when the HANDSETis placed on the BASE UNITfor charging. 33.PLAYButton: Press to play messages. 34.MICROPHONE play stop 3 speaker vol + memo min 2 BASE UNIT Controls 24.MINUTE BUTTON Pg. 34, 41 23.MAILBOX 2 BUTTON Pg. 36, 38~40 29.MAILBOX 3 BUTTON Pg. 36, 38~40 27.LED MESSAGE DISPLAY Pg. 13, 36~37, 39~40 33.PLA Y BUTTON Pg. 38~39 30.IN USE LED INDICATOR 31.STOPBUTTON Pg. 8, 34, 36, 39, 47 32.CHARGE LED INDICATOR 28.SPEAKER BUTTON Pg. 13 26.VOL+ BUTTON Pg. 13, 36, 47 25.MEMO BUTTON Pg. 38, 40 34.MICROPHONE Pg. 35, 38 1 Safety Instructions ------------------------------------------------------------------------------------------- 4 Getting Started ------------------------------------------------------------------------------------------------ 6 Desk Mounting ------------------------------------------------------------------------------------------------ 9 Wall Mounting ----------------------------------------------------------------------------------------------- 10 Cordless Telephone Operation -------------------------------------------------------------------------- 12 Preparing for Use --------------------------------------------------------------------------------------- 12 NO LINE Indicator --------------------------------------------------------------------------------------- 12 Receiving Calls ------------------------------------------------------------------------------------------ 12 Receiving Calls Using the BASE UNITSPEAKERPHONE --------------------------------- 12 Placing Calls --------------------------------------------------------------------------------------------- 14 Headset Feature ---------------------------------------------------------------------------------------- 14 Redial Feature ------------------------------------------------------------------------------------------- 15 Caller ID System Operation ------------------------------------------------------------------------------ 16 Caller ID System ---------------------------------------------------------------------------------------- 16 Viewing Caller Information During Incoming Calls ------------------------------------------ 16 MSG WAITING (Message Waiting) ------------------------------------------------------------ 16 Call Waiting ------------------------------------------------------------------------------------------ 17 Voice Mail Function -------------------------------------------------------------------------------- 17 C-F (Forwarded Call) ------------------------------------------------------------------------------ 17 L-D-C (Long Distance Call) ---------------------------------------------------------------------- 17 Caller List ------------------------------------------------------------------------------------------------- 17 Viewing the Caller List ----------------------------------------------------------------------------- 18 Placing a Call From the Caller List ------------------------------------------------------------- 18 Editing the Caller List before Dialing ----------------------------------------------------------- 18 Saving the Name and Number in the Caller List into the DIRECTORY--------------- 19 Deleting All Records in the Caller List --------------------------------------------------------- 19 Selective Deleting in the Caller List ------------------------------------------------------------ 19 Special Note to Caller List for Multiple Handset user -------------------------------------- 19 Name and Telephone Number DIRECTORY----------------------------------------------------- 19 Viewing the DIRECTORY------------------------------------------------------------------------- 20 Speed Viewing the DIRECTORY--------------------------------------------------------------- 20 Saving in the DIRECTORY----------------------------------------------------------------------- 20 Contents 2 PREFERRED CALLS ----------------------------------------------------------------------------- 21 BLOCKED CALLS ---------------------------------------------------------------------------------- 21 Editing a Name and Number in the DIRECTORY------------------------------------------- 21 Editing the Number in the DIRECTORYbefore Dialing ----------------------------------- 22 Placing Calls from the DIRECTORY----------------------------------------------------------- 23 Deleting All Records in the DIRECTORY----------------------------------------------------- 23 Selective Deleting in the DIRECTORY-------------------------------------------------------- 23 Function Operation ------------------------------------------------------------------------------------- 24 A. Language ---------------------------------------------------------------------------------------- 25 B. Silent On/Off ------------------------------------------------------------------------------------- 25 C. Time Set ------------------------------------------------------------------------------------------ 25 D. Ringer Volume ---------------------------------------------------…
Text truncated - open the document above for the full version.
Users Manual
23.MAILBOX 2 Button: Press to activate functions for MAILBOX 2. 24.MINUTE Button: Press to set the minute during time setting, or press to set the third digit of the access code during code setting. 25.MEMO Button: Press and hold down to record memo messages. 26.VOL +Button: Press to increase the speaker volume. 27.LED MESSAGE DISPLAY: indicates the number of memos/messages received, status of the system. Ea - Erase OP - OGM is playing 01 ~63- No. of memos/messages AO - Announce Only FU - Memory is full PA- Pause 28.SPEAKER Button: Press to answer the incoming call using the BASE UNIT. 29.MAILBOX 3 Button: Press to activate functions for MAILBOX 3. 30.IN USE LED Indicator: Lights up to indicate that the HANDSETis in TALK mode. 31.STOPButton: Press to stop playing a message. Press and hold down for more than 3 seconds to initiate/re-initiate your answering machine, then release the button and a “beep” will sound.(See detail operations in pages 34 and 47.) 32.CHARGE LED Indicator: Lights up when the HANDSETis placed on the BASE UNITfor charging. 33.PLAYButton: Press to play messages. 34.MICROPHONE play stop 3 speaker vol + memo min 2 BASE UNIT Controls 24.MINUTE BUTTON Pg. 34, 41 23.MAILBOX 2 BUTTON Pg. 36, 38~40 29.MAILBOX 3 BUTTON Pg. 36, 38~40 27.LED MESSAGE DISPLAY Pg. 13, 36~37, 39~40 33.PLA Y BUTTON Pg. 38~39 30.IN USE LED INDICATOR 31.STOPBUTTON Pg. 8, 34, 36, 39, 47 32.CHARGE LED INDICATOR 28.SPEAKER BUTTON Pg. 13 26.VOL+ BUTTON Pg. 13, 36, 47 25.MEMO BUTTON Pg. 38, 40 34.MICROPHONE Pg. 35, 38 1 Safety Instructions ------------------------------------------------------------------------------------------- 4 Getting Started ------------------------------------------------------------------------------------------------ 6 Desk Mounting ------------------------------------------------------------------------------------------------ 9 Wall Mounting ----------------------------------------------------------------------------------------------- 10 Cordless Telephone Operation -------------------------------------------------------------------------- 12 Preparing for Use --------------------------------------------------------------------------------------- 12 NO LINE Indicator --------------------------------------------------------------------------------------- 12 Receiving Calls ------------------------------------------------------------------------------------------ 12 Receiving Calls Using the BASE UNITSPEAKERPHONE --------------------------------- 12 Placing Calls --------------------------------------------------------------------------------------------- 14 Headset Feature ---------------------------------------------------------------------------------------- 14 Redial Feature ------------------------------------------------------------------------------------------- 15 Caller ID System Operation ------------------------------------------------------------------------------ 16 Caller ID System ---------------------------------------------------------------------------------------- 16 Viewing Caller Information During Incoming Calls ------------------------------------------ 16 MSG WAITING (Message Waiting) ------------------------------------------------------------ 16 Call Waiting ------------------------------------------------------------------------------------------ 17 Voice Mail Function -------------------------------------------------------------------------------- 17 C-F (Forwarded Call) ------------------------------------------------------------------------------ 17 L-D-C (Long Distance Call) ---------------------------------------------------------------------- 17 Caller List ------------------------------------------------------------------------------------------------- 17 Viewing the Caller List ----------------------------------------------------------------------------- 18 Placing a Call From the Caller List ------------------------------------------------------------- 18 Editing the Caller List before Dialing ----------------------------------------------------------- 18 Saving the Name and Number in the Caller List into the DIRECTORY--------------- 19 Deleting All Records in the Caller List --------------------------------------------------------- 19 Selective Deleting in the Caller List ------------------------------------------------------------ 19 Special Note to Caller List for Multiple Handset user -------------------------------------- 19 Name and Telephone Number DIRECTORY----------------------------------------------------- 19 Viewing the DIRECTORY------------------------------------------------------------------------- 20 Speed Viewing the DIRECTORY--------------------------------------------------------------- 20 Saving in the DIRECTORY----------------------------------------------------------------------- 20 Contents 2 PREFERRED CALLS ----------------------------------------------------------------------------- 21 BLOCKED CALLS ---------------------------------------------------------------------------------- 21 Editing a Name and Number in the DIRECTORY------------------------------------------- 21 Editing the Number in the DIRECTORYbefore Dialing ----------------------------------- 22 Placing Calls from the DIRECTORY----------------------------------------------------------- 23 Deleting All Records in the DIRECTORY----------------------------------------------------- 23 Selective Deleting in the DIRECTORY-------------------------------------------------------- 23 Function Operation ------------------------------------------------------------------------------------- 24 A. Language ---------------------------------------------------------------------------------------- 25 B. Silent On/Off ------------------------------------------------------------------------------------- 25 C. Time Set ------------------------------------------------------------------------------------------ 25 D. Ringer Volume ---------------------------------------------------…
Text truncated - open the document above for the full version.
Contact Information
Applicant
Beryl Liu(Sales Asst. Manager)
Technical Contact
Intertek Testing Services Taiwan, Ltd.Elton Chen
elton,[email protected]+886 3 519 1411
No. 11, Lane 275, Ko-Nan 1 Street · Hsinchu City · Taiwan
Test Firm
Intertek Testing Services Taiwan Ltd.Alpha Liu
Technical Specifications
| # | Rule Parts | Frequency Range | Power Output |
|---|---|---|---|
| 1 | 15C | 2.41 GHz - 2.47 GHz | 95.00 mW |
Other Applications from CIDMATE International Technology Inc.
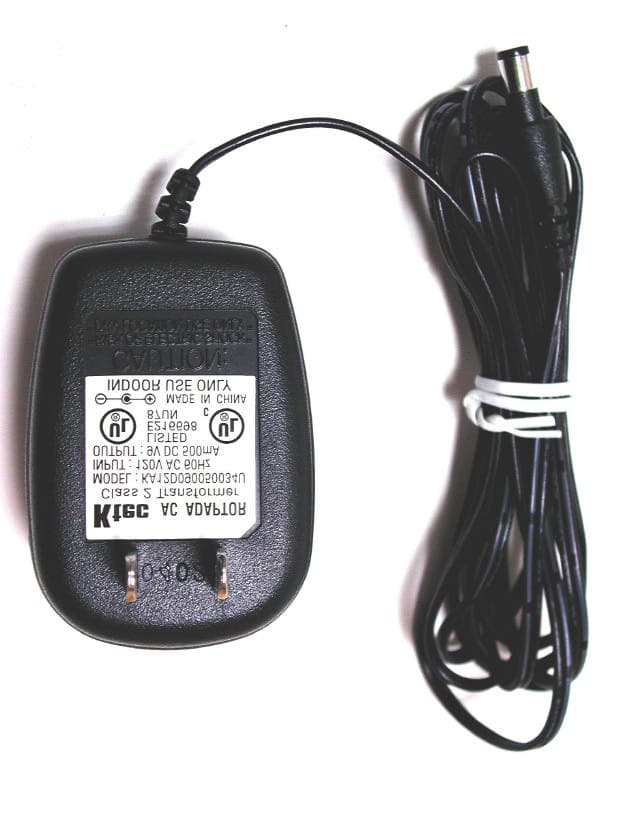
PIZGH9492
Mar 28, 20042.4 GHz Analog Cordless Phone with CID and DAM
Equipment Class
DXX - Part 15 Low Power Communication Device Transmitter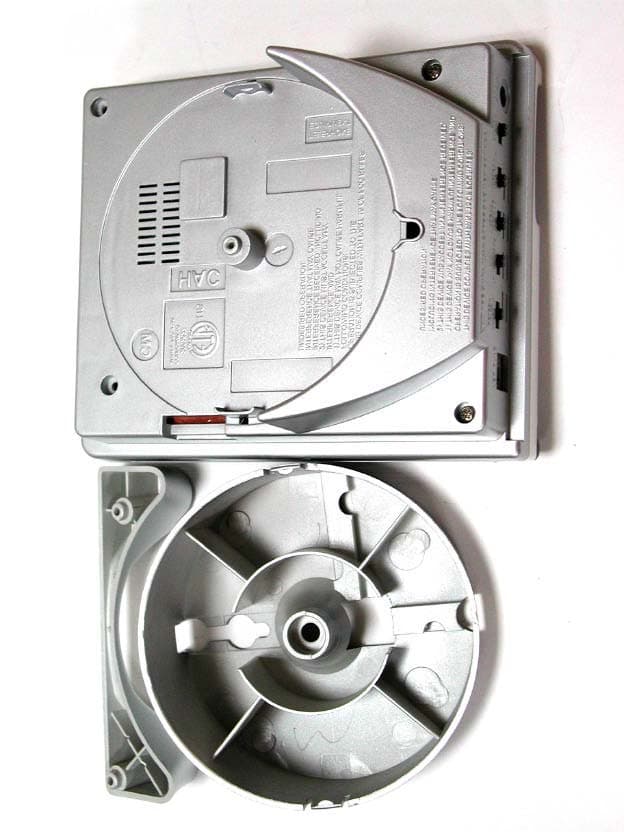
PIZXG34001
Aug 17, 20032.4GHz ANALOG CORDLESS PHONE
Equipment Class
DXX - Part 15 Low Power Communication Device Transmitter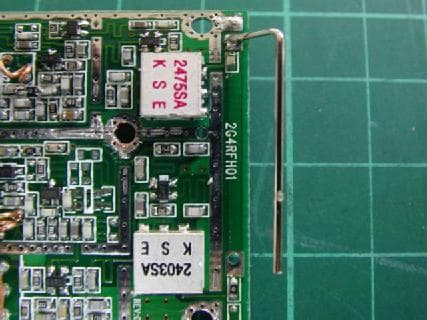
PIZMINI1
Jul 24, 20032.4 GHz Analog Cordless Telephone with CID
Equipment Class
DXX - Part 15 Low Power Communication Device Transmitter
PIZXG32010
Jul 09, 20032.4GHz ANALOG CORDLESS PHONE
Equipment Class
DXX - Part 15 Low Power Communication Device Transmitter
PIZXG21501
Mar 24, 20032.4 GHz Analog Cordless Phone
Equipment Class
DXX - Part 15 Low Power Communication Device Transmitter