RLS-STAVL0358INTELLI TRAC X
Systems & Technology Corp.
Click to zoom
Application Details
- Equipment Class
- JBP - Part 15 Class B Computing Device Peripheral
- Date of Grant
- Jan 04, 2004
- Application Purpose
- Original Equipment
- Date of Application
- Jan 04, 2004
- Equipment Note
- INTELLI TRAC X
- Company
- Systems & Technology Corp.
- Country
- Taiwan
Documents & Files
Document Text
Text extracted from the exhibit documents filed with the FCC. Open a document above to read the original.
Users Manual
*** USER’S MANUAL *** FCC ID : RLS-STAVL0358 Federal Communications Commission (FCC) Warning THIS DEVICE COMPLIES WITH PART 15 OF THE FCC RULES. OPERATION IS SUBJECT TO THE FOLLOWING TWO CONDITIONS: (1) THIS DEVICE MAY NOT CAUSE HARMFUL INTERFERENCE, AND (2) THIS DEVICE MUST ACCEPT ANY INTERFERECE RECEIVED, INCLUDING INTERFERENCE THAT MAY CAUSE UNDESIRED OPERATION. The antenna used for this transmitter must be installed to provide a separation distance of at least 20cm from all persons and must not be do-located or operating in conjunction with any other antenna or transmitter. The antenna used must not exceed 7 dBi gain for mobile or fixed operation. Federal Communications Commission (FCC) Statement This equipment has been tested and found to comply with the limits for a Class B digital device, pursuant to Part 15 of the FCC Rules. These limits are designed to provide reasonable protection against harmful interference in a residential installation. This equipment generates, uses and can radiate radio frequency energy and, if not installed and used in accordance with the instruction, may cause harmful interference to radio communications. However, there is no guarantee that interference will not occur in a particular installation. If this equipment does cause harmful interference to radio or television reception, which can be determined by turning the equipment off and on, the user is encouraged to try to correct the interference by one or more of the following measures: -- Reorient or relocate the receiving antenna. -- Increase the separation between the equipment and receiver. -- Connect the equipment into an outlet on a circuit different from that to which the receiver is connected. -- Consult the dealer or an experienced radio / TV technician for help. Warning : A shielded-type power cord is required in order to meet FCC emission limits and also to prevent interference to the nearby radio and television reception. It is essential that only the supplied power cord be used. Use only shielded cables to connect I/O devices to this equipment. You are cautioned that changes or modifications not expressly approved by the party responsible for compliance could void your authority to operate the equipment. IntelliTrac ® X Series Hardware Installation Guide 1. Install SIM Card To install the SIM card: -Press the yellow button to eject the SIM card holder. -Before insert the SIM card, make sure the PIN code has been disabled. -Insert the SIM card. -Check that it fit into place correctly. Copyright © 2003 Systems & Technology Corporation 2. Install GPS and GSM Antennas Connect GPS antenna to the GPS connector. The optimum location for the GPS antenna is on the roof of the vehicle. The covert and GPS antenna are directional, make sure they are facing up and laying as flat as possible. Secure them in place with glue, or zip ties. Note : Do not block or cover the GPS antenna with metal. Connect GSM antenna to the GSM connector. The GSM antenna is non-directional, so you can hide it in any place of vehicle. 3. Install Power Cable 1 2 3 4 1 2 3 4 5 6 7 8 9 10 11 12 1 2 3 4 5 6 7 8 9 10 Power InputOutput Power Connector 1 : Ground 2 : Ignition Key 3 : BAT. +8V ~ +32V 4 : Mute Control Copyright © 2003 Systems & Technology Corporation (1) General Installation (Without immobilizer installed) Connect Ground(-Black) and BAT(+Red) wires to the battery of vehicle. (2) With immobilizer installed Connect Ground (-Black) and BAT (+Red) to the battery of vehicle. Connect Ignition Key (Pink) to the IGNITION wire. Copyright © 2003 Systems & Technology Corporation 4. Install Immobilizer Relay (Optional) (1) If the wireless relay terminal is same as car original fuel pump (or ignition, or starter) relay terminal, please just unplug the car original relay, then plug in the wireless relay. (2) If the wireless relay terminal is different with car original fuel pump (or ignition, or starter) relay terminal : Please plug the wireless relay into the spare relay socket, then a. Connect the socket Black wire to Ground. b. Connect the socket Red wire to IGNITION c.Blue & Green wires are for engine disable cutting (ignition or fuel pump or starter...) (3) For security reason, it is better do NOT install the wireless relay at IGNITION key lock area. May install the wireless relay in the hood or near the fuel pump or any confidential place for engine disable cutting. Copyright © 2003 Systems & Technology Corporation 5. Install Input Cable 1 2 3 4 1 2 3 4 5 6 7 8 9 10 11 12 1 2 3 4 5 6 7 8 9 10 Power InputOutput Input Connector 1 : Input1 2 : Input2/ACC 3 : Input3 4 : Input4 5 : Input5 6 : Input6 7 : Input7 8 : Input8 9 : Analog Input1 10 : Analog Input2 11 : Vout +5V 12 : Ground The Input number 1, 2, 3, 4 are positive triggered inputs and Input number 5, 6, 7, 8 are negative triggered inputs. If you would like to use power saving function, please connect the Input2/ACC to ACC wire. The analog inputs are reserved. Copyright © 2003 Systems & Technology Corporation Positive Trigger: Negative Trigger: Copyright © 2003 Systems & Technology Corporation 6. Install Output Cable 1 2 3 4 1 2 3 4 5 6 7 8 9 10 11 12 1 2 3 4 5 6 7 8 9 10 Power InputOutput Output Connector 1 : Output1 2 : Output2 3 : Output3 4 : Output4 5 : Output5 6 : Output6 7 : Output7 8 : Output7 (via relay) 9 : External Output Power 10 : Ground The output number 1, 2, 7 are positive triggered outputs and output number 3, 4, 5, 6 are negative triggered outputs. Pin number 7 and 8 are controlled by the same signal (OutputID = 7), Pin7 is positive trigger and pin8 is negative trigger. The OutputID = 8 is reserved for immobilizer control. Copyright © 2003 Systems & Technology Corporation 7. LED Indicators Status Description There are 4 LEDs in front panel. When you power on the unit, these 4 LEDs will become blinking. After blinking several times, IntelliTrac X8 will start the modem which is inside the unit. In this time, the ERR led light is still bright. This is normal c…
Text truncated - open the document above for the full version.
Block Diagram
Block Diagram MCU (Toshiba TX19) 512K Program Flash 16K RAM GPRS Protocol Chip Wavecom Siemens DC 3.3V 5A Regulator DC 5V 5A Regulator UART & RS232-TTL Convertor Inputs Outputs 2X16 LCM DB9 Flash Memory 3.6V Li-Ion Backup Battery Control Circuit Immobilizer Primary Modules Optional Modules UART3 Address / Data Bus UART4 AD Input Vcc Power Source DC 9V - 32V LED Indicators Output GPS Engine CS (0..3) IntelliTrac X Series System Block Diagram Input (1..8) Output (1..7) Output (8) Voxson GSMPWR GPS ERROR Backup Battery Control Serial EEPROM SIO UART0 UART1 Discharge INT0 Charge Power Low Interrupt X2 Crystal 7.3728MHz Copyright c 2003 Systems & Technology Corp. All rights reserved.
External Photos
REPORT NO. : E920327 PHOTO.1.EUTFRONT VIEW PHOTO.2.EUTREAR VIEW
ID Label/Location Info
REPORT NO. : E920327 Page 5 of 16 1.3 LABELING REQUIREMENT A FCC ID label shall be permanently attached and conspicuously located on the equipment : FCC ID : RLS-STAVL0358 This device complies with Part 15 of the FCC Rules. Operation is subject to the following two conditions : (1) This device may not cause harmful 29 mm interference , and (2) this device must accept any interference received , including interference that may cause undesired operation . 74 mm The modular transmitter must be labeled with its own FCC ID number, and, if the FCC ID is not visible when the module is installed inside another device, then the outside of the device into which the module is inst alled must also display a label referring to the enclosed module: Contains Transmitter Module FCC ID : QIPMC45
ID Label/Location Info
PEP Testing Laboratory FCC ID : RLS-STAVL0358 FCC ID LABEL FCC ID : RLS-STAVL0358 This device complies with Part 15 of the FCC Rules. Operation is subject to the following two conditions : (1) This device may not cause harmful 29 mm interference , and (2) this device must accept any interference received , including interference that may cause undesired operation . 74 mm FCC ID : RLS-STAVL0358 This device complies with Part 15 of the FCC Rules. Operation is subject to the following two conditions : (1) This device may not cause harmful interference , and (2) this device must accept any interference received , including interference that may cause undesired operation . Contains Transmitter Module FCC ID: QIPMC45
Internal Photos
PHOTO. 3. EUT INSIDE VIEW PHOTO. 4. EUT COMPONENT SIDE VIEW PHOTO. 5. EUT SOLDERING SIDE VIEW ] PHOTO. 6. EUT SOLDERING SIDE VIEW REPORT NO. : E920327 PHOTO. 7. EUT COMPONENT SIDE VIEW PHOTO. 8. EUT COMPONENT SIDE VIEW REPORT NO. : E920327 PHOTO. 9. EUT COMPONENT SIDE VIEW PHOTO. 10. EUT SOLDERING SIDE VIEW
Test Report
REPORT NO. : E920327 Page 1 of 16 RFI / EMI TEST REPORT APPLICANT:SYSTEMS & TECHNOLOGY CORP. E. U. T.:IntelliTrac TRADE NAME:N/A FCC ID:RLS-STAVL0358 REGULATION:CFR 47 , Part 15 Subpart B ,Class B TEST SITE:PEP Testing Laboratory TEST ENGINEER : TEST DATE:OCT.01, 2003 ISSUED DATE:DEC. 16, 2003 REPORT No.:E920327 REPORT NO. : E920327 Page 2 of 16 VERIFICATION WE HEREBY VERIFY THAT: The E. U. T. listed below hascompleted RFI testing by PEP Testing Laboratory and the interference emissions can passFCC Class B limitations . The tested configurations and the facility complies with the radiated and AC line conducted test site criteria in ANSI C63 . 4 - 1992 . Any data in this RFI report is“ reference“ only . APPLICANT:SYSTEMS & TECHNOLOGY CORP. * PRODUCT:IntelliTrac * FCC ID: RLS-STAVL0358 * MODEL:X8 * M. Y. TSUI / Manager PEP Testing Laboratory 12-3FL., NO. 27-1, Lane 169, Kang-Ning St., Hsi-Chi, Taipei Hsien, Taiwan, R. O. C. TEL : 886-2-6922097 FAX : 886-2-6956236 REPORT NO. : E920327 Page 3 of 16 TABLE OF CONTENTS 1. GENERAL4 1.1General Information 1.2Place of Measurement 1.3Labeling Requirements 1.4Information to User 2.RADIATED EMISSIONS TEST 7 2.1Setup of the Test Facilities 2.2Test Procedures 3.DESCRIPTION FOR EUT TESTING CONFIGURATION 9 4.SUPPORTING DEVICES TO TEST 10 5.TEST CONFIGURATION 11 ** Radiated Emission Test Photo and Data 6.APPENDIX A.Photos of EUT Appearance15 B. List of Test Equipment16 REPORT NO. : E920327 Page 4 of 16 1. GENERAL 1.1 GENERAL INFORMATION: APPLICANT:SYSTEMS & TECHNOLOGY CORP. 17-7F, NO. 79, HSIN TAI WU ROAD, SEC. 1, HSICHIH, TAIPEI HSIEN,TAIWAN, R. O. C. MANUFACTURER :KYLINK COMMUNICATIONS CORP. NO. 31, TZYH CHYANG ST., TU-CHENG INDUSTRIAL DISTRICT TAIPEI, TAIWAN, R. O. C. MEASUREMENT PROCEDURE :ANSI C63 , 4 - 1992 TESTED FOR COMPLIANCE WITH :Title 47 of CFR Part 15 , Subpart B , Class B 1.2 PLACE OF MEASUREMENT PEP Testing Laboratory REPORT NO. : E920327 Page 5 of 16 1.3 LABELING REQUIREMENT A FCC ID label shall be permanently attached and conspicuously located on the equipment : FCC ID : RLS-STAVL0358 This device complies with Part 15 of the FCC Rules. Operation is subject to the following two conditions : (1) This device may not cause harmful29 mm interference , and (2) this device must accept any interference received , including interference that may cause undesired operation . 74 mm REPORT NO. : E920327 Page 6 of 16 1.4 INFORMATION TO THE USER The following FCC statement should be declared in a conspicuous location in the user’s manual . Federal Communications Commission (FCC) Statement This equipment has been tested and found to comply with the limits for a Class B digital device , pursuant to Part 15 of the FCC Rules . These limits are designed to provide reasonable protection against harmful interference in a residential installation . This equipment generates , uses and can radiate radio frequency energy and , if not installed and used in accordance with the instruction, may cause harmful interference to radio communications . However , there is no guarantee that interference will not occur in a particular installation . If this equipment does cause harmful interference to radio or television reception , which can be determined by turning the equipment off and on , the user is encouraged to try to correct the interference by one or more of the following measures : - Reorient or relocate the receiving antenna . - Increase the separation between the equipment and receiver . - Connect the equipment into an outlet on a circuit different from that to which the receiver is connected . - Consult the dealer or an experienced radio / TV technician for help . Warning : A shielded- type power cord is required in order to meet FCC emission limits and also to prevent interference to the nearby radio and television reception . It is essential that only the supplied power cord be used . Use only shielded cables to connect I / O devices to this equipment . You are cautioned that changes or modifications not expressly approved by the party responsible for compliance could void your authority to operate the equipment . REPORT NO. : E920327 Page 7 of 16 2.RADIATED EMISSION TEST 2.1 GENERAL SETUP OF THE FACILITIES 6 5 10 cm 3 5 10 cm 4 EUT 7 80 cm TO GROUND PLANE NONCONDUCTIVE TABLE 1.5 x 1 METER 1 8 8 2 40 cm REPORT NO. : E920327 Page 8 of 16 2.2 TEST PROCEDURES Radiated Emission Test Procedures The EUT is placed in the center of a non-conducting table which size is 1m by 1.5m and 80cm ( or may be enlarged , if necessary ) above the ground plane , it’s rear shall be flush with the rear of the table and a 10cm separation spaces between the other peripheral devices . The preliminary tests is performed in 3m standard anechonic chamber and as specified in ANSI C63.4 ( section 8.3.1.1 ) should be carried out while varying cable positions in order to determine the maximum or near-maximum emission level . Method of maximization follow ANSI C63.4 Appendix D . For the final test , the EUT is relocated from chamber to open field site ; then , based on the preliminary tests record , the highest emission shall be re-maximized before final radiated emissions measurements are performed . However , antenna height ( 1m to 4m ) and polarity ( Horizontal and Vertical ) and EUT azimuth ( 0 degree to 360 degree ) are to be varied . The highest emissions data were recorded in this RFI test report . REPORT NO. : E920327 Page 9 of 16 3.DESCRIPTION FOR EUT TESTING CONFIGURATION **Operational description ---- The equipment under test (EUT) is IntelliTrac, FCC ID: RLS-STAVL0358, model X8. The EUT that supports either GSM 900 or GSM 1800 network system is designed for the use of GPS automatic vehicle location application. After respective preliminary test on EUT with power source of DC 12V and DC 24V from DC power supply, we took the worst-case power rating: DC 12V for final test. The EUT I/O ports include GPS connector, GSM connector, Serial connector, Input connector, AUX connector, Output …
Text truncated - open the document above for the full version.
Test Setup Photos
REPORT NO. : E920327 Page 7 of 16 2. RADIATED EMISSION TEST 2.1 GENERAL SETUP OF THE FACILITIES Power Supply Modem EUT PC Monitor Printer Mouse Keyboard REPORT NO. : E920327 Page 12 of 16 RADIATED TEST CONFIGURATION PHOTOS < FRONT VIEW > < REAR VIEW >
Contact Information
Applicant
Michael Lan
Test Firm
PEP Testing LaboratoryM. Tsui
Technical Specifications
| # | Rule Parts | Frequency Range | Power Output |
|---|---|---|---|
| 1 | 15B | - | - |
Other Applications from Systems & Technology Corp.

RLS-STAVL1515
May 06, 2015GPS Vehicle Tracking Device
Equipment Class
PCB - PCS Licensed Transmitter
RLS-STAVL1450
Jan 18, 2015GPS Vehicle Tracking Device
Equipment Class
PCB - PCS Licensed Transmitter
RLS-STAVL1432
Jan 15, 2015GPS Vehicle Tracking Device
Equipment Class
PCB - PCS Licensed Transmitter
RLS-STAVL1234
Dec 05, 2012GPS Vehicle Tracking Device
Equipment Class
PCB - PCS Licensed Transmitter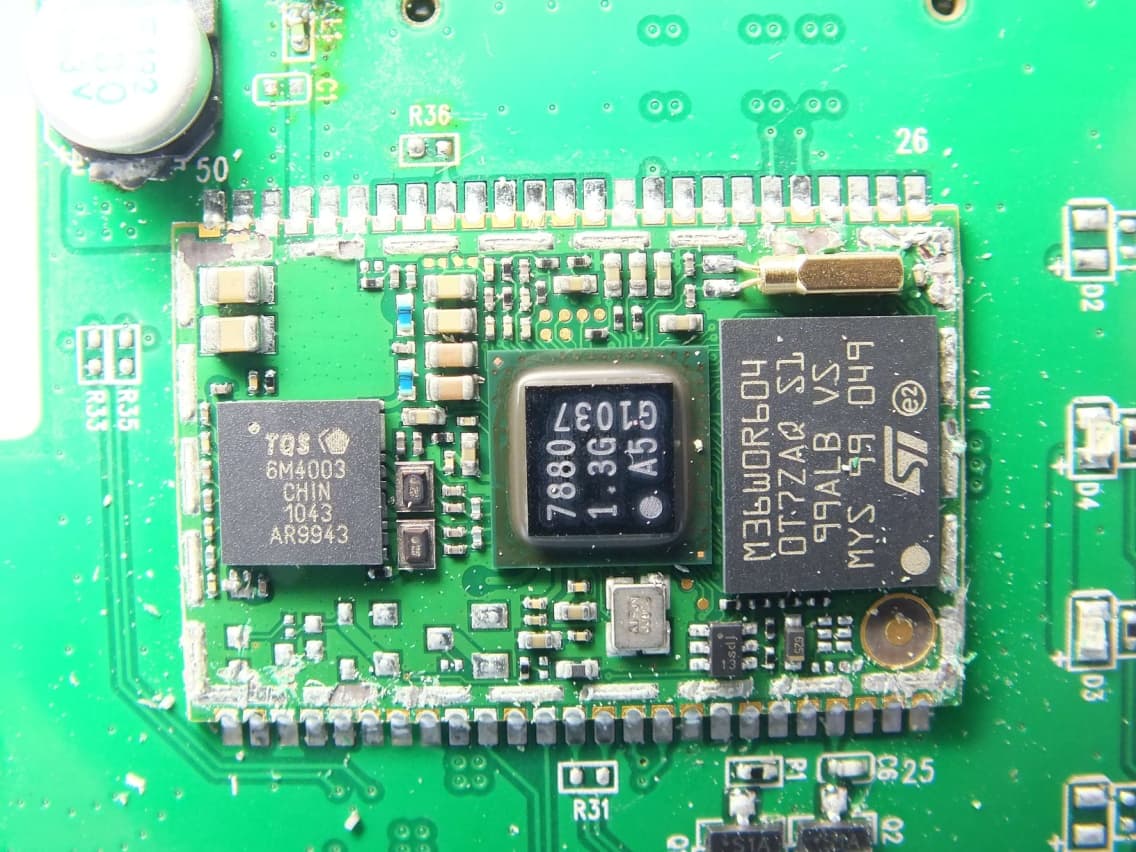
RLS-STAVL1213
Aug 28, 2012GPS VEHICLE TRACKING DEVICE
Equipment Class
PCB - PCS Licensed Transmitter