S8QEC-1Low Power Transmitter
Olympus Medical Systems Corp.Application Details
- Equipment Class
- DXX - Part 15 Low Power Communication Device Transmitter
- Date of Grant
- Jan 31, 2006
- Application Purpose
- Original Equipment
- Date of Application
- Jan 11, 2006
- Equipment Note
- Low Power Transmitter
- Frequency Range
- 315.00000000 - 315.00000000
- Country
- Japan
Documents & Files
Document Text
Text extracted from the exhibit documents filed with the FCC. Open a document above to read the original.
Users Manual
INSTRUCTIONS OLYMPUS CAPSULE ENDOSCOPE SYSTEM Contents i OLYMPUS CAPSULE ENDOSCOPE SYSTEM Contents Labels and Symbols .....................................................................1 Symbols ...................................................................................................1 Labels........................................................................................................3 Important Information – Please Read Before Use .....................11 Intended use ............................................................................................11 Instruction manual ....................................................................................11 Exclusion criteria .......................................................................................13 User qualifications ....................................................................................13 Instrument compatibility ............................................................................14 Repair and modification ...........................................................................14 FCC warning ............................................................................................14 Signal words .............................................................................................14 Danger, warnings and cautions.................................................................15 Danger, warnings and cautions for patients ..............................................20 Expiration date of the capsule endoscope ................................................22 Battery charger..........................................................................................23 Battery pack .............................................................................................24 EMC (Electromagnetic Compatibility) .......................................................27 Chapter 1Checking the Package Contents............................ 29 1.1Capsule endoscope system set A (MAJ-1467) ...............................30 1.2Capsule endoscope set A (MAJ-1469) ...........................................32 1.3Workstation (OLYMPUS WS-1) ......................................................33 Chapter 2Nomenclature and functions.................................. 36 2.1System components .......................................................................36 2.2Capsule endoscope set A (MAJ-1469) ...........................................38 2.3Antenna lead set (MAJ-1474) .........................................................40 2.4Recorder unit (OLYMPUS RE-1) ....................................................41 2.5Real time viewer (OLYMPUS VE-1) ...............................................43 2.6Recorder unit cradle (MAJ-1484) ....................................................45 2.7Real time viewer cable (MAJ-1485) ................................................46 2.8Recorder unit cradle cable ..............................................................46 2.9Battery charger (MAJ-1476)............................................................47 2.10 Battery pack (MAJ-1473) ................................................................48 2.11 Recorder unit harness (MAJ-1475) .................................................49 2.12 Workstation (OLYMPUS WS-1) ......................................................50 Contents ii OLYMPUS CAPSULE ENDOSCOPE SYSTEM Chapter 3Installation and Connection of the Workstation ... 52 3.1Installation of workstation and peripherals ......................................54 3.2Connection of equipment ................................................................55 3.3Installation of Endo Capsule software light .....................................58 Chapter 4Workstation Access and Setup .............................. 60 4.1Login ...............................................................................................61 4.2Start-up of Endo Capsule software light..........................................66 4.3Nomenclature and functions of the main screen.............................68 4.4User settings ...................................................................................75 4.5Language and units settings ...........................................................83 4.6Lock function ...................................................................................87 4.7Facility logo .....................................................................................91 4.8Log off and exit ...............................................................................93 Chapter 5Capsule Endoscope Procedures............................ 96 5.1Preparation .....................................................................................97 5.2Exterior............................................................................................98 5.3Capsule endoscope ........................................................................99 5.4Preparation on the day before the examination ..............................100 5.5Initial setup of the recorder unit.......................................................102 5.6Attaching the equipment to the patient ...........................................116 5.7Preparing the capsule endoscope ..................................................129 5.8Starting the examination .................................................................132 5.9During the examination ...................................................................133 5.10 Ending the examination ..................................................................134 Chapter 6Capsule Endoscope Image Observation ............... 145 6.1Main screen nomenclature and functions .......................................146 6.2Opening data ..................................................................................147 6.3Image observation ..........................................................................1…
Text truncated - open the document above for the full version.
Users Manual
Chapter 4 Workstation Access and Setup 75 OLYMPUS CAPSULE ENDOSCOPE SYSTEM 4.4User settings The “User Settings” function is not available in Endo Capsule Software Light. You can add or remove users, as well as change passwords. 1.Select “Settings” from the “Tools” menu on the main screen. 2.Click the “User accounts” tab. The user settings screen is displayed. Figure 4.15 Adding users • You must log in as an administrator in order to add a user. • Characters that can be used for user IDs and passwords are shown in Table 4.2. • For more information on authority levels, see “Workstation operation limitations” on page 82. Table 4.2 UppercaseA B C D E F G H I J K L M N O P Q R S T U V W X Y Z Lowercasea b c d e f g h i j k l m n o p q r s t u v w x y z Numbers0 1 2 3 4 5 6 7 8 9 Symbols ` ~ ! @ # $ % ^ & * ( ) _ + – = { } | [ ] : " ; ' < > ? , . / User accounts tab 76 Chapter 4 Workstation Access and Setup OLYMPUS CAPSULE ENDOSCOPE SYSTEM 1.Click the [Add] button on the user settings screen. The adding user screen is displayed. Figure 4.16 2.Enter the user ID, user name, authority, and password. Enter additional information in the “Remarks” field as necessary. Figure 4.17 • The user ID and password can be up to 32 characters in length. • All fields are case sensitive. • Operation on the workstation will be limited depending on the user’s authority (see “Workstation operation limitations” on page 82). • The password to be set is for initial use. Add button Chapter 4 Workstation Access and Setup 77 OLYMPUS CAPSULE ENDOSCOPE SYSTEM 3.Click the [OK] button. The user settings screen is displayed, and the new user is added to the list on the user settings screen. Figure 4.18 Click the [Cancel] button to return to the user settings screen without adding a user. 4.Click the [OK] button on the user settings screen. The new user is added. Click the [Cancel] button to cancel the addition. OK button 78 Chapter 4 Workstation Access and Setup OLYMPUS CAPSULE ENDOSCOPE SYSTEM Changing user information You must log in as an administrator in order to change user information. 1.Select the user whose information you wish to change, and click the [Edit] button. The user information update screen is displayed. Figure 4.19 2.Enter the new information. Figure 4.20 Edit button Chapter 4 Workstation Access and Setup 79 OLYMPUS CAPSULE ENDOSCOPE SYSTEM 3.Click the [OK] button. The user settings screen is displayed. Click the [Cancel] button to return to the user settings screen without changing the user information. 4.Click the [OK] button on the user settings screen. The user information is updated. Click the [Cancel] button to discard the changes. Changing passwords • You can only change the password for the user who is currently logged in. • If you forget your password, an administrator can change the user information. 1.Click the [Password] button. The password update screen is displayed. Figure 4.21 Password button 80 Chapter 4 Workstation Access and Setup OLYMPUS CAPSULE ENDOSCOPE SYSTEM 2.Enter the old and new passwords. Enter the new password twice to confirm it. Figure 4.22 3.Click the [OK] button. The password is changed, and the user settings screen is displayed. Click the [Cancel] to return to the user settings screen without changing the password. 4.Click the [OK] button on the user settings screen. The new password becomes effective. Click the [Cancel] button to discard the new password and keep the old password. Old password New password Chapter 4 Workstation Access and Setup 81 OLYMPUS CAPSULE ENDOSCOPE SYSTEM Removing users You must log in as an administrator in order to remove a user. Once a user is removed, the user can no longer log in to the workstation. 1.Select the user that you wish to remove and then click the [Remove] button. Figure 4.23 2.The user is removed from the “Users” list. Click the [Cancel] button to discard the removal. 3.Click the [OK] button on the user settings screen. The removal becomes effective. Remove button 82 Chapter 4 Workstation Access and Setup OLYMPUS CAPSULE ENDOSCOPE SYSTEM Workstation operation limitations The following table summarizes the workstation operations permitted for each authority level. Table 4.3 {:YES –:NO OperationAdministratorUserGuest Login{{{ Register patient data{{{ Download image data{{{ Observe image data{{– Select thumbnails{{– Add comments{{– Generate reports{{– Save reports{{– Export image data{{– Copy and delete image data{{{ Browse diagnosis log{{– Change user information{–– Add and remove users{–– Change passwords{{{ Chapter 4 Workstation Access and Setup 83 OLYMPUS CAPSULE ENDOSCOPE SYSTEM 4.5Language and units settings 1.Select “Settings” from the “Tools” menu on the main screen. 2.Select the “Regional options” tab. The local information settings screen is displayed. Figure 4.24 Regional options tab 84 Chapter 4 Workstation Access and Setup OLYMPUS CAPSULE ENDOSCOPE SYSTEM 3.Click the “” to the right of “Language” to select the language (see Figure 4.25). The available languages are listed in Table 4.4. Figure 4.25 Table 4.4 Available Languages English Italian Dutch Greek Swedish Spanish Danish German Norwegian Finnish French Portuguese Estonian Latvian Lithuanian Polish Slovak Slovene Hungarian Czech button Chapter 4 Workstation Access and Setup 85 OLYMPUS CAPSULE ENDOSCOPE SYSTEM You need to change a language in some languages other than English when you input alphabets. Please right-click on the text box and select “Language” and then "English" from the context menu. 4.Click the “” to the right of “Standards and formats” to select the region (see Figure 4.26). The format of date depends on the selected region. Figure 4.26 5.Click the “” to the right of “Measurement units” to select the measurement units (see Figure 4.27). The available units are listed in Table 4.5. Figure 4.27 button button 86 Chapter 4 Workstation Access and Setup OLYMPUS CAPSULE ENDOSCOPE SYSTEM Table 4.5 6.Click the [OK] button on the local information settings sc…
Text truncated - open the document above for the full version.
Users Manual
Chapter 5 Capsule Endoscope Procedures 115 OLYMPUS CAPSULE ENDOSCOPE SYSTEM Inserting battery pack into real time viewer 1. Open the battery pack slot cover by sliding it in the direction of the arrow (see Figure 5.23 (b)). Figure 5.23 2.With the battery pack removal ribbon hanging out of the battery pack slot, insert a fully charged battery pack into the slot (see Figure 5.24 (b)). Figure 5.24 3.Close the battery back slot cover, taking care not to catch the battery pack removal ribbon, and then slide the cover upward to lock it (see Figure 5.25 (b)). Figure 5.25 (a) (b) Arrow () Battery pack (a) (b) Arrow () 116 Chapter 5 Capsule Endoscope Procedures OLYMPUS CAPSULE ENDOSCOPE SYSTEM 5.6Attaching the equipment to the patient Patient confirmation Before attaching the antenna lead set to the patient, confirm the patient’s identity. Also confirm that the patient has not eaten or drunk for at least 8 hours before the examination. Confirmation of antenna locations (and shaving, if necessary) 1. Ask the patient to lie down with his upper body exposed, and to lower his pants or skirt. 2.Referring to the provided template “Antenna locations guide”, identify the 8 antenna locations on the patient, and determine if the locations require shaving. 3.If there is too much hair in a particular location to securely adhere the antenna lead cover, shave as necessary. Figure 5.26 Red: 7th right rib (immediately below the chest bulge) Green: Right flank Pink: Around the epigastric (center of body) White: Left flank Blue: Right lower abdomen (lowest possible position unaffected by bending of thigh) Brown: 7th left rib (immediately below the chest bulge) Yellow: Above the umbilicus (not to overlap the umbilicus) Purple: Left lower abdomen (lowest possible position unaffected by bending of thigh) For patients of normal stature Chapter 5 Capsule Endoscope Procedures 117 OLYMPUS CAPSULE ENDOSCOPE SYSTEM Figure 5.27 When attaching the antenna pads, position the cables so that they do not overlap with the antenna pads. Otherwise, noise may appear in the images. Red: 7th right rib (immediately below the chest bulge) Green: Right flank Pink: Around the epigastric (center of body) White: Left flank Blue: Right lower abdomen (lowest possible position unaffected by bending of thigh) Brown: 7th left rib (immediately below the chest bulge) Yellow: Above the umbilicus (not to overlap the umbilicus) Purple: Left lower abdomen (lowest possible position unaffected by bending of thigh) For patients of large stature 118 Chapter 5 Capsule Endoscope Procedures OLYMPUS CAPSULE ENDOSCOPE SYSTEM Attaching the antenna lead cover Before attaching the antenna lead cover to the antenna pad, check that the antenna pad has not been folded or creased, and that the antenna cable is free of significant deformation or abnormalities. 1.Insert the antenna into the antenna lead cover so that its color tag is on the same side as the blue surface of the antenna lead cover, then align their holes (see Figure 5.28). Figure 5.28 Antenna lead cover, top surface (blue) Lining paper (inside) Attachment in process Antenna color tag Antenna number Chapter 5 Capsule Endoscope Procedures 119 OLYMPUS CAPSULE ENDOSCOPE SYSTEM 2.Align the hole on the center of the antenna pad to the hole on the center of the antenna lead cover. Peel off the lining paper from the inside of the antenna lead cover (on the blue side), and adhere the antenna pad securely to the antenna lead cover (see Figure 5.29). Figure 5.29 Attachment complete Align the hole on the antenna pad with the hole on the antenna lead cover 120 Chapter 5 Capsule Endoscope Procedures OLYMPUS CAPSULE ENDOSCOPE SYSTEM Attaching the antennas to the patient Make sure that the antenna pads are attached firmly to the antenna lead cover, and that the antenna lead cover are attached firmly to the patient. Otherwise, noise may appear in the images, or the images may not be transmitted properly. 1.Dry the patient’s body by wiping with a dry piece of gauze. 2.Place the antenna pads on the patient so that their numbering matches the Antenna Locations Guide (see Figure 5.26). Starting with antenna pad , remove the lining paper on the back of the antenna lead cover by peeling from the point indicated by the arrow (see Figure 5.30), and then press down firmly on the antenna pad to attach it to the patient. Figure 5.30 3.Ask the patient to get off the bed, to move around slowly, then sit on the bed again. While making sure that all antennas are securely attached, have the patient check for any skin discomfort caused by the attached antennas. If the patient experiences discomfort, replace the antenna lead cover with a spare, and reattach the antenna. • Once used, the antenna lead cover loses adhesion. Please replace the antenna lead cover if reattaching the antenna. Chapter 5 Capsule Endoscope Procedures 121 OLYMPUS CAPSULE ENDOSCOPE SYSTEM • Be sure to use the antenna covers when attaching the antennas. Failure to do so may prevent the proper reception of small bowel capsule endoscopic images. • Perform the examination with all 8 antenna pads attached to the patient. The examination may fail with even one antenna pad not properly attached. • Do not allow the antenna cable to lay on or near the antenna pads. It may prevent the proper reception of capsule endoscopic images. • Do not use an antenna pad that has been completely folded. Its reception performance may be degraded, causing noise to appear in the transmitted images. 4.Have the patient get dressed, letting the antenna lead set protrude to the left of his/her abdomen (see Figure 5.31). Figure 5.31 122 Chapter 5 Capsule Endoscope Procedures OLYMPUS CAPSULE ENDOSCOPE SYSTEM 5.Have the patient wear the suspender. Figure 5.32 • The suspender can be released on one of its ends. • Pass the loose end of the belt between the belt and the pouch to keep it out of the way. Chapter 5 Capsule Endoscope Procedures 123 OLYMPUS CAPSULE ENDOSCOPE SYSTEM Connecting and testing th…
Text truncated - open the document above for the full version.
Users Manual
160 Chapter 6 Capsule Endoscope Image Observation OLYMPUS CAPSULE ENDOSCOPE SYSTEM Table 6.1 Enlarging images You can enlarge the image data displayed in the image display area of the main screen. 1.Click the [Zoom] button (see Figure 6.24). The image being displayed in the image display area will be enlarged. Figure 6.24 • When you enlarge an image, the [Zoom] button is changed to the original size mode (see Figure 6.25). Click the [Zoom] button again to restore the image to its original size. Figure 6.25 • Magnification varies in the image view mode (see Table 6.2). OverlapOne image is refreshed. SequentialAll images displayed are refreshed. Zoom button Enlargement mode Original size mode Chapter 6 Capsule Endoscope Image Observation 161 OLYMPUS CAPSULE ENDOSCOPE SYSTEM Table 6.2 Structure enhancement Use the [Enhance] buttons to emphasize the patterns on the surface of the mucosa (see Figure 6.26). Figure 6.26 Image view modeMagnification 1 Display modex 2 2 Display modex 1.5 4 Display mode− (not available) Enhance buttons 162 Chapter 6 Capsule Endoscope Image Observation OLYMPUS CAPSULE ENDOSCOPE SYSTEM The structure enhancement level can be switched between “Normal” and “High” (see Table 6.3). Table 6.3 Antenna display The antenna display identifies the antenna with the best signal reception. The antenna information is for reference only. Do not depend on this information to determine the position of the capsule endoscope. 1.Click the [Antenna] button in the antenna display section (see Figure 6.27). The antenna display panel is displayed. Figure 6.27 Click the [Antenna] button again to hide the antenna display panel. Enhancement levelDetail NormalThe image is displayed without structure enhancement applied. HighThe image is displayed with structure enhancement applied. Antenna button Chapter 6 Capsule Endoscope Image Observation 163 OLYMPUS CAPSULE ENDOSCOPE SYSTEM Creating thumbnails Clicking the [Capture] button while the playback of image data is paused will create and display thumbnails of the image data in the thumbnail view area (see Figure 6.28). To create thumbnails, double click on the image display area. Figure 6.28 When you click the [Capture] button during the playback of image data, a thumbnail will be created for the image being displayed at that moment, and the playback of image data will be paused. Removing thumbnails 1. On the thumbnail view area, select the thumbnail you wish to remove. 2.Right-click on the selected thumbnail to display the context menu (see Figure 6.29). Figure 6.29 Capture button Thumbnail view area 164 Chapter 6 Capsule Endoscope Image Observation OLYMPUS CAPSULE ENDOSCOPE SYSTEM 3.Select “Remove” from the context menu to delete the selected thumbnail. • You can also press the “Delete” key on the keyboard to delete the selected thumbnail. • If the thumbnail included in the reporting group is removed, one of the below messages is displayed. −The selected thumbnails are added to a report. If you delete these thumbnails, they will be removed from a report. −If you delete the selected thumbnails, the comments added to the group which contains these thumbnails will be deleted. • If no thumbnail has been created, pressing the land mark will create a new thumbnail. Setting features You can set a featured region on the time bar to identify the range of images (small bowel area) to focus on. 1.Click and select a thumbnail to set a feature. 2.Click the [Landmarks] button on the thumbnail and select “Landmarks” from the context menu (see Figure 6.30). Figure 6.30 Landmarks button Chapter 6 Capsule Endoscope Image Observation 165 OLYMPUS CAPSULE ENDOSCOPE SYSTEM 3.The feature setting screen is displayed (see Figure 6.31). Figure 6.31 Table 6.4 4.Select “No marker”, “Starting point of marker”, or “End point of marker” to set the marker area. Also set the origin for the relative time. • Only one thumbnail can be used as the starting point of marker, and as the end point of marker. • To set the selected thumbnail as origin of a relative time scale, check the checkbox for “Relative time”. No markerNo marker is set for the images. Starting point of marker Sets the selected thumbnail as the first image of the marker area. End point of marker Sets the selected thumbnail as the last image of the marker area. Origin for relative time Sets the selected thumbnail as the origin of a relative time scale. 166 Chapter 6 Capsule Endoscope Image Observation OLYMPUS CAPSULE ENDOSCOPE SYSTEM 5.Click the [OK] button. The feature interval is now set. • If you right-click on the thumbnail, the context menu which contains the items in the Table 6.4 appears. You can set features by selecting one of the context menu. • Click [Cancel] to discard the settings and exit the feature setting screen. • The configured feature interval is shown in a different color on the time bar. • When only the “Start of feature interval” is specified, the last image of the data set becomes the “End of feature interval”. • When only the “End of feature interval” is specified, the first image of the data set becomes the “Start of feature interval”. Time bar The time bar indicates the position of the currently displayed image relative to the overall timeframe (see Figure 6.32). Figure 6.32 The thumbnails are connected with a line to a position on the time bar that corresponds to the time at which they were captured. • When you drag the indicator on the time bar to the left or the right, the image data being displayed in the image area is updated accordingly. • The time bar becomes interrupted when the recorder unit is turned OFF or when signals are not being received. Time bar Chapter 6 Capsule Endoscope Image Observation 167 OLYMPUS CAPSULE ENDOSCOPE SYSTEM • When you click on the time bar, the indicator moves to the clicked position, and the image area is updated to display the corresponding image. Red color detection bar Figure 6.33 The red line on the red color detection bar indicates the position of …
Text truncated - open the document above for the full version.
Users Manual
210 Chapter 6 Capsule Endoscope Image Observation OLYMPUS CAPSULE ENDOSCOPE SYSTEM The folders and the data associated with the selected examination (image data, case data, and exported images) will be removed during the deletion process. 3.Click the [OK] button on the examination data deletion screen (see Figure 6.93). The selected examination data will be deleted. A progress screen is displayed while the examination data is being deleted. Figure 6.93 4.When the deletion of examination data is complete, you will be returned to the examination list screen. OK button Chapter 6 Capsule Endoscope Image Observation 211 OLYMPUS CAPSULE ENDOSCOPE SYSTEM Writing examination and thumbnail data onto a DVD 1. Select the examination data you wish to write onto a DVD and click the [DVD] button on the examination list screen (see Figure 6.94). The DVD writing screen is displayed. Figure 6.94 You can select multiple examination data simultaneously. The thumbnail data associated with the selected examination data will be written automatically. 2.Use the drive selection box to select the destination drive to write the data to (see Figure 6.95). The amount of available disk space on the selected drive is displayed. Figure 6.95 • The folder for the examination data will be created automatically during the writing process. DVD button Drive selection box 212 Chapter 6 Capsule Endoscope Image Observation OLYMPUS CAPSULE ENDOSCOPE SYSTEM • The following DVD formats are supported: • Though you use DVD-RW or DVD+RV, you cannot rewrite or delete data. • While it is possible to copy the data to an USB HDD, the safety of data on the USB HDD cannot be assured, so it is advised that the user first back up the examination data to a DVD. 3.The selected examination data which you wish to write is displayed (see Figure 6.96). Figure 6.96 4.Click the [Option] button to display the DVD writing options screen (see Figure 6.97). Figure 6.97 5.Select the type of files to be written together with the examination data. Click the [Picture] button to write still images, and the [Movie] button to write video files (see Figure 6.98). DVD : DVD-R, DVD+R Select examination data Option button Chapter 6 Capsule Endoscope Image Observation 213 OLYMPUS CAPSULE ENDOSCOPE SYSTEM Figure 6.98 All items are selected by default. 6.Click the [OK] button to save the settings and exit the DVD writing options screen (see Figure 6.99). Figure 6.99 Picture button Movie button OK button 214 Chapter 6 Capsule Endoscope Image Observation OLYMPUS CAPSULE ENDOSCOPE SYSTEM 7.Check the “Password” checkbox to set a password (see Figure 6.100). Figure 6.100 If you specify a password when writing the examination data, you will be required to enter the password to open the written examination data. 8.Check the “Make anonymous” checkbox to write the examination data with the individual information removed (see Figure 6.101). Figure 6.101 • Individual information removed include “Patient name” and “Image showing individual information”. • To remove “Image showing individual information”, you will need to set the hiding feature. For more information, refer to “Hiding images” on page 216. Password checkbox Make anonymous checkbox Chapter 6 Capsule Endoscope Image Observation 215 OLYMPUS CAPSULE ENDOSCOPE SYSTEM 9.Click the [OK] button on the DVD writing screen (see Figure 6.102). The selected examination data will be written. The progress screen is displayed while the examination data is being written. Figure 6.102 • To stop the writing process, click the [Cancel] button on the progress screen. • If there is insufficient storage space on the writing destination, an error message will be displayed. In that case, refer to Chapter 8, “Troubleshooting” on page 233. • The DVD drive will open after writing the data and close automatically to verify the written data. Please wait until the verification is completed. 10.When writing of examination data is complete, the examination list screen will be displayed. Finalize the report before you write the report onto the DVD. OK button 216 Chapter 6 Capsule Endoscope Image Observation OLYMPUS CAPSULE ENDOSCOPE SYSTEM Hiding images You can specify images that contain the facial portrait of a patient to be hidden when copying or exporting examination data. To hide images, the “Make anonymous” checkbox must be checked when copying or writing the examination data. • Specify the first image and the last image of the display range. Images between the first and last images will be included, and all other images will be excluded (hidden). • By default, the first and last images of each examination are used as the first and last images of the display range. 1.On the main screen, open the examination data which contains the images to be hidden (“Opening examination data and thumbnail data from the examination list screen” on page 148). 2.Display your desired first image in the image display area (6.3 “Image observation” on page 155). 3.Right-click on the image and select “First” from “Display range” in the context menu (see Figure 6.103). Figure 6.103 4.Display your desired last image in the image display area (6.3 “Image observation” on page 155). “First” Chapter 6 Capsule Endoscope Image Observation 217 OLYMPUS CAPSULE ENDOSCOPE SYSTEM 5.Right-click on the image and select “Last” from “Display range” in the context menu (see Figure 6.104). Figure 6.104 6.To reset the display range, right-click on an image and select “Reset” from “Display range” in the context menu (see Figure 6.105). Figure 6.105 “Last” “Reset” 218 Chapter 6 Capsule Endoscope Image Observation OLYMPUS CAPSULE ENDOSCOPE SYSTEM 6.6Exporting image data You can export image data as still images or videos. Export settings can be configured on the export screen. Export screen Figure 6.106 1.Movie list Displays the list of movie files to be created. 2.Picture list Displays the list of picture files to be created. 3.Back button Returns to the main screen. 4.Export list Displ…
Text truncated - open the document above for the full version.
Contact Information
Applicant
Yoshio Fukuda
Technical Contact
Non-Technical Contact
Akzo Nobel K. K.Izumi Mitsui
[email protected]+81 3 5210 5411
Test Firm
PCTEST Engineering Laboratory, Inc.Randy Ortanez
Technical Specifications
| # | Rule Parts | Frequency Range | Power Output |
|---|---|---|---|
| 1 | 15C | 315 MHz - 315 MHz | - |
Other Applications from Olympus Medical Systems Corp.
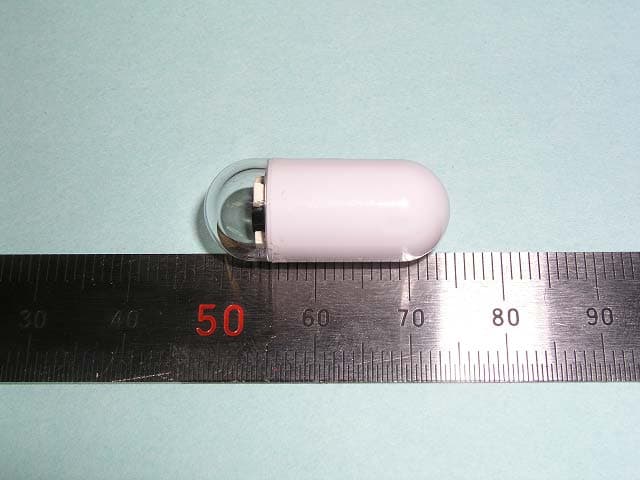
S8QEC-S10
Jul 01, 2012Low Power Transmitter
Equipment Class
DXX - Part 15 Low Power Communication Device Transmitter
S8Q-RU5796
Sep 06, 2011WIRELESS TRANSMITTER
Equipment Class
DXX - Part 15 Low Power Communication Device Transmitter
S8Q-RU5808
Sep 06, 2011WIRELESS RECEIVER
Equipment Class
DXX - Part 15 Low Power Communication Device Transmitter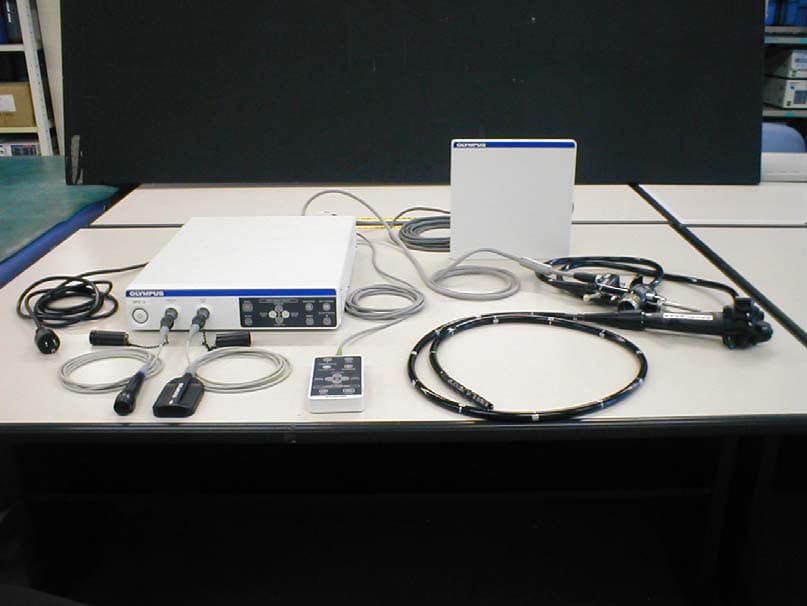
S8QUPD-3
Jan 05, 2011Endoscope Position Detecting Unit
Equipment Class
DXX - Part 15 Low Power Communication Device Transmitter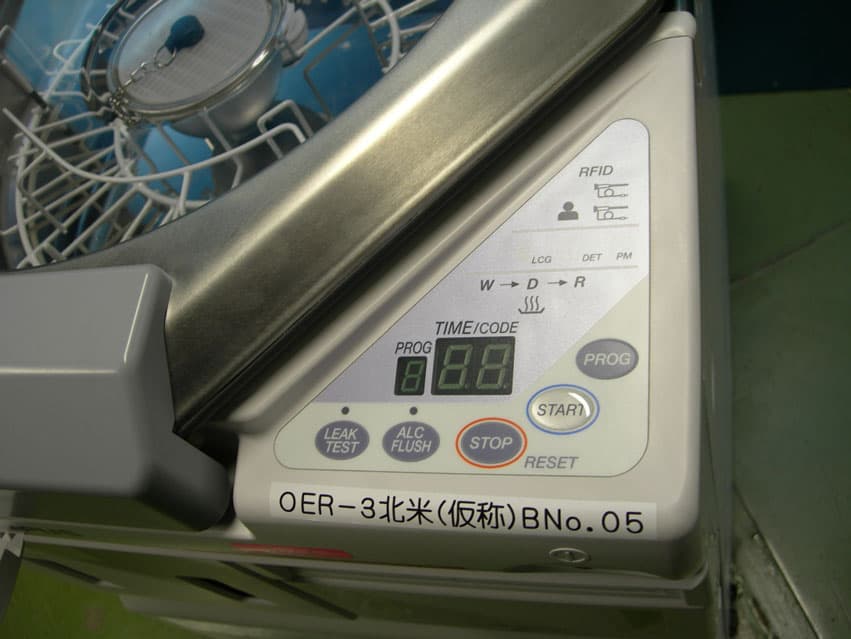
S8Q-GN4215
Nov 19, 2007Endoscope Reprocessor with RFID
Equipment Class
DXX - Part 15 Low Power Communication Device Transmitter