SLC11880411292.4 GHz Cordless Phone
TwinPro International Holdings Limited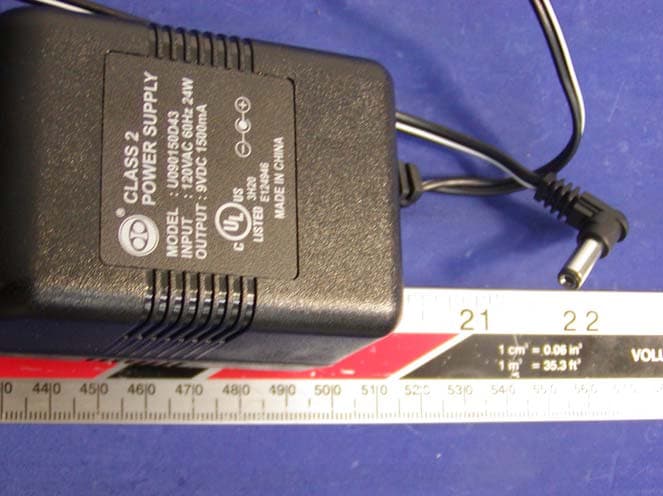
Click to zoom
Application Details
- Equipment Class
- DXX - Part 15 Low Power Communication Device Transmitter
- Date of Grant
- Jan 17, 2005
- Application Purpose
- Original Equipment
- Date of Application
- Jan 17, 2005
- Equipment Note
- 2.4 GHz Cordless Phone
- Frequency Range
- 2472.00000000 - 2475.90000000
- Country
- Hong Kong
Documents & Files
Document Text
Text extracted from the exhibit documents filed with the FCC. Open a document above to read the original.
Users Manual
Inside This ManualInside This Manual 21 Before You BeginProduct Features Make sure your package includes the items shown above. Parts Checklist You need an RJ11 type modular jack, which is the most common type of phone jack and might look like the one pictured here. I f you don't have a modular jack, c all your local phone company to find out how to get one. Modular Jack Requirements Your Caller I.D. phone stores and displays specific information, provided by your local telephone company, t o subscribers of Caller I.D. or similar caller identification services. You must subscribe to one of these services from your phone company in order to use the Caller I.D. f eatures of this unit. Your Caller I.D. phone enables you to: To get the most from your new phone, we suggest that you take a few minutes right now to read through this user's guide. Identify callers bef ore you answer the phone. View the time and date of the each incoming call. Store up to 80 Caller I.D. entr ies sequentially. Know who called while you were away. 43 REMINDER: This product requires a subscription to a Caller I.D. service from your telephone company to use Caller I.D. functions. Check for name and service availability. IMPORTANT: Because cordless phones operate on electr icity, y ou should have at least one phone in your house that isn't cordless, in case the power in your home goes out. Handset Base Unit AC power supply Telephone Line Cord INSTALLATION NOTE: Some cordless telephones operate at frequencies that may cause interference to nearby TV's and VCRs. To minimize or prevent such interference, the base of the cordless telephone should not be placed near or on top of a TV or VCR. I f such interference continues, move the cordless telephone farther away from the TV or VCR. Your cordless phone uses a digital securit y syst em to provide protection against false ringing, unauthoriz ed access, and charges to your phone line. When you place the handset in the base, the unit verifies its securit y code. After a power outage or batt ery replacement, y ou should place the handset in the base for about 20 seconds to reset the code. Digital Security System Contents 65 CAUTION: Use only the power supply that came with this unit. Using other power supplies may damage the unit. Table Top Installation Set the RINGER switch on the handset to ON. Turn on ringer and set number of rings (0,3,5) on bottom of base unit. This determines the numbr of rings bef ore the answering machine is activated. Place the handset in the base. Plug the power supply cord into the base and then into an AC outlet. The CHARGE/IN USE light comes on indicating that the batt ery is charging. Allow the phone to charge for 12 hours before using the first time. I f you don't charge the phone properly (for 12 hours) when you first set up the phone, performance of the batt ery will be compromised. After charging, c onnect the telephone cord to the phone and then to the wall jack. NOTE: The phone automatically defaults to touch tone dialing. To change to pulse (r otary) dialing, see "Tone/Pulse Dialing" on page 16. I f you don't know which type of service you have, check with the phone company. 1. 2. 3. 4. 5. 1 2 3 4 5 Table Top Installation Your cordless phone uses an intergrated memory chip that saves your time and date settings, speed dial phone numbers, outgoing answering machine greeting and saved answering machine messages. This memory chip will save these pref erence settings in your syst em for as long as 72 hours without power . Electronic Back up The ring count setting will prompt this unit to pick up an incoming call with the answering machine after zero, three or five rings. There is a ringer switch on the bottom of the unit. The following postions on this ringer switch allow you to set the number of rings to 0, 3, or 5. Ring Settings and Activation IMPORTANT! PLEASE READ CAREFULLY AND SAVE: This user's manual contains important information about your product's operation. I f you are installing this syst em for use by others, y ou must leave this manual - or a copy of it - with the end user. Chapter One: Intr oduction and Set Up Product features Bef ore you begin Parts checklist Tabletop installation Chapter Two: Quick Start Guide How to set the clock How to set the alarm How to set radio presets How to operate the answering machine How to operate the CD player How to store speed dial contacts Chapter Three: Clo ck Radio Operations Clo ck radio features Setting the Time Wake Alarms Snooze buttons Sleep buttons 3 4 4 5 7 8 9 10 11 12 13 14 15 16 16 Contents Chapter Four: Telephone Operations Telephone set up Caller I.D. f eatures Handset features Digital answering machine features Dir ectory Features Message indicator Changing the batt ery Chapter Fiv e: CD Pla yer Operations Listening to the CD player Chapter Six: Care and Trouble Shooting Troubleshooting guide Care and Maintenence Guarantee FCC registration information Warning notice 17 18 20 22 24 27 28 30 32 33 34 35 29 RINGER SWITCH AC CORD PORT TELEPHONE PORT PHONE CORD CHANNEL ELECTRIC CORD CHANNEL Quick Start GuideQuick Start Guide 87 Quick Start GuideQuick Start Guide 109 Quick Start GuideQuick Start Guide How To Set The ClockHow To Set The Alarm 1211 Press TIME SET button to activate clock /date function. Press TIME SET button to scroll through the active time segment. Press and buttons to adjust the time and date. Press TIME SET button to confirm. Note: Time and date may also be set automatically by utilizing your phone line's caller I.D. options. Press and hold ALARM 1 button for 2 seconds until alarm icon and time begin to flash. Press and buttons to adjust the hour. Press TIME SET button to confirm hour and enable minute to flash. Press and buttons to adjust the minute. Press TIME SET to confirm the alarm time set. The alarm symbol on the display shows that the alarm is set. To set ALARM 2 repeat above steps with ALARM 2 button How To Set Radio Presets How To Operate The Answering Mac…
Text truncated - open the document above for the full version.
Block Diagram
LCD DRIVE_HT1626 DAM_ DSP MX93L130N1 OTP-27LV1024 DAM_KEY FLASH_29LV800 TEL_NET CD_MCU 89C51 CD_MOTO CD_KEY AMP PT2257 TDA1517 RF_MODEL BS_MCU TCC150 PAGE HS_MCU KS57C5616 HS_ LCD HS_KEY RF_MODEL KA8057 RADIO CD_MP3 DSP MIC MIC TEL_LINE 4.5MHz 4.096MHz 27.000MHz16.9344MHz 3.5795MHz 32.768KHz 3.5795MHz
External Photos
EXHIBIT C - EUT EXTERNAL PHOTOGRAPHS Base – Chassis Front View Base – Chassis Rear View Power Adapter – Top View Handset – Chassis Top View Handset – Chassis Back View
ID Label/Location Info
EXHIBIT A - FCC ID LABEL INFORMATION Proposed FCC ID Label Specifications: Text is black or white in color and is left justified. Labels are silk- screened and shall be “permanently affixed” at a conspicuous location on the EUT. Proposed Label Location on EUT Rear View of EUT / FCC ID Label Proposed Location FCC ID: SLC1188041129 This device complies with Part 15 of the FCC Rules. Operation is subject to the following two conditions: (1) this device may not cause harmful interference, and (2) this device must accept any interference received, includin g interference that may cause undesired
Internal Photos
EXHIBIT C - EUT INTERNAL PHOTOGRAPHS Base – Cover Off View Base Board 1 – Component View Base Board 1 – Solder View Base Board 2 – Component View Base Board 2 – Solder View Base Board 3 – Component View Base Board 3 – Solder View Base Board 4 – Component View Base Board 4 – Solder View Base – Transmitter Component View Base – Transmitter Solder View Key / LED Boards – Component View Key / LED Boards – Solder View CD Player – Cover Off View CD Player Board – Component View CD Player Board – Solder View Handset – Chassis Cover Off View Handset – Component View Handset – Solder View Handset – Transmitter Component View Handset – Transmitter Solder View
Operational Description
1 Base a. RF Transmitter Section – RF Board The compressed audio signal (RF module pin 10) is modulated through the varactor diode VD201. These components, i.e. VD201, C216, L201, Q5 and the external components of Q5 compose the voltage controlled oscillator circuit for the transmitter part. This circuit generates the TX VCO frequency. A portion of this signal is fed back to the PLL IC (LMX1602)’s pin12 (FIN1) for phase comparison. Once the phase of oscillation stabilized, the PLL circuit generates the error voltage necessary for the VCO to oscillate at the desired transmitter’s RF frequency. The VCO circuit impedance is matched with the succeeding circuit through the transistor Q202 that also acts as the buffer amplifier. The RF amplifier Q201 boosts the signal for transmission. This amplified RF signal is trimmed to the desired frequency band by F2 (BPF2403) so as not to interfere with the receiver circuit. The transmitter RF signal is then propagated through the antenna. b. RF Receiver Section – RF Board The Base Unit antenna receives RF signal. The Band Pass Filter F1 (BPF2475) trims the signal to the desirable frequency band. Transistor Q101 $ Q104 is a low noise amplifier that boosts the RF signal to a specific level for mixing. PLL U2 (LMX1602) is used as a Universal Phase Lock Loop circuit. The frequency from the Voltage Controlled Oscillator (VCO) VD101, L102 and Q103, is fed back to the PLL IC through pin 5 (FIN2) for phase comparison. During channel scanning or turning the unit on, once the phase of oscillation stabilized (locked), the PLL circuit generates the first local oscillator frequency for down-converting the received RF signal into the first IF frequency 10.7Mhz. This process is accomplished through the IF mixer circuit Q104. Q104 is used for matching the impedance of the mixer circuit with the succeeding circuits. The resulting IF signal is kept constant by the IF Filter F3 to 10.7MHz which is then mixed with the second local oscillator frequency 11.150MHz (derived from X1 & VC1) to produced a much lower IF frequency. This lower IF frequency if further filtered by IF Filter FL4 to produce a more stable signal of 450KHz. Quadrature signal detection is accomplished internally by the Narrow-band Detector IC2 (KA3361) with the IF coil T1. The recovered audio frequency can be taken from U1 audio output pin9. c. Transmitter Audio Section – Main Board The Audio Frequency signal from the telephone line that is through Q1,R8,C4,C88,R112,Q12, C80,R119,C22 etc iscompressed through the compressor part of IC4to minimize the transmission noise. The degree ofcompression depends on the external RC combinations. AGC is also utilized by IC4to avoid shock noise caused by abrupt change of audio levels. The compressed audio is filtered and amplified for better acoustical performance. d. Receiver Audio Section – Main Board The compressed Audio Frequency signal from the RF module (pin3) is passed through passive RC filters for acoustic compliance. The filtered audio is then fed to the Compander IC4 (pin16 and pin17) for expansion thus retrieving the original Audio signal with noise filtered out. Q4 is used as buffer circuit. Bridge rectifier D1,D2,D3,D4 isolates the high-voltage telephone line to the rest of the circuit. e. CD Player – media formats: standard CD, CDR CD player and PCB are same module, it send CD’s TCO signal to U301, U301 control song, song same display on the LCD. CD module is control by U301 signal, it can eject CD, choose song. f. Digital Answering Machine Digital Answering Machine is control by DSP-U301?FLASH-icU302?U303. g. Radio Receiver: AM/FM Radio Receiver PCB is one module structure. It can send signal to U301, U301 can control those signal to display on LCD. Radio Receiver module can receive U301signal. It can use choose station, save station and switch between AM/FM. H.snooze feature Snooze feature can be achieve by press button or Infra-Red. 2 Handset a. RF Transmitter Section – RF Board Refer to portion 1.b for this section. All circuit performance is the same except that Band Pass Filter BPF2403 is changed to BPF2475 for the handset transmission. b. RF Receiver Section – RF Board Refer to portion 1.b for this section. All circuit performance is the same except that Band Pass Filter BPF2475 is changed to BPF2403 for the handset transmission. c. Transmitter Audio Section – Main Board Audio Frequency signal from the handset or from the headset microphone is compressed through the compressor part of U2to minimize the transmission noise. The degree of compression depends on the external RC combinations. AGC is also utilized by U2 to avoid shock noise caused by abrupt change of audio levels. The compressed audio is filtered and amplified for better acoustical performance. Q4,Q7 is a switching transistor that controls the power supply for the TX RF part. d. Receiver Audio Section – Main Board The compressed Audio Frequency signal from the RF module is passed through passive RC filters for acoustic compliance. The filtered audio is then fed to the Compander U2 for expansion thus retrieving the original audio signal with noise filtered out. Q2 & Q9 act as audio amplifier to sufficiently drive the handset speaker. Q4 and Q7 are switching transistors that control the power supply for the RF part, the Compander part and the AF amplifier respectively. An earphone jack is provided for an optional headset unit for hands free conversation on the handset. 3 OTHERS (Handset): a. Charging and Reset Controls Recharging the handset battery is accomplished by putting the handset on the cradle. Q8 and its external components are the reset circuit. R55 and R56 detect this action and send a command to the CPU (IC1 pin24) for proper exchange of security code. b. Ring Detection When the handset receives the ring command from the base unit, the CPU will send buzzer signal to the ringer amplifier Q2 and Q3 that drives the Buzzer. 4 OTHERS (Base): a. Hook Switching and Dialing The transi…
Text truncated - open the document above for the full version.
Schematics
ntp3321-lcd.sch-1 - Wed Dec 08 17:12:52 2004
Test Report
Note: The test report is specially limited to the above company and the product model only. It may not be duplicated without prior written consent of Bay Area Compliance Laboratory Corporation. This report must not be used by the client to claim product certification, approval, or endorsement by NVLAP, NIST or any agency of the US Government. FCC PART 15.249 EMI MEASUREMENT AND TEST REPORT For TwinPro International Holding limited Rm 2303, Office Tower, Convention Plaza, 1 Harbour Rd., Wanchai, Hong Kong FCC ID: SLC1188041129 This Report Concerns: Original Report Equipment Type: 2.4GHz Cordless Phone Test Engineer: Snell Leong/ Report No.: R0412158 Report Date: 2005-01-07 Reviewed By: Daniel Deng/ Prepared By: Bay Area Compliance Laboratory Corporation 230 Commercial Street Sunnyvale, CA 94085 Tel (408) 732-9162 Fax (408) 732-9164 TwinPro International Holdings Limited FCC ID: SLC1188041129 Report # R0412158Rpt.doc Page 2 of 18 FCC Part 15.249 Test Report TABLE OF CONTENTS GENERAL INFORMATION.......................................................................................................................................3 PRODUCT DESCRIPTION FOR EQUIPMENT UNDER TEST (EUT) ....................................................................................3 OBJECTIVE...................................................................................................................................................................3 RELATED SUBMITTAL(S)/GRANT(S).............................................................................................................................3 TEST METHODOLOGY..................................................................................................................................................3 TEST FACILITY.............................................................................................................................................................3 SYSTEM TEST CONFIGURATION ..........................................................................................................................5 JUSTIFICATION.............................................................................................................................................................5 SCHEMATICS AND BLOCK DIAGRAM............................................................................................................................5 EQUIPMENT MODIFICATIONS.......................................................................................................................................5 SUMMARY OF TEST RESULTS ...............................................................................................................................6 §15.203 - ANTENNA REQUIREMENT......................................................................................................................7 STANDARD APPLICABLE..............................................................................................................................................7 ANTENNA CONNECTED CONSTRUCTION......................................................................................................................7 § 15.249 (C) - CONDUCTED EMISSIONS TEST DATA .........................................................................................8 MEASUREMENT UNCERTAINTY....................................................................................................................................8 EUT SETUP..................................................................................................................................................................8 SPECTRUM ANALYZER SETUP......................................................................................................................................8 TEST EQUIPMENT LIST AND DETAILS...........................................................................................................................8 TEST PROCEDURE........................................................................................................................................................8 ENVIRONMENTAL CONDITIONS....................................................................................................................................8 SUMMARY OF TEST RESULTS.......................................................................................................................................9 CONDUCTED EMISSIONS TEST DATA...........................................................................................................................9 PLOT OF CONDUCTED EMISSIONS TEST DATA.............................................................................................................9 §15.209(A) - RADIATED EMISSION DATA ...........................................................................................................12 MEASUREMENT UNCERTAINTY..................................................................................................................................12 EUT SETUP................................................................................................................................................................12 SPECTRUM ANALYZER SETUP....................................................................................................................................12 TEST EQUIPMENT LIST AND DETAILS.........................................................................................................................13 ENVIRONMENTAL CONDITIONS..................................................................................................................................13 TEST PROCEDURE......................................................................................................................................................13 CORRECTED AMPLITUDE & MARGIN CALCULATION..................................................................................…
Text truncated - open the document above for the full version.
Test Setup Photos
EXHIBIT B - TEST SETUP PHOTOGRAPHS Conducted Emission Base Radiated Emission Handset Radiated Emission
Contact Information
Applicant
Terry Chan(Marketing Executive)
Test Firm
Bay Area Compliance LaboratoryJohn Chan
Technical Specifications
| # | Rule Parts | Frequency Range | Power Output |
|---|---|---|---|
| 2 | 15C | 2.47 GHz - 2.48 GHz | - |
Other Applications from TwinPro International Holdings Limited

SLCTP256AHM
Sep 27, 2007Wireless Rechargeable Speakers
Equipment Class
DXX - Part 15 Low Power Communication Device Transmitter
SLCTP256BHM
Sep 20, 2007Wireless Rechargeable Speakers (Remote Controller)
Equipment Class
DSC - Part 15 Security/Remote Control Transmitter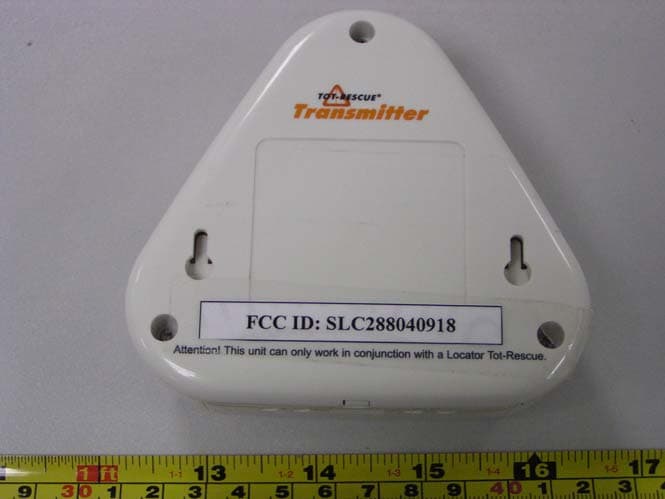
SLC288040918
Nov 07, 2004Tot Rescue
Equipment Class
DXX - Part 15 Low Power Communication Device Transmitter