TZI-LPP1000TURNTABLE AUDIO SYSTEM
Arts Electronics Co., Ltd
Click to zoom
Application Details
- Equipment Class
- DSS - Part 15 Spread Spectrum Transmitter
- Date of Grant
- Sep 18, 2013
- Application Purpose
- Original Equipment
- Date of Application
- Sep 18, 2013
- Equipment Note
- TURNTABLE AUDIO SYSTEM
- Frequency Range
- 2402.00000000 - 2480.00000000
- Company
- Arts Electronics Co., Ltd
- Country
- China
Documents & Files
Document Text
Text extracted from the exhibit documents filed with the FCC. Open a document above to read the original.
Users Manual
ENGLISH FRANÇAIS TURNTABLE AUDIO SYSTEM OWNER'S MANUAL MODE D’EMPLOI LP-P1000 Z 77-20L100000000 LP-P1000_OM_EF_vA_CS6.indb 12013/09/11 16:16 2 IMPORTANT SAFETY PRECAUTIONS CAUTION: TO REDUCE THE RISK OF ELECTRIC SHOCK, DO NOT REMOVE COVER (OR BACK). NO USER-SERVICEABLE PARTS INSIDE. REFER SERVICING TO QUALIFIED SERVICE PERSONNEL. M The lightning flash with arrowhead in an equilateral triangle is intended to alert the user to the presence of uninsulated “dangerous voltage” within the product’s enclosure that could be of sufficient magnitude to con- stitute a risk of electric shock to persons. V The exclamation point in an equilateral triangle is intended to alert the user to the presence of important operating and maintenance (servicing) instructions in the literature accompanying the appliance. WARNING: TO PREVENT FIRE OR SHOCK HAZARD, DO NOT EXPOSE THIS APPLIANCE TO RAIN OR MOISTURE. CAUTION oDO NOT REMOVE THE EXTERNAL CASES OR CABINETS TO EXPOSE THE ELECTRONICS. NO USER SERVICEABLE PARTS ARE INSIDE. oIF YOU ARE EXPERIENCING PROBLEMS WITH THIS PRODUCT, CONTACT TEAC FOR A SERVICE REFERRAL. DO NOT USE THE PRODUCT UNTIL IT HAS BEEN REPAIRED. oUSE OF CONTROLS OR ADJUSTMENTS OR PERFORMANCE OF PROCEDURES OTHER THAN THOSE SPECIFIED HEREIN MAY RESULT IN HAZARDOUS RADIATION EXPOSURE. IN USA/CANADA, USE ONLY ON 120 V SUPPLY. LP-P1000_OM_EF_vA_CS6.indb 22013/09/11 16:16 3 This product contains a semiconductor laser system inside the cabi- net and is classified as a “CLASS 1 LASER PRODUCT”. To prevent being exposed to the laser beam, do not try to open the enclosure. Laser: Type: EP-C101 Manufacturer: Ever Bright Teachnolog and Science Electronical Co., LTD. Laser output: Less than 0.5 mW Wavelength: 790±25 nm Model for USA This product has been designed and manufactured according to FDA regulations “title 21, CFR, chapter 1, subchapter J, based on the Radiation Control for Health and Safety Act of 1968”, and is classified as class laser product. There is not hazardous invisible laser radia- tion during operation because invisible laser radiation emitted inside of this product is completely confined in the protective housings. The label required in this regulation is as follows: Q Precautions concerning batteries Misuse of batteries could cause them to rupture or leak leading to fire, injury or the staining of nearby things. Please read and observe the following precautions carefully. oBe sure to insert the batteries with correct positive (+) and negative (_) orientations. oUse batteries of the same type. Never use different types of batteries together. oIf the remote control is not used for a long time (more than a month), remove the batteries to prevent them from leaking. oIf the batteries leak, wipe away the leakage inside the battery compartment and replace the batteries with new ones. oDo not use batteries of types other than those specified. Do not mix new batteries with old ones or use different types of batteries together. oDo not heat or disassemble batteries. Never throw batteries into fire or water. oDo not carry or store batteries with other metallic objects. The batteries could short circuit, leak or explode. oNever recharge a battery unless it is confirmed to be a rechargeable type. LP-P1000_OM_EF_vA_CS6.indb 32013/09/11 16:16 4 IMPORTANT SAFETY INSTRUCTIONS 1) Read these instructions. 2) Keep these instructions. 3) Heed all warnings. 4) Follow all instructions. 5) Do not use this apparatus near water. 6) Clean only with dry cloth. 7) Do not block any ventilation openings. Install in accordance with the manufacturer's instructions. 8) Do not install near any heat sources such as radiators, heat registers, stoves, or other apparatus (including amplifiers) that produce heat. 9) Do not defeat the safety purpose of the polarized or grounding- type plug. A polarized plug has two blades with one wider than the other. A grounding type plug has two blades and a third grounding prong. The wide blade or the third prong are pro- vided for your safety. If the provided plug does not fit into your outlet, consult an electrician for replacement of the obsolete outlet. 10) Protect the power cord from being walked on or pinched par- ticularly at plugs, convenience receptacles, and the point where they exit from the apparatus. 11) Only use attachments/accessories specified by the manufacturer. 12) Use only with the cart, stand, tripod, bracket, or table specified by the manu- facturer, or sold with the apparatus. When a cart is used, use caution when moving the cart/apparatus combination to avoid injury from tip-over. 13) Unplug this apparatus during lightning storms or when unused for long periods of time. 14) Refer all servicing to qualified service personnel. Servicing is required when the apparatus has been damaged in any way, such as power-supply cord or plug is damaged, liquid has been spilled or objects have fallen into the apparatus, the apparatus has been exposed to rain or moisture, does not operate normally, or has been dropped. oThe apparatus draws nominal non-operating power from the AC outlet with its POWER or STANDBY/ON switch not in the ON position. oThe mains plug is used as the disconnect device, the disconnect device shall remain readily operable. oCaution should be taken when using earphones or headphones with the product because excessive sound pressure (volume) from earphones or headphones can cause hearing loss. CAUTION oDo not expose this apparatus to drips or splashes. oDo not place any objects filled with liquids, such as vases, on the apparatus. oDo not install this apparatus in a confined space such as a book case or similar unit. oThe apparatus should be located close enough to the AC outlet so that you can easily reach the power cord plug at any time. oIf the product uses batteries (including a battery pack or installed batteries), they should not be exposed to sunshine, fire or excessive heat. oCAUTION for products that use replaceable lithium batter- ies: there is danger…
Text truncated - open the document above for the full version.
Users Manual
25 ENGLISH Setting the clock (1) Set the current time before using the unit. You can set the clock when the unit is in standby. 1 Press the STANDBY/ON button to put the unit into standby. NOTE When the ring around the button is not lit blue, the unit is in standby. Note that the clock cannot be set when the unit is on. 2 Press and hold the CLOCK ADJUST but- ton for at least 2 seconds. Press and hold for at least 2 seconds “SET CLOCK” scrolls across the display. 3 Press the TIME (j/k) buttons to switch between 24 HOUR and 12 HOUR (24- hour or 12-hour time display). c3 oIf a setting is left for more than 20 seconds, this time setting mode will end. 4 Press the CLOCK ADJUST button again. Display example The “hour” value blinks. 5 Press the TIME (j/k) buttons to set the current hour. Continued on the next page LP-P1000_OM_EF_vA_CS6.indb 252013/09/11 16:16 26 Setting the clock (2) 6 Press the CLOCK ADJUST button. Display example The minute value blinks. 7 Press the TIME (j/k) buttons to set the current minute. 8 Press the CLOCK ADJUST button. This completes the procedures for setting the time. The clock will start from the set minute at 0 seconds. oThe unit’s clock and wakeup timer settings will be erased if a power outage occurs or the power cord is unplugged from an outlet. Current time display The clock is always shown when the unit is in standby mode (off ) and when the function is set to PHONO/ AUX. Press the remote control's DISPLAY button to show the clock on the display. oThe current time is shown for 3 seconds in CD and FM/AM modes. Display example Current time oThe DISPLAY button does not function in AUX/ PHONO and Bluetooth modes. oIn Bluetooth mode, the current time is only shown when paired. LP-P1000_OM_EF_vA_CS6.indb 262013/09/11 16:16 27 ENGLISH Basic operation (1) 3 Turn the VOLUME knob to adjust the volume. MIN (0): minimum volume MAX (40): maximum volume Turn the VOLUME knob right to raise the volume and left to lower it. oThe default value is 20. oWhen you turn the VOLUME knob, the volume will be shown for about 3 seconds. oWhen the volume is at minimum level, “MIN” appears on the display. At maximum, “MAX” appears. V Sudden loud noises could damage your hear- ing or cause other harm. Set the volume to minimum. After sound output begins, adjust the volume to a suitable level. oWhen not using this unit, press the STANDBY/ON button to put the unit into standby. 1 Press the STANDBY/ON button to turn the unit on. The ring around the STANDBY/ON button lights blue when on. oEven when in standby (unit off ), pressing a func- tion button will turn the unit on. 2 Press a function button to set the play- back source. When a playback source is selected, the corre- sponding indicator appears on the display. Record External input Radio CD Bluetooth LP-P1000_OM_EF_vA_CS6.indb 272013/09/11 16:16 28 Basic operation (2) Adjusting the bass, treble and stereo balance 1 Press the SOUND button to select the item you want to adjust. Pressing the SOUND button cycles through the items in the following order. BASS TREBLE BALANCE Ordinary display 2 Within 3 seconds, start using the VOLUME (+/−) buttons to adjust the setting. oIf 3 seconds pass without any adjustment, the setting mode will end. Setting items and ranges BASS (low frequencies) Use to adjust the bass. Setting range: −5 to +5 Default value: 0 Display example TREBLE (high frequencies) Use to adjust the treble. Setting range: −5 to +5 Default value: 0 Display example BALANCE Use to adjust the left-right stereo balance. Setting range: L+10 to R+10 Default value: CENTER Display example You should usually leave BALANCE set to CENTER. LP-P1000_OM_EF_vA_CS6.indb 282013/09/11 16:16 29 ENGLISH Adjusting the brightness of the display Press the DIMMER button to cycle through the follow- ing brightness settings. Ordinary brightness Dim Very dim oWhen the unit enters standby, the dimmer setting is reset to ordinary brightness. Muting the output Press the MUTE button to temporarily silence the out- put. Press the MUTE button again to resume output at the previously set volume level. oWhen the mute function is active, “MUTE” appears on the display. oWhen the mute function is active, adjusting the vol- ume will unmute the output. oWhen the mute function is active, changing the source will unmute the output. LP-P1000_OM_EF_vA_CS6.indb 292013/09/11 16:16 30 Listening to a CD (1) 1 Press the CD/Bluetooth button to select CD. Press the CD/Bluetooth button again to switch between CD and Bluetooth. After switching to CD, “DISC” will appear, “READING” will blink for several seconds, and then the CD will be in a stopped state. If no disc is loaded, “NO DISC” appears on the display. 2 Press the open/close (-) button to open the tray. The disc tray opens forward. 3 Place a disc centered on the tray with the labeled side up. oNever place more than one disc on the tray. oIf the tray is closed while a disc is outside the center guides, the disc might become stuck inside and the tray might not open. Be sure to always place discs within the guides at the center of the tray. oDo not force the tray by hand when opening or closing. 4 Press the open/close (-) button to close the tray. Be careful not to let your fingers be pinched when the tray closes. oThe unit takes a few seconds to load the disc. No buttons will work when “READING” is displayed. Wait until the disc information is displayed. LP-P1000_OM_EF_vA_CS6.indb 302013/09/11 16:16 31 ENGLISH Audio CD display example Total number of tracks Total playback time MP3/WMA disc display example Folder number File number oA non-audio disc might be “played” in the same manner as an audio disc, but sound will not be output. oWhen a WMA disc is loaded, “WMA” will appear on the left side of the display. 5 Press the play/pause (y/9) button. Playback will start from the first track and y will appear on the display. Track number Playback elapsed time oIf you press the play/pause (y/9) button without closing the disc tray, the tray…
Text truncated - open the document above for the full version.
Users Manual
37 ENGLISH 3 Press the MEMORY button. The selected track/file is added at the selected pro- gram number, replacing the file that was there. Clearing all the program contents Press and hold the stop (8) button for at least 2 sec- onds when stopped. The contents of the program are cleared. When the contents of the program are cleared, “PROGRAM CLEAR” scrolls across the display. oThe program is also cleared in the following cases. • The unit enters standby mode • The PHONO/AUX, FM/AM or CD/Bluetooth button is pressed, changing the source • The disc tray is opened LP-P1000_OM_EF_vA_CS6.indb 372013/09/11 16:16 38 Repeat and shuffle playback e When the CD function is active, press the PLAY MODE button to cycle through the following playback modes. When an audio CD is loaded REPEAT (single track repeat) REPEAT ALL (all track repeat) SHUFFLE* OFF (normal playback) When an MP3/WMA disc is loaded REPEAT (single file repeat) REPEAT FOLDER REPEAT ALL (all file repeat) SHUFFLE* OFF (normal playback) Press the play/pause (y/9) button when the mode you want to select appears to start playback. *If shuffle is selected, playback starts automatically. oYou can also change the playback mode by pressing the PLAY MODE button during playback. oAny of the following operations will end repeat or shuffle playback mode. • The stop (8) button is pressed • The unit enters standby mode • The PHONO/AUX, FM/AM or CD/Bluetooth button is pressed, changing the source • The disc tray is opened Repeat playback REPEAT (single track/file repeat) During playback, press the PLAY MODE button once to repeat playback of the currently playing track/file. “REPEAT” appears on the display. oIf you turn the main unit's skip (.//) knob or press the remote control's skip/search (.m/,/) buttons and select another track/file, that track/file will be played repeatedly. oWhen stopped, press the PLAY MODE button and then use the main unit's skip (.//) knob or remote control's skip/search (.m/,/) buttons to select a track/file. Press the play/pause (y/9) button to start single repeat playback. oDuring programmed playback, the track/file being played will be played repeatedly. REPEAT ALL (all track/file repeat) Press the PLAY MODE button twice (or three times for an MP3/WMA disc). “REPEAT ALL” appears on the display and repeat play- back of all tracks/files starts. oDuring programmed playback, the programmed tracks/files will be played repeatedly. LP-P1000_OM_EF_vA_CS6.indb 382013/09/11 16:16 39 ENGLISH REPEAT FOLDER (MP3/WMA discs only) Press the PLAY MODE button twice. “REPEAT FOLDER” appears on the display, and the files in the selected folder are played back repeatedly. Shuffle playback All the tracks/files on the disc are played back randomly. SHUFFLE Press the PLAY MODE button repeatedly until “SHUFFLE” appears on the display. oDuring shuffle playback, turn the main unit's skip (/) knob right or press the remote control's skip/ search (,/) button to start playback of the next random track/file. Turn the main unit's skip (.) knob left or press the remote control's skip/search (.m) button to return to the beginning of the current track/file. oShuffle playback is not possible during programmed playback. About MP3/WMA files (1) File playback order A disc that contains MP3/WMA files can have the files in folders in the same manner that files are managed on an ordinary computer. One folder can also contain multiple subfolders. Example of folder numbers and file playback order ( 1 to 9 ) during normal playback of a disc that contains MP3/WMA files 1 2 3 4 8 9 6 7 5 MP3/WMA file MP3/WMA file MP3/WMA file MP3/WMA file MP3/WMA file MP3/WMA file MP3/WMA file MP3/WMA file MP3/WMA file 002 folder 001 (ROOT ) 004 folder 003 folder 005 folder Folder oAdding, removing or relocating files and fold- ers could change the order shown in the above illustration. LP-P1000_OM_EF_vA_CS6.indb 392013/09/11 16:16 40 About MP3/WMA files (2) Changing the display Each time you press the INFO button, the information on the display changes as follows. oThe first 32 characters of the song/artist/album names are shown. oIf the file information uses Japanese, Chinese or other double-byte characters, playback is possible but information will not be shown correctly on the display. oAfter each item of information scrolls across three times, the elapsed playback time will appear again. oWhen a WMA disc is loaded, “WMA” will appear on the left side of the display. Selecting folders and files To select a folder by number, use the main unit's search (m/,) buttons. When using the remote, use the MP3 (j/k) buttons. To select a file by number, use the main unit's scroll (MULTI JOG) knob. oAfter selecting the folder/file number, press the play/ pause (y/9) button to start playback. If the play button is not pressed within 5 seconds, “STOP” will appear on the display. LP-P1000_OM_EF_vA_CS6.indb 402013/09/11 16:16 41 ENGLISH Display example Track number Playback elapsed time c File name c Folder name c Title name c Album name c Artist name LP-P1000_OM_EF_vA_CS6.indb 412013/09/11 16:16 42 Listening to audio from a Bluetooth device With this unit, you can enjoy listening to music played back on another Bluetooth device wirelessly. 1 Press the CD/Bluetooth button to select “Bluetooth”. “PAIRING” appears on the display, and the unit searches for paired devices. oPress the CD/Bluetooth button to select “Bluetooth” (the Bluetooth indicator lights). When connection with a Bluetooth device succeeds, the Bluetooth icon ( ) appears and “BLUETOOTH” scrolls across the display. Bluetooth figure mark c After “BLUETOOTH” scrolls across 5 times, the current time is shown. oThe unit will automatically try to connect to the previously connected device. oIf it cannot connect for two minutes or longer, “NO DEVICE CONNECTED” will scroll across the display. oPairing is necessary before using the Bluetooth function of this unit for the first time and when you want to connect a new Bluetooth device. oIf conne…
Text truncated - open the document above for the full version.
Users Manual
49 ENGLISH Manual station selection When using the main unit Turn the scroll (MULTI JOG) knob to change the recep- tion frequency. oTurn right to increase the reception frequency and left to decrease it. When using the remote control Press a TUNING/TIME (j/k) button briefly to change the frequency by a fixed step. oKeep pressing the TUNING/TIME (j/k) button until you find the station that you want. FM MODE button When a stereo FM program is tuned in, you can switch between stereo and mono by pressing the FM MODE button. Stereo mode selection When an FM stereo broadcast is being received in ste- reo, the STEREO indicator appears. oIf reception is poor, the STEREO indicator will not light. Display example c Stereo indicator Mono mode selection When the reception of an FM stereo broadcast is poor, select this mode. Use to receive broadcasts in mono to improve the sound. Display example c LP-P1000_OM_EF_vA_CS6.indb 492013/09/11 16:16 50 Preset tuning (1) You can store FM and AM stations into preset numbers 1 to 20 respectively. 1 Press the FM/AM button to select FM or AM band. Press the FM/AM button again to switch between FM and AM bands. 2 Use the TUNING (j/k) buttons to search for the radio station that you want to save as a preset. 3 After selecting a radio station, press the MEMORY button. The preset number and the MEMORY indicator blink on the display. Display example Preset number 4 Use the PRESET buttons to select the preset number that you want to use to store that radio station. 5 Press the MEMORY button. The radio station will be stored, and the preset number and the MEMORY indicator will stop blink- ing and continue to appear on the display. To save more radio station presets, repeat proce- dures 1 to 5 . LP-P1000_OM_EF_vA_CS6.indb 502013/09/11 16:16 51 ENGLISH Automatic presets The unit can automatically search for and add presets for the stations that it can receive. 1 Press the FM/AM button to select FM or AM broadcast reception. Each time you press the FM/AM button, the unit will switch between FM and AM broadcast reception. 2 Press and hold the MEMORY button for at least 2 seconds. “AUTO” appears on the display and the unit auto- matically adds presets for the stations that it can receive. oAfter 20 presets have been added automatically, “PROG FULL” will appear followed by preset 01 and reception of that station will start. Listening to a preset station 1 Press the FM/AM button to choose the band. 2 Press a PRESET (j/k) button repeat- edly until you find the preset number of the radio station you want. Continued on the next page LP-P1000_OM_EF_vA_CS6.indb 512013/09/11 16:16 52 Preset tuning (2)Wakeup timer (1) At the set time, sound will be output from the speakers. oAdjust the clock before setting the timer (page 25). Setting the timer 1 Put the unit into standby (power off ). The unit must be in standby to set the timer. If the ring around the STANDBY/ON button is lit blue, the unit is on. Press the STANDBY/ON button to put the unit into standby. 2 Press and hold the TIMER button for at least 2 seconds. Press and hold for at least 2 seconds The timer indicator () blinks and “SET TIMER” scrolls across the display once. “ON TIME” appears and then the time input mode becomes active. Display example c c When using the remote control The preset number appears on the left side of the display. Example when preset 3 is selected Preset number oWhen a preset station is selected, the MEMORY indicator appears. oAfter selecting a preset, this number will con- tinue to be shown unless you select another station manually. LP-P1000_OM_EF_vA_CS6.indb 522013/09/11 16:16 53 ENGLISH 4 Press the TIME (j/k) buttons to set the TIMER ON minute and press the TIMER button. Display example After making the TIMER ON setting, “OFF TIME” appears and the hour value blinks. c 5 Repeat steps 3 and 4 to set the TIMER OFF time. Display example The “hour” value blinks. oIf no action is taken for 10 seconds, timer setting will end automatically. 3 Press the TIME (j/k) buttons to set the TIMER ON hour and press the TIMER button. Display example oAfter setting the hour, the minutes blink. Continued on the next page LP-P1000_OM_EF_vA_CS6.indb 532013/09/11 16:16 54 7 Press the TIME (j/k) buttons to set the volume level. You can set the volume between 5 (minimum) and 32 (maximum). oWhen the wakeup timer turns the unit on, the volume will gradually increase until the set vol- ume is reached. 8 Press the TIMER button. Timer indicator The timer indicator appears. This completes wakeup timer setting. oThe wakeup timer settings will be erased if a power outage occurs or the power cord is unplugged from an outlet. oAt the TIMER ON time, operation starts and the timer indicator blinks. Prepare the playback source before the wakeup timer turns the unit on. If you have selected “CD”, place a disc. (If no disc is loaded, the FM tuner will be used.) Wakeup timer (2) 6 Press the TIME (j/k) buttons to select the playback source and press the TIMER button. Display example The sources that can be selected are CD, FM TUNER and AM TUNER. Press the TIME (j/k) button to cycle through the following source settings. CDFM TUNERAM TUNER “BLUETOOTH” and “PHONO” cannot be set. LP-P1000_OM_EF_vA_CS6.indb 542013/09/11 16:16 55 ENGLISH The unit can be set to enter standby after a specified amount of time. Setting the sleep timer Press the SLEEP button repeatedly until the desired set- ting appears on the display. The settings for the time until the unit enters standby change as follows (shown in minutes). 90 60 45 30 15 Off When the sleep timer is active, the SLEEP indicator appears at the bottom right of the display. oThe display is dimmed when the sleep timer is active. oWhen the sleep timer is active, press the SLEEP but- ton once to show for a few seconds the amount of time until the unit enters standby. oWhen the sleep timer is operating, you can press the SLEEP button twice to turn the sleep timer off. Sleep timer Turn the wakeup timer…
Text truncated - open the document above for the full version.
Users Manual
73 FRANÇAIS Remplacement de la pointe oLes pointes pour disque sont des pièces de précision à manipuler avec précaution pour éviter de tordre ou d'endommager leur extrémité. Si une pointe est tordue ou endommagée, elle pourrait ne plus être en mesure de suivre précisément le sillon audio et pourrait endommager les disques ou causer d'autres dysfonctionnements. oSi une pointe est sale, utilisez un nettoyant pour pointe du commerce ou un produit similaire pour la nettoyer. oNe frottez pas fort sur la pointe avec un objet dur. N'essuyez pas la pointe avec un diluant ou d'autres produits chimiques. Cela pourrait l'endommager. Remplacement de la pointe L'utilisation d'une pointe l'use, ce qui pourrait dégra- der la qualité sonore, voire endommager les disques. Remplacez dès que possible la pointe par un modèle de rechange spécifié par TEAC. En général, vous devez remplacer une pointe saphir pour 33t après environ 50 heures d'utilisation et une pointe diamant pour 45t après environ 100 heures. ATTENTION oComme de forts bruits pourraient soudainement se produire, mettez l'unité en veille avant de changer la pointe. oFaites attention de ne pas abîmer vos mains ou l'équipement. oVeillez à ne pas permettre à de petits enfants d'avaler accidentellement les pointes. Dépose de la pointe (partie rouge) 1 Appuyez sur la touche STANDBY/ON pour mettre l’unité en veille. 2 Maintenez la cellule d'une main, et utilisez un petit tournevis ou un autre outil pour pousser la partie proé- minente à l'avant de la pointe vers le bas dans la direction « A ». Ensuite, tirez-la vers l'avant et sortez-la. Tournevis Montage d'une nouvelle pointe 1 Insérez-la dans la direction « B », de sorte que l'extrémité de la pointe s'in- sère dans la cellule. 2 Poussez dans la direction « C » jusqu'à ce qu'elle s'enclenche en place. Pointes de rechange (vendues séparément) STL-103 : pointe saphir pour albums (LP) et maxis (EP) (conditionnées par 3) SPL-102 : pointe diamant pour 45t (SP) (condi- tionnées par 2) Pour des pointes de rechange, contactez votre revendeur ou le service après-vente TEAC (voir au dos de la couverture). LP-P1000_OM_EF_vA_CS6.indb 732013/09/11 16:17 74 Nomenclature et fonctions des parties (unité principale) KLMNOP ABCDHEFGIJ A Touche STANDBY/ON Appuyez sur cette touche pour allumer l'unité ou la mettre en veille (standby). L'anneau autour de la touche STANDBY/ON s'allume en bleu quand l'unité est en service. B Touches de fonction (PHONO/AUX, FM/AM, CD/Bluetooth) Pour écouter un disque vinyle, appuyez sur la touche PHONO/AUX et sélectionnez PHONO. Pour écouter un appareil externe branché à l'une des prises auxiliaires (AUX 1 IN ou AUX 2 IN), appuyez sur la touche PHONO/AUX et sélectionnez AUX. Pour écouter un CD, appuyez sur la touche CD/ Bluetooth et sélectionnez CD. Pour écouter un appareil Bluetooth, appuyez sur la touche CD/Bluetooth et sélectionnez Bluetooth. Pour écouter la radio, appuyez sur la touche FM/ AM. Appuyez à nouveau sur la touche FM/AM pour alterner entre les bandes FM et AM. C Touche PAIRING Sert à l'appairage avec d'autres appareils Bluetooth et pour mettre fin aux connexions Bluetooth (pages 99 et 100). D Touche PLAY MODE Touche FM MODE Lors de l'écoute d'un fichier CD/MP3/WMA, sert à changer de mode de jeu (ordinaire, en boucle, aléa- toire) (page 94). En écoute de la radio FM, sert à alterner entre stéréo et mono (page 105). E Touches de recherche (m/,) Touches PRESET (j/k) Maintenez une de ces touches pressée durant la lecture d'un CD pour une recherche en arrière/ avant (page 89). En écoute de la radio, servent à sélectionner les sta- tions préréglées (page 107). QQ LP-P1000_OM_EF_vA_CS6.indb 742013/09/11 16:17 75 FRANÇAIS F Touche Stop (8) Appuyez sur cette touche pour stopper la lecture d'un CD. G Touche Lecture/Pause (y/9) Appuyez sur cette touche quand le CD ou un appa- reil Bluetooth pris en charge est arrêté ou en pause pour lancer la lecture. Utilisez cette touche pour interrompre la lecture et la mettre en pause. H Touche Ouvrir/Fermer (-) Appuyez pour ouvrir et fermer le tiroir de disque. I Couvercle de la platine J Bouton VOLUME Sert à régler le volume. Tournez-le vers la droite pour augmenter le volume ou vers la gauche pour le réduire. K Prise casque (PHONES) Si vous voulez utiliser un casque, réduisez d'abord le niveau de volume au minimum. Puis insérez la fiche de votre casque dans la prise PHONES et montez progressivement le volume en tournant le bouton VOLUME. oNe mettez pas l'unité sous tension ni en veille et ne branchez/débranchez pas la fiche du casque alors que vous portez celui-ci (cela risquerait de produire un bruit fort dans le casque). oQuand une fiche est enfoncée dans la prise pour casque, aucun son ne sort par les enceintes. L Prise d'entrée audio analogique (AUX 2 IN) Sert à recevoir les signaux audio analogiques. Pour connecter à l'unité la prise casque d'un lecteur de musique portable ou d'un appareil similaire, branchez le câble à mini-jack stéréo fourni à la prise d'entrée audio analogique de la face avant (AUX 2 IN). Dans ce cas, réglez le volume sur le lecteur de musique portable. Attention toutefois, car trop monter le volume du lecteur de musique portable pourrait entraîner une distorsion. M Récepteur du signal de télécommande Les signaux envoyés par la télécommande sont reçus ici. Quand vous utilisez une télécommande, pointez-la vers ce capteur. N Écran Affiche le numéro de piste, le temps, la fréquence FM/AM et d'autres informations. O Tiroir de disque P Molette de défilement/saut (MULTI JOG/. //j k) Sert à régler la radio pour sélectionner les stations (page 105). Sert également pour régler l'horloge et le réveil (pages 81 et 108). Lors de l'écoute d'un CD, sert à sauter à la piste pré- cédente ou suivante (page 89). Q Enceintes gauche/droite Placez les enceintes comme désiré. LP-P1000_OM_EF_vA_CS6.indb 752013/09/11 16:17 76 Nomenclature et fonctions des parties (télécommande) a b c d h e m f g n i o p q l j k a Touche STANDBY/ON b Touche DIMM…
Text truncated - open the document above for the full version.
Contact Information
Applicant
SH Lee(Safety Engineer)
Test Firm
BTL Inc.Daisy Dai
Technical Specifications
| # | Rule Parts | Frequency Range | Power Output |
|---|---|---|---|
| 1 | 15C | 2.40 GHz - 2.48 GHz | 1.20 mW |
Other Applications from Arts Electronics Co., Ltd
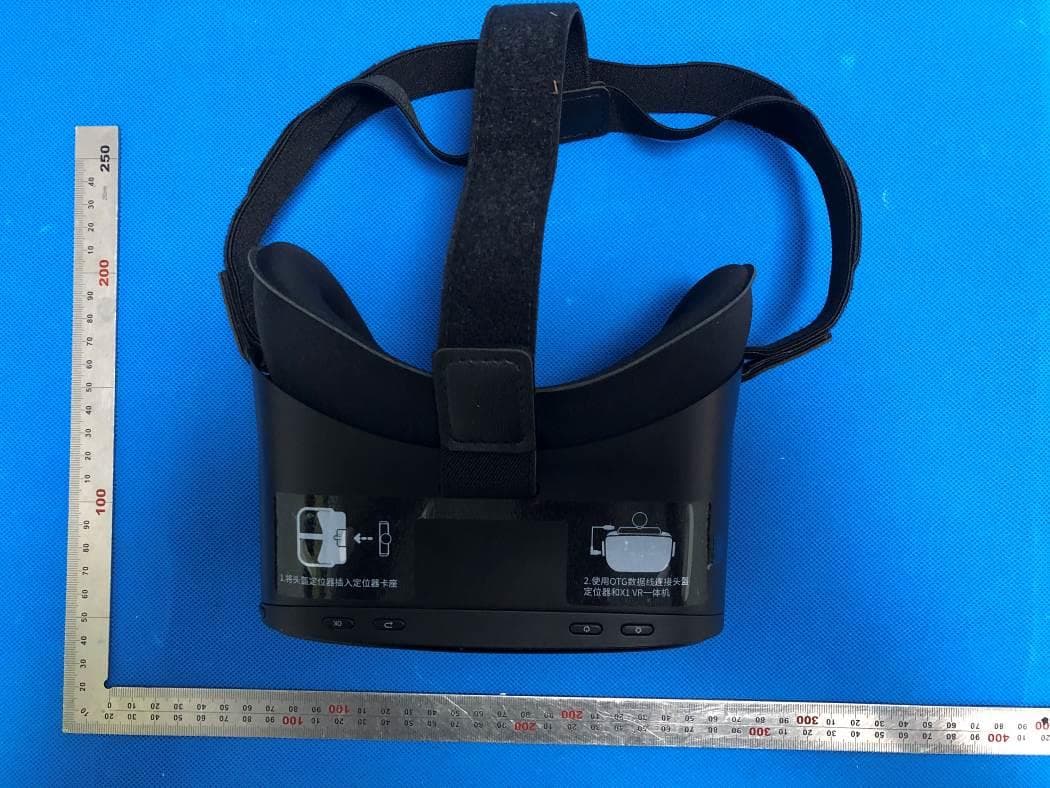
TZIUX598
Sep 15, 2020Bluetooth & WIFI & 5G WIFI VR All-in-One HMD
Equipment Class
DTS - Digital Transmission System
TZIXRM10
Mar 26, 2020Job Site Charger Radio
Equipment Class
DSS - Part 15 Spread Spectrum Transmitter
TZISDL9030DB
Nov 16, 2015PROFESSIONAL HD KARAOKE SYSTEM WITH BLUETOOTH
Equipment Class
DSS - Part 15 Spread Spectrum TransmitterTZISDL366
Sep 14, 2015HD KARAOKE SYSTEM WITH BLUETOOTH
Equipment Class
DSS - Part 15 Spread Spectrum Transmitter
TZI-CN897153
Sep 08, 2015Bluetooth Alarm Clock
Equipment Class
DSS - Part 15 Spread Spectrum Transmitter