TZI-MCD800TURNTABLE AUDIO SYSTEM
Arts Electronics Co., Ltd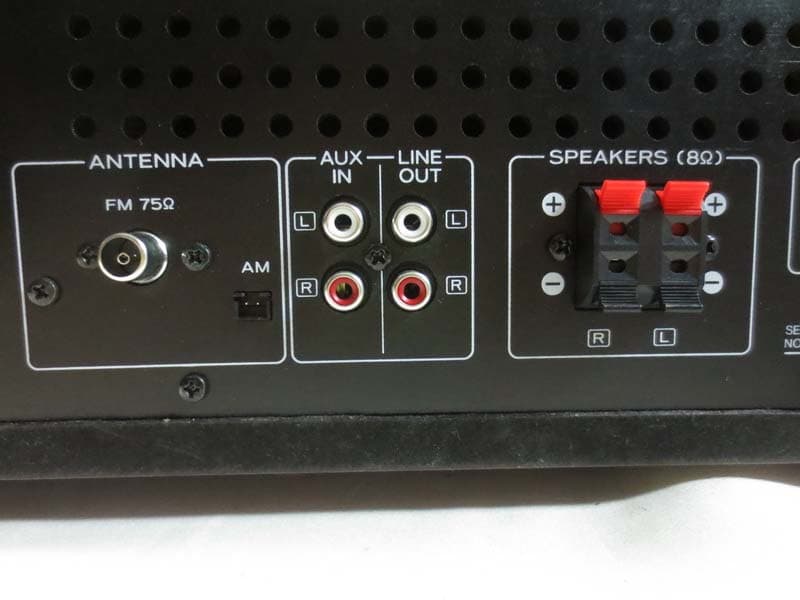
Click to zoom
Application Details
- Equipment Class
- DSS - Part 15 Spread Spectrum Transmitter
- Date of Grant
- Jun 25, 2014
- Application Purpose
- Original Equipment
- Date of Application
- Jun 25, 2014
- Equipment Note
- TURNTABLE AUDIO SYSTEM
- Frequency Range
- 2402.00000000 - 2480.00000000
- Company
- Arts Electronics Co., Ltd
- Country
- China
Documents & Files
Document Text
Text extracted from the exhibit documents filed with the FCC. Open a document above to read the original.
Users Manual
34 Programmed playback (CD/USB) Up to 32 CD tracks or MP3/WMA files can be programmed in the desired order . Program tracks/files when playback is stopped . Programming tracks/files 1 Press the CD/Bluetooth/USB button to select “CD” or “USB”. 2 Press the MEMORY button when stopped. Display example Program number The track number (or folder and file numbers) and the MEMORY indicator blink . oTo stop programming, press the stop (8) button or wait 20 seconds or more . oDuring pr ogramming if you do nothing for 20 seconds or more, the program will be confirmed . Example of display after program confirmation 3 Select a track/file to add to the program. With an audio CD Use the skip/search (.m /,/) buttons to select a track by number . Display example Track number MP3/WMA file example To select a folder by number, use the MP3 (j/k) buttons . MC-D800_OM_EF_vB_CS6.indb 342014/06/02 10:16 35 ENGLISH To select a file by number, use the skip/search (.m/,/) buttons . Display example Folder number File number oThis unit treats MP3/WMA files that are not in folders as being in the 001 (ROOT ) folder . oIf you change the folder or file number, only the MEMORY indicator will blink . 4 Press the MEMORY button. The selected track/file is added to the program, and “P02” appears on the display . oTo program multiple tracks/files, repeat steps 3 to 4 . oTo st op programming, press the stop ( 8) button . 5 When you have finished adding tracks/ files to a program, press the play/pause (y/9) button to start programmed playback. oTo stop programmed playback, press the stop (8) button . The contents of the program are retained . oDuring pr ogrammed playback, use the skip/search (.m/,/) buttons to select different tracks/files in the program . You can also use the scroll (MULTI JOG) knob on the main unit for this operation . oDuring programmed playback, shuffle playback (page 38) is not possible . oThe displa y will appear as follows when programmed playback completes . Display example Total number of program tracks MC-D800_OM_EF_vB_CS6.indb 352014/06/02 10:16 36 Checking the program order When stopped, press the MEMORY button to cycle through the program numbers and the programmed track/file numbers in order . Adding tracks/files to the end of the program 1 When stopped, press the MEMORY but- ton repeatedly to show the number which is one higher than the last pro- gram number. When using an audio CD, the track number and MEMORY indicator will blink . When using MP3/WMA files, the folder number, file number and MEMORY indicator will blink . 2 Press the skip/search (.m/,/) button to select a track/file. 3 Press the MEMORY button. The track/file is added to the end of the program . Changing a track/file within the program 1 When programmed playback is stopped, press the MEMORY button repeatedly until the program number of the track/ file you want to change appears on the display. 2 Use the skip/search (.m/,/) button to select the track/file that you want to use as a replacement in the program. Programmed playback (CD/USB) (continued) MC-D800_OM_EF_vB_CS6.indb 362014/06/02 10:16 37 ENGLISH 3 Press the MEMORY button. The selected track/file is added at the selected program number, replacing the track/file that was there . Clearing all the program contents Press and hold the stop (8) button for at least two sec- onds when stopped . The cont ents of the program are cleared . When the contents of the program are cleared, “PROGRAM CLEAR” scrolls across the display . oThe program is also cleared in the following cases . • The unit enters standby mode • The PHONO/A UX, FM/AM or CD/Bluetooth/USB button is pressed, changing the source • The disc tray is opened MC-D800_OM_EF_vB_CS6.indb 372014/06/02 10:16 38 oYou can also change the playback mode by pressing the PLAY MODE button during playback . oAny of the f ollowing operations will end repeat or shuffle playback mode . • The stop (8) button is pressed • The unit enters standby mode • The PHONO/AUX, FM/AM or CD/Bluetooth/USB button is pressed, changing the source • The disc tra y is opened Repeat playback REPEAT (single track/file repeat) During playback, press the PLAY MODE button once to repeat playback of the currently playing track/file . “REPEAT” appears on the display . oIf you turn the main unit's skip (.//) knob or press the remote control's skip/search (.m/,/) buttons and select another track/file, that track/file will be played repeatedly . oWhen stopped , press the PLAY MODE button and then use the main unit's skip (.//) knob or remote control's skip/search (.m/,/) buttons to select a track/file . Press the play/pause (y/9) button to start single repeat playback . oDuring pr ogrammed playback, the track/file being played will be played repeatedly . REPEAT ALL (all track/file repeat) Press the PLAY MODE button twice (or three times for MP3/WMA files) . “REPEAT ALL” appears on the display and repeat play- back of all tracks/files starts . oDuring programmed playback, the programmed tracks/files will be played repeatedly . Repeat and shuffle playback (CD/USB) Z e When the CD/USB function is active, press the PLAY MODE button to cycle through the following playback modes . Audio CD ( CD function) REPEAT (single track repeat) REPEAT ALL (all track repeat) SHUFFLE* OFF (normal playback) MP3/WMA files (CD/USB function) REPEAT (single file repeat) REPEAT FOLDER REPEAT ALL (all file repeat) SHUFFLE* OFF (normal playback) Press the play/pause (y/9) button when the mode you want to select appears to start playback . *If shuffle is selec ted, playback starts automatically . MC-D800_OM_EF_vB_CS6.indb 382014/06/02 10:16 39 ENGLISH REPEAT FOLDER (MP3/WMA files only) Press the PLAY MODE button twice . “REPEAT FOLDER” appears on the display, and the files in the selected folder are played back repeatedly . Shuffle playback All the tracks/files are played back randomly . SHUFFLE Press the PLAY MODE button repeatedly until “SHUFFLE” appears on the display . oDuring shuffle pla yback…
Text truncated - open the document above for the full version.
Users Manual
51 ENGLISH Automatic presets The unit can automatically search for and add presets for the stations that it can receive . 1 Press the FM/AM button to select FM or AM broadcast reception. Each time you press the FM/AM button, the unit will switch between FM and AM broadcast reception . 2 Press and hold the MEMORY button for at least two seconds. “AUTO” appears on the display and the unit auto- matically adds presets for the stations that it can receive . oAfter 20 presets have been added automatically, “PROG FULL” will appear followed by preset 01 and reception of that station will start . Listening to a preset station 1 Press the FM/AM button to choose the band. Z 2 Press a PRESET (j/k) button repeat- edly until you find the preset number of the radio station you want. Z Continued on the next page MC-D800_OM_EF_vB_CS6.indb 512014/06/02 10:16 52 Preset tuning (continued) When using the remote control The preset number appears on the left side of the display . Example when preset 3 is selected Preset number oWhen a preset station is select ed, the MEMORY indicator appears . oAft er selecting a preset, this number will con- tinue to be shown unless you select another station manually . Wakeup timer At the set time, sound will be output from the speakers . oAdjust the clock before setting the timer (page 25) . Setting the timer 1 Put the unit into standby (power off ). The unit must be in standby to set the timer . Press the STANDBY/ON button to put the unit into standby . 2 Press and hold the TIMER button for at least two seconds. Press and hold for at least 2 seconds The timer indicator () blinks and “SET TIMER” scrolls across the display once . “ON TIME” appears and then the time input mode becomes active . Display example c c MC-D800_OM_EF_vB_CS6.indb 522014/06/02 10:16 53 ENGLISH The “hour” value blinks . oIf no action is taken for 20 seconds, timer setting will end automatically . 3 Press the TIME (j/k) buttons to set the TIMER ON hour and press the TIMER button. Display example oAfter setting the hour, the minutes blink . 4 Press the TIME (j/k) buttons to set the TIMER ON minute and press the TIMER button. Display example After making the TIMER ON setting, “OFF TIME” appears and the hour value blinks . c 5 Repeat steps 3 and 4 to set the TIMER OFF time. Display example MC-D800_OM_EF_vB_CS6.indb 532014/06/02 10:16 54 6 Press the TIME (j/k) buttons to select the playback source and press the TIMER button. Display example The sources that can be selected are CD, USB, FM TUNER and AM TUNER . Press the TIME (j/k) button to cycle through the following source settings . CD USB FM TUNER AM TUNER “BLUETOOTH” and “PHONO” cannot be set . 7 Press the TIME (j/k) buttons to set the volume level. You can set the volume between 5 (minimum) and 32 (maximum) . oWhen the wakeup timer turns the unit on, the volume will gradually increase until the set vol- ume is reached . 8 Press the TIMER button. Timer indicator The timer indicator appears . This completes wak eup timer setting . oThe wakeup timer settings will be erased if a power outage occurs or the power cord is unplugged from an outlet . oAt the TIMER ON time, operation starts and the timer indicator blinks . Prepare the playback source before the wakeup timer turns the unit on. If you have selected “CD”, place a disc . If you ha ve set “USB” as the playback source, connect a USB flash drive . oIf a disc or USB flash drive is not loaded, the FM tuner will be used . Wakeup timer (continued) MC-D800_OM_EF_vB_CS6.indb 542014/06/02 10:16 55 ENGLISH Turn the wakeup timer on and off when the unit is in standby mode . Turning the timer off When you do not want to use the wakeup timer, press the TIMER button to turn it off . “TIMER OFF” scrolls across the display and the timer indicator disappears from the display . oYou can turn the timer off whether the unit is on or in standb y . Turning the timer on To use the wakeup timer, press the TIMER button again . “TIMER ON” scrolls across the display followed by the timer settings in the following order: TIMER ON time, TIMER OFF time, playback source and volume . The timer indicator also appears on the display, showing that the unit is waiting for the TIMER ON time . oDuring timer playback, press the TIMER button to disable the timer . In this case, the unit will not enter standby mode (turn off ) automatically when the TIMER OFF time is reached . oThe timer cannot be turned on unless the unit is in standb y mode . The unit can be set to enter standby after a specified amount of time . Setting the sleep timer Press the SLEEP button repeatedly until the desired set- ting appears on the display . The settings for the time until the unit enters standby change as follows (shown in minutes) . 90 75 60 45 30 15 Off When the sleep timer is active, the SLEEP indicator appears at the bottom right of the display . oThe display is dimmed when the sleep timer is active . oWhen the sleep timer is active, press the SLEEP but- ton once to show for a few seconds the amount of time until the unit enters standby . oWhen the sleep timer is operating, you can press the SLEEP button twice to turn the sleep timer off . Sleep timer MC-D800_OM_EF_vB_CS6.indb 552014/06/02 10:16 56 Listening to a connected device You can connect the audio output jack or headphones jack of a portable audio player or other device to this unit and listen to its audio playback through this unit . 1 Use a commercially-available audio cable to connect the headphones jack (or audio output jack) of a portable audio player or other device to the ana- log audio input jacks (AUX IN) on the back of the unit. 2 Press the PHONO/AUX button to select “AUX”. Z 3 Start playback on the playback device. Then, adjust the volume of both this unit and the connected device. oIf the volume is not raised on an audio player when its headphones jack is connected to this unit, no sound will be output from this unit . oIf you raise the volume level of the connected device too high,…
Text truncated - open the document above for the full version.
Users Manual
85 FRANÇAIS Réglage de la luminosité de l'écran Appuyez sur la touche DIMMER pour passer en revue les réglages de luminosité suivants : Luminosité Atténué Très ordinaire atténué oQuand l'unité entre en veille, la luminosité ordinaire revient . Coupure du son en sortie Appuyez sur la touche MUTE pour temporairement couper le son de la sortie . Appuyez à nouveau sur la touche MUTE pour rétablir la sortie avec le niveau de volume antérieur . oQuand la fonction de coupure du son est active, « MUTE » est affiché . oQuand la fonction de coupure du son est active, régler le volume rétablit le son de la sortie . oQuand la fonc tion de coupure du son est active, changer de source rétablit le son de la sortie . MC-D800_OM_EF_vB_CS6.indb 852014/06/02 10:16 86 3 Placez un disque au centre du tiroir avec sa face sérigraphiée vers le haut. oNe placez jamais plusieurs disques sur le tiroir . oSi l e tiroir est refermé alors qu'un disque est en dehors des guides de centrage, le disque peut être coincé à l'intérieur et le tiroir risque de ne plus s'ou- vrir . Veillez à toujours placer les disques dans les guides au centre du tiroir . oNe forcez pas sur le tiroir avec la main quand vous l'ouvrez et le fermez . 4 Appuyez sur la touche Ouvrir/Fermer (-) pour fermer le tiroir. Z Veillez bien à ne pas vous coincer les doigts quand le tiroir se ferme . oL'unité prend quelques secondes pour charger le disque . Aucune touche ne fonctionne tant que « READING » est affiché . Patientez jusqu'à ce que les informations sur le disque s'affichent . Écoute d'un CD 1 Appuyez sur la touche CD/Bluetooth/ USB pour sélectionner « CD ». Z Chaque fois que vous appuyez sur la touche CD/ Bluetooth/USB, la fonction change comme indiqué ci-dessous . CD Bluetooth USB Après la commutation sur CD, « DISC » s'affiche, « READING » clignote pendant quelques secondes, puis le CD passe à l'arrêt . Si aucun disque n'est chargé, le message « NO DISC » s'affiche . 2 Appuyez sur la touche Ouvrir/Fermer (-) pour ouvrir le tiroir. Z Le tiroir de disque s'ouvre . MC-D800_OM_EF_vB_CS6.indb 862014/06/02 10:16 87 FRANÇAIS Exemple d'affichage de CD audio Nombre total de pistes Durée totale de lecture Exemple d'affichage de fichier MP3/WMA Numéro de dossier Numéro de fichier oUn disque non audio peut être « lu » de la même manière qu'un disque audio, mais aucun son ne sortira . oQuand le fichier actuel est un fichier WMA, « WMA » apparaît sur le côté gauche de l'écran . 5 Appuyez sur la touche Lecture/Pause (y/9). Z La lecture commencera à la première piste et y s'affichera . Exemple d'affichage de CD audio Numéro de piste Temps de lecture écoulé Exemple d'affichage de fichier MP3/WMA Numéro de fichier Temps de lecture écoulé oSi vous appuyez sur la touche Lecture/Pause (y/9) sans fermer le tiroir du disque, le tiroir se ferme automatiquement et la lecture démarre . oCett e unité traite les fichiers MP3/WMA qui ne sont pas dans des dossiers comme s'ils appar- tenaient au dossier 001 (racine ou « ROOT ») . La lec ture commence par la première piste du dos- sier « 001 (ROOT ) » . oPour des détails sur l'ordre de lecture des fichiers MP3/WMA, voir page 95 . oAprès lecture de toutes les pistes, la lecture s'ar- rête automatiquement . MC-D800_OM_EF_vB_CS6.indb 872014/06/02 10:16 88 Vous pouvez lire les fichiers audio sauvegardés sur une clé USB en connectant cette dernière à cette unité .* Pour des détails sur l'ordre de lecture des fichiers MP3/ WMA, voir « Fichiers MP3/WMA » en page 68 . * Le por t USB de cette unité ne prend en charge que les mémoires flash USB (aussi appelées « clés USB ») . Il ne prend pas en charge les disques durs USB standards . 1 Appuyez sur la touche CD/Bluetooth/ USB pour sélectionner « USB ». Z Après la commutation sur USB, « USB » s'affiche, « READING » clignote pendant quelques secondes, puis la clé USB passe à l'arrêt . Si aucune clé USB n'est branchée, « NO USB » s'affiche . 2 Soulevez le volet du port USB et insérez une clé USB. ATTENTION Si vous utilisez le couvercle de la platine, fermez-le lentement pour éviter de toucher la clé USB . Si le couvercle de la platine entre en contact avec la clé USB, ne fermez pas le couvercle . Écoute des fichiers d'une clé USB 3 Appuyez sur la touche Lecture/Pause (y/9). Z La lecture commencera au premier fichier et y s'affichera . Exemple d'affichage Numéro de fichier Temps de lecture écoulé MC-D800_OM_EF_vB_CS6.indb 882014/06/02 10:16 89 FRANÇAIS Mise en pause de la lecture Z Appuyez sur la touche Lecture/Pause (y/9) pour mettre la lecture en pause . En pause, appuyez sur la touche Lecture/Pause (y/9) pour reprendre la lecture depuis le point de mise en pause . oEn pause, le temps de lecture clignote . Arrêt de la lecture Z Appuyez sur la touche Stop (8) pour arrêter la lecture . Saut de fichiers/pistes Z Durant la lecture, tournez la molette (.//) pour sauter au fichier/piste précédent ou suivant et com- mencer la lecture . Continuez de tourner jusqu'à ce que vous ayez atteint le numéro de fichier/piste désiré . oA l'arrêt, après la sélection d'un fichier/piste avec la molette de saut (.//), appuyez sur la touche Lecture/Pause (y/9) pour lancer la lecture . oDurant la lecture, tournez légèrement vers . pour revenir au début du fichier/piste actuellement lu . Pour lir e un fichier/piste antérieur, continuez à tour- ner vers . . Recherche d'un passage de fichier/piste Z Durant la lecture, maintenez pressée une touche de recherche (m/,) pour une recherche en arrière/ avant . Lorsque vous arrêtez d'appuyer, la lecture ordi- naire reprend . Écoute d'un CD/des fichiers d'une clé USB MC-D800_OM_EF_vB_CS6.indb 892014/06/02 10:16 90 Lecture programmée (CD/USB) 32 pistes de CD ou fichiers MP3/WMA peuvent être pro- grammés dans l'ordre désiré . Programmez les pistes/fichiers quand la lecture est arrêtée . Programmation de fichiers/pistes 1 Appuyez sur la touche CD/Bluetooth/ USB pour sélectionner « CD » ou « USB ». 2 Appuyez sur la touche MEMORY quand la lecture est arrêtée. Exemple d'affichage…
Text truncated - open the document above for the full version.
Users Manual
101 FRANÇAIS Appairage de proximité Si l'autre appareil Bluetooth est compatible NFC (Near Field Communication ou communication en champ proche), vous pouvez l'appairer avec cette unité au moyen des procédures suivantes . 1 Appuyez sur la touche CD/Bluetooth/ USB pour sélectionner « Bluetooth ». oL'appairage de proximité ne peut pas être utilisé si une autre fonction est sélectionnée . 2 Maintenez l'antenne de l'appareil com- patible NFC près du lecteur d'appairage de proximité. Faites-le dans les deux secondes qui suivent la sélection de « Bluetooth » . Le lecteur d'appairage de proximité est sur le des- sus de l'unité près de l'endroit où repose la pointe de lecture . À la sor tie d'usine, il est recouvert d'un autocollant . Lecteur d'appairage de proximité Appareil compatible NFC (smartphone, etc .) oTenez l'appareil compatible NFC à un maximum de 2 cm du lecteur d'appairage de proximité . oVeillez à ne pas heurter la pointe de lecture en tenant l'appareil compatible NFC . Écoute de disques vinyle Avant d'utiliser la platine, faites tourner la vis de ver- rouillage de transport dans le sens horaire au moyen d'une pièce de monnaie ou d'un autre outil jusqu'à ce qu'elle s'arrête . R etirez le cache de la pointe (en plas- tique blanc) (page 79) . 1 Appuyez sur la touche PHONO/AUX pour sélectionner « PHONO ». Z Chaque fois que l'on appuie sur la touche PHONO/ AUX, cela sélectionne alternativement PHONO (disque vinyle) et AUX (appareil externe) . 2 Ouvrez lentement le couvercle de la platine. V Veillez à ne pas vous pincer les doigts, par exemple, lors de l'ouverture et de la ferme- ture du couvercle de la platine. Suite à la prochaine page MC-D800_OM_EF_vB_CS6.indb 1012014/06/02 10:17 102 6 Soulevez le levier (lève-bras) pour lever le bras de lecture. Bras de lecture Lève-bras oVous pouv ez aussi laisser le lève-bras baissé et amener le bras de lecture au-dessus du disque puis l'y poser lentement pour lancer la lecture . 7 Amenez le bras de lecture sur le bord du disque ou du morceau dont vous souhaitez lancer la lecture. Lorsque vous déplacez le bras de lecture vers le disque, la platine tourne-disque commence à tourner . Écoute de disques vinyle (suite) 3 Placez un disque sur la platine. Pour lire un 45 tr/min à grand trou central, utilisez l'adaptateur fourni . 4 Réglez la vitesse de rotation (tr/min) en fonction du disque. La vitesse de rotation peut être réglée sur l'une des trois valeurs suivantes : 33 1/3, 45 ou 78 . 5 Repoussez le crochet de blocage vers la droite pour libérer le bras de lecture. Crochet de blocage MC-D800_OM_EF_vB_CS6.indb 1022014/06/02 10:17 103 FRANÇAIS 8 Baissez lentement le levier (lève-bras) pour poser doucement le bras de lecture. Bras de lecture Lève-bras oDurant la lecture du disque, vous pouvez fermer le couvercle de la platine pour éviter la poussière . V Ne placez rien sur le couvercle de la platine. Les objets posés sur le couvercle peuvent provoquer du bruit dû aux vibrations ou tom- ber, en particulier lors de la lecture. Durant la lecture du disque, une réinjection du signal (« larsen ») peut se produire si le volume est trop fort . Si cela se produit, tournez le bouton VOLUME vers la gauche pour baisser le volume . Lorsque la lecture est terminée Lorsque la fin du disque est atteinte, le bras de lecture retourne automatiquement sur son support et la pla- tine cesse de tourner (fonction de retour automatique) . oPour arrêter manuellement la lecture, soulevez légè- rement le bras de lecture à l'aide du levier lève-bras ou d'un doigt et ramenez le bras de lecture sur son support . Bras de lecture Lève-bras La fonction de retour automatique peut ne pas fonctionner en fonction du disque . Dans ce cas, ramenez manuellement le bras de lecture à sa position d'origine . MC-D800_OM_EF_vB_CS6.indb 1032014/06/02 10:17 104 Sélection automatique de station Appuyez à plusieurs reprises sur une touche j/k jusqu'à ce que la fréquence commence à changer . Quand la fréquence a commencé à changer, arrêtez d'appuyer sur la touche de sélection automatique de la station . Avec l'unité principale Z Avec la télécommande o« SEARCH » (recherche) s'affiche jusqu'à ce que la sta- tion soit trouvée . Exemple d'affichage oLorsqu'une station de radio est reçue, la sélection automatique de station prend fin . oPour annuler la sélection automatique de station, appuyez à nouveau sur une touche j/k . oSi la réception est mauvaise ou si l'ant enne est débranchée, « PLEASE CHECK ANTENNA » (veuillez vérifier l'antenne) s'affiche . Vérifiez la position de l'antenne et sa connexion, puis essayez de nouveau l'opération . Écoute de la radio Appuyez sur la touche FM/AM pour sélectionner la bande FM ou AM . Avec l'unité principale Z Avec la télécommande Chaque fois que vous appuyez sur la touche FM/AM, la réception de l'unité alterne entre FM et AM . Exemple de réception de radio FM c Exemple de réception de radio AM c MC-D800_OM_EF_vB_CS6.indb 1042014/06/02 10:17 105 FRANÇAIS Sélection manuelle de station Avec l'unité principale Z Tournez la molette de défilement (MULTI JOG) pour changer la fréquence de réception . oTournez-la vers la droite pour augmenter la fré- quence de réception et vers la gauche pour la baisser . Avec la télécommande Appuyez brièvement sur une touche TUNING/TIME (j/k) pour changer la fréquence par paliers fixes . oMaint enez une touche TUNING/TIME (j/k) jusqu'à ce que vous trouviez la station que vous voulez . Touche FM MODE Quand un programme FM stéréo est capté, vous pou- vez choisir entre stéréo et mono en appuyant sur la touche FM MODE . Sélection du mode stéréo Quand une émission FM stéréo est reçue en stéréo, l'in- dicateur STEREO s'affiche . oSi la réception est mauvaise, l'indicateur STEREO ne s'allume pas . Exemple d'affichage c Indicateur stéréo Sélection du mode mono Lorsque la réception d'une émission FM stéréo est médiocre, sélectionnez ce mode . R ecevoir des émissions en mono permet d'améliorer le son . Exemple d'affichage c MC-D800_OM_EF_vB_CS6.indb 10…
Text truncated - open the document above for the full version.
Users Manual
ENGLISH FRANÇAIS TURNTABLE AUDIO SYSTEM OWNER'S MANUAL MODE D’EMPLOI MC-D800 Z 77-20MD80001000 Z MC-D800_OM_EF_vB_CS6.indb 12014/06/02 10:16 2 IMPORTANT SAFETY INSTRUCTIONS CAUTION: TO REDUCE THE RISK OF ELECTRIC SHOCK, DO NOT REMOVE COVER (OR BACK). NO USER-SERVICEABLE PARTS INSIDE. REFER SERVICING TO QUALIFIED SERVICE PERSONNEL. M The lightning flash with arrowhead in an equilateral triangle is intended to alert the user to the presence of uninsulated “dangerous voltage” within the product’s enclosure that could be of sufficient magnitude to con- stitute a risk of electric shock to persons. V The exclamation point in an equilateral triangle is intended to alert the user to the presence of important operating and maintenance (servicing) instructions in the literature accompanying the appliance. WARNING: TO PREVENT FIRE OR SHOCK HAZARD, DO NOT EXPOSE THIS APPLIANCE TO RAIN OR MOISTURE. CAUTION oDO NOT REMOVE THE EXTERNAL CASES OR CABINETS TO EXPOSE THE ELECTRONICS. NO USER SERVICEABLE PARTS ARE INSIDE. oIF YOU ARE EXPERIENCING PROBLEMS WITH THIS PRODUCT, CONTACT THE STORE WHERE YOU PURCHASED THE UNIT FOR A SERVICE REFERRAL. DO NOT USE THE PRODUCT UNTIL IT HAS BEEN REPAIRED. oUSE OF CONTROLS OR ADJUSTMENTS OR PERFORMANCE OF PROCEDURES OTHER THAN THOSE SPECIFIED HEREIN MAY RESULT IN HAZARDOUS RADIATION EXPOSURE. IN USA/CANADA, USE ONLY ON 120 V SUPPLY. MC-D800_OM_EF_vB_CS6.indb 22014/06/02 10:16 3 ENGLISH This product contains a semiconductor laser system inside the cabi- net and is classified as a “CLASS 1 LASER PRODUCT”. To prevent being exposed to the laser beam, do not try to open the enclosure. Laser: Type: EP-C101 M anufacturer: GUANGDONG EVER BRIGHT GR OUP CO.,LTD. Laser output: Less than 0.5 mW Wa velength: 790±25 nm Model for USA This product has been designed and manufactured according to FDA regulations “title 21, CFR, chapter 1, subchapter J, based on the Radiation Control for Health and Safety Act of 1968”, and is classi- fied as class ! laser product. There is not hazardous invisible laser radiation during operation because invisible laser radiation emit- ted inside of this product is completely confined in the protective housings. The label required in this regulation is as follows: Q Precautions concerning batteries Misuse of batteries could cause them to rupture or leak leading to fire, injury or the staining of nearby things. Please read and observe the following precautions carefully. oBe sure to insert the batteries with correct positive (¥) and negative (^) orientations. oUse batteries of the same type. Never use different types of batteries together. oIf the remote control is not used for a long time (more than a month), remove the batteries to prevent them from leaking. oIf the batteries leak, wipe away the leakage inside the battery compartment and replace the batteries with new ones. oDo not use batteries of types other than those specified. Do not mix new batteries with old ones or use different types of batteries together. oDo not heat or disassemble batteries. Never throw batteries into fire or water. oDo not carry or store batteries with other metallic objects. The batteries could short circuit, leak or explode. oNever r echarge a battery unless it is confirmed to be a rechargeable type. MC-D800_OM_EF_vB_CS6.indb 32014/06/02 10:16 4 IMPORTANT SAFETY INSTRUCTIONS (continued) 1) Read these instructions. 2) Keep these instructions. 3) Heed all warnings. 4) Follow all instructions. 5) Do not use this apparatus near water . 6) Clean only with dry cloth. 7) Do not block any ventilation openings. Install in accordance with the manufacturer's instructions. 8) Do not install near any heat sources such as radiators, heat registers, stoves, or other apparatus (including amplifiers) that produce heat. 9) Do not defeat the safety purpose of the polarized or grounding- type plug. A polarized plug has two blades with one wider than the other. A grounding type plug has two blades and a third grounding prong. The wide blade or the third prong are pro- vided for your safety. If the provided plug does not fit into your outlet, consult an electrician for replacement of the obsolete outlet. 10) Protect the power cord from being walked on or pinched par- ticularly at plugs, convenience receptacles, and the point where they exit from the apparatus. 11) Only use attachments/accessories specified by the manufacturer. 12) Use only with the cart, stand, tripod, bracket, or table specified by the manu- facturer, or sold with the apparatus. When a cart is used, use caution when moving the cart/apparatus combination to avoid injury from tip-over. 13) Unplug this apparatus during lightning st orms or when unused for long periods of time. 14) Refer all ser vicing to qualified service personnel. Servicing is required when the apparatus has been damaged in any way, such as power-supply cord or plug is damaged, liquid has been spilled or objects have fallen into the apparatus, the apparatus has been exposed to rain or moisture, does not operate normally, or has been dropped. oThe apparatus draws nominal non-operating power from the AC outlet with its POWER or STANDBY/ON switch not in the ON position. oThe mains plug is used as the disconnect de vice, the disconnect device shall remain readily operable. oCaution should be taken when using ear phones or headphones with the product because excessive sound pressure (volume) from earphones or headphones can cause hearing loss. CAUTION oDo not expose this apparatus to drips or splashes. oDo not place any objec ts filled with liquids, such as vases, on the apparatus. oDo not install this apparatus in a confined space such as a book case or similar unit. oThe apparatus should be located close enough to the AC outlet so that you can easily reach the power cord plug at any time. oIf the product uses batteries (including a battery pack or installed batteries), they should not be exposed to sunshine, fire or excessive heat. oCAUTION for products that use re…
Text truncated - open the document above for the full version.
Contact Information
Applicant
SH Lee(Safety Engineer)
Test Firm
BTL Inc.Daisy Dai
Technical Specifications
| # | Rule Parts | Frequency Range | Power Output |
|---|---|---|---|
| 1 | 15C | 2.40 GHz - 2.48 GHz | 1.00 mW |
Other Applications from Arts Electronics Co., Ltd
TZIUX598
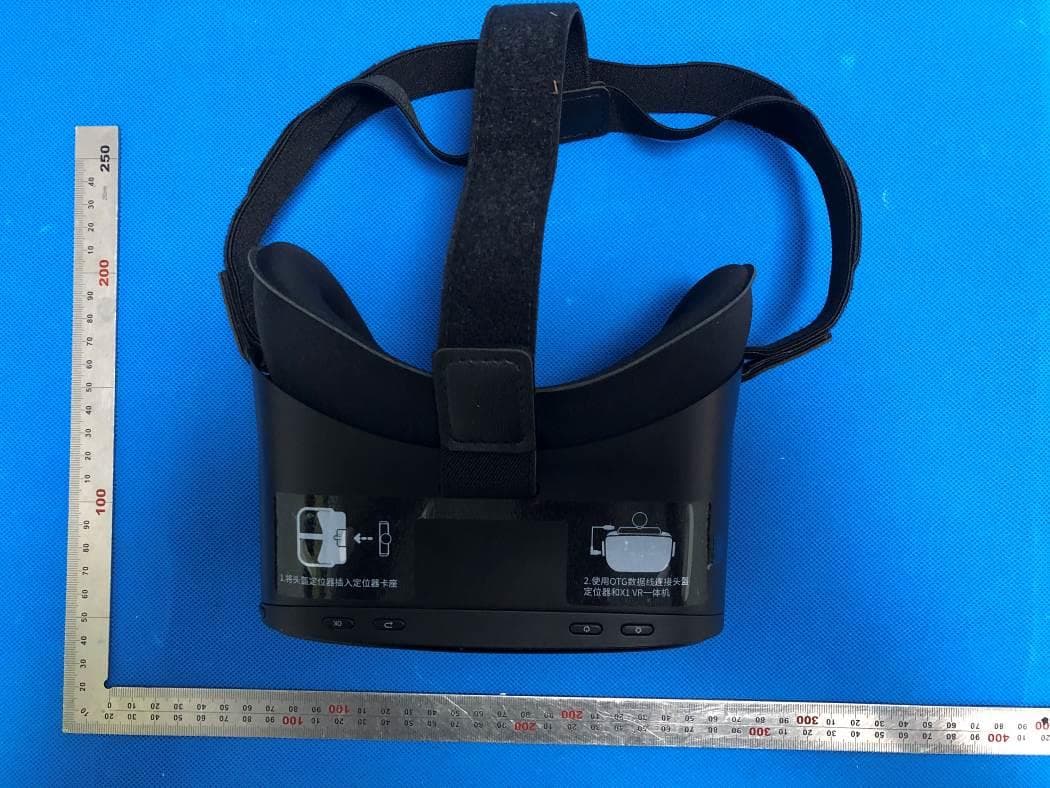
Sep 15, 2020Bluetooth & WIFI & 5G WIFI VR All-in-One HMD
Equipment Class
DTS - Digital Transmission System
TZIXRM10
Mar 26, 2020Job Site Charger Radio
Equipment Class
DSS - Part 15 Spread Spectrum Transmitter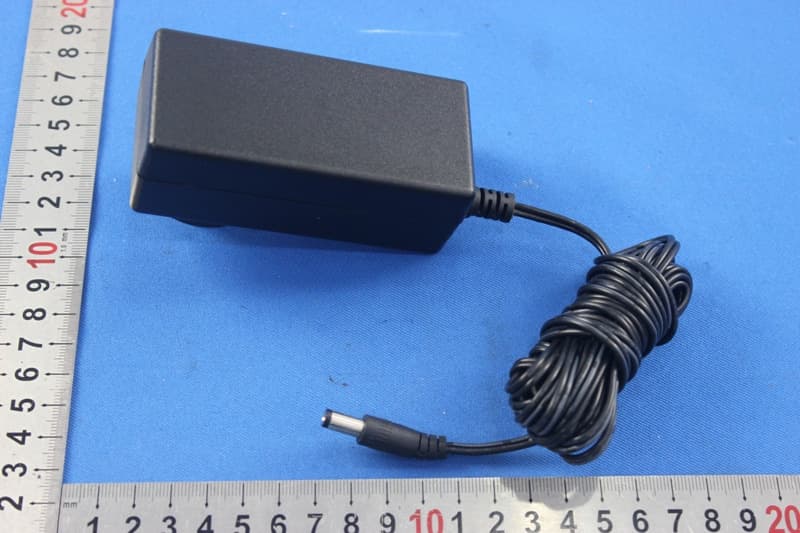
TZISDL9030DB
Nov 16, 2015PROFESSIONAL HD KARAOKE SYSTEM WITH BLUETOOTH
Equipment Class
DSS - Part 15 Spread Spectrum TransmitterTZISDL366
Sep 14, 2015HD KARAOKE SYSTEM WITH BLUETOOTH
Equipment Class
DSS - Part 15 Spread Spectrum Transmitter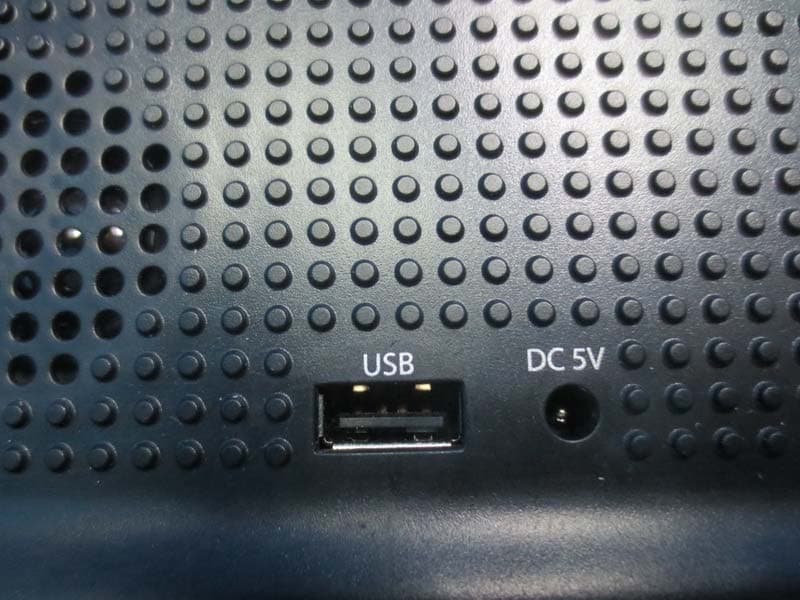
TZI-CN897153
Sep 08, 2015Bluetooth Alarm Clock
Equipment Class
DSS - Part 15 Spread Spectrum Transmitter