U3N-XP4BLUETOOTH HEADSET
Sound ID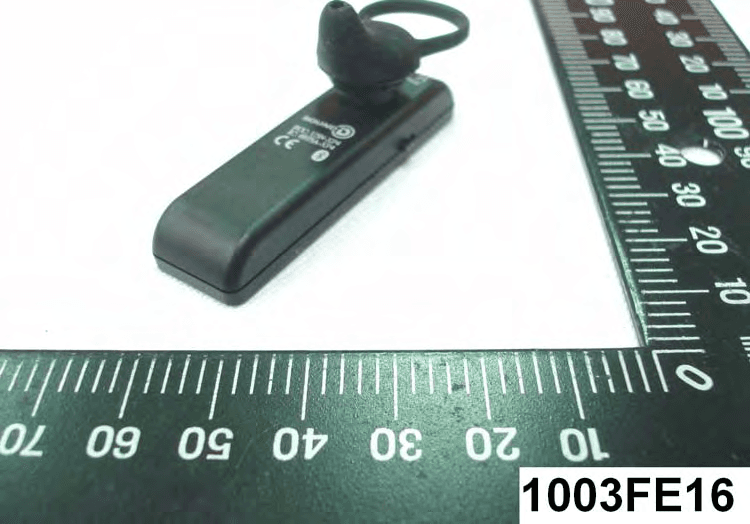
Click to zoom
Application Details
- Equipment Class
- DSS - Part 15 Spread Spectrum Transmitter
- Date of Grant
- May 10, 2010
- Application Purpose
- Original Equipment
- Date of Application
- May 04, 2010
- Equipment Note
- BLUETOOTH HEADSET
- Frequency Range
- 2402.00000000 - 2480.00000000
- Company
- Sound ID
- Country
- United States
Documents & Files
Document Text
Text extracted from the exhibit documents filed with the FCC. Open a document above to read the original.
Users Manual
Sound ID 5 Series Bluetooth™ Headset User Manual (To be published on Sound ID website) Please take a few moments to read this user manual. It contains instructions for operating your Sound ID 5 Series, along with other important information. For customer support please call 1‐866‐703‐7480. To Achieve the Best Performance with Your Sound ID 5 Series Headset: • Place the phone in a belt holder or maintain a line‐of‐sight. Holding the phone in your hand reduces the wireless signals. • Having the mobile phone on the opposite side as your headset or behind you will reduce wireless signals. Keep the mobile phone and headset on the same side, preferably line‐of‐sight. If you experience intermittent static, reposition the phone to find the best reception. • As you increase the separation between your phone and your headset the wireless signal strength will be reduced and will produce static and/or disconnect. Reduce the distance. • If you put your phone in a purse or briefcase, keep the purse or briefcase on the same side as the headset. Welcome. Thank you for purchasing the Sound ID 5 Series Headset. Important Notices The volume control should be set at a reasonable sound level. Prolonged exposure to excessive volume over time can lead to hearing impairment. If you suspect hearing problems, consult with your physician or an audiologist. The Sound ID 5 Series enables hands‐free operation of mobile phones. Please obey mobile phone laws while driving and pay full attention to the operation of the vehicle. Register Your Sound ID 5 Series Online Visit www.soundid.com to register your product online so we can provide you with the best possible service and support. Questions & Support Please contact Sound ID Customer Support at [email protected] For a Spanish version of this manual please visit www.soundid.com. Sound ID 5 Series User Manual (This document is supplemental to the Quick Start Guide) Installing the RealComfort™ Ear Loop Three eartips are provided, each with a different size RealComfort™ Ear Loop (large, medium, and small). The eartip with the medium Ear Loop comes pre‐installed on the headset, so check its fit first. If it’s not comfortable, try the other two to find the best fit. If you need to change the eartip, gently pull it away from the headset, then snap on the desired eartip and line the pointer with the L or R ear preference. The Sound ID 5 Series design allows an Over‐the‐Ear wearing style. Simply snap the Over‐ the‐Ear Hook to the neck of the headset corresponding to “Left Ear” or “Right Ear” configuration. For users who do not wish to use a RealComfort™ Ear Loop an ear cushion has been provided. In this case replace your eartip with the ear cushion. Sound ID’s Custom Ear Mold Option Soft Custom Ear molds can be individually made for your ear to provide enhanced comfort, security and sound quality. Doctors of Audiology or Audiologists are hearing professionals that can advise you about your hearing and take an impression of your ear. The process takes about 15 minutes. The impression is sent to a laboratory, a custom ear mold is fabricated, and sent directly to you. Sound ID has made arrangements with a number of Audiologists who can procure and adjust a custom eartip for you. For an Audiologist nearest you please visit www.soundid.com . 3X Noise Navigation Your Sound ID 5 Series headset employs Noise Cancelling technologies and technique with three microphones to optimize speech intelligibility at both ends of the conversation. Dual microphones help isolate speech. Advanced DSP algorithms reduce wind and general background noise to enhance what is heard by the other party. NoiseNavigation™ is always active. Automatic Volume Control The Sound ID 5 Series has built‐in Automatic Volume Control. Your headset will automatically adjust the volume based on the surrounding noise level. Advanced Operations To REJECT a phone call: Press and hold the Main Button for 2 seconds while the phone is ringing. To VOICE DIAL: Press and hold the Main Button for 2 seconds. Note : You must have a phone that supports this feature. To REDIAL the last number called: Tap the Main Button twice. To MUTE/UNMUTE in a call: Select “Mute/UnMute” on your handset menu. To RECONNECT with your mobile phone: The Sound ID 5 Series will automatically attempt re‐connection with your mobile phone after first being disconnected. If the connection is not made, you will need to manually reconnect by turning your headset OFF, and then back ON. To RESET your headset: If you experience problems during pairing, you can perform a soft reset on your headset. Place the headset into pairing mode and wait for it to flash red and green. Then tap the Main Button twice, 2 times. The status light will turn ORANGE. Turn the headset OFF and then ON and it will go into pairing mode. Charge It It is important to charge your Sound ID 5 Series battery for a minimum of 4 hours before you use the headset for the first time. Subsequent charges take up to 2.5 hours for a full charge. Disregard the green status light during the initial charge. When the headset is charging, the status light is RED. When the headset is fully charged, the status light is GREEN. When the battery on your Sound ID 5 Series is low and in need of recharging, you will begin hearing a series of beeps that will repeat every 20 minutes. The status light will also begin blinking RED. Micro USB Charging Your Sound ID 5 Series Headset incorporates a Micro USB socket for charging. The supplied cable features a Micro USB connector on one side and a Standard USB connector on the other side. To charge your Sound ID 5 Series, plug the side with the USB connector into the wall adapter and plug the side with the Micro USB connector into your headset. The USB Charging Cable can also be used to charge your headset from any standard powered USB port on devices like a Personal Computer or the iPhone charger. FIRMWARE UPDATE Firmware updates require a USB connection and the special chargin…
Text truncated - open the document above for the full version.
Users Manual
5 SERIES QUICK START GUIDE INITIAL PAIRING If your headset has not been paired to a phone, just turn it “ON”. PAIRAGE INITIAL Si votre oreillette n’a pas été reliée (pairage) à un télé- phone, mettez-la simplement en marche (« ON »). EMPAREJAMIENTO INICIAL Si su auricular no ha sido emparejado con un teléfono, simplemente “ENCIÉNDALO”. Select “LOOK FOR DEVICES” in the Bluetooth menu on your mobile phone. (Some phones, such as the iPhone, will initiate this search automatically.) Sélectionnez « RECHERCHE DE PÉRIPHÉRIQUES » dans le menu Bluetooth de votre téléphone mobile. (Certains téléphones, tels que le iPhone, démar- reront automatiquement cette recherche.) Seleccione “BUSCAR DISPOSITIVOS” en el menú Bluetooth o en su teléfono móvil. (Algunos teléfonos, como el iPhone, inician esta búsqueda automáticamente). Select, “SOUND ID 5 SERIES” when it appears on your screen. If asked to enter a PIN, enter “0000”. Sélectionnez « SOUND ID 5 SERIES » lorsque ceci apparaîtra sur votre écran. Si un NIP vous est demandé, entrez « 0000 ». Seleccione “SOUND ID 5 SERIES” cuando aparezca en la pantalla. Si le pide que ingrese un código personal, ingrese “0000”. After a successful pairing, LED will stop flashing and the device will remain “ON”. Une fois que la concordance a été établie avec succès, le voyant à DEL cesse de clignoter et le dispositif demeure en « MARCHE ». Luego de un emparejamiento exitoso, la luz LED dejará de destellar y el dispositivo permanecerá “ENCENDIDO”. Hold the Sound ID 5 Series headset verti- cally and insert the eartip into your ear. Rotate headset until it points towards your mouth and fits snugly in your ear. Tenez l’oreillette Sound ID 5 Series verticalement et insérez l’écouteur dans l’oreille. Déplacez l’oreillette jusqu’à ce qu’elle s’ajuste parfaitement à votre oreille et que le micro soit en face de votre bouche. Sujete el auricular Sound ID 5 verticalmente e inserte la toma a tierra en su oreja. Gire el auricular hasta que apunte hacia su boca y se ajuste bien a su oreja. If you need to change the ear loop for a better fit, gently pull it away from the headset, then snap on the desired eartip and line the pointer with the L or R ear preference. Si vous avez besoin de modifier le contour d’oreille pour une meilleure adaptation, retirez-le délicate- ment de l’oreillette, puis exercez une pression sur l’écouteur désiré et ajustez le pointeur avec le « L » ou le « R » de l’oreille choisie. Si necesita cambiar el gancho de la oreja para que se ajuste mejor, tire de él suavemente hacia afuera del auricular, luego coloque la toma a tierra a presión y ajuste la punta hacia la “D” o “I” para la oreja según su preferencia. PAIRINGPAIRINGPAIRINGWEARING THE HEADSETCHANGING EARLOOP For customer support please call 1-866-703-7480 or visit www.soundid.com 123 0000 PAIRING Press and hold Main Button for 3 seconds as you turn headset “ON”. The LED should begin flashing RED and GREEN. Pressez et maintenez enfoncé le bouton principal durant 3 secondes lors de la mise sur « ON » de votre oreillette. Le DEL devrait commencer à clignoter en ROUGE et vert. Presione y mantenga presionado el botón principal durante 3 segundos mientras “ENCIENDE” su auricular. La luz LED debería comenzar a destellar de color ROJO y VERDE. MANUAL PAIRING 3 USB PORT LED STATUS LIGHT MAIN BUTTON ON/OFF SWITCH TOUCH PAD OFF LED flashes red. DEL clignote en rouge. APAGADO: la luz LED destella de color rojo. ON LED flashes green. DEL clignote en vert. ENCENDIDO: la luz LED destella de color verde. NOTE: For best results, touch in the center as the sensors are concentrated in the middle of the pad. Volume can also be changed using the volume control on your phone. POWER SWITCHMAIN BUTTON TOUCH PAD When the headset is charging, the status light is RED. When the headset is fully charged, the status light is GREEN. Lorsque l’oreillette est en train de se charger, le voyant de fonctionnement est ROUGE. Lorsque l’oreillette est entière- ment chargée, le voyant de fonctionnement est VERT. Cuando el auricular se está cargando, la luz del estado es ROJA. Cuando el auricular está completamente cargado, la luz del estado es VERDE. CHARGING 1X (tap once) Answer / End call; Activate voice dialing. 1X (pressé une fois) - Réponse / Fin de l’appel; Activation de la numérotation vocale. 1X (golpear levemente una vez) - Contestar / finalizar la llamada; activar marcación por voz. 2X (tap twice) Redial last number called. 2X (pressé deux fois) - Recomposition du dernier numéro composé. 2X (golpear levemente dos veces). - Volver a marcar el último número discado. + VOLUME Slide finger from mouth towards ear. + VOLUME - Faites glisser le doigt de la bouche vers l’oreille. + VOLUMEN - Deslice el dedo de la boca hacia la oreja. – VOLUME Slide finger from ear towards mouth - VOLUME - Faites glisser le doigt de l’oreille vers la bouche – VOLUMEN - Deslice el dedo de la oreja hacia la boca. Sound ID, EarPrint and the ID symbol are among the registered and unregistered trademarks of Sound ID. The Bluetooth trademarks are used by Sound ID under license. U.S. Patents: 7,181,297; 6,944,474, D540,312. Other patents pending. © 2010 Sound ID 95007501 Consult www.soundid.com for support for the following: Consultez www.soundid.com pour obtenir du soutien en ce qui concerne : Consulte www.soundid.com para obtener ayuda con lo siguiente: Custom Ear Mold option les options de l’embout auriculaire Opción de molde a medida para la oreja. Device Firmware Upgrade feature les fonctionnalités du dispositif de mise à niveau du microprogramme Opción de mejora del microprograma del dispositivo. Connecting a Second Phone la connexion à un second téléphone Conectar un segundo teléfono. www.soundid.com Personalize with EarPrint Your mobile phone will prompt you on your handset, if the Sound iD EarPrint app is available.
External Photos
1 of 7 External Photos Model Name: Bluetooth Headset FCC ID: U3N-XP4 IC ID: 6975A-XP4 2 of 7 EUT Photo 1 ) EUT Photo 2 ) 3 of 7 EUT Photo 3 ) EUT Photo 4 ) 4 of 7 EUT Photo 5 ) EUT Photo 6 ) 5 of 7 EUT Photo 7 ) EUT Photo 8 ) 6 of 7 EUT Photo 9 ) EUT Photo 10 ) 7 of 7 EUT Photo 11 )
ID Label/Location Info
FCC: U3N-XP4 IC: 6975A-XP4
Internal Photos
1 of 5 Internal Photos Model Name: Bluetooth Headset FCC ID: U3N-XP4 IC ID: 6975A-XP4 2 of 5 EUT Photo 1 ) EUT Photo 2 ) 3 of 5 EUT Photo 3 ) EUT Photo 4 ) 4 of 5 EUT Photo 5 ) EUT Photo 6 ) 5 of 5 EUT Photo 7 )
Test Report
FCC 47 CFR PART 15 SUBPART C Product Type : Bluetooth Headset Applicant : Sound ID Address 2637 Marine Way, Suite 200, Mountain View, CA 94043, USA Trade Name : Sound ID Model Number : Sound ID 510 Test Specification : FCC 47 CFR PART 15 SUBPART C: Oct., 2009 Canada RSS-210 ISSUE 7: Jun., 2007 Canada RSS-Gen ISSUE 2: Jun., 2007 ANSI C63.4-2003 Issue Date : Apr. 28, 2010 Issue by A Test Lab Techno Corp. No. 140-1, Changan Street, Bade City, Taoyuan Country 334, Taiwan R.O.C. Te l:+886-3-2710188 / Fax:+886-3-2710190 T aiwan Accreditation Foundation accreditation number: 1330 Note: This report shall not be reproduced except in full, without the written approval of A Test Lab Techno Corp. This document may be altered or revised by A Test Lab Techno Corp. personnel only, and shall be noted in the revision section of the document. The client should not use it to claim product endorsement by TAF, or any government agencies. The test results in the report only apply to the tested sample. A Test Lab Techno Corp. Report No: 1003FR25-01 Page 1/71 Revision History Rev. Issue Date Revisions Revised By 00 Apr. 01, 2010 Initial Issue 01 Apr. 28, 2010 Revised power table and antenna gain. Joyce Liao A Test Lab Techno Corp. Report No: 1003FR25-01 Page 2/71 Verification Issued Date: 2010/04/28 Product Type : Bluetooth Headset Applicant : Sound ID Address : 2637 Marine Way, Suite 200, Mountain View, CA 94043, USA Trade Name : Sound ID Model Number : Sound ID 510 FCC ID : U3N-XP4 IC ID : 6975A-XP4 EUT Rated Voltage : DC 3.7V Test Voltage : 120 Vac / 60 Hz Applicable Standard : FCC 47 CFR PART 15 SUBPART C: Oct., 2009 Canada RSS-210 ISSUE 7: Jun., 2007 Canada RSS-Gen ISSUE 2: Jun., 2007 ANSI C63.4-2003 Test Result : Complied Performed Lab. : A Test Lab Techno Corp. No. 140-1, Changan Street, Bade City, Taoyuan Country 334, Taiwan R.O.C. Te l:+886-3-2710188 / Fax:+886-3-2710190 T aiwan Accreditation Foundation accreditation number: 1330 http://www.atl-lab.com.tw/e-index.htm The above equipment has been tested by A Test Lab Techno Corp., and found compliance with the requirements set forth in the Electromagnetic Compatibility Directive 2004/108/EC and technical standards mentioned above. The results of testing in this report apply only to the product/system, which was tested. Other similar equipment will not necessarily produce the same results due to production tolerance and measurement uncertainties. Approved By : Reviewed By : (Manager) (Miller Lee ) (Testing Engineer)(Gary Wu) A Test Lab Techno Corp. Report No: 1003FR25-01 Page 3/71 TABLE OF CONTENTS 1 General Information.............................................................................................................................. 6 2 EUT Description .................................................................................................................................... 7 3 Test Methodology ................................................................................................................................. 8 3.1. Mode of Operation ........................................................................................................................ 8 3.2. EUT Exercise Software................................................................................................................. 9 3.3. Configuration of Test System Details ............................................................................................ 9 3.4. Test Site Environment ................................................................................................................... 9 4 Conducted Emission Measurement..................................................................................................10 4.1. Limit............................................................................................................................................. 10 4.2. Test Instruments .......................................................................................................................... 10 4.3. Test Setup ................................................................................................................................... 10 4.4. Test Procedure ............................................................................................................................ 11 4.5. Test Result .................................................................................................................................. 12 5 Radiated Interference Measurement................................................................................................. 14 5.1. Limit............................................................................................................................................. 14 5.2. Test Instruments .......................................................................................................................... 14 5.3. Setup ........................................................................................................................................... 15 5.4. Test Procedure ............................................................................................................................ 15 5.5. Test Result .................................................................................................................................. 17 6 Maximum Conducted Output Power Measurement ........................................................................29 6.1. Limit............................................................................................................................................. 29 6.2. Test Setup ................................................................................................................................... 29 6.3. Test Instruments .......................................................................................................................... 29 6.4. Test Procedure ..........................…
Text truncated - open the document above for the full version.
Test Setup Photos
Part 15C Test Setup Photographs Conducted Emissions Test Configuration: Front View Rear View A Test Lab Techno Corp. Report No: 1003FR25-01 Page 1/3 Radiated Emissions Test Configuration: Below 1GHz _ Front View Below 1GHz _ Rear View A Test Lab Techno Corp. Report No: 1003FR25-01 Page 2/3 Above 1GHz _ Front View Above 1GHz _ Rear View A Test Lab Techno Corp. Report No: 1003FR25-01 Page 3/3
Contact Information
Applicant
Ahmad Shamsoddini(Director of System Engineering)
Test Firm
A Test Lab Techno CorpCountry Huang
Technical Specifications
| # | Rule Parts | Frequency Range | Power Output |
|---|---|---|---|
| 1 | 15C | 2.40 GHz - 2.48 GHz | 2.00 mW |
Other Applications from Sound ID
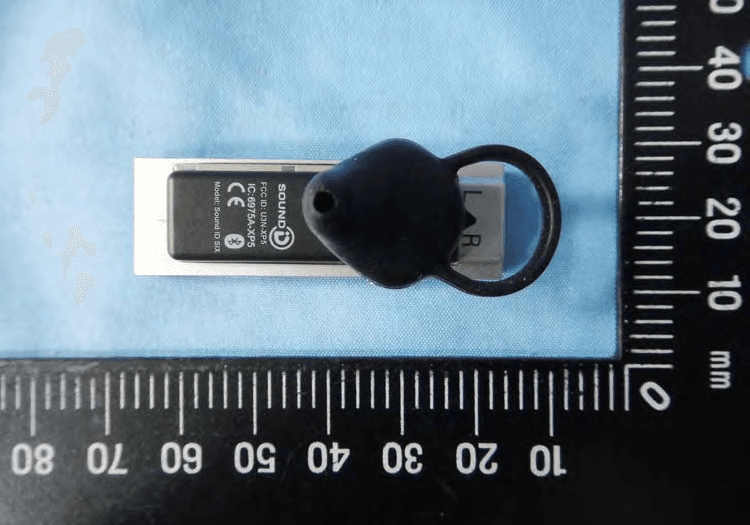
U3N-XP5
Jun 07, 2011BLUETOOTH HEADSET
Equipment Class
DSS - Part 15 Spread Spectrum Transmitter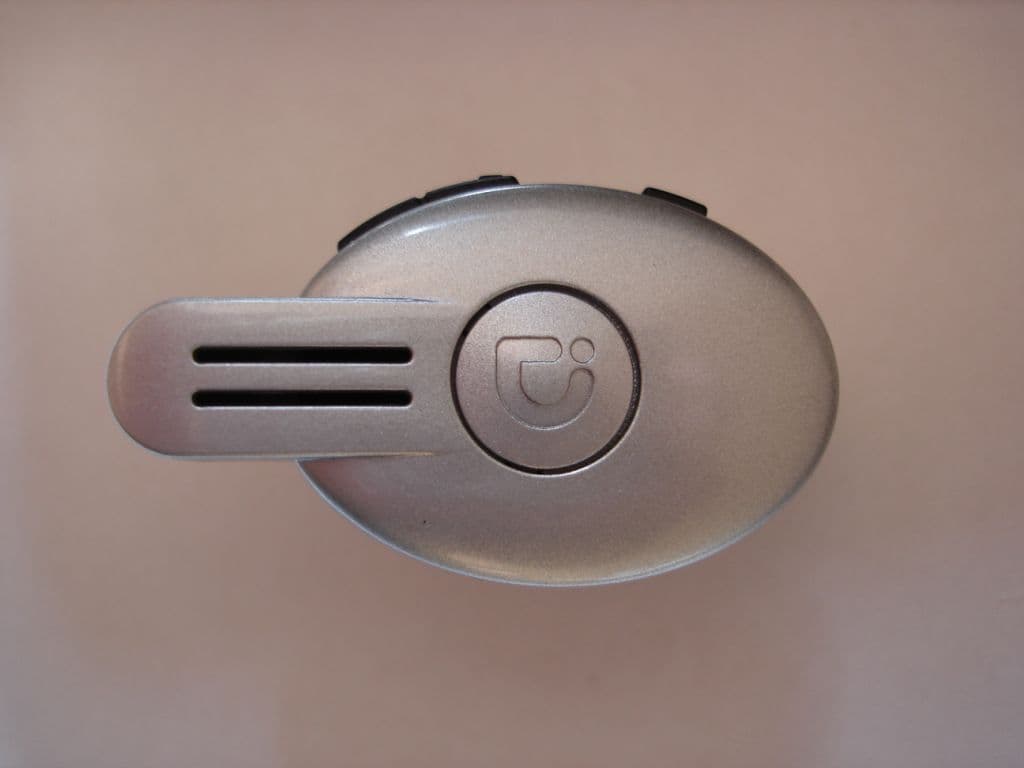
U3NSM100
Mar 15, 2007BT Headset
Equipment Class
DSS - Part 15 Spread Spectrum Transmitter