VLJ-MBP867BUDigital Video Baby Monitor (Baby Unit)
Binatone Electronics International Ltd.
Click to zoom
Application Details
- Equipment Class
- DSS - Part 15 Spread Spectrum Transmitter
- Date of Grant
- Jan 11, 2015
- Application Purpose
- Original Equipment
- Date of Application
- Jan 11, 2015
- Equipment Note
- Digital Video Baby Monitor (Baby Unit)
- Frequency Range
- 2402.00000000 - 2479.00000000
- Country
- China
Documents & Files
Document Text
Text extracted from the exhibit documents filed with the FCC. Open a document above to read the original.
Users Manual
User’s Guide Digital Video Baby Monitor Models: MBP867, MBP867-2, MBP867-3, MBP867-4 The features described in this User’s Guide are subject to modifications without prior notice. Welcome... to your new Motorola Video Baby Monitor! Thank you for purchasing the Motorola Video Baby Monitor. Now you can see and hear your baby sleeping in another room or you can monitor your older children in their playroom. Please retain your original dated sales receipt for your records. For warranty service of your Motorola product, you will need to provide a copy of your dated sales receipt to confirm warranty status. Registration is not required for warranty coverage. For product related questions, please call: This User's Guide provides you with all the information you need to get the most from your product. Before you can use the baby monitor, we recommend you fully charge the battery in the parent unit, so that it continues to work if you disconnect it from the power supply to carry it to another location. Please read the Safety Instructions on page 6 before you install the units. Got everything? • 1 x Parent unit • 1 x Baby unit (Camera) • 1 x Power adapter for the Parent unit • 1 x Power adapter(s) for the Baby unit In multi-camera packs, you will find one or more additional camera units with power adapter units. US and Canada 1-888-331-3383 Email: [email protected] Overview of the Parent Unit 1.Display (LCD screen) 2.Vol + Key Normal Mode: Vol Up Menu Mode: Up 3.Vol - Key Normal Mode: Vol Down Menu Mode: Down 4.Menu Key M Press to open the Menu options 5.OK Key O Long press OK key for 4 seconds, snap shot display photo. Save image to Micro SD card, photos inside DCIM folder. 6.Video ON/OFF Key V Press to turn OFF the LCD display Press again to turn ON the LCD display 7.Ta l k K e y T Press and hold to speak to your baby 8.Microphone 9.Power Key P Press and Hold to turn the unit ON/OFF 10.Stand 11.Speaker 12.USB power adapter socket 13.Reset Key Use a pin to reset device, if any frozen screen or unstable problem occur. 14.Micro SD Card Slot SD 10 11 4 8 5 6 7 1 9 13 2 3 12 14 Parent unit menu icons Signal Level (4 Levels) Night Vision Mode (Screen changes to Black/White) Ta l k M o d e Battery Level Control (4 Levels) Volume Level Control (8 Levels) Zoom Level Control (1X, 2X) Brightness Level Control (8 Levels) Lullaby Control (5 Song Selections) Alarm Setting (6h, 4h, 2h, Off ) Important guidelines for installing your Baby Monitor • To use your Video Monitor Baby and Parent Units together, you must be able to establish a radio link between them, and the range will be affected by environmental conditions. • Any large metal object, like a refrigerator, a mirror, a filing cabinet, metallic doors or reinforced concrete between the Baby and Parent Unit may block the radio signal. • The signal strength may also be reduced by other solid structures, like walls, or by radio or electrical equipment, such as TVs, computers, cordless or mobile phones, fluorescent lights or dimmer switches. • Use of other 2.4 GHz products, such as wireless networks (Wi-Fi ® routers), Bluetooth ® systems, or microwave ovens, may cause interference with this product, so keep the baby monitor away at least 5ft (1.5m) from these types of products, or turn them off if they appear to be causing interference. • If the signal is weak, try lifting up the Parent Unit Antenna, moving the Parent and/or the Baby Unit to different positions in the rooms. 1. Light Sensor (Night Vision Mode)6. Speaker 2. Camera Lens7. ON/OFF Switch 3. Infrared LEDs8. Power Adapter Socket 4. Power LED9. Temperature Sensor 5. Microphone 10. Pair Key Parent unit menu icons (cont’d) Overview of Your Baby Unit Temperature Reading (HH ºC / ºF or LL ºC / ºF) Icon & readings turn RED > 29ºC / 84ºF, and reading display HH ºC / ºF > 36ºC / 97 ºF Icon & readings turn RED < 14ºC / 57ºF, and reading display LL ºC / ºF < 1ºC / 34 ºF Cam Control (scan, view, add, delete) Screen viewing mode control (Single Screen, 4-split Screen) Set Video On Timer (5 min, 30 min, 60 min) 7 8 1 2 5 10 9 6 34 Table of contents5 ENGLISH Table of contents 1.Safety Instructions ..................................................................................... 6 2.Getting Started .......................................................................................... 9 2.1Baby Unit Power Supply .............................................................................. 9 2.2Parent Unit Power Supply ........................................................................... 9 2.3Registration (Pairing)................................................................................. 10 3.Using the Baby Monitor ........................................................................... 11 3.1Setting up................................................................................................... 11 3.2Night Vision Mode..................................................................................... 11 3.3Talk Mode .................................................................................................. 11 3.4Video ON/OFF.......................................................................................... 11 3.5Temperature Display (HH °C / °F or LL °C / °F) ...................................... 11 4.Parent Unit Menu Options....................................................................... 12 4.1Volume....................................................................................................... 12 4.2Brightness .................................................................................................. 12 4.3Lullaby........................................................................................................ 12 4.4Zoom.......................................................................................................... 12 4.5Alarm................................................................................................…
Text truncated - open the document above for the full version.
Cover Letter(s)
Date (09/01/2015) TUV SUD BABT TCB Octagon House, Segensworth Road, Fareham, Hampshire, PO15 5RL Dear Sir or Madam, We,(Binatone Electronics International Limited),hereby authorize Ray Cheung (TUV SUD HK LTD) to act as our agent in all matters relating to applications for equipment authorization, including the signing of all documents relating to these matters. This authorization expires on(09/07/2015]). Sincerely, Company Officer:Karl Heinz Muller Telephone Number: 852 2802 7388 Email:[email protected]
Cover Letter(s)
Date (09/01/2015) TUV SUD BABT TCB Octagon House, Segensworth Road, Fareham, Hampshire, PO15 5RL Confidentiality Request FCC ID:VLJ-MBP867BU, VLJ-MBP867PU Pursuant to Sections 0.457(d)(1)(ii) and 0.459 of the Commission’s Rules,(Binatone Electronics International Limited)hereby requests permanent confidential treatment of information accompanying this application as outlined below: Schematics Block Diagrams Theory of Operation (Binatone Electronics International Limited) alsohereby requests short-term confidential treatment of information accompanying this application as outlined below for a period of(9 JULY, 2015)days: Internal Photos External Photos User Manual Test Set-up Photographs The above materials contain trade secrets and proprietary information not customarily released to the public. The public disclosure of these matters might be harmful to the Applicant and provide unjustified benefits to its competitors. The Applicant understands that pursuant to Rule 0.457(d)(1)(ii), disclosure of this Application and all accompanying materials will not be made before the date of the Grant for this Application. Yours sincerely, Company Officer:Karl Heinz Mueller Telephone Number: 852 2802 7388 Email:852 2802 8138
External Photos
Appendix B Date: 2014-12-22 Report No.: 60.870.14.025.01F Model No.: MBP867BU Page 1 of 4 TÜV SÜD Hong Kong Ltd. 3/F, West Wing, Phase 2, 10 Science Park West Avenue, Shatin, Hong Kong. Appendix B Date: 2014-12-22 Report No.: 60.870.14.025.01F Model No.: MBP867BU Page 2 of 4 TÜV SÜD Hong Kong Ltd. 3/F, West Wing, Phase 2, 10 Science Park West Avenue, Shatin, Hong Kong. Appendix B Date: 2014-12-22 Report No.: 60.870.14.025.01F Model No.: MBP867BU Page 3 of 4 TÜV SÜD Hong Kong Ltd. 3/F, West Wing, Phase 2, 10 Science Park West Avenue, Shatin, Hong Kong. Appendix B Date: 2014-12-22 Report No.: 60.870.14.025.01F Model No.: MBP867BU Page 4 of 4 TÜV SÜD Hong Kong Ltd. 3/F, West Wing, Phase 2, 10 Science Park West Avenue, Shatin, Hong Kong.
ID Label/Location Info
MBP867_安規貼紙(BU) 材質: 50#特多龍, , Material: 50# polyester, Background:white Text:black,matting coating. Mingwei Wu Mingwei Wu Sam Chen Sam Chen 2014.12.08 2014.12.08 2014.12.08 2014.12.08 1/1mm1:1 01 MBP867(BU) FI5100000019718 0391I-A4-103P691 3C DABU Customer Model Name Position: Camera unit rating label 1) Colour: White background black letters 2) Material: label paper with plastic lamination on top 3) Scale: 1:1, size:40 x 15mm 40 15
Internal Photos
Appendix C Date: 2014-12-22 Report No.: 60.870.14.025.01F Model No.: MBP867BU Page 1 of 4 TÜV SÜD Hong Kong Ltd. 3/F, West Wing, Phase 2, 10 Science Park West Avenue, Shatin, Hong Kong. Appendix C Date: 2014-12-22 Report No.: 60.870.14.025.01F Model No.: MBP867BU Page 2 of 4 TÜV SÜD Hong Kong Ltd. 3/F, West Wing, Phase 2, 10 Science Park West Avenue, Shatin, Hong Kong. Appendix C Date: 2014-12-22 Report No.: 60.870.14.025.01F Model No.: MBP867BU Page 3 of 4 TÜV SÜD Hong Kong Ltd. 3/F, West Wing, Phase 2, 10 Science Park West Avenue, Shatin, Hong Kong. Appendix C Date: 2014-12-22 Report No.: 60.870.14.025.01F Model No.: MBP867BU Page 4 of 4 TÜV SÜD Hong Kong Ltd. 3/F, West Wing, Phase 2, 10 Science Park West Avenue, Shatin, Hong Kong.
RF Exposure Info
Date: 2014-12-22 Report No.: 60.870.14.025.01S Model No.:MBP867BU Page 1 of 1 TÜV SÜD Hong Kong Ltd. 3/F, West Wing, Phase 2, 10 Science Park West Avenue, Shatin, Hong Kong. SAR Evaluation Exemption Compliance Information The device has a standalone transmission. According to KDB 447498 section 4.3.1, the 1-g SAR test exclusion thresholds at test separation distances 50 mm are determined by: [(max. power of channel, including tune-up tolerance, mW)/(min. test separation distance, mm)]·[ ¥f(GHz)] 3.0 The maximum tune-up limit power is 69mW @ 2.440GHz For the head and body SAR, use 50mm as the conservative minimum test separation distance, [(max. power of channel, including tune-up tolerance, mW)/(min. test separation distance, mm)]·[ ¥f(GHz)] = 0.883 3.0 So standalone SAR measurements are not required for both head and body
Test Report
TEST REPORT Date: 2014-12-22 Report No.: 60.870.14.025.01F Page 1 of 29 TUV SUD Hong Kong Ltd. 3/F, West Wing, Phase 2, 10 Science Park West Avenue, Shatin, Hong Kong Applicant:Binatone Electronics International Ltd. Floor 23A, 9 Des Voeux Road West, Sheung Wan, Hong Kong Description of Samples:Model name: Digital Video Baby Monitor(BabyUnit) Brand name: Motorola Model no.:MBP867 BU FCCID:VLJ-MBP867BU Date Samples Received:2014-12-12 Date Tested:2014-12-13 to 2014-12-19 Investigation Requested:FCC Part 15 Subpart C, Section 15.247 Conclusions:The submitted product COMPLIED with the requirements of Federal Communications Commission [FCC] Rules and Regulations Part 15. The tests were performed in accordance with the standards described above and on Section 2.2 in this Test Report. Remarks:--- Checked by:Approved by:- Ray CheungJeff Pong Project EngineerManager Wireless & Telecom DepartmentWireless & Telecom Department ReportNo.: 60.870.14.025.01F Page 2 of 29 TÜV SÜD Hong Kong Ltd. 3/F, West Wing, Phase 2, 10 Science Park West Avenue, Shatin, Hong Kong CONTENT: Cover Page 1 of 29 Content Page 2-3 of 29 1.0General Details 1.1Test Laboratory Page 4 of 29 1.2Applicant Details Page 4 of 29 1.3Equipment Under Test [EUT] Page 5 of 29 1.4 Related Submittal(s) Grants Page 5 of 29 2.0Technical Details 2.1Investigations Requested Page 6 of 29 2.2Test Standards and Results Summary Page 6 of 29 3.0Test Methodology 3.1Radiated Emission Page 7 of 29 3.2Field Strength Calculation Page 7 of 29 3.3Conducted Emission Page 7 of 29 4.0Test Results 4.1 Number of Frequency Hopping Page 8 of 29 4.2 20dB Bandwidth Measurement Page 9-10 of 29 4.3 Hopping Channel Carrier Frequency Separation Page 11 of 29 4.4 Average Time of Occupancy Page 12-14 of 29 4.5 Pseudorandom Hopping Algorithm Page 15 of 29 4.6 Band Edge Measurement Page 16-17 of 29 4.7 Maximum Output Power Page 18-20 of 29 4.8 Out ofBand Emissionsand Emissions in Restricted Bands Page 21-25 of 29 4.9 Conducted Emission on AC Mains Page 26-28 of 29 ReportNo.: 60.870.14.025.01F Page 3 of 29 TÜV SÜD Hong Kong Ltd. 3/F, West Wing, Phase 2, 10 Science Park West Avenue, Shatin, Hong Kong 5.0List of Measurement Equipments Page 29 of 29 Appendix A Photos of Test Setup Appendix B External EUT Photos Appendix C Internal EUT Photos ReportNo.: 60.870.14.025.01F Page 4 of 29 TÜV SÜD Hong Kong Ltd. 3/F, West Wing, Phase 2, 10 Science Park West Avenue, Shatin, Hong Kong 1.0General Details 1.1Test Laboratory Attestation of Global ComplianceSZCoLtd. 2/F, Building 2,No.1-No.4,Chaxi Sanwei, Technical Industrial Park, Gushu, Xixiang, Shenzhen, China. Registration Number: 259865 Tested by: John Zhi 1.2Applicant Details Applicant Binatone Electronics International Ltd. Floor 23A, 9 Des Voeux Road West, Sheung Wan, Hong Kong Manufacturer Dongguan TaoSen Electronic Technology Co. Ltd. No.7 Huanguoshan Road, Xinan Community, Changan Town, Dongguan City, Guangdong, China ReportNo.: 60.870.14.025.01F Page 5 of 29 TÜV SÜD Hong Kong Ltd. 3/F, West Wing, Phase 2, 10 Science Park West Avenue, Shatin, Hong Kong 1.3Equipment Under Test [EUT] Description of EUT Product Description:Digital Video Baby Monitor(BabyUnit) ModelNo.:MBP867BU Brand Name: Motorola FCCID:VLJ-MBP867BU Rating:DC5.0V,1000mApowered by AC/DC power adaptor Operated Frequency:2402 – 2479 MHz No. of Operated Channel:23 Accessories and Auxiliary Equipments:AC/DC Switching Adaptor Antenna Type:Integral Manufacture of Antenna:CVISION HKLTD Antenna Gain:0dBi Antenna Model:N/A General Operation of EUT The Equipment Under Test (EUT) is a Camera of Wireless Monitoring System, which include of a FHSS Module. FHSS Operation Principle: This module is controlled by microchip to generate Pseudorandom Frequency Hopping Sequence, this module support 23 hopping channels. Refer to section 4.5 of this report to have more detail of Pseudorandom Hopping Algorithm. 1.4Related Submittal(s) Grants This is a signal application subjected to Certificate Authorization. ReportNo.: 60.870.14.025.01F Page 6 of 29 TÜV SÜD Hong Kong Ltd. 3/F, West Wing, Phase 2, 10 Science Park West Avenue, Shatin, Hong Kong 2.0Technical Details 2.1Investigations Requested Perform ElectroMagnetic Interference measurement in accordance with FCC 47CFR [Codes of Federal Regulations] Part 15:2012 and ANSI C63.4: 2009 2.2Test Standards and Results Summary Tables Test ConditionTest RequirementTest Result PassN/A Number of Frequency Hopping Section 15.247 ( a1 ) 20dB Bandwidth Measurement Section 15.247 ( a1 ) Hopping Channel Carrier Frequency Separation Section 15.247 ( a1 ) Average Time of Occupancy Section 15.247 ( a1 ) Pseudorandom Hopping Algorithm Section 15.247 ( a1 ) Band Edge Measurement Section 15.247 Maximum Output PowerSection 15.247 ( b1 ) Out of Band EmissionSection 15.247 ( d ) Radiated Emission in Restricted Band Section 15.247 ( d ) Conducted Emission on AC MainsSection 15.207 Antenna RequirementSection 15.203 See note 1 Note 1 :The EUT uses a permanently attached antenna, which in accordance to Section 15.203, is considered sufficient to comply with the provisions of this section. Remark: N/A - Not Applicable ReportNo.: 60.870.14.025.01F Page 7 of 29 TÜV SÜD Hong Kong Ltd. 3/F, West Wing, Phase 2, 10 Science Park West Avenue, Shatin, Hong Kong 3.0Test Methodology 3.1Radiated Emission The sample was placed 0.8m above the ground plane on a standard emission test site *. Measurements in both horizontal and vertical polarities were performed. During the test, each emission was maximized by: having the EUT continuously working, investigated all operating modes, rotated about all 3 axis (X, Y & Z) and considered typical configuration to obtain worst position, manipulating interconnecting cables, rotating turntable, varying antenna height from 1m to 4m in both horizontal and vertical polarizations. The emissions worst-case are shown in Test Results of the following pages. 3.2Field Strength Calculation The field strength at 3 m was established by adding the meter rea…
Text truncated - open the document above for the full version.
Test Setup Photos
Appendix A Date: 2014-12-22 Report No.: 60.870.14.025.01F Model No.:MBP867BU Page 1 of 2 TÜV SÜD Hong Kong Ltd. 3/F, West Wing, Phase 2, 10 Science Park West Avenue, Shatin, Hong Kong. Radiated Emission Appendix A Date: 2014-12-22 Report No.: 60.870.14.025.01F Model No.:MBP867BU Page 2 of 2 TÜV SÜD Hong Kong Ltd. 3/F, West Wing, Phase 2, 10 Science Park West Avenue, Shatin, Hong Kong. Conducted Emission
Contact Information
Applicant
Sam Lee(Product Director)
Test Firm
Attestation of Global Compliance Shenzhen Co. Ltd.Forrest Lei
Technical Specifications
| # | Rule Parts | Frequency Range | Power Output |
|---|---|---|---|
| 1 | 15C | 2.40 GHz - 2.48 GHz | 69.00 mW |
Other Applications from Binatone Electronics International Ltd.

VLJ-NV531BU
Jul 03, 2022Video Baby Monitor
Equipment Class
DSS - Part 15 Spread Spectrum Transmitter
VLJ-MH002W
Mar 02, 2021Bluetooth Headset
Equipment Class
DSS - Part 15 Spread Spectrum Transmitter
VLJ-ST600
Feb 09, 20215-in-1 Nursery Humidifier
Equipment Class
DSS - Part 15 Spread Spectrum Transmitter
VLJ-SP025
Feb 01, 2021Portable Bluetooth Music Speaker
Equipment Class
DCD - Part 15 Low Power Transmitter Below 1705 kHz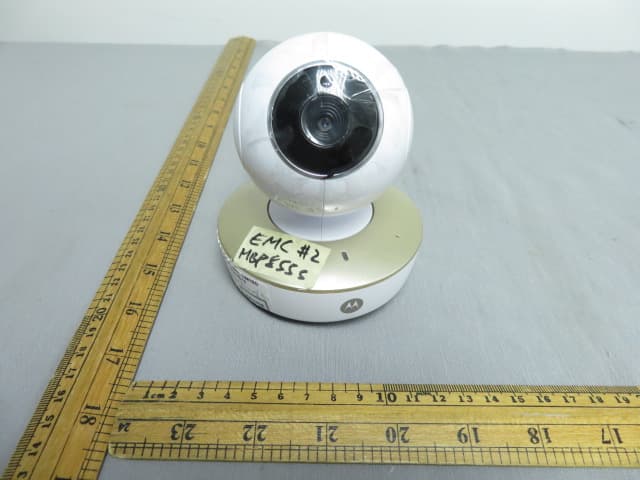
VLJ-MBP855BU
Dec 17, 20205inch Wi-Fi Video Baby Monitor
Equipment Class
DSS - Part 15 Spread Spectrum Transmitter