Y5VMW0811AOC TABLET
Fuzhou Smart Digital Science & Technology Co., Ltd.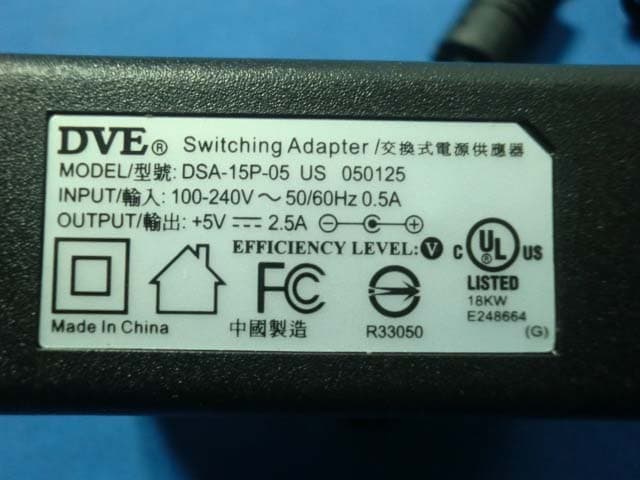
Click to zoom
Application Details
- Equipment Class
- DXX - Part 15 Low Power Communication Device Transmitter
- Date of Grant
- Jan 09, 2011
- Application Purpose
- Original Equipment
- Date of Application
- Jan 09, 2011
- Equipment Note
- AOC TABLET
- Frequency Range
- 2402.00000000 - 2480.00000000
- Country
- China
Documents & Files
Document Text
Text extracted from the exhibit documents filed with the FCC. Open a document above to read the original.
Users Manual
-1- Tablet quick set up guide Power On / Off Power On : press the power button to turn the machine. Shutdown: In any mode, press the power button for 2 seconds, there shutdown device options, click on the "off" to turn off the product。 Appearance A Power B Volum e +/- C Power indicator D Home:short press to return home page Press 2second to Recall the recent implementation of six applications E M(MENU) F Preview G Built in MIC hole H Touch Screen I Built in Speaker J Earphone jack K MINI USB Port(connect to PC) L OTG interface(connect USB) M T-Flash Card N DC Jack O Reset AB J K L M O N C D E G H I F -2- Main interface A Information check Drug the bar to check B IE address bar C Back key D Time E Wi-Fi Signal Indication F Battery Indicator G/H Volume-/+ I Return J Menu button K Home L Enter“Application” M Interface switching Menu key in the touch screen equals to the menu key in the machjne. Wireless Network 1.Enter into the main interface when MID is turned on . The screen is settled to be locked, press “Menu” key to unlock。 Manager wifi set-up to connect wireness network. • Wi-Fi: Turn on or Turn off WiFi. -- when WiFi mentions “ Turn on WiFi” , and the icon in the right shows , it means A D E K B L M FG HI J C -3- WiFi is in the closed position --Click WiFi , and the status mention that it is turning on ... , and the icon in the right side shows , it means that WiFi is in the open position. Note: In the set-up of this device , other than the follwing additional description - The right icon shows , it means that the option is in close position. - The right icon shows , it means that the option is in open position. • Wi-Fi Set-up: to set up and manage wireless access point -- Network notice that the right icon is , it means that automatic scanning is in the close position. -- Click Network notice, the right icon shows , it means that scanner is in the open position , the deive will seach automaticly and add the nearby WiFi network which can be connected. Click wireless network port , then you can connect network. After connectiong successful , the WiFi set-up icon will show have connected to ......, it means that the device have connected to network successfully. --As to the WiFi router which have been connected before, this machine will keep record automaticly, if you need to connect again in the future , you just need to turn on WiFi in the WiFi set-up , or choose this WiFi router then connect it. -4- When the status of WiFi set-up is open ( showing turn off WiFi), the machine will search the WiFi router automaticly and then connect to it when the device is started up each time. Notes: You can enter into Wi-Fi set-up directly by pressing the icon network connect manager Virtual keyboard Input Click input character area then popup virtual keyboard。 Android Keyboard: A Display the input text。 B Caps Lock Switch C Numbers and symbols keyboard switch D Input space E Search the input web F Delete the edited text File transmission Connect to Pc: 1.Boot condition,connect the tablet PC to PC with USB line 。 2.After connecting,It will disappear two dish,one is the equipment memory, another is storage memory。It can do data transmission now。 Disconnect Pc: Click on the icon on the right corner of the screen to move the hardware from E D F A B C -5- computer in safety。 VideoPlayer /Audio Player / Photo Browse 1. First download the Video / Audio / Pictures files to the Unit。 2. Click the “video player” “audio player”, “photo browser” to enter the mode. 3. Click the file which you want to play. Explorer(Resource Manager) Click “Explorer” on the homepage to enter. Homepage:return to sub menu Last interface:return the above menu Multichoose:choose one more files Edit:Copy,delete,move,paste,rename the file folder. Last:Return last operation Next:Return the next cooperation APK Installer APK Installer: This device support the third party’s applications on the basis of android -6- platform. Most of the applications can be downloaded from the website, and copoed into the flash or SD card of this device. Installation Installer: Click the Install Installer when enter the Apk installation interface Note:it can not unload the factory default installation software. specifications product model E800 System android V2.1 processor RK2818 Memory support DDRII 128MB - 512 MB, and memory capacity 24bit ECC memory (MLC support 2G 32GB capacity) WIFI support standard 802.11b FLASH built-in FLASH memory (2G FLASH) Expansion card standard TF card, the biggest support 16 GB LCD TFT LCD 8 inches high definition, resolution 800 * 480. Power specifications Voltage power supply voltage: 5V recharging voltage: 5V power maximum play direct current 0.8 A Maximum charge current dc 1A battery built-in polymer lithium ion battery recharging the battery, 3.7 V, 3500mAh adapter ac input: 100-60Hz 240V 50 / dc output: 5V 2.5 A Charging time with standard charger :charging time about six hours, charging time -7- also will be different depending on the residual capacity battery Please note during charging, the time does not exceed 12 hours. battery life (at normal temperature and full battery audio: about 20 hours Video: about six hours Note: this playing time, is under room temperature 25 °C, earphones output, brightness biggest, volume two-thirds place, screen standb y time for 1 minute, not connected WIFI, audio standard MP3 music bitrate for 128Kbps; Video playback RealVideo 9 coding RMVB files, streaming for 451Kbps, continuous broadcast forward-test income. Due to the operating environment different, broadcast file format, streaming, and other factors, the actual broadcast time may be with this test playing time some variations, this belongs to the normal phenomenon Music, pictures and video specifications Audio formats MP3、WMA、FLAC、APE、WAV、OGG compression rate MP3:MPEG 1.0 Layer 3 96Kbps~320Kbps WMA:80Kbps~192Kbps FLAC:8~48KHz APE:support the normal or fast zip file in V3.95 V3.97 V3.98 V3.99 version Recording MIC: 3GPP Audio o…
Text truncated - open the document above for the full version.
Block Diagram
Checked By: Created By: Page: Data: Rev: File: Title: E-SMART RK2818 DDRII 64X16 DDRII 64X16 NAND FLASH 1 x2 die 8.0' LCD PANAL 1.0 Audio WiFi Touch_Screen POWER PMU 2010.11.13 1/8 oscillator 24.000MHz RTC 32.768KHz oscillator MW0811 2.4G CH A B C D 5 4 3 2 1 D C B A 1 2 3 4 5
ID Label/Location Info
FCC ID LABEL FCC ID: Y5VMW0811 This device complies with Part 15 of the FCC Rules.Operation is subject to the following two conditions:1. This device may not cause harmful interference, and 2. This device must accept any interference received,including interference that may cause undesired operation. Label Location on EUT EUT Bottom View/ FCC ID Label Location
Operational Description
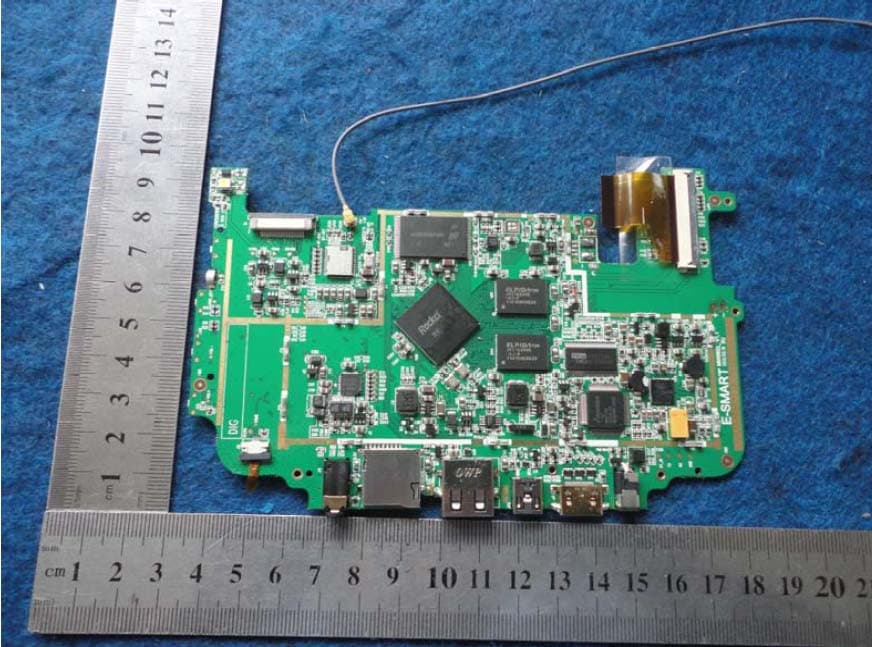
Brief Introduction to MW0811 Principle —— MW0811 is built in a ROCKCHIPS RK2818 processor, with 256MB / 512MB memory to run program, optional 2GB / 4GB / 8GB / 16GB / 32GB disk capacity, supporting external TF card up to 32GB. —— MW0811 is designed with a 8 inches 800 × 600 LCD display, resistive touch screen, man-machine interface design. —— MW0811 is built in a power control IC to manage charging by a lithium ion polymer battery, charged by an adaptor through a DC - IN socket. —— MW0811 can connect to the Internet.through a Wi-Fi module wirelessly. —— MW0811 is built in 3.5cm earphone interface, audio files will decoded by CPU then converts to audio analogue signal by audio IC, finally output voice by earphone or built in speaker ——MW0811 comes with a USB port connects to a computer, an OTG socket to be used in connection with USB devices.
Schematics
Checked By: Created By: Page: Data: Rev: File: Title: E-SMART RK2818 DDRII 64X16 DDRII 64X16 NAND FLASH 2 x2 die NAND FLASH 1 x2 die 8.0' LCD PANAL 3G 1.0 Audio WiFi Touch_Screen POWER PMU 2010.11.13 1/8 A B C D 5 4 3 2 1 D C B A 1 2 3 4 5 Checked By: Created By: Page: Data: Rev: File: Title: E-SMART 0.7A DC&USB POWER USB Host Power 1.1 1.6A 1.2A BATTER&OTG JACK 2010.11.13 3/8 1.0 A B C D 5 4 3 2 1 D C B A 1 2 3 4 5 8 8 8 8 8 8 8 5 8 8 5 5,8 8 5,8 8 8 C1 106/X7R 1 LX 2 GND 3 FB 4 EN 5 IN 6 NC U6 SY7208 1 2 L7 SMD_L_4X4 4.7uH R1 10K 1 2 R12 10K N_VBUSEN1 T-1 PAD 1 2 R27 10K G4 T-1 PAD RM3 1K C3 10uF/10V C15 106/X7R 1 OUT 2 GND 3 IN 4 EN 5 OUT U3 RT9701 1 2 R116 1 R24 220K%1 C30 10uF/10V R117 1R 1 2 L8 SMD_L_4X4 4.7uH C12 47uF/X7R C8 226 C5 103 1 2 R18 NC C21 1uF/X7R 1 1 2 2 3 3 4 4 5 5 6 6 7 7 8 8 U46 USB TYPE B C24 NC 1 2 R26 10K C16 106/X7R RM6 2K R5 47K C18 C0805 22uF/10V N_RSTO1 T-1 PAD C33 103 1 2 R28 0 C3 106 C34 10uF/10V R2 NC 1 2 R22 2.2k C2 103 1 2 R3 0 1 2 R25 10K R7 NC C25 0.1uF/X7R C28 NC L2 4.7uH C27 10uF/10V R4 1M 1 1 2 2 3 3 4 4 5 5 6 6 7 7 J1 PJK-109 G2 T-1 PAD C17 C0805 22uF/10V G1 T-1 PAD 1 IO 2 IO 3 GND 4 GND 5 IO 6 IO U5 UCLAMP 0522 1 1 2 2 U2 ESD1 1 2 R16 200K%1 1 GND 2 NC 3 DP 4 DM 5 VCC 6 GND 7 GND 8 GND 9 GND 10 NC 11 NC U1 MINI_USB5 USB C11 106uF/X7R D2 NC 1 VIN 2 GND 3 VOUT U7 ZEN056 + EC1 CP200 220uF/595D - + 3 V+ 1 V- 2 NC 4 4 5 V- 6 6 BT1 LI_3.7V 1 2 R23 2.2k L4 0603R BLM18EG471SH1 1 1 2 2 U28 ESD1 1 1 2 2 3 3 4 4 5 5 6 6 7 7 8 8 9 9 SW8 LS10N2 1 2 R17 0 C7 226 1 2 L6 SMD_L_4X4 2.2uH R8 75K 1 2 R14 10K C20 C0805 22uF/10V C29 1uF/X7R G3 T-1 PAD R10 R0402 1K R9 30k1% C4 226 37 TS 34 BAT 35 BAT 33 ACIN 32 ACIN 31 VBUS 41 GPIO3 42 GPIO4 43 NC 36 CHGLED 30 BACKUP 26 VINT 24 BIAS 21 APS 25 VREF 22 AGND 19 GPIO0/LDOIO0 18 GPIO1 48 WAKEUP/IRQ 2 SCK 1 SDA 47 DCDC1 39 IPSOUT 38 IPSOUT 45 LX1 44 VIN1 46 PGND1 10 DCDC2 8 LX2 7 VIN2 9 PGND2 17 DCDC3 15 LX3 16 PGND3 14 VIN3 13 LDOIN 28 LDO1 12 LDO2 40 EXTEN 23 PWRON 20 GPIO2 4 N_OE 27 PWREN 5 PWROK/N_LBO 6 N_VBUSEN 29 SYSEN 3 N_RSTO 11 LDO3 U8 AXP192/QFN48 C26 1uF/X7R C6 226 C32 105 R11 10K C18 C0805 22uF/10V C9 106/X7R 1 2 R15 2K2 L5 0603R BLM18EG471SH1 1 2 R29 0 L3 0603R BLM18EG471SH1 C31 47uF C14 C0805 22uF/10V 1 2 R19 0 D1 1N5819 G5 T-1 PAD R6 220K%1 CM19 0402C 103 R20 220K%1 L1 0603R BLM18EG471SH1 1 2 R21 47K GND GND GND VCCIO GND GND GND LDO1_3_3V GND VCCA GND DC_5V DC_5V VBUS VCC5V IPSOUT 5V DC_5V VBUS BATT GND IPSOUT IPSOUT GND EXTEN GND LDO3 VCCIO GND GND GND GND BATT GND GND LDO1_3_3V GND VCCIO GND VDD GND VCCDR VCCA LDO3 VCCIO DC_5V OTG_5V 5V DC5V_DET USB_ID VBUS_DET USB_DP USB_DM WAKEUP_INT OTG_DRVVBUS POWER_KEY NPOR BAT_DET POWER_KEY I2C0_SCL PMU_INT I2C0_SDA CHG_OK PWR_ON USB_ID OTG_DRVVBUS CHG_OK USB_ID POWER_KEY USB_DP USB_DP BAT_DET DC5V_DET PWR_ON N_VBUSEN IPSOUT VBUS_DET WAKEUP_INT USB_DM USB_ID USB_ID POWER_KEY DC_5V USB_DP USB_DP USB_DP USB_DP BAT_DET N_VBUSEN IPSOUT IPSOUT IPSOUT IPSOUT IPSOUT VBUS_DET USB_DM USB_DM USB_DM USB_DM USB_DM Checked By: Created By: Page: Data: Rev: File: Title: E-SMART 3.6V 12.4V 18V -6.8V E800 2010.11.13 4/8 1.0 LCD A B C D 5 4 3 2 1 D C B A 1 2 3 4 5 8 8 8 8 8 8 8 8 8 8 8 8 8 8 8 8 8 8 8 8 8 8 8 8 8 8 8 8 8 8 8 D4 BAT54S C56 106/X7R R49 10K R51 10K D5 6.8V/ÎÈѹ R41 47K%1 C38 226 D8 15V/ÎÈѹ R44 NC C47 105/25V C53 22p C50 104 C35 226 R43 0R 1 LX 2 GND 3 FB 4 EN 5 OVP 6 VCC U9 SY7201 C48 106/25V R46 10K R36 1R0 1 3 2 Q2 3904 R47 0R R50 100K R18 100K D6 1N5819 R53 100K R45 NC C39 103 R34 NC R52 3.3K R38 75K%1 C36 475/25V C40 104/X7R C55 106/25V 1 1 2 2 JP1 BL_JACK C49 106 R42 2K2 C46 104 EC2 106 R54 NC L9 4.7uH L11 22uH C45 106 R30 0R C51 104 L10 600R/100MHZ D7 BAT54S C41 105/X7R R48 6.8K 1 IN 2 GND 3 SHDN 4 BP 5 FB/OUT U10 RT9163A-33CB/CE6200B33M C44 104 1 LX 2 GND 3 FB 4 EN 5 OVP 6 VCC U11 SY7201 C52 103 R31 NC D3 1N5819 1 NC 2 NC 3 NC 4 NC 5 GND 6 VCOM 7 VCC 8 MODE 9 DE 10 VS 11 HS 12 B7 13 B6 14 B5 15 B4 16 B3 17 B2 18 B1 19 B0 20 G7 21 G6 22 G5 23 G4 24 G3 25 G2 26 G1 27 G0 28 R7 29 R6 30 R5 31 R4 32 R3 33 R2 34 R1 35 R0 36 GND 37 DCLK 38 GND 39 L/R 40 U/D 41 VGH 42 VGL 43 AVDD 44 RESET 45 NC 46 VCOM 47 DITHB 48 GND 49 NC 50 NC 51 GND 52 GND J2 EK080SV01 R55 200K C37 104/X7R C54 105/25V C57 104 R40 NC AVDD VB LCD_VCC2 VB VGH VGL AVDD LCD_VCC2 VCOM VCOM LCD_VCC2 LCD_VCC2 LCD_VCC2 VCOM LCD_VCC2 VGL VGH LCD_VCC2 AVDD VCOM LCD_RST LCD_DISP_ON LED_PWM0 LCD_D8 LCD_D9 LCD_D10 LCD_D11 LCD_D12 LCD_D13 LCD_D14 LCD_D15 LCD_D16 LCD_D17 LCD_D18 LCD_D19 LCD_D20 LCD_D21 LCD_D22 LCD_D23 LCD_DE LCD_CLK_OUT LCD_VSYNC LCD_HSYNC LCD_D1 LCD_D2 LCD_D3 LCD_D4 LCD_D5 LCD_D6 LCD_D7 LCD_D0 LCD_D4 LCD_D3 LCD_D0 LCD_D7 LCD_D2 LED_PWM0 LCD_D6 LCD_D20 LCD_D1 LCD_D8 LCD_VSYNC LCD_CLK_OUT LCD_DE LCD_RST LCD_D15 LCD_DISP_ON LCD_D10 LCD_D14 LCD_D11 LCD_D12 LCD_D13 LCD_D9 LCD_D22 LCD_D18 LCD_D23 LCD_D21 LCD_D19 LCD_D16 LCD_HSYNC LCD_D17 LCD_D5 Checked By: Created By: Page: Data: Rev: File: Title: E-SMART Touch_screen RTC G SENSOR Audio AMP HEADPHONE 2.1 1.43 0.27 2.6 0.76 CODEC TF KEY E800 2010.11.13 ²ÌÒå·æ 3/8 1.0 ²ÌÒå·æ PMU&USB&OTG 2010.11.13 5/8 1.0 A B C D 5 4 3 2 1 D C B A 1 2 3 4 5 8 8 3,8 3,8 8 8 8 8 8 8 8 8 8 8 8 8 3 8 8 8 8 8 8 8 8 8 8 3,8 8 L17 0603R 2K/100MHZ C64 105 R66 100K + EC3 E-B 220uF 1 RESERVED 2 N/C 3 AVDD 4 AVSS 5 INT 6 SCL 7 SDA 8 DVSS 9 DVDD 10 N/C 11 NC 12 N/C U16 MMA7660FC C81 C0402 104 C78 C0402 33p 1 H2 T-1 TP 1 1 2 2 3 3 4 4 5 5 6 6 7 7 U17 PJ-327AD + EC5 E-A 47uF 1 1 2 2 3 3 4 4 5 5 6 6 7 7 8 8 9 9 SW7 LS10N2 R59 4K7 C82 C0402 474 1 MCLK 2 DCVDD 3 DBVDD 4 DGND 5 BCLK 6 DACDAT 7 LRC 8 ADCDAT 9 HPCOM 10 LCOM 11 ROUT1 12 LOUT1 13 HPGND1 14 ROUT2 15 LOUT2 16 HPVDD 17 AVDD 18 AGND1 19 VREF 20 VMID 21 RINPUT2 22 LINPUT2 23 RINPUT1 24 LINPUT1 25 MODE 26 CSB 27 SDIN 28 SCLK 29 PAD U14 WM8988 C62 12P C79 104 C71 105 R86 R0402 20K C85 NC R57 4K7 C60 104 1 1 2 2 U15 ESD54 R64 2K2 R70 20K R114 0 R80 NC C72 475 1 EN 2 BYPASS 3 IN+ 4 IN- 5 VO1 6 VDD 7 GND 8 VO2 U21 MSOP8 LM4890 C73 105 + EC4 E-B 220uF 1 1 2 2 3 3 4 4 5 5 6 6 7 7 8 8 9 9 SW5 LS10N2 R60 4K7 1 1 2 2 3 3 4 4 5 5 6 6 7 7 8 8 9 …
Text truncated - open the document above for the full version.
Test Report
FCC PART 15.249 EMI MEASUREMENT AND TEST REPORT For FUZHOU SMART DIGITAL SCIENCE & TECHNOLOGY CO., LTD. No.8 Building of Hongshan Science & Technology zone, Gulou district ,Fuzhou,Fujian,China FCC ID:Y5VMW0811 January 6, 2011 This Report Concerns: Original Report Equipment Type: AOC Tablet Test Engineer: Eric Li Report No.: BST10120408Y-1ER-3 Receive EUT Date/Test Date: Jan 3, 2011/ Jan 6, 2010 Reviewed By: Christina Prepared By: Shenzhen BST Technology Co.,Ltd. 3F,Weames Technology Building, No. 10 Kefa Road, Science Park, Nanshan District,Shenzhen,Guangdong,China Tel: 0755-26747751~3 Fax: 0755-26747751~3 ext.826 Note: The test report is specially limited to the above company and this particular sample only. It may not be duplicated without prior written consent of Shenzhen BST Technology Co.,Ltd. This report must not be used by the client to claim product certification,approval,or endorsement by NVLAP, NIST or any agency of the US Government. FUZHOU SMART DIGITAL SCIENCE & TECHNOLOGY CO., LTD. FCC ID: Y5VMW0811 BST FCC ID REPORT : BST10120408Y-1ER-3 Page 2/20 TABLE OF CONTENTS 1. GENERAL INFORMATION ....................................................................................................3 1.1. Report information ............................................................................................................3 1.2. Measurement Uncertainty .................................................................................................3 2. PRODUCT DESCRIPTION ......................................................................................................4 2.1. EUT Description ...............................................................................................................4 2.2. Block Diagram of EUT Configuration..............................................................................4 2.3. Support Equipment List ....................................................................................................4 2.4. Test Conditions .................................................................................................................5 3. FCC ID LABEL...........................................................................................................................5 4. TEST RESULTS SUMMARY ...................................................................................................6 Modifications ................................................................................................................................6 5. TEST EQUIPMENT USED .......................................................................................................7 6. CONDUCTED POWER LINE TEST .......................................................................................8 6.1. Test Equipment .................................................................................................................8 6.2. Test Procedure ..................................................................................................................8 6.3. Test Setup..........................................................................................................................8 6.4. Configurating of the EUT .................................................................................................8 6.5. EUT Operating Condition...............................................................................................10 6.6. Conducted Power line Emission Limits..........................................................................10 6.7. Conducted Power Line Test Result.................................................................................11 7. RADIATED EMISSION TEST ...............................................................................................13 7.1. Test Equipment ...............................................................................................................13 7.2. Test Procedure ................................................................................................................13 7.3. Radiated Test Setup ........................................................................................................13 7.4. Confihuration of the EUT ...............................................................................................14 7.5. EUT Operating Condition...............................................................................................14 7.6. Radiated Emission Limit.................................................................................................14 7.7. Radiated Emission Test Result .......................................................................................15 8. BAND EDGE .............................................................................................................................17 8.1. Test Equipment ...............................................................................................................17 8.2. Test Procedure ................................................................................................................17 8.3. Configuration of The EUT ..............................................................................................17 8.4. EUT Operating Condition...............................................................................................17 8.5. Band Edge FCC 15.249(d) Limit ....................................................................................17 8.6. Band Edge Test Result ....................................................................................................17 9. §15.203 - ANTENNA REQUIREMENT .................................................................................20 9.1. Standard Applicable........................................................................................................20 9.2. Antenna Connector Construction..................................................................................…
Text truncated - open the document above for the full version.
Contact Information
Applicant
Wei Lin(Assistant R&D Director)
Test Firm
emitel (Shenzhen) LimitedLouis Lin
Technical Specifications
| # | Rule Parts | Frequency Range | Power Output |
|---|---|---|---|
| 1 | 15C | 2.40 GHz - 2.48 GHz | - |
Other Applications from Fuzhou Smart Digital Science & Technology Co., Ltd.
Y5VMW0922
May 08, 2012AOC Tablet
Equipment Class
DTS - Digital Transmission System
Y5VMW0821
Sep 15, 2011AOC Tablet
Equipment Class
DTS - Digital Transmission SystemY5VMW0812
May 16, 2011AOC TABLET
Equipment Class
JBP - Part 15 Class B Computing Device Peripheral