YETCELFI-RS225CUCel-Fi Residential System
Nextivity Incorporated
Click to zoom
Application Details
- Equipment Class
- NII - Unlicensed National Information Infrastructure TX
- Date of Grant
- Jul 05, 2012
- Application Purpose
- Original Equipment
- Date of Application
- May 07, 2012
- Equipment Note
- Cel-Fi Residential System
- Frequency Range
- 5668.80000000 - 5668.80000000
- Company
- Nextivity Incorporated
- Country
- United States
Documents & Files
Document Text
Text extracted from the exhibit documents filed with the FCC. Open a document above to read the original.
Users Manual
Cel-Fi TM with IntelliBoost TM Nextivity Incorporated Headquarters: 12230 World Trade Drive Suite 250 San Diego, CA 92128, USA http://www.nextivityinc.com European Office:Whitehill Way Swindon, UK SN5 6QR Cel-Fi TM with IntelliBoost TM Nextivity Incorporated Headquarters: 12230 World Trade Drive Suite 250 San Diego, CA 92128, USA http://www.nextivityinc.com European Office:Whitehill Way Swindon, UK SN5 6QR STOP!!! Do not call your carrier until you have read the Quick Start Guide. If you need more help, try visiting http://www.celfihelp.com Safety Precautions Install Cel-Fi indoors. It should not be used outdoors. This product is designed to be used with the provided power supply. It is a listed direct plug-in power unit marked “Class 2” and rated 12 Vdc, minimum 1.66A. There are no user serviceable parts inside. STOP!!! Do not call your carrier until you have read the Quick Start Guide. If you need more help, try visiting http://www.celfihelp.com Safety Precautions Install Cel-Fi indoors. It should not be used outdoors. This product is designed to be used with the provided power supply. It is a listed direct plug-in power unit marked “Class 2” and rated 12 Vdc, minimum 1.66. There are no user serviceable parts inside. Caution: Changes or modifications to this product not expressly approved by Nextivity may void your right to operate the equipment. Caution: Changes or modifications to this product not expressly approved by Nextivity may void your right to operate the equipment. Limited Warranty; Warranties This Cel-Fi (Product) is distributed by your mobile carrier, and depending on their terms and conditions of sale, you may or may not have additional rights under a warranty program for Cel-Fi. This does not affect your statutory rights. All Products must be stored, carried, processed, installed or otherwise handled or dealt with by End User and its agents in accordance with Nextivity’s published instructions, and in accordance with normal safety procedures for the handling of Products, and Nextivity shall not be liable for any loss, damage, injury or expense arising out of the Products or their condition if this is not done. Nextivity shall not be liable to replace any Products rejected only on the grounds of immaterial imperfections or variations in the manufacturing process. THIS WARRANTY IS IN LIEU OF ALL OTHER WARRANTIES WITH RESPECT TO THE PRODUCTS AND ANY DOCUMENTATION OR OTHER MATERIALS PROVIDED BY NEXTIVITY, EITHER EXPRESSED OR IMPLIED, INCLUDING ANY IMPLIED WARRANTIES OF MERCHANTABILITY, FITNESS FOR ANY PARTICULAR PURPOSE, AND NONINFRINGEMENT, ALL OF WHICH ARE HEREBY DISCLAIMED. WITHOUT LIMITING THE FOREGOING, NEXTIVITY. DOES NOT WARRANT THAT THE HARDWARE WILL WORK PROPERLY IN ALL ENVIRONMENTS AND APPLICATIONS, NO PERSON IS AUTHORIZED TO REPRESENT, PROMISE OR ASSUME ANY OBLIGATION OR LIABILITY CONTRARY OR IN ADDITION TO THIS WARRANTY. Limitation of Liability In no event shall Nextivity, nor its directors, employees, agents, suppliers or End Users, be liable under contract, tort, strict liability, negligence or any other legal or equitable theory with respect to the Products or any other subject matter of this Agreement (i) for any lost profits, cost of procurement of substitute goods or services, or special, indirect, incidental, punitive, or consequential damages of any kind whatsoever or (ii) for any direct damages in excess of (in the aggregate) the fees actually received by Nextivity from End User with respect to the Products actually purchased and paid for. Intellectual Property End User agrees not to copy any product or process of Nextivity, or any part thereof, except with the express, prior written consent of Nextivity, given in its sole discretion. All risks of direct or indirect patent infringement are assumed by the End User. Nothing shall be construed as recommendation to make, use, or sell any Product or process in conflict with existing or future patents. End User shall not (and End User shall not permit anyone else to): (i) in any way reverse engineer or otherwise attempt to derive any source code or underlying ideas or algorithms from any part of the Products, except to the limited extent applicable laws specifically prohibit such restriction, (ii) modify, translate, or otherwise create derivative works of any part of the Products, or (iii) copy, rent, lease, distribute, or otherwise transfer any of the rights that End User receives hereunder. End User shall abide by all applicable local, state, national and international laws and regulations. Miscellaneous Cel-Fi, IntelliBoost, and Nextivity logo are trademarks of Nextivity, Inc. Copyright © 2012 by Nextivity, Inc. U.S. Patents 7,519,323, 8,086,174, and 8,081,585. Other Patents Pending. All Rights Reserved. Reproduction or media conversion by any means is protected by copyright and may only occur with prior written permission of Nextivity. Declaration of Conformity We, Nextivity, Incorporated, 12230 World Trade Drive Suite 250, San Diego, CA 92128, USA declare under our sole responsibility that the product(s): Product Description: Cel-Fi Residential (CELFI-RS2) Models: CELFI-RS218WU and CELFI-RS218CU, CELFI-RS225WU and CELFI-RS225CU to which this declaration relate(s) is(are) in conformance with the provisions of Directive 1999/5/EC governing Radio Equipment and Telecommunications Terminal Equipment and the Mutual Recognition of their Conformity using the following standards: SAFETY (art 3.1.a): EN 60950:2006 /A11:2009 /A1:2010 EMC: (art 3.1.b): EN 301 489-1 v1.8.1, EN 301 489-23 v1.4.1, EN 301 489-17 v2.1.1, EN 62311:2008, SAR Touch Safe RADIO SPECTUM (art 3.2): EN 301 908-1 v4.2.1, EN 301 908-11 v4.2.1, EN 301 893 v1.5.1 _____________________________________ ________________________________________________________________ (Place/Date of issue) (name and signature or equivalent marking of authorized person) Limited Warranty; Warranties This Cel-Fi (Product) is distributed by your mobile carrier, a…
Text truncated - open the document above for the full version.
Users Manual
Congratulations on your new indoor signal solution. This Cel-Fi system is designed to provide you with significant improve- ments in coverage as well as 3G data rates. Setting up the system is extremely simple and consist of placing and plugging in two components; a Window Unit and a Coverage Unit. By spending just a few minutes using the instructions in this guide, you can optimize the installation and get the very most from your new Cel-Fi System. If you have any trouble during setup, please use the trouble shooting steps included in this guide. Step 1 Find the spot with the best 3G coverage: The first step in setting up your Cel-Fi system is to find the spot in your home or office that has the best 3G coverage by using your phone’s display of a 3G or 4G icon. This is typically by a window, and if you are in a multi-story building, upstairs windows are usu- ally better than downstairs windows. Step 2 Plug in the Window Unit: Take the Window Unit and one power supply out of the box (both power supplies are the same, so grab either one). Plug the Window Unit in, and check to make sure that you can see at least 1 “Bar” on the display in the center of the device. If you do not see at least 1 bar, try a different location. Need Help? Visit us at www.celfihelp.com for an installation video and other helpful information regarding installation and trouble shooting. WINDOW UNIT COVERAGE UNIT In the package you will find: • Window Unit • Coverage Unit • Two power adapters. CEL - FIRS 2 Quick Start Guide 3G WINDOW UNIT Step 4 Place the Coverage Unit Move to a location in your home where you need to have improved coverage. Plug the Coverage Unit in and wait until the numeric display stops cycling, this could take several minutes. At this point you should see a green icon indicat- ing that the unit is working properly. It is possible to place the Coverage Unit so far away that it cannot communicate with the Window Unit. If this hap- pens, a red icon will illuminate indicating that you need to move the Coverage Unit closer to the Window Unit. CEL - FIRS 2 Trouble Shooting TOO CLOSE A zero on the numeric display indicates that the Coverage Unit needs to be moved farther away from the Window Unit. GOOD This green icon indicates that the Coverage Unit is functioning normally. TOO FAR This red icon indicates that the Coverage Unit needs to be moved closer to the Window Unit. Step 3 Optimize the Window Unit Placement The number of bars you can see on the Window Unit make a significant difference in the operation of the Cel-Fi system. Try moving the Window Unit to a couple of different spots to see if you can get better signal; the more bars the better. Step 5 Optimize The Coverage Unit Placement The farther away you place the Coverage Unit from the Window Unit the better the coverage in your home, so put the Coverage Unit as far away from the Window Unit as possible. The number shown on the side of the display gives you an indication as to the quality of the placement. Test two or three locations and for best results; try and get a 7, 8 or 9 on the display. Indicator Problem Try This Indicator Problem Try This Indicator Problem Try This No lights on “Window Unit” display. Status indicator is flashing green for more than a minute. Status indicator is on solid red. No segment lit on signal display and status indicator on solid green. Center three bars on signal display are flashing. No lights on ”Coverage Unit” display. 7 segment display is cycling for more than a minute. 7 segment display shows a value of 0. Red “Too Far” Indicator. Red Status Indicator. E1 E3 E4 E8 There is no power. The “Window Unit” unit is attempting to complete regulatory compliance. Hardware Error. Not receiving 3G signal. Network operator data is missing. There is no power. The ”Coverage Unit” is taking longer than normal to make a link. The ”Coverage Unit” is “Too Close” to the “Window Unit”. The ”Coverage Unit” is “Too Far” from the “Window Unit. Hardware Error. No 3G signal on “Window Unit”. ”Coverage Unit” is overheating. “Window Unit” is overheating. Input signal too strong. 1. Is the unit plugged in? 2. Is there power at the outlet? 3. Try exchanging the power supplies with the “Coverage Unit” to see if the power supply is defective. 1. Wait for the status indicator to stop flashing, this could take several minutes. 1. Try resetting the “Window Unit” by unplugging it and then plugging it back in. 2. If problem persists return system for service/replacement. 1. Try moving the “Window Unit” to another room or area where you have more coverage. (Use your cell phone to find the best 3G coverage). 1. Insert operator SD card into “Window Unit”. 1. Is the unit plugged in? 2. Is there power at the outlet? 3. Try exchanging the power supplies with the “Window Unit” to see if the power supply is defective. 1. Wait for the display to stop cycling, this could take several minutes 2. Move away from WiFi devices. 1. Move the ”Coverage Unit” further away from the “Window Unit”. 1. Move the ”Coverage Unit” closer to the “Window Unit”. 1. Try resetting the ”Coverage Unit” by unplugging it and then plugging it back in. 2. If problem persists return system for service. Try moving the “Window Unit” to another room or area where you have coverage. (Use your cell phone to find the best 3G coverage). Make sure that the vents on the unit are not blocked. Move the unit to a cooler area. The system will start working normally when it cools down. The signal from the wireless network is too strong to use a booster. WINDOW UNIT COVERAGE UNIT ERROR MESSAGES WINDOW UNIT COVERAGE UNIT qsg-RS2.1-English_12-0411
Users Manual
Congratulations on your new indoor signal solution. This Cel-Fi system is designed to provide you with significant improve- ments in coverage as well as 3G data rates. Setting up the system is extremely simple and consist of placing and plugging in two components; a Window Unit and a Coverage Unit. By spending just a few minutes using the instructions in this guide, you can optimize the installation and get the very most from your new Cel-Fi System. If you have any trouble during setup, please use the trouble shooting steps included in this guide. Step 1 Find the spot with the best 3G coverage: The first step in setting up your Cel-Fi system is to find the spot in your home or office that has the best 3G coverage by using your phone’s display of a 3G or 4G icon. This is typically by a window, and if you are in a multi-story building, upstairs windows are usu- ally better than downstairs windows. Step 2 Plug in the Window Unit: Take the Window Unit and one power supply out of the box (both power supplies are the same, so grab either one). Plug the Window Unit in, and check to make sure that you can see at least 1 “Bar” on the display in the center of the device. If you do not see at least 1 bar, try a different location. Need Help? Visit us at www.celfihelp.com for an installation video and other helpful information regarding installation and trouble shooting. WINDOW UNIT COVERAGE UNIT In the package you will find: • Window Unit • Coverage Unit • Two power adapters. CEL - FIRS 2 Quick Start Guide 3G WINDOW UNIT Step 4 Place the Coverage Unit Move to a location in your home where you need to have improved coverage. Plug the Coverage Unit in and wait until the numeric display stops cycling, this could take several minutes. At this point you should see a green icon indicat- ing that the unit is working properly. It is possible to place the Coverage Unit so far away that it cannot communicate with the Window Unit. If this hap- pens, a red icon will illuminate indicating that you need to move the Coverage Unit closer to the Window Unit. CEL - FIRS 2 Trouble Shooting TOO CLOSE A zero on the numeric display indicates that the Coverage Unit needs to be moved farther away from the Window Unit. GOOD This green icon indicates that the Coverage Unit is functioning normally. TOO FAR This red icon indicates that the Coverage Unit needs to be moved closer to the Window Unit. Step 3 Optimize the Window Unit Placement The number of bars you can see on the Window Unit make a significant difference in the operation of the Cel-Fi system. Try moving the Window Unit to a couple of different spots to see if you can get better signal; the more bars the better. Step 5 Optimize The Coverage Unit Placement The farther away you place the Coverage Unit from the Window Unit the better the coverage in your home, so put the Coverage Unit as far away from the Window Unit as possible. The number shown on the side of the display gives you an indication as to the quality of the placement. Test two or three locations and for best results; try and get a 7, 8 or 9 on the display. Indicator Problem Try This Indicator Problem Try This Indicator Problem Try This No lights on “Window Unit” display. Status indicator is flashing green for more than a minute. Status indicator is on solid red. No segment lit on signal display and status indicator on solid green. Center three bars on signal display are flashing. No lights on ”Coverage Unit” display. 7 segment display is cycling for more than a minute. 7 segment display shows a value of 0. Red “Too Far” Indicator. Red Status Indicator. E1 E3 E4 E8 There is no power. The “Window Unit” unit is attempting to complete regulatory compliance. Hardware Error. Not receiving 3G signal. Network operator data is missing. There is no power. The ”Coverage Unit” is taking longer than normal to make a link. The ”Coverage Unit” is “Too Close” to the “Window Unit”. The ”Coverage Unit” is “Too Far” from the “Window Unit. Hardware Error. No 3G signal on “Window Unit”. ”Coverage Unit” is overheating. “Window Unit” is overheating. Input signal too strong. 1. Is the unit plugged in? 2. Is there power at the outlet? 3. Try exchanging the power supplies with the “Coverage Unit” to see if the power supply is defective. 1. Wait for the status indicator to stop flashing, this could take several minutes. 1. Try resetting the “Window Unit” by unplugging it and then plugging it back in. 2. If problem persists return system for service/replacement. 1. Try moving the “Window Unit” to another room or area where you have more coverage. (Use your cell phone to find the best 3G coverage). 1. Insert operator SD card into “Window Unit”. 1. Is the unit plugged in? 2. Is there power at the outlet? 3. Try exchanging the power supplies with the “Window Unit” to see if the power supply is defective. 1. Wait for the display to stop cycling, this could take several minutes 2. Move away from WiFi devices. 1. Move the ”Coverage Unit” further away from the “Window Unit”. 1. Move the ”Coverage Unit” closer to the “Window Unit”. 1. Try resetting the ”Coverage Unit” by unplugging it and then plugging it back in. 2. If problem persists return system for service. Try moving the “Window Unit” to another room or area where you have coverage. (Use your cell phone to find the best 3G coverage). Make sure that the vents on the unit are not blocked. Move the unit to a cooler area. The system will start working normally when it cools down. The signal from the wireless network is too strong to use a booster. WINDOW UNIT COVERAGE UNIT ERROR MESSAGES WINDOW UNIT COVERAGE UNIT qsg-RS2.1-English_12-0411
Users Manual
Congratulations on your new indoor signal solution. This Cel-Fi system is designed to provide you with significant improve- ments in coverage as well as 3G data rates. Setting up the system is extremely simple and consist of placing and plugging in two components; a Window Unit and a Coverage Unit. By spending just a few minutes using the instructions in this guide, you can optimize the installation and get the very most from your new Cel-Fi System. If you have any trouble during setup, please use the trouble shooting steps included in this guide. Step 1 Find the spot with the best 3G coverage: The first step in setting up your Cel-Fi system is to find the spot in your home or office that has the best 3G coverage by using your phone’s display of a 3G or 4G icon. This is typically by a window, and if you are in a multi-story building, upstairs windows are usu- ally better than downstairs windows. Step 2 Plug in the Window Unit: Take the Window Unit and one power supply out of the box (both power supplies are the same, so grab either one). Plug the Window Unit in, and check to make sure that you can see at least 1 “Bar” on the display in the center of the device. If you do not see at least 1 bar, try a different location. Need Help? Visit us at www.celfihelp.com for an installation video and other helpful information regarding installation and trouble shooting. WINDOW UNIT COVERAGE UNIT In the package you will find: • Window Unit • Coverage Unit • Two power adapters. CEL - FIRS 2 Quick Start Guide 3G WINDOW UNIT Step 4 Place the Coverage Unit Move to a location in your home where you need to have improved coverage. Plug the Coverage Unit in and wait until the numeric display stops cycling, this could take several minutes. At this point you should see a green icon indicat- ing that the unit is working properly. It is possible to place the Coverage Unit so far away that it cannot communicate with the Window Unit. If this hap- pens, a red icon will illuminate indicating that you need to move the Coverage Unit closer to the Window Unit. CEL - FIRS 2 Trouble Shooting TOO CLOSE A zero on the numeric display indicates that the Coverage Unit needs to be moved farther away from the Window Unit. GOOD This green icon indicates that the Coverage Unit is functioning normally. TOO FAR This red icon indicates that the Coverage Unit needs to be moved closer to the Window Unit. Step 3 Optimize the Window Unit Placement The number of bars you can see on the Window Unit make a significant difference in the operation of the Cel-Fi system. Try moving the Window Unit to a couple of different spots to see if you can get better signal; the more bars the better. Step 5 Optimize The Coverage Unit Placement The farther away you place the Coverage Unit from the Window Unit the better the coverage in your home, so put the Coverage Unit as far away from the Window Unit as possible. The number shown on the side of the display gives you an indication as to the quality of the placement. Test two or three locations and for best results; try and get a 7, 8 or 9 on the display. Indicator Problem Try This Indicator Problem Try This Indicator Problem Try This No lights on “Window Unit” display. Status indicator is flashing green for more than a minute. Status indicator is on solid red. No segment lit on signal display and status indicator on solid green. Center three bars on signal display are flashing. No lights on ”Coverage Unit” display. 7 segment display is cycling for more than a minute. 7 segment display shows a value of 0. Red “Too Far” Indicator. Red Status Indicator. E1 E3 E4 E8 There is no power. The “Window Unit” unit is attempting to complete regulatory compliance. Hardware Error. Not receiving 3G signal. Network operator data is missing. There is no power. The ”Coverage Unit” is taking longer than normal to make a link. The ”Coverage Unit” is “Too Close” to the “Window Unit”. The ”Coverage Unit” is “Too Far” from the “Window Unit. Hardware Error. No 3G signal on “Window Unit”. ”Coverage Unit” is overheating. “Window Unit” is overheating. Input signal too strong. 1. Is the unit plugged in? 2. Is there power at the outlet? 3. Try exchanging the power supplies with the “Coverage Unit” to see if the power supply is defective. 1. Wait for the status indicator to stop flashing, this could take several minutes. 1. Try resetting the “Window Unit” by unplugging it and then plugging it back in. 2. If problem persists return system for service/replacement. 1. Try moving the “Window Unit” to another room or area where you have more coverage. (Use your cell phone to find the best 3G coverage). 1. Insert operator SD card into “Window Unit”. 1. Is the unit plugged in? 2. Is there power at the outlet? 3. Try exchanging the power supplies with the “Window Unit” to see if the power supply is defective. 1. Wait for the display to stop cycling, this could take several minutes 2. Move away from WiFi devices. 1. Move the ”Coverage Unit” further away from the “Window Unit”. 1. Move the ”Coverage Unit” closer to the “Window Unit”. 1. Try resetting the ”Coverage Unit” by unplugging it and then plugging it back in. 2. If problem persists return system for service. Try moving the “Window Unit” to another room or area where you have coverage. (Use your cell phone to find the best 3G coverage). Make sure that the vents on the unit are not blocked. Move the unit to a cooler area. The system will start working normally when it cools down. The signal from the wireless network is too strong to use a booster. WINDOW UNIT COVERAGE UNIT ERROR MESSAGES WINDOW UNIT COVERAGE UNIT qsg-RS2.1-English_12-0411
Users Manual
Cel-Fi ™ with IntelliBoost ™ Nextivity Incorporated Headquarters: 12230 World Trade Drive Suite 250 San Diego, CA 92128, USA http://www.nextivityinc.com Bureau en Europe: Whitehill Way Swindon, UK SN5 6QR Cel-Fi ™ with IntelliBoost ™ Nextivity Incorporated Headquarters: 12230 World Trade Drive Suite 250 San Diego, CA 92128, USA http://www.nextivityinc.com Bureau en Europe: Whitehill Way Swindon, UK SN5 6QR STOP!!! Do not call your carrier until you have read the Quick Start Guide. If you need more help, try visiting http://www.celfihelp.com Safety Precautions Install Cel-Fi indoors. It should not be used outdoors. These products are designed to be used with a direct plug-in power supply unit meeting SELV and “Limited Power Source” (NEC/CEC Class 2) requirements rated 12 Vdc, 1.66 A. When installing the equipment, all the requirements of the manufacturer and the referenced standards must be met. There are no user serviceable parts inside. 420N005‐002‐001‐10 R01 CAUTION: Changes or modifications to this product not expressly approved by Nextivity may void your right to operate the equipment. STOP!!! Do not call your carrier until you have read the Quick Start Guide. If you need more help, try visiting http://www.celfihelp.com CAUTION: Changes or modifications to this product not expressly approved by Nextivity may void your right to operate the equipment. 420N005‐002‐001‐10 R01 Safety Precautions Install Cel-Fi indoors. It should not be used outdoors. These products are designed to be used with a direct plug-in power supply unit meeting SELV and “Limited Power Source” (NEC/CEC Class 2) requirements rated 12 Vdc, 1.66 A. When installing the equipment, all the requirements of the manufacturer and the referenced standards must be met. There are no user serviceable parts inside. Limited Warranty; Warranties This Cel-Fi (Product) is distributed by your mobile carrier, and depending on their terms and conditions of sale, you may or may not have additional rights under a warranty program for Cel-Fi. This does not affect your statutory rights. All Products must be stored, carried, processed, installed or otherwise handled or dealt with by End User and its agents in accordance with Nextivity’s published instructions, and in accordance with normal safety procedures for the handling of Products, and Nextivity shall not be liable for any loss, damage, injury or expense arising out of the Products or their condition if this is not done. Nextivity shall not be liable to replace any Products rejected only on the grounds of immaterial imperfections or variations in the manufacturing process. THIS WARRANTY IS IN LIEU OF ALL OTHER WARRANTIES WITH RESPECT TO THE PRODUCTS AND ANY DOCUMENTATION OR OTHER MATERIALS PROVIDED BY NEXTIVITY, EITHER EXPRESSED OR IMPLIED, INCLUDING ANY IMPLIED WARRANTIES OF MERCHANTABILITY, FITNESS FOR ANY PARTICULAR PURPOSE, AND NONINFRINGEMENT, ALL OF WHICH ARE HEREBY DISCLAIMED. WITHOUT LIMITING THE FOREGOING, NEXTIVITY. DOES NOT WARRANT THAT THE HARDWARE WILL WORK PROPERLY IN ALL ENVIRONMENTS AND APPLICATIONS, NO PERSON IS AUTHORIZED TO REPRESENT, PROMISE OR ASSUME ANY OBLIGATION OR LIABILITY CONTRARY OR IN ADDITION TO THIS WARRANTY. Limitation of Liability In no event shall Nextivity, nor its directors, employees, agents, suppliers or End Users, be liable under contract, tort, strict liability, negligence or any other legal or equitable theory with respect to the Products or any other subject matter of this Agreement (i) for any lost profits, cost of procurement of substitute goods or services, or special, indirect, incidental, punitive, or consequential damages of any kind whatsoever or (ii) for any direct damages in excess of (in the aggregate) the fees actually received by Nextivity from End User with respect to the Products actually purchased and paid for. Intellectual Property End User agrees not to copy any product or process of Nextivity, or any part thereof, except with the express, prior written consent of Nextivity, given in its sole discretion. All risks of direct or indirect patent infringement are assumed by the End User. Nothing shall be construed as recommendation to make, use, or sell any Product or process in conflict with existing or future patents. End User shall not (and End User shall not permit anyone else to): (i) in any way reverse engineer or otherwise attempt to derive any source code or underlying ideas or algorithms from any part of the Products, except to the limited extent applicable laws specifically prohibit such restriction, (ii) modify, translate, or otherwise create derivative works of any part of the Products, or (iii) copy, rent, lease, distribute, or otherwise transfer any of the rights that End User receives hereunder. End User shall abide by all applicable local, state, national and international laws and regulations. Miscellaneous Cel-Fi, IntelliBoost, and Nextivity logo are trademarks of Nextivity, Inc. Copyright © 2011 by Nextivity, Inc. U.S. Patent 7,519,323 and other Patents Pending. All Rights Reserved. Reproduction or media conversion by any means is protected by copyright and may only occur with prior written permission of Nextivity. Declaration of Conformity We, Nextivity, Incorporated, 12230 World Trade Drive, Suite 250, San Diego, CA 92128, USA declare under our sole responsibility that the product(s): Product Description: Cel-Fi Residential (CELFI-RS2) Models: CELFI-RS218WU and CELFI-RS218CU, CELFI-RS225WU and CELFI-RS225CU to which this declaration relate(s) is(are) in conformance with the provisions of Directive 1999/5/EC governing Radio Equipment and Telecommunications Terminal Equipment and the Mutual Recognition of their Conformity using the following standards: SAFETY (art 3.1.a): EN 60950:2006 /A11:2009 /A1:2010 EMC: (art 3.1.b): EMC – (art 3.1.b): EN 301 489-1 v1.8.1, EN 301 489-17 v2.1.1, EN 301 489-23 v1.3.1, EN 62311:2008, SAR Touch Safe RADIO SPECTUM (art 3.2): EN 301 908-1 v5.2.1, EN 301 908-11 v5.2.1, E…
Text truncated - open the document above for the full version.
Cover Letter(s)
12230 World Trade Drive Suite 250 San Diego California 92128 858.485.9442 (main) 858-485.9445 (fax) [email protected] www.nextivityinc.com Federal Communications Commission 7435 Oakland Mills Road Columbia, MD 21046 4/11/2012 Dear Examiner: I am writing to avoid the possibility of an inadvertent disclosure of proprietary information. The accompanying Form 731 is being filed with the commission on our behalf by Elliott/NTS Laboratories, Inc., a consulting and testing laboratory. Included as exhibits with the enclosed application are block diagrams, BOMs, schematics, and a detailed description of the theory of operation of the device. It is our intention to provide the commission with a full disclosure of our product so that its merits can be evaluated. Indeed, we are pleased to provide any further information that the commission might wish to see. It is not our intention, however, to make our proprietary process a matter of public record. In view of the fact that the block diagrams, BOMs, schematics, and associated theory of operation disclose th…
Text truncated - open the document above for the full version.
Contact Information
Applicant
Michiel Lotter(Vice President, Engineering)
Technical Contact
ELLIOTT LABORATORIES LLCDAVID BARE
[email protected]510-578-3500
41039 BOYCE ROAD · FREMONT, California · United States
Non-Technical Contact
ELLIOTT LABORATORIES LLCDAVID BARE
[email protected]510-578-3500
Test Firm
Elliott Laboratories LLCDavid Bare
Technical Specifications
| # | Rule Parts | Frequency Range | Power Output |
|---|---|---|---|
| 2 | 15E | 5.67 GHz - 5.67 GHz | 115.00 mW |
Other Applications from Nextivity Incorporated
YETA91-JV4
Sep 12, 2024Smart Server Antenna
Equipment Class
DTS - Digital Transmission System
YETG41-CE
Jan 10, 2024Cellular Signal Booster with BLE
Equipment Class
B2I - Part 20 Industrial Booster (CMRS)
YETA71-JV4
Oct 02, 2023Smart Server Antenna
Equipment Class
DTS - Digital Transmission System
YETQ42-Z1CNU
May 05, 2023Provider-Specific Consumer Signal Booster
Equipment Class
B2P - Part 20 Provider-Specific Consumer Booster (CMRS)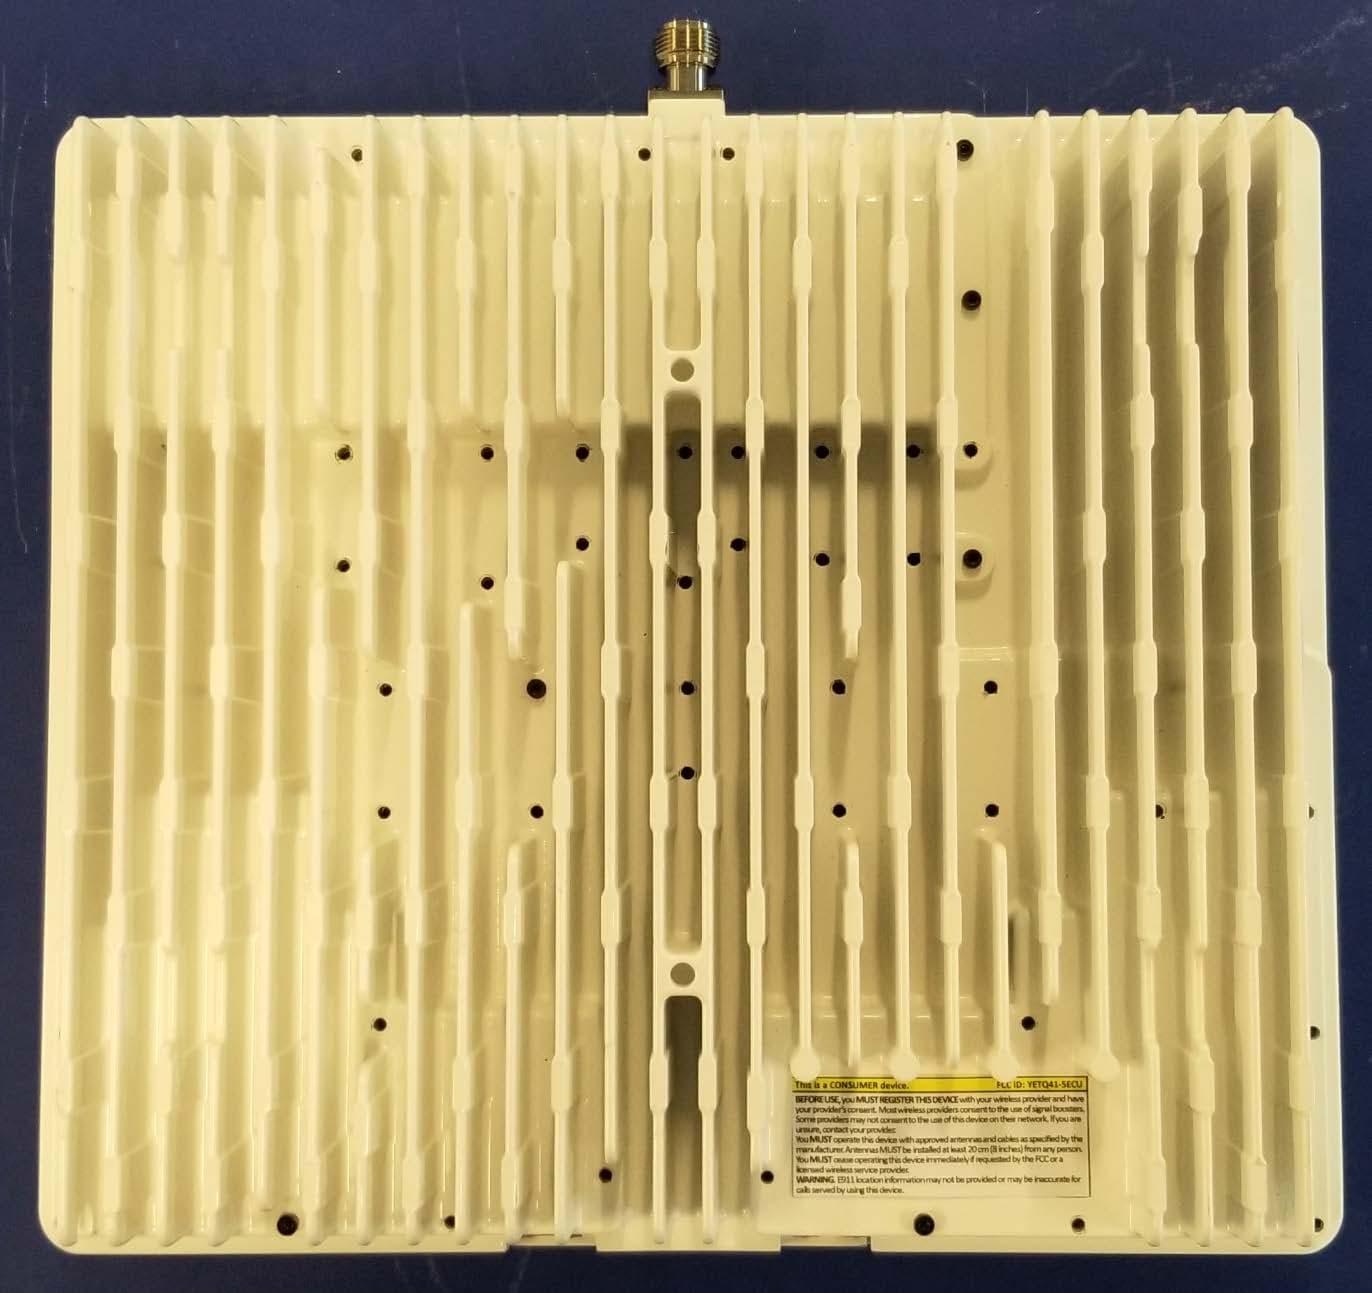
YETQ41-BXCU
May 05, 2023Provider-Specific Consumer Signal Booster
Equipment Class
B2P - Part 20 Provider-Specific Consumer Booster (CMRS)