2AU5D-WNRH1Smart Gateway with Netatmo
Legrand/Pass & Seymour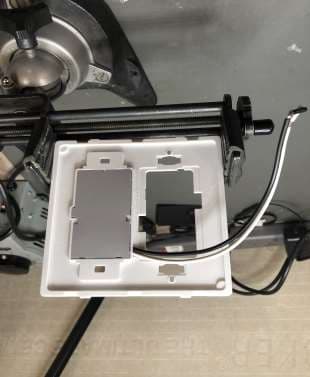
Click to zoom
Application Details
- Equipment Class
- DTS - Digital Transmission System
- Date of Grant
- Mar 11, 2021
- Application Purpose
- Original Equipment
- Date of Application
- Mar 10, 2021
- Equipment Note
- Smart Gateway with Netatmo
- Frequency Range
- 2412.00000000 - 2462.00000000
- Company
- Legrand/Pass & Seymour
- Country
- United States
Documents & Files
Document Text
Text extracted from the exhibit documents filed with the FCC. Open a document above to read the original.
Users Manual
No. 34XXXX 2/21 radiant ® WHRH10KIT. Includes WNRH2 Smart Gateway with Netatmo and WNRL10 Smart Switch with Netatmo Incandescent, Halogen: 1800W; Resistive: 120VAC, 60Hz, 15A; Standard + Electronic Ballast: 15A; Motor: 1/2 HP Installation Instructions • Notice d’Installation • Instrucciones de Instalación Catalog Number(s) • Numéro(s) de Catalogue • Les Numéros de Catalogue: WHRH10KIT Country of Origin: Made in China • Pays d’origine: Fabriqué en Chine • País de origen: Hecho en China WNRH10KIT Radiant Smart Gateway & Switch BEFORE YOU START Review this guide in its entirety. Consult an electrician with any questions or if you are unsure of your abilities. Warning: Incorrect installation could result in death, serious injury, and/or damage to your home or devices. Caution: To reduce the risk of injury and/or overheating and damage to other equipment: • For dry, indoor use only. • Do not use to power medical equipment – not suitable as a disconnecting means. • Do not use with loads exceeding the device load rating. • Connect the Gateway to a 120 VAC, 60 Hz power source ONLY. • Always use copper wire to install the Gateway and follow all applicable local and national electrical codes. WHAT YOU NEED Required: • Phillips-head screwdriver • Flat blade screwdriver You May Also Need: Voltage tester, pliers, wire cutter, wire stripper, electrical tape, flashlight, wiring leads (included), and wire nuts (included). INSTALLATION & SETUP 1. Choose a place to install the Gateway a. If there is an Internet router in the home, use a smartphone to check if the WiFi signal is strong enough in the chosen place. b. If there isn’t a router yet, choose a place near a fiber or Cat 5 socket which will be used for the router. c. This device is compatible with standard two gang U.S. electrical boxes, attach with screws, or it may also be installed over the wall, next to a one gang standard electrical box. The Gateway can be installed with the Smart Switch shipped with the product, or next to any UL listed device in the home. 2. Turn off power to the box at circuit breaker NOTE: Ensure power is off to all devices in the electrical box. 3. Remove existing device Check for the following wires: a. HOT or LINE: Receives power from the circuit box. Referred to as “HOT” for the purpose of this guide. Do not touch or let “HOT” wire contact other wires. b. LOAD: Directs power to your load (light or outlet). c. NEUTRAL: Creates a path to return current to the power source when the device is off. Required for your Gateway installation. d. GROUND: Provides a safe path for electricity in the event of a short circuit. 3. Attaching Smart Switch to the Smart Gateway Attach the gateway to the Smart Switch device strap using the #6-32 x ¼” screws supplied. Orient Gateway to either left or right of box as desired. 4. Wiring Use the wire nuts provided to secure the wires together. a. Connect the WHITE neutral wire on the Gateway to the neutral wire(s) in the box, and to the white NEUTRAL wire on the Smart Switch using the red wire nut. b. Connect the black HOT wire on the Gateway to the HOT wire(s) in the box and to the black HOT wire on the Smart Switch using the red wire nut.. c. Connect the GROUND wire(s) in the box to the GROUND wire on the Smart Switch. d. Connect the red LOAD wire on the Smart Switch to the LOAD wire(s) in the box. 5. Secure Gateway a. Fold the wires into the electrical box, taking care not to pinch a wire. b. Use included screws to secure the Smart Switch to the electrical box with the Gateway hanging over the wall. c. If further attachment is desired (not required), use either drywall screws to attach to stud if present, or use drywall anchors provided (may need to remove screws from Step 5b after marking location for drill hole). If mounted over tile or marble, the provided adhesive strip may be used instead. 6. Set up the Gateway NOTE: See getting to know your Gateway section for feature details. Turn the power back on at the circuit breaker. To confirm power is on, the LED on the Gateway should be solid red. Press the EZ button on the Gateway, the LED will blink magenta to indicate setup mode. Follow the instructions from the app to finish setting up your system. 7. Set up your System For more information on this product please see this link, or scan the QR code: https://www.legrand.us/radiant/products/smart-lighting/whrh10kit.aspxg GETTING TO KNOW YOUR GATEWAY ItemNameDescription 1Gateway LED Indicator Light Indicates the current state of device during setup. 2Gateway EZ Button Used to initiate setup. 3Paddle SwitchPress the top of the paddle to turn light on and the bottom of paddle to turn light off. 4Smart Switch LED indicator light Indicates the current state of device. Refer to “LED Locator Light Explanations” for detail. 5Smart Switch EZ Button Used to enter setup mode. LED Indicator Light Explanations State of LightExplanation Solid RedFactory reset, not in network. Blinking MagentaDevice is attempting to connect to the network. Solid MagentaDevice in network, temporarily open. Reset To Factory Default Deleting a device from the app will reset it to factory defaults. To manually reset the device to factory defaults press and hold the EZ button for 20 seconds until you see the LED turn solid orange, then release. When the LED blinks green, follow the instructions from the app to finish setting up your system. Legrand reserves the right to change specifications without notice. OFF ON OFF ON OFF ON OFF ON OFF ON OFF ON OF F ON OFF ON VOL TAGE TESTER Load Supply Hot FCC COMPLIANCE – FCC ID: XXXXXX IC ID: XXXXXX HVIN: XXXXXXXX FCC NOTICE: This device complies with Part 15 of the FCC rules. Operation is subject to the following two conditions: (1) this device may not cause harmful interference, and (2) this device must accept any interference received, including interference that may cause undesirable operation. This equipment has been tested and found to comply with the limits for a Class B digital…
Text truncated - open the document above for the full version.
Users Manual
No. 341322 2/21 radiant ® WNRH1 Smart Gateway with Netatmo Passerelle intelligente radiant ® WNRH1 avec Netatmo Puerta de enlace inteligente WNRH1 radiant ® con Netatmo Installation Instructions • Notice d’Installation • Instrucciones de Instalación Catalog Number(s) • Numéro(s) de Catalogue • Les Numéros de Catalogue: WNRH1 Country of Origin: Made in China • Pays d’origine: Fabriqué en Chine • País de origen: Hecho en China WNRH1 radiant ® Smart Gateway BEFORE YOU START Review this guide in its entirety. Consult an electrician with any questions or if you are unsure of your abilities. Warning: Incorrect installation could result in death, serious injury, and/or damage to your home or devices. Caution: To reduce the risk of injury and/or overheating and damage to other equipment: • For dry, indoor use only. • Do not use to power medical equipment – not suitable as a disconnecting means. • Do not use with loads exceeding the device load rating. • Connect the Gateway to a 120 VAC, 60 Hz power source ONLY. • Always use copper wire to install the Gateway and follow all applicable local & national electrical codes. WHAT YOU NEED Required: • Phillips-head screwdriver • Flat blade screwdriver You May Also Need: Voltage tester, pliers, wire cutter, wire stripper, electrical tape, flashlight, wiring leads (included), and wire nuts (included). INSTALLATION & SETUP 1. Choose a place to install the Gateway a. If there is an Internet router in the home, use a smartphone to check if the WiFi signal is strong enough in the chosen place. b. If there isn’t a router yet, choose a place near a fiber or Ethernet port which will be used for the router. c. This device is compatible with standard U.S. electrical boxes, attach with screws. 2. Turn off power to the box at circuit breaker NOTE: Ensure power is off to all devices in the electrical box. 3. Remove existing device Check for the following wires: a. HOT or LINE: Receives power from the circuit box. Referred to as “HOT” for the purpose of this guide. Do not touch or let “HOT” wire contact other wires. b. LOAD: Directs power to your load (light or outlet). c. NEUTRAL: Creates a path to return current to the power source when the device is off. Required for your Gateway installation. d. GROUND: Provides a safe path for electricity in the event of a short circuit. 4. Install the Gateway Use the wire nuts provided to secure the wires together. a. Connect the WHITE neutral wire on the Gateway to the neutral wire(s) in the box, using the included wire nut. b. Connect the HOT wire on the Gateway to the HOT wire(s) in the box. c. Connect the ground wire in the box to the green ground screw on the Gateway. 5. Secure Gateway a. Fold the wires into the electrical box, taking care not to pinch a wire. b. Use included screws to secure Gateway to the electrical box. Do not fully tighten the screws. 6. Set up the Gateway NOTE: See getting to know your Gateway section for feature details. Turn the power back on at the circuit breaker. To confirm power is on, the LED on the Gateway should be solid magenta for 5 seconds. After initializing, the LED will blink green to indicate setup mode. Follow the instructions from the app to finish setting up your system. 7. Set up your System a. Download and launch the Legrand Home + Control app. The app is available on the App Store or on Google Play. b. Connect your smart device to your home network by following the step by step instructions in the app. c. Use the app to control your smart device. For the most recent instruction sheets or more information on this product, please see this link or scan the QR code: https://www.legrand.us/p/wnrh1wh GETTING TO KNOW YOUR GATEWAY ItemNameDescription 1LED Indicator Light Indicates the current state of device during setup. 2EZ ButtonUsed to initiate setup. LED Indicator Light Explanation ActionLEDGateway Behavior Power to the GatewayMagenta for 5 secondsGateway booting up After Gateway boot up Flashes green for 15 minutes Setup mode: refer to app Press EZ Button for 20 seconds Solid orangeFactory reset Gateway receives an update Flashes blue for 2–3 minutes Gateway is updating Reset To Factory Default Deleting a device from the app will reset it to factory defaults. To manually reset the device to factory defaults press and hold the EZ button for 20 seconds until you see the LED turn solid orange, then release. When the LED blinks green, follow the instructions from the app to finish setting up your system. Legrand reserves the right to change specifications without notice. OFF ON OFF ON OFF ON OFF ON OFF ON OFF ON OF F ON OFF ON VOL TAGE TESTER Load Supply Hot OFF ON OFF ON OF F ON Supply Hot 2 1 AVANT DE COMMENCER Passer l’ensemble de ce guide en revue. En cas de question ou d’incertitude concernant ses capacités, consulter un électricien. Mise en garde : Une installation inappropriée pourrait entraîner la mort, des blessures graves et (ou) des dommages à votre domicile ou à vos dispositifs. Mise en garde : Pour réduire le risque de blessures et (ou) de surchauffe et de dommage à d’autre matériel :: • Pour usage intérieur dans un endroit sec seulement. • Ne pas utiliser pour alimenter du matériel médical; ne convient pas comme moyen de débranchement. • Ne pas utiliser avec des charges dépassant la capacité de charge du dispositif. • Raccorder la passerelle UNIQUEMENT à une source d’alimentation de 120 V c. a., 60 Hz. • Toujours utiliser un fil de cuivre pour installer la passerelle et respecter tous les codes de l’électricité locaux et nationaux applicables. CE DONT VOUS AVEZ BESOIN Obligatoire : • Tournevis cruciforme • Tournevis à tête plate Autres éléments pouvant être requis : Testeur de tension, pinces, pince coupe-fils, pince à dénuder, ruban isolant, lampe de poche, fils de connexion (inclus) et connecteurs de fils (inclus). INSTALLATION ET CONFIGURATION 1. Choisir un endroit où installer la passerelle a. S’il y a un routeur Internet à la maison, utiliser un téléphone intellig…
Text truncated - open the document above for the full version.
Cover Letter(s)
Legrand/ Pass & Seymour P.O. Box 4822, Syracuse, NY 13221 Phone (315) 468-8014 Fax (315) 634-2684 Kris.Glassford @legrand.us Authority to Act as Agent Date: February 12, 2021 American Certification Body, Inc. 6731 Whittier Avenue Suite C110 McLean, VA 22101 To Whom It May Concern: Steve Fanella from BEC Incorporated is authorized to act on our behalf, until otherwise notified, for applications to American Certification Body, Inc. (ACB). We certify that we are not subject to denial of federal benefits, that includes FCC benefits, pursuant to Section 5301 of the Anti-Drug Abuse Act of 1988, 21 U.S.C. 862. Further, no party, as defined in 47 CFR 1.2002 (b), to the application is subject to denial of federal benefits, that includes FCC benefits. We also declare that the information provided to the FCC is true and correct to the best of our knowledge (47 CFR 2.911(d)) and we have been informed of the grantee responsibilities (47 CFR 2.909) with regard to certified equipment. Thank you, Agency Agreement Expiration Date: _02/04/2022 By: Title: Lab Testing and Certification Manager On behalf of: Legrand Pass & Seymour Telephone: 315-468-8014
Cover Letter(s)
Legrand/ Pass & Seymour P.O. Box 4822, Syracuse, NY 13221 Phone (315) 468-8014 Fax (315) 634-2684 Kris.Glassford @legrand.us Request for Confidentiality Date: February 12, 2021 Subject: Confidentiality Request for: FCC ID: 2AU5D-WNRH1 Pursuant to FCC 47 CFR 0.457(d) and 0.459 and IC RSP-100, Section 12.4, the applicant requests that a part of the subject FCC application be held confidential. Type of Confidentiality Requested Exhibit ☐ Short Term ☒ Permanent Block Diagrams ☐ Short Term External Photos ☐ Short Term ☐ Permanent * 1 Internal Photos ☐ Short Term ☒ Permanent Operation Description/Theory of Operation ☐ Short Term ☐ Permanent Parts List & Placement/BOM ☐ Short Term ☐ Permanent Tune-Up Procedure ☐ Short Term ☒ Permanent Schematics ☐ Short Term Test Setup Photos ☐ Short Term ☐ Permanent * 3 User’s Manual Legrand Pass & Seymour has spent substantial effort in developing this product and it is one of the first of its kind in industry. Having the subject information easily available to "competition" would negate the advantage they have achieved by developing this product. Not protecting the details of the design will result in financial hardship. Permanent Confidentiality: The applicant requests the exhibits listed above as permanently confidential be permanently withheld from public review due to materials that contain trade secrets and proprietary information not customarily released to the public. Short-Term Confidentiality: The applicant requests the exhibits selected above as short term confidential be withheld from public view for a period of 0 days from the date of the Grant of Equipment Authorization and prior to marketing. This is to avoid premature release of sensitive information prior to marketing or release of the product to the public. Applicant is also aware that they are responsible to notify ACB in the event information regarding the product or the product is made available to the public before the requested period has expired. ACB will then release the documents listed above for public disclosure pursuant to FCC Public Notice DA 04-1705. NOTE for Industry Canada Applications: IC currently only distinguishes Permanent Confidentiality exhibits as shown above. Short Term confidentiality is not considered applicable to IC applications. Sincerely, By: 1 - The asterisked items (*) require further information to be provided to ACB before permanent confidentiality will be extended to these exhibits. Please refer to FCC KDB 726920 and the specific Document link for D01 found at: https://apps.fcc.gov/oetcf/kdb/forms/FTSSearchResultPage.cfm?switch=P&id=41731 and review section II, 3) regarding specific information that must accompany these requests.
External Photos
WNRH with Wifi and Zigbee Radios External Pictures Legrand Model WNRH Front Side Legrand Model WNRH Rear Side Legrand Model WNRH Left Side Legrand Model WNRH Right Side
External Photos
WNRH2 with Wi-Fi and Zigbee Radios External Pictures Legrand Model WNRH2 Front Side Legrand Model WNRH2 Rear Side Legrand Model WNRH2 Left Side Legrand Model WNRH2 Right Side
ID Label/Location Info
12.7mm 50.8mm R013A21011503 辉 2021.01.18 Color:K+Die Size: 50.8X12.7mm PN: WNRH1 376504
ID Label/Location Info
12.7mm 50.8mm R013A21011503-2 辉 2021.01.18 Color:K+Die Size: 50.8X12.7mm PN: WNRH2 376505
ID Label/Location Info
Gateway Devices FCC and ISED ID Label Locations InWall Radiant Gateway: Model: WNRH1 FCC ID: 2AU5D-WNRH1 IC: 25764-WNRH1 HVIN: WNRH1 OverWall Radiant Gateway: Model: WNRH2 FCC ID: 2AU5D-WNRH1 IC: 25764-WNRH1 HVIN: WNRH2
Internal Photos
WNRH1 Wifi and Zigbee Radios on PCB Pictures Figure 1: WNRH1 PCB Front View Figure 2: WNRH1 PCB Rear View Figure 3: WNRH1 Wi-Fi Antenna Figure 4: WNRH1 Zigbee Antenna Figure 5: WNRH1 Assembly View Figure 6: WNRH1 Assembled Device Front View Figure 7: WNRH1 Assembled Device Rear View
Internal Photos
WNRH2 Wifi and Zigbee Radios on PCB Pictures Figure 1: WNRH2 PCB Front View Figure 2: WNRH2 PCB Rear View Figure 3: WNRH2 Wi-Fi Antenna Figure 4: WNRH2 Zigbee Antenna Figure 5: WNRH2 Assembly View
Parts List/Tune Up Info
XXI-Lab NETATMO –– Antenna Expertise – NLG US product Antenna matching and measurement report Document reference Date Version Page Exp-NETATMO_Match_NLG-US_25-09-2020 25/09/2020 1.0 1 Antenna matching and measurement report Projet : NLG-US XXI-Lab Le client Nom Jean-Michel Monteix Nom Frederic Esnault Date : 25/09/2020 Société NETATMO Historique Date Version Référence Motifs 25/09/2020 1.0 Exp-NETATMO_Match_NLG-US_25-09-2020 Création XXI-Lab NETATMO –– Antenna Expertise – NLG US product Antenna matching and measurement report Document reference Date Version Page Exp-NETATMO_Match_NLG-US_25-09-2020 25/09/2020 1.0 2 Sommaire 1 Introduction...................................................................................................................................... 3 1.1 Type of service : .................................................................................................................................. 3 1.2 Purpose of the study .......................................................................................................................... 3 1.3 Tools used ........................................................................................................................................... 3 1.4 Input data ........................................................................................................................................... 3 1.5 Delivery............................................................................................................................................... 3 2 Wifi Antenna Performances ............................................................................................................. 4 2.1 Antenna Matching .............................................................................................................................. 4 2.2 Radiated measurements ..................................................................................................................... 6 3 Zigbee Antenna Performances ....................................................................................................... 10 3.1 Antenna Matching ............................................................................................................................ 10 3.2 Radiated measurements ................................................................................................................... 12 4 Conclusion ...................................................................................................................................... 16 XXI-Lab NETATMO –– Antenna Expertise – NLG US product Antenna matching and measurement report Document reference Date Version Page Exp-NETATMO_Match_NLG-US_25-09-2020 25/09/2020 1.0 3 1 Introduction 1.1 Type of service : Tuning of antenna matching circuit at 2.4GHz (Ref XXI-Lab: Ant_dev) 1.2 Purpose of the study Search for the optimal matching networks for the NLG-US product antennas - Wifi & Zigbee - at 2.4GHz. 1.3 Tools used Network analyser Anechoic chamber 1.4 Input data One product in permanent transmission mode (Zigbee), one product in permanent transmission mode (Wifi) and one product without firmware for conducted tests only. 1.5 Delivery This study report XXI-Lab NETATMO –– Antenna Expertise – NLG US product Antenna matching and measurement report Document reference Date Version Page Exp-NETATMO_Match_NLG-US_25-09-2020 25/09/2020 1.0 4 2 Wifi Antenna Performances 2.1 Antenna Matching With the antenna matching circuit used by default the tuning is not good. The resonance frequency is too low. figure 1. antenna matching circuit ‘’Ant-1.5pf serie’’ used by default figure 2. Adaptation of the antenna with the matching used as default : ‘’Ant-1.5pf serie’’ A new matching circuit has been designed to improve the antenna tuning. This circuit is the following: XXI-Lab NETATMO –– Antenna Expertise – NLG US product Antenna matching and measurement report Document reference Date Version Page Exp-NETATMO_Match_NLG-US_25-09-2020 25/09/2020 1.0 5 figure 3. antenna matching circuit proposed: ‘’Ant-1pf serie – 1pf shunt’’ With this circuit the antenna matching is good. It is the following: figure 4. Adaptation of the antenna with the matching proposed : ‘’Ant-1pf serie-1pF shunt’’ Among the different matching circuit studied, this matching circuit allows the better radiated performances XXI-Lab NETATMO –– Antenna Expertise – NLG US product Antenna matching and measurement report Document reference Date Version Page Exp-NETATMO_Match_NLG-US_25-09-2020 25/09/2020 1.0 6 2.2 Radiated measurements The measurements were carried out for the E1, E2 and H planes at the2412, 2442 & 2480MHz frequency in vertical and horizontal polarization with a step of 1 °. From these results the total polarization was calculated. Measurements have been done using the modem of the product tuned at maximum power for two different product configurations: product with Wifi matching circuit used by default – ‘’Ant -1.5pF serie’’ and Wifi matching circuit proposed – ‘’ant-1pF serie – 1pF shunt’’ The E1, E2 and H plane are displayed below : figure 5. Photo of the E1, E2 and H plane Results are compiled in the table below: Radiated Power (dBm) / Fréquence / plane 2412MHz 2442MHz 2480MHz H E1 H H E1 E2 H E1 E2 Default matching network ‘’Ant-1.5pf serie’’ 17.3 19.6 21.6 16.2 18.5 21.3 14.9 17.3 20.1 Proposed matching network ‘’Ant-1pf serie – 1pF shunt’’ 20.0 22.7 23.7 19.3 21.6 22.6 18.1 19.8 20.7 tableau 1. Maximum radiated power for the default and proposed matching network The proposed matching network allow to gain 2.1dB at 2412Mhz, 1.3dB at 2442 and 0.6dB at 2480MHz. XXI-Lab NETATMO –– Antenna Expertise – NLG US product Antenna matching and measurement report Document reference Date Version Page Exp-NETATMO_Match_NLG-US_25-09-2020 25/09/2020 1.0 7 figure 6. From left to right, from top to bottom, Radiation pattern for E1, E2 and H planes for the 2412MHz frequency XXI-Lab NETATMO –– Antenna Ex…
Text truncated - open the document above for the full version.
Parts List/Tune Up Info
No.IDManufacturerManufacturer P/NDescriptionQuantity Unit 1C1Murata GJM1555C1H1R0BB01D1pF, 50V, ±1%, Ceramic Capacitor C0G/NP0 HIGH Q RF DESIGN, 04021EA 2C7, C15, C16MurataGRM188R71E105KA12D 1μF, 25V, ±10%, Ceramic Capacitor, X7R, 0603 3EA 3C17, C18, C19TDK CorporationC1005X5R1A104K100nF, 10V, ±15%, Ceramic Capacitor, X5R, 04023EA 4C20, C21MurataGRM1555C1H120JZ01D12pF, 50V, ±5%, Ceramic Capacitor C0G, 04022EA 5C6, C8Taiyo YudenLMK212BJ106KG-T10μF, 10V, ±10%, Ceramic Capacitor, X5R, 08052EA 6L4MurataLQG15HS3N3S02D3.3nH, 300mA, ±10%, Ceramic Inductor, 04021EA 7L6MurataLQG15HS6N8J02D6.8nH, 600mA, 240mOhm, Fixed Inductor SMD, 04021EA 8PF4NetatmoPIFA_TH_H100P220_2480X500X40PIFA ANTENNA 2.4GHZ WIRED 248X50X41EA 9R5, R16PanasonicERJ2GE0R00X0 Ohm, 1/16W, ±1%, RES TF, 04022EA 10R8, R38Rohm SemiconductorMCR01MRTF1003100 kOhm, 1/16W, ±1%, RES TF 04022EA 11R6PanasonicERJ-2RKF1004X1 Mohm, 1/16W, ±1%, RES TF 04021EA 12U8Johanson Technology Inc.2450BM15A0015E RF Balun 2.4GHZ-2.5GHZ 08051EA 13U10AtmelATSAMR21E18A-MUTIC MCU 32BIT 256KB FLASH 32QFN1EA 14X1TXC Corporation7M-16.000MEEQ-T16MHz ±10ppm Crystal 10pF 80 Ohms 4-SMD1EA 981813 Gateway PCB ASSY- Zigbee Radio Parts List
Parts List/Tune Up Info
No.IDManufacturerManufacturer P/NDescriptionQuantity Unit 1C11, C28, C33, C71, C103TDK CorporationC1005X5R1A104K100nF, 10V, ±15%, Ceramic Capacitor, X5R, 04025EA 2C32, C104Taiyo YudenEMK212BBJ475KDHT4.7μF, 16V, ±10%, Ceramic Capacitor, X5R, 08052EA 3C27, L2Murata GJM1555C1H1R0BB01D1pF, 50V, ±1%, Ceramic Capacitor C0G/NP0 HIGH Q RF DESIGN, 04021EA 4C29, C66Taiyo YudenLMK212BJ106KG-T10μF, 10V, ±10%, Ceramic Capacitor, X5R, 08052EA 6C35, C36Johanson Technology Inc500R07S270GV4T27pF, 50V, ±2%, Ceramic Capacitor, NP0, 04022EA 7FB2MurataBLM15BD221SN1D220Ohm, 300mA, 1LN Ferrite Bead, 04021EA 8L3MurataLQG15HS3N3S02D3.3nH, 300mA, ±10%, Ceramic Inductor, 04021EA 9L5TDKMLZ2012A2R2M2.2μH, 650mA, Fixed Inductor, 04021EA 10PF3NetatmoPIFA_TH_H100P220_2480X500X40PIFA ANTENNA 2.4GHZ WIRED 248X50X41EA 11R12, R19, R37, R40, R42, R43PanasonicERJ2GE0R00X0 Ohm, 1/16W, ±1%, RES TF, 04026EA 12R14, R33, R34, R35, R36Rohm SemiconductorMCR01MRTF330233 kOhm, 1/16W, ±1%, RES TF, 04025EA 13R24, R25, R27, R28PanasonicERJ-2RKF1004X1 MOhm, 1/16W, ±1%, RES TF 04024EA 14R30PanasonicERJ-2RKF1002X10 kOhm, 1/16W, ±1%, RES TF 04021EA 15R31PanasonicERJ-2RKF13301X3.3 kOhm, 1/16W, ±1%, RES TF, 04021EA 16R32MurataGRM155R71H102KA01D1000pF, 50V, ±10%, Ceramic Capacitor, X7R, 04021EA 17U6AmpakAP6212Ampak WiFi 802.11b/g/n + BT4.0 module1EA 18U7On SemiconductorNL27WZU04DFT2GIC INVERTER DUAL UNBUFF SOT3631EA 19X4JFVNYX32F-C18OOA-26.000MHzCrystal 26MHz, 18pF, Tol 10ppm, Stab 10ppm1EA 981813 Gateway PCB ASSY- Wi-Fi Radio Parts List
RF Exposure Info
B B E E C C I I N N C C O O R R P P O O R R A A T T E E D D SAR REPORT TEST STANDARDS: FCC Part 15 Subpart C Intentional Radiator KDB 447498 D01 EUT: Legrand WNRH1 Smart Gateway Switch with Netatmo FCC ID: 2AU5D-WNRH1 REPORT#: BEC-2107-03 REV1 CUSTOMER: Pass & Seymour/Legrand 50 Boyd Avenue Syracuse, NY 13209 PREPARED BY: Paul Banker, Test Engineer REVIEWED and APPROVED BY: Steve Fanella, Quality Manager The results described in this report relate only to the item(s) tested. This document shall not be reproduced except in full without prior written permission of BEC Incorporated Report # BEC-2107-03 REV1 Legrand Model WNRH1 Zigbee & Wi-Fi Radio SAR Test Report Release Date: 03/08/2021 Page 2 of 7 TABLE OF CONTENTS Notice To Customer ...................................................................................................................... 3 Revision History ............................................................................................................................ 3 1.0 Administrative Information .............................................................................................. 4 1.1 General Information Table ............................................................................................... 4 2.0 SAR Test Exclusion Parameters and Justification ......................................................... 5 3.0 SAR Test Exclusion Calculation ....................................................................................... 6 Report # BEC-2107-03 REV1 Legrand Model WNRH1 Zigbee & Wi-Fi Radio SAR Test Report Release Date: 03/08/2021 Page 3 of 7 Notice To Customer This report and any recommendations it contains represent the result of BEC’s testing and assessment on behalf of your company. Testing has been conducted according to accepted engineering standards and practices. This report reflects testing and assessment of product samples provided by your company and may not reflect the characteristics of other samples, especially those produced at different times. Therefore this report and its findings and recommendations, if implemented, should not be construed as an assurance or implied warranty for the continuing electromagnetic compatibility (EMC) of the product. BEC shall not be liable for incidental or consequential damages, even if advised of the possibility thereof. BEC will not disseminate this report to other parties without your express permission. You may reproduce this report in its entirety including this notice and the entireties of any supplemental test reports on the same product (e.g. reports on additional testing following modification). However ‘you may not reproduce portions of the report (except for the entirety of the summary section) or quote from it for any purpose without specific prior written permission from BEC’. Revision History Revision # Description of Changes Date of Changes Date Released 0 Test Report Initial Release N/A 01/14/2021 1 Antenna Gain is corrected to 1.0 dBi value. Added all modes of Wi-Fi modulation to the report. 03/04/2021 03/08/2021 Report # BEC-2107-03 REV1 Legrand Model WNRH1 Zigbee & Wi-Fi Radio SAR Test Report Release Date: 03/08/2021 Page 4 of 7 1.0 Administrative Information 1.1 General Information Table Project Number BEC-2107 Manufacturer Legrand Model Number WNRH1 EUT Radios Zigbee Wi-Fi EUT Serial Number 4 8 EUT Sample Number 2107-04 2107-08 Frequency of Operation Zigbee: 2405 – 2480 MHz Wi-Fi: 2412-2462 MHz Antenna Gain + 1.0 dBi Software/Firmware Version certifications_nlg_zb permanent stm32_boot0_app- jtag and TestRadio_v1 nlg-stm32-v2-app FCC ID 2AU5D-WNRH1 Zigbee Radio Chip Info Atmel Model # SAMR21E Wi-Fi Radio Chip Info AMPAK Model # AP6212 FCC Classification DTS Date Samples Received 12/04/2020 Condition of Samples Received Suitable for test Sample Type Production unit EUT Description Legrand Model WNRH1 Smart Gateway Switch with Netatmo Applicable FCC Rules 47 CFR Part 2.1093, KDB 447498 D01 Report # BEC-2107-03 REV1 Legrand Model WNRH1 Zigbee & Wi-Fi Radio SAR Test Report Release Date: 03/08/2021 Page 5 of 7 2.0 SAR Test Exclusion Parameters and Justification From KDB 447498 D01: 4.3. General SAR test exclusion guidance 4.3.2. Standalone SAR test excl…
Text truncated - open the document above for the full version.
Contact Information
Applicant
Kris Glassford(Testing Lab & Certification Manager)
Test Firm
BEC IncorporatedSteve Fanella
Technical Specifications
| # | Rule Parts | Frequency Range | Power Output |
|---|---|---|---|
| 2 | 15C | 2.41 GHz - 2.46 GHz | 66.80 mW |
Other Applications from Legrand/Pass & Seymour
2AU5D-LXX12
Aug 09, 2021Wireless Charging Pad
Equipment Class
DCD - Part 15 Low Power Transmitter Below 1705 kHz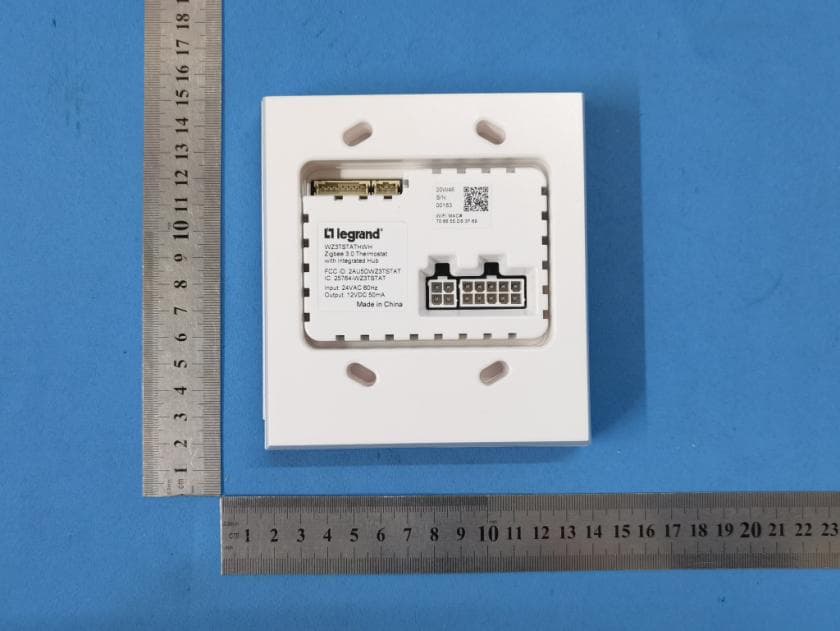
2AU5DWZ3TSTAT
Jun 28, 2021Thermostat
Equipment Class
DTS - Digital Transmission System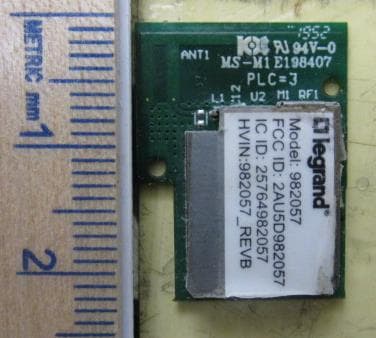
2AU5D982057
Jun 07, 2020982057 Module
Equipment Class
DTS - Digital Transmission System