A3LST10WLRNotebook Computer with Integral Wireless LAN
Samsung Electronics Co Ltd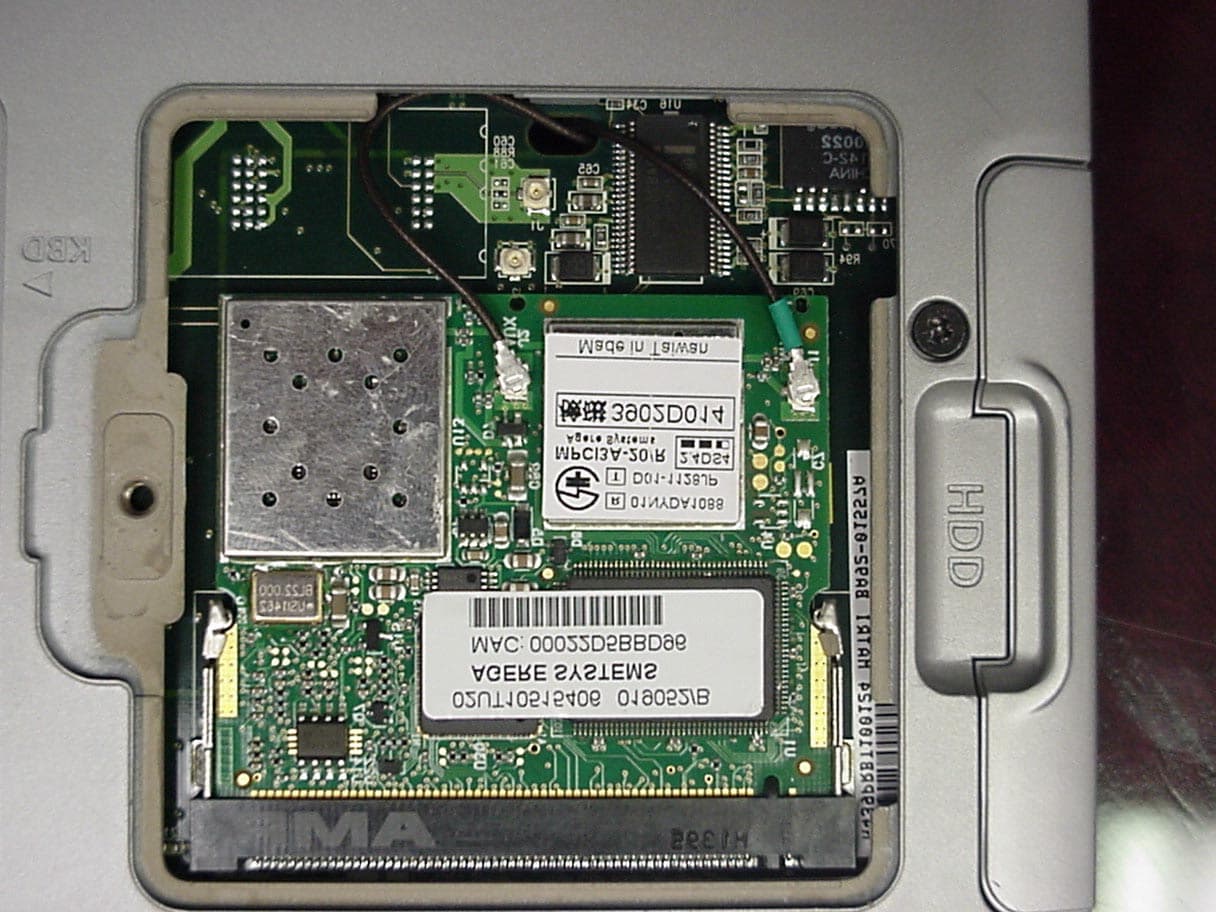
Click to zoom
Application Details
- Equipment Class
- DSS - Part 15 Spread Spectrum Transmitter
- Date of Grant
- Jun 11, 2002
- Application Purpose
- Original Equipment
- Date of Application
- Jun 11, 2002
- Equipment Note
- Notebook Computer with Integral Wireless LAN
- Frequency Range
- 2412.00000000 - 2462.00000000
- Company
- Samsung Electronics Co Ltd
- Country
- United States
Documents & Files
Document Text
Text extracted from the exhibit documents filed with the FCC. Open a document above to read the original.
Users Manual
Notices i Notices No part of this publication may be reproduced, stored in a retrieval system, or transmitted, in any form or by any means, mechanical photocopying, recording or otherwise, without the prior written permission of the manufacturer. The information within this manual is subject to change without notice. The manufacturer shall not be held liable for technical or editorial errors or omissions contained in herein; nor for incidental or consequential damages resulting from the furnishing, performance or use of this material. Microsoft Windows is a registered trademark of the Microsoft Corporation. Product names mentioned herein are for identification purposes only, and may be trademarks and/or registered trademarks of their respective companies. Macrovision Statement If your computer has a DVD drive and an analog TV Out port, the following paragraph applies: This product incorporates copyright protection technology that is protected by method claims of certain U.S. patents and other intellectual property rights owned by Macrovision Corporation and other rights owners. Use of this copyright protection technology must be authorized by Macrovision Corporation, and is intended for home and other limited viewing uses only unless otherwise authorized by Macrovision Corporation. Reverse engineering or disassembly is prohibited. Copyright 2002 All rights are reserved Notice and Safety With Wireless - English.fm Page i Monday, April 1, 2002 11:58 AM ii Users Manual Important Safety Information Safety Instructions Your system is designed and tested to meet the latest standards for safety of information technology equipment. However, to ensure safe use of this product, it is important that the safety instructions marked on the product and in the documentation are followed. Always follow these instructions to help guard against personal injury and damage to your system. i Setting Up your System •Read and follow all instructions marked on the product and in the documentation before you operate your system. Retain all safety and operating instructions for future use. •Do not use this product near water or a heat source such as a radiator. •Set up the system on a stable work surface. •The product should be operated only with the type of power source indicated on the rating label. •Ensure that the electrical outlet you are using to power your equipment is easily accessible in case of fire or short circuit. •If your computer has a voltage selector switch, make sure that the switch is in the proper position for your area. •Openings in the computer case are provided for ventilation. Do not block or cover these openings. Make sure you provide adequate space, at least 6 inches (15 cm), around the system for ventilation when you set up your work area. Never insert objects of any kind into the computer ventilation openings. •Ensure that the fan vents on the bottom of the casing are clear at all times. Do not place the computer on a soft surface, doing so will block the bottom vents. •If you use an extension cord with this system, make sure that the total ampere rating on the products plugged into the extension cord does not exceed the extension cord ampere rating. Notice and Safety With Wireless - English.fm Page ii Monday, April 1, 2002 11:58 AM Important Safety Information iii Care During Use •Do not walk on the power cord or allow anything to rest on it. •Do not spill anything on the system. The best way to avoid spills is to not eat or drink near your system. •Some products have a replaceable CMOS battery on the system board. There is a danger of explosion if the CMOS battery is replaced incorrectly. Replace the battery with the same or equivalent type recommended by the manufacturer. Dispose of batteries according to the manufacturer’s instructions. If the CMOS battery requires replacement insure that a qualified technician performs the task •When the computer is turned off, a small amount of electrical current still flows through the computer. To avoid electrical shock, always unplug all power cables, remove the battery and modem cables from the wall outlets before cleaning the system. •Unplug the system from the wall outlet and refer servicing to qualified personnel if: – The power cord or plug is damaged. – Liquid has been spilled into the system. – The system does not operate properly when the operating instructions are followed. – The system was dropped or the casing is damaged. – The system performance changes. Replacement Parts and Accessories Use only replacement parts and accessories recommended by manufacturer. To reduce the risk of fire, use only No. 26 AWG or larger telecommunications line cord. Written by: Daryl L. Osden Do not use this product in areas classified as hazardous. Such areas include patient care areas of medical and dental facilities, oxygen rich environments, or industrial areas. Notice and Safety With Wireless - English.fm Page iii Monday, April 1, 2002 11:58 AM iv Users Manual Battery Disposal Do not put rechargeable batteries or products powered by non-removable rechargeable batteries in the garbage. Contact the Samsung Helpline for information on how to dispose of batteries that you cannot use or recharge any longer. Follow all local regulations when disposing of old batteries. Notice and Safety With Wireless - English.fm Page iv Monday, April 1, 2002 11:58 AM Regulatory Compliance Statements v Regulatory Compliance Statements Wireless Guidance Low power, Radio LAN type devices (radio frequency (RF) wireless communication devices), operating in the 2.4 GHz Band, may be present (embedded) in your notebook system. The following section is a general overview of considerations while operating a wireless device. Additional limitations, cautions, and concerns for specific countries are listed in the specific country sections (or country group sections). The wireless devices in your system are only qualified for use in the countries identified by the Radio Approval Marks…
Text truncated - open the document above for the full version.
Users Manual
Regulatory Compliance Statements xiii Japan Wireless Devices Low power, Radio LAN type devices (radio frequency (RF) wireless communication devices), operating in the 2.4 GHz Band, may be present (embedded) in your notebook system. This section is only applicable if these devices are present. Refer to the system label to verify the presence of wireless devices. Wireless devices that may be in your system are only qualified for use in Japan if a TELEC ID is on the system label. Operational guidelines for 2.4 GHz band wireless equipment (if equipped) This equipment uses the 2.4 GHz ISM frequency band. The ISM band is the industrial, scientific, and medical device band. Devices that might also use this band are microwave ovens, other LAN devices, amateur radio stations, licensed premises radio stations, and non-licensed specified low-power radio stations. Prior to setting up your device: 1.Make sure that there are no other devices in your area using the same frequency band. 2.Change the channel, location, or discontinue device use if you are interfering with any other radio station. 3.Contact manufacturer if you have any problems with this device. Notice and Safety With Wireless - English.fm Page xiii Monday, April 1, 2002 11:58 AM xiv Users Manual VCCI Statement This equipment is in the Class B category (Information Technology Equipment to be used in a residential area or an adjacent area thereto) and conforms to the standards set by the Voluntary Control Council for Interference by Information Technology Equipment aimed at preventing radio interference in such residential areas. When used near a radio or TV receiver, it may become the cause of radio interference. Read instructions for correct handling. Notice and Safety With Wireless - English.fm Page xiv Monday, April 1, 2002 11:58 AM Laser Safety xv Laser Safety All systems equipped with CD or DVD drives comply with the appropriate safety standards, including IEC 825. The laser devices in these components are classified as “Class 1 Laser Products” under a US Department of Health and Human Services (DHHS) Radiation Performance Standard. Should the unit ever need servicing, contact an authorized service location. Laser Safety Note: Use of controls or adjustments or performance of procedures other than those specified in this manual may result in hazardous radiation exposure. To prevent exposure to laser beams, do not try to open the enclosure of a CD or DVD drive. Notice and Safety With Wireless - English.fm Page xv Monday, April 1, 2002 11:58 AM xvi Users Manual Power Cord Requirements The power cord set (wall plug, cable and AC adapter plug) you received with your computer meets the requirements for use in the country where you purchased your equipment. Power cord sets for use in other countries must meet the requirements of the country where you use the computer. For more information on power cord set requirements, contact your authorized dealer, reseller, or service provider. General Requirements The requirements listed below are applicable to all countries: •The length of the power cord set must be at least 6.00 feet (1.8m) and a maximum of 9.75 feet (3.0m). •All power cord sets must be approved by an acceptable accredited agency responsible for evaluation in the country where the power cord set will be used. •The power cord set must have a minimum current capacity of 7 A and a nominal voltage rating of 125 or 250 volts AC, as required by each country’s power system. •The appliance coupler must meet the mechanical configuration of an EN 60 320/IEC 320 Standard Sheet C13 connector, for mating with appliance inlet on the computer. Notice and Safety With Wireless - English.fm Page xvi Monday, April 1, 2002 11:58 AM Power Cord Requirements xvii Country-Specific Power Cord Set Requirements The requirements listed below are applicable to the specific country listed: Written by: Daryl L. Osden Notes: 1.Flexible cord must be Type HO5VV-F, 2-conductor, 1.0 mm² conductor size. Power cord set fittings (appliance coupler and wall plug) must bear the certification mark of the agency responsible for evaluation in the country where it will be used. 2.Flexible cord must be Type SVT or equivalent, No.18 AWG. Wall plug must be a two-pole grounding type. 3.Appliance coupler, flexible cord, and wall plug must bear a “T” mark and registration number in accordance with the Japanese Dentori Law. Flexible cord must be Type VCT or VCTF, 2-conductor, 0.75 mm² conductor size. Wall plug must be a two-pole grounding type with a Japanese Industrial Standard C8303 (15 A, 125V) configuration. Country Accrediting Agency Applicable Note Numbers AustraliaEANSW1 AustriaOVE1 BelgiumCEBC1 CanadaCSA2 DenmarkDEMKO1 FinlandFIMKO1 FranceUTE1 GermanyVDE1 Italy IMQ1 JapanJIS3 The NetherlandsKEMA1 NorwayNEMKO1 SwedenSEMKO1 SwitzerlandSEV1 United KingdomBSI1 United States UL2 Notice and Safety With Wireless - English.fm Page xvii Monday, April 1, 2002 11:58 AM Using Your Documentation 1 Using Your Documentation Congratulations on your purchase of a notebook computer with the Windows® 2000 operating system. Whether you are new to using a portable computer or are an experienced user, this user’s manual can help you get the most from your computer. Manual Documentation Conventions Information Icons Three icons and their associated messages appear in this manual. The information icons are placed before the step/information they apply to: Warning: Indicates the possibility of personal injury. Caution: Warns you of possible damage to equipment or data. Note: Informs you of special circumstances. Technical Information: Informs you of special requirements or limitations for use of item(s). Keyboard Conventions Keys that you need to press to perform certain functions are displayed in the manual using a small graphic of the button. For example: <Ctrl> or <Ctrl> indicates the control key (Ctrl on the keyboard). If you need to press two keys at the same time, the key names are shown joined …
Text truncated - open the document above for the full version.
Users Manual
6 Users Manual Using Your Computer for the First Time This section gives you detailed information on using your computer for the first time. Installing the Battery To install the battery pack: 1.With the computer’s power off, close the LCD panel and turn the computer over so the bottom of the unit faces up. 2.Slide the battery compartment cover straight up and off the computer. See ”Installing the Battery” on page 42. Insert the battery into the battery compartment, ensuring the correct orientation so that the battery fits in its slot properly. 3.Slide the battery pack into the compartment. Make sure the battery is fully inserted into the compartment. 4.Align the tabs on the battery compartment cover with the slots on the battery compartment. 5.Push the cover straight down until it snaps into place. Matrix 3 Plus (Windows 2000) - English.fm Page 6 Thursday, April 18, 2002 10:35 AM Using Your Computer for the First Time 7 Attaching the AC Adapter Your computer runs on power from the battery in the computer or from an electrical outlet. The first time that you use your computer, fully charge the battery by attaching the power cord to the computer and to an electrical outlet. All batteries lose their charge if they sit unused for an extended time period. When not used, battery can discharge fully in 2 to 3 months. The battery may have discharged in the time it took for the computer to go from the factory to you. To attach the power cord: 1.Plug the AC adapter into the power connector on the back side of the computer. 2.Connect the power cord to the AC adapter and then to an electrical outlet. The battery starts charging as soon as you plug the power cord into an electrical outlet. The battery charges faster if the computer is turned off during charging. If the battery is fully depleted and the computer is turned off, the battery charges in about 3 hours. If the computer is turned on, the battery charges in about 6 hours. When the battery is charging, the battery charge light is red. When the battery is fully charged, the light turns green. See ”Using Power Management Options” on page 52 for more information on using your computer’s battery. AC Adapter Matrix 3 Plus (Windows 2000) - English.fm Page 7 Thursday, April 18, 2002 10:35 AM 8 Users Manual Turning On the Computer To turn on the computer’s power for the first time: 1.Slide the LCD latch, located on the front of the cover to the right. 2.Lift up the cover. 3.Press and then release the power button. The power light is on when the computer’s power is on. Initial Computer Startup: The first time you start your computer you will see the operating system registration screens. Simply read each screen and follow the simple directions. You must complete this process in order to use your computer. A tutorial is provided if you require it. Adjusting the LCD Display You may wish to adjust the LCD (Liquid-Crystal Display) when you begin using your computer. A TFT (Thin-Film Transistor) LCD does not require adjustment for contrast because the contrast is set to remain at maximum. To adjust the LCD: •Press <Fn+Right Arrow> to increase the display brightness. •Press <Fn+Left Arrow> to decrease the display brightness. Power Light Power button Cover Latch Matrix 3 Plus (Windows 2000) - English.fm Page 8 Thursday, April 18, 2002 10:35 AM Using Your Computer for the First Time 9 Turning Off Your Computer Prior to shutting down your computer ensure all of your data and current work are saved. The system will ask if you wish to save any unsaved work, saving your work first will speed the shutdown process. To turn off the computer, complete the following steps: 1.Click on the taskbar. If you need to restart your computer after software (re)installation or because it is not responding select the Restart option in step 3 below. 2.Click Shut Down to display the shutdown popup window shown below. 3.Select Shut down. 4.Click OK. Power Off: If the system does not power off, then press and hold the power button for over 5 seconds. See ”Using Power Management Options” on page 52. Power Button Functions: The power button has several functions other than just turning on and off your computer, see “Using Power Management Options” on page 52. You can also perform a soft boot by saving your files and pressing <Ctrl+Alt+Del> to pop-up the “Windows Task Manager” window. Click Shut Down > Restart. You can perform a cold boot by pressing the power button for more than 4 seconds to turn the computer off, waiting more than five seconds, and then pressing the power button to turn the computer on. The system may perform some extra checks during the restart. ++ Matrix 3 Plus (Windows 2000) - English.fm Page 9 Thursday, April 18, 2002 10:35 AM 10 Users Manual Tips for Using Your Computer The following information helps you avoid potential problems as you use your computer: Do not try to disassemble your computer. Opening the system chassis voids your warranty. Only an authorised manufacturer service center can replace or add any parts inside the chassis. •Follow all the instructions and cautions in your computer user documentation. •The LCD has a polarized surface and can be damaged easily. To prevent damage, avoid touching the screen. •Use only approved AC adapters, auto adapters, memory modules and other options. •Because a notebook computer is small and has restricted air flow around components, it is more likely to overheat than a desktop computer. A fan inside your computer runs when needed to help eliminate heat. Make sure the fan vent on the left side of your computer is not blocked when you use the computer. Occasionally check the vents and remove any accumulated dust on the outside. •Avoid using or storing the computer in extremely hot or cold areas, such as a car on a hot day. Keep the computer away from heaters and out of direct sunlight. Exposure to excessive heat may damage computer components. If you have left your computer in a hot place, let it cool down slowly t…
Text truncated - open the document above for the full version.
Users Manual
Working with PC Cards 35 Working with PC Cards When you install PC Cards, you can add a multitude of functions to your notebook computer similar to those found on add-in boards for desktop computers. There are many PC Cards on the market, the supported PC Cards are listed below: •Input/output, such as modem, network, video capture, and SCSI cards. •Storage, such as hard drive and flash memory cards. Your computer includes the following PC Card support: •Two PC-Card slots: You can install Type I, II, or III cards in the slots. TYPE III Cards: Type III cards are thicker than Types I and II. If you install a Type III card in the bottom slot, you cannot install a card in the top slot. •CardBus hardware and software: CardBus enables the computer to use 32-bit PC Cards. Windows 2000 supports 32-bit and 16-bit PC Cards. •Zoomed video: Both PC Card slots and the video chip on your computer support zoomed video. When you install a zoom video PC Card in the upper or lower slot, data can be transferred directly from the PC Card to video and audio systems without going through the microprocessor. Video conferencing and real-time multimedia devices, such as video cameras, are supported by zoomed video. Maintaining PC Cards To maintain your PC Cards, follow these guidelines: •Keep cards away from excessive heat, direct sunlight, and liquids. •Do not drop, bend, flex, or crush cards when handling. •Keep dust, magnets, and static electricity away from PC Cards. •When a card is not in use, carry it in its protective carrying case. •Some PC Cards include cables that extend from the back of the cards. Be careful not to bend or put excessive strain on these cables. Matrix 3 Plus (Windows 2000) - English.fm Page 35 Thursday, April 18, 2002 10:35 AM 36 Users Manual Using PC Cards To insert a PC Card into a slot: 1.Push the slot door in with the PC Card. 2.Align the card with a slot and insert the card into the slot until it locks in place. Windows automatically assigns computer resources (such as communication ports and memory addresses) to a PC Card installed in your computer. To remove a PC Card from your computer: Use the following procedures to remove PC Cards, or you may lose data that is being stored to a card. 1.Click icon on the taskbar. 2.Select the card currently in use, and click the Stop button. PC Card Eject Buttons PC Card: (Example) Insert PC Card with product information facing up Matrix 3 Plus (Windows 2000) - English.fm Page 36 Thursday, April 18, 2002 10:35 AM Working with PC Cards 37 The eject button for the card slot operates in two steps, therefore to remove a PC Card: 3.Push the eject button once to pop it outward then push the eject button again to eject the card. 4.Pull the card out of the PC Card slot. PC Card Eject Buttons Matrix 3 Plus (Windows 2000) - English.fm Page 37 Thursday, April 18, 2002 10:35 AM 38 Users Manual Multi Media Functions/Equipment Media Player You can play video and audio CD files with the Windows Media Player, as well as watching TV, video and listening to the radio through internet. The on-board audio hardware and software of your computer enable the computer to play audio/video compact discs. The instructions to play a video CD-ROM are the same as the instructions for the audio CD below. If you wish to do so, you can attach external speakers to the Headphone jack. Playing a Audio/Multimedia CD To play an CD follow the instructions below: 1.Insert a compact disc into your CD-ROM drive. 2.Press the button on the CD-ROM drive to open the CD-ROM device. 3.Insert a CD, label side up. 4.Carefully push the tray in to close the drive tray. The Windows Media Player button appears on the taskbar if not already there, and the music begins to play. If the disk does not play click Start > Programs > Accessories > Entertainment > Windows Media Player. CD LED On: A LED on the drive tray is on when the computer is reading from a CD. Do not remove a disc when this LED is on. Removing the Audio/Multimedia CD To remove the CD follow the instructions below: 1.Click Start > Programs > Accessories > Entertainment > Windows Media Player to open the Windows Media Player window, if not already open. 2.Click Stop in the Windows Media Player window or simply close the Windows media player. 3.Press the button on your CD-ROM drive. The drive tray opens and you can remove the CD from the CD-ROM drive. 4.For more information on playing compact discs, see the Help menu in the Windows Media Player window. Matrix 3 Plus (Windows 2000) - English.fm Page 38 Thursday, April 18, 2002 10:35 AM Multi Media Functions/Equipment 39 Dolby Digital & Dolby Theater System Your computer supports Dolby Digital & Dolby Theater System through a SPDIF connector, located next to the volume control wheel on the left side of the computer. You must have a 3.5 mm (mono)- to RCA cable to use this port. Volume Control Using the Wheel Volume Control Simply turn the wheel located on the left side of the computer. Using the Keyboard Changing the volume with your keyboard. Use to decrease the volume or to increase the volume. Using the Volume Control Icon Double-Click icon in the active program tray. The Volume Control window pops up. Use this window to adjust the volume. You can pop up a simple volume slider by a single click icon. Wheel Volume Control ++ Matrix 3 Plus (Windows 2000) - English.fm Page 39 Thursday, April 18, 2002 10:35 AM 40 Users Manual Using the Battery Your computer uses a smart rechargeable Lithium-ion (Li-ion) battery pack for power when the AC adapter is not attached to an electrical outlet. The smart battery gives a accurate measurement of the current battery capacity which helps extend operating time by enabling effective power management in operating systems that take advantage of the accurate information supplied by the battery. Charging the Battery Your computer’s battery starts charging automatically when you connect the power to the computer and to an electrical outlet. If the computer is o…
Text truncated - open the document above for the full version.
Users Manual
60 Users Manual Using Dual View Mode Single View mode is the basic display mode which displays same view on all the display devices connected to a system. Dual View mode is the “Extended screen mode” supported in Windows, which displays separate views on each display devices connected to a system. The default setting on your system is Single View mode. Setting Dual View Mode To set Dual View mode on your system: 1.Connect peripheral display device such as monitor or TV to your system and start the system. 2.Click Start > Settings > Control Panel. 3.Click Display icon . The Display Properties window appears. 4.Click the Settings tab. The Settings screen appears. 5.Check Extend my Windows desktop onto this monitor. 6.You can drag the second monitor image to position where you want your extended screen space with respect to the primary monitor (usually the LCD). To confirm whether the system is set properly with Dual View mode: 1.Open Display properties and click Settings tab. 2.Place the cursor on the first monitor picture and click and hold over a second, a number 1 will be shown on the first actual monitor screen. And place the cursor on the second monitor picture and click and hold over a second, then digit number 2 will be shown on the second actual monitor screen. 3.The monitor displays digit number 1 is the primary monitor and number 2 is the secondary monitor. In Windows explorer, the program is displayed on the primary monitor, if you can drag it to the secondary monitor, then Duo View mode is now working properly. Matrix 3 Plus (Windows 2000) - English.fm Page 60 Thursday, April 18, 2002 10:35 AM Using Dual View Mode 61 The secondary monitor has a display of 256 colours (colour depth) and 640x480 pixels (resolution) at first. The colour depth and resolution of primary/secondary monitors are separately changeable. To reset the system to Single View mode: 1.Start Display properties. 2.Click Settings tab. 3.Click the second monitor among two monitor pictures. 4.Uncheck Extend my Windows desktop onto this monitor. 5.Click OK. Matrix 3 Plus (Windows 2000) - English.fm Page 61 Thursday, April 18, 2002 10:35 AM 62 Users Manual Using the TV-Out Port Using the TV-out port, a compatible TV or other compatible display device can be connected and an image displayed. No Audio is transmitted through the TV-Out port. To check if and how your TV displays the TV-out signal see the documentation included with your TV. You must also insure that (TV/Video) is changed to Video mode using the TV remote controller or the buttons on the TV set. To enable TV-out: 1.Connect the TV to the TV-Out port using an appropriate cable. 2.Click Start > Settings > Control Panel. 3.Click Display icon . The Display Properties window appears. 4.Click the Settings tab. The Settings screen appears. 5.Ensure Extend my Windows desktop onto this monitor box is unchecked. 6.Click Advanced > Display. 7.Click the check box to the left of the text “TV”. 8.Follow the screen prompts and the LCD screen display will be duplicated on the television. If the TV symbol is grayed out then the system has not detected a TV, check that the TV standard in the System Setup is set correctly and that the TV is turned on and connected properly. You can not use TV-out port in DOS mode. 9.Click Apply or OK. Matrix 3 Plus (Windows 2000) - English.fm Page 62 Thursday, April 18, 2002 10:35 AM Using Options 63 Using Options You can order the following options for your Notebook computer from your authorised reseller: •An extra AC adapter. •An auto adapter that enables you to charge the computer’s battery and operate the computer while in an automobile. •An extra battery pack. •An upgraded hard drive. Optional hard drives are available to fit in the hard drive compartment or the Flex-Bay. •128, 256 and 512 MB DDR SDRAM memory modules that enable you to upgrade your computer’s memory to a maximum of 1 GB. •A CD-ROM drive module (CD Only or CD R/W). •DVD/CD-RW Combo drive: •A DVD-ROM drive module. •A Superdisk LS-120 drive. •Docking options that enable you to use your computer like a desktop computer. •Wireless LAN •IrSTICK TM The options that are available may change periodically. Contact your reseller for updated information on current and new options. Memory Modules You can increase system memory by installing optional memory modules. You can install a 128 256 or 512 MB modules. To avoid possible system problems, use only approved memory modules in your computer. Matrix 3 Plus (Windows 2000) - English.fm Page 63 Thursday, April 18, 2002 10:35 AM 64 Users Manual Before You Install Memory To prevent personal injury and damage to the equipment, follow the precautions listed here before installing a memory module. Take the following precautions when installing a memory module: •Before you remove the memory module compartment door, turn off the computer, unplug the power cord, and remove the battery. Also, disconnect any peripheral devices. •Before handling a memory module, discharge any static electricity by touching a grounded surface or using a grounding wrist strap. •Do not insert objects with conductive material, such as metal screwdrivers or graphite pencils, into the memory-module compartment. •Be careful in handling the metal plate of the memory door. Installing a Memory Module Handle a memory module carefully. Hold them only by the edges. To install a memory module: 1.Turn the computer over so that the bottom faces up. Matrix 3 Plus (Windows 2000) - English.fm Page 64 Thursday, April 18, 2002 10:35 AM Using Options 65 2.Using a screwdriver, remove the screw that holds the memory-module compartment door in place. 3.Grasp the edge of the door and pull the door off the chassis. 4.Remove installed modules if necessary: Memory Module Precautions: When removing the module, pull on the plastic portion of the connector slot tabs only. Do not pull on the metal part of the tabs, this may damage the tabs. a.Pull the plastic tabs on the connector slot outward …
Text truncated - open the document above for the full version.
Contact Information
Applicant
Jenni Chun(General Manager)
Technical Contact
Rhein Tech Laboratories, Inc.Desmond Fraser
[email protected]703 689 0368
360 Herndon Parkway · Herndon, Virginia · United States
Test Firm
Rhein Tech Laboratories, Inc.Rick McMurray
Technical Specifications
| # | Rule Parts | Frequency Range | Power Output |
|---|---|---|---|
| 1 | 15C | 2.41 GHz - 2.46 GHz | 38.00 mW |
Other Applications from Samsung Electronics Co Ltd
A3LSMS741B
Aug 05, 2026Portable Handset
Equipment Class
6VL - 15E 6 GHZ Very Low Power DeviceA3LSMX940
Jul 31, 2026BT,BLE Tablet DTS,UNII a,b,g,n,ac,ax,be and digitizer
Equipment Class
DTS - Digital Transmission SystemA3LSMS741U
Jul 30, 2026Portable Handset
Equipment Class
6CD - 15E 6 GHz Low Power Dual ClientA3LSMX840
Jul 27, 2026BT,BLE Tablet DTS,UNII a,b,g,n,ac,ax and Digitizer
Equipment Class
DSS - Part 15 Spread Spectrum TransmitterA3LSMX848U
Jul 27, 2026WCDMA, LTE, 5G NR Tablet BT,BLE, DTS,UNII a b g n ac ax and Digitizer
Equipment Class
JBP - Part 15 Class B Computing Device Peripheral