ABZ89FT76235400xxyyzzab
Motorola Solutions, Inc.
Click to zoom
Application Details
- Equipment Class
- NII - Unlicensed National Information Infrastructure TX
- Date of Grant
- Jul 26, 2007
- Application Purpose
- Original Equipment
- Date of Application
- Mar 20, 2007
- Equipment Note
- 5400xxyyzzab
- Frequency Range
- 5495.00000000 - 5705.00000000
- Company
- Motorola Solutions, Inc.
- Country
- United States
Documents & Files
Document Text
Text extracted from the exhibit documents filed with the FCC. Open a document above to read the original.
Users Manual
March 200 Through Software Re le ase 6. Dra f t 3 - for Regula tory Review Canopy ® System Release 8 User Guide Sys8-UG-en Issue 2 February 2007 includes... Planning Guide Installation and Configuration Guide Operations Guide Reference Information R Notices See the following information: ◦ important regulatory and legal notices in Section 36 on Page 489. ◦ personal safety guidelines in Section 15 on Page 169. Trademarks, Product Names, and Service Names MOTOROLA, the stylized M Logo and all ot her trademarks indicated as such herein are trademarks of Motorola, Inc. ® Reg. U.S. Pat & Tm. Office. Canopy is a registered trademark and MOTOwi4 is a trademark of Motorola, Inc. All other product or service names are the property of their respective owners. Adobe Reader is a registered trademark of Adobe Systems Incorporated. Java and all other Java-based marks are trademarks or registered trademarks of Sun Microsystems, Inc. in the U.S. and other countries. Microsoft and Windows are registered trademarks of Microsoft Corporation, and Windows XP is a trademark of Microsoft Corporation. © 2007 Motorola, Inc. All rights reserved. http://www.motorola.com/canopy March 200 Through Software Re le ase 6. Dra f t 3 - for Regula tory Review TABLE OF SECTIONS Guide To This User Guide 31 Overview of Canopy Networks 43 Planning Guide 127 Installation and Configuration Guide 167 Operations Guide 363 Reference Information 485 Glossary 501 March 200 Through Software Re le ase 6. Dra f t 3 - for Regula tory Review TABLE OF CONTENTS G G U I D E U I D E T T O O T T H I S H I S U U S E R S E R G G U I D E U I D E . . . . . . . . . . . . . . . . . . . . . . . . . . . . . . . . . . . . . . . . . . . . . . . . . . 3 1 3 1 1 New in This Issue....................................................................................................33 1.1 New Products and Features Described in Issue 2..........................................33 1.2 New Descriptions and Revisions in Issue 2....................................................33 1.3 MOTOwi4 Portfolio.........................................................................................33 1.4 Products Covered by This User Guide...........................................................33 1.5 Products Not Covered by This User Guide.....................................................34 1.6 Software Compatibility Described in This User Guide.....................................34 2 Using This User Guide............................................................................................35 2.1 Finding the Information You Need..................................................................35 2.1.1 Becoming Familiar with This User Guide..........................................................35 2.1.2 Searching This User Guide.................................................................................38 2.1.3 Finding Parameter and Field Definitions for Module Web Pages....................38 2.2 Interpreting Typeface and Other Conventions................................................41 2.3 Getting Additional Help...................................................................................42 2.4 Sending Feedback.........................................................................................42 O O V E R V I E W O F V E R V I E W O F C C A N O A N O P Y P Y N N E T WO R K S E T WO R K S . . . . . . . . . . . . . . . . . . . . . . . . . . . . . . . . 4 3 4 3 3 Advancing from Research to Implementation......................................................45 4 Realizing a Wireless Backhaul Network................................................................47 5 Exploring the Scope of Solutions..........................................................................49 5.1 Components...................................................................................................49 5.1.1 Canopy Access Point Module.............................................................................49 5.1.2 Advantage Access Point Module.......................................................................49 5.1.3 Access Point Cluster...........................................................................................50 5.1.4 Canopy Subscriber Module................................................................................50 5.1.5 Advantage Subscriber Module...........................................................................50 5.1.6 Canopy Lite Subscriber Module.........................................................................50 5.1.7 900-MHz AP and SM..........................................................................................51 5.1.8 Backhaul Module.................................................................................................52 5.1.9 OFDM Series Backhaul Modules.......................................................................52 5.1.10 Power Indoor Units for OFDM Series Backhaul Modules..............................53 5.1.11 Radio Adjustable Power Capabilities...............................................................54 5.1.12 T1/E1 Multiplexer...............................................................................................54 5.1.13 Cluster Management Module-2 (Part 1008CK-2)...........................................55 5.1.14 Cluster Management Module micro (Part 1070CK)........................................56 5.1.15 GPS Antenna.....................................................................................................56 5.1.16 Surge Suppressor (Part 300SS).......................................................................57 5.1.17 Accessory Components....................................................................................57 5.2 Frequency Band Ranges................................................................................61 5.3 Canopy Product Comparisons........................................................................62 5.3.1 C…
Text truncated - open the document above for the full version.
Users Manual
Re le ase 8 Installation and Configuration Guide Issue 2, December 2006 Dra f t 2 for Regula tory Review 201 ◦ Board Type ◦ FPGA Version 3. Systematically ensure that you can retrieve this data (from a database, for example) when you later prepare to deploy the SM to subscriber premises. 4. Return you to the Remote Subscribers tab of the AP. 5. Click the link of the next SM that you wish to test. 6. Repeat the test procedure from that point. When you have tested all of the SMs that you intend to test, return your browser to the General Status tab of the AP. =========================== end of procedure =========================== 16.3.8 General Status Tab of the AP An example of an AP General Status tab is displayed in Figure 67. Figure 67: General Status tab of AP, example The General Status tab provides information on the operation of this AP. This is the tab that opens by default when you access the GUI of the AP. The General Status tab provides the following read-only fields. Installation and Configuration Guide Re le ase 8 202 Dra f t 2 for Regula tory Review Issue 2, December 2006 Device Type This field indicates the type of the Canopy module. Values include the frequency band of the AP, its module type, and its MAC address. Software Version This field indicates the Canopy system release, the time and date of the release, and whether communications involving the module are secured by DES or AES encryption (see Encrypting Canopy Radio Transmissions on Page 371). If you request technical support, provide the information from this field. Software BOOT Version This field indicates the version of the CANOPYBOOT file. If you request technical support, provide the information from this field. Board Type This field indicates the series of hardware. See Designations for Hardware in Radios on Page 367. FPGA Version This field indicates the version of the field-programmable gate array (FPGA) on the module. When you request technical support, provide the information from this field. Uptime This field indicates how long the module has operated since power was applied. System Time This field provides the current time. If the AP is connected to a CMM, then this field provides GMT (Greenwich Mean Time). Any SM that registers to the AP inherits the system time. Last NTP Time Update This field displays when the AP last used time sent from an NTP server. If the AP has not been configured in the Time tab of the Configuration page to request time from an NTP server, then this field is populated by 00:00:00 00/00/00. Ethernet Interface This field indicates the speed and duplex state of the Ethernet interface to the AP. Registered SM Count This field indicates how many SMs are registered to the AP. GPS Sync Pulse Status This field indicates the status of synchronization as follows: ◦ Generating sync indicates that the module is set to generate the sync pulse. ◦ Receiving Sync indicates that the module is set to receive a sync pulse from an outside source and is receiving the pulse. ◦ ERROR: No Sync Pulse indicates that the module is set to receive a sync pulse from an outside source and is not receiving the pulse. Re le ase 8 Installation and Configuration Guide Issue 2, December 2006 Dra f t 2 for Regula tory Review 203 NOTE: When this message is displayed, the AP transmitter is turned off to avoid self-interference within the Canopy system. Site Name This field indicates the name of the physical module. You can assign or change this name in the SNMP tab of the AP Configuration page. This information is also set into the sysName SNMP MIB-II object and can be polled by an SNMP management server. Site Contact This field indicates contact information for the physical module. You can provide or change this information in the SNMP tab of the AP Configuration page. This information is also set into the sysName SNMP MIB-II object and can be polled by an SNMP management server. Site Location This field indicates site information for the physical module. You can provide or change this information in the SNMP tab of the AP Configuration page. Scheduling Type This field indicates the type of frame scheduler that is active in the AP. MP Double Rate This field indicates whether 2X modulation rate is enabled for the sector. 16.3.9 Concluding the Test of Point-to-Multipoint Links To conclude the test, perform the following steps. Procedure 11: Verifying and recording information from the AP 1. Confirm that the GPS Sync Pulse Status field indicates Generating Sync. NOTE: This indication confirms that the AP is properly functional. 2. While your browser is directed to this General Status tab, note (or print) the values of the following fields: ◦ Device type ◦ Software Version ◦ Software BOOT Version ◦ Board Type ◦ FPGA Version 3. Systematically ensure that you can retrieve this data when you prepare to deploy the AP. =========================== end of procedure ====================== Installation and Configuration Guide Re le ase 8 204 Dra f t 2 for Regula tory Review Issue 2, December 2006 16.4 CONFIGURING A POINT-TO-POINT LINK FOR TEST NOTE: This section supports the Canopy 10- and 20-Mbps Backhaul Modules. To find setup and configuration guides that support the OFDM Series Backhaul Modules, refer to Products Not Covered by This User Guide on Page 34. Perform the following steps to begin the test setup. Procedure 12: Setting up the BH for Quick Start 1. In one hand, securely hold the top (larger shell) of the BH that you intend to deploy as a timing master. With the other hand, depress the lever in the back of the base cover (smaller shell). Remove the base cover. 2. Plug one end of a CAT 5 Ethernet cable into the timing master. 3. Plug the other end of the Ethernet cable into the jack in the pig tail that hangs from the power supply. 4. Plug the other connector of the pig tail into the Ethernet jack of the computing device. WARNING! From this point until you remove power from the BH, stay at least as far from the BH a…
Text truncated - open the document above for the full version.
Users Manual
Re le ase 8 Installation and Configuration Guide Issue 2, December 2006 Dra f t 2 for Regula tory Review 251 18.1.6 Security Tab of the AP An example of the Security tab of the AP is displayed in Figure 86. Figure 86: Security tab of AP, example In the Security tab of the AP, you may set the following parameters. Authentication Mode If the AP has authentication capability, then you can use this field to select from among the following authentication modes: ◦ Authentication Disabled—the AP requires no SMs to authenticate. Installation and Configuration Guide Re le ase 8 252 Dra f t 2 for Regula tory Review Issue 2, December 2006 ◦ Authentication Required—the AP requires any SM that attempts registration to be authenticated in BAM or Prizm before registration. If the AP does not have authentication capability, then this parameter displays Authentication Not Available. Authentication Server 1 to 3 If either BAM or the BAM subsystem in Prizm is implemented and the AP has authentication capability, enter the IP address of one or more BAM servers that perform authentication for SMs registered to this AP. Enter these in order of primary, secondary, then tertiary. Encryption Specify the type of air link security to apply to this AP: ◦ Encryption Disabled provides no encryption on the air link. This is the default mode. ◦ Encryption Enabled provides encryption, using a factory-programmed secret key that is unique for each module. Encrypt Downlink Broadcast When Encryption Enabled is selected in the Airlink Security parameter (described above) and Enable is selected in the Encrypt Downlink Broadcast parameter, the AP encrypts downlink broadcast packets as ◦ DES where the AP is DES capable. ◦ AES where the AP is AES capable. For more information about the Encrypt Downlink Broadcast feature, see Encrypting Downlink Broadcasts on Page 380. SM Display of AP Evaluation Data You can use this field to suppress the display of data about this AP on the AP Evaluation tab of the Tools page in all SMs that register. Web, Telnet, FTP Session Timeout Enter the expiry in seconds for remote management sessions via HTTP, telnet, or ftp access to the AP. IP Access Control You can permit access to the AP from any IP address (IP Access Filtering Disabled) or limit it to access from only one, two, or three IP addresses that you specify (IP Access Filtering Enabled). If you select IP Access Filtering Enabled, then you must populate at least one of the three Allowed Source IP parameters or have no access permitted from any IP address, including access and management by Prizm. Allowed Source IP 1 to 3 If you selected IP Access Filtering Enabled for the IP Access Control parameter, then you must populate at least one of the three Allowed Source IP parameters or have no access permitted to the AP from any IP address. You may populate as many as all three. If you selected IP Access Filtering Disabled for the IP Access Control parameter, then no entries in this parameter are read, and access from all IP addresses is permitted. Re le ase 8 Installation and Configuration Guide Issue 2, December 2006 Dra f t 2 for Regula tory Review 253 The Security tab of the AP also provides the following buttons. Save Changes When you click this button, any changes that you made on this tab are recorded in flash memory. However, these changes do not apply until the next reboot of the module. Reboot When you click this button 1. the module reboots. 2. any changes that you saved by a click of the Save Changes button are implemented. 18.1.7 VLAN Tab of the AP An example of the AP VLAN tab is displayed in Figure 87. Figure 87: VLAN tab of AP, example In the VLAN tab of the AP, you may set the following parameters. VLAN Specify whether VLAN functionality for the AP and all linked SMs should (Enabled) or should not (Disabled) be allowed. The default value is Disabled. Installation and Configuration Guide Re le ase 8 254 Dra f t 2 for Regula tory Review Issue 2, December 2006 Dynamic Learning Specify whether the AP should (Enabled) or should not (Disabled) add the VLAN IDs (VIDs) of upstream frames to the VID table. (The AP passes frames with VIDs that are stored in the table both upstream and downstream.) The default value is Enabled. Allow Frame Types Select the type of arriving frames that the AP should tag, using the VID that is stored in the Untagged Ingress VID parameter. The default value is All Frames. VLAN Aging Timeout Specify how long the AP should keep dynamically learned VIDs. The range of values is 5 to 1440 (minutes). The default value is 25 (minutes). NOTE: VIDs that you enter for the Management VID and VLAN Membership parameters do not time out. Management VID Enter the VID that the operator wishes to use to communicate with the module manager. The range of values is 1 to 4095. The default value is 1. SM Management VID Pass-through Specify whether to allow the SM (Enable) or the AP (Disable) to control the VLAN settings of this SM. The default value is Enable. CAUTION! Do not set this parameter to Enable where both ◦ a BAM release earlier than 2.1 is implemented. ◦ the Configuration Source parameter in the AP is set to BAM. This combination causes the SMs to become unmanageable, until you gain direct access with an override plug and remove this combination from the AP configuration. Save Changes When you click this button, any changes that you made on this tab are recorded in flash memory. However, these changes do not apply until the next reboot of the module. Reboot When you click this button 1. the module reboots. 2. any changes that you saved by a click of the Save Changes button are implemented. Re le ase 8 Installation and Configuration Guide Issue 2, December 2006 Dra f t 2 for Regula tory Review 255 18.1.8 VLAN Membership Tab of the AP An example of the VLAN Membership tab of the AP is displayed in Figure 88. Figure 88: VLAN Membership tab of AP, example You may set the VLAN Membership tab parameter as follows. VLAN Members…
Text truncated - open the document above for the full version.
Users Manual
Re le ase 8 Installation and Configuration Guide Issue 2, December 2006 Dra f t 2 for Regula tory Review 301 RECOMMENDATION: Note the color code that you enter. Ensure that you can readily associate this color code both with the module and with the other data that you store about the module. Sector ID You can optionally enter an identifier to distinguish this link. Downlink Data The operator specifies the percentage of the aggregate (uplink and downlink total) throughput that is needed for the downlink. The default for this parameter is 50%. Transmit Frame Spreading If you select Enable, then a BHS between two BHMs can register in the assigned BHM (not the other BHM). Canopy strongly recommends that you select this option. With this selection, the BHM does not transmit a beacon in each frame, but rather transmits a beacon in only pseudo-random frames in which the BHS expects the beacon. This allows multiple BHMs to send beacons to multiple BHSs in the same range without interference. Transmitter Output Power Nations and regions may regulate transmitter output power. For example ◦ Both 900-MHz and 5.7-GHz modules are available as connectorized radios, which require the operator to adjust power to ensure regulatory compliance. In addition to setting the power in the 5.7-GHz connectorized module, the operator must set the antenna gain/cable loss such that the module can accurately report received power at the antenna. ◦ Legal maximum allowable transmitter output power and EIRP (Equivalent Isotropic Radiated Power) in the 2.4-GHz frequency band varies by country and region. The output power of Series P9 2.4-GHz modules can be adjusted to meet these national or regional regulatory requirements. ◦ Countries and regions that permit the use of the 5.4-GHz frequency band (CEPT member states, for example), generally require equipment using the band to have adjustable power. The professional installer of Canopy equipment has the responsibility to ◦ maintain awareness of applicable regulations. ◦ calculate the permissible transmitter output power for the module. ◦ confirm that the initial power setting is compliant with national or regional regulations. ◦ confirm that the power setting is compliant following any reset of the module to factory defaults. For information on how to calculate the permissible transmitter output power to enter in this parameter, see Adjusting Transmitter Output Power on Page 326. The Radio tab also provides the following buttons. Installation and Configuration Guide Re le ase 8 302 Dra f t 2 for Regula tory Review Issue 2, December 2006 Save Changes When you click this button, any changes that you made on the IP Configuration page are recorded in flash memory. However, these changes do not apply until the next reboot of the module. Reboot When you click this button 1. the module reboots. 2. any changes that you saved by a click of the Save Changes button are implemented. Re le ase 8 Installation and Configuration Guide Issue 2, December 2006 Dra f t 2 for Regula tory Review 303 18.4.4 SNMP Tab of the BHM An example of the SNMP tab in a BHM is displayed in Figure 109. Figure 109: SNMP tab of BHM, example In the SNMP tab of the BHM, you may set the following parameters. Installation and Configuration Guide Re le ase 8 304 Dra f t 2 for Regula tory Review Issue 2, December 2006 Community String Specify a control string that allows Prizm or a Network Management Station (NMS) to access the module through SNMP. No spaces are allowed in this string. The default string is Canopy. The Community String value is clear text and is readable by a packet monitor. Additional security derives from the configuration of the Accessing Subnet, Trap Address, and Permission parameters. Accessing Subnet Specify the addresses that are allowed to send SNMP requests to this BHM. Prizm or the NMS has an address that is among these addresses (this subnet). You must enter both ◦ The network IP address in the form xxx.xxx.xxx.xxx ◦ The CIDR (Classless Interdomain Routing) prefix length in the form /xx For example ◦ the /16 in 198.32.0.0/16 specifies a subnet mask of 255.255.0.0 (the first 16 bits in the address range are identical among all members of the subnet). ◦ 192.168.102.0 specifies that any device whose IP address is in the range 192.168.102.0 to 192.168.102.254 can send SNMP requests to the BHM, presuming that the device supplies the correct Community String value. NOTE: For more information on CIDR, execute an Internet search on “Classless Interdomain Routing.” The default treatment is to allow all networks access. Trap Address 1 to 10 Specify ten or fewer IP addresses (xxx.xxx.xxx.xxx) to which trap information should be sent. Trap information informs Prizm or an NMS that something has occurred. For example, trap information is sent ◦ after a reboot of the module. ◦ when Prizm or an NMS attempts to access agent information but either − supplied an inappropriate community string or SNMP version number. − is associated with a subnet to which access is disallowed. Trap Enable Select either Sync Status or Session Status to enable SNMP traps. If you select neither, then traps are disabled. Read Permissions Select Read Only if you wish to disallow any parameter changes by Prizm or an NMS. Re le ase 8 Installation and Configuration Guide Issue 2, December 2006 Dra f t 2 for Regula tory Review 305 Site Name Specify a string to associate with the physical module. This parameter is written into the sysName SNMP MIB-II object and can be polled by an NMS. The buffer size for this field is 128 characters. Site Contact Enter contact information for the module administrator. This parameter is written into the sysContact SNMP MIB-II object and can be polled by an NMS. The buffer size for this field is 128 characters. Site Location Enter information about the physical location of the module. This parameter is written into the sysLocation SNMP MIB-II object and can be polled by an NMS. The buffer size for this…
Text truncated - open the document above for the full version.
Users Manual
Re le ase 8 Installation and Configuration Guide Issue 2, December 2006 Dra f t 2 for Regula tory Review 351 7. Open the Session Status tab in the Home page of the AP. NOTE: An example of this page is shown in Figure 137. Figure 137: AP/SM link status indications in the AP Session Status tab 8. Find the Session Count line under the MAC address of the SM.
Users Manual
Re le ase 8 Installation and Configuration Guide Issue 2, December 2006 Dra f t 2 for Regula tory Review 353 Improper dish, tube, and module positions for this case are illustrated in Figure 139. --------------------------------------------EARTH-------------------------------------------- Figure 139: Incorrect mount with reflector dish 19.9.2 Modules Mounted at Different Elevations For cases where the other module in the link is mounted at a different elevation, the assembly hardware allows tilt adjustment. The proper angle of tilt can be calculated as a factor of both the difference in elevation and the distance that the link spans. Even in this case, a plumb line and a protractor can be helpful to ensure the proper tilt. This tilt is typically minimal. The number of degrees to offset (from vertical) the mounting hardware leg of the support tube is equal to the angle of elevation from the lower module to the higher module (b in the example provided in Figure 40 on Page 145). 19.9.3 Mounting Assembly Both the hardware that Mounting Assembly 27RD provides for adjustment and the relationship between the offset angle of the module and the direction of the beam are illustrated in Figure 140. Installation and Configuration Guide Re le ase 8 354 Dra f t 2 for Regula tory Review Issue 2, December 2006 Figure 140: Mounting assembly, exploded view 19.10 INSTALLING A BH TIMING MASTER To install the Canopy BHM, perform the following steps: Procedure 30: Installing the BHM 1. Access the General tab of the Configuration page in the BHM. 2. If this is a 20-Mbps BH, set the 2X Rate parameter to Disabled (temporarily for easier course aiming). 3. Click the Save Changes button. 4. Click the Reboot button. 5. After the reboot is completed, remove power from the BHM. 6. Choose the best mounting location for your particular application. 7. Attach the BHM to the arm of the Canopy Passive Reflector dish assembly as shown in Figure 141. RECOMMENDATION: The arm is molded to receive and properly aim the module relative to the aim of the dish. ( See Figure 138 on Page 352.) Stainless steel hose clamps should be used for the attachment. Re le ase 8 Installation and Configuration Guide Issue 2, December 2006 Dra f t 2 for Regula tory Review 355 Stainless steel hose clamps Reflector dish arm Figure 141: BH attachment to reflector arm 8. Align the BHM as follows: a. Move the module to where the link will be unobstructed by the radio horizon and no objects penetrate the Fresnel zone. (The Canopy System Calculator page AntennaElevationCalcPage.xls automatically calculates the minimum antenna elevation that is required to extend the radio horizon to the other end of the link. The Canopy System Calculator page FresnelZoneCalcPage.xls automatically calculates the Fresnel zone clearance that is required between the visual line of sight and the top of a high-elevation object.) b. Use a local map, compass, and/or GPS device as needed to determine the direction to the BHS. c. Apply the appropriate degree of downward or upward tilt. (The Canopy System Calculator page DowntiltCalcPage.xls automatically calculates the angle of antenna downward tilt that is required.) d. Ensure that the BHS is within the beam coverage area. (The Canopy System Calculator page BeamwidthRadiiCalcPage.xls automatically calculates the radii of the beam coverage area.) 9. Using stainless steel hose clamps or equivalent fasteners, lock the BHM into position. 10. Remove the base cover of the BHM. (See Figure 52 on Page 178.) 11. If this BHM will not be connected to a CMMmicro, optionally connect a utility cable to a GPS timing source and then to the RJ-11 port of the BHM. 12. Either connect the BHM to the CMM or connect the DC power converter to the BHM and then to an AC power source. RESULT: When power is applied to a Canopy module or the unit is reset on the web-based interface, the module requires approximately 25 seconds to boot. During this interval, self-tests and other diagnostics are being performed. 13. Access the General tab of the Configuration page of this BHM. 14. If the CMM is a CMMmicro, set the Sync Input parameter to the Sync to Received Signal (Power Port) selection. If the CMM is a CMM2, set the Sync Input parameter to the Sync to Received Signal (Timing Port) selection. =========================== end of procedure =========================== Installation and Configuration Guide Re le ase 8 356 Dra f t 2 for Regula tory Review Issue 2, December 2006 19.11 INSTALLING A BH TIMING SLAVE Installing a Canopy BHS consists of two procedures: ◦ Physically installing the BHS and performing a course alignment using the alignment tone (Procedure 31). ◦ Verifying the BH link and finalizing alignment using review of power level and jitter, link tests, and review of registration and session counts (Procedure 32 on Page 357). Procedure 31: Installing the BHS 1. Choose the best mounting location for the BHS. 2. Remove the base cover of the BHS. (See Figure 52 on Page 178.) 3. Terminate the UV outside grade Category 5 Ethernet cable with an RJ-45 connector, and connect the cable to the BHS. (See Procedure 8 on Page 192.) 4. Attach the BHS to the arm of the Canopy Passive Reflector dish assembly as shown in Figure 133 on Page 346. RECOMMENDATION: The arm is molded to receive and properly aim the BH relative to the aim of the dish. Use stainless steel hose clamps for the attachment. 5. Use stainless steel hose clamps or equivalent fasteners to lock the BHS into position. 6. Remove the cover of the 300SS Surge Suppressor. 7. With the cable openings facing downward, mount the 300SS as close to the grounding…
Text truncated - open the document above for the full version.
Contact Information
Applicant
Matthew Nawrocki
Technical Contact
Elliott Laboratories, Inc.David Bare
[email protected]4082457800
684 West Maude Ave. · Sunnyvale, California · United States
Non-Technical Contact
Elliott Laboratories, Inc.David Guidotti
[email protected]4082457800
Test Firm
Element Materials Technology Fremont NewarkDavid Bare
Technical Specifications
| # | Rule Parts | Frequency Range | Power Output |
|---|---|---|---|
| 1 | 15E | 5.50 GHz - 5.71 GHz | 1 W |
Other Applications from Motorola Solutions, Inc.

ABZ89FT4940
Aug 06, 2026Non Broadcast Transmitter
Equipment Class
TNB - Licensed Non-Broadcast Station TransmitterABZ89FT4950
Jun 25, 2026Non-Broadcast Transmitter
Equipment Class
TNB - Licensed Non-Broadcast Station TransmitterABZ89FT5901
Jun 20, 2024Non Broadcast Transmitter
Equipment Class
TNB - Licensed Non-Broadcast Station Transmitter
ABZ99FT5101B
May 02, 2023Non Broadcast Transmitter
Equipment Class
PCB - PCS Licensed Transmitter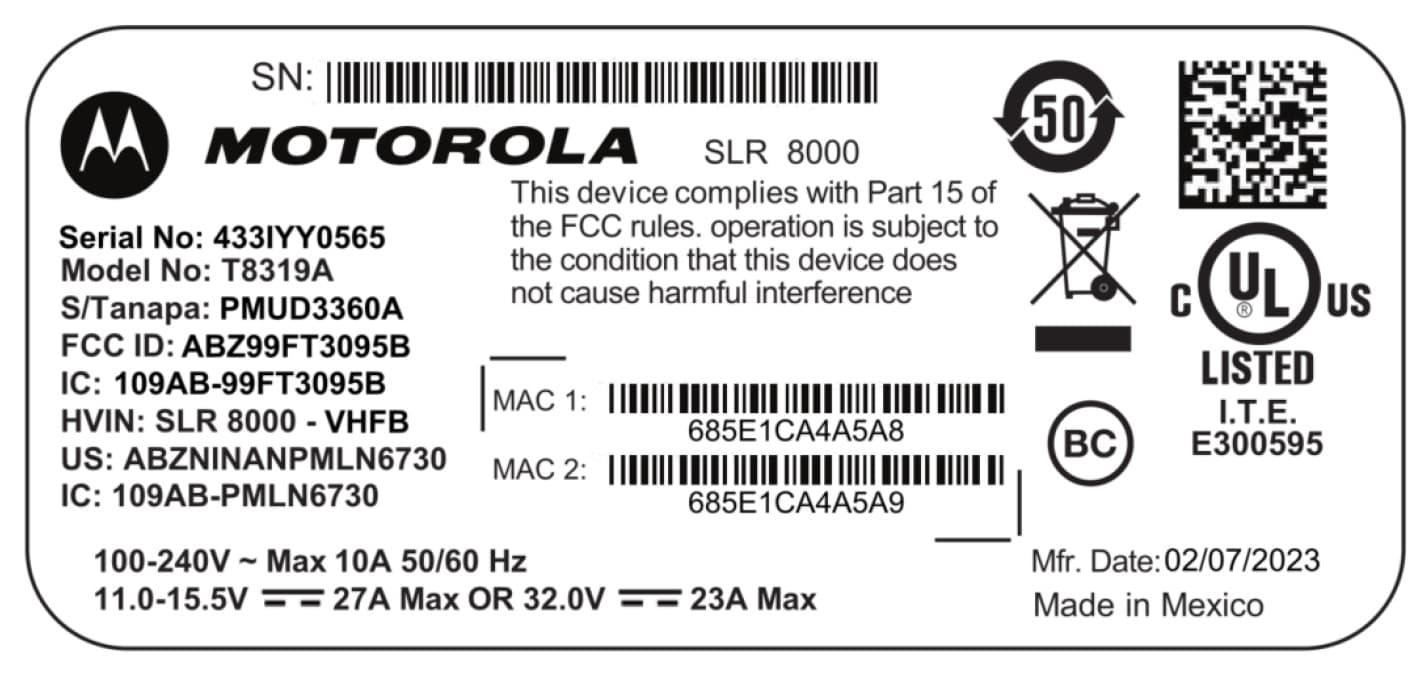
ABZ99FT3095B
Mar 26, 2023Non Broadcast Transmitter
Equipment Class
TNB - Licensed Non-Broadcast Station Transmitter