AZ492FT71292-Way Mobile Radio (with Bluetooth, Bluetooth LE and WIFI)
Motorola Solutions, Inc.
Click to zoom
Application Details
- Equipment Class
- DTS - Digital Transmission System
- Date of Grant
- Jun 18, 2020
- Application Purpose
- Original Equipment
- Date of Application
- May 21, 2020
- Equipment Note
- 2-Way Mobile Radio (with Bluetooth, Bluetooth LE and WIFI)
- Frequency Range
- 2402.00000000 - 2480.00000000
- Company
- Motorola Solutions, Inc.
- Country
- United States
Documents & Files
Document Text
Text extracted from the exhibit documents filed with the FCC. Open a document above to read the original.
Users Manual
APX MOBILE O7 CONTROL HEAD USER GUIDE APX TWO-WAY RADIOS APX 2500, APX 5500, APX 6500, APX 7500, APX 8500 *68012006034* 68012006034-EM MAY 2020 © 2020 Motorola Solutions, Inc. All rights reserved Contents List of Tables...............................................................................................................9 Software Version.......................................................................................................10 Chapter 1: Read Me First..........................................................................................11 1.1 Notations Used in This Manual..............................................................................................11 1.2 Radio Care.............................................................................................................................11 1.2.1 Cleaning the External Surface of the Radio.............................................................12 1.3 Additional Performance Enhancement.................................................................................. 12 1.3.1 ASTRO 25 Enhanced Data......................................................................................12 1.3.2 Dynamic System Resilience.................................................................................... 12 1.3.3 CrossTalk Prevention...............................................................................................13 1.3.4 Encrypted Integrated Data.......................................................................................13 1.3.5 SecureNet................................................................................................................13 1.3.6 Over-the-Air Rekeying............................................................................................. 13 1.3.7 P25 Digital Vehicular Repeater System...................................................................13 1.3.8 Conventional Talkgroup and Radio Scan Enhancements....................................... 14 1.4 What Your Dealer/System Administrator Can Tell You......................................................... 14 Chapter 2: Preparing Your Radio for Use...............................................................15 2.1 Turning On the Radio ........................................................................................................... 15 2.2 Adjusting the Volume.............................................................................................................15 2.3 Validating Compatibility During Power Up.............................................................................16 Chapter 3: Radio Controls........................................................................................17 3.1 O7 Control Head and Microphone.........................................................................................17 3.2 Keypad...................................................................................................................................19 3.3 Programmable Features........................................................................................................20 3.3.1 Assignable Radio Functions.................................................................................... 21 3.3.2 Assignable Settings or Utility Functions...................................................................23 Chapter 4: Status Indicators....................................................................................25 4.1 LED Indications......................................................................................................................25 4.2 Status Icons...........................................................................................................................25 4.3 TMS Status Icons.................................................................................................................. 28 4.4 Call Type Icons......................................................................................................................29 4.5 Multi-function Knob - Concentric Ring LED........................................................................... 29 4.6 Intelligent Lighting Indicators................................................................................................. 30 4.7 Alert Tones ........................................................................................................................... 30 Chapter 5: General Radio Operation.......................................................................33 68012006034-EM Contents 2 5.1 Selecting a Zone....................................................................................................................33 5.2 Selecting a Radio Channel.................................................................................................... 33 5.3 Receiving and Responding to a Radio Call........................................................................... 33 5.3.1 Receiving and Responding to a Talkgroup Call.......................................................34 5.3.2 Receiving and Responding to a Private Call (Trunking Only)..................................34 5.3.3 Receiving and Responding to a Telephone Call (Trunking Only)............................35 5.4 Methods to Make a Radio Call...............................................................................................35 5.4.1 Making a Talkgroup Call ......................................................................................... 35 5.4.2 Making a Private Call (Trunking Only)..................................................................... 36 5.4.3 Making a Telephone Call (Trunking Only)............................................................... 36 5.5 Switching Between Repeater or Direct Operation Button......................................................37 5.6 Monitor Feature.............................................................................…
Text truncated - open the document above for the full version.
Users Manual
Enhanced Single Band Mobile Radio Installation Manual *MN005720A01* MN005720A01-AB APRIL 2020 © 2020 Motorola Solutions, Inc. All rights reserved Contents List of Figures..............................................................................................................7 List of Tables.............................................................................................................11 Foreword ...................................................................................................................12 Copyrights.................................................................................................................13 Notations Used in This Manual................................................................................14 Related Publications.................................................................................................15 Commercial Warranty...............................................................................................16 I. What This Warranty Covers And For How Long.......................................................................16 II. General Provisions.................................................................................................................. 16 III. State Law Rights (Applicable Only in U.S.A.).........................................................................17 IV. How To Get Warranty Service................................................................................................17 V. What This Warranty Does Not Cover......................................................................................17 VI. Patent And Software Provisions.............................................................................................18 VII. Governing Law......................................................................................................................18 Chapter 1: Introduction.............................................................................................20 1.1 Mobile Radio Description.......................................................................................................20 1.1.1 Dimensions..............................................................................................................20 1.2 Standard Configurations........................................................................................................23 1.2.1 Dash Mount Configuration.......................................................................................23 1.2.2 Remote Mount Configuration...................................................................................25 1.2.3 Multi Control Head...................................................................................................30 1.3 Motorcycle Configurations.....................................................................................................30 1.4 Base/Control Stations............................................................................................................30 1.5 Tools Required for Radio Installations...................................................................................30 Chapter 2: Standard Configurations.......................................................................32 2.1 Planning the Installation.........................................................................................................32 2.1.1 Installation Examples...............................................................................................32 2.1.2 Wiring Diagrams...................................................................................................... 34 2.1.3 Radio Operation Wiring for Dash and Remote Configurations................................45 2.1.3.1 Dash Mount: Power, Ignition, and Emergency Cable Installation..............45 2.1.3.2 Remote Mount: Power, Ignition, and Emergency Cable Installation..........45 2.1.4 Ignition Sense Switch (Radio Wide Advance)..........................................................47 2.1.5 Siren/PA Configuration and Programming...............................................................48 2.2 Radio Mounting......................................................................................................................49 2.2.1 Dash Mount with Trunnion.......................................................................................50 MN005720A01-AB Contents 2 2.2.2 Remote Mount with Trunnion...................................................................................52 2.2.2.1 Remote Mount Control Head Installation...................................................52 2.2.2.2 Multiple Control Head Installation.............................................................. 55 2.2.2.3 Cable Installation........................................................................................56 2.2.2.4 Setting the Initial Control Head ID..............................................................56 2.2.2.5 O3 Control Head and Remote Mount Cabling........................................... 58 2.2.3 Radio Locking..........................................................................................................60 2.2.3.1 Locking Kit..................................................................................................60 2.3 Power Cables (Transceiver and Control Head).....................................................................61 2.3.1 Optional Locking Feature for High-Power Chassis Power Cables...........................61 2.3.2 O2, O3, O5, O7, O9 or E5 Control Head Power Cables..........................................63 2.3.3 Battery Selector Switch............................................................................................64 2.4 Antenna Installation...............................................................................................................65 2.4.1 Antenna Installation on a Metal Body Vehicle..............…
Text truncated - open the document above for the full version.
Users Manual
Figure 17: Remote Mount Configuration with Mid Power Transceiver, Transceiver Interface Board, CHIB Rear Assembly, and O2 Control Head 1 1 2 22 2 No.Description 1ASTRO 25 Subscribers Enhanced Single Band Mobile Radio 2MMP Figure 18: Remote Mount Configuration with Mid Power Transceiver, Transceiver Interface Board, and O3 Control Head 1 2 No.Description 15 m (17 ft) Extension Cable 2ASTRO 25 Subscribers Enhanced Single Band Mobile Radio MN005720A01-AB Chapter 1: Introduction 26 Figure 19: Remote Mount Configuration with Mid Power Transceiver, Transceiver Interface Board, CHIB Rear Assembly, and O5 Control Head 1 1 2 2 No.Description 1ASTRO 25 Subscribers Enhanced Single Band Mobile Radio 2MMP Figure 20: Remote Mount Configuration with Mid Power Transceiver, Transceiver Interface Board, CHIB Rear Assembly, and E5 Control Head 1 2 2 No.Description 1ASTRO 25 Subscribers Enhanced Single Band Mobile Radio 2MMP MN005720A01-AB Chapter 1: Introduction 27 Figure 21: Remote Mount Configuration with Mid Power Transceiver, Transceiver Interface Board, CHIB Rear Assembly, and O7 Control Head 1 1 2 2 2 2 No.Description 1ASTRO 25 Subscribers Enhanced Single Band Mobile Radio 2MMP Figure 22: Remote Mount Configuration with Mid Power Transceiver, Transceiver Interface Board, and O9 Control Head 1 2 No.Description 117 ft Extension Cable 2ASTRO 25 Subscribers Enhanced Single Band Mobile Radio MN005720A01-AB Chapter 1: Introduction 28 Figure 23: Remote Mount Configuration with Mid Power Radio Transceiver, Universal Relay Controller (URC), and O7 Control Head (URC is optional) 1 2 No.Description 117 ft Extension Cable 2O7 to URC Cable Figure 24: Remote Mount Configuration with Mid Power Radio Transceiver, Universal Relay Controller (URC), and O9 Control Head (URC is optional) 1 2 No.Description 117 ft Extension Cable 2O9 to URC Cable MN005720A01-AB Chapter 1: Introduction 29 1.2.3 Multi Control Head The multi control head option allows separate, remotely operated control heads to operate and control the radio. For example, a fire truck could have a control head located in the cab and on the rear of the truck so that the radio could be operated from outside the vehicle. NOTICE: The dual control head can be used together in the future. 1.3 Motorcycle Configurations The mobile motorcycle radio models provide most of the equipment needed for installing a standard mobile radio on a motorcycle. Most of this radio system is standard equipment. See Motorcycle Radio Installation on page 98 for further information. NOTICE: The motorcycle configurations are not applicable O9 control heads. 1.4 Base/Control Stations NOTICE: The base/control station option is not applicable for O9 control heads. The antenna installation must comply with the following requirements if mobile radio equipment is installed at a fixed location and operated as a control station or as a fixed unit to ensure optimal performance and compliance with the RF energy exposure limits in the standards and guidelines listed in the 6881095C99 manual: • The antenna should be mounted outside the building on the roof or a tower if at all possible. • As with all fixed site antenna installations, it is the responsibility of the licensee to manage the site in accordance with applicable regulatory requirements and may require additional compliance actions such as site survey measurements, signage, and site access restrictions to ensure that exposure limits are not exceeded. 1.5 Tools Required for Radio Installations These are the tools required for mobile radio installation. Table 1: Tools Required for Radio Installations ToolPart Number 10 mm wrench– 5 mm Allen wrench– Rubber-coated pliers– Regular slot screwdriver of Phillips #2– Pin removal tool6680163F01 MN005720A01-AB Chapter 1: Introduction 30 ToolPart Number RF antenna toolHLN6695_ Wing screw torque toolHLN6970_ MN005720A01-AB Chapter 1: Introduction 31 Chapter 2 Standard Configurations The radio operates only in negative ground electrical systems with a valid operating range of 10.8–16.3 VDC. Before starting the installation, ensure that the ground polarity of the vehicle is correct. Accidentally reversing the polarity could damage the radio and cause the cable fuses to blow. 2.1 Planning the Installation Planning is the key to fast, easy radio installation. Before starting the installation, inspect the vehicle and determine how and where you intend to mount the antenna, radio, and accessories. Plan wire and cable run to provide maximum protection from pinching, crushing, and overheating. CAUTION: Before installing any electrical equipment, check the user manual of the vehicle for warnings or recommendations. Authorized servicer or installer should complete the installation of this device. Failure to properly install the device may result in damage to the device, or improper operation. 2.1.1 Installation Examples The mobile two-way radio offers various methods of installation, with accessories placed to the vehicle as desired. The radio can be dash or remote mounted except for the O9 control head, which can only be mounted remotely. Figure 25: Dash Mount Installation Dash mount radios mounted in the middle console, on the transmission hump, or under the dash, 911 3 2 2 1 4 No.Description 1Antenna ¼-Wavelength 2Radio 3Speaker 4Battery MN005720A01-AB Chapter 2: Standard Configurations 32 Figure 26: Remote Mount Installation Remote mount radio control heads mounted in the middle console, on the transmission hump, or under the dash. 911 3 5 2 5 1 4 No.Description 1Antenna ¼-Wavelength 2Radio 3Speaker 4Battery 5Control Head Figure 27: Remote Mount Installation for Radio with O9 Control Head and Universal Relay Controller (URC is optional) 911 3 6 7 5 2 8 1 4 No.Description 1Antenna ¼-Wavelength 2Radio 3Speaker 4Battery 5Control Head 6Siren Speaker 7Universal Relay Controller Box 8Siren Box MN005720A01-AB Chapter 2: Standard Configurations 33 2.1.2 Wiring Diagrams The following figures show the wiring diagrams …
Text truncated - open the document above for the full version.
Users Manual
Figure 31: Radio Installation (E5 Dash Mount) BATTERY HORN RELAY LIGHT RELAY MIC CLIP SPEAKER MIC EMERGENCY SWITCH FUSE FUSE BLOCK (+) (-) REDLEAD FUSE FIREWALL HOLE MOUNTING SCREW DASHMOUNT RADIO ANTENNA CONNECTION ANTENNA 1 3 ft IGNSENSE(ACC) P2 (SEEJ2 PINOUT) DC POWER CABLE TRUNNION J2 REAR ACCESSORY CONNECTOR 1 7 8 14 13 20 21 26 SPKR- SPKR+ VIPOUT2 12V (RELAY) VIPOUT1 12V (RELAY) GROUND EMERGENCY IGNSENSE (ACC) ANTENNA CONNECTION ANTENNA 2 WI-FI (OPTIONAL) ANTENNA CONNECTION ANTENNA 3 GPS (OPTIONAL) 3 ft Figure 32: Radio Installation (O7 Dash Mount) BATTERY HORN RELAY LIGHT RELAY MIC CLIP SPEAKER MIC EMERGENCY SWITCH FUSE FUSE BLOCK (+) (-) REDLEAD FUSE FIREWALL HOLE MOUNTING SCREW DASHMOUNT RADIO ANTENNA CONNECTION ANTENNA 1 3 ft IGNSENSE(ACC) P2 (SEEJ2 PINOUT) DC POWER CABLE TRUNNION J2 REAR ACCESSORY CONNECTOR 1 7 8 14 13 20 21 26 SPKR- SPKR+ VIPOUT2 12V (RELAY) VIPOUT1 12V (RELAY) GROUND EMERGENCY IGNSENSE (ACC) ANTENNA CONNECTION ANTENNA 2 WI-FI (OPTIONAL) ANTENNA CONNECTION ANTENNA 3 GPS (OPTIONAL) 3 ft MN005720A01-AB Chapter 2: Standard Configurations 36 NOTICE: In dash mount configuration, it is mandatory that a rear accessory cable is attached to the back of a mid power radio, to ground the Emergency pin to ground (GND). Or, an emergency footswitch or pushbutton switch must be attached to the back of a mid power radio. If the emergency pin is not grounded, upon the attachment of the A+ cable at the DC connector, the radio detects HIGH for the emergency pin state, and assume that emergency has been activated. This condition is an attempt to power on the radio, and results in excessive current draw and incorrect radio operation. Refer to Dash Mount: Power, Ignition, and Emergency Cable Installation on page 45 for further details and recommended wiring of Emergency in dash mount configuration. Figure 33: Radio Installation (O2 Remote Mount) BATTERY HORN RELAY LIGHT RELAY MIC CLIP SPEAKER MIC EMERGENCY SWITCH REDLEAD FUSE BLOCK YELLOW LEAD BLACK LEAD (+) (-) FUSE FUSE CONTROL HEAD FIREWALL HOLE ANTENNA CONNECTION ANTENNA CONNECTION ANTENNA CONNECTION ANTENNA 1 DC POWER CABLE RADIO FUSE ANTENNA 2 WI-FI (OPTIONAL) ANTENNA 3 GPS (OPTIONAL) PWR SPK J400-1REDSWB+ J400-2GREENGND J400-3-NOPIN J400-4-"VIP"detect:GPIO=HIGH J400-5BLUEVIP_OUT_1 J400-6YELLOWVIP_OUT_2 J400-7BLACKVIP_OUT_3 J400-8WHITEVIP_IN_1(VIP_INGPIO) J400-9ORANGEVIP_IN_2(VIP_INGPIO) J400-10VIOLETVIP_IN_3 CANCANUSBACC PORTS ON REAR OF REMOTE CONTROL HEAD VIP CONNECTOR PIN-OUT J400 6 9 10 7 4 2 5 8 1 Radio Pin Number VIPCable (HKN6196_) WireColor Function 3 ft3 ft DEK VIP J400 Figure 34: Radio Installation (O3 Remote Mount) BA TTERY HORN RELAY LIGHT RELAY CH hang up box SPEAKER O3CH 5m (17ft) CABLE(PMLN4958) EMERGENCY SWITCH FUSE FUSE BLOCK (+) (-) REDLEAD FUSE FIREWALL HOLE MOUNTING SCREW IGN SENSE(ACC) P2 (SEEJ626 PINOUT) CABLE HLN6863 DC POWER CABLE TRUNNION connectto P2 FRONTACCESSORY CABLE(PMLN4959) ANTENNA CONNECTION ANTENNA CONNECTION ANTENNA CONNECTION ANTENNA1 J2 REARACCESSORY CONNECTOR 1 7 8 14 13 20 21 26 SPKR- SPKR+ VIPOUT2 12V (RELAY) VIPOUT1 12V (RELAY) GROUND EMERGENCY IGN SENSE (ACC) ANTENNA2 WI-FI (OPTIONAL) ANTENNA3 GPS(OPTIONAL) 3 ft 3 ft RADIO MN005720A01-AB Chapter 2: Standard Configurations 37 Figure 35: Radio Installation (O5 Remote Mount) BATTERY HORN RELAY LIGHT RELAY MIC CLIP SPEAKER MIC EMERGENCY SWITCH REDLEAD FUSE BLOCK YELLOW LEAD BLACK LEAD (+) (-) FUSE FUSE CONTROL HEAD FIREWALL HOLE ANTENNA CONNECTION ANTENNA CONNECTION ANTENNA CONNECTION ANTENNA 1 DC POWER CABLE RADIO FUSE ANTENNA 2 WI-FI (OPTIONAL) ANTENNA 3 GPS (OPTIONAL) PWR SPK J400-1REDSWB+ J400-2GREENGND J400-3-NOPIN J400-4-"VIP"detect:GPIO=HIGH J400-5BLUEVIP_OUT_1 J400-6YELLOWVIP_OUT_2 J400-7BLACKVIP_OUT_3 J400-8WHITEVIP_IN_1(VIP_INGPIO) J400-9ORANGEVIP_IN_2(VIP_INGPIO) J400-10VIOLETVIP_IN_3 CANCANUSBACC PORTS ON REAR OF REMOTE CONTROL HEAD VIP CONNECTOR PIN-OUT J400 6 9 10 7 4 2 5 8 1 Radio Pin Number VIPCable (HKN6196_) WireColor Function 3 ft3 ft DEK VIP J400 Figure 36: Radio Installation (E5 Remote Mount) BATTERY HORN RELAY LIGHT RELAY MIC CLIP SPEAKER MIC EMERGENCY SWITCH REDLEAD FUSE BLOCK YELLOW LEAD BLACK LEAD (+) (-) FUSE FUSE CONTROL HEAD FIREWALL HOLE ANTENNA CONNECTION ANTENNA CONNECTION ANTENNA CONNECTION ANTENNA 1 DC POWER CABLE RADIO FUSE ANTENNA 2 WI-FI (OPTIONAL) ANTENNA 3 GPS (OPTIONAL) PWR SPK J400-1REDSWB+ J400-2GREENGND J400-3-NOPIN J400-4-"VIP"detect:GPIO=HIGH J400-5BLUEVIP_OUT_1 J400-6YELLOWVIP_OUT_2 J400-7BLACKVIP_OUT_3 J400-8WHITEVIP_IN_1(VIP_INGPIO) J400-9ORANGEVIP_IN_2(VIP_INGPIO) J400-10VIOLETVIP_IN_3 CANCANUSBACC PORTS ON REAR OF REMOTE CONTROL HEAD VIP CONNECTOR PIN-OUT J400 6 9 10 7 4 2 5 8 1 Radio Pin Number VIPCable (HKN6196_) WireColor Function 3 ft3 ft DEK VIP J400 MN005720A01-AB Chapter 2: Standard Configurations 38 Figure 37: Radio Installation (O7 Remote Mount) BATTERY HORN RELAY LIGHT RELAY MIC CLIP SPEAKER MIC EMERGENCY SWITCH REDLEAD FUSE BLOCK YELLOW LEAD BLACK LEAD (+) (-) FUSE FUSE CONTROL HEAD FIREWALL HOLE ANTENNA CONNECTION ANTENNA CONNECTION ANTENNA CONNECTION ANTENNA 1 DC POWER CABLE RADIO FUSE ANTENNA 2 WI-FI (OPTIONAL) ANTENNA 3 GPS (OPTIONAL) PWR SPK J400-1REDSWB+ J400-2GREENGND J400-3-NOPIN J400-4-"VIP"detect:GPIO=HIGH J400-5BLUEVIP_OUT_1 J400-6YELLOWVIP_OUT_2 J400-7BLACKVIP_OUT_3 J400-8WHITEVIP_IN_1(VIP_INGPIO) J400-9ORANGEVIP_IN_2(VIP_INGPIO) J400-10VIOLETVIP_IN_3 CANCANUSBACC PORTS ON REAR OF REMOTE CONTROL HEAD VIP CONNECTOR PIN-OUT J400 6 9 10 7 4 2 5 8 1 Radio Pin Number VIPCable (HKN6196_) WireColor Function 3 ft3 ft DEK VIP J400 Figure 38: Radio Installation of O9 Remote Mount with Transceiver (URC is optional) MIC MIC CLIP EMERGENCY SWITCH (SEE J2 PINOUT) GUN LOCK EARJACK Control Head Speaker Siren Speaker Siren Box RED LEAD HORN RELAY ANTENNA 1 FIREWALL HOLE DC POWER CABLE URC Controller Box BLACK LEAD LIGHTBAR O9 TO URC Cable RADIO CAN Cable ANTENNA CONNECTION ANTENNA CONNECTION ANTENNA 2 (+) (-) RED LEAD RED LEAD RED LEAD YELLOW LEAD CONTROL HEAD FUSE FUSE FUSE FUSE BL…
Text truncated - open the document above for the full version.
Users Manual
emergency accessory is installed, the radio powers up incorrectly into emergency mode all the time. Refer to Figure 89: Emergency Jumper Removal in Remote Mount on page 86 for details. The design of the control head is different compared to the radio. Therefore it is also not necessary to attach HLN6863 to J100 to prevent accidental emergency operation. The control head uses an edge- detect, not a state-detect like on the radio, so mounting of HLN6863 is not mandatory. Table 2: Dash O2, O3, O5, O7, or O9 Radio Operations Dependent Upon A+ and Ignition Connections Dash Mount Transceiv- er Red Power Wire HLN6863 Thin Red Wire Transceiv- er Red Power Wire HLN6863 Thin Red Wire Transceiv- er Red Power Wire HLN6863 Thin Red Wire Connected to battery XXXX Connected to ignition switch XXX Ignition switch controls No ignition switch control.Enables ignition switch functionality as program- med in the codeplug. Illegal wiring configura- tion. Table 3: Remote O2, O3, O5, E5, O7, or O9 Radio Operations Dependent Upon A+ and Ignition Connections Remote Mount Control Head Red Wire Control Head Yel- low Wire Control Head Red Wire Control Head Yel- low Wire Control Head Red Wire Control Head Yel- low Wire Connected to battery XXXX Connected to ignition switch XXX Ignition switch controls No ignition switch control.Enables ignition switch functionality as program- med in the codeplug. Illegal wiring configura- tion. Table 4: Remote O2, O3, O5, E5, O7, or O9 Radio Operations Dependent Upon A+ and Ignition Connections Mid Pow- er Dash/ Remote Transceiv- er Red Power Wire HLN6863 Thin Red Wire at J2 Transceiv- er Red Power Wire HLN6863 Thin Red Wire at J2 Transceiv- er Red Power Wire HLN6863 Thin Red Wire at J2 High-Pow- er Dash/ Remote HLN6863 Thin Red Wire at J626 HLN6863 Thin Red Wire at J626 HLN6863 Thin Red Wire at J626 Connected to battery XXX MN005720A01-AB Chapter 2: Standard Configurations 46 Mid Pow- er Dash/ Remote Transceiv- er Red Power Wire HLN6863 Thin Red Wire at J2 Transceiv- er Red Power Wire HLN6863 Thin Red Wire at J2 Transceiv- er Red Power Wire HLN6863 Thin Red Wire at J2 High-Pow- er Dash/ Remote HLN6863 Thin Red Wire at J626 HLN6863 Thin Red Wire at J626 HLN6863 Thin Red Wire at J626 Connected to ignition switch XXX Ignition switch controls No ignition switch control.Enables ignition switch functionality as program- med in the codeplug. Illegal wiring configura- tion. CAUTION: DO NOT connect any wires to the battery terminals until you have finished the entire radio installation (dash or remote mount configuration) to avoid potential equipment damage. Incorrect wiring of the radio may result in incorrect ignition sense detection, incorrect power-on state, or incorrect power-off state of the radio system. The Control Head Power cable wire (RED) and Transceiver Power cable wire (RED) are always attached to the battery terminal and NOT to the ignition switch. 2.1.4 Ignition Sense Switch (Radio Wide Advance) The CPS (Customer Programming Software) selectable settings is used to control the radio functionality based on the state of the vehicle Ignition status. These descriptions can be found in the CPS tool HELP Guides and are repeated here for convenience. Table 5: Ignition Sense Switch Settings in CPS FeatureDescription Blank • Radio POWERS ON when the Power button is pressed or with the Emer- gency Power-up feature. • Radio POWERS OFF when the Power button is pressed. TX Inhibit • Radio POWERS ON when the Power button is pressed or with the Emer- gency Power-up feature. • Radio POWERS OFF when the Power button is pressed. • If IGNITION is not present, all transmissions are inhibited. • The radio does not affiliate with trunking systems and therefore cannot receive any trunking dispatch communications. • Emergency Alarm transmissions are NOT possible with the use of the Emergency Power-up feature. PTT TX Inhibit • Radio POWERS ON when the Power button is pressed or with the Emer- gency Power-up feature. • Radio POWERS OFF when the Power button is pressed. MN005720A01-AB Chapter 2: Standard Configurations 47 FeatureDescription • If IGNITION is not present, all transmissions are inhibited. • The radio is able to affiliate with trunking systems. The radio can ONLY receive trunking dispatch communications. • Emergency Alarm transmissions are possible with the use of the Emer- gency Power-up feature. Required • Radio POWERS ON when the Power button is pressed and Ignition is present. • Radio POWERS ON when Ignition is cycled and radio was previously turned ON. • Radio POWERS OFF when the Power button is pressed, or when Igni- tion is lost. Soft Power-off • Radio POWERS ON when the Power button is pressed, or when Ignition is detected. • Radio POWERS OFF when the Power button is pressed, or when Igni- tion is lost. Ignition Only Pow- er-up • Radio POWERS ON when Ignition is present. • Radio POWERS OFF when Ignition is lost. • Control head Power button is ignored. NOTICE: When either TX Inhibit, PTT TX Inhibit or Required are selected, the Emergency Power-up feature is not available. When any other Ignition Switch setting is made, Emergency Power-up is available regardless of the current ignition state. Any optional inactivity time-out timer setting in CPS may delay the power-off of the radio once Ignition sense is removed. 2.1.5 Siren/PA Configuration and Programming The Siren/PA is shipped pre-wired for 100 W operation. It can be rewired for 65 W, 75 W, or 130 W power levels. Refer to this procedure if you want to change to another power level. Procedure: 1Open the Siren/PA connector cover to gain access to the two-connector speaker leads. Do not change the speaker common lead (pin 20). The other lead is connected to pin 35 (for 100 W operation). 2Using an appropriate pin removal tool, extract pin 35 and move it to one of the following pin locations: • Pin location 36 for 75 W operation • Pin location 28 for 65 W or 130 W operation 3Do one of the following: • For 65 W or 75 W operation, rea…
Text truncated - open the document above for the full version.
Contact Information
Applicant
Deanna Zakharia(Regulatory Compliance Manager)
Test Firm
Motorola Penang Advanced Communication LaboratoryMohd Azuan Shah Yaakap
Technical Specifications
| # | Rule Parts | Frequency Range | Power Output |
|---|---|---|---|
| 2 | 15C | 2.40 GHz - 2.48 GHz | 5.30 mW |
Other Applications from Motorola Solutions, Inc.
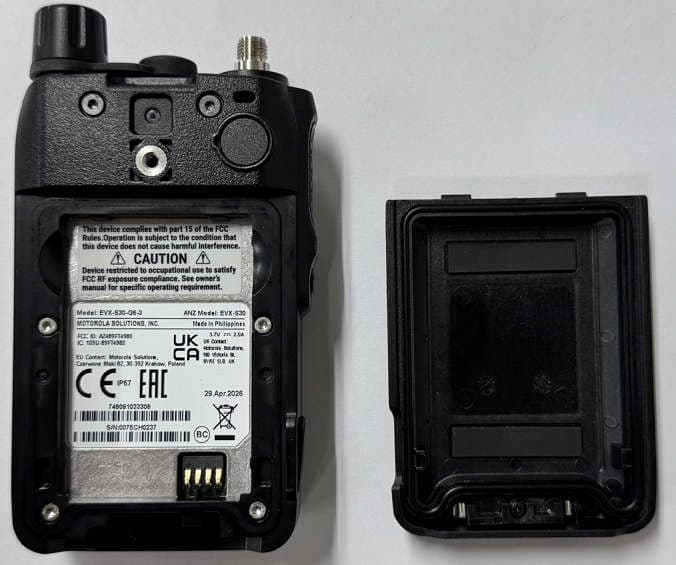
AZ489FT4980
Sep 08, 2026Portable two way radio
Equipment Class
TNF - Licensed Non-Broadcast Transmitter Held to FaceAZ489FT4981
Aug 14, 2026Handheld Portable - TANAPA BPR 45 400-470 MHZ 4W NKP
Equipment Class
TNF - Licensed Non-Broadcast Transmitter Held to Face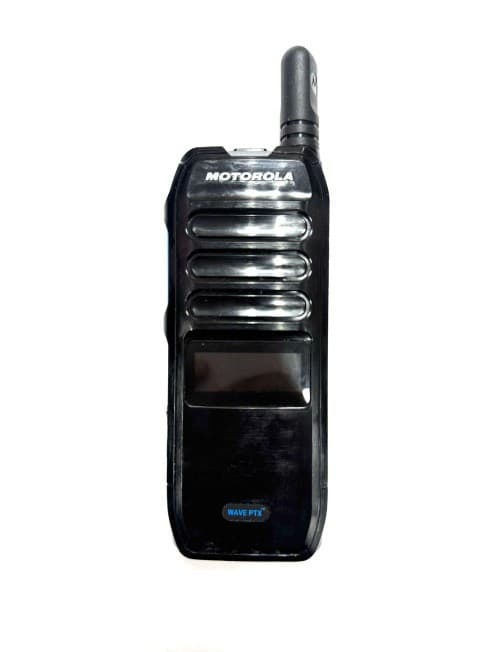
AZ489FT7187
Jul 13, 2026Portable 2-Way Radio with Bluetooth, Bluetooth LE, WIFI 2.4GHz, WIFI 5GHz, LTE
Equipment Class
DSS - Part 15 Spread Spectrum TransmitterAZ499FT6031
May 11, 2026Operation Critical Wireless Earpiece PTT
Equipment Class
DSS - Part 15 Spread Spectrum Transmitter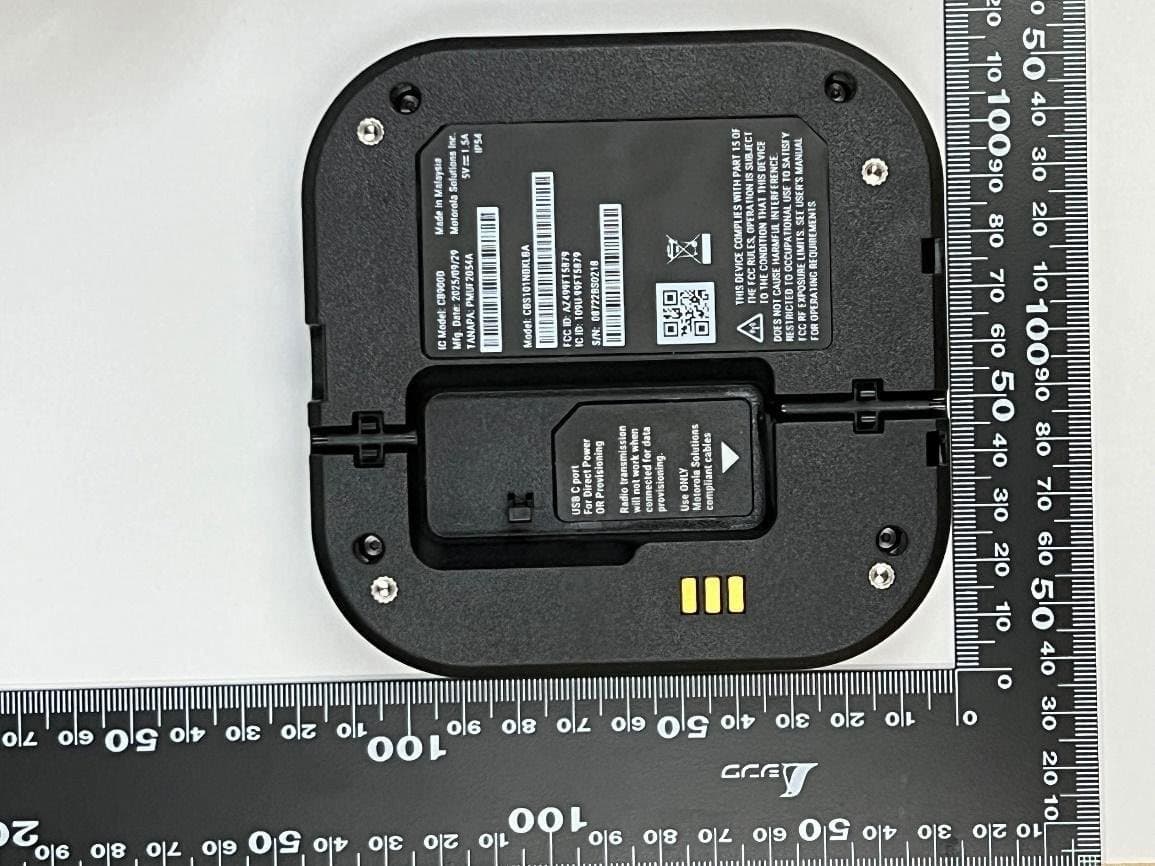
AZ499FT5879
Dec 19, 20252-way Portable Radio with BT, BTLE, WIFI, NFC and LTE
Equipment Class
DSS - Part 15 Spread Spectrum Transmitter