H9PAP5181DSymbol Access Point
Symbol Technologies Inc
Click to zoom
Application Details
- Equipment Class
- DTS - Digital Transmission System
- Date of Grant
- Jan 16, 2007
- Application Purpose
- Original Equipment
- Date of Application
- Jan 16, 2007
- Equipment Note
- Symbol Access Point
- Frequency Range
- 5745.00000000 - 5825.00000000
- Company
- Symbol Technologies Inc
- Country
- United States
Documents & Files
Document Text
Text extracted from the exhibit documents filed with the FCC. Open a document above to read the original.
Users Manual
To the InstallerThis guide is intended for the technician respon sible for installing the Symbol AP-5181 model access point. It assumes the technician is fami liar with basic Ethernet LAN-based networking and device installation concepts. This guide pr ovides specifications, procedures and guidelines to use during the installation process. This guide does not provide site-specific installation procedures. For detailed site-specific installa tion procedures, refer to the site-specific documentation derived from site survey and site network analysis. Verifying Package ContentsInspect the package contents and report any missing or damaged items to your sales representative. Safety InformationBefore operating any equipment, review this document for any hazards associated with installation and use of the device. Also, revi ew standard practices for preventing accidents. •Only trained and qualified personnel shoul d install and remove the Power Injector. •A power cord is not supplied with the device. Use only a correctly rated power cord that’s certified, as appropriate, for the country of operation. • The power cord must be a three-conductor type (two current carrying conductors and one ground conductor) terminated on one end by an IEC 60320 appliance coupler (for Power Injector connection) and on the other end by a plug containing a ground (earth) contact. • The power cord must be rated for a minimu m of 250VAC RMS operation, with a minimum rated current capcity of 5A [or a minimum wire gauge of 18AWG (0.75mm²)]. • The AC wall-socket outlet must be near the Power Injector and easily accessible.• The Power Injector Data and Data & Power interfaces are qualified as SELV (Safety Extra-Low Voltage) circuits according to to IEC 60950. These interfaces can only be connected to SELV interfaces on other equipment. Warnings • Read the installation instructions before connecting the Power Injector to a power source. •Follow basic electricity safety measures w henever connecting the Power Injector to its power source. •This product relies on on the building inst allation for short-circuit (over current) protection. Ensure a fuse or circuit breaker no larger than 120 VAC, 3A U.S. (240VAC, 1.5A international) is used on the phase conductor. •A volatge mismatch can cause equipment dam age and could pose a fire hazard. If the voltage indicated on the label is different from the power outlet voltage, do not connect the Power Injector to that particular outlet. •The Power Injector Data In and Data & Power Out ports are shielded RJ-45 sockets. Only RJ-45 data connectors should be connected to these sockets. Service InformationBefore using the unit, it must be configured to operate in the facility’s network and run your applications. If you have a problem running yo ur unit or using your equipment, contact your facility’s Technical or Systems Support. If t here is a problem with the equipment, they will contact the Symbol Support Center:For the latest version of this guide go to: http://www.symbol.com/manuals/ United States 1-800-653-5350 1-631-738-2400 Canada 905-629-7226 United Kingdom 0800 328 2424 Asia / Pacific +65-6796-9600 Australia 1-800-672-906 Austria / Österreich 1-505-5794-0 Denmark / Danmark 7020-1718 Finland / Suomi 9 5407 580 France 01-40-96-52-21 Germany / Deutschland 6074-49020 Italy / Italia 2-484441 Mexico / México 5-520-1835 Netherlands / Nederland 315-271700 Norway / Norge +47 2232 4375 South Africa 11-8095311 Spain / España 91 324 40 00 Inside Spain Sweden / Sverige 84452900 +34 91 324 40 00 Outside Spain Latin America Sales Support 1-800-347-0178 Inside US+1-954-255-2610 Outside US Europe/Mid-East Distributor Operations Contact local distributor or call+44 118 945 7360 AP-5181 Access Point Installation Guide 72-70762-01Revision 01 Pre-Release January 2006 (2) (1) (3) (4) (5) (6) IntroductionThe AP-5181 is an Access Point designed for outdoor installation using the existing AP-5131 feature set. The AP-5181 provides a dual-mode simultaneous 802.11a and 802.11g radio solution. There is one mechanical version of the AP-5181containing both 802.11a and 802.11g radios within the access point The AP-5181 has four external antenna connectors supporting both the 802.11a antennas options and the 802.11g antenna options. All supported external antennas are part of Symbol’s existing antenna suite for the 2.4 and 5.2 GHz bands. Product DescriptionThe AP-5181 design is loosely based on the current AP-5131 core architecture. The AP-5 has 2 Ethernet ports for connecting to the network and receiving 802.3af power (on the AP-5181’s LAN port only). The AP-5181’s mode of operation is identical to the AP-5131’s functionality Mounting the AP-5181 The AP-5181 access point can be mounted in t he following ways using the supplied mounting bracket: • To a 1.5 - 2 inch diameter pole•To a wall The mounting bracket has four parts. One rectan gular plate used for pol e and wall mounting, one square plate that attaches directly to t he AP-5181, and two plates forming an adjustable V-shaped clamp for pole mounting. Mounting the AP-5181 on a Pole Complete the following steps to mount the AP-518 1 to a 1.5 to 2 inch diameter steel pole or tube (using the mounting bracket): 1. Fit the edges of the V-shaped clamp parts in to the slots on the flat side of the rectan- gular plate. The inner slots are for the 1.5-inch diameter pole and 181 outer slots for a 2-inch diameter pole. 2. Place the V-shaped bracket clamp parts around the pole and tighten the nuts just enough to hold the bracket to the pole. (The bracket may need to be rotated around the pole during the antenna alignment process). 3. Attach the square mounting plate to the bridge with the supplied screws. 4. Attach the AP-5181 and mounting plate to the bracket already fixed to the pole. 5. Secure the AP-5181 to the pole bracket using the provided nuts. Note: The AP-5181 tilt angle may need to be adjusted during the antenna alignment process. Verify the antenna polariz…
Text truncated - open the document above for the full version.
Users Manual
To the InstallerThis guide is intended for the technician respon sible for installing the Symbol AP-5181 model access point. It assumes the technician is fami liar with basic Ethernet LAN-based networking and device installation concepts. This guide pr ovides specifications, procedures and guidelines to use during the installation process. This guide does not provide site-specific installation procedures. For detailed site-specific installa tion procedures, refer to the site-specific documentation derived from site survey and site network analysis. Note - This AP-5181 Installation Guide is intended to assist installers with the installation of the AP-5181. Once secured in its intended operational position, refer to the AP-51xx Product Reference Guide for detailed instructions on configuring the access point’s feature set. For more information, go to http://www.symbol.com/legacy_m anuals/wire/accesspoints.html. Verifying Package ContentsInspect the contents and report any missing or damaged items to your sales representative. The AP-5181 access point ships with the following components: • 1 AP-5181 802.11 a+bg dual-radio access point (AP-5181-13040-WWR)• 1 AP-5181 Installation Guide (this document) • 1 set of cable connectors• 3 antenna connector dust covers• 2 connector cover AP67 jacks, plus chain_LTW-M9/14-SB• 1 Waste Electrical and Equipment (WEEE) addendum Note : A RJ-45 to Serial (9-pin D) cable is required to make a connection to the AP-5181’s Console port. This cable is not supplied and must be provided by the customer. To mount the AP-5181 access point to a pole (1.5 - 18 inches in diameter) or wall, an AP-5181 Mounting Kit (Part No. KT-5181 -WP-01R) can be separately order ed. This kit contains the brackets and accessories required to mount the access point.If installing the AP-5181 in an outdoor area prone to high winds and rain, Symbolrecommends using the AP-5181 Heavy Weather Kit (Part No. KT-5181-HW-01R). This kit affords additional protection to shield an AP-5181 from high wind and waterdamage as a result of driving rain.If using a single-port Power-Over-Ethernet solution to supply power to the AP-5181,Symbol recommends using the AP-5181 Pow er Tap (Part No. AP-PSBIAS-5181-01R). This single-port power injector is designed s pecifically for outdoor use with the AP-5181. Safety InformationBefore operating any equipment, review this document for any hazards associated with installation and use of the device. Also, revi ew standard practices for preventing accidents. • Only trained and qualified personnel should install and remove the Power Injector.• The power cord must be a three-conductor type (two current carrying conductors and one ground conductor) terminated on one end by an IEC 60320 appliance coupler (for Power Injector connection) and on the other end by a plug containing a ground (earth) contact. • The power cord must be rated for a minimu m of 250VAC RMS operation, with a minimum rated current capacity of 5A [or a minimum wire gauge of 18AWG (0.75mm²)]. • The AC wall-socket outlet must be near the Power Injector and easily accessible.• The Power Injector Data and Data & Power interfaces are qualified as SELV (Safety Extra-Low Voltage) circuits according to IEC 60950. These interfaces can only be connected to SELV interfaces on other equipment. Warnings • Read the installation instructions before connecting the Power Injector to a power source. • Follow basic electricity safety measures whenever connecting the Power Injector to its power source. • This product relies on the building installation for short-circuit (over current) protection. Ensure a fuse or circuit breaker no larger than 120 VAC, 3A U.S. (240VAC, 1.5A international) is used on the phase conductor. • A voltage mismatch can cause equipment dam age and could pose a fire hazard. If the voltage indicated on the label is different from the power outlet voltage, do not connect the Power Injector to that particular outlet. • The Power Injector Data In and Data & Power Out ports are shielded RJ-45 sockets. Only RJ-45 data connectors should be connected to these sockets. Service InformationBefore using the unit, it must be configured to operate in the facility’s network and run your applications. If you have a problem running yo ur unit or using your equipment, contact your facility’s Technical or Systems Support. If t here is a problem with the equipment, they will contact the Symbol Support Center:For the latest version of this guide go to: http://www.symbol.com/manuals/ United States 1-800-653-5350 1-631-738-2400 Canada 905-629-7226 United Kingdom 0800 328 2424 Asia / Pacific +65-6796-9600 Australia 1-800-672-906 Austria / Österreich 1-505-5794-0 Denmark / Danmark 7020-1718 Finland / Suomi 9 5407 580 France 01-40-96-52-21 Germany / Deutschland 6074-49020 Italy / Italia 2-484441 Mexico / México 5-520-1835 Netherlands / Nederland 315-271700 Norway / Norge +47 2232 4375 South Africa 11-8095311 Spain / España 91 324 40 00 Inside Spain Sweden / Sverige 84452900 +34 91 324 40 00 Outside Spain Latin America Sales Support 1-800-347-0178 Inside US+1-954-255-2610 Outside US Europe/Mid-East Distributor Operations Contact local distributor or call+44 118 945 7360 AP-5181 Access Point Installation Guide 72-92950-01Revision A January 2007 (2) (1) (3) (4) (5) (6) IntroductionThe AP-5181 is a ruggedized access point designed for outdoor deployments. The AP-5181 employs a dual-mode simultaneous 802.11a and 802.11g radio solution. Unlike the AP-5131 model access point, there is just the one dual -radio mechanical version of the AP-5181 (no single radio model is available).Product DescriptionThe AP-5181 has a separate LAN and WAN port for connecting to the network and receiving 802.3af power (over the AP-5181’s LAN port only). The AP-5181 has four antenna connectors (on top) supporting 802.11a and 802.11g antenna options. However, the AP-5181 antenna suite is designed for outdoor deployments, so the existing AP-5131 antenna su…
Text truncated - open the document above for the full version.
Users Manual
AP-51xx Access Point Product Reference Guide AP-51xx Access Point Product Reference Guide 72E-XXXXX-01 Revision X Juanuary 2007 Pre-Release © 2006 by Symbol Technologies, Inc. All rights reserved. No part of this publication may be reproduced or used in any form, or by any electrical or mechanical means, without permission in writing from Symbol. This includes electronic or mechanical means, such as photocopying, recording, or information storage and retrieval systems. The material in this manual is subject to change without notice. The software is provided strictly on an “as is” basis. All software, including firmware, furnished to the user is on a licensed basis. Symbol grants to the user a non-transferable and non-exclusive license to use each software or firmware program delivered hereunder (licensed program). Except as noted below, such license may not be assigned, sublicensed, or otherwise transferred by the user without prior written consent of Symbol. No right to copy a licensed program in whole or in part is granted, except as permitted under copyright law. The user shall not modify, merge, or incorporate any form or portion of a licensed program with other program material, create a derivative work from a licensed program, or use a licensed program in a network without written permission from Symbol. The user agrees to maintain Symbol’s copyright notice on the licensed programs delivered hereunder, and to include the same on any authorized copies it makes, in whole or in part. The user agrees not to decompile, disassemble, decode, or reverse engineer any licensed program delivered to the user or any portion thereof. Symbol reserves the right to make changes to any software or product to improve reliability, function, or design. Symbol does not assume any product liability arising out of, or in connection with, the application or use of any product, circuit, or application described herein. No license is granted, either expressly or by implication, estoppel, or otherwise under any Symbol Technologies, Inc., intellectual property rights. An implied license only exists for equipment, circuits, and subsystems contained in Symbol products. Symbol, Spectrum One, and Spectrum24 are registered trademarks of Symbol Technologies, Inc. Other product names mentioned in this manual may be trademarks or registered trademarks of their respective companies and are hereby acknowledged. Symbol Technologies, Inc. One Symbol Plaza Holtsville, New York 11742-1300 http://www.symbol.com Contents About This Guide Introduction . . . . . . . . . . . . . . . . . . . . . . . . . . . . . . . . . . . . . . . . . . . . . . . . . . . . . . . . . vii Document Conventions . . . . . . . . . . . . . . . . . . . . . . . . . . . . . . . . . . . . . . . . . . . . . . . . vii Notational Conventions . . . . . . . . . . . . . . . . . . . . . . . . . . . . . . . . . . . . . . . . . . . . . . .viii Service Information. . . . . . . . . . . . . . . . . . . . . . . . . . . . . . . . . . . . . . . . . . . . . . . . . . .viii Chapter 1. Introduction New Features . . . . . . . . . . . . . . . . . . . . . . . . . . . . . . . . . . . . . . . . . . . . . . . . . . . . . . 1-2 Mesh Networking . . . . . . . . . . . . . . . . . . . . . . . . . . . . . . . . . . . . . . . . . . . . . . . 1-2 Additional LAN Subnet . . . . . . . . . . . . . . . . . . . . . . . . . . . . . . . . . . . . . . . . . . . 1-3 On-board Radius Server Authentication. . . . . . . . . . . . . . . . . . . . . . . . . . . . . . 1-4 Hotspot Support . . . . . . . . . . . . . . . . . . . . . . . . . . . . . . . . . . . . . . . . . . . . . . . . 1-4 Routing Information Protocol (RIP) . . . . . . . . . . . . . . . . . . . . . . . . . . . . . . . . . . 1-5 Manual Date and Time Settings. . . . . . . . . . . . . . . . . . . . . . . . . . . . . . . . . . . . 1-5 Feature Overview . . . . . . . . . . . . . . . . . . . . . . . . . . . . . . . . . . . . . . . . . . . . . . . . . . . 1-6 AP-51xx Access Point Product Reference Guide iv Single or Dual Mode Radio Options . . . . . . . . . . . . . . . . . . . . . . . . . . . . . . . . . 1-7 Separate LAN and WAN Ports . . . . . . . . . . . . . . . . . . . . . . . . . . . . . . . . . . . . . 1-7 Multiple Mounting Options . . . . . . . . . . . . . . . . . . . . . . . . . . . . . . . . . . . . . . . 1-7 Antenna Support for 2.4 GHz and 5.2 GHz Radios . . . . . . . . . . . . . . . . . . . . . . 1-8 Sixteen Configurable WLANs. . . . . . . . . . . . . . . . . . . . . . . . . . . . . . . . . . . . . . 1-8 Support for 4 BSSIDs per Radio . . . . . . . . . . . . . . . . . . . . . . . . . . . . . . . . . . . . 1-8 Quality of Service (QoS) Support . . . . . . . . . . . . . . . . . . . . . . . . . . . . . . . . . . 1-10 Industry Leading Data Security . . . . . . . . . . . . . . . . . . . . . . . . . . . . . . . . . . . 1-10 Kerberos Authentication. . . . . . . . . . . . . . . . . . . . . . . . . . . . . . . . . . . . . 1-11 EAP Authentication. . . . . . . . . . . . . . . . . . . . . . . . . . . . . . . . . . . . . . . . . 1-11 WEP Encryption . . . . . . . . . . . . . . . . . . . . . . . . . . . . . . . . . . . . . . . . . . . 1-12 KeyGuard Encryption . . . . . . . . . . . . . . . . . . . . . . . . . . . . . . . . . . . . . . . 1-13 Wi-Fi Protected Access (WPA) Using TKIP Encryption . . . . . . . . . . . . . 1-13 WPA2-CCMP (802.11i) Encryption . . . . . . . . . . . . . . . . . . . . . . . . . . . . . 1-13 Firewall Security . . . . . . . . . . . . . . . . . . . . . . . . . . . . . . . . . . . . . . . . . . . 1-14 VPN Tunnels . . . . . . . . . . . . . . . . . . . . . . . . . . . . . . . . . . . . . . . . . . . . . . 1-14 Content Filtering . . . . . . . . . . . . . . . . . . . . . . . . . . . . . . . . . . . . . . . . . . . 1-14 VLAN Support . . . . . . . . . . . . . . . . . . . . . . . . . . . . . . . . . . . . . . . . . . . . . . . . . 1-14 Multiple Management Accessibility Options. . . . . . . . . . . . . . . . . . . . . . . . . 1-15 Updatable Firm…
Text truncated - open the document above for the full version.
Users Manual
System Configuration 4-19 The access point SNMP agent functions as a command responder and is a multilingual agent responding to SNMPv1, v2c and v3 managers (command generators). The factory default configuration maintains SNMPv1/2c support of the community names, hence providing backward compatibility. SNMP v1/v2c community definitions and SNMP v3 user definitions work independently, and both use the Access Control List (ACL) of the SNMP Access Control sub-screen. Use the SNMP Access screen to define SNMP v1/v2c community definitions and SNMP v3 user definitions. SNMP version 1 (v1) provides a strong network management system, but its security is relatively weak. The improvements in SNMP version 2c (v2c) do not include the attempted security enhancements of other version-2 protocols. Instead, SNMP v2c defaults to SNMP-standard community strings for read-only and read/write access. SNMP version 3 (v3) further enhances protocol features, providing much improved security. SNMP v3 encrypts transmissions and provides authentication for users generating requests. To configure SNMP v1/v2c community definitions and SNMP v3 user definitions for the access point: 1.Select System Configuration - > SNMP Access from the access point menu tree. SNMP v1/v2c community definitions allow read-only or read/write access to access point management information. The SNMP community includes users whose IP addresses are specified on the SNMP Access Control screen. A read-only community string allows a remote device to retrieve information, while a read/ write community string allows a remote device to modify settings. Symbol recommends AP-51xx Access Point Product Reference Guide 4-20 considering adding a community definition using a site-appropriate name and access level. Set up a read/write definition (at a minimum) to facilitate full access by the access point administrator. 2.Configure the SNMP v1/v2 Configuration field (if SNMP v1/v2 is used) to add or delete community definitions, name the community, specify the OID and define community access. 3.Configure the SNMP v3 User Definitions field (if SNMP v3 is used) to add and configure SNMP v3 user definitions. SNMP v3 user definitions allow read-only or read/write access to management information as appropriate. AddClick Add to create a new SNMP v1/v2c community definition. DeleteSelect Delete to remove a SNMP v1/v2c community definition. Community Use the Community field to specify a site-appropriate name for the community. The name is required to match the name used within the remote network management software. OIDUse the OID (Object Identifier) pull-down list to specify a setting of All or a enter a Custom OID. Select All to assign the user access to all OIDs in the MIB. The OID field uses numbers expressed in dot notation. AccessUse the Access pull-down list to specify read-only (R) access or read/write (RW) access for the community. Read-only access allows a remote device to retrieve access point information, while read/write access allows a remote device to modify access point settings. Add Click Add to create a new entry for an SNMP v3 user. DeleteSelect Delete to remove an entry for an SNMP v3 user. Username Specify a username by typing an alphanumeric string of up to 31 characters. System Configuration 4-21 4.Specify the users who can read and optionally modify the SNMP-capable client. Security LevelUse the Security Level area to specify a security level of noAuth (no authorization), AuthNoPriv (authorization without privacy), or AuthPriv (authorization with privacy). The NoAuth setting specifies no login authorization or encryption for the user. The AuthNoPriv setting requires login authorization, but no encryption. The AuthPriv setting requires login authorization and uses the Data Encryption Standard (DES) protocol. OIDUse the OID (Object Identifier) area to specify a setting of All or enter a Custom OID. Select All to assign the user access to all OIDs in the MIB. The OID field uses numbers expressed in dot notation. PasswordsSelect Passwords to display the Password Settings screen for specifying authentication and password settings for an SNMP v3 user. The maximum password length is 11 characters. Use the Authentication Algorithm drop-down menu to specify MD5 or SHA1 as the authentication algorithm. Use the Privacy Algorithm drop-down menu to define an algorithm of DES or AES-128bit. When entering the same username on the SNMP Traps and SNMP Access screens, the password entered on the SNMP Traps page overwrites the password entered on the SNMP Access page. To avoid this problem, enter the same password on both pages. AccessUse the Access pull-down list to specify read-only (R) access or read/write (RW) access for a user. Read-only access permits a user to retrieve access point information, while read/write access allows a user to modify access pointsettings. AP-51xx Access Point Product Reference Guide 4-22 5.If configuring SNMP v3 user definitions, set the SNMP v3 engine ID. 6.Click Apply to save any changes to the SNMP Access screen. Navigating away from the screen without clicking the Apply button results in all changes to the screen being lost. 7.Click Undo Changes (if necessary) to undo any changes made. Undo Changes reverts the settings displayed on the SNMP Access screen to the last saved configuration. 8.Click Logout to securely exit the access point Symbol Access Point applet. A prompt displays confirming the logout before the applet is closed. For additional SNMP configuration information, see: •Configuring SNMP Access Control •Enabling SNMP Traps •Configuring Specific SNMP Traps •Configuring SNMP RF Trap Thresholds 4.4.1 Configuring SNMP Access Control Use the SNMP Access Control screen (as launched from the SNMP Access screen) to specify which users can read SNMP generated information and, if capable, modify related settings from an SNMP-capable client. SNMP Access ControlClick the SNMP Access Control button to display the SNMP Acc…
Text truncated - open the document above for the full version.
Users Manual
Configuring Access Point Security 6-11 6.Click the Apply button to return to the WLAN screen to save any changes made within the Kerberos Configuration field of the New Security Policy screen. 7.Click the Cancel button to undo any changes made within the Kerberos Configuration field and return to the WLAN screen. This reverts all settings for the Kerberos Configuration field to the last saved configuration. 6.5 Configuring 802.1x EAP Authentication The IEEE 802.1x standard ties the 802.1x EAP authentication protocol to both wired and wireless LAN applications. The EAP process begins when an unauthenticated supplicant (client device) tries to connect with an authenticator (in this case, the authentication server). The access point passes EAP packets from the client to an authentication server on the wired side of the access point. All other packet types are blocked until the authentication server (typically, a RADIUS server) verifies the MU’s identity. To configure 802.1x EAP authentication on the access point: 1.Select Network Configuration -> Wireless -> Security from the access point menu tree. If security policies supporting 802.1x EAP exist, they appear within the Security Configuration screen. These existing policies can be used as is, or their properties edited by clicking the Edit button. To configure a new security policy supporting 802.1x EAP, continue to step 2. 2.Click the Create button to configure a new policy supporting 802.1x EAP. The New Security Policy screen displays with no authentication or encryption options selected. Backup KDCOptionally, specify a numerical (non-DNS) IP address and port for a backup KDC. Backup KDCs are referred to as slave servers. The slave server periodically synchronizes its database with the primary (or master) KDC. Remote KDCOptionally, specify a numerical (non-DNS) IP address and port for a remote KDC. Kerberos implementations can use an administration server allowing remote manipulation of the Kerberos database. This administration server usually runs on the KDC. PortSpecify the ports on which the Primary, Backup and Remote KDCs reside. The default port number for Kerberos Key Distribution Centers is Port 88. AP-51xx Access Point Product Reference Guide 6-12 3.Select the 802.1x EAP radio button. The 802.1x EAP Settings field displays within the New Security Policy screen. 4.Ensure the Name of the security policy entered suits the intended configuration or function of the policy. 5.If using the access point’s Internal Radius server, leave the Radius Server drop-down menu in the default setting of Internal. If an external Radius server is used, select External from the drop-down menu. 6.Configure the Server Settings field as required to define address information for the authentication server. The appearance of the Server Settings field varies depending on whether Internal or External has been selected from the Radius Server drop-down menu. Configuring Access Point Security 6-13 Radius Server Address If using an External Radius Server, specify the numerical (non-DNS) IP address of a primary Remote Dial-In User Service (Radius) server. Optionally, specify the IP address of a secondary server. The secondary server acts as a failover server if the primary server cannot be contacted. An ISP or a network administrator provides these addresses. Radius is a client/server protocol and software enabling remote- access clients to communicate with a server used to authenticate users and authorize access to the requested system or service. This setting is not available if Internal has been selected from the Radius Server drop-down menu. RADIUS PortIf using an External Radius Server, specify the port on which the primary Radius server is listening. Optionally, specify the port of a secondary (failover) server. Older Radius servers listen on ports 1645 and 1646. Newer servers listen on ports 1812 and 1813. Port 1645 or 1812 is used for authentication. Port 1646 or 1813 is used for accounting. The ISP or a network administrator needs to confirm the appropriate primary and secondary port numbers for authentication. This setting is not available if Internal has been selected from the Radius Server drop-down menu. RADIUS Shared Secret Specify a shared secret for authentication on the Internal or Primary Radius server (External Radius Server only). The shared secret is required to match the shared secret on the Radius server. Optionally, specify a shared secret for a secondary (failover) server. Use shared secrets to verify Radius messages (with the exception of the Access-Request message) sent by a Radius enabled device configured with the same shared secret. Apply the qualifications of a well-chosen password to the generation of a shared secret. Generate a random, case-sensitive string using letters, numbers and symbols. Verify the shared secret is at least 22 characters to protect the Radius server from brute- force attacks. An example of a strong and secure shared secret is: 8d#>9fq4bV)H7%a3-zE13sW. AP-51xx Access Point Product Reference Guide 6-14 7.Select the Accounting tab as required to define a timeout period and retry interval Syslog for MUs interoperating with the access point and EAP authentication server. The items within this tab could be enabled or disabled depending on whether internal or External has been selected from the Radius Server drop-down menu. 8.Select the Reauthentication tab as required to define authentication connection policies, intervals and maximum retries. The items within this tab are identical regardless of whether Internal or External is selected from the Radius Server drop-down menu. Internal/External Accounting If using an Internal Radius server, select Disabled (no Internal Accounting), Internal Only or Both Internal and External. Selecting Both Internal and External displays additional parameters for configuring the External Radius Server. If using an External Radius server, simply select Enable or Disable to allow or de…
Text truncated - open the document above for the full version.
Contact Information
Applicant
Qianlin Zhou(Regulatory Specialist)
Technical Contact
Advance Data Technology Corporation (Hsinchu)Eric Lin
[email protected]886-3-5935343
81-1 Luliaoken, 9th Lin, Wulung Tsuen Chunglin · Hsinchu · Taiwan
Non-Technical Contact
Advance Data Technology CorporationEric Lin
[email protected]886-3-5935343
Test Firm
Bureau Veritas CPS (H.K.) Ltd. Taoyuan BranchRichard Chen
Technical Specifications
| # | Rule Parts | Frequency Range | Power Output |
|---|---|---|---|
| 2 | 15C | 5.75 GHz - 5.83 GHz | 79.00 mW |
Other Applications from Symbol Technologies Inc

H9PCCHUB1
Jun 30, 2015Customer Concierge
Equipment Class
NII - Unlicensed National Information Infrastructure TX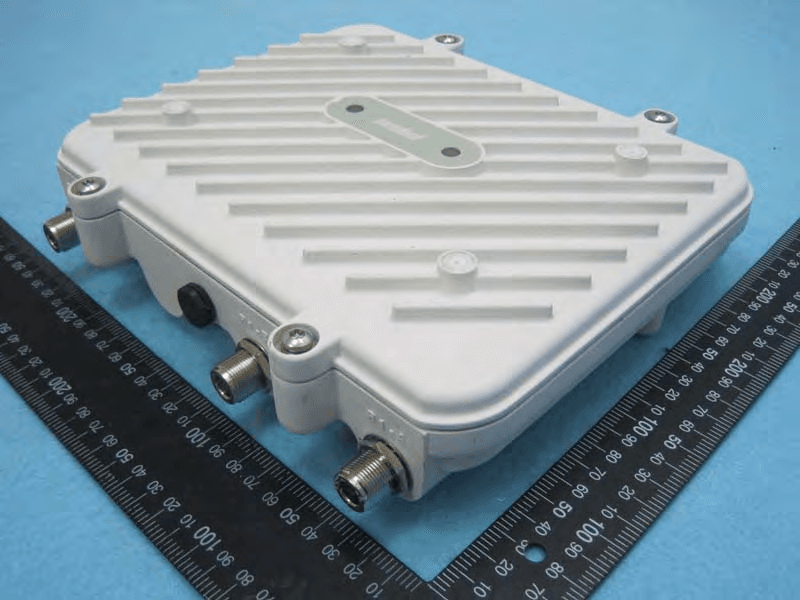
H9PAP7562
May 10, 2015802.11 abgn/ac Access Point
Equipment Class
DTS - Digital Transmission System
H9PTC75AH
Mar 26, 2015Touch Computer
Equipment Class
NII - Unlicensed National Information Infrastructure TX
H9PRA1202
Sep 24, 2014UHF Narrowband Radio Module
Equipment Class
TNB - Licensed Non-Broadcast Station Transmitter
H9PEMG101
Aug 26, 2014802.15.4 Gateway
Equipment Class
DTS - Digital Transmission System