K6630573X30HANDHELD MARINE TRANSCEIVER
Yaesu Musen Co., Ltd.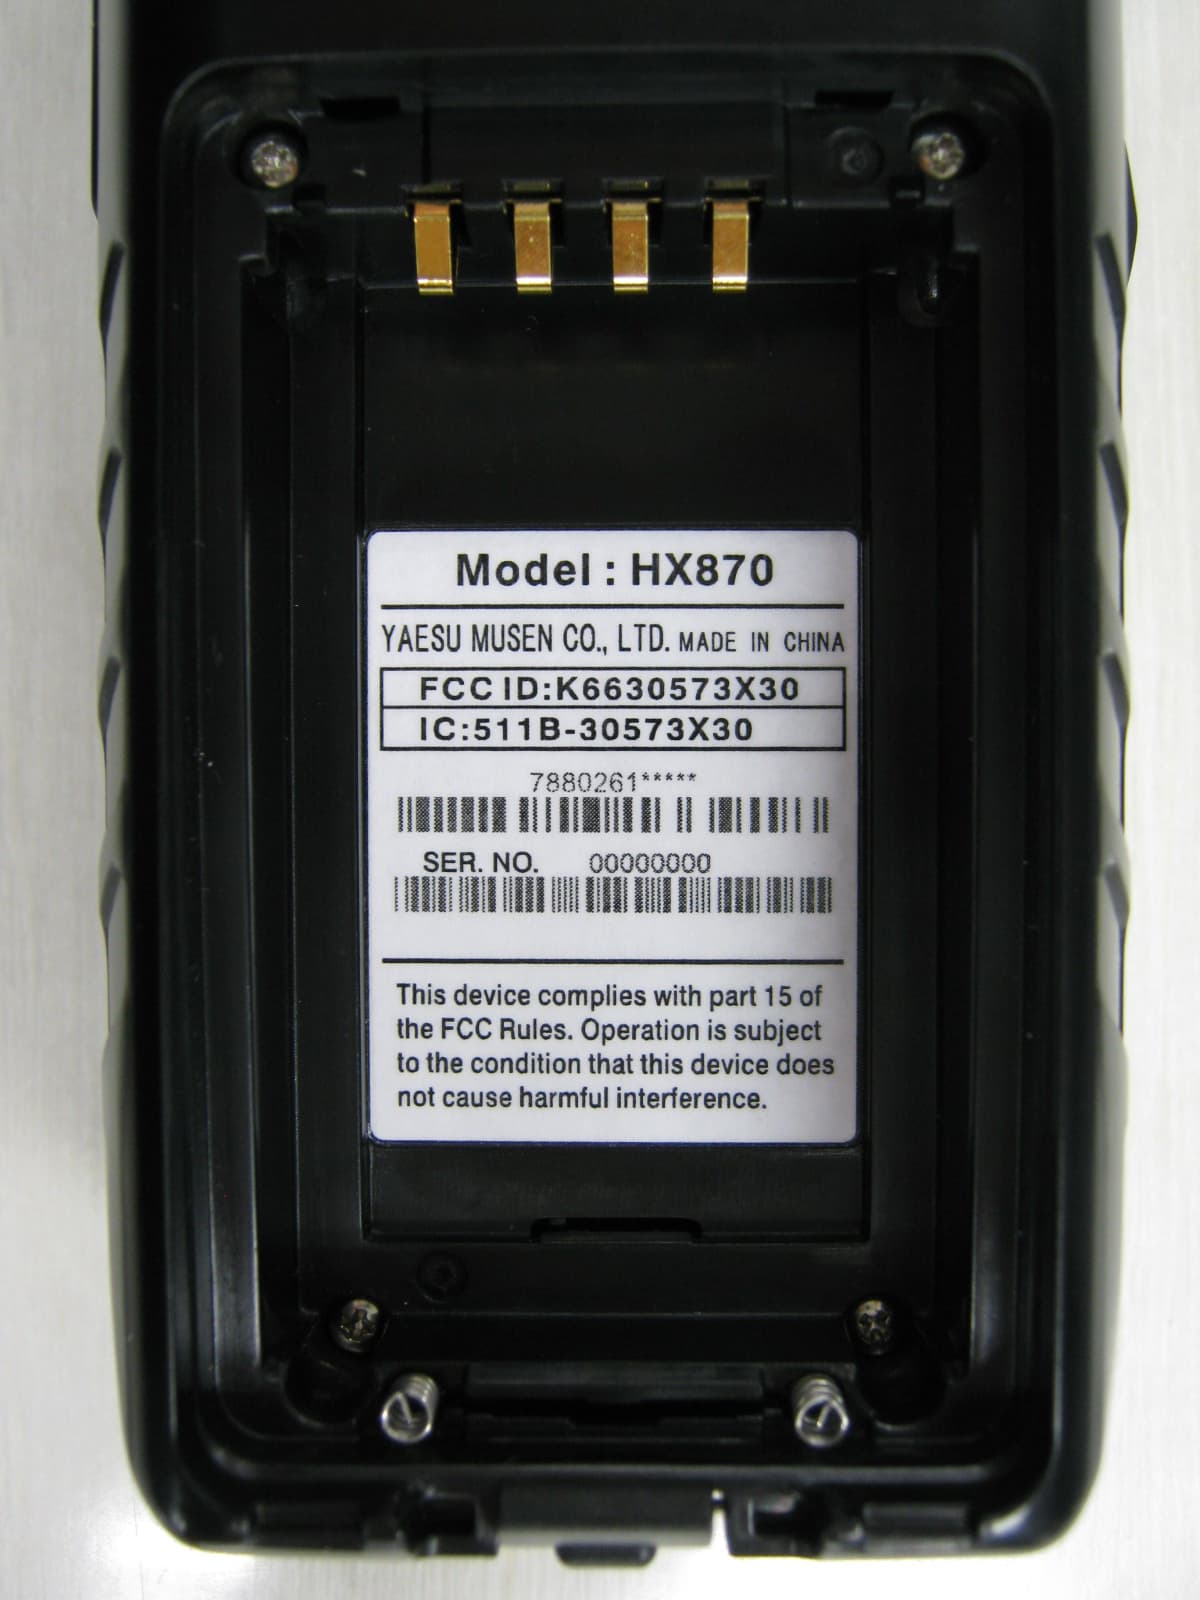
Click to zoom
Application Details
- Equipment Class
- TNF - Licensed Non-Broadcast Transmitter Held to Face
- Date of Grant
- Aug 16, 2014
- Application Purpose
- Original Equipment
- Date of Application
- Aug 16, 2014
- Equipment Note
- HANDHELD MARINE TRANSCEIVER
- Frequency Range
- 156.02500000 - 157.42500000
- Company
- Yaesu Musen Co., Ltd.
- Country
- Japan
Documents & Files
Document Text
Text extracted from the exhibit documents filed with the FCC. Open a document above to read the original.
Users Manual
Page 1 HX870 HX870 6 Watt VHF/FM Floating Marine Transceiver with DSC Class D and GPS Owner’s Manual Page 2 HX870 TABLE OF CONTENTS Quick Reference Guide ...............................................................................4 RADIO CARE ................................................................................................5 1 GENERAL INFORMATION .....................................................................6 2 PACKING LIST .......................................................................................7 3 OPTIONAL ACCESSORIES ...................................................................8 4 ONLINE WARRANTY REGISTRATION (in USA or Canada only) .......8 5 ABOUT THIS RADIO ..............................................................................9 5.1 PROHIBITED COMMUNICATIONS .............................................9 5.2 ABOUT VHF RADIO ....................................................................9 5.3 DISTRESS AND HAILING (CHANNEL 16) ..................................9 5.4 CALLING ANOTHER VESSEL (CHANNEL 16 OR 9)................10 5.5 MAKING TELEPHONE CALLS ..................................................11 5.6 BRIDGE CHANNELS 13 AND 67 ..............................................11 5.7 AUTOMATED RADIO CHECK SERVICE ..................................12 6 GETTING STARTED............................................................................. 13 6.1 BATTERIES AND CHARGERS..................................................13 6.1.1 Battery Safety ..................................................................13 6.1.2 Battery Installation/Removal ............................................15 6.1.3 Battery Life Information ....................................................15 6.1.4 Using the SBH-12 Charger Cradle ...................................16 6.2 CONNECTING A USB DATA TERMINAL TO THE PC ...............17 6.3 CHECKING GPS SIGNAL (GPS STATUS DISPLAY) ................18 6.4 CHANGING THE GPS TIME .....................................................19 6.5 CHANGING THE TIME LOCATION ...........................................20 6.6 CHANGING THE TIME FORMAT ..............................................20 7 CONTROLS AND INDICATORS ..........................................................21 8 BASIC OPERATION .............................................................................25 8.1 INITIAL SETUP ..........................................................................25 8.2 RECEPTION ..............................................................................25 8.3 TRANSMISSION ........................................................................25 8.4 TRANSMIT TIME - OUT TIMER (TOT) ......................................26 8.5 SIMPLEX/DUPLEX CHANNEL USE ..........................................26 8.6 USA, INTERNATIONAL, AND CANADA MODE ........................26 8.7 NOAA WEATHER CHANNELS ..................................................27 8.7.1 NOAA Weather Alert ........................................................27 8.7.2 NOAA Weather Alert Testing ............................................28 8.8 DUAL W ATCH (TO CHANNEL 16) ............................................28 8.9 SCANNING ................................................................................28 8.9.1 Selecting the Scan Type ..................................................29 8.9.2 Programming Scan Memory ............................................30 8.9.3 Memory Scanning (M-SCAN) ..........................................30 8.9.4 Priority Scanning (P-SCAN) .............................................31 8.10 PRESET CHANNELS: INSTANT ACCESS ...............................31 8.10.1 Programming .................................................................31 8.10.2 Operation .......................................................................32 8.10.3 Deletion ............................................... ...........................32 9 GPS Operation .....................................................................................33 9.1 GPS Logger Operation ..............................................................33 9.2 GPS Compass Display ..............................................................33 9.3 GPS Information Display ............................................................34 9.4 Numerical display with GPS status ............................................34 10 DIGITAL SELECTIVE CALLING (DSC) ...............................................35 10.1 GENERAL ..................................................................................35 10.2 MARITIME MOBILE SERVICE IDENTITY (MMSI) ....................35 10.2.1 What is an MMSI? ............................................... ...........35 10.2.2 Programming the MMSI ............................................... ..36 10.3 DSC DISTRESS CALL...............................................................37 10.3.1 Transmitting a DSC Distress Call ...................................37 10.3.2 Receiving a DSC Distress Call ......................................39 10.4 ALL SHIPS CALL ............................................... ........................41 10.4.1 Transmitting an All Ships Call ........................................41 10.4.2 Receiving an All Ships Call ............................................42 10.5 INDIVIDUAL CALL ............................................... ......................43 10.5.1 Setting up the Individual / Position Call Directory ..........43 10.5.2 Setting up the Individual Call Reply ...............................44 10.5.3 Enabling the Individual Call Acknowledgment ...............45 10.5.4 Transmitting an Individual Call .......................................45 10.5.5 Receiving an Individual Call ...........................................48 10.5.6 Setting up the Individual Call Ringer ..............................49 10.6 GROUP CALL ............................................................................51 10…
Text truncated - open the document above for the full version.
Users Manual
Page 31 HX870 8.9.4 Priority Scanning (P-SCAN) In the default setting, Channel 16 is set as the priority channel. You may change the priority channel to the desired channel from Channel 16 on the main menu screen, refer to section “13.5 PRIORITY CHANNEL”. 1. Press the SQL key, then press the CH▲/CH▼ key until background noise disappears. 2. Press th e ◄/► key repeatedly, then press the [SCAN] soft key. “P-SCAN” appears on the display. Scanning will proceed between the memorized channels and preset channel (described in next section) and the priority channel. The priority channel will be scanned after each programmed channel. A P 26 P-SCAN VOL 118 ° 09.582 33 ° 37.120 W s LOC 09.56AM BUSY LO USA TIME LON LAT C A MEM P-SET 3. To stop scanning, press the 16/S, [SCAN] or CLR key. 8.10 PRESET CHANNELS: INSTANT ACCESS 10 preset channels can be programmed for instant access. Press the ◄/► key repeatedly, then press the [PRESET] soft key. Pressing the [PRESET] key activates the user assigned channel bank. If the [PRESET] soft key is pressed and no channels have been assigned, an alert beep will be emitted from the speaker. Before beginning the Instant Access operation, assign the “PRESET” command into one of the programmable keys, refer to section “12.7 SOFT KEYS”. 8.10.1 Programming 1. Press the CH▲/CH▼ key to select the chan- nel to be programmed. A P 26 USCG VOL 118 ° 09.582 33 ° 37.120 W s LOC 09.56AM BUSY LO USA TIME LON LAT C A MEM P-SET A P 26 USCG VOL 118 ° 09.582 33 ° 37.120 W s LOC 09.56AM BUSY LO USA TIME LON LAT C A MEM P-SET A P 26 USCG VOL 118 ° 09.582 33 ° 37.120 W s LOC 09.56AM BUSY LO USA TIME LON LAT C A MEM P-SET 2. Press the ◄/► key repeatedly to indicate the function on the display, then press and hold the [PRESET] soft key until the “P-SET” icon and channel number are blinking. 3. Press the [ADD] soft key to program the channel into the preset channel. “P-SET” icon will blink. 4. Repeat steps 1 through 4 to program the desired channels into the preset channels. Up to 10 channels can be registered. If you attempt to register the 11th channel, error beep will sound. Page 32 HX870 8.10.2 Operation 1. Press the ◄/► key repeatedly, then press the [PRESET] soft key to recall the preset channel. The “P SET” icon will appear on the display. 2. Press the CH▲ /CH▼ key to select the desired preset channel. 3. Press one of soft keys, then press the [PRESET] soft key to return to the last selected channel. The “P SET” icon will disappear from the display. 8.10.3 Deletion 1. Press the ◄/► key repeatedly, then press the [PRESET] soft key to recall the preset channel. 2. Press the CH▲ /CH▼ key to select the preset channel to be deleted. 3. Press one of soft keys, then press and hold the [PRESET] soft key until the “P-SET” icon and channel number are blinking. 4. Press the [DELETE] soft key to delete the channel from the preset channel. 5. Repeat steps 2 through 4 to delete the desired channels from preset chan- nels. 6. To exit from deleting the preset channels, press the [QUIT] soft key. Page 33 HX870 8.10.2 Operation 1. Press the ◄/► key repeatedly, then press the [PRESET] soft key to recall the preset channel. The “P SET” icon will appear on the display. 2. Press the CH▲/CH▼ key to select the desired preset channel. 3. Press one of soft keys, then press the [PRESET] soft key to return to the last selected channel. The “P SET” icon will disappear from the display. 8.10.3 Deletion 1. Press the ◄/► key repeatedly, then press the [PRESET] soft key to recall the preset channel. 2. Press the CH▲/CH▼ key to select the preset channel to be deleted. 3. Press one of soft keys, then press and hold the [PRESET] soft key until the “P-SET” icon and channel number are blinking. 4. Press the [DELETE] soft key to delete the channel from the preset channel. 5. Repeat steps 2 through 4 to delete the desired channels from preset chan- nels. 6. To exit from deleting the preset channels, press the [QUIT] soft key. 9 GPS Operation 9.1 GPS Logger Operation The HX870 includes a logger for position information that allows you to record your location at a regular interval. 1. Press the [LOGGER] soft key to switch the function on and off. The recording starts and the display returns to the previous screen with the “@” icon on the top of the display. • You may change the interval time of recording via the SETUP mode. Notes: • The power save operation of the GPS unit is disabled while the logger is activated. • To utilize the records, connect the HX870 to a PC and take the log data from the radio by using the PC Programming Software YCE02 (the YCE02 may be downloaded through the YAESU website). Logger operation alert: When the memory for log data becomes full, three beeps will sound and a warning message will be displayed. Afterwards the logger does not operate until the log data in the memory are erased. When the logger cannot record for some reasons, three beeps will sound and a warning message will be displayed. Afterwards the logger does not operate anymore. An error message will be displayed when the radio cannot erase the log data in the memory during the operation following the alert of memory full (see above) or in the SETUP mode (page xx). 9.2 GPS Compass Display 1. Press the MENU key to display “MENU”, then select “GPS” with the CH▲/CH▼/◄/► key. 2. Press the [SELECT] soft key, then select “COMPASS” with the CH▲/CH▼ key. 3. Press the [ENTER] soft key to display the compass display. 4. Press the CLR key to return to radio operation. Page 34 HX870 9.3 GPS Information Display 1. Press the MENU key to display “MENU”, then select “GPS” with the CH▲/CH▼/◄/► key. 2. Press the [SELECT] soft key, then select “GPS INFO” with the CH▲/CH▼ key. 3. Press the [ENTER] soft key to display the information display. 4. Press the CLR key to return to radio operation. 9.4 Numerical display with GPS status 1. Press the MENU key to display “MENU”, then select “GPS” with the CH▲/CH▼/◄/► key. GPS INFO COMPASS ENTER GPS GPS STA…
Text truncated - open the document above for the full version.
Users Manual
Page 61 HX870 10.7.4 Setting up a Position Request Ringer The HX870 has the capability to turn off the position request ringer. 1. Press the MENU key to display “MENU”. DSC SETUP GM SETUP BACK SETUP WAYPOINT SETUP CH SETUP GPS SETUP ATIS SETUP SELECT INDIVIDUAL DIR. INDIVIDUAL REPLY INDIVIDUAL ACK. INDIVIDUAL RING GROUP DIR. POSITION REPLY DSC BEEP DSC SETUP BACK SELECT 2. Press the CH▲/CH▼/◄/► key to select “SETUP”. 3. Select “DSC SETUP” menu with the CH▲/ CH▼ key. 4. Press the [SELECT] soft key, then select “DSC BEEP” with the CH▲/CH▼ key. 5. Press the [SELECT] soft key, then select “POS REQUEST” with the CH▲/CH▼ key. 6. Press the [SELECT] soft key, then select “OFF” with the CH▲/CH▼ key. 7. Press the [SELECT] soft key to store the selected setting. 8. Press the CLR key to return to radio operation. To re-enable the ringer tone, repeat the above procedure, pressing the CH▲/ CH▼ key to select “ON” in step 6 above. 10.8 POSITION REPORT The feature is similar to position request, however instead of requesting a posi- tion of another vessel this function allows you to send your position to another vessel. Your vessel must mark the internal GPS receiver for the HX870 to send the position. NOTE To transmit a position report call, the HX870 individual directory must be programmed with stations you wish to send your position to. To setup this directory refer to section “10.5.1 Setting up the Individual / Position Call Directory”. Page 62 HX870 10.8.1 Transmitting a DSC Position Report Call DSC Position Report Call using the Individual/Position Directory 1. Press the MENU key to display “MENU”, then select “DSC CALL” with the CH▲/CH▼/◄/► key. INDIVIDUAL GROUP BACK DSC CALL ALL SHIPS POS REQUEST POS REPORT DIST ALERT MSG SELECT HISTORY MEMORY NEW ID POS REQUEST BACK SELECT KAREN BOB 366901254 Horizon-1 Standard Horizon-2 USCG POS REQUEST BACK SELECT HISTORY POS REQUEST Do you want to transmit a Call? CATEG: SAFETY Horizon-1 987654321 POS: YESNO 24 ° 25.975 S 118 ° 59.456 W POS POS REQUEST Transmitted CATEG: SAFETY Horizon-1 987654321 POS: QUIT 24 ° 25.975 S 118 ° 59.456 W 2. Press the CH▲/CH▼ key to select “POS REPORT”. (To cancel, press the [BACK] soft key.) 3. Press the [SELECT] soft key. 4. Press the CH▲/CH▼ key to select the category (“HISTORY”, “MEMORY” or “NEW ID”). 5. Press the [SELECT] soft key. 6. Press the CH▲ /CH▼ key to select the name in the directory, then press the [SELECT] soft key. 7. Press the [YES] soft key to send your posi- tion to the selected vessel. 8. Press the [QUIT] soft key to return to radio operation. DSC Position Report Call Manually Entering an MMSI This feature allows you to send your position to another vessel by manually entering the MMSI of the ship you want to send your position to. 1. Press the MENU key to display “MENU”, then select “DSC CALL” with the CH▲/CH▼/◄/► key. INDIVIDUAL GROUP BACK DSC CALL ALL SHIPS POS REQUEST POS REPORT DIST ALERT MSG SELECT HISTORY MEMORY NEW ID POS REPORT BACK SELECT BACK SELECTFINISH POS REPORT MMSI -98765432 1 5 6 7 8 9 0 2 4 Delete 3 2. Press the CH▲/CH▼ key to select “POS REPORT”. (To cancel, press the [QUIT] soft key.) 3. Press the [SELECT] soft key. The trans- ceiver will beep, and the POS report call menu will appear. 4. Press the CH▲/CH▼ key to select “NEW ID”, then press the [SELECT] soft key. 5. Press the CH▲ /CH▼ key to select the first number of the MMSI which you want to contact, then press the [SELECT] soft key to step to the next number. Page 63 HX870 6. Repeat step 5 to set the MMSI number. If a mistake was made entering in the MMSI number, repeatedly press the [BACK] soft key until the wrong number is selected, then press the CH▲/CH▼ key to correct the entry. POS REPORT CATEG: SAFETY Horizon-1 987654321 POS: 24 ° 25.975 S 118 ° 59.456 W Do you want to transmit a Call? YESNOPOS BACK SELECTFINISH POS REPORT POSITION 1 2 4 5 6 7 8 9 0 S N Delete 3 Lat Lon 34 ° 25.975 S 118 ° 59.456 W POS REPORT Transmitted CATEG: SAFETY Horizon-1 987654321 POS: QUIT 24 ° 25.975 S 118 ° 59.456 W 7. When finished entering the MMSI number, press the [FINISH] soft key. 8. If another position is displayed, press the [POS] soft key to go to the position informa- tion input screen. After inputting new position information, press the [FINISH] soft key to confirm. 9. Press the [YES] soft key to send your position to the selected vessel. 10. Press the [QUIT] soft key to return to radio operation. 10.8.2 Receiving a DSC Position Report Call When another vessel transmits their vessels location to the HX870 the follow- ing will happen: 1. A ringing sound will be produced when the call is received and NMEA sentences (DSC, DSE) are outputted on the USB Data Jack. RX POS REPORT Horizon POS INFO 987654321 POS: 24 ° 25.975 N 118 ° 59.456 W POS TM: 12 DST: 10 BRG: 006 ° 56 AM LOC NH ° T TO UPTQUITBACK 2. Press any key to stop ringing. 3. Press the [INFO] soft key to see more detailed position information of the station. 4. To exit to radio mode, press the [QUIT] soft key. Page 64 HX870 10.8.3 Navigating to a Position Report The HX870 has a feature that allows navigation to a received position report call by using the compass display. Navigating to the position of a position report call may be enabled by the procedure below. 1. After the position report call has been received, press the [TO WPT] soft key. RX POS REPORT Horizon POS INFO 987654321 POS: 24 ° 25.975 N 118 ° 59.456 W POS TM: 12 DST: 10 BRG: 006 ° 56 AM LOC NH ° T TO UPTQUITBACK SOGkph 36.0 DSTkm 35.2 BRG T WPT Horizon HIUSA WPT N-UP 20nm BUSY 300 25 ° DW-16 2. To start navigating using the compass display, press the [START] soft key until the compass page is shown. The display indicates the distance and direction of the received vessel, and also the compass indicates the received vessel by dot (). 10.8.4 Stopping Navigation to a Position Report 1. Press one of the soft keys to show the key selections. 2. Press the [STOP] key. The radio will stop navigating to a the waypoint and the Norm…
Text truncated - open the document above for the full version.
Users Manual
Page 81 HX870 11.2.4 Deleting a Waypoint 1. Press the MENU key to display “MENU”, then select “SETUP” with the CH▲/CH▼/◄/► key. DSC SETUP GM SETUP BACK SETUP WAYPOINT SETUP CH SETUP GPS SETUP ATIS SETUP SELECT ADD WAYPOINT SETUP EDIT DELETE WAYPOINT DIR. BACK SELECT Standard USCG WAYPOINT DIR. BACK SELECT KAREN 366901254 BOB Horizon-1 Horizon-2 DELETE NAME: KAREN------------ ENTERBACK CANCEL OK POSITION: 34 ° 25.975 S 118 ° 59.456 W DELETE 2. Press the CH▲/CH▼ key to select “WAYPOINT SETUP”. 3. Press the [SELECT] soft key, then select “WAYPOINT DIR.” with the CH▲/CH▼ key. 4. Press the [SELECT] soft key, then select “DELETE” with the CH▲/CH▼ key. 5. Press the [SELECT] soft key, then press the CH▲/CH▼ key to highlight the waypoint to be deleted. 6. Press the [SELECT] soft key. 7. Confirm the waypoint to be deleted, then with “OK” highlighted, press the [ENTER] soft key. 8. Press the CLR key to return to radio operation. 11.2.5 Saving a DSC Position Call as a Waypoint When a position is received from another DSC radio the HX870 allows the position to be saved as a waypoint. Refer to section “10.8.5 Saving a Position Report as a Waypoint” for details. Page 82 HX870 11.2.6 Selecting the Waypoint Range This menu item allows setting of the range on the display. The default setting is “10nm”. 1. Press the MENU key to display “MENU”, then select “SETUP” with the CH▲/CH▼/◄/► key. DSC SETUP GM SETUP BACK SETUP WAYPOINT SETUP CH SETUP GPS SETUP ATIS SETUP SELECT MARK POSITION WAYPOINT DIR. DISPLAY RANGE ARRIVED RANGE ROUTING OPERATION WAYPOINT SETUP BACK SELECT 1nm BACK WAYPOINT SETUP 5nm 10nm 15nm 30nm ENTER WAYPOINT RANGE 2. Press the CH▲/CH▼ key to select “WAYPOINT SETUP”. 3. Press the [SELECT] soft key, then select “DISPLAY RANGE” with the CH▲/CH▼ key. 4. Press the [SELECT] soft key. 5. Press the CH▲/CH▼ key to select desired range. Available selections are “1nm”, “5nm”, “10nm”, “15nm”, and “30nm”. 6. Press the [ENTER] soft key to store the selected setting. 7. Press the CLR key to return to radio opera- tion. 11.2.7 Selecting the Arrived Range To stop navigating to a waypoint, the radio must be switched to the normal mode with the following procedure. 1. Press the MENU key to display “MENU”, then select “SETUP” with the CH▲/CH▼/◄/► key. DSC SETUP GM SETUP BACK SETUP WAYPOINT SETUP CH SETUP GPS SETUP ATIS SETUP SELECT MARK POSITION WAYPOINT DIR. DISPLAY RANGE ARRIVED RANGE ROUTING OPERATION WAYPOINT SETUP BACK SELECT 50m BACK WAYPOINT SETUP 100m 200m 500m 1km ENTER ARRIVED RANGE 2. Press the CH▲/CH▼ key to select “WAYPOINT SETUP”. 3. Press the [SELECT] soft key, then select “ARRIVED RANGE” with the CH▲/CH▼ key. 4. Press the [ENTER] soft key. 5. Press the CH▲ /CH▼ key to select desired range. Available selections are “50 m”, “100 m”, “200 m”, “500 m”, and “1 km”. 6. Press the [ENTER] soft key to store the selected setting. Page 83 HX870 12 CONFIGURATION 12.1 DIMMER ADJUSTMENT This menu selection adjusts the backlight intensity. 1. Press the MENU key to display “MENU”, then select “SETUP” with the CH▲/CH▼/◄/► key. GM SETUP WAYPOINT SETUP BACK SETUP CH SETUP GPS SETUP ATIS SETUP CONFIGURATION SELECT DIMMER LAMP CONTRAST KEY BEEP BATTERY SAVE STROBE LED SOFT KEY CONFIGURATION BACK SELECT DIMMER 5 CONFIGURATION BACKENTER 2. Press the CH▲/CH▼ key to select “CONFIG- URATION” menu. 3. Press the [SELECT] soft key, then select “DIMMER” with the CH▲/CH▼ key. 4. Press the [SELECT] soft key. 5. Press the CH▲/CH▼ key to select the desired level (“5” is default). When “OFF” is selected, the lamp is turned off. 6. Press the [SELECT] soft key to store the selected level. 7. Press the CLR key to return to radio operation. 12.2 LAMP This menu selection is used to setup the illumination time of the display and keypad. The default setting is “OFF”. 1. Press the MENU key to display “MENU”, then select “SETUP” with the CH▲/CH▼/◄/► key. GM SETUP WAYPOINT SETUP BACK SETUP CH SETUP GPS SETUP ATIS SETUP CONFIGURATION SELECT DIMMER LAMP CONTRAST KEY BEEP BATTERY SAVE STROBE LED SOFT KEY CONFIGURATION BACK SELECT OFF BACK CONFIGRATION 3sec 5sec 10sec CONTINUOUS SELECT LAMP 2. Press the CH▲/CH▼ key to select “CONFIG- URATION” menu. 3. Press the [SELECT] soft key, then select “LAMP” with the CH▲/CH▼ key. 4. Press the [SELECT] soft key. 5. Press the CH▲/CH▼ key to select the desired time. CONTINUOUS: Illuminates the display/keypad continuously . 3/5/10 Sec: Illuminates the display/keypad for the selected time when press any key (except the PTT switch). OFF: Disables the display/keypad lamp illumination. 6. Press the [SELECT] soft key to store the selected setting. Page 84 HX870 7. Press the CLR key to return to radio operation. 12.3 DISPLAY CONTRAST The display contrast can be adjusted to suit overhead or dash board installa- tions. 1. Press the MENU key to display “MENU”, then select “SETUP” with the CH▲/CH▼/◄/► key. GM SETUP WAYPOINT SETUP BACK SETUP CH SETUP GPS SETUP ATIS SETUP CONFIGURATION SELECT DIMMER LAMP CONTRAST KEY BEEP BATTERY SAVE STROBE LED SOFT KEY CONFIGURATION BACK SELECT CONTRAST 30 CONFIGURATION BACKENTER 2. Press the CH▲/CH▼ key to select “CONFIG- URATION” menu. 3. Press the [SELECT] soft key, then select “CONTRAST” with the CH▲/CH▼ key. 4. Press the [SELECT] soft key. 5. Press the CH▲/CH▼ key to select the desired level. The contrast level can be set from “0” to “30” (“15” is default). 6. Press the [SELECT] soft key to store the selected level. 7. Press the CLR key to return to radio operation. 12.4 KEY BEEP This selection is used to select the beep tone volume level when a key is pressed. 1. Press the MENU key to display “MENU”, then select “SETUP” with the CH▲/CH▼/◄/► key. GM SETUP WAYPOINT SETUP BACK SETUP CH SETUP GPS SETUP ATIS SETUP CONFIGURATION SELECT DIMMER LAMP CONTRAST KEY BEEP BATTERY SAVE STROBE LED SOFT KEY CONFIGURATION BACK SELECT KEY BEEP 3 CONFIGURATION BACKENTER 2. Press the CH▲/CH▼ key to select “CONFIG- URATION” menu. 3. Press the [SELECT] soft key, then press the CH▲/CH▼ key to selec…
Text truncated - open the document above for the full version.
Users Manual
Page 96 HX870 14.12 SUMMARY OF THE DSC SETUP MENU ItemDescriptionDefault Value INDIVIDUAL DIR.Sets addresses used for individual call− INDIVIDUAL REPLYSelects a reply to individual callMANUAL INDIVIDUAL ACK.Selects the message to be sent automati- cally as an individual call acknowledge- ment ABLE TO COMPLY INDIVIDUAL RINGSelects the ringing time when an individual call or a position request 2 min GROUP DIR.Sets addresses used for group call− POSITION REPLYSelects a reply to position requestAUTO AUTO POS POLLINGSwitches on and off of the AUTO POS POLLING function AUTO POS REQUEST AUTO POS INTERVALSets the transmission interval of AUTO POS POLLING signal 5 min AUTO CH CHANGESelects the delay time to move to the requested channel automatically after receiving a distress call, All Ship call, or group call 30 s POS UNFIX WAITSets the maximum wait time till obtaining a position information when receiving a distress call, POS Report call, or acknowl- edgement to POS request call 15 s DSC BEEPSwitches on and off of the alarm sound when receiving a DSC call INDIVI.: On All Ship: On GROUP: On POS RQ.: Off POS RP: Off Geog.: On Polling: On T est Call: On Page 97 HX870 15 GPS SETUP The “GPS Setup” mode allows the parameters for the HX870 internal GPS unit to be custom-configured for your operating requirements. 15.1 GPS ON/OFF This selection allows the internal GPS unit to be turned on or off to conserve battery power. The default setting is “ON”. 1. Press the MENU key to display “MENU”, then select “SETUP” with the CH▲/CH▼/◄/► key. DSC SETUP GM SETUP BACK SETUP WAYPOINT SETUP CH SETUP GPS SETUP ATIS SETUP SELECT GPS ON/OFF POWER SAVE DIRECTION LOCATION FORMAT TIME OFFSET TIME AREA TIME FORMAT GPS SETUP BACK SELECT ON OFF GPS SETUP ON INT at PWR OFF GPS ON/OFF BACKENTER 2. Press the CH▲/CH▼ key to select “GPS SETUP” menu. 3. Press the [SELECT] soft key, then select “GPS ON/OFF” with the CH▲/CH▼ key. 4. Press the [SELECT] soft key. 5. Press the CH▲/CH▼ key to select “ON”. 6. Press the [ENTER] soft key to save the new setting. 7. Press the CLR key to return to radio opera- tion. 15.2 POWER SAVE This menu item selects the Battery Save Mode for the internal GPS unit. The default setting for the Power Save Mode is “AUTO”. 1. Press the MENU key to display “MENU”, then select “SETUP” with the CH▲/CH▼/◄/► key. DSC SETUP GM SETUP BACK SETUP WAYPOINT SETUP CH SETUP GPS SETUP ATIS SETUP SELECT GPS ON/OFF POWER SAVE DIRECTION LOCATION FORMAT TIME OFFSET TIME AREA TIME FORMAT GPS SETUP BACK SELECT ON 2. Press the CH▲/CH▼ key to select “GPS SETUP” menu. 3. Press the [SELECT] soft key, then select “POWER SAVE” with the CH▲/CH▼ key. 4. Press the [SELECT] soft key. Page 98 HX870 5. Press the CH▲/CH▼ key to select the desired level. OFF: GPS Signals are always being received. AUTO: Activates the GPS receiver automati- cally when GPS signals are received. OFF BACK GPS SETUP 50% 70% 80% 90% ENTER POWER SAVE 50%: Activates the GPS receiver for 3 seconds every 3 seconds. 75%: Activates the GPS receiver for 3 seconds every 9 seconds. 90%: Activates the GPS receiver for 3 seconds every 27 seconds. 6. Press the [ENTER] soft key to store the selected setting. 7. Press the CLR key to return to radio operation. 15.3 LOCATION FORMAT This menu item selects the coordinate system to be shown on the HX870 display. The default setting is “ddd mm.mmm”. 1. Press the MENU key to display “MENU”, then select “SETUP” with the CH▲/CH▼/◄/► key. DSC SETUP GM SETUP BACK SETUP WAYPOINT SETUP CH SETUP GPS SETUP ATIS SETUP SELECT GPS ON/OFF POWER SAVE DIRECTION LOCATION FORMAT TIME OFFSET TIME AREA TIME FORMAT GPS SETUP BACK SELECT ON ddd mm.mmm BACK GPS SETUP ENTER LOCATION FORMAT ° ddd mm.mm ° ddd mm.ss ° 2. Press the CH▲/CH▼ key to select “GPS SETUP” menu. 3. Press the [SELECT] soft key, then select “LOCATION FORMAT” with the CH▲/CH▼ key. 4. Pres s the [SELECT] soft key, then press the CH▲/CH▼ key to select the desired coordinate system. The location format can be selected from “ddd’mm.ss”, “ddd’mm.mm”, and “ddd’mm.mmm”. 5. Press the [ENTER] soft key to save the new setting. 6. Press the CLR key to return to radio operation. 15.4 TIME OFFSET Sets the local time offset between UTC (Universal Time Coordinated) and local time shown on the display. The offset is added or subtracted from the time received from the GPS or chart plotter. Time is only displayed when a GPS or chart plotter is connected. Refer to section “6.4 CHANGING THE GPS TIME” for details. Page 99 HX870 15.5 TIME AREA This menu selection allows the radio to show UTC time or local time with the offset. Refer to section “6.5 CHANGING THE TIME LOCATION” for details. 15.6 TIME FORMAT This menu selection allows the radio to show time in 12-hour or 24-hour format. Refer to section “6.6 CHANGING THE TIME FORMAT” for details. 15.7 UNIT OF MEASURE This section allows you to set the speed, distance and altitude units. 1. Press the MENU key to display “MENU”, then select “SETUP” with the CH▲/CH▼/◄/► key. DSC SETUP GM SETUP BACK SETUP WAYPOINT SETUP CH SETUP GPS SETUP ATIS SETUP SELECT POWER SAVE DIRECTION LOCATION FORMAT TIME OFFSET TIME AREA TIME FORMAT UNITS OF MEASURE GPS SETUP BACK SELECT SPEED BACK GPS SETUP DISTANCE ALTITUDE kts nm ft SELECT UNITS OF MEASURE 2. Press the CH▲/CH▼ key to select “GPS SETUP” menu. 3. Press the [SELECT] soft key, then press the CH▲/CH▼ key to select “UNIT OF MEASURE”. 4. Press the [SELECT] soft key. 5. Press the CH▲/CH▼ key to select the item you want to set. 6. Press the [SELECT] soft key. 7. Press the CH▲/CH▼ key to select the unit. 8. Press the [ENTER] soft key to store the new setting. 9. Press the CLR key to return to radio operation. Page 100 HX870 15.8 PINNING This selection is used to enable or disable position updates when the vessel is not underway. The default setting is “OFF”. 1. Press the MENU key to display “MENU”, then select “SETUP” with the CH▲/CH▼/◄/► key. DSC SETUP GM SETUP BACK SETUP WAYPOINT SETUP CH SETUP GPS SETUP ATIS SETUP SELECT U…
Text truncated - open the document above for the full version.
Contact Information
Applicant
Masatoshi Muraishi(Engineering Division)
Technical Contact
Timco Engineering, Inc.Cory Leverett
[email protected]888-472-2424
849 NW State Road 45 · Newberry, Florida · United States
Non-Technical Contact
Timco Engineering, Inc.Sharon Hoffman
[email protected]888-472-2424
Test Firm
Timco Engineering, Inc.Bruno Clavier
Technical Specifications
| # | Rule Parts | Frequency Range | Power Output | Emission | Tolerance |
|---|---|---|---|---|---|
| 4 | 8 | 156.025 MHz - 157.425 MHz | 1 W | 16K0G2B | 2.5 ppm |
Other Applications from Yaesu Musen Co., Ltd.
K660E180X10
Dec 01, 2025BLUETOOTH MICROPHONE
Equipment Class
DTS - Digital Transmission System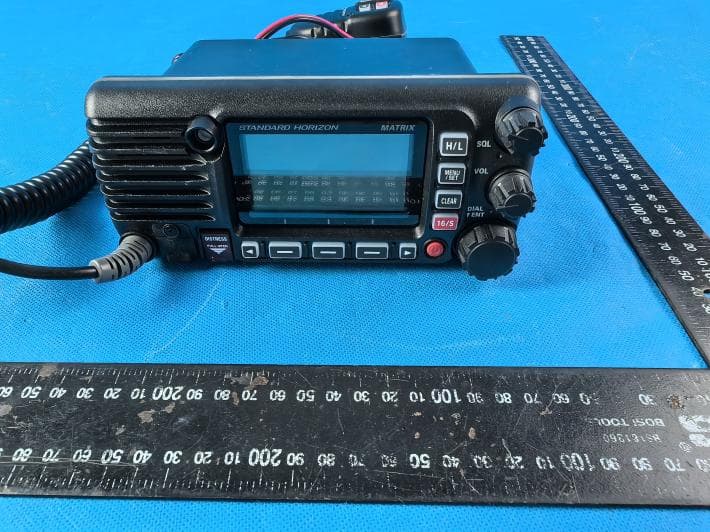
K6630673Y3D
Aug 01, 2024VHF FM Marine Transceiver
Equipment Class
CXX - Communications Rcvr for use w/ licensed Tx and CBs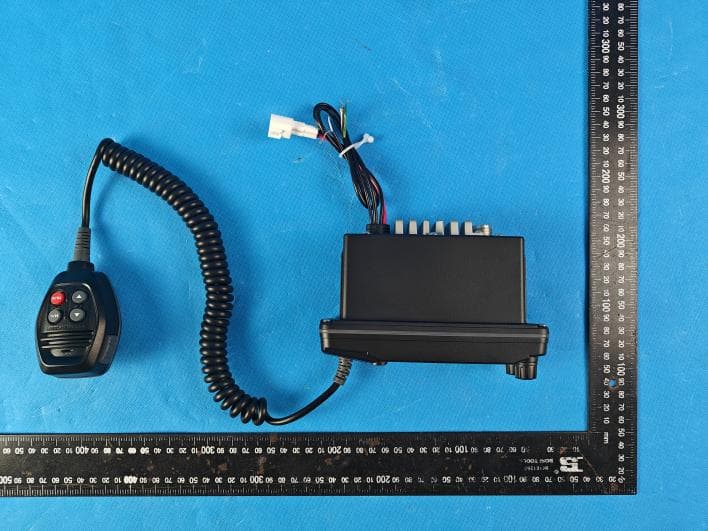
K6630653Y3D
Aug 01, 2024VHF FM Marine Transceiver
Equipment Class
CXX - Communications Rcvr for use w/ licensed Tx and CBs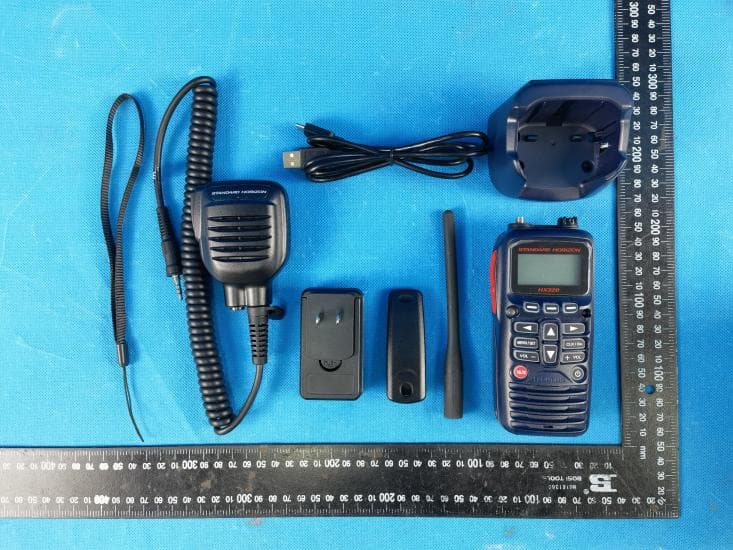
K6630683X30
Jan 10, 2023VHF FM Marine Transceiver
Equipment Class
TNF - Licensed Non-Broadcast Transmitter Held to Face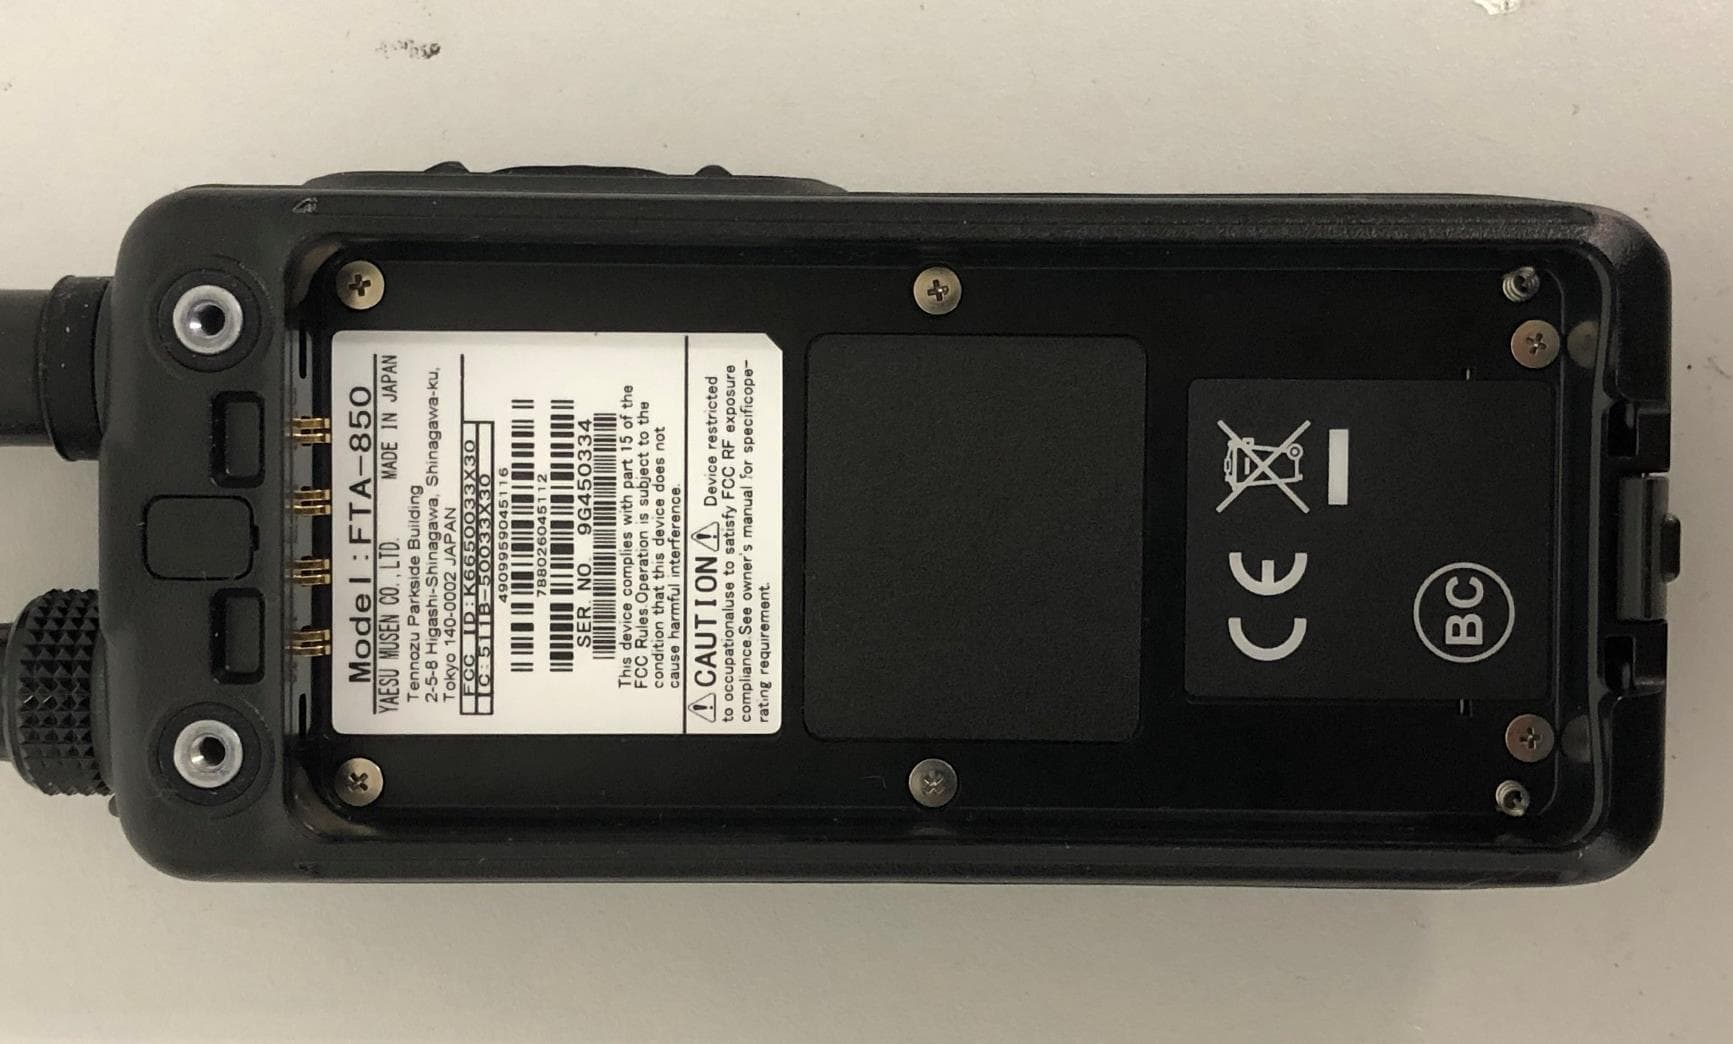
K6650033X30
Nov 18, 2020Airband Radio Transceiver
Equipment Class
TNF - Licensed Non-Broadcast Transmitter Held to Face