K66VX-4204-0HVHF Mobile Transceiver
Yaesu Musen Co., Ltd.
Click to zoom
Application Details
- Equipment Class
- TNB - Licensed Non-Broadcast Station Transmitter
- Date of Grant
- May 26, 2003
- Application Purpose
- Original Equipment
- Date of Application
- May 26, 2003
- Equipment Note
- VHF Mobile Transceiver
- Frequency Range
- 134.00000000 - 174.00000000
- Company
- Yaesu Musen Co., Ltd.
- Country
- Japan
Documents & Files
Document Text
Text extracted from the exhibit documents filed with the FCC. Open a document above to read the original.
Users Manual
FCC ID: K66VX-4204-0H O PERATING M ANUAL Vertex Standard Co., Ltd.1 VX-4204 Operating Manual Congratulations! You now have at your fingertips a valuable communications tool: a VERTEX STANDARD two-way radio! Rugged, reliable and easy to use, your VERTEX STANDARD radio will keep you in constant touch with your colleagues for years to come, with negligible maintenance downtime. Please take a few minutes to read this manual carefully. The information presented here will allow you to derive maximum performance from your radio, in case questions arise later on. We’re glad you joined the VERTEX STANDARD team. Call on us anytime, because communications is our business. Let us help you get your message across. Notice ! There are no owner-serviceable parts inside the transceiver. All service jobs must be referred to an authorized VERTEX STANDARD Service Representative. Consult your Authorized VERTEX STANDARD Dealer for installation of optional accessories. Safety/Warning Information WARNING - DO NOT operate the VX-4200 radio when any person(s) (bystanders) outside the vehicle are within the distances shown in the chart at the bottom of this section. Safety Training information: Antennas used for this transmitter must not exceed an antenna gain of 0 dBd. The radio must be used in vehicle-mount configurations with a maximum operating duty factor not exceeding 25%, in typical Push-to-Talk configurations. This radio is restricted to occupational use, work related operations only where the radio operator must have the knowledge to control the exposure conditions of its passengers and bystanders by maintaining the minimum separation distance shown below. Failure to observe these restrictions will result in exceeding the FCC RF exposure limits. Antenna Installation: For rear deck trunk installation, the antenna must be located at least the following distance away from rear-seat passengers in order to comply with the FCC RF exposure requirements. For roof top installations, the antenna must be placed in the center of the roof. Introduction The VX-4200 Series are full-featured FM transceivers designed for flexible mobile and base station business communications in the VHF or UHF Land Mobile bands. These transceiver are designed for reliable business communications in a wide variety of applications with a wide range of operating capability provided by their leading-edge design. The 501-channel memories can each be programmed with a 12-character channel name. Important channel frequency data is stored in EEPROM and flash memory on the CPU, and is easily programmable by dealers using a personal computer and the VERTEX STANDARD VPL-1 Programming Cable and CE59 Software. The pages which follow will detail the many advanced features provided on the VX-4200 Series transceiver. After reading this manual, you may wish to consult with your FCC ID: K66VX-4204-0H O PERATING M ANUAL Vertex Standard Co., Ltd.2 Network Administrator regarding precise details of the configuration of this equipment for use in your application For North American Users Regarding 406 MHz Guard Band The U.S. Coast Guard and National Oceanographic and Atmospheric Administration have requested the cooperation of the U.S. Federal Communications Commission in preserving the integrity of the protected frequency range 406.0 to 406.1 MHz, which is reserved for use by distress beacons. Do not attempt to program this apparatus, under any circumstances, for operation in the frequency range 406.0 - 406.1 MHz if the apparatus is to be used in or near North America. Controls & Connectors Front Panel Important! - All buttons located on the Front Panel are Programmable Function (PF) Buttons, configured according to your network requirements and programmed by your VERTEX STANDARD dealer. The instructions below a typically-configured radio. 1. [ xxx ] Button Press the [ xxx ] button more than 2 seconds to turn the radio on. Press it again more than 2 seconds to turn the radio off. 2. VOL Knob Turn this control clockwise to increase the volume. 3. BUSY/TX Indicator Indicate transceiver Transmit/Receive Status Steady Red:Transmitting in progress Steady Green: Busy Channel Blinking Green: Tone Squelch in defeated condition 4. LCD (Liquid Crystal Display) The display includes 3-character numeric section showing various statuses, and 12-character alphanumeric section showing Group and Channel name tag and identity information, and error messages etc. 5. [θ]/[π] Buttons (Programmable Function Buttons) Pressing either button changes the current channel (and displayed channel number or name). Holding a button for more than 1/2 second causes the function to repeat. 6. Microphone Jack Connect the microphone plug to this jack. 7. [A] Button (Programmable Function Button) This button can be set up for special applications, such as High/Low power selection, Monitor, Talk-Around, etc, as determined by your network requirements and programmed by your VERTEX STANDARD dealer. 8. [P1] - [P4] Buttons (Programmable Function Buttons) These buttons can be set up for special applications, such as High/Low power selection, Monitor, Talk-Around, etc, as determined by your network requirements and programmed by your VERTEX STANDARD dealer. FCC ID: K66VX-4204-0H O PERATING M ANUAL Vertex Standard Co., Ltd.3 Rear Panel 1. Antenna Socket The 50-Ohm coaxial feedline to the antenna must be connected here, using a type- M (PL-259) plug. 2. 13.6V DC Cable Pigtail with Connector The supplied DC power cable must be connected to this 2-pin connector. Use only the supplied fused cable, extended if necessary, for power connection. 3. External Speaker Jack An external loudspeaker may be connected to this 2-contact, 3.5-mm mini-phone jack. Caution: Do not connect either wire of this line to ground, and be certain that the speaker has adequate capability to handle the audio output (12 W) from the radio. 4. D-Sub 15-Pin Accessory Connector External TX audio line input, PTT (Push To Talk), Squelch, and…
Text truncated - open the document above for the full version.
Users Manual
Congratulations! You now have at your fingertips a valuable communications tool - a two-way radio! Rugged, reliable and easy to use, your radio will keep you in constant touch with your colleagues for years to come, with negligible main- tenance down time. Please take a few minutes to read this manual carefully. The information presented here will allow you to derive maximum performance from your radio. After reading it, keep the manual handy for quick reference, in case questions arise later on. We’re glad you joined the team. Call on us any time, because our business is communications. Let us help you get your message across. NOTICE There are no user-serviceable points inside this transceiver. All service jobs must be referred to your Authorized Service Center or Network Administrator. Safety / Warning Information WARNING - DO NOT operate the VX-4200 radio when someone (bystanders) outside the vehicle is within following range. Safety Training information: Antennas used for this transmitter must not exceed an antenna gain of 0 dBd. The radio must be used in vehicle-mount configurations with a maximum operating duty factor not exceeding 50%, in typical Push-to-Talk configurations. This radio is restricted to occupational use, work related operations only where the radio operator must have the knowledge to control the exposure conditions of its passengers and bystanders by maintaining the minimum separation distance of following range. Failure to observe these restrictions will result in exceeding the FCC RF exposure limits. Antenna Installation: For rear deck trunk installation, the antenna must be located at least following range away from rear seat passengers in order to comply with the FCC RF exposure requirements. For roof top installation, the antenna must be placed in the center of the roof. Radiated frequency and Distance VX-4204 0.6 m FCC ID: K66VX-4204-0H O PERATING M ANUAL Vertex Standard Co., Ltd. FCC ID: K66VX-4204-0H O PERATING M ANUAL Vertex Standard Co., Ltd. Introduction The VX-4200 Series are full-featured FM transceivers designed for flexible mobile and base station business communications in the VHF or UHF Land Mobile bands. These transceiver are designed for reliable business communications in a wide variety of applications with a wide range of operating capability provided by their leading-edge design. The 501-channel memories can each be programmed with a 12-character channel name. Important channel frequency data is stored in EEPROM and flash memory on the CPU, and is easily programmable by dealers using a personal computer and the VERTEX STANDARD VPL-1 Programming Cable and CE59 Software. The pages which follow will detail the many advanced features provided on the VX-4200 Series transceiver. After reading this manual, you may wish to consult with your Network Administrator regarding precise details of the configuration of this equipment for use in your application Controls & Connectors Front Panel Important! - All buttons located on the Front Panel are Programmable Function (PF) Buttons, configured according to your network requirements and programmed by your VERTEX STANDARD dealer. The instructions below a typically-configured radio. 1. [ xxx ] Button Press the [ xxx ] button more than 2 seconds to turn the radio on. Press it again more than 2 seconds to turn the radio off. 2. VOL Knob Turn this control clockwise to increase the volume. 3. BUSY/TX Indicator Indicate transceiver Transmit/Receive Status Steady Red:Transmitting in progress Steady Green: Busy Channel Blinking Green: Tone Squelch in defeated condition 4. LCD (Liquid Crystal Display) The display includes 3-character numeric section showing various statuses, and 12-character alphanumeric section showing Group and Channel name tag and identity information, and error messages etc. 5. [θ]/[π] Buttons (Programmable Function Buttons) Pressing either button changes the current channel (and displayed channel number or name). Holding a button for more than 1/2 second causes the function to repeat. 6. Microphone Jack Connect the microphone plug to this jack. 7. [A] Button (Programmable Function Button) This button can be set up for special applications, such as High/Low power selection, Monitor, Talk-Around, etc, as determined by your network requirements and programmed by your VERTEX STANDARD dealer. 8. [P1] - [P4] Buttons (Programmable Function Buttons) FCC ID: K66VX-4204-0H O PERATING M ANUAL Vertex Standard Co., Ltd. These buttons can be set up for special applications, such as High/Low power selection, Monitor, Talk-Around, etc, as determined by your network requirements and programmed by your VERTEX STANDARD dealer. Rear Panel 1. Antenna Socket The 50-Ohm coaxial feedline to the antenna must be connected here, using a type- M (PL-259) plug. 2. 13.6V DC Cable Pigtail with Connector The supplied DC power cable must be connected to this 2-pin connector. Use only the supplied fused cable, extended if necessary, for power connection. 3. External Speaker Jack An external loudspeaker may be connected to this 2-contact, 3.5-mm mini-phone jack. Caution: Do not connect either wire of this line to ground, and be certain that the speaker has adequate capability to handle the audio output (12 W) from the radio. 4. D-Sub 15-Pin Accessory Connector External TX audio line input, PTT (Push To Talk), Squelch, and external RX audio line output signals may be obtained from this connector for use with accessories such as data transmission/reception modems, and external Channel control input etc. Basic Operation of the Transceiver Important! - Before turning on the radio the first time, confirm that the power connections have been made correctly and that a proper antenna is connected to the antenna jack. Switching Power ON/OFF Press the PWR button to turn the radio on. The display will become illuminated. Press the [θ]/[π] button to choose the desired operating channel. A channel name will appear on the display. If you wa…
Text truncated - open the document above for the full version.
External Photos
FCC ID: K66VX-4204-0H Vertex Standard Co., Ltd. Front view (FRONT-D-UNIT) Front view (FRONT-C-UNIT) FCC ID: K66VX-4204-0H Vertex Standard Co., Ltd. Rear view Left view FCC ID: K66VX-4204-0H Vertex Standard Co., Ltd. Right view Top view FCC ID: K66VX-4204-0H Vertex Standard Co., Ltd. Bottom view Microphone FCC ID: K66VX-4204-0H Vertex Standard Co., Ltd. DC Power Cable
ID Label/Location Info
FCC ID: K66VX-4204-0H Vertex Standard Co., Ltd. Bottom view Microphone
ID Label/Location Info
VX-4204-0-50 / VX-4104-0-50VX-4204-0-50 / VX-4104-0-50 LABEL DRAWINGLABEL DRAWING Vertex Standard Co., Ltd.Vertex Standard Co., Ltd. ID / Part 15.19 and CAUTION drawings ID drawing Part 15.19 and CAUTION drawings Label location VX-4204-0-50 VERTEX STANDARD CO., LTD. MADE IN JAPAN IC: 511B-VX42040H FCC ID: K66VX-4204-0H 4909959000000 SER NO. 00000000 ! ! Device restricted to occupational use to satisfy FCC RF exposure compliance. See owner's manual for specific operating requirement CAUTION This device complies with part 15 of the FCC rules.Operation is subject to that this device dose not cause harmful interference. VX-4104-0-50 VERTEX STANDARD CO., LTD. MADE IN JAPAN IC: 511B-VX42040H FCC ID: K66VX-4204-0H 4909959000000 SER NO. 00000000
Internal Photos
FCC ID: K66VX-4204-0H Vertex Standard Co., Ltd. Removed top cover Inside of EUT with shield case FCC ID: K66VX-4204-0H Vertex Standard Co., Ltd. Inside of EUT without shield case Side-A of RF-UNIT FCC ID: K66VX-4204-0H Vertex Standard Co., Ltd. Side-B of RF-UNIT with shield case Side-B of RF-UNIT without shield case FCC ID: K66VX-4204-0H Vertex Standard Co., Ltd. Inside of front panel with PWB (FRONT-D-UNIT) Inside of front panel with PWB (FRONT-C-UNIT) FCC ID: K66VX-4204-0H Vertex Standard Co., Ltd. Side-A of FRONT-D-UNIT with LCD Side-A of FRONT-D-UNIT without LCD FCC ID: K66VX-4204-0H Vertex Standard Co., Ltd. Side-B of FRONT-D-UNIT Front of LCD
Internal Photos
FCC ID: K66VX-4204-0H Vertex Standard Co., Ltd. Side-B of FRONT-D-UNIT Front of LCD FCC ID: K66VX-4204-0H Vertex Standard Co., Ltd. Back of LCD Side-A of FRONT-C-UNIT FCC ID: K66VX-4204-0H Vertex Standard Co., Ltd. Side-B of FRONT-C-UNIT Inside of front panel (for FRONT-D-UNIT) FCC ID: K66VX-4204-0H Vertex Standard Co., Ltd. Inside of front panel (for FRONT-C-UNIT) Inside of chassis FCC ID: K66VX-4204-0H Vertex Standard Co., Ltd. Inside of top case Inside of top cover FCC ID: K66VX-4204-0H Vertex Standard Co., Ltd. Inside of microphone
Operational Description
FCC ID: K66VX-4204-0H Circuit Description 1/3 Vertex Standard Co., Ltd. VX-4204 Circuit Description 1. Circuit Configuration by Frequency The receiver is a double-conversion superheterodyne with a first intermediate frequency (IF) of 50.85MHz and a second IF of 450kHz. Incoming signal from the antenna is mixed with the local signal from the VCO/PLL to produce the first IF of 50.85MHz. This is then mixed with the 50.4MHz second local oscillator output to produce the 450kHz second IF. This is detected to give the demodulated signal. The transmit signal frequency is generated by the PLL VCO, and modulated by the signal from the microphone. It is then amplified and sent to the antenna. 2. Receiver System 2-1. Front-end RF amplifier Incoming FR signal from the antenna is delivered to the RF Unit and passes through Low-pass filer, antenna switching diode, and removed undesired frequencies by varactor diode (tuned band-pass filer: T1001, T1002 and T1003). The passed signal is amplified in Q1022 and moreover cuts an image frequency with the band path filter and comes into the 1st mixer. The Q1020 controls bias of Q1022. 2-2. First Mixer The 1st mixer consists of the Q1035, T1004, T1005 and T1006. Buffered output from the VCO is amplified by Q1038 to provide a pure first local signal between 184.85 and 224.85MHz for injection to the first mixer. The output IF signal is amplified by Q1046 and enters from the mixer to the crystal filter. The IF signal then passes through monolithic crystal filters XF1001 (±5.5 kHz BW) to strip away all but the desired signal. 2-3. IF Amplifier The first IF signal is amplified by Q1059. The amplified first IF signal is applied to FM IF subsystem IC Q1079 which contains the second mixer, second local oscillator, limiter amplifier, noise amplifier, and S-meter amplifier. The signal from reference oscillator X1003 becomes 3 times of frequencies in Q1079, it is mixed with the IF signal and becomes 450KHz. The second IF then passes through the ceramic filter CF1001 (for wide channels), CF1002 (for narrow channels) to strip away unwanted mixer products, and is applied to the limiter amplifier in Q1038, which removes amplitude variations in the 450kHz IF, before detection of the speech by the ceramic discriminator CD1001. 2-4. Audio amplifier Detected signal from Q1079 is inputted to Q1037 and is output through the band path filter inside Q1037. In the case an optional unit is installed, the Q1063 is made OFF and the AF signal from Q1037 goes the optional unit. In the case an optional unit is not installed, Q1037 is made ON and the signal goes through Q1063. The signal then goes through AF mute switch Q1068, de-emphasis part and expander Q1021. When the function of expander is off, the 1021 will be bypassed by Q1069. The output signal of expander (or a signal from de-emphasis) is amplified by Q1088 and it is amplified with AF power amplifier Q1005 after passing AF volume Q1029. The output of Q1005 drives a speaker (it chooses the external SP or internal SP in J6001) 2-5. Squelch Circuit There are 13 levels of squelch setting from 0 to 12. The level 0 means open the squelch. The level 1 means the threshold setting level and level 11 means tight squelch. FCC ID: K66VX-4204-0H Circuit Description 2/3 Vertex Standard Co., Ltd. From 2 to 10 is established in the middle of threshold and tight. The bigger figure is nearer the tight setting. The level 12 becomes setting of carrier squelch. 2-5-1. Noise Squelch Noise squelch circuit is composed of the band path filter of Q1079, noise amplifier Q1091, and noise detector D1059, D1061. When a carrier isn't received, the noise ingredient which goes out of the demodulator Q1079 is amplified in Q1091 through the band path filter Q1079, is detected to DC voltage with D1059, D1061 and is inputted to 19pin (the A/D port) of the Q1083 (CPU). When a carrier is received, the DC voltage becomes low because the noise is compressed. When the detected voltage to CPU is high, the CPU stops AF output with Q1068 "OFF" by making the 40pin "L" level. When the detection voltage is low, the CPU makes Q1068 ON with making 40pin "H" and the AF signal is output. 2-5-2. Carrier Squelch The CPU (18pin: A/D port) detect RSSI voltage output from Q1079 12 pin, and controls AF output. The RSSI output voltage changes according to the signal strength of carrier. The stronger signal makes the RSSI voltage to be higher voltage. The process of the AF signal control is same as Noise Squelch The shipping data is adjusted 3dB higher than squelch tight sensitivity. 3. Transmitter System 3-1. Mic Amplifier The AF signal from microphone jack J4001 (4ch) or J5001 (501ch) is amplified with microphone amplifier Q1066, is amplified with 2nd microphone amplifier Q1088 after microphone selection switch Q1016, and passes microphone gain volume Q1029. The AF signal which was controlled in the correct gain passes compandor Q1021. When not using a compandor, with the control from the CPU, it passes in the compandor circuit inside of Q1021 and it is output and it passes a pre-emphasis circuit. Q1063 becomes OFF when an option unit is attached and the AF signal from Q1037 goes via the option unit. When an option unit isn't attached, Q1063 becomes ON, the signal passes Q1063 and is input to Q1037. The signal passed limiter and splatter filer of Q1037 is adjusted by maximum deviation adjustment volume Q1029. The adjusted low frequency signal ingredient is amplified by Q1074, added modulation terminal of TCXO (X1003), the FM modulation is made by reference oscillator. The high frequency signal ingredient is amplified Q1074, and adjusted the level by volume Q1029 to make frequency balance between low frequency. After that, it is made FM modulation to transmit carrier by the modulator D1030 of VCO. 3-2. Drive and Final amplifier The modulated signal from the VCO Q1054 is buffered by Q1049 and amplified by Q1038 and Q1002. The low-level transmit signal is then applied to the Power Module Q10…
Text truncated - open the document above for the full version.
Parts List/Tune Up Info
FCC ID: K66VX-4204-0H Alignment 1/6 Vertex Standard Co., Ltd. VX-4204 Alignment Introduction The VX-4204 is carefully aligned at the factory for the specified performance across the frequency range specified for each version. Realignment should therefore not be necessary except in the event of a component failure, or altering version type. All component replacement and service should be performed only by an authorized Vertex Standard representative, or the warranty policy may be void. The following procedures cover the sometimes critical and tedious adjustments that are not normally required once the transceiver has left the factory. However, if damage occurs and some parts subsequently are placed, realignment may be required. If a sudden problem occurs during normal operation, it is likely due to component failure; realignment should not be done until after the faulty component has been replaced. We recommend that servicing be performed only by authorized Vertex Standard service technicians who are experienced with the circuitry and fully equipped for repair and alignment. Therefore, if a fault is suspected, contact the dealer from whom the transceiver was purchased for instructions regarding repair. Authorized Vertex Standard service technicians realign all circuits and make complete performance checks to ensure compliance with factory specifications after replacing any faulty components. Those who do undertake any of the following alignments are cautioned to proceed at their own risk. Problems caused by unauthorized attempts at realignment are not covered by the warranty policy. Also, Vertex Standard reserves the right to change circuits and alignment procedures in the interest of improved performance, without notifying owners. Under no circumstances should any alignment be attempted unless the normal function and operation of the transceiver are clearly understood, the cause of the malfunction has been clearly pinpointed and any faulty components replaced, and realignment determined to be absolutely necessary. The following test equipment (and thorough familiarity with its correct use) is necessary for complete realignment. Correction of problems caused by misalignment resulting from use of improper test equipment is not covered under the warranty policy. While most steps do not require all of the equipment listed, the interactions of some adjustments may require that more complex adjustments be performed afterwards. Do not attempt to perform only a single step unless it is clearly isolated electrically from all other steps. Have all test equipment ready before beginning, and follow all of the steps in a section in the order presented. Required Test Equipment RF Signal Generator with calibrated output level at 200MHz Deviation Meter (linear detector) In-line Wattmeter with 5% accuracy at 200MHz 50Ω RF Dummy Load with power rating 100W at 200MHz 8Ω/10W AF Dummy Load (Attention : Audio output is BTL output) Regulated DC Power Supply (standard 13.6V DC, 15A) Frequency Counter with 0.2ppm accuracy at 200MHz AC Voltmeter DC Voltmeter VHF Sampling Coupler IBM PC / compatible Computer with Microsoft DOS v3.0 or later operating system Vertex Standard VPL-1 Connection Cable & Alignment program FCC ID: K66VX-4204-0H Alignment 2/6 Vertex Standard Co., Ltd. Alignment Preparation & Precautions A 50-Ω RF Dummy Load and in-line wattmeter must be connected to the main antenna jack in all procedures that call for transmission, except where specified otherwise. Correct alignment is not possible with an antenna. After completing one step, read the following step to determine whether the same test equipment will be required. If not, remove the test equipment (except dummy load and wattmeter, in connected) before proceeding. Correct alignment requires that the ambient temperature be the same as that of the transceiver and test equipment, and that this temperature be held constant between 20 and 30°C (68 - 86 °F). When the transceiver is brought into the shop from hot or cold air, it should be allowed time to come to room temperature before alignment. Whenever possible, alignments should be made with oscillator shields and circuit boards firmly affixed in place. Also, the test equipment must be thoroughly warmed up before beginning. Note: Signal levels in dB referred to in the alignment procedure are based on 0dBμ EMF = 1μV. Setup the test equipment as shown for transceiver alignment, apply 13.6V DC power to the transceiver. Refer to the drawings above for Alignment Points. PC POWER SUPPLY 13.6V DC RF SIGNAL GENERATOR 50 Ω DUMMY LOAD IN-LINE WATTMETER DEVIATION METER FREQUENCY COUNTER RF SAMPLING COUPLER TRANSCEIVER ANT MIC/SP COM port VPL-1 connection cable The transceiver must be programmed for use in the intended system before alignment is attempted. The RF parameters are loaded from the file during the alignment process. In order to facilitate alignment over the complete switching range of the equipment it is recommended that the channel data in the transceiver is preset as the chart below. ChannelsFrequency BAND-LOW134.000MHz BAND-MID154.000MHz BAND-HIGH174.000MHz The alignment mode is accessed by “Alignment mode” command from the computer whilst switching on. And the alignment tool operates it automatically. During the alignment mode, normal operation is suspended. Use the alignment tool program running on PC. FCC ID: K66VX-4204-0H Alignment 3/6 Vertex Standard Co., Ltd. The alignment tool outline Installation the tool This alignment tool consists, MS-DOS based, only one execute file " vx-4200adj.exe ". You make a directly as you think fit, and copy this file. That is all of the installation process. Boot the tool Change directly and input in command line, " vx-4200adj [enter] ", and boot the alignment tool. Enter to the alignment mode To enter the alignment mode, you have to power on the transceiver, and press [F10]. If entry succeed, the transceiver generated a beep " p-p "…
Text truncated - open the document above for the full version.
Parts List/Tune Up Info
1/3 FCC ID: K66VX-4204-0H Component Applications Address Device nameDescriptionApplication [RF-UNIT] Q 1001 TransisterDTC114TEDTMF DEC INPUT SW Q 1002 Transister2SC5226-4/5TX Buff AMP Q 1004 ICNJM7808DL1A8V Regurator Q 1005 ICTDA1519CTHAF Power AMP Q 1006 FETRTQ030P02DC SW Q 1007 TransisterDTA144EEDC SW Q 1008 Dual TransisterXP1501TX8V DC SW Q 1009 TransisterDTC144EEAF AMP MUTE SW Q 1010 TransisterCPH6102TX8V DC SW Q 1011 TransisterDTC114TEDC SW Q 1012 TransisterDTC144EEIGN SENS DC SW Q 1013 Dual TransisterUMG2NTRX SW Q 1014 ICNJU4053BVFRONT/EXT MIC SW/Normal/Flat SW/ADJ AF/DTMF SW Q 1015 FETRTQ030P02DC SW Q 1016 ICNJU4053BVPre-Emphasis SW/EXT AF OUT Normal/Flat Select SW/PA SW Q 1017 TransisterUN911FRX5V DC SW Q 1018 TransisterDTC144EETX8V Protection Q 1019 TransisterDTC114TERX5V Protection Q 1020 Transister2SA1774Q1022 Bias Q 1021 ICLA8630MCompand/Expand IC Q 1022 Transister2SC3357RF AMP Q 1023 TransisterDTC144EEDC SW Q 1024 TransisterDTC144EECompand/Expand ON/OFF SW Q 1025 Transister2SC4617HOOK/FLASH Write Select SW Q 1026 Transister2SC4617C_DATA/FLASH Write Select SW Q 1027 Transister2SC4617PTT/FLASH Write Select SW Q 1028 FETS-AV32TX Power Amp Q 1029 ICM62364FPD/A Q 1030 TransisterDTC144EECLONE SW Q 1031 TransisterDTA124EECLONE SW Q 1032 TransisterDTC144EERX Emphasis SW Q 1033 TransisterDTC144EEPower OFF SW Q 1034 ICBD6111FV-5V Regurator Q 1035 ICSPM5001Mixer IC Q 1036 ICNJM2125F-VCV Control Q 1037 ICAK2345Base Band IC Q 1038 Transister2SC5226-4VCO Buff AMP Q 1039 Dual TransisterUMC5NRX VCO SW Q 1044 Transister2SA1774Ripple Filter Q 1045 TransisterDTC114TEClock Shift Q 1046 Transister2SC3357-T2 RFIF AMP Q 1047 TransisterDTC144EEVCO Buff AMP SW Q 1049 Transister2SC5226-4VCO Buff AMP Q 1051 TransisterDTC144EERevers Tone SW Q 1053 TransisterDTC144EERX VCO SW Q 1054 FET2SK508RX VCO OSC Q 1055 TransisterDTC144EEBuff AMP SW Q 1056 TransisterDTC114TETX VCO SW Q 1057 Transister2SC5226-4Buff AMP Q 1058 Transister2SC3356TX VCO OSC Q 1059 Transister2SC5226-4IF AMP Q 1060 ICTK71735SCL3.5V Regurator Q 1061 Dual TransisterXN1501CONT5V AVR Q 1062 Transister2SB1201SCONT5V AVR Q 1063 ICBU4066BCFVOPTION SW/DTMF DEC INPUT SW/De-emphasis SW Q 1064 ICLC73881MDTMF DEC IC Q 1065 ICS-80835CNMC-B8URESET IC Q 1066 Quadruple OP-AMPNJM12902VEXT MIC AMP/WXT AF AMP/EXT RSSI AMP/FRONT MIC AMP Q 1067 Transister2SC4617Ripple Filter Q 1068 ICBU4066BCFVEXT MIC GAIN Select SW/Compand SW/ AF MUTE/De-emphasi s Q 1072 Transister2SC4617RESET Q 1073 TransisterDTC144EEACC4 OUTPUT SW Q 1074 Quadruple OP-AMPNJM12902VVCO MOD AMP/REF MOD AMP/RX TUNE DC AMP/BIAS Q 1075 TransisterDTC114TEClock Shift Q 1076 Quadruple OP-AMPNJM12902V5TONE DEC/DCS DEC Q 1077 TransisterDTC144EEACC3 INPUT SW Q 1078 FET2SK880GRVCV Buff AMP Q 1079 ICTA31136FNIF System IC Q 1080 ICBR93L66RFVMEEPROM Q 1081 TransisterDTC144EEACC3 OUTPUT SW Q 1082 TransisterDTC144EEACC2 INPUT SW Q 1083 ICLC87F74C8ACPU Q 1084 TransisterDTC144EEACC2 OUTPUT SW Q 1085 ICSA7025DKPLL IC Vertex Standard Co., Ltd. 2/3 FCC ID: K66VX-4204-0H Component Applications Address Device nameDescriptionApplication Q 1086 TransisterDTC144EEACC1 OUTPUT SW Q 1087 TransisterDTC144EEACC1 INPUT SW Q 1088 Quadruple OP-AMPNJM12902VMIC AMP/RX AF buff AMP/Freq Cntl DC AMP Q 1089 Quadruple OP-AMPNJM12902VReverceTone/DCS/Reverce Tone DEC Q 1090 Dual OP-AMPNJM12904VAPC Q 1091 Transister2SC4617SQL Noise AMP Q 1092 TransisterDTC144EEW/N SW Q 1093 TransisterDTC144EEW/N SW D 1001 DiodeUM9957FANT SW D 1002 Surge AbsorberP6KE18ASurge Protector D 1003 Varactor Diode1SV279RX tune D 1004 Varactor Diode1SV279RX tune D 1006 DiodeUM9957FANT SW D 1007 Diode1SS400Surge Protector D 1…
Text truncated - open the document above for the full version.
Contact Information
Applicant
Masatoshi Muraishi(Engineering Division)
Test Firm
M. Flom Associates, Inc.Morton Flom
Technical Specifications
| # | Rule Parts | Frequency Range | Power Output | Emission | Tolerance |
|---|---|---|---|---|---|
| 4 | 90.21 | 134 MHz - 174 MHz | 50 W | 11K0F3E | 2.5 ppm |
Other Applications from Yaesu Musen Co., Ltd.
K660E180X10
Dec 01, 2025BLUETOOTH MICROPHONE
Equipment Class
DTS - Digital Transmission System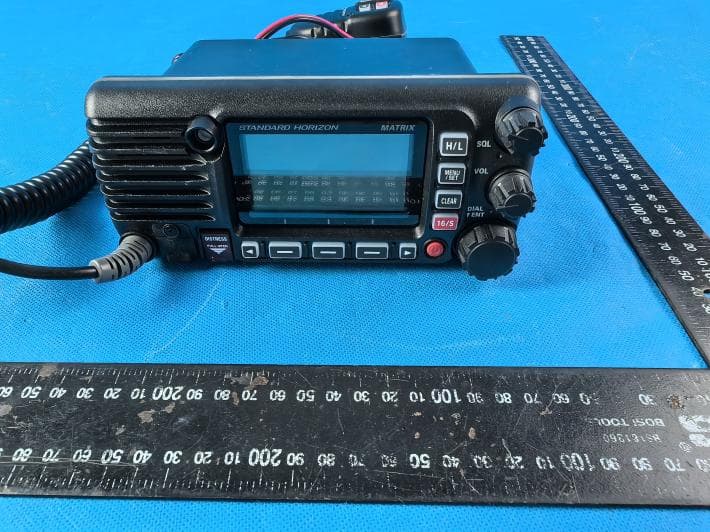
K6630673Y3D
Aug 01, 2024VHF FM Marine Transceiver
Equipment Class
CXX - Communications Rcvr for use w/ licensed Tx and CBs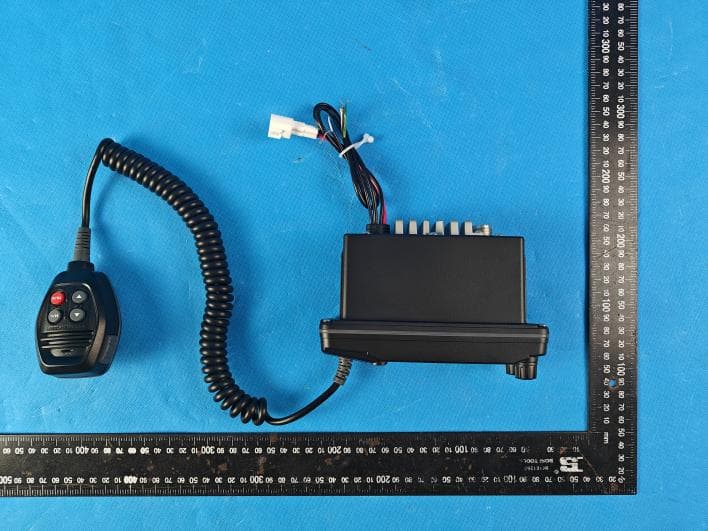
K6630653Y3D
Aug 01, 2024VHF FM Marine Transceiver
Equipment Class
CXX - Communications Rcvr for use w/ licensed Tx and CBs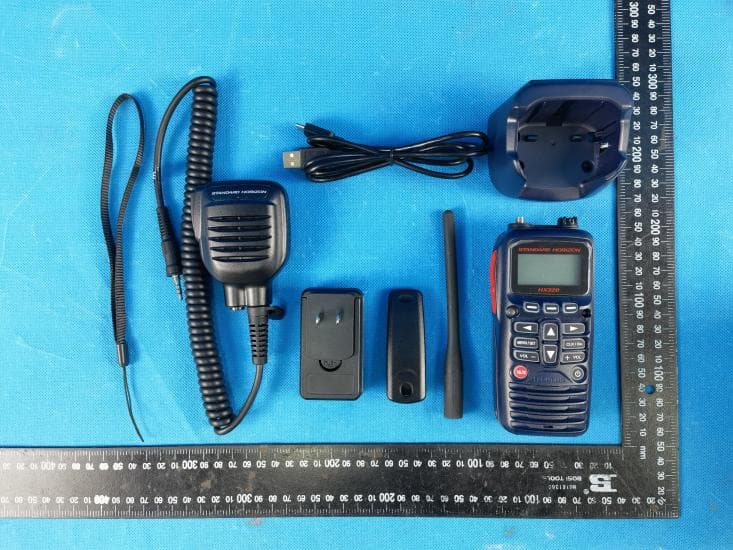
K6630683X30
Jan 10, 2023VHF FM Marine Transceiver
Equipment Class
TNF - Licensed Non-Broadcast Transmitter Held to Face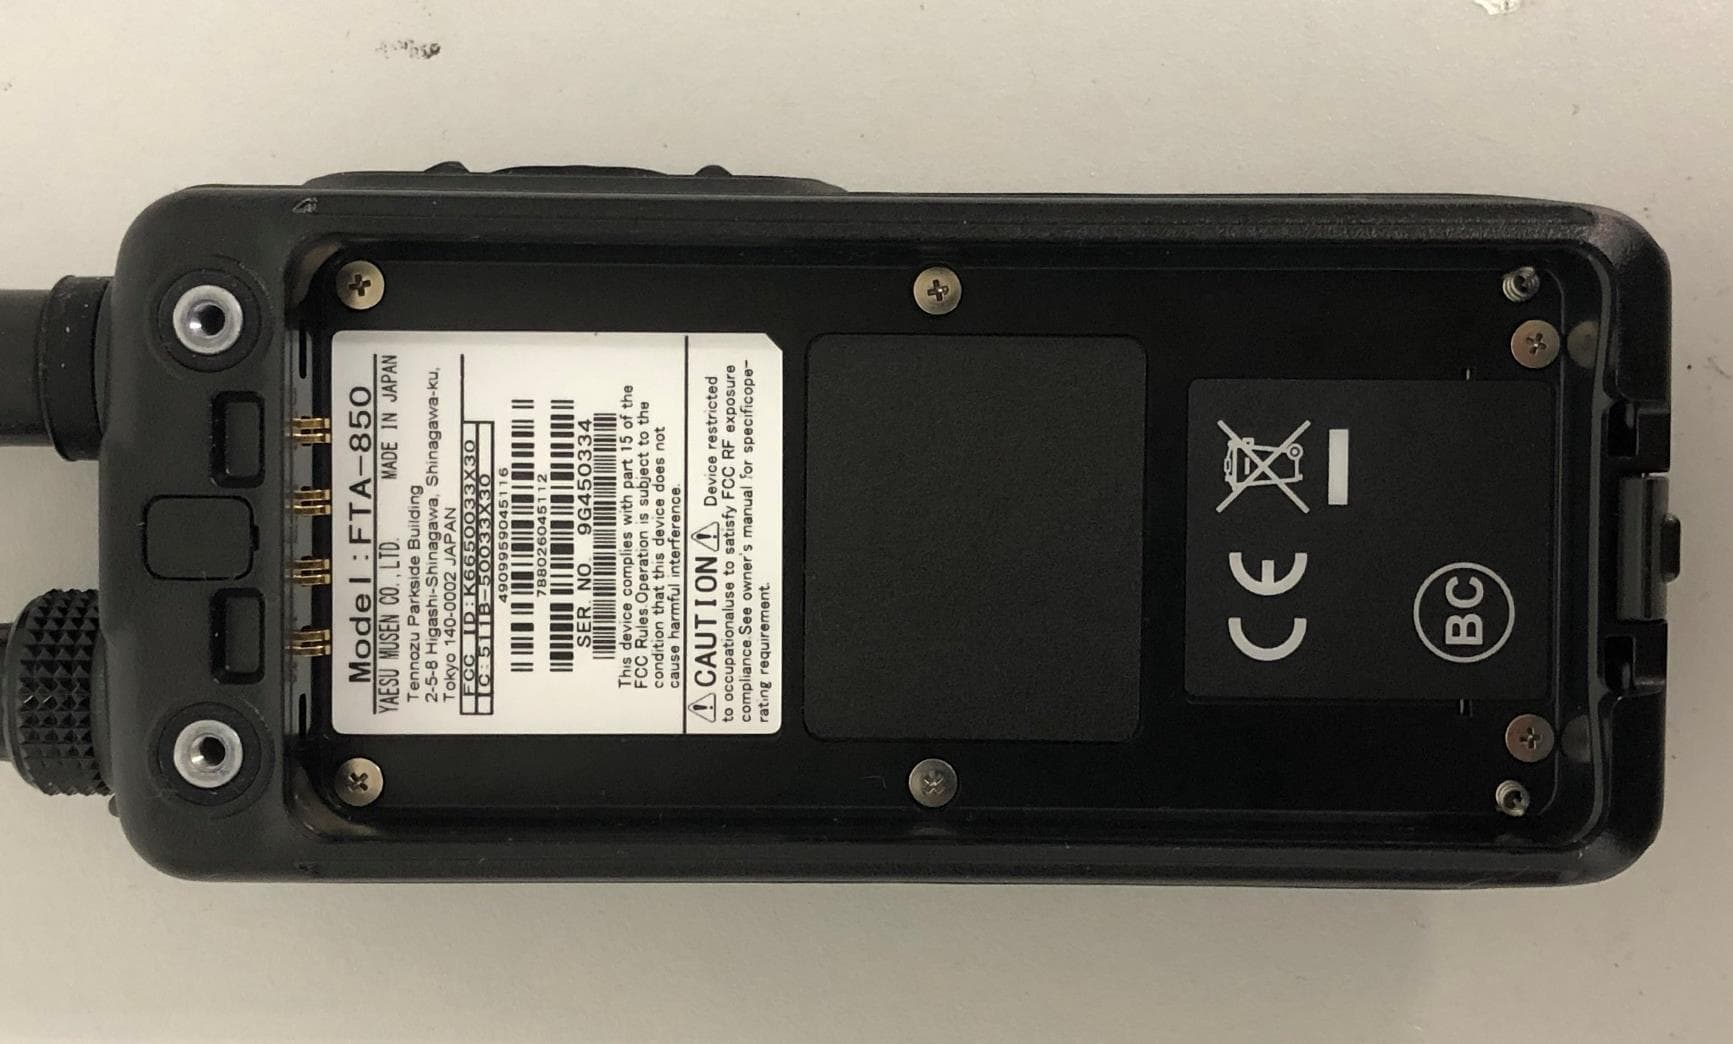
K6650033X30
Nov 18, 2020Airband Radio Transceiver
Equipment Class
TNF - Licensed Non-Broadcast Transmitter Held to Face