NM8HIMALAYASWireless PDA Phone
HTC Corporation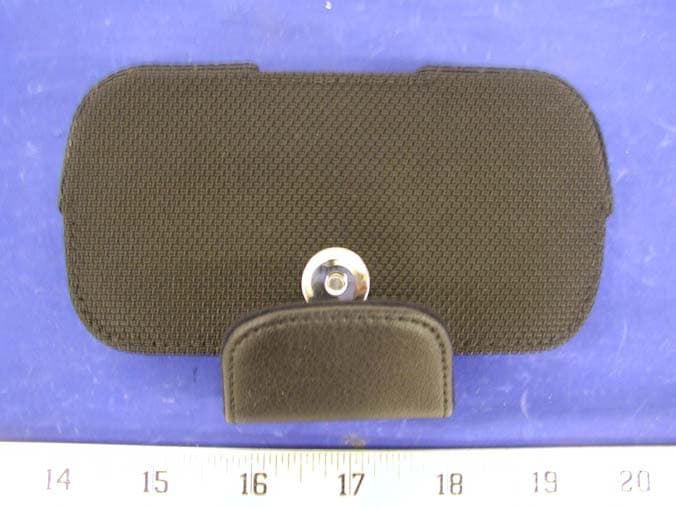
Click to zoom
Application Details
- Equipment Class
- PCE - PCS Licensed Transmitter held to ear
- Date of Grant
- Oct 06, 2003
- Application Purpose
- Original Equipment
- Date of Application
- Oct 06, 2003
- Equipment Note
- Wireless PDA Phone
- Frequency Range
- 1850.20000000 - 1909.80000000
- Company
- HTC Corporation
- Country
- Taiwan
Documents & Files
Document Text
Text extracted from the exhibit documents filed with the FCC. Open a document above to read the original.
Users Manual
Pocket PC Phone 3 Congratulations on the purchase of your new Windows® Powered Pocket PC Phone 2003 ! This information will help you set up your phone so you can begin using it. Safeguards Warnings! Please Read Before Operating your Device THE DEVICE IS NOT CHARGED WHEN YOU TAKE IT OUT OF THE BOX. (For information, see Step 2: Charge the battery below) DO NOT REMOVE THE BATTERY PACK WHEN THE DEVICE IS CHARGING. WHEN INSERTING YOUR SIM CARD, MAKE SURE THE DEVICE IS POWERED-OFF BEFORE YOU REMOVE THE BATTERY PACK. THEN CLICKS IT INTO PLACE. (For more information, see Step 1: Insert the SIM card below) IN MANY COUNTRIES YOU ARE REQUIRED BY LAW TO TURN OFF YOUR PHONE WHEN YOU FLY. TURNING OFF YOUR POCKET PC DOESN’T TURN OFF YOUR PHONE; YOU MUST TURN OFF YOUR WIRELESS CONNECTION TO YOUR OPERATOR’S NETWORK. YOUR WARRANTY IS INVALIATED IF YOU OPEN OR TAMPER WITH THE DEVICE’s OUTER CASING. (For more information, see the enclosed warranty card) 2 nSetting Up nThe Basics nNavigating nUsing for the First Time nBluetooth nRegulatory Notice 5 Step 1 : Insert the SIM card Follow the steps outlined below to set up your phone and get it ready to synchro- nize with your PC: 1 Turn over your device and press the fixing lock button to remove the back cover. 2 Press the stylus into the slot under the bottom end of the battery to unlock and remove the battery. 3 Lift up the SIM card case and insert the SIM. Push it forward and pull back to secure the SIM. MAKE SURE YOU HAVE SAVED ANY DATA IN OPEN PROGRAMS: OPENING THE SIM DOOR WILL TURN YOUR DEVICE OFF 4 Replace the battery and back cover. Remember to push back the black lock point to clip it into place it the bottom. Setting Up G F Press to unlock and remove the battery. F 4 Step 2 : Charge the Battery You can charge your Pocket PC Phone in the following ways: Option 1 1 Insert the AC adapter into the back of the cradle, and then plug into the mains. 2 Dock your Pocket PC phone in its cradle and fully charge for 3 ~ 4 hours. A steady amber LED indicates charging; solid green fully charged. 3 If you have spare battery for your Pocket PC Phone, you can also put your battery into the slot in the cradle for recharging. Setting Up Option 2 You can plug the AC adapter into the optional USB/Serial cable head and then con- nect your phone directly to an external power source. 1 To your Pocket pc phone. 2 USB synchronization cable. 3 Plug the AC adapter into a socket. Option 3 You can plug the AC adapter into the optional DC Converter and then connect your phone directly to an external power source. 1 To AC adapter. 2 To your Pocket pc phone. AC Adapter plugs into the back of the cradle 1 2 3 2 1 Put an optional unit into the slot for recharging 7 Step 3 : Switching on and Entering your PIN Once you have started to charge your device, you can switch it on. First time, it is however recommended that you fully charge your device about 1 hour - before switching it on. 1 Press the button indicated below for about 3 seconds – wait for your operator and Microsoft screens to load. 2 Remove the stylus from its housing. 3 When the Welcome Wizard Screen appears, tap with your stylus. The wizard's onscreen instructions will lead you through the rest of the setup process. 4 Enter your PIN, and then press Enter. Setting Up 6 Step 4 : Installing ActiveSync Using Microsoft® ActiveSync® you can synchronize information on your desktop computer and/or a Microsoft® Exchange Server with the information on your Pocket PC phone. ActiveSync compares the information on your Pocket PC phone with the information on your desktop computer and/or the server and updates all locations, keeping you up-to-date with the most recent information. Before you can begin synchronization with your desktop PC, you must install Ac- tiveSync on your desktop computer from the Pocket PC phone 2003 Companion CD. ActiveSync is already installed on your Pocket PC phone. Hardware Connection Dock your Pocket PC phone in its cradle and plug the USB/Serial to your desktop PC for synchronizaton. Software Installation 1 Insert the Pocket PC phone 2003 Companion CD into the CD-ROM drive of your desktop computer. 2 Click the yellow arrow, click Start Here, and then follow the directions on the screen. To Create a Partnership After the installation is completed, the ActiveSync New Partnership Wizard will helps you set up a partnership between your phone and your desktop computer so that you can start synchronizing information and customizing your synchro- nization settings. Your first synchronization process will automatically begin when you finish using the wizard. After the first synchronization, you will notice that your Outlook information now appears on your phone. To prevent synchronization problems, it is important that you select Synchronise with this desktop in the New Partnership Wizard options. Setting Up USB port on your desktop PC 9 The Basics Front , Top and Left Side Panel Components Contacts Press for quick access to your Contacts Record Press to record a voice note Volume Press to adjust the volume of your device Camera Press to launch camera capture utility. Press again to take a picture. Soft Reset Press into the hole with the stylus to reset your device. Send Press to take an incoming call, or press to dial a number Microphone Speak here when receiving / making a phone call or voice recording. MMC and SD car slot Insert either MMC or SD cards in this slot. Infrared port Enables you to exchange file(s) or data with other devices without cables/ wires Speaker Listen to audio media or a phone call from here. Calendar Press to quickly access to the Calendar. Touch Screen For handwriting, drawing or to make a selection with the stylus End Press to end a call. Navigation Pad To move up/ down and left/ right through any of the drop down menus or program instructions; select by pressing in the center. When in the Dialerscreen : Left - Press once to access the Speed Dial feature. Right- Press once to access the C…
Text truncated - open the document above for the full version.
Users Manual
14 Using for the First Tiem To use Block Recognizer With Block Recognizer you can input character strokes using the stylus that are similar to those used on other devices. Tap the arrow next to the Input Panel button and then Block Recognizer. Write a letter in the box. When you write a letter, it is converted to typed text that appears on the screen. For specific instructions on using Block Recognizer, with Block Recognizer open, taps the question mark next to the writing area. To switch to Transcriber With Transcriber you can write anywhere on the screen using the stylus just as you would on paper. Unlike Letter Recognizer and Block Recognizer, you can write a sentence or more of information. Then, pause and let Transcriber change the written characters to typed characters. Tap the arrow next to the Input Panel button and then Transcriber. Write anywhere on the screen. For specific instructions on using Transcriber, with Transcriber open, tap the question mark in the lower right hand corner of the screen. 1 1 2 2 3 3 4 4 17 Using for the First Time To punctuate in Transcriber Tap the keyboard on the toolbar. Tap OK to hide the keyboard. To see how to write a letter in Transcriber Tap “a” on the toolbar. In the screen that appears, select the letter you want to learn about, and then tap on one of the examples given above. For specific instructions on using Transcriber, with Transcriber open, tap the question mark in the lower right hand corner of the screen. Click on a letter for a demonstration Write your first notes (Cont'd) 1 2 2 1 3 16 To make a call from Dialer 1 Press Send to enter the Home screen. 2 Dial the number you want to call using the keypad. 3 If the number or name is already in your contacts list, enter the name or number of the person you want to call. 4 When it appears in the list, scroll to it and press the Talk key. Make Your First Call Using for the First Tiem To make a call from Contacts You can make a call from Contacts in the following ways : Option 1 Press the Microsoft Contacts Button, find the contact and then tap the left button twice -- once to send to the dialer screen and once to call. The pop up menu and the left button will by default display Call Work Tel. However, you can customize so that the mobile number or email is displayed instead: Option 2 Select a contact in the contacts list and then press left or right on the navigation pad -- the number on the screen will change. Option 3 1 In the contacts list, tap the w in the right column next to the contact you want to customize. A pop-up menu will display the phone numbers and email addresses for this contact with a dot next to the priority number. 2 In the pop-up menu select a priority -- If you selected mobile number, m should now be in the right column next to the contact. 19 Write your first text message or email 1 Press Send, tap Tools, and then Send SMS. 2 The screen below will appear. 3 Tap New. 4 In the TO field, enter either e-mail address or SMS number of one or more recipients, separating them with a semicolon, or select a name from the contact list by tapping the Address Book button. All e-mail addresses entered in the e-mail fields in Contacts appear in the Address Book. 5 Compose your message. Tap Send. To enter preset or frequently used message, tap My Text and select a message. Using for the First Time 18 Set up to access email, WAP and the Internet Setting up your phone for using the Internet, email and WAP is one of the most important things you will have to do. However, once done, you will be able to access a world of information anywhere, all at the touch of a few keys. You can use GPRS to connect to your mobile ISP : 1 Obtain the following information from your ISP: ISP server phone number, user name, and password. 2 Tap → Setting → Connections tab → Connections 3 In My ISP, tap Add a new modem connection. 4 Create a modem connection. Wireless connections can be made via a mobile phone network or GPRS. If you are using a mobile phone network to connect, in the Select a modem list, tap Cellular Line. If you are using GPRS, tap Cellular Line (GPRS). 5 To start the connection, begin using the desired program. For example, switch to Pocket Internet Explorer and browse to a Web page. Your device will automatically connect. n To set up a network card or wireless network connection to your ISP, add a new connection under My Work Network. n To change modem connection settings, in either My ISP or My Work Network, tap Manage existing connections. Select the desired modem connection, tap Settings, and follow the instructions on the screen. To view additional information for any screen in the ward or while changing settings, tap . Using for the First Tiem G 21 Using for the First Time Setting up your e-mail account 1 Prepare your email account details. 2 In Inbox on your device, tap Accounts, and then New Account. Follow the directions in the New Account wizard Press Menu, scroll to Options, press Action and then enter E-mail setup. 3 To fill you e-mail address in the field, and then tap Next. 4 Enter “Your name”, your “User name” and “Password” then tap Next. 5 From the drop down menu select the “Service type” that your email provider supports (POP3 or IMAP4). 6 Enter a “Name” for your email account then tap Next 7 Enter the your email provider’s server name information for Incoming mail and Outgoing mail, then tap Finish.For an explanation of a screen, tap and then Help. When finished, to connect to your e-mail server, tap Accounts and then Connect. 8 When you have finished, you will see the Set-up Complete screen. Press Finish to save the account. You can repeat the process for as many accounts as you wish to setup. 20 Using for the First Time Using for the First Tiem Accessing information using Pocket Internet Explorer Tap and then Internet Explorer. To browse the Internet 1 In the address bar that appears at the top of the screen, enter the Web address you want to visit. 2 Tap Go to the w…
Text truncated - open the document above for the full version.
Users Manual
Pocket PC Phone 3 Congratulations on the purchase of your new Windows® Powered Pocket PC Phone 2003 ! This information will help you set up your phone so you can begin using it. Safeguards Warnings! Please Read Before Operating your Device THE DEVICE IS NOT CHARGED WHEN YOU TAKE IT OUT OF THE BOX. (For information, see Step 2: Charge the battery below) DO NOT REMOVE THE BATTERY PACK WHEN THE DEVICE IS CHARGING. WHEN INSERTING YOUR SIM CARD, MAKE SURE THE DEVICE IS POWERED-OFF BEFORE YOU REMOVE THE BATTERY PACK. THEN CLICKS IT INTO PLACE. (For more information, see Step 1: Insert the SIM card below) IN MANY COUNTRIES YOU ARE REQUIRED BY LAW TO TURN OFF YOUR PHONE WHEN YOU FLY. TURNING OFF YOUR POCKET PC DOESN’T TURN OFF YOUR PHONE; YOU MUST TURN OFF YOUR WIRELESS CONNECTION TO YOUR OPERATOR’S NETWORK. YOUR WARRANTY IS INVALIATED IF YOU OPEN OR TAMPER WITH THE DEVICE’s OUTER CASING. (For more information, see the enclosed warranty card) 2 nSetting Up nThe Basics nNavigating nUsing for the First Time nBluetooth nRegulatory Notice 5 Step 1 : Insert the SIM card Follow the steps outlined below to set up your phone and get it ready to synchro- nize with your PC: 1 Turn over your device and press the fixing lock button to remove the back cover. 2 Press the stylus into the slot under the bottom end of the battery to unlock and remove the battery. 3 Lift up the SIM card case and insert the SIM. Push it forward and pull back to secure the SIM. MAKE SURE YOU HAVE SAVED ANY DATA IN OPEN PROGRAMS: OPENING THE SIM DOOR WILL TURN YOUR DEVICE OFF 4 Replace the battery and back cover. Remember to push back the black lock point to clip it into place it the bottom. Setting Up G F Press to unlock and remove the battery. F 4 Step 2 : Charge the Battery You can charge your Pocket PC Phone in the following ways: Option 1 1 Insert the AC adapter into the back of the cradle, and then plug into the mains. 2 Dock your Pocket PC phone in its cradle and fully charge for 3 ~ 4 hours. A steady amber LED indicates charging; solid green fully charged. 3 If you have spare battery for your Pocket PC Phone, you can also put your battery into the slot in the cradle for recharging. Setting Up Option 2 You can plug the AC adapter into the optional USB/Serial cable head and then con- nect your phone directly to an external power source. 1 To your Pocket pc phone. 2 USB synchronization cable. 3 Plug the AC adapter into a socket. Option 3 You can plug the AC adapter into the optional DC Converter and then connect your phone directly to an external power source. 1 To AC adapter. 2 To your Pocket pc phone. AC Adapter plugs into the back of the cradle 1 2 3 2 1 Put an optional unit into the slot for recharging 7 Step 3 : Switching on and Entering your PIN Once you have started to charge your device, you can switch it on. First time, it is however recommended that you fully charge your device about 1 hour - before switching it on. 1 Press the button indicated below for about 3 seconds – wait for your operator and Microsoft screens to load. 2 Remove the stylus from its housing. 3 When the Welcome Wizard Screen appears, tap with your stylus. The wizard's onscreen instructions will lead you through the rest of the setup process. 4 Enter your PIN, and then press Enter. Setting Up 6 Step 4 : Installing ActiveSync Using Microsoft® ActiveSync® you can synchronize information on your desktop computer and/or a Microsoft® Exchange Server with the information on your Pocket PC phone. ActiveSync compares the information on your Pocket PC phone with the information on your desktop computer and/or the server and updates all locations, keeping you up-to-date with the most recent information. Before you can begin synchronization with your desktop PC, you must install Ac- tiveSync on your desktop computer from the Pocket PC phone 2003 Companion CD. ActiveSync is already installed on your Pocket PC phone. Hardware Connection Dock your Pocket PC phone in its cradle and plug the USB/Serial to your desktop PC for synchronizaton. Software Installation 1 Insert the Pocket PC phone 2003 Companion CD into the CD-ROM drive of your desktop computer. 2 Click the yellow arrow, click Start Here, and then follow the directions on the screen. To Create a Partnership After the installation is completed, the ActiveSync New Partnership Wizard will helps you set up a partnership between your phone and your desktop computer so that you can start synchronizing information and customizing your synchro- nization settings. Your first synchronization process will automatically begin when you finish using the wizard. After the first synchronization, you will notice that your Outlook information now appears on your phone. To prevent synchronization problems, it is important that you select Synchronise with this desktop in the New Partnership Wizard options. Setting Up USB port on your desktop PC 9 The Basics Front , Top and Left Side Panel Components Contacts Press for quick access to your Contacts Record Press to record a voice note Volume Press to adjust the volume of your device Camera Press to launch camera capture utility. Press again to take a picture. Soft Reset Press into the hole with the stylus to reset your device. Send Press to take an incoming call, or press to dial a number Microphone Speak here when receiving / making a phone call or voice recording. MMC and SD car slot Insert either MMC or SD cards in this slot. Infrared port Enables you to exchange file(s) or data with other devices without cables/ wires Speaker Listen to audio media or a phone call from here. Calendar Press to quickly access to the Calendar. Touch Screen For handwriting, drawing or to make a selection with the stylus End Press to end a call. Navigation Pad To move up/ down and left/ right through any of the drop down menus or program instructions; select by pressing in the center. When in the Dialerscreen : Left - Press once to access the Speed Dial feature. Right- Press once to access the C…
Text truncated - open the document above for the full version.
Users Manual
14 Using for the First Tiem To use Block Recognizer With Block Recognizer you can input character strokes using the stylus that are similar to those used on other devices. Tap the arrow next to the Input Panel button and then Block Recognizer. Write a letter in the box. When you write a letter, it is converted to typed text that appears on the screen. For specific instructions on using Block Recognizer, with Block Recognizer open, taps the question mark next to the writing area. To switch to Transcriber With Transcriber you can write anywhere on the screen using the stylus just as you would on paper. Unlike Letter Recognizer and Block Recognizer, you can write a sentence or more of information. Then, pause and let Transcriber change the written characters to typed characters. Tap the arrow next to the Input Panel button and then Transcriber. Write anywhere on the screen. For specific instructions on using Transcriber, with Transcriber open, tap the question mark in the lower right hand corner of the screen. 1 1 2 2 3 3 4 4 17 Using for the First Time To punctuate in Transcriber Tap the keyboard on the toolbar. Tap OK to hide the keyboard. To see how to write a letter in Transcriber Tap “a” on the toolbar. In the screen that appears, select the letter you want to learn about, and then tap on one of the examples given above. For specific instructions on using Transcriber, with Transcriber open, tap the question mark in the lower right hand corner of the screen. Click on a letter for a demonstration Write your first notes (Cont'd) 1 2 2 1 3 16 To make a call from Dialer 1 Press Send to enter the Home screen. 2 Dial the number you want to call using the keypad. 3 If the number or name is already in your contacts list, enter the name or number of the person you want to call. 4 When it appears in the list, scroll to it and press the Talk key. Make Your First Call Using for the First Tiem To make a call from Contacts You can make a call from Contacts in the following ways : Option 1 Press the Microsoft Contacts Button, find the contact and then tap the left button twice -- once to send to the dialer screen and once to call. The pop up menu and the left button will by default display Call Work Tel. However, you can customize so that the mobile number or email is displayed instead: Option 2 Select a contact in the contacts list and then press left or right on the navigation pad -- the number on the screen will change. Option 3 1 In the contacts list, tap the w in the right column next to the contact you want to customize. A pop-up menu will display the phone numbers and email addresses for this contact with a dot next to the priority number. 2 In the pop-up menu select a priority -- If you selected mobile number, m should now be in the right column next to the contact. 19 Write your first text message or email 1 Press Send, tap Tools, and then Send SMS. 2 The screen below will appear. 3 Tap New. 4 In the TO field, enter either e-mail address or SMS number of one or more recipients, separating them with a semicolon, or select a name from the contact list by tapping the Address Book button. All e-mail addresses entered in the e-mail fields in Contacts appear in the Address Book. 5 Compose your message. Tap Send. To enter preset or frequently used message, tap My Text and select a message. Using for the First Time 18 Set up to access email, WAP and the Internet Setting up your phone for using the Internet, email and WAP is one of the most important things you will have to do. However, once done, you will be able to access a world of information anywhere, all at the touch of a few keys. You can use GPRS to connect to your mobile ISP : 1 Obtain the following information from your ISP: ISP server phone number, user name, and password. 2 Tap → Setting → Connections tab → Connections 3 In My ISP, tap Add a new modem connection. 4 Create a modem connection. Wireless connections can be made via a mobile phone network or GPRS. If you are using a mobile phone network to connect, in the Select a modem list, tap Cellular Line. If you are using GPRS, tap Cellular Line (GPRS). 5 To start the connection, begin using the desired program. For example, switch to Pocket Internet Explorer and browse to a Web page. Your device will automatically connect. n To set up a network card or wireless network connection to your ISP, add a new connection under My Work Network. n To change modem connection settings, in either My ISP or My Work Network, tap Manage existing connections. Select the desired modem connection, tap Settings, and follow the instructions on the screen. To view additional information for any screen in the ward or while changing settings, tap . Using for the First Tiem G 21 Using for the First Time Setting up your e-mail account 1 Prepare your email account details. 2 In Inbox on your device, tap Accounts, and then New Account. Follow the directions in the New Account wizard Press Menu, scroll to Options, press Action and then enter E-mail setup. 3 To fill you e-mail address in the field, and then tap Next. 4 Enter “Your name”, your “User name” and “Password” then tap Next. 5 From the drop down menu select the “Service type” that your email provider supports (POP3 or IMAP4). 6 Enter a “Name” for your email account then tap Next 7 Enter the your email provider’s server name information for Incoming mail and Outgoing mail, then tap Finish.For an explanation of a screen, tap and then Help. When finished, to connect to your e-mail server, tap Accounts and then Connect. 8 When you have finished, you will see the Set-up Complete screen. Press Finish to save the account. You can repeat the process for as many accounts as you wish to setup. 20 Using for the First Time Using for the First Tiem Accessing information using Pocket Internet Explorer Tap and then Internet Explorer. To browse the Internet 1 In the address bar that appears at the top of the screen, enter the Web address you want to visit. 2 Tap Go to the w…
Text truncated - open the document above for the full version.
Cover Letter(s)
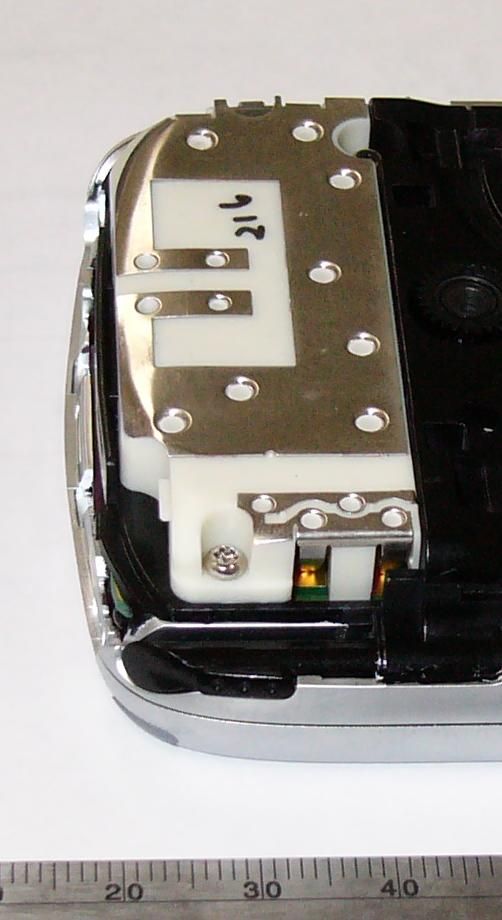
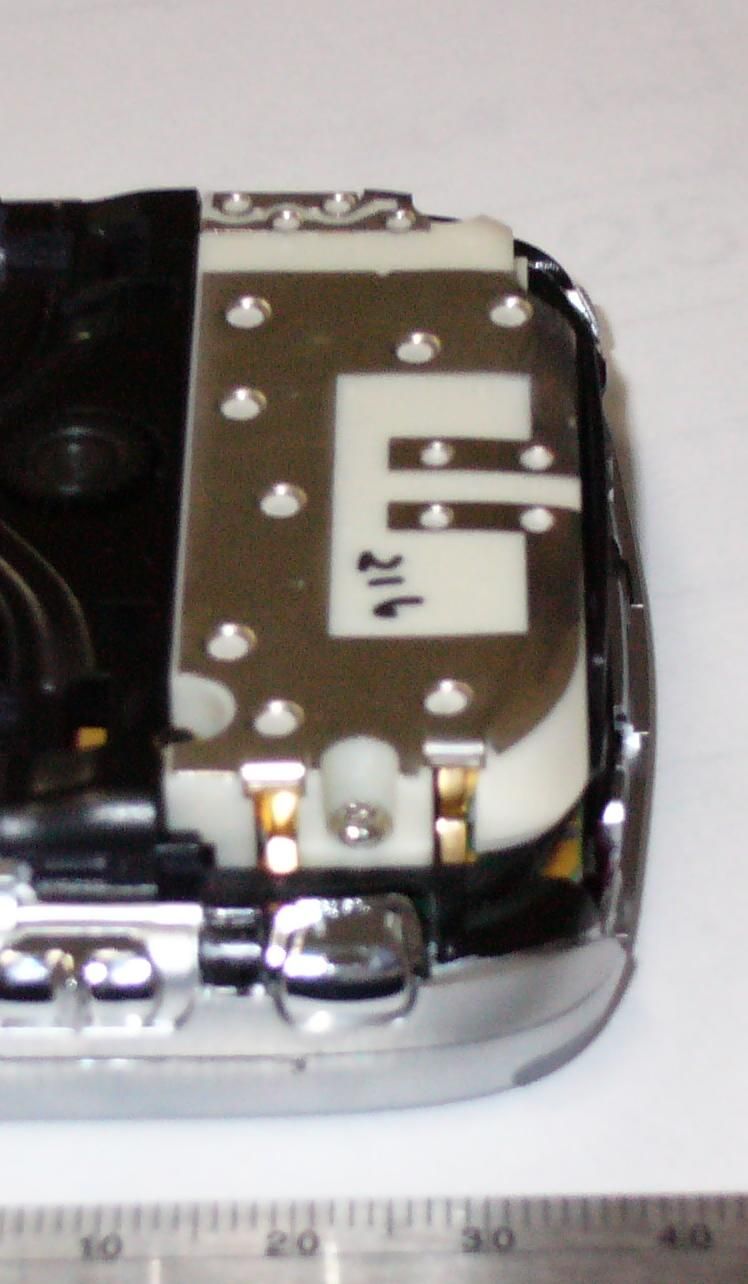
1) Please note newly uploaded antenna photos with the location of antennae shown. 2) FCC ID has been corrected in two places of the user's ,manual, page 25 and page 28 to remove the space between "NM8" and "HIMALAYAS". See newly uploaded users manual. 3)The unit was tested both with the backpack accessory and without. SAR test report page 48, shows the Body-Worn back-touching with headset and pouch. The SAR Test Results on page 32, the first entry on the table is without the backpack. It was then determined that with the backpack it yielded the highest readings. 4) Due to the low power of the bluetooth transmitter, it was not tested in co- transmit mode.
External Photos
EXHIBIT C - EUT EXTERNAL PHOTOGRAPHS EUT – PH10A Top View EUT – PH10A Rear View EUT – PH10B Front View EUT – PH10B Rear View EUT – PH10A/PH10B Connector View 1 EUT – PH10A/PH10B Connector View 2 EUT – PH10A/PH10B Back Pack Top View EUT – PH10A/PH10B Back Pack Bottom View EUT – PH10A/PH10B Back Pack Rear View Serial Cradle with Cable USB Cradle with Cable Serial Cable USB Cable VGA Cable DC Connector View Stereo Headset Mono Headset Pouch View 1 Pouch View 2
ID Label/Location Info
EXHIBIT A - FCC ID LABEL INFORMATION Proposed FCC ID Label Specifications : Text is black or white in color and is left justified. Labels are silk-screened and shall be “permanently affixed” at a conspicuous location on the EUT. Proposed Label Location on EUT Bottom View of EUT/FCC ID Label FCC ID: NM8HIMALAYAS This device complies with Part 15 of the FCC Rules. Operation is subject to the following two conditions: (1) this device may not cause harmful interference, and (2) this device must accept an y interference received, Label Here
RF Exposure Info
Note: This test report is specially limited to the above client company and the product model only. It may not be duplicated without prior written consent of Bay Area Compliance Laboratory Corporation. This report must not be used by the client to claim product endorsement by NVLAP or any agency of the U.S. Government. SAR EVALUATION REPORT For High Tech Computer, Corp. 23, Hsin-Hua Rd., Taoyuan, 330, Taiwan FCC ID: NM8HIMALAYAS 2003-09-11 This Report Concerns: Original Report Equipment Type: Wireless PDA Phone Test Engineer: Eric Hong / Report No.: R0308083S Test Date: 2003-08-19 / 2003-08-22 Reviewed By: Ling Zhang / Prepared By: Bay Area Compliance Laboratory Corporation 230 Commercial Street Sunnyvale, CA 94085 Tel: (408) 732-9162 Fax: (408) 732 9164 High Tech Computer, Corp. FCC ID: NM8HIMALAYAS Report #R0308083S.doc SAR Evaluation Report Page 2 of 67 TABLE OF CONTENTS SUMMARY....................................................................................................................................................................4 1 - REFERENCE ...........................................................................................................................................................5 2 - TESTING EQUIPMENT.........................................................................................................................................6 2.1 EQUIPMENTS LIST & CALIBRATION INFO...............................................................................................................6 2.2 EQUIPMENT CALIBRATION CERTIFICATE...............................................................................................................6 3 - EUT DESCRIPTION .............................................................................................................................................14 3.1 EUT DESCRIPTION...............................................................................................................................................14 3.2 ACCESSORIES INFORMATION................................................................................................................................14 4 - SYSTEM TEST CONFIGURATION...................................................................................................................15 4.1 JUSTIFICATION.....................................................................................................................................................15 4.2 EUT EXERCISE PROCEDURE................................................................................................................................15 4.3 EQUIPMENT MODIFICATIONS...............................................................................................................................15 5 – CONDUCTED OUTPUT POWER MEASUREMENTS ...................................................................................16 5.1 PROVISION APPLICABLE.......................................................................................................................................16 5.2 TEST PROCEDURE................................................................................................................................................16 5.3 TEST EQUIPMENT.................................................................................................................................................16 5.4 TEST RESULTS.....................................................................................................................................................16 6 - DOSIMETRIC ASSESSMENT SETUP...............................................................................................................18 6.1 MEASUREMENT SYSTEM DIAGRAM.....................................................................................................................19 6.2. SYSTEM COMPONENTS........................................................................................................................................20 6.3 MEASUREMENT UNCERTAINTY............................................................................................................................24 7 - EVALUATION PROCEDURE..........................................................................................................…
Text truncated - open the document above for the full version.
Contact Information
Applicant
Sylvia Shen
Test Firm
Bay Area Compliance LaboratoryJohn Chan
Technical Specifications
| # | Rule Parts | Frequency Range | Power Output | Emission | Tolerance |
|---|---|---|---|---|---|
| 1 | 24E | 1.85 GHz - 1.91 GHz | 813.00 mW | 310KGXW | 2.5000000000 ppm |
Other Applications from HTC Corporation
NM82QDJ100
Dec 31, 2025VIVE Headset
Equipment Class
DSS - Part 15 Spread Spectrum TransmitterNM82QD4100
Sep 01, 2024Headset
Equipment Class
6XD - 15E 6 GHz Low Power Indoor Client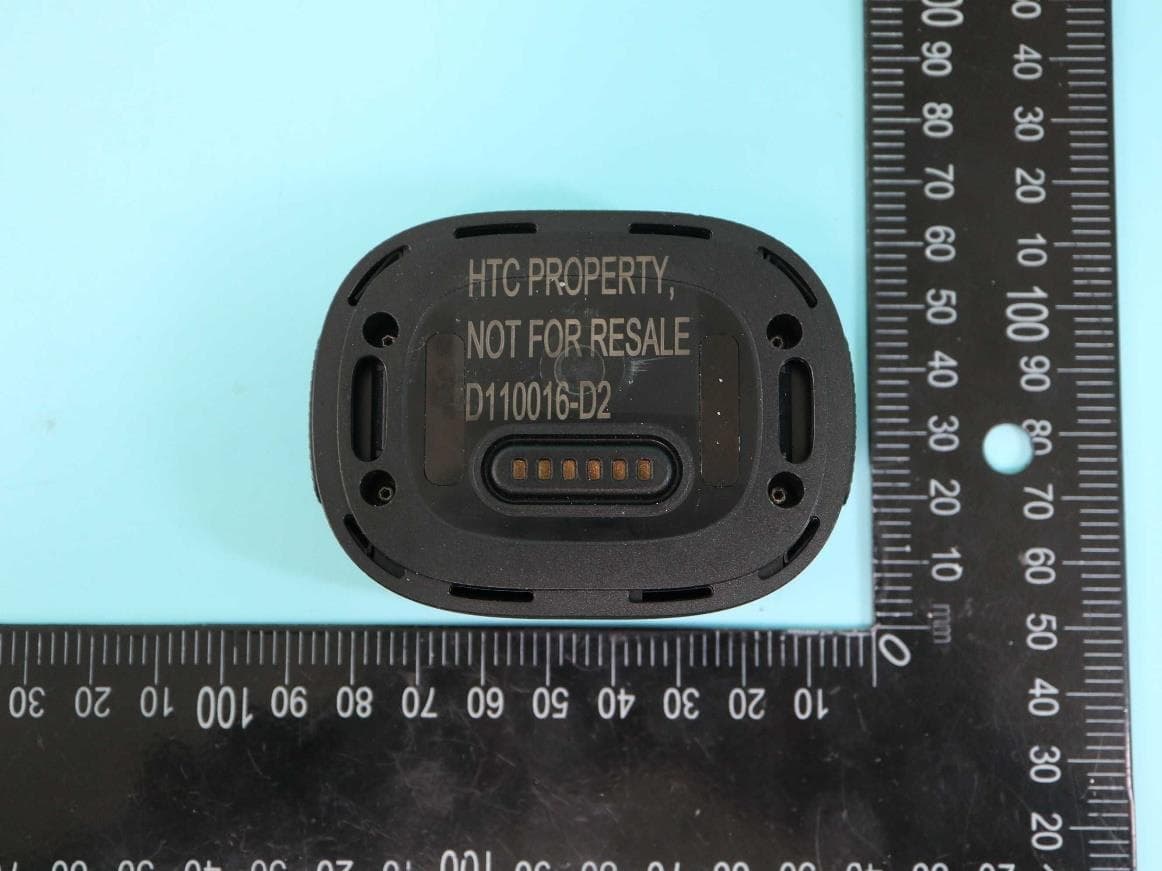
NM82QBP100
May 10, 2023Tracker
Equipment Class
DTS - Digital Transmission System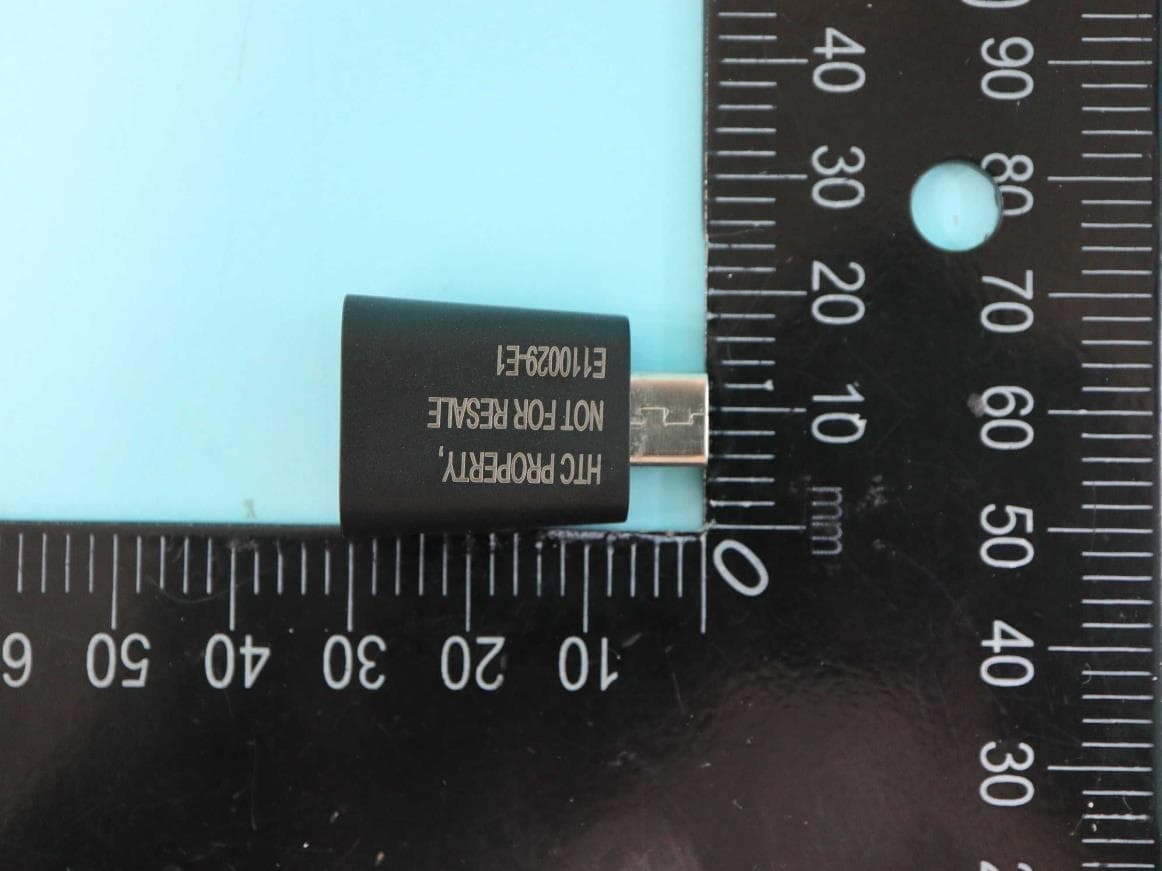
NM82QCD100
May 07, 2023Dongle
Equipment Class
DTS - Digital Transmission System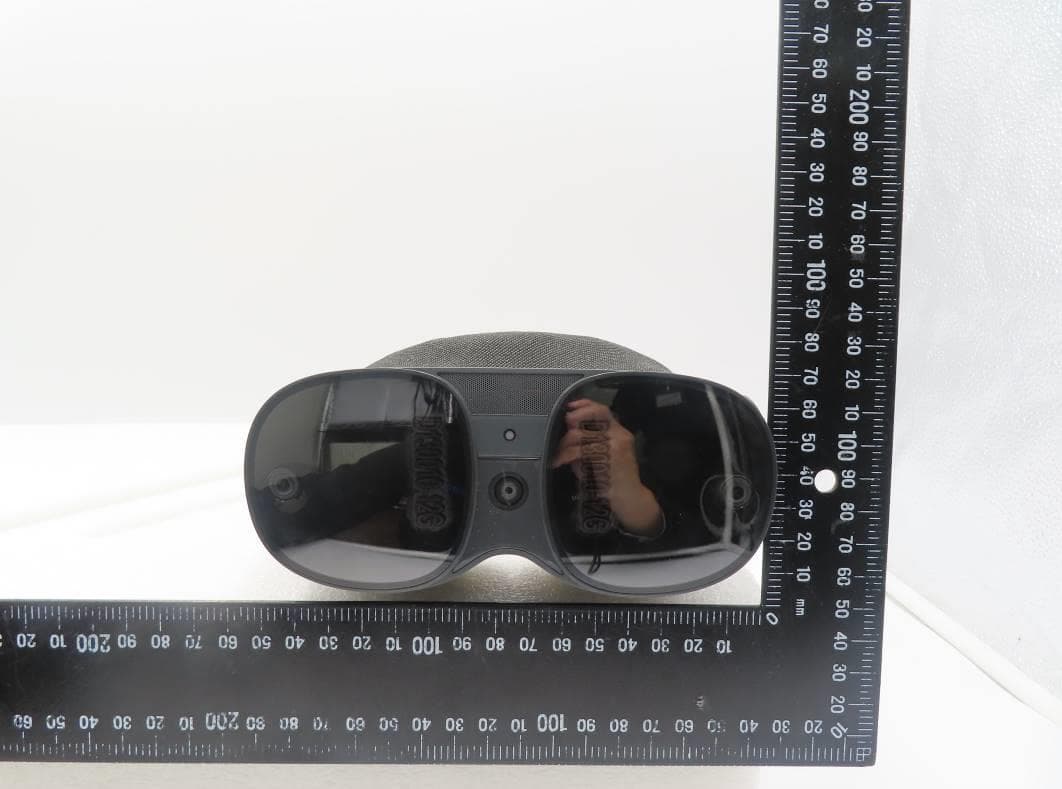
NM82QBB100
Jan 08, 2023Headset
Equipment Class
DTS - Digital Transmission System