OH21510620G/630G/640G/670G Insulin Delivery Pump
Medtronic MiniMed, Inc.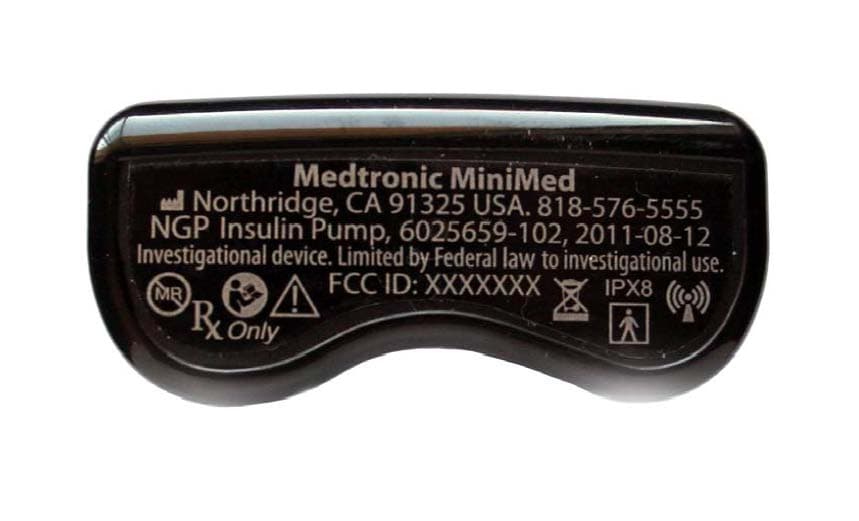
Click to zoom
Application Details
- Equipment Class
- DTS - Digital Transmission System
- Date of Grant
- Sep 24, 2014
- Application Purpose
- Original Equipment
- Date of Application
- Sep 22, 2014
- Equipment Note
- 620G/630G/640G/670G Insulin Delivery Pump
- Frequency Range
- 2420.00000000 - 2480.00000000
- Company
- Medtronic MiniMed, Inc.
- Country
- United States
Documents & Files
Document Text
Text extracted from the exhibit documents filed with the FCC. Open a document above to read the original.
Users Manual
MiniMed ™ 640G System User Guide MP6025958-022 / A RELEASED MP6025958-022 / A RELEASED MiniMed ™ 640G System User Guide MP6025958-022 / A RELEASED Copyright & trademarks ©2014 Medtronic MiniMed, Inc. All rights reserved. CareLink™, Guardian™, Bolus Wizard™, Enlite™, MiniLink™, Dual Wave™, Square Wave™, MiniMed™, and SmartGuard™ are trademarks of Medtronic MiniMed, Inc. Bayer™ is a trademark of Bayer. Humalog™ is a trademark of Eli Lilly and Company. NovoLog™ and NovoRapid™ are trademarks of Novo Nordisk A/S. 6025958-022_a REF MMT-1512 MMT-1712 MP6025958-022 / A RELEASED Contacts: Africa: Medtronic Africa (Pty) Ltd. Tel: +27 (0) 11 677 4800 Australia: Medtronic Australasia Pty. Ltd. Tel: 1800 668 670 (product orders) Tel: 1800 777 808 (customer help) Azerbaijan: Isomed Tel: +994 (12) 464 11 30 Bangladesh: Sonargaon Healthcare Pvt Ltd. Mobile: (+91)-9903995417 or (+880)-1714217131 Belarus: Badgin Ltd Tel: +375 17 313 0990 België/Belgique: N.V. Medtronic Belgium S.A. Tel: 0800-90805 Bosnia and Herzegovina: Medimpex d.o.o. Tel: +387 33 476 444 or +387 33 476 400 Fax: +387 33 476 401 or +387 33 432 241 Brasil: Medtronic Comercial Ltda. Tel: +(11) 3707-3707 Bulgaria: Interagro-90 Ltd Tel: +359 888 636 033 Canada: Medtronic of Canada Ltd. Tel: 1-800-284-4416 (toll free/sans- frais) China: Medtronic (Shanghai) Ltd. 24 Hour Help (Cell): +86 400-820-1981 24 Hour Help (Landline): +86 800-820-1981 Croatia: Oktal Pharma Tel: +385 1 659 57 77 Croatia: Medtronic Adriatic d.o.o. Tel: +385 1 488 11 20 Fax: +385 1 484 40 60 Danmark: Medtronic Danmark A/S Tel: +45 32 48 18 00 Deutschland: Medtronic GmbH Geschäftsbereich Diabetes Telefon: +49 2159 8149-370 Telefax: +49 2159 8149-110 24-Stdn-Hotline: 0800 6464633 Eire: Accu-Science LTD. Tel: +353 45 433000 España: Medtronic Ibérica S.A. Tel: +34 91 625 05 42 Fax: +34 91 625 03 90 24 horas: +34 901 120 335 Europe: Medtronic Europe S.A. Europe, Middle East and Africa Headquarters Tel: +41 (0) 21-802-7000 France: Medtronic France S.A.S. Tel: +33 (0) 1 55 38 17 00 Hellas: Medtronic Hellas S.A. Tel: +30 210677-9099 Hong Kong: Medtronic International Ltd. Tel: +852 2919-1300 To order supplies: +852 2919-1322 24-hour helpline: +852 2919-6441 India: India Medtronic Pvt. Ltd Tel: (+91)-80-22112245 / 32972359 Mobile: (+91)-9611633007 Indonesia: Medtronic International Ltd. Tel: +65 6436 5090 or +65 6436 5000 Israel: Agentek Tel: +972 3649 3111 Italia: Medtronic Italia S.p.A. Tel: +39 02 24137 261 Fax: +39 02 24138 210 Servizio assistenza tecnica: Nº verde 24h: 800 20 90 20 Japan: Medtronic Japan Co. Ltd. Tel: +81-3-6430-2019 24 Hr. Support Line: 0120-56-32-56 Kazakhstan: Medtronic BV in Kazakhstan Tel: +7 727 311 05 80 (Almaty) Tel: +7 717 224 48 11 (Astana) Latin America: Medtronic, Inc. Tel: 1(305) 500-9328 Fax: 1(786) 709-4244 Latvija: Ravemma Ltd. Tel: +371 7273780 Macedonia: Alkaloid Kons Dooel Tel: +389 2 3204 430 Magyarország: Medtronic Hungária Kft. Tel: +36 1 889 0688 Malaysia: Medtronic International Ltd. Tel: +603 7946 9000 Middle East and North Africa: Regional Office Tel: +961-1-370 670 Montenegro: Glosarij Tel: +382 20 642 495 Fax: +382 20 642 540 Nederland, Luxembourg: Medtronic B.V. Tel: +31 (0) 45-566-8291 Gratis: 0800-3422338 New Zealand: Medica Pacifica Phone: 64 9 414 0318 Free Phone: 0800 106 100 Norge: Medtronic Norge A/S Tel: +47 67 10 32 00 Fax: +47 67 10 32 10 POCCИЯ: Medtronic B. V. Tel: +7 495 580 73 77 24h: 8-800-200-76-36 Philippines: Medtronic International Ltd. Tel: +65 6436 5090 or +65 6436 5000 Polska: Medtronic Poland Sp. Z.o.o. Tel: +48 22 465 6934 Portugal: Medtronic Portugal Lda Tel: +351 21 7245100 Fax: +351 21 7245199 Puerto Rico: Medtronic Puerto Rico Tel: 787-753-5270 Republic of Korea: Medtronic Korea, Co., Ltd. Tel: +82.2.3404.3600 Romania: Trustmed SRL Tel: +40 (0) 21 220 6477 Schweiz: Medtronic (Schweiz) AG Tel: +41 (0)31 868 0160 24-Stunden-Hotline: 0800 633333 Fax Allgemein: +41 (0)318680199 MP6025958-022 / A RELEASED Serbia: Epsilon Tel: +381 11 311 5554 Fax: +381 11 311 5554 Serbia: Medtronic B.V. Serbia Tel: +381 11 2095 900 Fax: +381 11 2095 985 Singapore: Medtronic International Ltd. Tel: +65 6436 5090 or +65 6436 5000 Slovenija: Zaloker & Zaloker d.o.o. brezplačna številka: 080 1880 Tel: +386 1 542 51 11 24-h pomoč: 386 51 316 560 Slovenská republika: Medtronic Slovakia, s.r.o. Tel: +421 26820 6942 HelpLine: +421 26820 6986 Sri Lanka: Swiss Biogenics Ltd. Mobile: (+91)-9003077499 or (+94)-777256760 Suomi: Medtronic Finland Oy Tel: +358 20 7281 200 Help line: +358 400 100 313 Sverige: Medtronic AB Tel: +46 8 568 585 20 Fax: +46 8 568 585 11 Taiwan: Medtronic-Taiwan Ltd. Tel: +886.2.2183.6068 Toll Free: +886.0800.005.285 Thailand: Medtronic (Thailand) Ltd. Tel: +662 232 7400 Turkiye: Medtronic Medikal Teknoloji Ticaret Ltd. Sirketi. Tel: +90 216 4694330 USA: Medtronic Diabetes Global Headquarters Tel: +1-800-646-4633 24 Hour HelpLine: +1-800-826-2099 To order supplies: +1-800-843-6687 Ukraine: Med EK Service Ltd. Tel: +380 44 545 7705 United Kingdom: Medtronic Ltd. Tel: +44 1923-205167 Österreich: Medtronic Österreich GmbH Tel: +43 (0) 1 240 44-0 24 – Stunden – Hotline: 0820 820 190 Česká republika: Medtronic Czechia s.r.o. Tel: +420 233 059 401 Non-stop help line: +420 233 059 059 MP6025958-022 / A RELEASED Contents ■ Before you begin 3Using this user guide 4Emergency kit 5User safety 5Indications 6Contraindications 6General warnings 8General precautions 10Adverse reactions 10Notice 12Keeping track of your system information 13Insulin guidelines 13Consumables 14Optional devices 15Accessories 15Ordering supplies and accessories ■ First steps 19Your pump 20Using the buttons 21About batteries 22Inserting the battery 23Removing the battery Contentsv ■ contents MP6025958-022 / A RELEASED 24Getting to know your pump 24Entering your startup settings 26Unlocking your pump 26Home screen 28Status bar 31Status screens 32Using the Menu screen 34Scroll bar 34Power modes 35If you remove your pump ■ Basal 39Basal rate 40Basal insul…
Text truncated - open the document above for the full version.
Users Manual
IconIcon nameWhat it means Connection The connection icon appears green when the Sensor feature is on and your transmitter is successfully communicating with your pump. The connection icon appears gray when the Sensor feature is turned on, but the transmitter is not connected or communication with your pump has been lost. For more information about the Sensor feature, see Understanding Continuous Glucose Monitoring (CGM), on page 151. Airplane ModeAppears in place of the Connection icon if Airplane Mode is turned on. When Airplane Mode is turned on, the pump cannot receive wireless communication from other devices. The pump also cannot send wireless communication to other devices. For more information about using Airplane Mode, see Airplane Mode, on page 137. ReservoirShows the approximate amount of insulin left in your reservoir. The color and the fill level of the icon indicate the status. When your reservoir is full, the icon is solid green. As your insulin is used, the icon becomes emptier, and the color of the icon changes as shown in the following example. For more information about your reservoir, see Reservoir and infusion set on page 93. Audio The audio mode you are using: vibrate only , audio only , or vibrate and audio . For more information about your audio settings, see Audio Options, on page 138. ■ first steps First steps 29 MP6025958-022 / A RELEASED IconIcon nameWhat it means CalibrationThe approximate time left until your next sensor calibration is due. Appears only when the Sensor feature is turned on. The color and the fill level of the icon indicate the status. When your sensor is fully calibrated, the icon is solid green. As the time for your next sensor calibration approaches, the icon becomes emptier, and the color of the icon changes as shown in the following example. For more information about calibrating your sensor, see Calibrating your sensor, on page 183. When your sensor is initializing, the Calibration icon appears with three dots . If the time to your next sensor calibration is unavailable, the Calibration icon appears with a question mark . 6 Sensor LifeThe number of days remaining in the life of your sensor. Appears only when the Sensor feature is turned on. The color and the fill level of the icon indicate the status. When you insert a new sensor, the icon is solid green. As your sensor life is used, the icon becomes emptier. The icon turns yellow when less than 24 hours remains in the life of your sensor. It turns red when less than 12 hours remains in the life of your sensor. If the number of days remaining in the life of your sensor is unavailable, the Sensor Life icon appears with a question mark . 30 Chapter 2 MP6025958-022 / A RELEASED IconIcon nameWhat it means Block ModeIndicates that the pump is in Block Mode, and that certain functions are restricted. Caregivers, such as parents of a young child, can use Block Mode to restrict access to critical pump settings. For more information about Block Mode, see Block Mode, on page 139. Temporary Network Connection Appears while you are temporarily connected to a remote upload device. Status screens The Status screens provide information about your pump, any notifications you have received, your current settings, and optional sensor. The Status screens are described in the following table: Status screenDisplays this information NotificationsA list of alarms, alerts, and reminders that have occurred over the past 24 hours. You can display further details about a particular alarm, alert, or reminder by selecting it from the list. For more information on alarms and alerts, see the Alarms, alerts, and messages chapter. Quick StatusA summary of status information, including your last bolus, last BG meter reading, current basal rate, reservoir level, and pump battery charge level. If you are using a sensor, this screen also displays the time that your next calibration is due and the SmartGuard™ status. PumpProvides a detailed view of your pump status, including whether your pump is in a specific mode, the reservoir status, battery status, the pump serial number, and other details about your pump. SensorThe Sensor status screen is available only if your sensor feature is turned on. The Sensor status screen indicates if any alert silence options are turned on. It also shows the status of your calibrations, your sensor life, ISIG, transmitter battery, serial number and version number of your transmitter, and the SmartGuard status. ■ first steps First steps 31 MP6025958-022 / A RELEASED Status screenDisplays this information Settings Review The Settings Review screen provides a list of all your pump settings. The settings are organized by where they appear in the menu for your pump. For example, your bolus settings appear under the Insulin Settings section, and your brightness level setting appears under the Utilities section. Viewing the Status screens 1.Go to the Home screen. 2.Select the status bar that appears at the top of the Home screen. 17:00 Bolus Basal 110 mg/dL Active Insulin 1.0 U BG The Status screen appears. 3.Select the status screen that you want to view. Refer to the table at the beginning of this section for a description of the different status screens. Using the Menu screen The Menu screen is where you access the various features and functions of your system. To display the Menu screen, press . 32Chapter 2 MP6025958-022 / A RELEASED The following options are available from the Menu screen: Select thisTo do this Suspend DeliveryStop your current basal and bolus insulin delivery. Audio OptionsSet your audio, vibrate, and volume options for the notifications you receive. HistoryAccess the Summary, Daily History, and Alarm History screens. If you are using a sensor, you can access the SG Review and ISIG History screens. Reservoir & Tubing Start the process of changing your reservoir and infusion set. Insulin SettingsSet up and manage your insulin delivery options, including your Basal and Bolus se…
Text truncated - open the document above for the full version.
Users Manual
The Edit screen for that particular Preset Bolus appears. 4.Select Bolus to set the bolus amount. 5.Select Type to set this as a Normal bolus, Square Wave bolus, or Dual Wave bolus. Note: The Type field appears only when you have the Dual Wave bolus or Square Wave bolus features turned on. If you set the type to Square Wave or Dual Wave, additional settings appear. 6.If you are setting up a Square Wave bolus or Dual Wave bolus, do the following: •For a Square Wave bolus, set the Duration of time for the bolus delivery. •For a Dual Wave bolus, adjust the Now/Square percentages as needed, then set the Duration of time for the Square Wave portion of the bolus. Note: If you later turn off the Dual Wave or Square Wave feature, your existing Preset Bolus settings are still available for use. 7.Select Save. Changing, renaming, or deleting a Preset Bolus You cannot delete, rename, or edit a Preset Bolus while it is delivering. Note: You cannot edit a Dual Wave or Square Wave Preset Bolus when the Dual Wave or Square Wave features are turned off. You can, however, rename or delete a Dual Wave or Square Wave Preset Bolus when the features are turned off. To change, rename, or delete a Preset Bolus: 1.Go to the Preset Bolus Setup screen. Menu > Insulin Settings > Preset Bolus Setup The Preset Bolus Setup screen appears, showing any existing Preset Bolus settings. 86Chapter 4 MP6025958-022 / A RELEASED 2.Select the desired Preset Bolus. 3.Select Options. 4.Do one of the following: •Select Edit to adjust the Bolus value and Type, if applicable. If you change to a Square Wave bolus, you need to enter the Duration. If you change to a Dual Wave bolus, you need to enter the Now and Square amounts, and the Duration. •Select Rename to assign a different name to this Preset Bolus. When the Select Name screen appears, you can select any available name from the list. •Select Delete to delete this Preset Bolus. Delivering a Preset Bolus Follow these steps to deliver a Preset Bolus. You must set up Preset Bolus deliveries before you can use the Preset Bolus feature. For more information, see Setting up and managing Preset Bolus deliveries, on page 85. To deliver a Preset Bolus: 1.Go to the Home screen. 2.Select Bolus. The Bolus screen appears. 3.Select Preset Bolus. The existing preset bolus settings appear, showing your current BG value (if applicable) and any insulin that is still active from previous boluses. For more information about active insulin, see About active insulin, on page 71. 4.Select the Preset Bolus you want to deliver. 5.Verify your bolus amounts, and then select Deliver Bolus. Your pump beeps or vibrates and displays a message when your bolus starts. ■ bolus Bolus87 MP6025958-022 / A RELEASED Stopping a bolus delivery The following procedures describe how to stop a Normal bolus or a Dual Wave bolus during the Now portion delivery, and how to stop a Square Wave bolus or a Dual Wave bolus during the Square portion delivery. Note: This procedure describes how to stop a bolus that is in progress. It does not stop your basal insulin delivery. If you need to stop all insulin delivery, use the Suspend Delivery feature (Menu > Suspend Delivery). To stop a Normal bolus delivery or the Now portion of a Dual Wave bolus delivery: 1.While your pump is delivering your Normal bolus or the Now portion of a Dual Wave bolus, select Stop Bolus from the Home screen. 2.To stop your bolus, select Yes to confirm. Note: If you are delivering a Normal bolus and a Square Wave bolus at the same time, or a Normal bolus and the Square portion of a Dual Wave bolus at the same time, both boluses are stopped. The Bolus Stopped screen appears and shows the amount of bolus delivered, and the original bolus amount you set up. To stop a Square Wave bolus delivery or the Square portion of a Dual Wave bolus delivery: 1.Select Bolus (S) or Bolus (D) from the Home screen. 2.Select Stop Bolus. 3.To stop your bolus, select Yes to confirm. 88Chapter 4 MP6025958-022 / A RELEASED Note: If you are delivering a Normal bolus and a Square Wave bolus at the same time, or a Normal bolus and the Square portion of a Dual Wave bolus at the same time, both boluses are stopped. The Bolus Stopped screen appears and shows the amount of bolus delivered, and the original bolus amount you set up. ■ bolus Bolus89 MP6025958-022 / A RELEASED 90Chapter 4 MP6025958-022 / A RELEASED reservoir and infusion set MP6025958-022 / A RELEASED MP6025958-022 / A RELEASED Reservoir and infusion set Setting up the reservoir and infusion set When you are ready to use your pump with insulin, make sure the time and date are correct on your pump. For details on changing the time and date on your pump, see Time and date, on page 148. You must also program your settings as instructed by your healthcare professional. You will need these items: •MiniMed 640G insulin pump •Vial of insulin (U100) •MiniMed reservoir •MiniMed-compatible infusion set and its user guide WARNING: If this is the first time you are using your pump with insulin, and you have practiced giving boluses on your pump, you need to clear the active insulin value before starting on insulin. For details, see Clearing your active insulin, on page 144. Removing the reservoir If this is the first time you are inserting a reservoir into your pump and you do not currently have a reservoir loaded, skip to Rewinding your pump, on page 94. Reservoir and infusion set93 ■ reservoir and infusion set MP6025958-022 / A RELEASED WARNING: Make sure the infusion set is disconnected from your body before you remove the reservoir from your pump. To remove your reservoir: 1.Wash your hands. 2.Remove the entire infusion set from your body. 3.If you have the optional activity guard attached to the reservoir compartment on your pump, remove it now. 4.Turn the tubing connector a half-turn counter-clockwise, then pull the reservoir and connector out from the pump. tubing connector 5.Dispose of the used reservoir and infusion set accor…
Text truncated - open the document above for the full version.
Users Manual
To clear all your settings: 1.Make sure the pump is not connected to your body. 2.Go to the Manage Settings screen. Menu > Utilities > Manage Settings 3.Simultaneously press and hold and until the Manage Settings menu appears. 4.Select Clear All Settings. A confirmation screen appears asking if you want to clear all your settings. 5.To continue clearing your settings, select Yes. If you do not want to clear your settings, select No. If you clear your settings, your pump displays the Welcome screen and continues to the Startup Wizard. For more details on entering your startup settings, see Entering your startup settings, on page 24. Clearing your active insulin Use this feature when you are ready to use your pump with insulin for the first time. This feature clears any active insulin values that your pump has tracked, and sets the active insulin value to zero. If you have practiced delivering a bolus with your pump prior to using your pump with insulin, you must clear the active insulin. This ensures that the Bolus Wizard has an accurate active insulin amount for bolus calculations. You can clear your active insulin only once. After you clear your active insulin, the feature is no longer available. 1.Go to the Manage Settings screen. Menu > Utilities > Manage Settings 2.Simultaneously press and hold and until the Manage Settings menu appears. The Manage Settings screen appears. If you have never cleared your active insulin, the Clear Active Insulin option appears. 144Chapter 9 MP6025958-022 / A RELEASED Manage Settings Save Settings Restore Settings Clear All Settings Clear Active Insulin Settings History Note: If the Clear Active Insulin selection does not appear on the Manage Settings screen, it means that you have already cleared your active insulin on the pump. 3.Select Clear Active Insulin. A confirmation screen appears asking if you want to continue. 4.Select Clear to clear your active insulin value from your pump. If you do not want to clear your active insulin at this time, select Cancel. A message appears confirming that your active insulin value is cleared. Viewing your pump setting history The Settings History shows you a history of activities you have performed in the Manage Settings area, such as saving, restoring, or clearing your settings. 1.Go to the Manage Settings screen. Menu > Utilities > Manage Settings 2.Simultaneously press and hold and until the Manage Settings menu appears. 3.Select Settings History. The Settings History screen appears. Self Test Self Test is a safety utility that allows you to check if your pump is operating properly. This self-diagnostic feature can be used for maintenance or to check that your pump is operating properly. Self Test is additional to the routine tests that run independently while the pump operates. ■ general settings General settings145 MP6025958-022 / A RELEASED WARNING: Your insulin is suspended for up to two minutes while your pump runs the self test. Self Test includes the following tests: TestDescription DisplayTurns on the display for up to 30 seconds. Notification lightTurns on the notification light for three seconds and then turns it off. VibrationGenerates two vibration cycles. ToneGenerates an alert tone, an Easy Bolus (step 1) tone, and an alarm tone. The pump will run through a series of tests as listed in the previous table. Self Test requires you to observe the pump during the test. To run the Self Test: 1.Go to the Self Test screen. Menu > Utilities > Self Test A message indicates that the Self Test is in progress. Self Test takes up to two minutes to complete. During that time, the display briefly turns white, the notification light blinks, the pump vibrates, and the pump beeps. 2.If Self Test does not detect a problem, the display returns to the Utilities screen. If Self Test detects a problem, a message appears with more information about the problem. If Self Test displays an error message or you observe the pump not behaving as indicated during the test, contact the 24 Hour HelpLine or your local representative. Sensor Demo Sensor Demo lets you see what the Home screen would look like if you were using the optional Continuous Glucose Monitoring (CGM) feature. For more information about sensor graphs, please see The sensor graph, on page 191. 146Chapter 9 MP6025958-022 / A RELEASED WARNING: Do not use Sensor Demo to make any decisions related to your therapy. Information seen in the Sensor Demo is not real data. It is an example of the type of information you can access when using the sensor feature. Making treatment decisions based on data that is not real can lead to low or high blood glucose conditions. To view the sensor graphs: 1.Go to the Sensor Demo screen. Menu > Utilities > Sensor Demo A screen appears as an example of what your Home screen looks like when you are using the optional CGM feature. 2.Press Select to access the sensor graph examples. 3.From the sensor screen examples you can: •Press the or buttons to move the cursor across the graph. Examples of sensor data appear for the different time periods. •Press the or buttons to view graphs that cover different time periods. You can view 3-hour, 6-hour, 12-hour, and 24-hour graphs. Sensor Demo simulates a sensor glucose graph, showing an example of the general trend of glucose as it rises and falls over time. The top of the graph indicates the time of day, while the side bar shows the sensor glucose (SG) reading markers. 4.To exit Sensor Demo, press . To see and hear examples of sensor-related alerts: 1.Go to the Sensor Demo screen. ■ general settings General settings147 MP6025958-022 / A RELEASED Menu > Utilities > Sensor Demo 2.Select Alert Demo. 3.To see and hear sensor-related alerts, select any of the listed alerts. 4.To exit an alert example, press , then select OK to clear the alert. To exit Sensor Demo, press . Time and date Make sure the time and date are always set correctly on your pump. This is necessary to ensure the correct basal insul…
Text truncated - open the document above for the full version.
Users Manual
WARNING: If you receive a critical error on your pump, the following screen displays and the pump sirens. Immediately disconnect from your insulin pump and discontinue use. Contact your local representative for assistance. Remember, your body still needs insulin while your pump is removed. It is important that you consult your healthcare professional to determine an alternate method of receiving insulin while your pump is removed. Alarms An alarm warns you that the pump detected something that prevents insulin from being delivered. It is important that you respond to an alarm. WARNING: Do not ignore your pump when it has an alarm because all insulin delivery is stopped, which may lead to high blood glucose and ketoacidosis. When an alarm occurs: Display: The pump displays a notification with a red icon and instructions. Notification light: The red notification light blinks twice, followed by a pause, in a continuous repeating pattern. The notification light is shown in Using the buttons, on page 20. 200Chapter 12 MP6025958-022 / A RELEASED Audio: Depending on your Audio Options settings, the pump emits an alarm tone, a continuous three-pulse-and-pause vibration pattern, or both the alarm tone and vibration. You must resolve the underlying problem that triggered the alarm. In most cases, you clear an alarm by pressing and then you make a selection. In some cases, however, clearing the alarm does not fix the underlying problem. The alarm repeats until the underlying problem is fixed. If you do not respond to an alarm, after ten minutes the alarm tone escalates to a loud emergency siren. For more information, see Alarm and alert escalation, on page 247. Alerts An alert makes you aware of a situation that may require your attention. An alert is less serious than an alarm. When an alert occurs: Display: The pump displays a notification with a yellow icon and instructions. Notification light: The red notification light on your pump blinks once, followed by a pause, then blinks once again in a continuous repeating pattern. The notification light is shown in Using the buttons, on page 20. Audio: Depending on your Audio Options settings, the pump either beeps or vibrates in a continuous three-pulse-and-pause pattern, or does both. To clear an alert, press and then make a selection. If you do not respond to an alert, the pump beeps every five minutes or every fifteen minutes, depending on the alert. Some alerts will also escalate to a loud emergency siren after ten minutes. For more information, see Alarm and alert escalation, on page 247. Note: If an alert occurs when you are in a screen other than the Home screen, the alert message may appear after you return to the Home screen. ■ alarms, alerts, and messages Alarms, alerts, and messages201 MP6025958-022 / A RELEASED Messages A message informs you about the status of your pump or if you need to make a decision. When a message occurs: Display: The pump displays a notification with a blue icon and instructions. Notification light: Does not illuminate or blink. Audio: Depending on the message, the pump emits a message tone, an alert tone, or no tone. Depending on your Audio Options settings, you may hear a tone, feel a one-pulse-only vibration, or hear a tone and feel a vibration. You clear the message by pressing and make a selection. Pump alarms, alerts, and messages The following table lists the most common or serious alarms, alerts, and messages related to your pump. The table also explains the meaning, consequences, and the reasons why these notifications appear, and provides steps for problem resolution. Title and textExplanationNext steps Active Insulin cleared Any Active Insulin amount has been cleared. An alarm has cleared your active insulin amount. Your active insulin amount is now at 0 units. • Select OK to clear the alarm. • The active insulin tracked prior to pump restart is not included in new Bolus Wizard calculations. Consult your healthcare professional for how long you need to wait after active insulin is cleared before you can rely on the active insulin calculation of your Bolus Wizard • You can check Daily History for the time and amount of your last bolus. For more information, see Daily History, on page 121. 202Chapter 12 MP6025958-022 / A RELEASED Title and textExplanationNext steps Auto Suspend Insulin delivery suspended. No buttons pressed within time set in Auto Suspend. You have not pressed any buttons during the time specified in the Auto Suspend settings. • To clear the alarm and resume basal insulin delivery, select Resume Basal. • Check your BG and treat as necessary. Battery failed Insert a new AA battery. The pump battery does not have enough power. • Select OK to clear the alarm. • Remove the old battery and insert a new AA battery. For details, see About batteries, on page 21. Battery not compatible. See User Guide. The battery that you inserted into the pump is not compatible. • To clear the alarm, remove the incompatible battery. • Insert a new AA battery. For compatible battery types, see About batteries, on page 21. Bolus not delivered. Bolus entry timed out before delivery. If bolus intended, enter values again. Bolus values entered, but bolus was not delivered within 30 seconds. • Select OK to clear the alert. • If bolus delivery was intended, check your BG, re-enter bolus values and deliver bolus. Bolus stopped Cannot resume bolus or cannula fill. XX.XXX of YY.YYY U delivered. ZZ.ZZZ U not delivered. If needed, enter values again. The battery power was exhausted while a bolus or Fill Cannula was in progress. • Note the amount of insulin not delivered. • Replace the AA battery. • Select OK to clear the alarm. • Deliver the remaining bolus amount if needed. ■ alarms, alerts, and messages Alarms, alerts, and messages203 MP6025958-022 / A RELEASED Title and textExplanationNext steps Cannot connect device This device is incompatible with your pump. See User Guide. • You may be trying to connect a device that is…
Text truncated - open the document above for the full version.
Contact Information
Applicant
Jonathan Tabalujan(Sr. Electrical Engineer)
Technical Contact
Medtronic MiniMed Inc.Robert G Vitti
[email protected]818-576-4069
18000 Devonshire Street · Northridge · United States
Non-Technical Contact
AquaCheck (pty) LtdArthur Pickworth
[email protected]+27-21-970-5140
Test Firm
CKC Laboratories, Inc.Steve Behm
Technical Specifications
| # | Rule Parts | Frequency Range | Power Output |
|---|---|---|---|
| 1 | 15C | 2.42 GHz - 2.48 GHz | 400.00 µW |
Other Applications from Medtronic MiniMed, Inc.
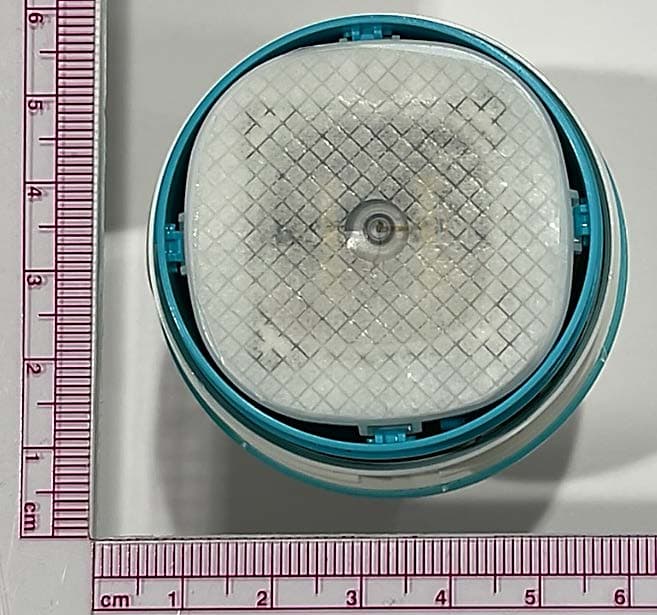
OH2BLEGST2
Jul 08, 2024Disposable glucose sensor transmitter
Equipment Class
DTS - Digital Transmission System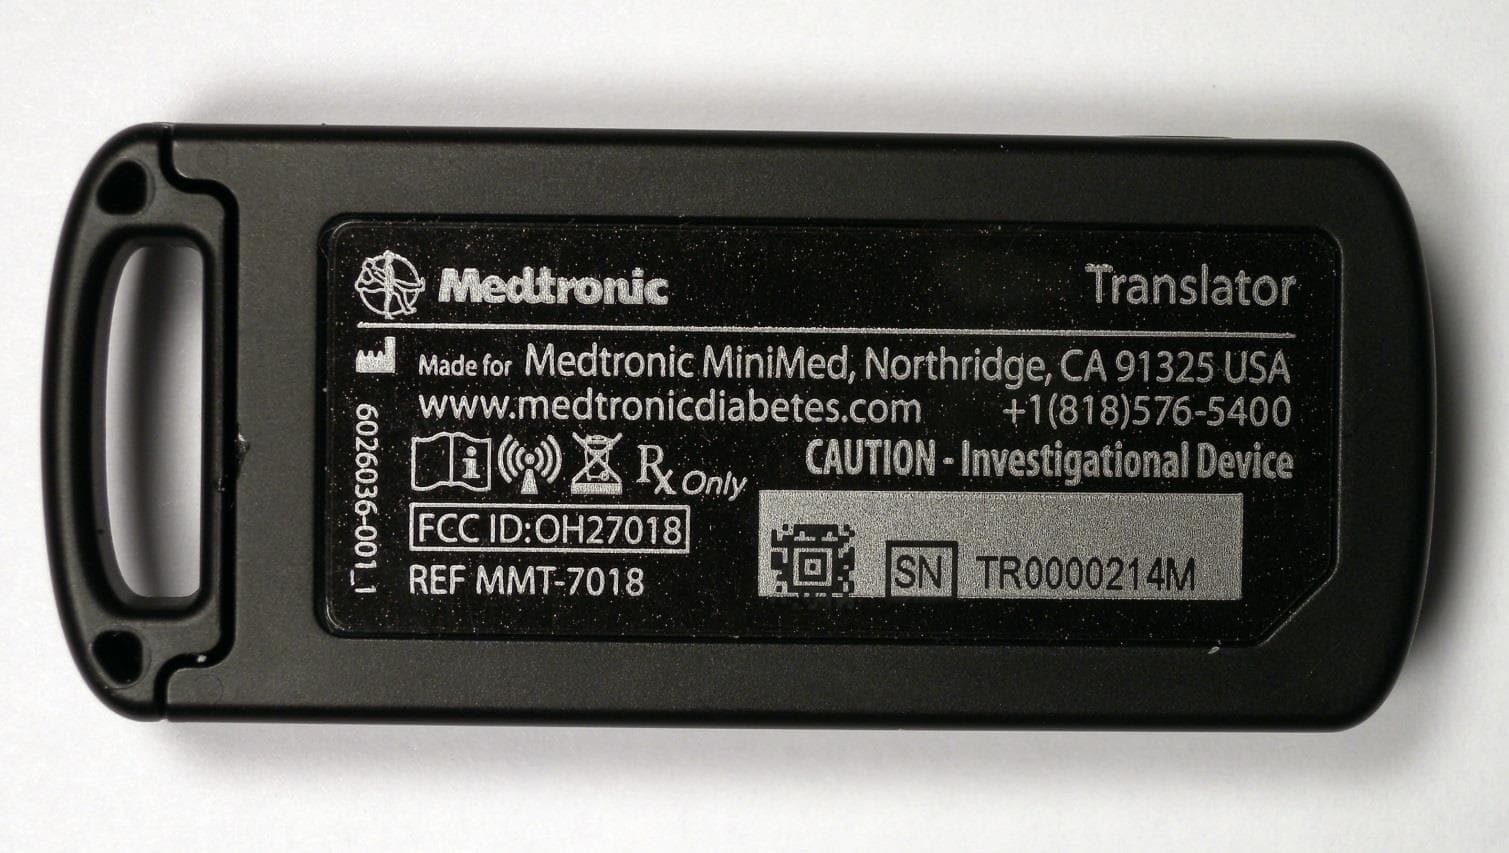
OH27018
Jul 09, 2015The Paradigm Translator allows RF intercommunication between Medtronic Minimed Paradigm series insulin pumps and commercially available smartphones running Medtronic application software.
Equipment Class
DXT - Part 15 Low Power Transceiver, Rx Verified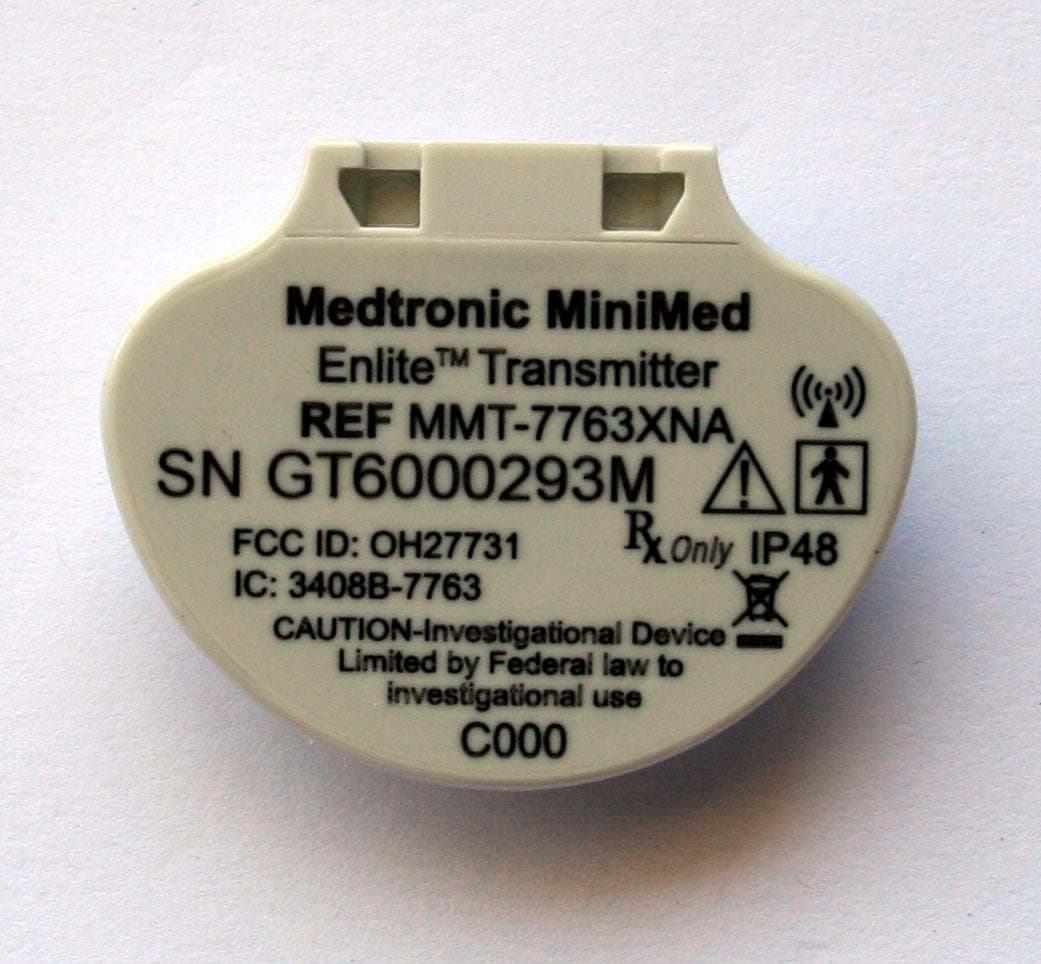
OH27731
Mar 10, 2015The Guardian Link transmitter is a component of the continuous glucose monitoring system for the MiniMed 600 series insulin pumps. The transmitter collects data from the glucose sensor and then wirelessly sends the data to the insulin pump.
Equipment Class
DTS - Digital Transmission System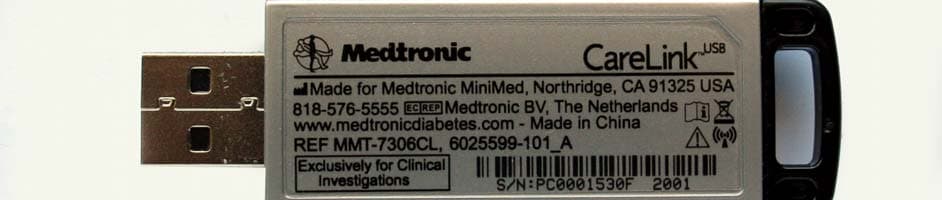
OH27306
Feb 08, 2015CareLINK USB
Equipment Class
DTS - Digital Transmission System
OH27703
Apr 17, 2006Glucose Sensor Transmitter (GST1)
Equipment Class
DXX - Part 15 Low Power Communication Device Transmitter