OJFDHRU-G2-19HRU Digital High Power Amplifier Module supporting PCS
Corning Optical Communication LLC
Click to zoom
Application Details
- Equipment Class
- B2I - Part 20 Industrial Booster (CMRS)
- Date of Grant
- Apr 09, 2024
- Application Purpose
- Original Equipment
- Date of Application
- Mar 24, 2024
- Equipment Note
- HRU Digital High Power Amplifier Module supporting PCS
- Frequency Range
- 2000.00000000 - 2020.00000000
- Country
- United States
Documents & Files
Document Text
Text extracted from the exhibit documents filed with the FCC. Open a document above to read the original.
Users Manual
Everon™ 6000 G2 Build11_1.7 User Manual Corning Optical Communications User Manual I LAN-3091-AEN I Page 2 Preface Material About this Manual This manual describes how to install, use, configure and manage the Corning® Everon™ 6000 G2 platform. It includes a description of the first and ongoing end-to-end configuration, management, and maintenance of the system. Intended Users and Scope This manual is applicable to Corning system installation personnel, technicians, and users. It is assumed that the user is familiar with the system and its units and understands the basic functionality of the system. Contacting Technical Support Help Desk Corning technical support contact information: Email: [email protected] Tel: +(1) 833 4CORNING (833-426-7646) Legal Notice Copyright Disclaimer Conventions Important information is highlighted in a frame as follows: Warning: Actions requiring special attention to avoid serious physical injury; for example, pay attention when working with high voltage components. Caution: Actions requiring special attention to avoid possible damage to device. Note: Tips and suggestions for efficient work Corning Optical Communications User Manual I LAN-3091-AEN I Page 3 Warranties Hardware Warranty Corning Optical Communications, LLC (“Corning”) warrants to the original purchaser (“Customer”) that for a period of one (1) year from the date of shipment of the Hardware, unless otherwise agreed in writing by Corning (the “Hardware Warranty Period”), the Hardware furnished by Corning shall conform in all material respects with, and perform the functions set forth in, the Specifications, as defined below (the “Hardware Warranty”). If notified by Customer of any nonconformity with applicable portions of the Specifications within the Hardware Warranty Period, Corning shall promptly, at its own election and expense, repair or replace the affected Hardware with a product having equivalent functionality as such nonconforming Hardware under the terms of this Hardware Warranty. Such repair or replacement shall be Customer’s sole remedy and Corning’s sole obligation in the event this Hardware Warranty is invoked. If the Hardware or any components comprising a part of the Hardware are replaced or repaired during the Hardware Warranty Period, the Hardware Warranty Period for such repaired or replaced Hardware shall extend to the longer of (i) the balance of the Hardware Warranty Period or (ii) three (3) months from the date of repair or replacement. For purposes of this Warranty, “Specifications” shall mean the specifications and performance standards of the Hardware as set forth in documents formally published by Corning and delivered to Customer which contain technical specifications for the Hardware. If Customer invokes this Hardware Warranty, it shall notify Corning promptly of the claimed defect. Customer will allow Corning to inspect the Hardware at Customer’s location or shall return the Hardware to Corning’s closest repair facility, at Corning’s option. For Hardware returned to Corning’s repair facility, Customer shall be responsible for payment of all transportation and freight costs (including insurance) to Corning’s repair facility, and Corning shall be responsible for all transportation and freight costs (including insurance) incurred in connection with the shipment of such Hardware to other repair facilities of Corning and/or its return to Customer. FOB point shall be the point of origin in either case. Notwithstanding the foregoing, in no event will Corning be liable for damage to Products resulting from improper handling during or after shipment, misuse, neglect, improper installation, operation or repair (other than by authorized Corning personnel), alteration, accident, or for any other cause not attributable to nonconformance to the Specifications on the part of Corning. Corning shall not reimburse or make any allowance to Customer for any labor charges incurred by Customer for replacement or repair of any goods unless such charges are authorized in advance in writing by Corning. Software Warranty Corning warrants to Customer that, for a period of one (1) year from the date of shipment of the original Software, unless otherwise agreed in writing by Corning (the “Software Warranty Period”), the Software shall conform in all material respects with the Specifications (the “Software Warranty”). In the event the Software is proven to fail to conform to the Specification during the Software Warranty Period, Corning shall correct such failure and ensure that the Software conforms with the Specifications. Customer will allow Corning to inspect the operation of the Software at Customer’s location or will provide remote access for Corning staff. Notwithstanding the foregoing, Corning shall have no obligation under the Software Warranty if the Software is modified or used with hardware or software not supplied or approved by Corning or if the Software is subject to, improper installation, application, or operation. Third-party software distributed with the Software may carry certain warranties which, to the maximum extent allowed by law, Corning hereby assigns, transfers, and otherwise conveys to Customer, provided, however, that Corning itself provides no warranty of any kind, express, implied, statutory or otherwise, for any third-party software provided hereunder. Corning does not warrant any hardware, software or services not provided by Corning. THIS WARRANTY IS THE ONLY WARRANTY MADE BY CORNING AND IS IN LIEU OF ALL OTHER WARRANTIES, EXPRESS OR IMPLIED INCLUDING, BUT NOT LIMITED TO, THE IMPLIED WARRANTIES OF MERCHANTABILITY OR FITNESS FOR A PARTICULAR PURPOSE, QUIET ENJOYMENT, THE OPERATION OF THE HARDWARE OR SOFTWARE WILL BE UNINTERRUPTED OR ERROR FREE, NONINFRINGEMENT OR ANY EXPRESS OR IMPLIED WARRANTY ARISING OUT OF TRADE USAGE OR OUT OF COURSE OF DEALING OR COURSE OF PERFORMANCE. CORNING SHALL NOT BE LIABLE FOR ANY OTHER DAMAGE INCLUDING, BUT NOT LIMITED TO, INDIRE…
Text truncated - open the document above for the full version.
Users Manual
Corning Optical Communications User Manual I LAN-3091-AEN I Page 65 2.6.7 Fan module (optional) If the upper and lower space of the equipment is less than 2U, a fan shall be added to assist heat dissipation. Fan connection is shown in the figure below. Figure 73. Fan Connection Remove the cover plate of the end face joint and expose the joint DB15. Figure 74. Fan Connection with DB15 Connect DB15. Figure 75. Fan Installation Four screws securing the fan module. 4 screws Corning Optical Communications User Manual I LAN-3091-AEN I Page 66 2.6.8 Mount the dMRU The dMRU may be mounted on cabinet. Push the cabinet into place and secure the four 4 screws. Figure 76. Rack Installation 2.6.9 Wall mounted installation Figure 77. Wall mounted installation Corning Optical Communications User Manual I LAN-3091-AEN I Page 67 Figure 78.Wall mounted installation Figure 79. Wall mounted installation The installation steps are as follows: Step 1: Determine the installation position based on the dimensions of the mounting rack, drill holes in the wall according to the positions of the mounting holes, and prepare to install M10*110 expansion screws. Step 2: Fix the mounting rack on the wall with 8 M10*110 expansion bolts, as shown in Figure 77. Step 3: Put the device first on the mounting rack to hang nails, straighten the position; Step 4: Connect the device and the mounting rack with 3 M8x16 bolts. All devices and the mounting rack are connected in the same way, as shown in Figure 78. Step 5: If a shelter cover needs to be installed, determine the installation position based on the dimensions of the occlude cover. (The left and right sides of the shelter cover are centered on the left and right sides of the occlude cover, and the top of the occlude cover is as close as possible to the mounting rack to provide enough cable space at the bottom.) Drill holes in the wall according to the positions of the mounting holes, and prepare to install M10*110 expansion screws. Step 6: Fix the cover to the wall with four M10*110 expansion bolts as shown in Figure 79. Corning Optical Communications User Manual I LAN-3091-AEN I Page 68 2.6.10 Connect the rest of the Cables For each of the units, connect the cables as follows: • Ground, see 2.6.11 • Antenna, see 2.6.12 2.6.11 Ground Note: Ground according to local regulations The following additional (not supplied) tools and components are required for connecting the system ground: ▪ Grounding wire - grounding wire should be sized according to local and national installation requirements. The provided grounding lug supports 6 AWG stranded copper wire conductors. 1. Use a wire-stripping tool to remove approximately 0.4 inch (10.9 mm) of the covering from the end of the grounding wire. 2. Insert the stripped end of the grounding wire into the open end of the grounding lug. 3. Crimp the grounding wire in the barrel of the grounding lug. Verify that the ground wire is securely attached to the ground lug by holding the ground lug and gently pulling on the ground wire. 4. Prepare the other end of the grounding wire and connect it to an appropriate grounding point at the site to ensure adequate earth ground. Figure 80. GND Connection Corning Optical Communications User Manual I LAN-3091-AEN I Page 69 2.6.12 Antenna Connect the dMRU male 4.3-10 Type duplexed RF “ANTENNA” port to the broadband antenna(s) using appropriate coax cables. Figure 81. Antenna Connection 2.6.13 Verify normal operation The following Table describes the dMRU LED behavior. MODULE LED Outside the module Status Description Color Status Power Up The dMRU was powered up Green Solid RUN The system is up and running Green Blinking (1Hz) Identify Identify dMRU was activated Green Blinking (2Hz) Over temperature The dMRU temperature exceeded the max range Red Blinking(1Hz) Hardware Failure Hardware failure occurred Red Solid Figure 82. LED on dMRU Corning Optical Communications User Manual I LAN-3091-AEN I Page 70 2.7 dHRU Installation 2.7.1 Verify box Contents 1. Open the package and verify all elements are available according to Table 20. Table 21. dMRU Package Items List Item Quantity Image Part Number HARDWARE – provided in the box dHRU unit 1 dHRU-G2- 6/7/85/1719/23 HARDWARE – not provided 4 screws #8 or 4 mm (for attachment to ceiling) 4 SFP+ Pluggable Transceivers (hot-pluggable optical transceiver module); Support for option 8 line-rate 24.3 Gbps, single mode 2 Optical cables Up to 10 km LC/UPC SM DX SOFTWARE NA Required TOOLS Phillips Screwdriver 1 Corning Optical Communications User Manual I LAN-3091-AEN I Page 71 2.7.2 dHRU Dimensions 500 356 80 Figure 83. dHRU Dimensions Physical Dimensions Dimension (W x H x D) (approx. Inch (mm) 21.7 x 3.1 x 14 (550 x 80 x 356) Weight (approx. Lbs. (Kg) 40.8(18.5) Corning Optical Communications User Manual I LAN-3091-AEN I Page 72 2.7.3 dHRU Interfaces Figure 84. dHRU Front View Figure 85. dHRU Back View Connectors Antenna Ports 2, 4.3-10 female Couple Ports 2, QMA female CPRI Port 2, SFP+ 24.3Gbps Management Ports 1, RJ45 Power Port 1, C016 20C003, male Ground 1, Two holes M6 CPRI Port Ground Power Port Management Port Couple Port 1-35dB Couple Port 2 -35dB Antenna Port 1 Antenna Port 2 Corning Optical Communications User Manual I LAN-3091-AEN I Page 73 2.7.4 Cables Connection For each of the units connect the external cables as follows: ▪ Power, see 2.7.5 ▪ SFP+, see 2.7.6 2.7.5 Power Connect the AC wire to the dHRU connectors panel Figure 86. dHRU Connectors Panel 2.7.6 SFP+ Cables Remove the rubber stopper from the SFP+ connector located in the dHRU CPRI port Connect the SFP+ LC/UPC SM DX optic cable to the dHRU optic connector. Figure 87. SFP Connector Figure 88.SPF and Optical Cable Corning Optical Communications User Manual I LAN-3091-AEN I Page 74 2.7.7 Wall mounted installation The specific installation steps are as follows: Step 1: Determine the installation position based on the external dimensions of the mounting bracket, drill holes on the wall according…
Text truncated - open the document above for the full version.
Users Manual
Corning Optical Communications User Manual I LAN-3091-AEN I Page 103 Figure 126. DCU—Function—Trigger Switch--Baseline Save Confirmation Figure 127. DCU—Function—Trigger Switch--Baseline Clear Confirmation Corning Optical Communications User Manual I LAN-3091-AEN I Page 104 Figure 128. DCU--Dashboard-- Compare with Baseline 5.2.3.4 Import &Export The user can import and export DCU configuration by clicking Function Import & Export, as shown in the following figure. Figure 129 DCU Function Import & Export Corning Optical Communications User Manual I LAN-3091-AEN I Page 105 5.2.3.5 Firmware Click Function Firmware and the firmware info can be viewed and upgraded. Figure 130.DCU Function Firmware Two upgrade modes are supported by 5G digital DAS products of D430 series of the system software of all NE: centralized upgrade and decentralized upgrade. The settings of the two modes can be configured in Control Switch. Figure 131. Firmware Upgrade Configuration 1. Decentralized upgrade: the Control Switch is OFF and only the software of the current DCU unit can be upgraded in this mode. The steps to upgrade the software are the followings: Step 1: Click SCAN to import the software version to be upgraded. Step 2: Click Upgrade. When the progress of downloading the software to the device is 100% and FINISH is prompted, the software is successfully downloaded. Step 3: After the device is reset, the software will be upgraded automatically. Corning Optical Communications User Manual I LAN-3091-AEN I Page 106 2. Centralize upgrade: the Control Switch is ON. The system software of seven NE (RIU, DCU, DEU, dLRU-2.5, dLRU-3.5, dMRU-2.5, dMRU-3.5) in the 5G digital DAS products will be stored after they are imported into the internal storage by the users. All the slave NE (slave DCU, DEU, dLRU) connected to this seven NE will automatically take the system software to be upgraded independently. Figure 132. System Upgrade ON/OFF 5.2.3.6 Alarm Setting Through Function Alarm Setting, setting the alarm duration can be achieved. When it is set to 1~253, it shows alarm duration, with the unit of 10s. Setting to 254 indicates an immediate level alarm; Set to 0 and the alarm will not occur until 3 minutes later. Figure 133. DCU Function Alarm SettingAlarm Detect Duration Corning Optical Communications User Manual I LAN-3091-AEN I Page 107 5.2.3.7 Comm.Setting Click Function--Comm. Setting to set the network management communication types. Figure 134. DCU Function Comm. Setting 5.2.3.8 Log Click Function--Log to export the log of DCU for problem analysis. Figure 135.DCU—Function-- Log Corning Optical Communications User Manual I LAN-3091-AEN I Page 108 5.2.3.9 Certification Click Certification to view issuer name, subject name, start time and end time of DCU. Figure 136.DCU—Function—Certification 5.2.3.10 IP Setting Click Function--IP Setting to set DCU IP for OMC communication. Figure 137.DCUFunction-- IP Setting Corning Optical Communications User Manual I LAN-3091-AEN I Page 109 5.2.4 DCU -> User Info 5.2.4.1 Password Click User->Password to reset the DCU password which should include capital and lower-case letters and 12 digits in length. Figure 138. DCUUserPassword The rules for setting passwords are as follows: 1. Default account and password at the first access: account/password= admin/admin 2. Need to change the password after the first access 3. Password restriction: - The minimum user password length is 12 characters. - At least three combinations of numbers, uppercase, lowercase and special symbols It has been shown in the Web GUI if we enter into the password setup/modify page as follow Corning Optical Communications User Manual I LAN-3091-AEN I Page 110 5.2.4.2 User Info Click User->User Info to add a user and set the role and password. Figure 139.DCUUserUser Info Corning Optical Communications User Manual I LAN-3091-AEN I Page 111 Figure 140.DCUUserUser InfoAdd User 5.2.4.3 Login Info Click User->Login Info to set the max value of password input attempts. This function indicates that when a user logs in, the system will be locked if the times of password input exceeds the maximum. Figure 141. DCUUserLogin Info Corning Optical Communications User Manual I LAN-3091-AEN I Page 112 5.2.4.4 Notification Figure 142. Notification 5.2.4.5 Program The DCU ID is automatically obtained and cannot be set. The default value is 0. It is updated only when the internal DCU network is connected. Click Program Site Management to clear the site ID of the DCU. Figure 143. DCU ProgramSite Management Corning Optical Communications User Manual I LAN-3091-AEN I Page 113 5.3 DEU Config SN DEU Parameters Ranges Default Values 1 Temperature THR 0~125°C 80°C 2 Power Temperature THR 0~125°C 80°C 3 Optical Module Temperature THR 0~125°C 80°C 4 RU Temperature THR 0~125°C 80°C 5 Equipment mode 25G/10G 6 Alarm Detect Duration 0-255S 0-10S 7 Switch ON/OFF ON 8 Technology 3G/4G/5G 3G 9 UL Center Freq. (MHz) (2496-2690), (3450-3700), (3700-3980), (817-849), (663-698), (2305-2315), (698-798), (1850-1915), (1695-1780) 10 DL Center Freq. (MHz) (2496-2690), (3450-3700), (3700-3980), (862-894), (617-652), (2350-2360), (728-768), (1930-2020), (2110-2200) 11 BW N/A/5MHz/10MHz/15MHz/20MHz/30MHz/40MHz/50MHz/60MH z/70MHz/80MHz/90MHz/100MHz/150MHz/200MHz 12 Operator ATT/VZW/TMB/OTHER 13 Power Sharing =OFF UL ATTN -9~20 dB 0 dB DL ATTN 0~20 dB 0 dB Power Sharing =ON DL ATTN calculated by Power sharing 0 dB 14 UL Delay 0~4000000 us 0.0 us 15 DL Delay 0~4000000 us 0.0 us Corning Optical Communications User Manual I LAN-3091-AEN I Page 114 5.3.1 DEU -> Dashboard Click the Dashboard navigation button to enter the dashboard page, where you can query the full topology of all the dependent NE connected to the DEU unit. And the info query and configuration management page of other NE can be switched to after clicking NE ID in the topology. Figure 144. DEU25G Dashboard Figure 145.DEU10GDashboard Corning Optical Communications User Manual I LAN-3091-AEN I Pa…
Text truncated - open the document above for the full version.
Users Manual
Corning Optical Communications User Manual I LAN-3091-AEN I Page 128 Figure 168. DEU25GFunction Reset Figure 169.DEU 10 GFunction Reset Corning Optical Communications User Manual I LAN-3091-AEN I Page 129 5.3.2.3 Trigger Switch Click DEU->Function->Trigger Switch. Figure 170.DEU 25G—Function--Trigger Switch Figure 171.DEU 10 G—Function--Trigger Switch Corning Optical Communications User Manual I LAN-3091-AEN I Page 130 5.3.2.4 Firmware Click Function Firmware and the firmware info can be viewed and upgraded. Figure 172. DEU 25G Function Firmware Figure 173.DEU 10GFunctionFirmware Corning Optical Communications User Manual I LAN-3091-AEN I Page 131 5.3.2.5 Alarm Setting Click Function Alarm Setting to set the DEU alarm detect duration. Figure 174. DEU25G FunctionAlarm Setting Figure 175.DEU10GFunctionAlarm Setting Corning Optical Communications User Manual I LAN-3091-AEN I Page 132 5.3.2.6 Import & Export Import and export the DEU configuration by clicking Function Import & Export. Figure 176.DEU25G FunctionImport & Export Figure 177.DEU 10 GFunctionImport & Export Corning Optical Communications User Manual I LAN-3091-AEN I Page 133 5.3.2.7 Log Click Function Log to export the log of DEU for problem analysis. Figure 178.DEU 25G FunctionLog Figure 179.DEU 10GFunctionLog Corning Optical Communications User Manual I LAN-3091-AEN I Page 134 5.3.3 DEU -> User Info 5.3.3.1 Password Click User->Password to reset DEU password. Figure 180. DEU25GUserPassword Figure 181. DEU 10 GUserPassword Corning Optical Communications User Manual I LAN-3091-AEN I Page 135 5.3.3.2 User Info Click User->User Info to add a user to set the role and password. Figure 182.DEU25G UserUser Info Figure 183.DEU 10GUserUser Info Corning Optical Communications User Manual I LAN-3091-AEN I Page 136 Figure 184.DEU10G/25GUserUser InfoAdd User Corning Optical Communications User Manual I LAN-3091-AEN I Page 137 5.3.3.3 Login Info Click User->Login Info to set the max value of entering the password. Figure 185. DEU25GUserLogin Info Figure 186.DEU 10 GUserLogin Info Corning Optical Communications User Manual I LAN-3091-AEN I Page 138 5.3.3.4 Notification Figure 187.DEU 25GNotification Figure 188. DEU 10 GNotification Corning Optical Communications User Manual I LAN-3091-AEN I Page 139 5.4 dMRU Config 5.4.1 RU -> Overview & Alarm Click RU to enter the Overview interface and view the current status of RU alarms (e.g., Link Alarm). Figure 189.DEURUOverview Each alarm is defined as follows: ▪ Link Alarm ▪ Digital HW ALM ▪ Temperature Alarm ▪ Low Transmission Alarm ▪ Overflow Alarm ▪ DC Voltage Lower Alarm ▪ Over Consumption Alarm ▪ Firmware Mismatch Alarm Drag the scroll bar to view more information (e.g., Low Transmission Alarm) as shown in Figure 190. Corning Optical Communications User Manual I LAN-3091-AEN I Page 140 Figure 190.RUOverviewMore Corning Optical Communications User Manual I LAN-3091-AEN I Page 141 5.4.2 dMRU Parameter config 5.4.2.1 RF Info Click RF Info to read various RF information of RU. Figure 191. RF Info SN RU parameter Range Default values Remark 1 RF Switch ON/OFF ON 2 DL ATTN (0~20) dB 10 dB 0dB (max power) 3 UL ATTN (0~20) dB 10 dB 0dB (max power) 4 Work Mode Normal DL force uplink UL force uplink Normal 5 Delay adjust mode Auto/Manual Auto 6 Manual Delay Adjust Value 0~50000ns 0ns 7 Fan Switch ON/OFF OFF 8 DL VSWR THR 1.5/2.0/2.5 1.5 ➢ To configure the RF info 1. Click RU RU 3 to enter the info page. 2. Click the icon in each field. 3. Select one from the drop-down options (In the Band of example below, N3500F is selected). 4. For UL ATT, DL ATT, enter values with the range according to the parameters form above. 5. For RF Switch, DL VSWR Alarm, Antenna Sense Alarm and PA Alarm, select ON/OFF and Enable /Disable button. 6. Click Finish to complete the settings. Corning Optical Communications User Manual I LAN-3091-AEN I Page 142 Figure 192. RF info More 5.4.2.2 Carrier Info Figure 193.RU Carrier Info Corning Optical Communications User Manual I LAN-3091-AEN I Page 143 5.4.2.3 OP Info The OP Info list box displays the current optical port connection status and information reading volume of the device. Figure 194. RUOP Info Figure 195.RUOP InfoMore Corning Optical Communications User Manual I LAN-3091-AEN I Page 144 5.4.2.4 CPRI Info Figure 196.RU—CPRI Info 5.4.2.5 Other Info Figure 197. RUOther info Corning Optical Communications User Manual I LAN-3091-AEN I Page 145 5.5 dLRU Config 5.5.1 RU -> Overview &Alarm Click RU to enter the Overview interface and view the current status of RU alarms (e.g., Link Alarm). Figure 198. RUOverview Each alarm is defined as follows: ⚫ Link Alarm ⚫ Digital HW ALM ⚫ Temperature Alarm ⚫ Low Transmission Alarm ⚫ Overflow Alarm ⚫ DC Voltage Lower Alarm ⚫ Over Power Consumption Alarm ⚫ Firmware Mismatch Alarm Drag the scroll bar to view more information (e.g., Temperature) . Figure 199.RU Overview More Corning Optical Communications User Manual I LAN-3091-AEN I Page 146 5.5.2 dLRU Parameter config 5.5.2.1 RF info Figure 200.RF Info Click RU RU1 to read various RF information of RU, as shown in Figure 201. SN Parameter Range Recommend value 1 RF Switch ON/OFF ON 2 DL ATTN (0~20) 10 3 UL ATTN (0~20) 10 4 Work Mode Normal DL force uplink UL force uplink Normal 5 Service off alarm Disable Enable Enable 6 MIMO MIMO 1 MIMO 2 Figure 201. RF info Corning Optical Communications User Manual I LAN-3091-AEN I Page 147 5.5.2.2 Carrier info Figure 202.RU Carrier Info 5.5.2.3 OP info The OP Info list box displays the current optical port connection status and information reading volume of the device. Figure 203.RU OP Info Corning Optical Communications User Manual I LAN-3091-AEN I Page 148 Figure 204.RU OP InfoMore 5.5.2.4 CPRI Info Figure 205. RU-CPRI Info Corning Optical Communications User Manual I LAN-3091-AEN I Page 149 5.6 dHRU Config 5.6.1 RU -> Overview &Alarm Click RU to enter the Overview interface and view the current status of RU alarms (e.g., Link Alarm). Figure 206. RU—Overview E…
Text truncated - open the document above for the full version.
Users Manual
Corning Optical Communications User Manual I LAN-3091-AEN I Page 158 5.8 Case 2x2 MIMO Case Corning Optical Communications User Manual I LAN-3091-AEN I Page 159 2TO1 2x2 MIMO Case 4TO1 2x2 MIMO Case Corning Optical Communications User Manual I LAN-3091-AEN I Page 160 Refer to the table below for Everon™ 6000 Parameters. Everon™ 6000 Parameters_Build 9_V1.0.xlsx Corning Optical Communications User Manual I LAN-3091-AEN I Page 161 Release Version SN Unit Version 1 RIU-TDD 23.4.1.11_Everon_6000_RIU_P2.V01.00.00.11 2 RIU-FDD 23.4.1.11_Everon_6000_RIU_P2.V02.00.00.05 3 DEU-25G 23.4.1.11_Everon_6000_DEU_P2.V01.00.03.87 4 DEU-10G 23.4.1.11_Everon_6000_DEU_P2.V02.00.03. 5 DCU 23.4.1.11_Everon_6000_DCU_P2.V01.00.03.83 6 dLRU-3.5 23.4.1.11_Everon_6000_dLRUH_P2.V01.00.04.92 7 dLRU-M 23.4.1.11_Everon_6000_dLRUM_P2.V02.00.04.06 8 dLRU-L 23.4.1.11_Everon_6000_dLRUL_P2.V02.00.04.03 9 dMRU-3.5 23.4.1.11_Everon_6000_dMRUH_P2.V01.00.03.51 10 dMRU-FDD 23.4.1.11_Everon_6000_dMRUF_P2.V02.00.00.46 11 dHRU-FDD 23.4.1.11_Everon_6000_dHRUF_P2.V01.00.01.68 12 System Version 23.4.1.11_Everon_6000_SYSTEM_P2.V01.04.03.38 Corning Optical Communications User Manual I LAN-3091-AEN I Page 162 6. APPENDIX: LED Functionality and Color Definition Optical LED definition Green Amber (SYNC) (LOS) SFP Plug out SFP Plug out OFF OFF Optic Link Fail 1. Optic cable disconnected OFF ON 2. SFP fail OFF ON 2.1 SFP fault OFF ON 2.2 SFP warning OFF ON 2.3 SFP alarm OFF ON 3. CPRI link down OFF ON Optic Link OK 1. Optic cable connected ON ON 2. SFP OK ON ON 3. CPRI link down ON ON CPRI Link OK 1. Optic cable connected ON OFF 2. SFP OK ON OFF 3. CPRI link up ON OFF ALM/RUN/Power LED definition LED Description Color ALM 1. Alarm Red 2. Device detect (Identify and is controlled from DCU) Red Flash (1Hz, 10s) 3. No alarm OFF RUN 1. The system is up and running Green Flash(1Hz) 2. Software or hardware failure OFF Power 1. Power on Green 2. Power off OFF Corning Optical Communications User Manual I LAN-3091-AEN I Page 163 Corning Optical Communications LLC • 4200 Corning Place • Charlotte, NC 28216 USA 800-743-2675 • FAX: 828-325-5060 • International: +1-828-901-5000 • www.corning.com/opcomm Corning Optical Communications reserves the right to improve, enhance, and modify the features and specifications of Corning Optical Communications products without prior notification. A complete listing of the trademarks of Corning Optical Communications is available at www.corning.com/opcomm/trademarks. All other trademarks are the properties of their respective owners. Corning Optical Communications is ISO 9001 certified. © 2023 Corning Optical Communications. All rights reserved. LAN-3091-AEN / January 2023
Attestation Statements
Applicant Declaration QSF27-14-04 Rev 1.1 Jan 17, 2024 Page 1 of 1 Original Issue: Jan. 4, 2021 SGS North America Inc. 620 Old Peachtree Road SUITE 100 Suwanee, Georgia 30024 United States Applicant Legal Business Name Corning Optical Communication LLC Address 840 N McCarthy Blvd , Milpitas, California, 95035, United States FRN 0021095476 Grantee Code OJF FCC ID OJFDHRU-G2-19 Authorized Contact Name Dana Whitney Contact Email [email protected] Contact Phone 817-431-7894 I, the undersigned, certify that I am an authorized signatory for the Applicant and therefore declare; a) in accordance with 47CFR2.911(d), all of the statements herein and the exhibits attached hereto are true and correct to the best of my knowledge and belief. b) in accepting a Grant of Equipment Authorization issued by a TCB, under the authority of the FCC, as a result of the representations made in this application, the Applicant is responsible for: (1) labeling the equipment with the exact FCC ID as specified in this application, (2) compliance statement labeling pursuant to the applicable rules, (3) compliance of the equipment with the applicable technical rules, c) if the Applicant is not the actual manufacturer of the equipment, appropriate arrangements have been made with the manufacturer to ensure that production units of this equipment will continue to comply with the FCC’s technical requirements. d) in accordance with 47 CFR 2.909 and KDB394321, the Applicant has read, understood and agrees to accept that they are the responsible party and agree to abide by their responsibilities as specified under 47 CFR 2.909 and KDB394321. e) in accordance with ISO 17065, FCC KDB641163, FCC KDB610077, KDB394321 and RSP-100, the Applicant has read, understood, accepts and agrees to abide by the post market surveillance requirements. (1) the Applicant understands, accepts and agrees that a sample may be requested for surveillance testing. (2) the Applicant shall make provisions to always have a production sample available upon request by SGS, FCC and/or ISED. (3) the Applicant shall, upon request by SGS, at the Applicant’s expense, provide a production sample of the requested product to SGS, FCC and/or ISED as instructed. The sample shall include all support devices, cables, software, accessories or other hardware or software required for evaluation, review, certification and audit surveillance of products certified by SGS. f) neither the Applicant nor any party to the application is subject to a denial of Federal benefits, that includes FCC benefits, pursuant to Section 5301 of the Anti-Drug Abuse Act of 1988, 21 U.S.C. §862 because of a conviction for possession or distribution of a controlled substance. See 47CFR 1.2002(b) for the definition of a “party” for these purposes. g) the Applicant has read, understood, accepts and agrees to abide by the SGS North America, Inc.(TCB) terms and conditions. Link to CFRs: https://www.fcc.gov/wireless/bureau-divisions/technologies-systems-and-innovation-division/rules-regulations-title-47 Link to KDBs: https://apps.fcc.gov/oetcf/kdb/index.cfm Link to RSP-100: https://www.ic.gc.ca/eic/site/smt-gst.nsf/eng/sf01130.html Link to the Covered List: Covered List Corning Optical Communication LLC (“the applicant”) certifies that the equipment for whic…
Text truncated - open the document above for the full version.
Contact Information
Applicant
Dana Whitney(Director of Operations and Program)
Technical Contact
SGS-CSTC Standards Technical Services Co., LtdBonnie Liao
[email protected]82155379
No.198 Kezhu Road, · Guangzhou, Guangdong · China
Non-Technical Contact
SGS-CSTC Standards Technical Services Co., LtdBonnie Liao
[email protected]82155379
Test Firm
SGS-CSTC Standards Technical Services Co., Ltd.Bonnie Liao
[email protected]02082155379
Technical Specifications
| # | Rule Parts | Frequency Range | Power Output | Emission | Tolerance |
|---|---|---|---|---|---|
| 6 | 27 | 2.00 GHz - 2.02 GHz | 40.46 W | D9W | Amp |
Other Applications from Corning Optical Communication LLC

OJFE62-N3-7US
Aug 29, 2024Remote Unit, Radio Node
Equipment Class
B2I - Part 20 Industrial Booster (CMRS)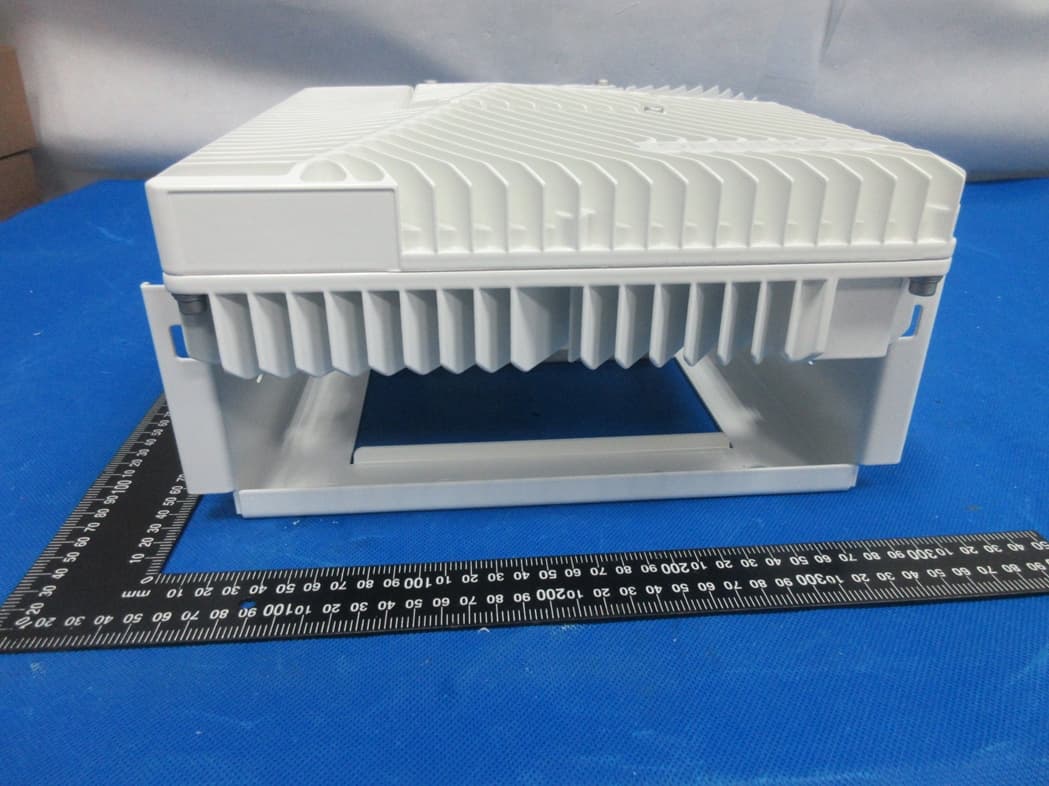
OJFDLRUG2678
Oct 17, 2023Low Band dRAU
Equipment Class
B2I - Part 20 Industrial Booster (CMRS)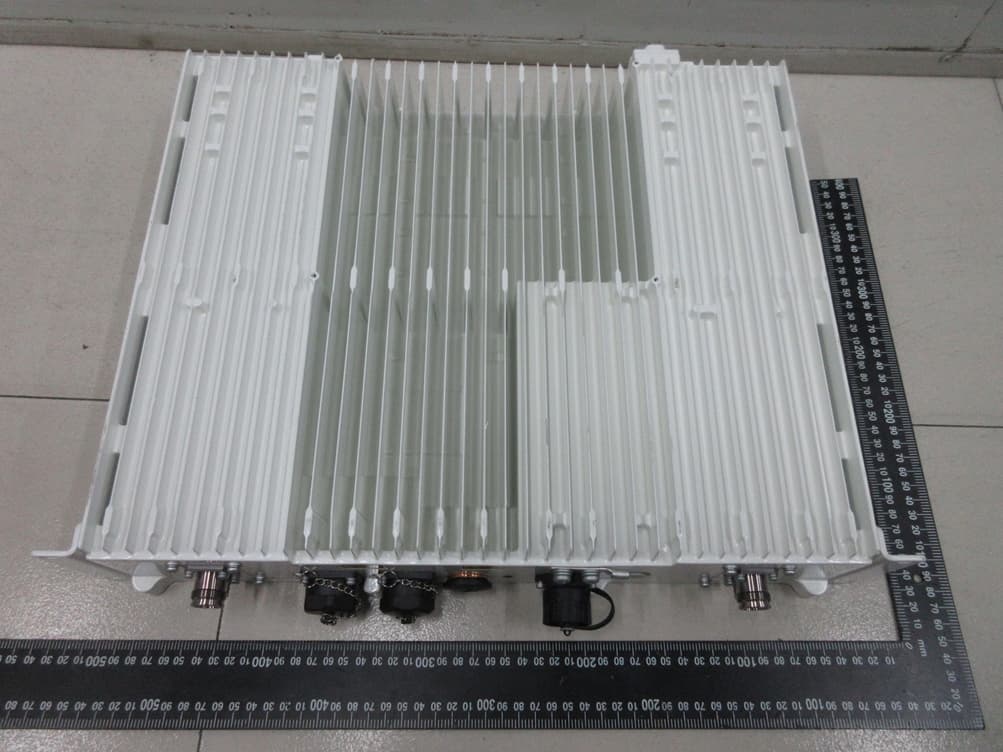
OJFDMRUG22325
Jul 31, 2023digital Medium-power Remote Unit
Equipment Class
B2I - Part 20 Industrial Booster (CMRS)
OJFDMRUG2678
Jul 30, 2023digital Medium-power Remote Unit
Equipment Class
B2I - Part 20 Industrial Booster (CMRS)
OJFE62-M3-35
Jul 20, 2023Remote Unit
Equipment Class
B2I - Part 20 Industrial Booster (CMRS)